Articles
How To Make Basement Ceiling Higher
Modified: October 28, 2024
Discover effective articles on how to make your basement ceiling higher, including tips, techniques, and expert advice. Create a more spacious and inviting living area with these helpful resources.
(Many of the links in this article redirect to a specific reviewed product. Your purchase of these products through affiliate links helps to generate commission for Storables.com, at no extra cost. Learn more)
Introduction
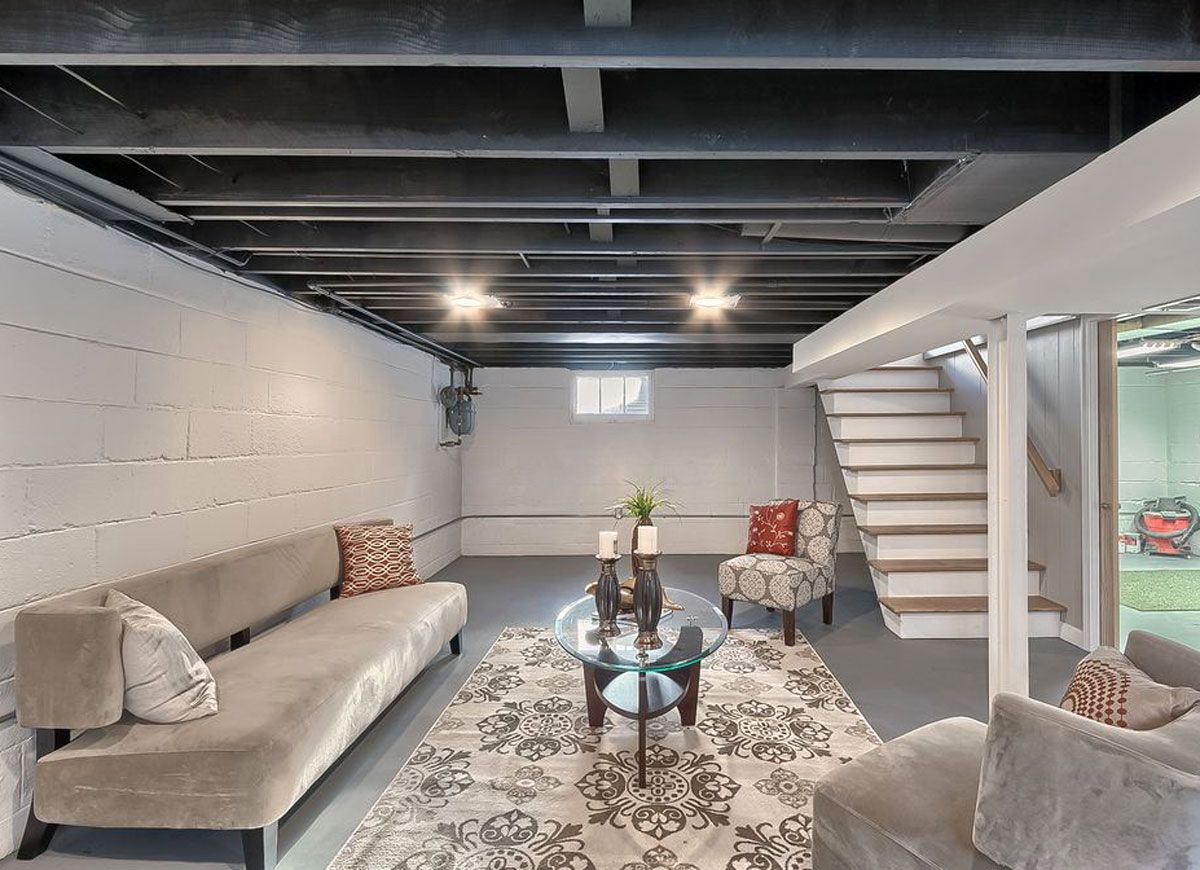
When it comes to maximizing the space and functionality of your basement, one important consideration is the height of the ceiling. A low basement ceiling can make the space feel cramped and claustrophobic, limiting its potential for various uses such as a home office, game room, or additional living space.
Fortunately, there are several methods you can employ to make your basement ceiling higher, creating a more open and inviting atmosphere. In this article, we will explore the step-by-step process of increasing your basement ceiling height, from assessing the current height to choosing the optimal ceiling materials.
Before beginning any work, it is crucial to check local building codes and regulations to ensure compliance. You may also want to consult with a professional contractor or structural engineer to evaluate the feasibility and safety of raising your basement ceiling.
So, if you’re ready to transform your cramped basement into a spacious and inviting area, let’s dive into the process of raising the height of your basement ceiling.
Key Takeaways:
- Transform your cramped basement into a spacious and inviting area by raising the ceiling height using careful planning, professional consultation, and the right materials for a safe and efficient process.
- Elevate the visual appeal and functionality of your basement with a raised ceiling, incorporating modern lighting, optimal materials, and construction techniques tailored to your space for a polished and inviting transformation.
Read more: How To Make Ceiling Look Higher
Assessing the Current Ceiling Height
The first step in making your basement ceiling higher is to assess the current ceiling height. This will give you a baseline measurement and help determine the feasibility of raising the ceiling.
Start by measuring the distance from the floor to the existing ceiling. Use a measuring tape to measure the height at various points around the basement to ensure accuracy. Note down the lowest measurement, as this will be the critical height to work with.
Next, consider the structural elements of your basement. Look for any support beams, ductwork, or pipes that may hinder the possibility of raising the ceiling. Measure the distance between these structural elements and the current ceiling height. This will help determine how much space you have to work with and whether any modifications will be necessary.
Additionally, take note of any obstructions such as lighting fixtures, electrical wiring, or sprinkler systems that may need to be relocated or modified. These factors will impact the feasibility and cost of raising the ceiling height.
Lastly, it is important to consider the purpose of your basement space. Different uses may have different height requirements. For example, a home gym or workshop may require a higher ceiling compared to a home theater or storage area. Keep these requirements in mind as you assess the current ceiling height.
By accurately assessing the current ceiling height and considering the structural elements and purpose of the space, you will have a solid foundation for planning the next steps in making your basement ceiling higher.
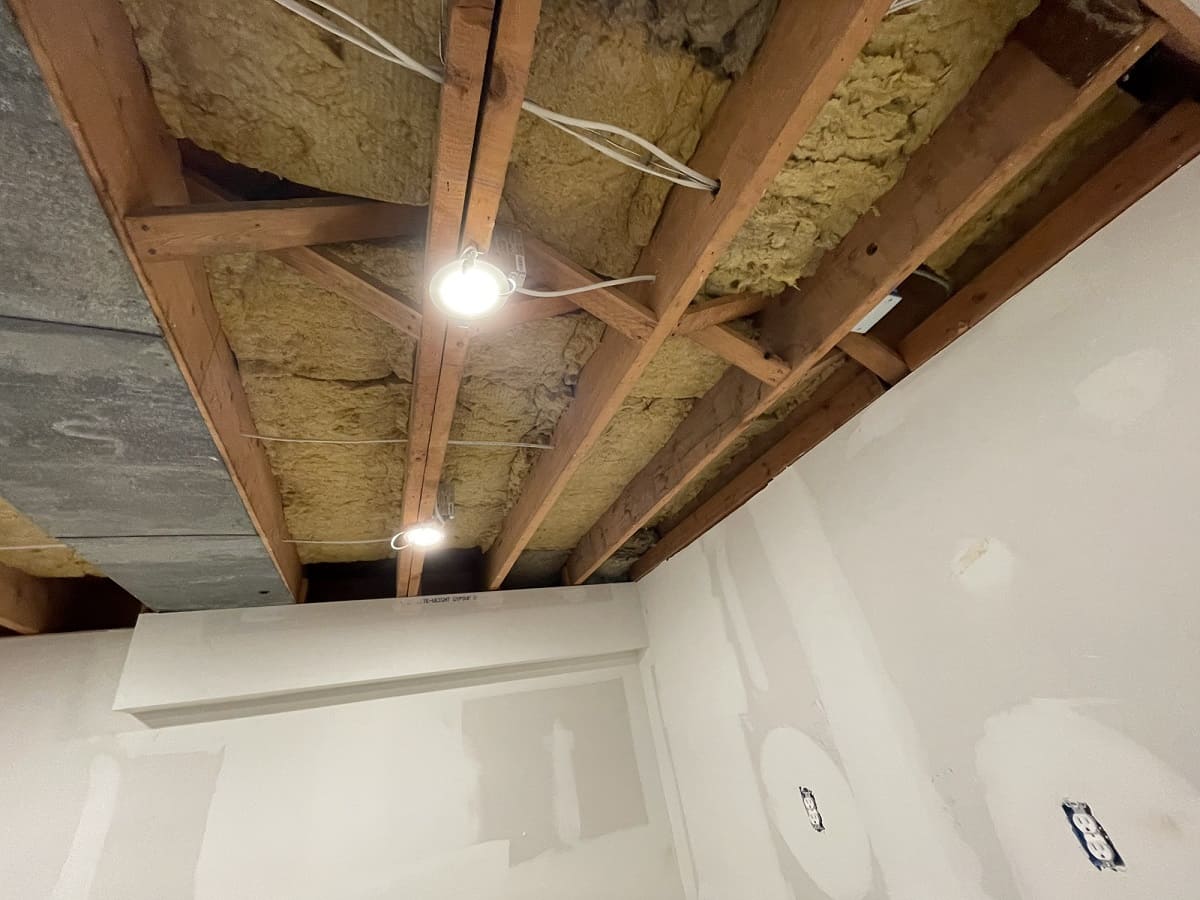
Removing Existing Ceiling Materials
Once you have assessed the current ceiling height and determined that raising it is feasible, the next step is to remove the existing ceiling materials. This may include drywall, drop ceiling tiles, or any other materials that are currently in place.
Before you begin, make sure to turn off the power supply to the basement and remove any furniture or belongings from the area. This will ensure a safe and unobstructed work environment.
If your basement has a drop ceiling, start by removing the ceiling tiles. Carefully lift each tile and detach it from the grid. Set aside the tiles for disposal or reuse, depending on their condition.
If your basement has a drywall ceiling, the process may be a bit more involved. Start by using a utility knife to cut along the edges of the ceiling where it meets the walls. This will help you remove the drywall in sections without causing unnecessary damage.
Once you have made the necessary cuts, carefully pry the drywall sections away from the ceiling joists using a pry bar or a hammer and a flathead screwdriver. Take care not to damage any electrical wiring or plumbing that may be hidden behind the drywall.
If there are any light fixtures or other fixtures attached to the ceiling, disconnect them and remove them carefully. Cap any exposed wires with wire connectors to ensure safety.
As you remove the existing ceiling materials, be prepared for the possibility of encountering insulation, mold, or other issues. If you come across any mold, it is important to address it properly by wearing protective gear and following proper mold removal procedures.
Dispose of the removed materials responsibly, following local regulations and guidelines. If possible, consider recycling or repurposing the materials to minimize waste.
By removing the existing ceiling materials, you are clearing the way for the next steps in raising your basement ceiling. This will allow you to create a higher and more spacious area for your desired use.
Identifying Structural Constraints
After removing the existing ceiling materials, it’s important to identify any structural constraints that may affect the process of raising your basement ceiling. This step is crucial to ensure the safety and stability of your basement.
Start by examining the layout of your basement and identifying any load-bearing walls or beams. These structural elements are essential for supporting the weight of the floors above. It’s important not to tamper with or remove these load-bearing components without consulting a professional engineer or contractor.
Next, look for any HVAC ductwork, plumbing lines, or electrical wiring running along the ceiling or attached to the wall framing. These systems may need to be relocated or adjusted to accommodate a higher ceiling. Consult with a licensed professional to ensure that any adjustments meet local building codes and safety standards.
Keep in mind that altering the structural layout of your basement may require permits and inspections. It’s essential to check with your local building department to determine the specific requirements for your project.
If you encounter any structural constraints that prevent you from raising the ceiling to your desired height, you may need to explore alternatives. This could include creating drop-down soffits to hide obstructions or incorporating architectural features to work around structural limitations.
In some cases, it may not be feasible to significantly raise the ceiling due to structural or budget constraints. If that’s the case, consider other design techniques to create the illusion of a higher ceiling. These can include painting the ceiling and walls the same color, using vertical stripes or patterns, or incorporating mirrors or reflective surfaces to enhance the sense of height.
By identifying and addressing any structural constraints early on, you can ensure a safe and stable environment while working towards raising the ceiling height in your basement.
Rerouting Plumbing and Electrical Systems
When raising your basement ceiling, it’s likely that you will need to reroute or adjust the plumbing and electrical systems that are currently running along the ceiling or attached to the walls. This step is crucial to accommodate the increased height and ensure that these systems are properly installed and safe.
Start by consulting with a licensed plumber and electrician to assess the existing systems and develop a plan for rerouting them. They will help you determine the best course of action based on the specific layout of your basement and the local building codes.
For plumbing, this may involve relocating water supply lines, drainpipes, and venting. The plumber will work with you to identify new pathways for these pipes so they can run parallel or perpendicular to the ceiling joists. This may involve cutting into the walls or floors of the basement to create new access points.
Similarly, for electrical systems, the electrician will assess the existing wiring and determine the best approach for rerouting it. They will ensure that all wiring is properly supported and that there are no electrical hazards. This may include installing new junction boxes, extending wiring runs, or rerouting them to meet the new height requirements.
When rerouting plumbing and electrical systems, it’s important to consider the overall design and functionality of your basement space. Plan the new pathways in a way that minimizes obstructions and ensures ease of access. This will help prevent future maintenance issues and make any necessary repairs more manageable.
Throughout the rerouting process, be sure to obtain any necessary permits and inspections to ensure compliance with local building codes. This will give you peace of mind knowing that the work is being done correctly and safely.
By rerouting plumbing and electrical systems, you can ensure that your basement ceiling can be raised to the desired height without compromising the functionality or safety of these essential systems.
Read more: How To Make Your Mattress Higher
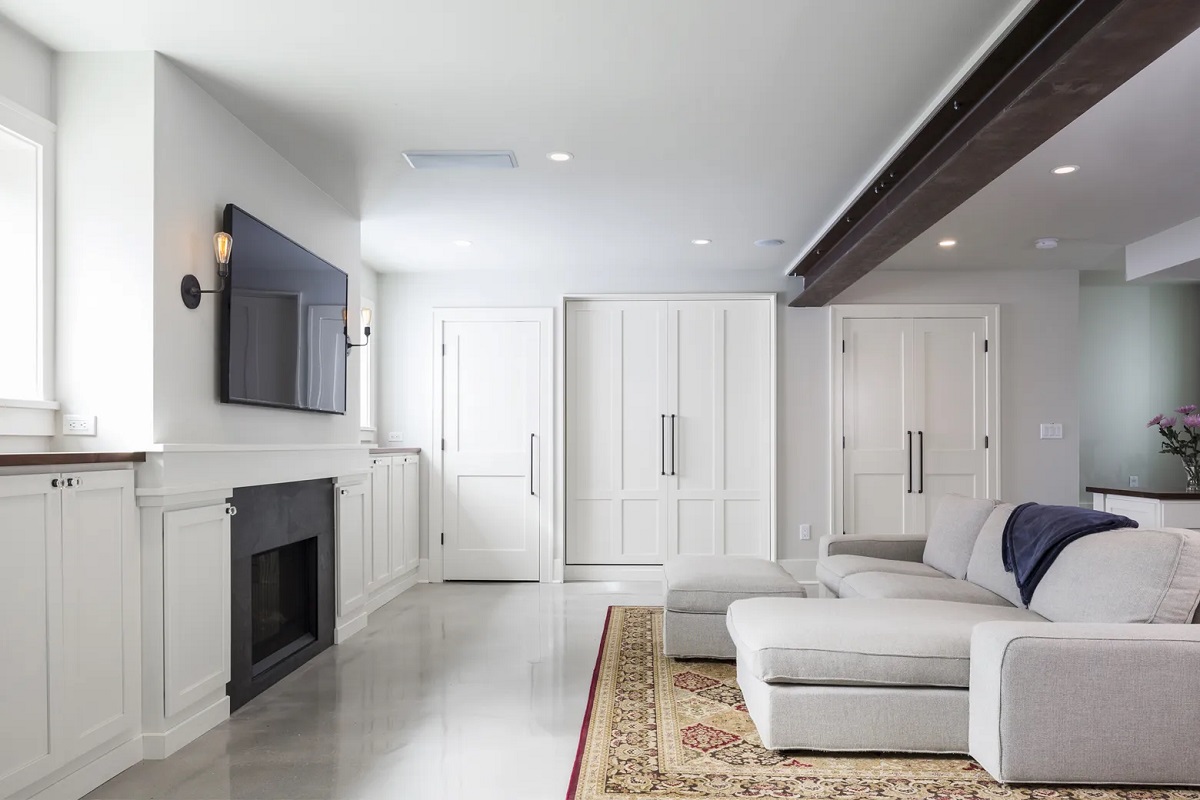
Installing Recessed Lighting
As you raise your basement ceiling, it is a great opportunity to upgrade the lighting in the space. Recessed lighting, also known as can lights or pot lights, can provide a modern and streamlined look while offering ample illumination.
The installation of recessed lighting involves several steps:
1. Planning: Determine the optimal placement of the recessed lights in your basement. Consider the purpose of the space and the desired lighting effect. Create a lighting layout plan, spacing the lights evenly throughout the area.
2. Electrical Work: Before installing the recessed lights, it is essential to ensure that the electrical wiring is correctly set up. Consult with a licensed electrician to make any necessary adjustments or additions to the wiring, ensuring that it complies with local electrical codes.
3. Ceiling Preparation: If you have removed the existing ceiling, this is the perfect time to install any additional electrical wiring and junction boxes needed for the recessed lights. Plan the wiring routes and secure them to the ceiling joists. Ensure that the junction boxes are compatible with the type of recessed lights you will be installing.
4. Cutting Holes: Using a hole saw or a drywall saw, carefully cut holes in the ceiling for each recessed light. Follow the manufacturer’s guidelines for the correct size and spacing of the holes. Take caution to avoid cutting into any electrical wiring or plumbing in the process.
5. Installing the Recessed Lights: Place the recessed light fixtures into the holes, following the manufacturer’s instructions. Most recessed lights require a secure connection to the housing or junction box. Ensure a tight fit and proper alignment of the fixtures.
6. Electrical Connection: Connect the wiring from the recessed lights to the junction boxes, making sure to follow the appropriate wiring color codes and secure connections. Consult with an electrician if you are unsure about any electrical work.
7. Ceiling Finishing: Once all the recessed lights are installed and wired, proceed with finishing the ceiling. This may involve adding drywall, patching, sanding, and painting to create a smooth and cohesive look.
Always prioritize safety when working with electrical components and consult with professionals if you’re uncertain about any aspect of the installation process.
By installing recessed lighting during the process of raising your basement ceiling, you can enhance both the functionality and aesthetics of the space, creating a brighter and more inviting atmosphere.
Consider using recessed lighting or track lighting to avoid hanging light fixtures that can lower the appearance of the ceiling. This can create the illusion of a higher ceiling.
Considering Alternatives for HVAC Ductwork
When raising your basement ceiling, one of the challenges you may encounter is dealing with the existing HVAC (heating, ventilation, and air conditioning) ductwork. The standard ductwork height may not align with the new height of the ceiling. In such cases, it is important to explore alternatives to ensure proper airflow and comfort in the basement.
Below are some alternatives to consider for HVAC ductwork:
1. Ductwork Modification: In some cases, the existing ductwork can be modified to fit the new ceiling height. This may involve extending or adjusting the ducts to align with the raised ceiling. Rerouting and repositioning ducts can be a complex task and it is recommended to consult with a professional HVAC contractor to ensure proper airflow and system efficiency.
2. Compact or Low-Profile Ductwork: Another option is to replace the existing ductwork with compact or low-profile duct systems. These systems are designed to take up less vertical space while maintaining efficient airflow. They are often used in basements and other areas with limited ceiling height.
3. Ductless Mini-Split System: A ductless mini-split system is a viable alternative to traditional ducted HVAC systems. This system consists of an outdoor unit and one or more indoor units, which can be mounted on the wall or ceiling. Ductless mini-split systems offer flexibility in terms of temperature control and installation, making them a popular choice for basement renovations.
4. In-Floor Radiant Heating: If you are exploring options beyond traditional forced-air systems, in-floor radiant heating may be worth considering. This involves installing radiant tubing in the floor, which distributes heat evenly and efficiently throughout the space. In-floor radiant heating not only eliminates the need for ductwork but also provides comfortable heating from the ground up.
5. Combination Approach: Depending on your specific requirements and budget, you may consider a combination approach. This involves a combination of ducted and ductless systems, using ductwork in some areas while incorporating ductless units in others. This allows for customized zoning and more efficient heating and cooling throughout the basement.
It is important to consult with a professional HVAC contractor who can evaluate your specific basement layout and recommend the best alternative for your needs. They can assess the feasibility, efficiency, and cost-effectiveness of different options to ensure optimal comfort and airflow in your newly raised basement ceiling.
By considering alternatives for HVAC ductwork, you can find a solution that suits your needs and allows for a seamless transition to the raised ceiling height in your basement.
Choosing Optimal Ceiling Materials
Once you have raised your basement ceiling, it’s time to select the optimal materials for your new ceiling. The choice of materials will not only impact the aesthetics of the space but also play a role in insulation, soundproofing, and maintenance. Here are some factors to consider when choosing the right ceiling materials:
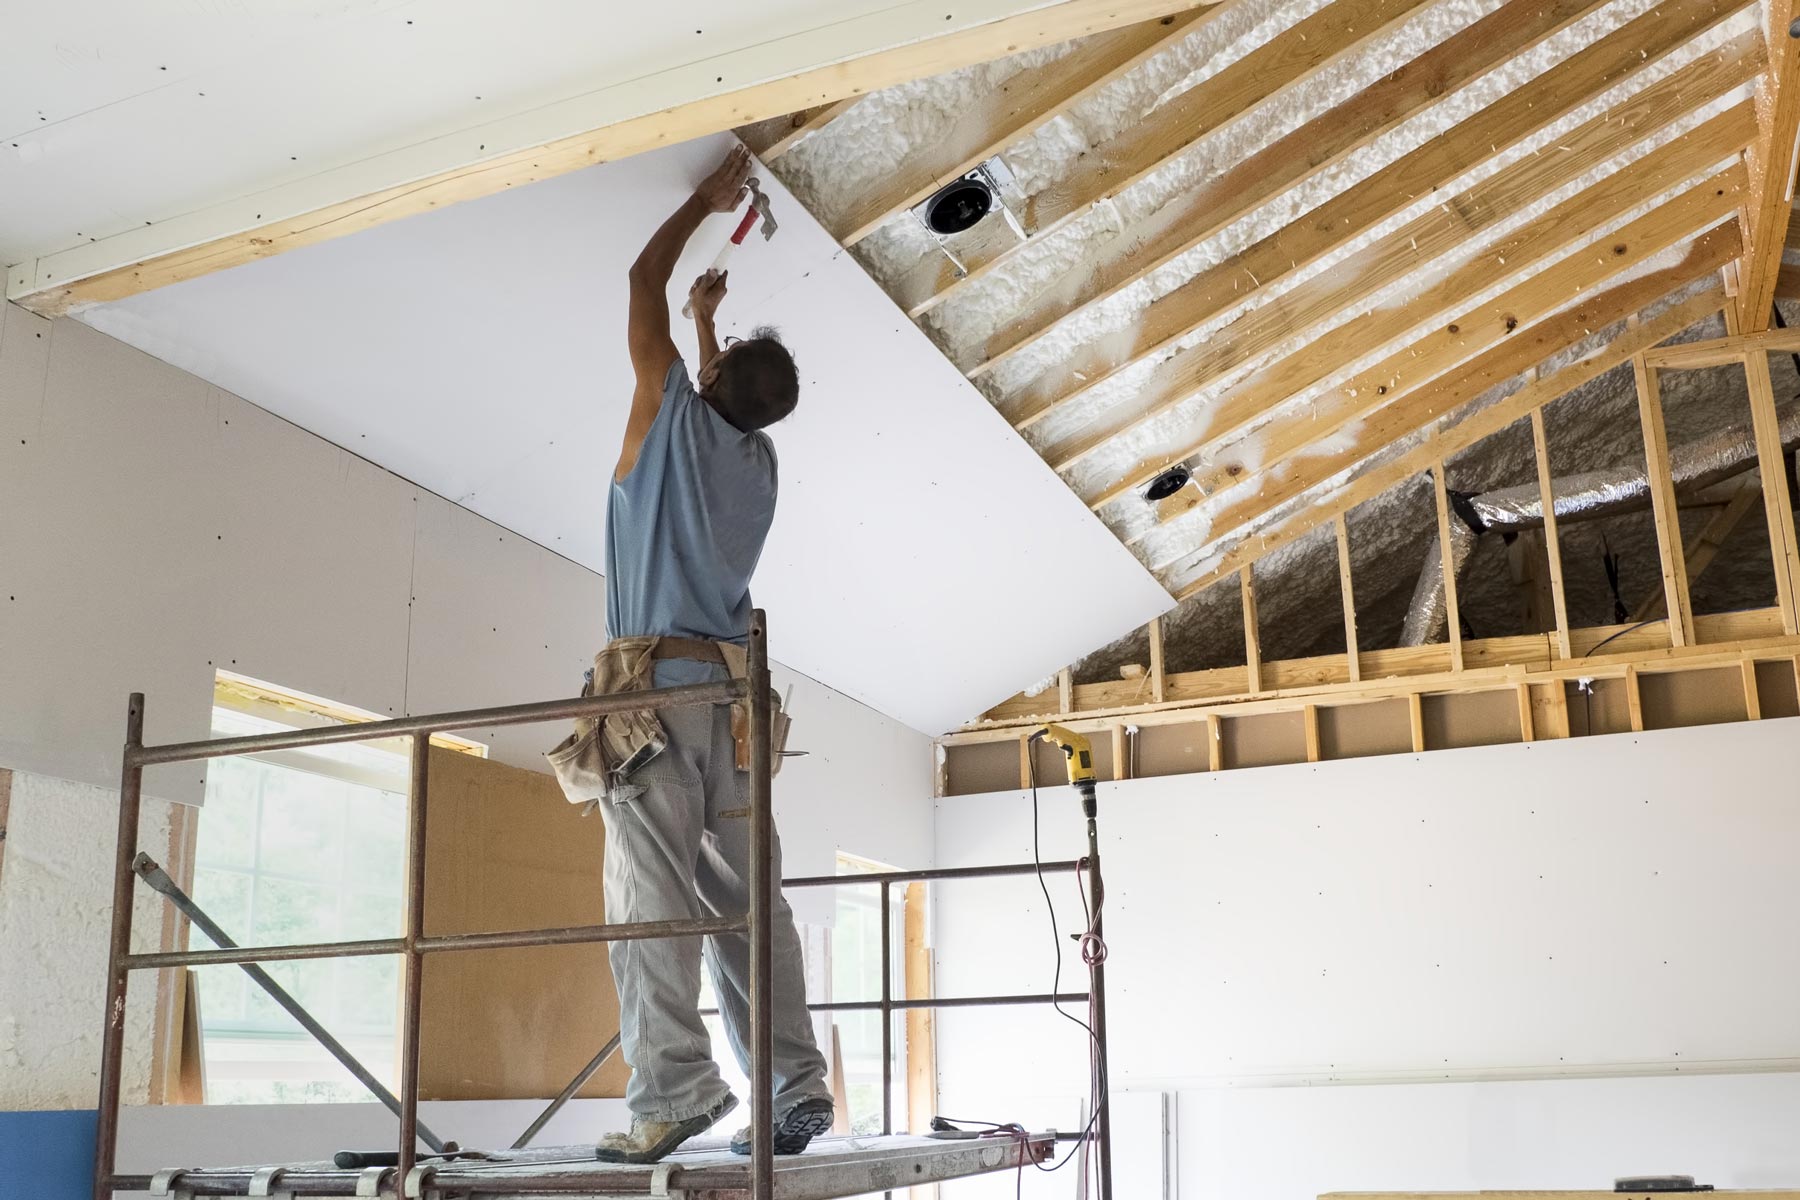
1. Drywall: Drywall is a popular and cost-effective option for basement ceilings. It is easy to install and provides a smooth and seamless finish. Choose moisture-resistant drywall to mitigate potential moisture issues commonly found in basements. Drywall can also be painted or finished with texture for a customized look. Keep in mind that access to electrical and plumbing systems may require the installation of removable access panels.
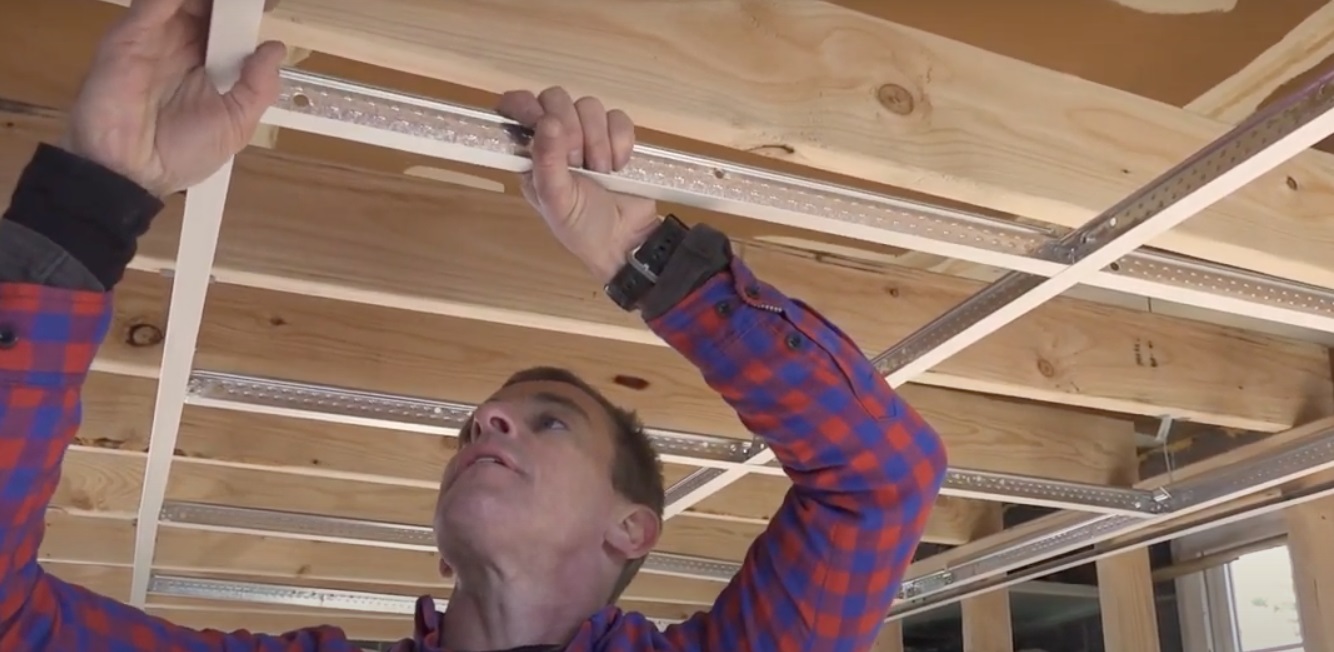
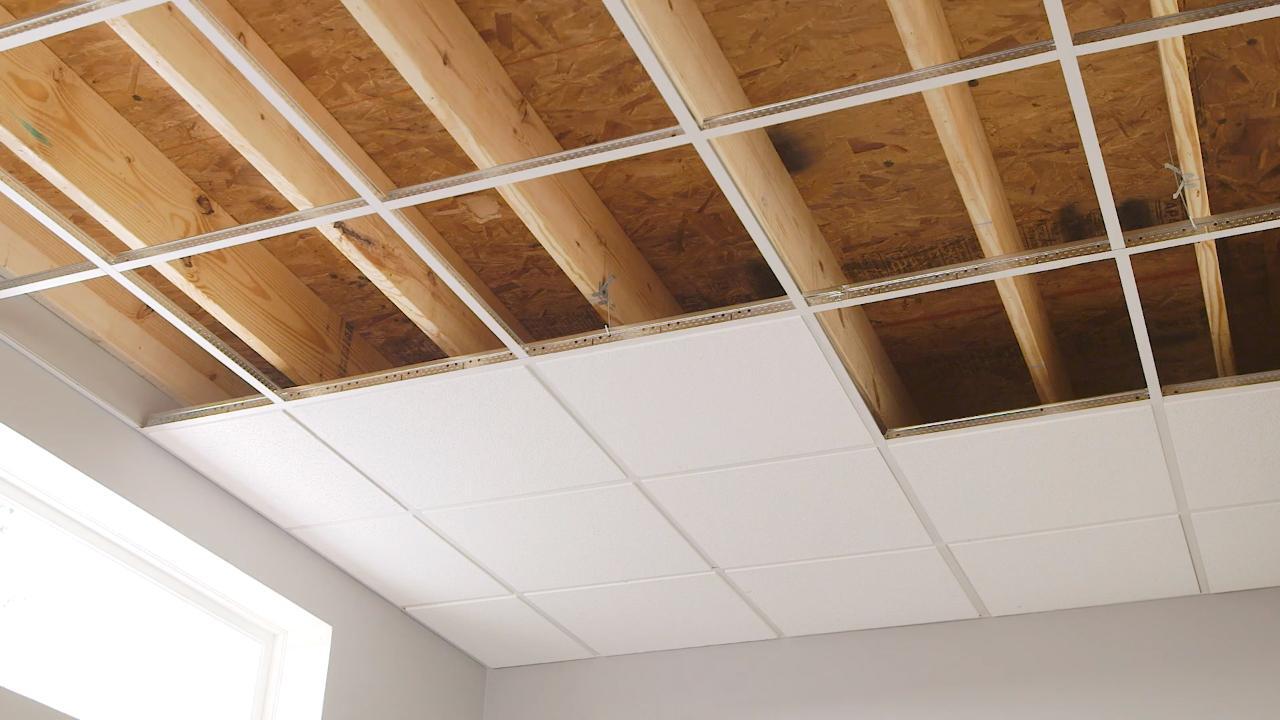
2. Drop Ceiling: Drop ceiling, also known as suspended ceiling, is a versatile option for basement ceilings. It consists of a grid system of metal tracks and acoustical tiles that can be easily removed and replaced for access to electrical or plumbing systems above. Drop ceilings provide soundproofing and allow for the installation of recessed lights or other fixtures. They come in a variety of styles, including smooth, textured, or patterned tiles.
3. Tin Ceiling Tiles: Tin ceiling tiles can add a touch of elegance and vintage charm to your basement. They are often installed in decorative patterns and can be painted to match your desired aesthetic. Tin ceiling tiles are known for their durability and fire resistance. They can be installed directly over the drywall or as an alternative to drop ceilings.
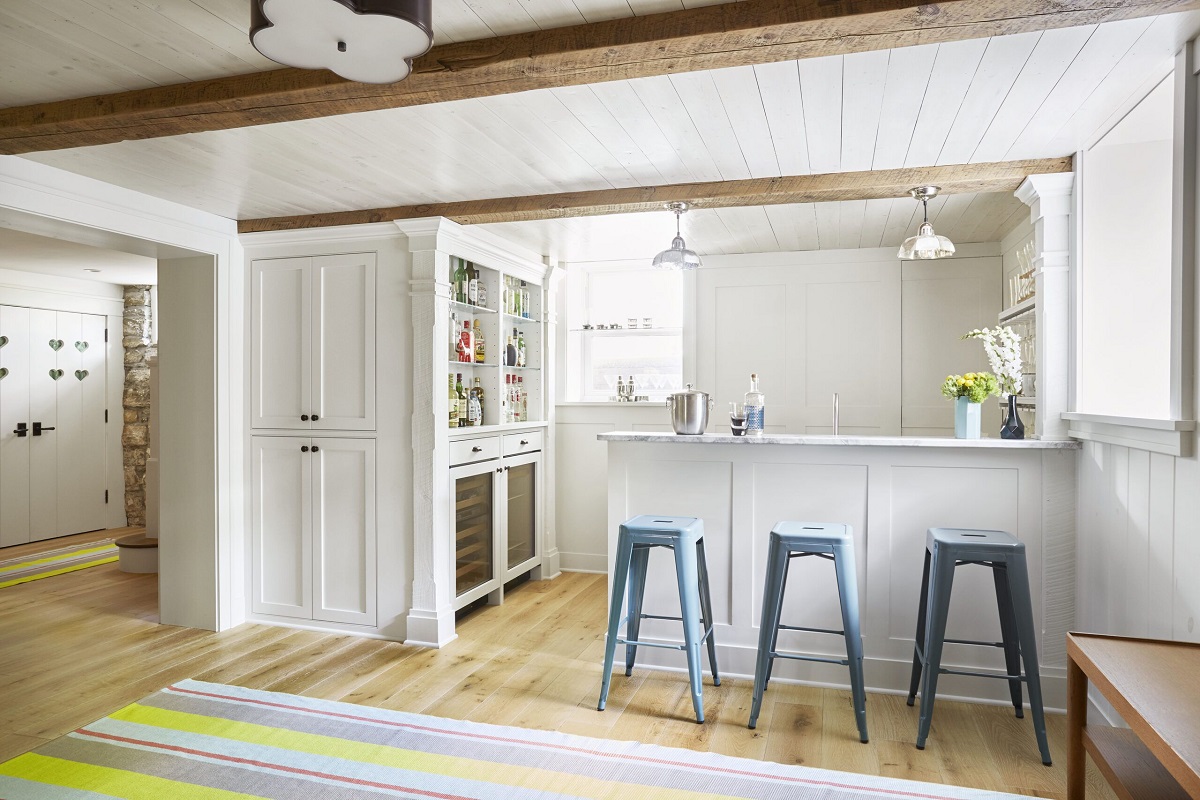
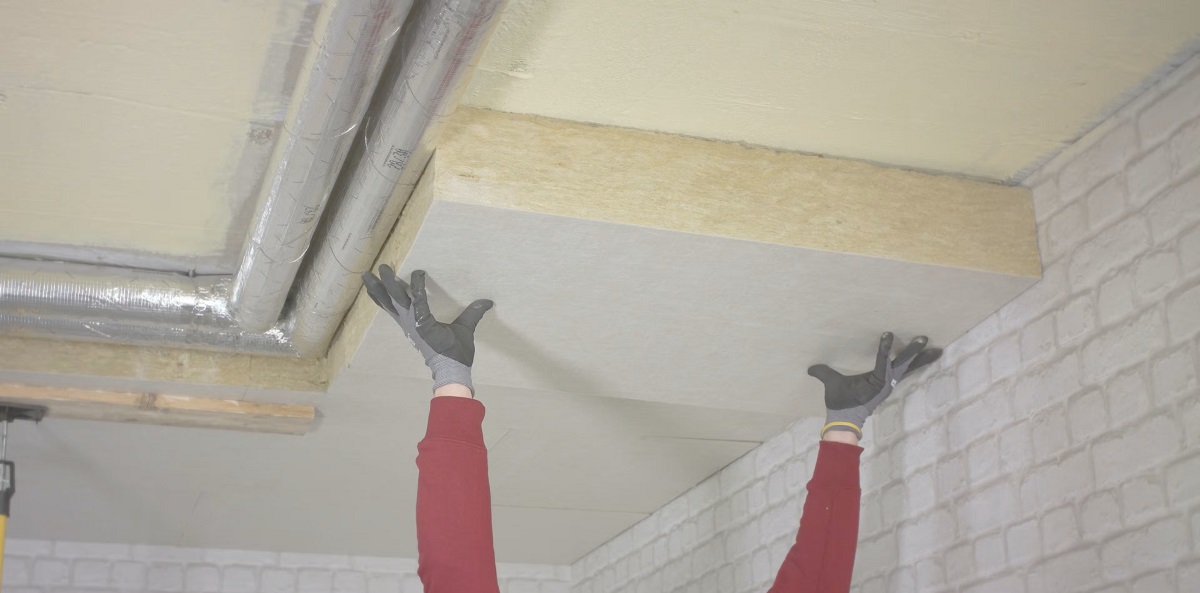
4. Wood Planks or Beadboard: For a warm and rustic look, consider using wood planks or beadboard for your basement ceiling. Wood adds natural beauty and can be stained or painted to achieve the desired finish. Wood ceilings provide additional insulation and can help create a cozy atmosphere. However, it’s important to ensure proper ventilation and moisture control to prevent warping or damage.
5. Stretch Fabric Ceiling: A stretch fabric ceiling is a unique and modern option that provides a seamless and artistic look. The fabric is stretched across a frame to create a smooth and sleek surface. This type of ceiling allows for the integration of lighting fixtures, speakers, and other design elements. It is also a great option for soundproofing and hiding imperfections in the original ceiling.
Consider the style, functionality, and maintenance requirements when choosing the optimal ceiling materials for your basement. Take into account the existing decor and purpose of the space to ensure a cohesive and pleasing result.
Whichever material you choose, it is essential to consult with professionals or follow manufacturer guidelines for proper installation techniques and safety precautions. This will ensure that the new ceiling is not only visually appealing but also durable and long-lasting.
By carefully selecting the optimal ceiling materials, you can enhance the overall aesthetics and functionality of your raised basement ceiling.
Elevating Ceiling Height with Construction Techniques
When raising your basement ceiling, there are several construction techniques you can employ to achieve the desired elevation. These techniques may involve modifying the existing structure or creating new elements to increase the height. Here are some construction techniques to consider:
1. Excavating the Floor: If there is enough headroom in your basement, excavating the floor can be an effective way to gain additional ceiling height. This involves removing a portion of the existing concrete floor to create a lower level. However, this technique should be carefully considered as it can be complex, costly, and may require permits or approval from local authorities.
2. Lowering the Foundation: In situations where your basement ceiling height is severely limited, lowering the foundation itself might be necessary. This entails excavating the soil beneath the existing foundation and pouring a new, lower foundation. This technique should only be undertaken by experienced professionals who can assess the structural implications and ensure proper support during the process.
3. Coffer or Tray Ceilings: Another construction technique to elevate the ceiling height is to incorporate coffer or tray ceilings. These architectural features can add depth and dimension to the space while creating the illusion of a higher ceiling. Coffer or tray ceilings are created by installing recessed or raised sections within the ceiling, providing visual interest and additional height.
4. Structural Changes: Depending on the existing structure of your basement, structural changes might be necessary to achieve a higher ceiling height. This could involve modifying or reinforcing existing beams, columns, or load-bearing walls to accommodate the raised ceiling. Consulting with a structural engineer or a professional contractor is crucial to ensure the safety and stability of the modified structure.
5. Mezzanine Floor or Loft: If you have a particularly high basement, consider creating a mezzanine floor or loft space. This involves constructing an elevated platform within the basement, providing additional usable space while maintaining the height below. A mezzanine floor can be used for various purposes such as a home office, reading nook, or storage area.
Before proceeding with any construction technique, it is essential to consult with professionals such as architects, engineers, or contractors. They will assess the feasibility, structural implications, and local building codes to ensure the safe execution of the chosen technique. They can also provide guidance on best practices and any required permits or inspections.
Keep in mind that construction techniques to elevate the ceiling height may require significant time, effort, and investment. Therefore, careful planning and budgeting are vital to achieve the desired results.
By employing construction techniques tailored to your basement’s specific needs, you can create a more spacious and visually appealing environment with a heightened ceiling.
Read more: How To Make Sofa Cushions Higher
Sanding, Painting, and Finishing the New Ceiling
Once you have successfully raised your basement ceiling to the desired height, the next step is to sand, paint, and finish the new ceiling. This process will help provide a polished and cohesive look to your basement space. Here are the steps involved in sanding, painting, and finishing the new ceiling:
1. Sanding: Start by sanding the surface of the new ceiling to ensure it is smooth and free of any imperfections. Use a sanding block or sandpaper to gently remove any rough edges, bumps, or uneven spots. This step is crucial to achieve a flawless finish and create a clean canvas for painting.
2. Priming: Before applying paint, it is important to prime the newly sanded ceiling. Primer helps seal the surface, improves paint adhesion, and prevents future peeling or cracking. Choose a primer that is suitable for the type of ceiling material you have installed, whether it’s drywall, wood, or another material. Apply the primer evenly with a roller or brush, following the manufacturer’s instructions.
3. Painting: Once the primer is dry, it’s time to paint the new ceiling. Select a paint color that complements the overall design and style of your basement. Consider using a lighter color to create a sense of openness and brightness. Use a roller or brush to apply the paint evenly, working in small sections at a time. Apply multiple coats if necessary, allowing sufficient drying time between each coat. Be mindful of protecting the surrounding walls and floor from paint drips or splatters.
4. Finishing Touches: After the paint has dried, complete the finishing touches to enhance the appearance of the new ceiling. Consider adding crown molding or decorative trim along the edges to create a smooth transition between the ceiling and walls. This can also help conceal any gaps or imperfections. Additionally, install any lighting fixtures or fans that were part of your design plan, ensuring they are securely mounted and properly wired.
5. Clean-Up: Once you have completed the sanding, painting, and finishing process, it’s important to clean up the workspace. Remove any protective coverings, clean any paint spills or splatters, and dispose of any unused materials properly.
Remember to prioritize safety throughout the sanding, painting, and finishing process. Use appropriate protective gear such as goggles, masks, and gloves. Ensure the area is well-ventilated to minimize exposure to fumes from paint and primers.
By sanding, painting, and finishing the new ceiling, you can achieve a polished and visually appealing result that enhances the overall aesthetic of your raised basement ceiling. Take your time, follow proper techniques, and enjoy the transformation of your basement space.
Conclusion
Raising the ceiling height in your basement can transform the space from a cramped and confined area to a spacious and inviting environment. By following the step-by-step process outlined in this article, you can successfully achieve a higher basement ceiling and unlock the full potential of your basement.
Throughout the journey, it is important to consider various factors such as the structural constraints, plumbing, electrical systems, and HVAC ductwork. Assessing the current ceiling height and identifying any obstacles or modifications needed will ensure a safe and efficient process.
Choosing the optimal ceiling materials, whether it’s drywall, drop ceiling, wood planks, or something more unique, will greatly impact the overall look and functionality of the space. Each material has its own advantages and considerations, so it’s important to select the one that suits your needs and aesthetic preferences.
Once the new ceiling is in place, sanding and priming the surface provides a smooth foundation for painting. Applying multiple coats of paint and adding finishing touches like crown molding or decorative trim can elevate the visual appeal of the new ceiling while incorporating lighting fixtures or fans enhances functionality.
It is crucial to consult with professionals such as contractors, electricians, and HVAC specialists to ensure compliance with local regulations and ensure the structural integrity of the modified space.
Ultimately, by raising your basement ceiling, you can create a more spacious and enjoyable area for various uses such as a home office, game room, or additional living space. The process requires careful planning, attention to detail, and patience, but the end result will be well worth the effort.
So, if you’re ready to transform your basement into a functional and inviting space, follow the steps outlined in this article and embark on your journey to raise the ceiling height in your basement.
Frequently Asked Questions about How To Make Basement Ceiling Higher
Was this page helpful?
At Storables.com, we guarantee accurate and reliable information. Our content, validated by Expert Board Contributors, is crafted following stringent Editorial Policies. We're committed to providing you with well-researched, expert-backed insights for all your informational needs.


0 thoughts on “How To Make Basement Ceiling Higher”