Articles
How To Finish A Basement Ceiling
Modified: October 28, 2024
Discover helpful articles on how to finish a basement ceiling and transform your space with expert tips and easy-to-follow instructions.
(Many of the links in this article redirect to a specific reviewed product. Your purchase of these products through affiliate links helps to generate commission for Storables.com, at no extra cost. Learn more)
Introduction
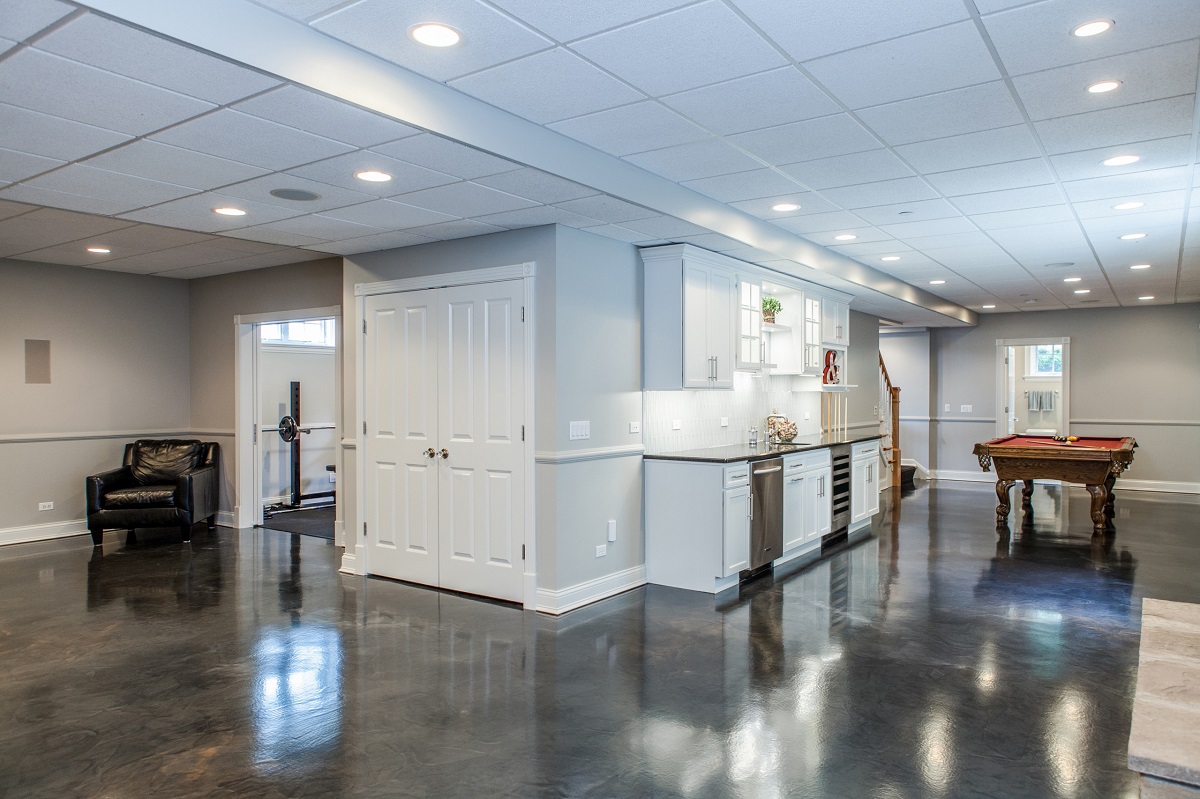
Finishing a basement ceiling is an essential step in turning your basement into a usable and attractive space. Many homeowners overlook this important aspect of basement renovation, focusing solely on the walls and flooring. However, a well-finished ceiling can greatly enhance the overall aesthetics of your basement, as well as improve insulation and soundproofing.
In this article, we will guide you through the process of finishing a basement ceiling. We will explore the steps involved, from evaluating the existing ceiling to installing a new ceiling grid and choosing the right finishing materials. By following these steps, you can transform your basement into a comfortable and inviting space that matches the rest of your home.
Before diving into the process, it is important to note that finishing a basement ceiling requires some level of DIY skills and tools. If you are not comfortable with electrical work, structural modifications, or using power tools, it may be best to hire a professional contractor to assist you with the project. Safety should always be a priority when working on any home improvement task.
Now, let’s get started and discover how to finish a basement ceiling step by step, unlocking the full potential of your basement.
Key Takeaways:
- Transform your basement into a comfortable and inviting space by following the steps to finish the ceiling. Enhance aesthetics, improve insulation, and create a functional area that complements your home.
- Prioritize safety, seek professional assistance if needed, and carefully follow manufacturer’s instructions for a successful and long-lasting basement ceiling finishing project. Attention to detail and proper planning are key.
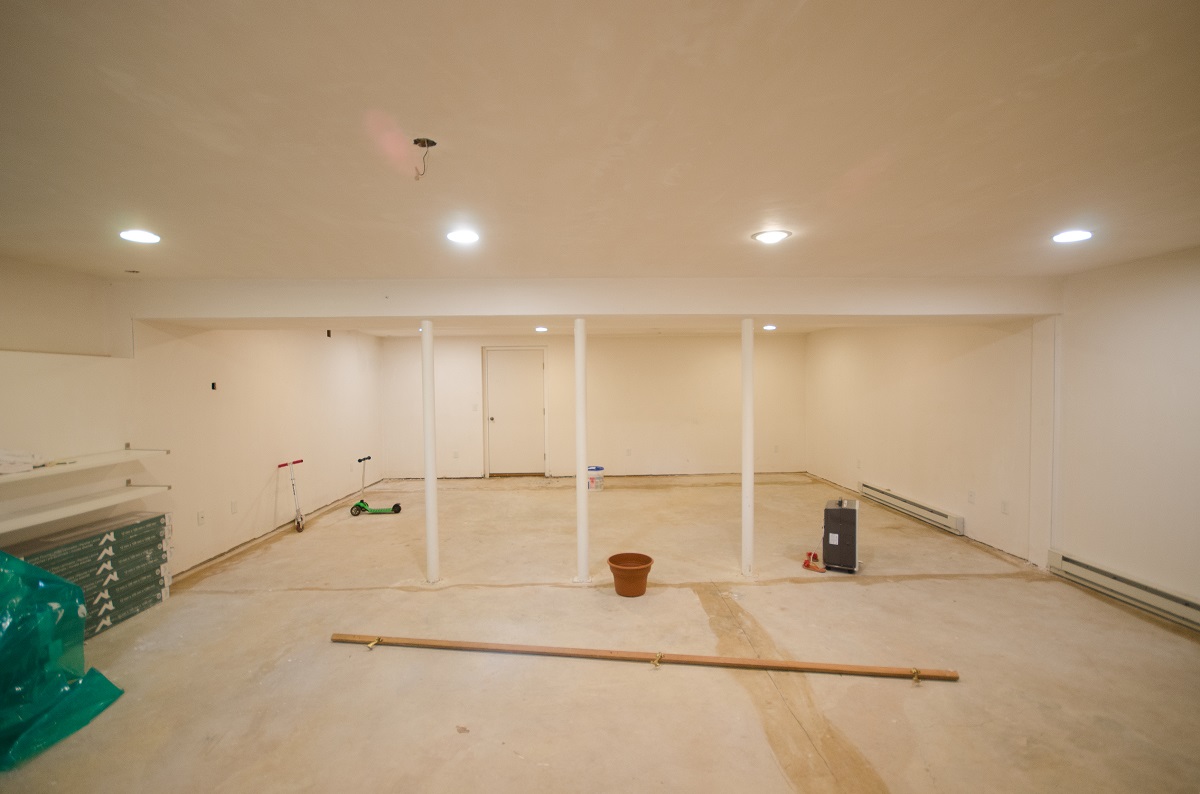
Step 1: Evaluate the Existing Ceiling
The first step in finishing a basement ceiling is to evaluate the condition of your existing ceiling. This will help determine the necessary actions and materials needed for the project.
Start by inspecting the ceiling for any signs of water damage, leaks, or structural issues. Look for cracks, sagging, or discoloration that may indicate problems. If you notice any major issues, it is important to address them before proceeding with the finishing process.
Next, consider the height of your basement ceiling. Basement ceilings are typically lower than those in the rest of the house, so it’s important to account for this when planning the finishing materials. You don’t want to install a ceiling that is too low and makes the space feel cramped.
Additionally, assess the soundproofing and insulation of your basement ceiling. If you find that there is minimal insulation or poor soundproofing, you may want to consider adding insulation during the finishing process. This will help improve energy efficiency and reduce noise transmission between floors.
Take note of any existing features that may impact the finishing process, such as exposed pipes, ductwork, or electrical wiring. These elements will need to be accounted for in your design and may require additional measures to conceal or work around.
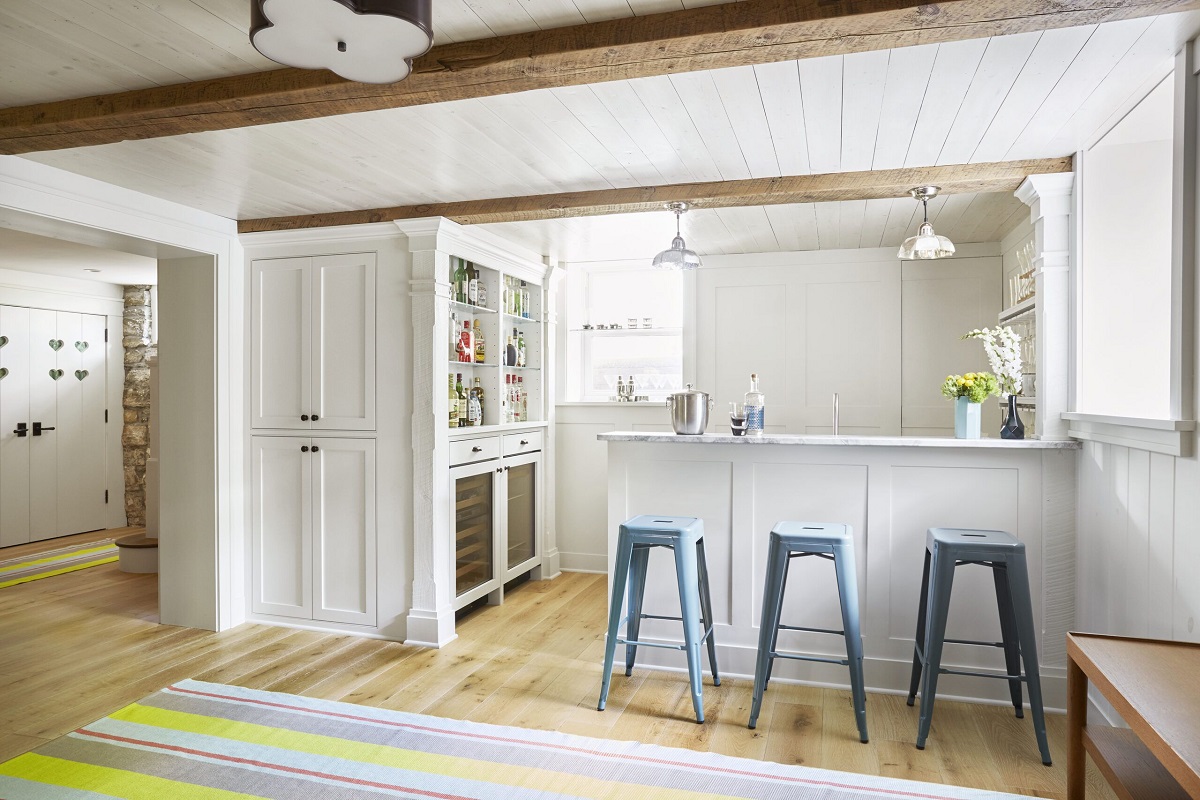
Finally, consider the overall style and aesthetic you want to achieve with your finished basement ceiling. Take into account the design of the rest of your basement and your personal preferences. Are you going for a more modern and sleek look or a rustic and cozy vibe? This will help inform the choice of finishing materials.
By thoroughly evaluating the existing ceiling, you can accurately plan and prepare for the upcoming steps in the basement ceiling finishing process. It will also ensure that any necessary repairs or modifications are addressed beforehand for a smooth and successful project.
Step 2: Determine the Desired Ceiling Finish
Once you have evaluated the condition of your existing basement ceiling, the next step is to determine the desired ceiling finish. This involves considering the aesthetic style, functionality, and budget for your basement project.
There are various options available for finishing a basement ceiling, each with its own unique characteristics and benefits. Here are some popular choices:
- Drywall: Drywall is a common choice for basement ceilings. It provides a clean and seamless finish, and it can easily be painted or textured to match your desired aesthetic. Drywall also offers good insulation properties and is a cost-effective option.
- Dropped or Suspended Ceiling: A dropped or suspended ceiling consists of a metal grid system with ceiling panels that are inserted into the grid. This type of ceiling allows for easy access to electrical wires, ductwork, and plumbing, making it convenient for future repairs or modifications. It also offers good soundproofing and insulation capabilities.
- Tongue and Groove Wood Planks: If you’re aiming for a more rustic or traditional look, tongue and groove wood planks are a great option. They create a warm and cozy atmosphere and can be stained or painted to match your style. However, it’s worth noting that wood planks may require more maintenance and can be more expensive than other options.
- PVC or Metal Ceiling Tiles: PVC or metal ceiling tiles are a durable and easy-to-install option. They come in various designs and finishes, allowing you to customize the look of your basement ceiling. These tiles are moisture-resistant, making them ideal for basement environments.
Consider your personal style preferences, the overall aesthetic of your basement, and the functionality of the space when choosing a ceiling finish. You may also want to consult with a professional or do some research to gather inspiration and ideas.
It’s important to keep your budget in mind when selecting a ceiling finish. Some options, like drywall or tongue and groove wood planks, may require more upfront investment compared to other materials. However, they can offer long-term durability and visual appeal.
By determining the desired ceiling finish, you can move forward with the next steps of the basement ceiling finishing process, knowing exactly what materials and techniques to use. This will help you create a cohesive and visually pleasing basement space that aligns with your vision.
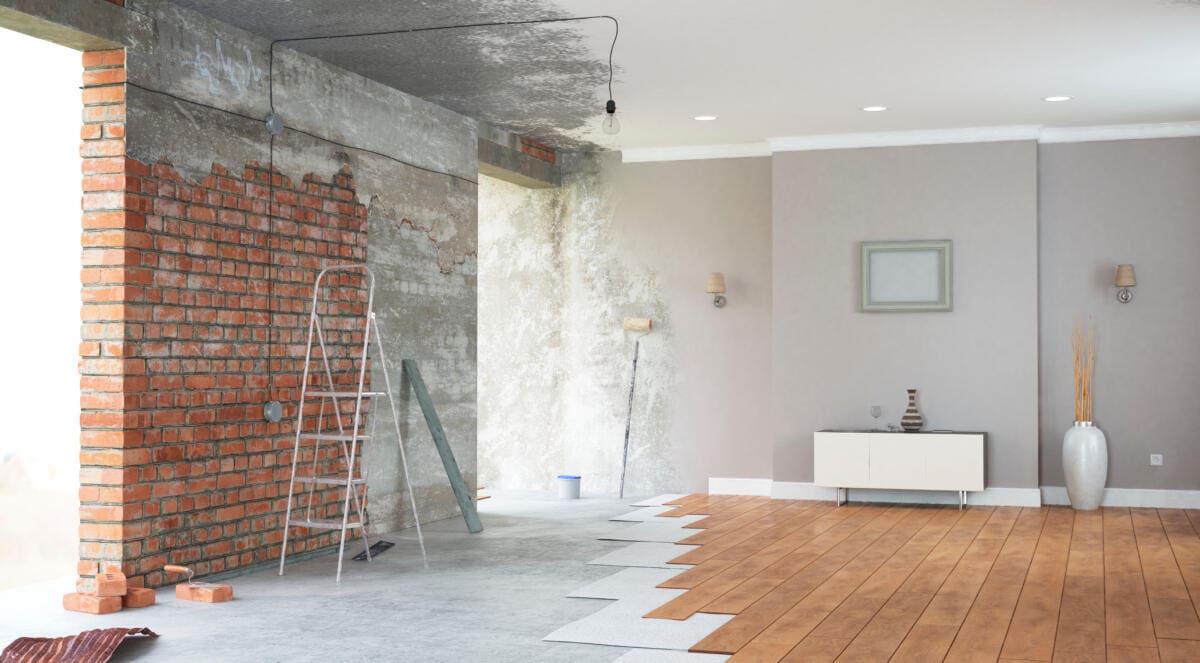
Step 3: Prepare the Ceiling Surface
Before you can begin installing your chosen ceiling finish, it’s important to properly prepare the surface of your basement ceiling. This step ensures that your new ceiling will adhere securely and have a smooth and professional appearance.
Here are the key steps involved in preparing the ceiling surface:
- Clear the Area: Begin by removing any furniture, decorations, or stored items from the basement. This will give you a clear and unobstructed workspace to work on the ceiling.
- Protect the Floors and Walls: Cover the floors and walls of the basement with drop cloths or plastic sheeting to protect them from dust, debris, and any potential damage during the preparation process.
- Clean the Ceiling: Use a broom or vacuum to remove any dust, dirt, or cobwebs from the ceiling surface. Cleaning the ceiling ensures better adhesion for the finishing materials.
- Repair Damages: Inspect the ceiling for any cracks, holes, or imperfections. Use a putty knife and joint compound to fill in any small cracks or holes. For larger damages, you may need to patch them with a piece of drywall or consult a professional for repair.
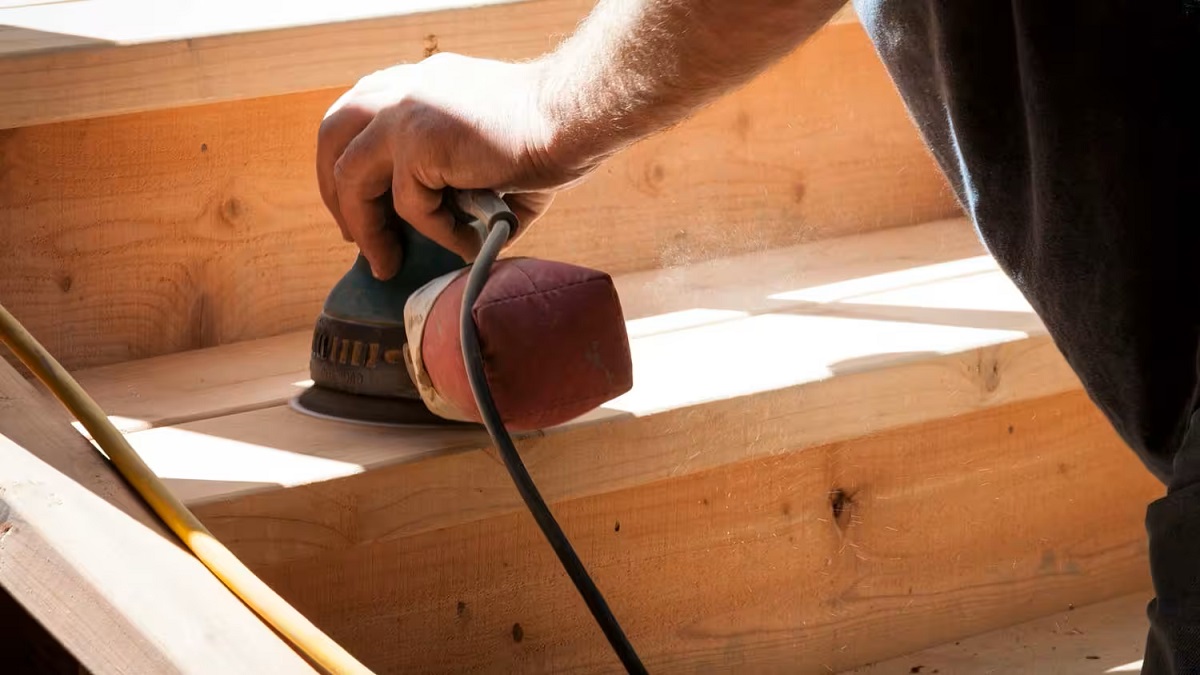
- Smooth the Surface: Sand down any rough spots or uneven surfaces on the ceiling. This step is essential to achieve a smooth and seamless finish. Use sandpaper or an electric sander for larger areas.
- Apply a Primer (Optional): Depending on the type of ceiling finish you’ve chosen, applying a primer may be beneficial. A primer helps create a uniform surface, improves adhesion, and enhances the durability of the finishing materials. Consult the manufacturer’s instructions to determine if a primer is recommended for your chosen ceiling finish.
By properly preparing the ceiling surface, you ensure that your chosen ceiling finish will adhere securely and provide a visually appealing result. Taking the time to clean, repair, and smooth the ceiling surface sets the foundation for a successful basement ceiling finishing project.
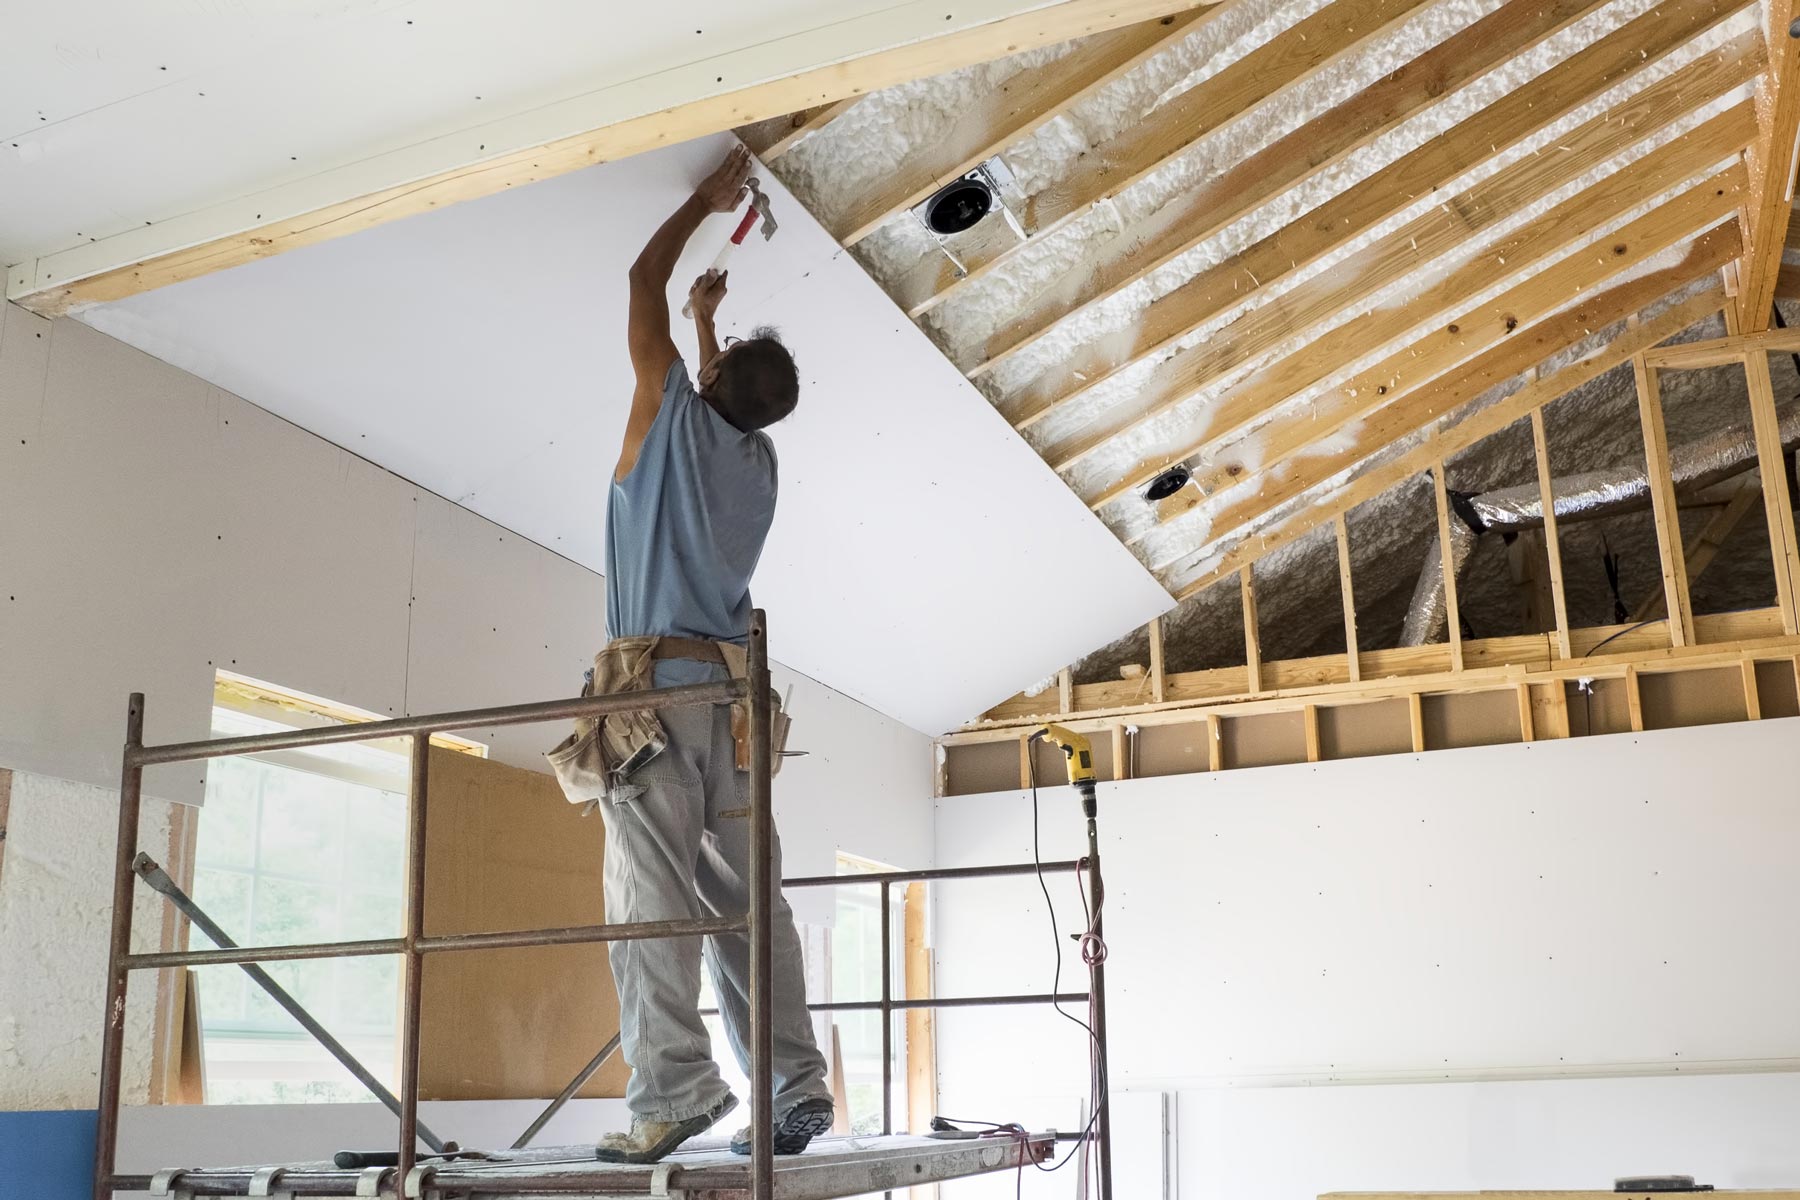
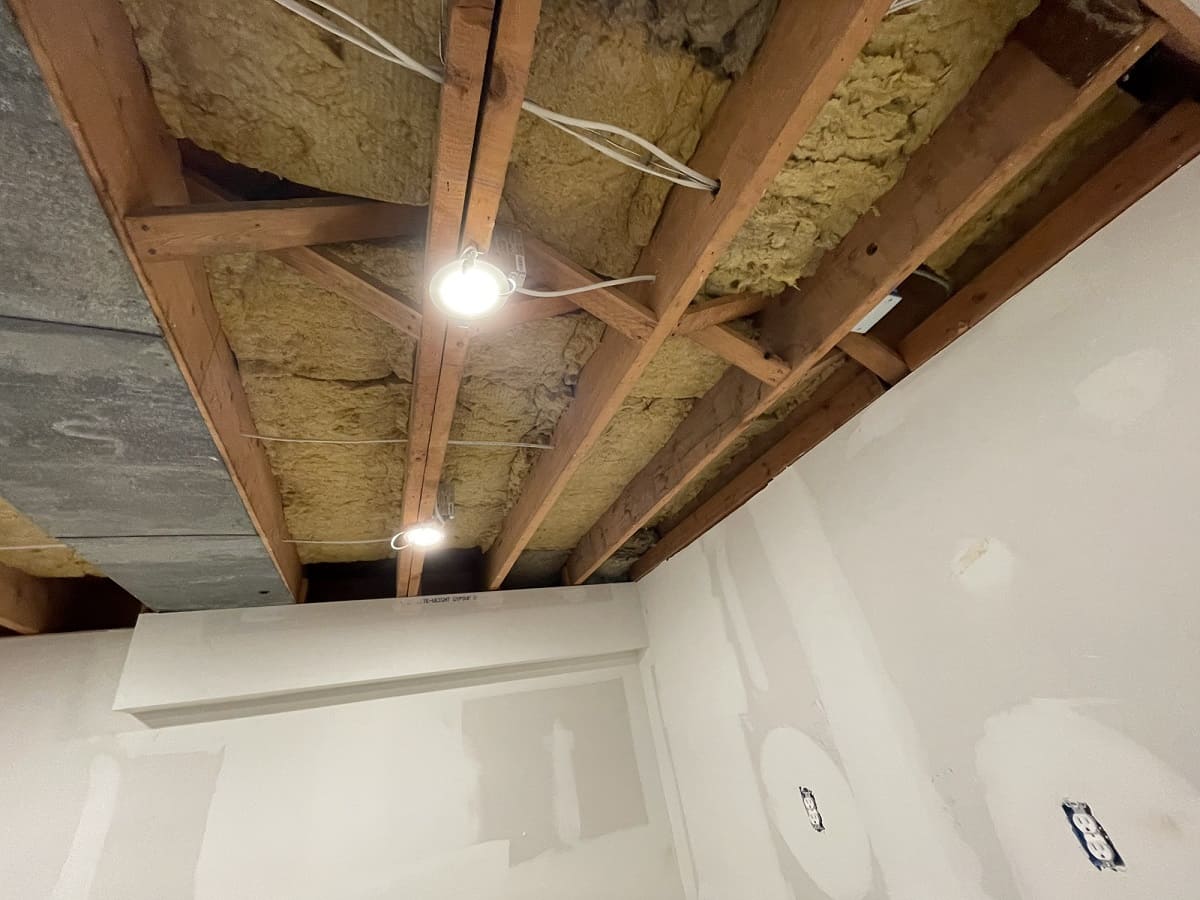
Step 4: Install Insulation (Optional)
Insulating your basement ceiling is an optional but highly recommended step in the finishing process. Proper insulation not only helps regulate temperature and improve energy efficiency but also minimizes noise transmission between floors.
If your basement is located in a colder climate, insulating the ceiling can help prevent heat loss and keep the space warm. It also reduces the risk of condensation and moisture buildup, which can lead to mold and structural damage.
Here are the steps to install insulation in your basement ceiling:
- Measure and Calculate: Measure the area of the ceiling to determine the amount of insulation you’ll need. Consider the R-value, which indicates the insulation’s resistance to heat flow. Higher R-values provide better insulation.
- Choose the Insulation Type: Decide on the insulation material based on factors such as budget, desired R-value, and ease of installation. Common insulation options for ceilings include fiberglass batts, foam boards, and blown-in insulation.
- Prepare the Area: Clear the workspace by moving any furniture or obstructions out of the way. Ensure that the area is clean and free from debris.
- Install Vapor Barrier (If Needed): If moisture is a concern in your basement, it may be necessary to install a vapor barrier before adding the insulation. This helps prevent condensation and moisture from seeping into the insulation.
- Cut and Fit the Insulation: Measure the insulation material and use a utility knife or insulation cutter to cut it to the appropriate size. Fit the insulation snugly between the ceiling joists, ensuring a tight seal.
- Seal Gaps and Cracks: Check for any gaps or cracks around the insulation and seal them using insulation tape or expanding foam. This helps prevent air leakage and ensures optimal insulation.
It’s important to follow local building codes and regulations when installing insulation. If you’re unsure about the process or the specific requirements for your area, consult a professional or building inspector for guidance.
Installing insulation in your basement ceiling provides several benefits, including improved energy efficiency, soundproofing, and moisture control. It creates a more comfortable and well-insulated space, making your finished basement even more enjoyable.
Read more: DIY: How To Finish A Basement
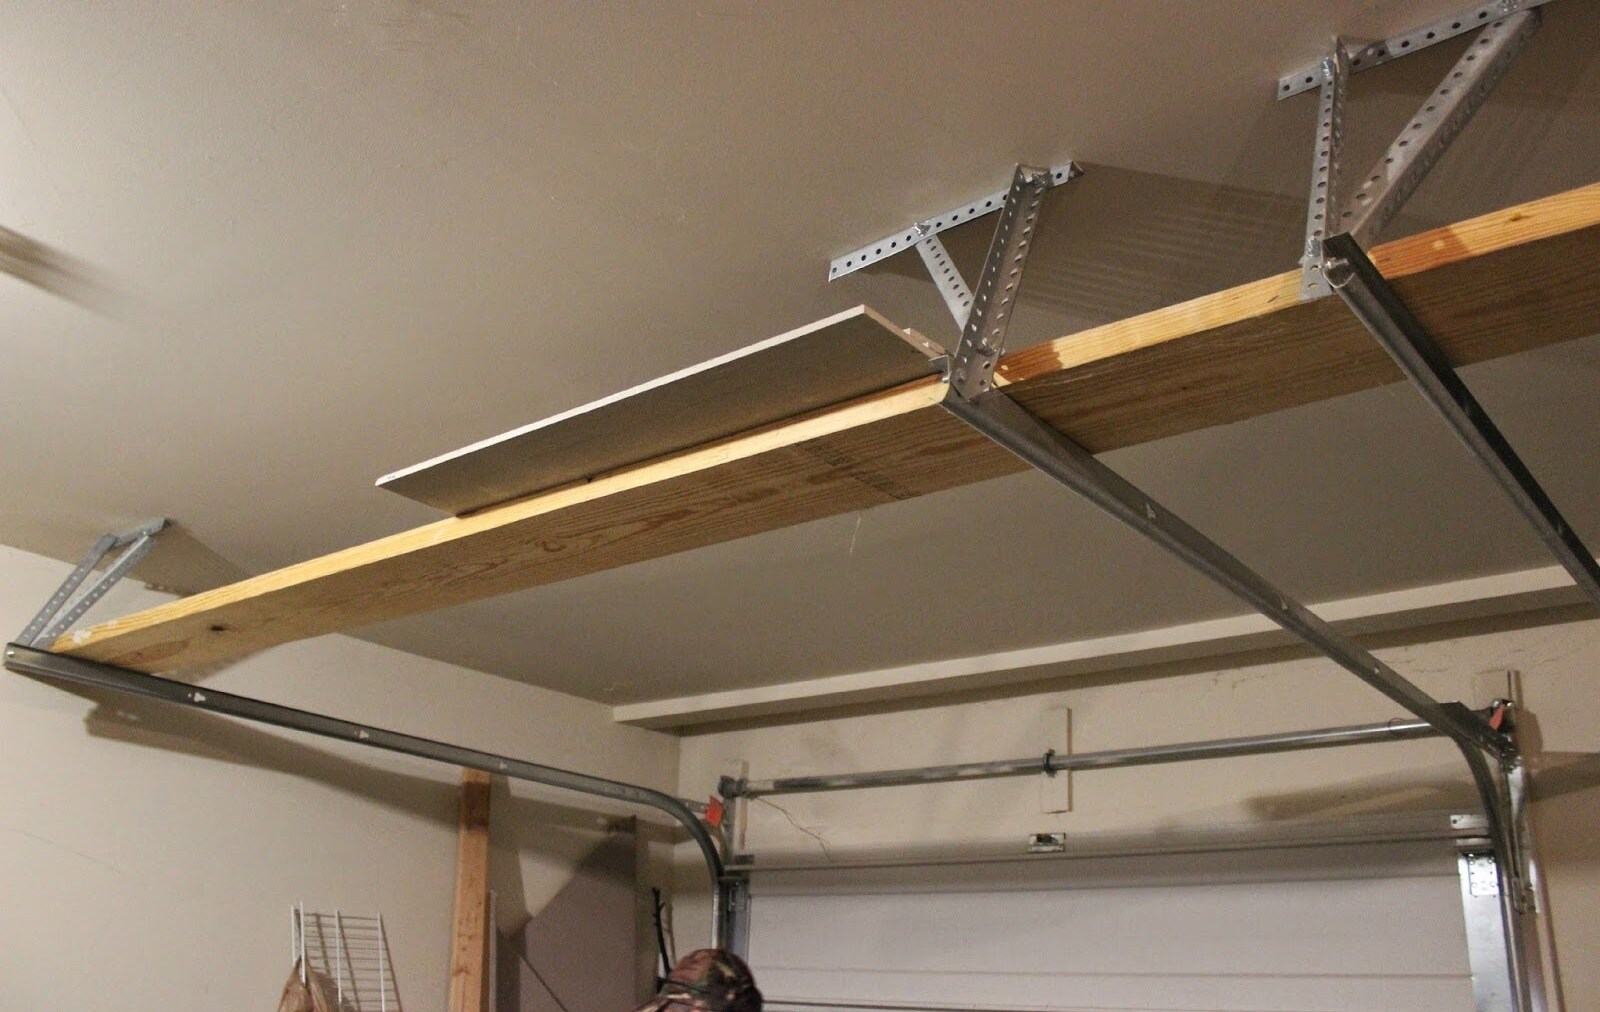
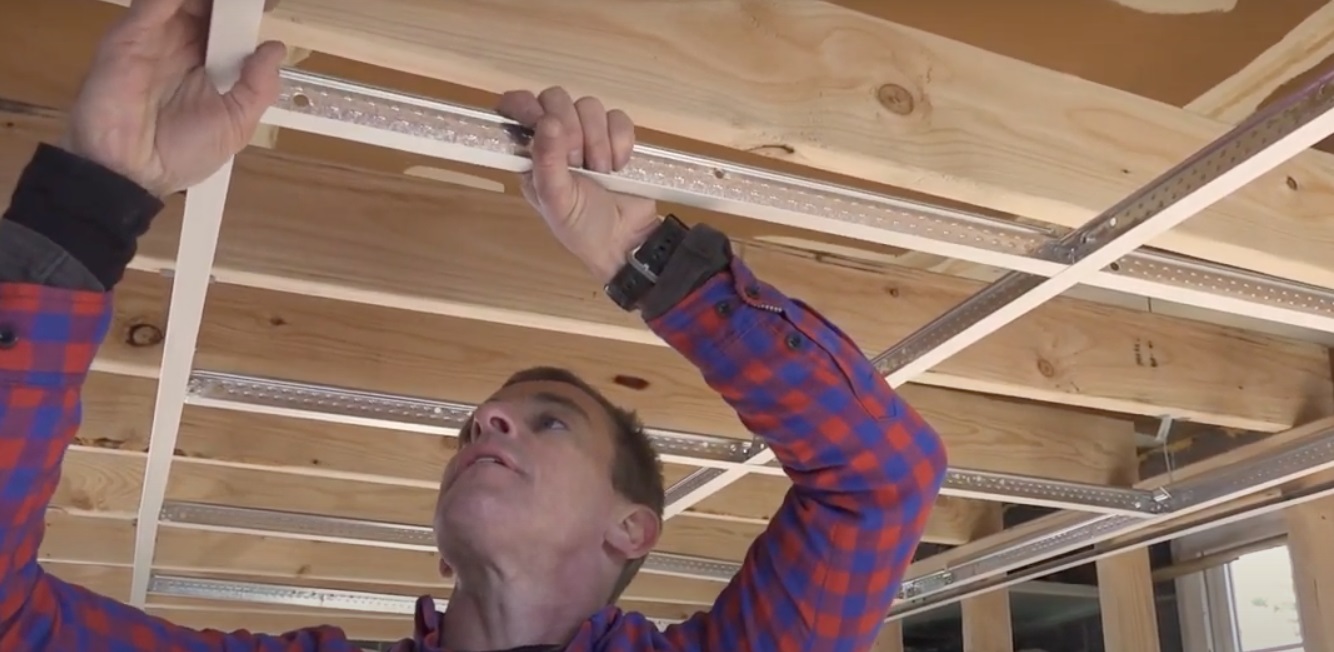
Step 5: Install Ceiling Grid
Installing a ceiling grid is a common method for finishing basement ceilings, especially when opting for a dropped or suspended ceiling. The grid system provides structural support and allows for the easy installation and removal of ceiling tiles or panels.
Here are the steps to install a ceiling grid:
- Gather the Required Materials: Before starting the installation process, gather all the necessary materials, including the ceiling grid tracks, hanger wires, drill, screws, and a level.
- Measure and Mark: Measure the dimensions of your basement ceiling and use a chalk line or laser level to mark the placement of the grid. Ensure that the lines are straight and aligned with the rest of the room.
- Install Wall Angles: Begin by installing the wall angles, which are metal tracks that run along the perimeter of the room. Secure them to the walls using screws, ensuring they are level and aligned with the marked lines.
- Attach Main Beams: Connect the main beams to the wall angles using hanger wires. These wires provide support and stability to the ceiling grid. Install the main beams at regular intervals, following the manufacturer’s instructions.
- Add Cross Tees: Once the main beams are in place, add the cross tees to create the grid pattern. Connect the cross tees to the main beams, ensuring they are perpendicular and evenly spaced.
- Check for Level and Adjust: Periodically check the level of the grid as you install the main beams and cross tees. Make any necessary adjustments to ensure a level and properly aligned grid system.
It’s important to carefully follow the manufacturer’s instructions and guidelines specific to your chosen ceiling grid system. This will ensure proper installation and stability.
Before moving on to the next step, take a moment to step back and assess the installed ceiling grid. Ensure that it is level, sturdy, and aligned with the markings on the walls.
Installing the ceiling grid is an important step as it serves as the foundation for the finished ceiling. Once the grid is in place, you can proceed with mounting the ceiling tiles or panels for a polished and professional look.
Consider using drop ceiling tiles or drywall to finish your basement ceiling. Drop ceiling tiles are easy to install and provide access to utilities, while drywall creates a seamless look.
Step 6: Mount Ceiling Tiles or Panels
With the ceiling grid in place, it’s time to mount the ceiling tiles or panels. This step adds the finishing touch to your basement ceiling, providing a clean and polished look. The specific method will depend on the type of ceiling finish you have chosen.
Here are the steps to mount ceiling tiles or panels:
- Measure and Cut: Measure the dimensions of the ceiling area where the tiles or panels will be installed. Using a utility knife or a specific cutting tool for your chosen material, carefully cut the tiles or panels to fit the designated spaces.
- Start from One Corner: Begin at one corner of the room and insert the tiles or panels into the grid. Ensure that they fit snugly and securely. Some ceiling finishes may require twisting or sliding the tiles into place, while others may involve simply dropping them into position.
- Continue the Pattern: Work your way across the room, installing the remaining tiles or panels in the desired pattern or layout. Double-check the alignment and spacing between each piece to maintain a uniform and cohesive look.
- Make Adjustments: If necessary, make any adjustments to the tiles or panels to ensure they fit properly within the grid system. Trim or recut any pieces that are too large or do not align correctly.
- Secure the Tiles or Panels: Once all the tiles or panels are in place, secure them to the ceiling grid if required. This may involve using clips, brackets, or screws provided by the manufacturer. Follow the specific instructions for your chosen ceiling finish.
Take your time during this step to ensure that each tile or panel is properly installed and aligned. Pay attention to details such as pattern continuity, spacing, and joins between pieces for a seamless and visually pleasing result.
Remember to consult the manufacturer’s instructions for your chosen ceiling finish, as different materials may have specific installation requirements.
Mounting the ceiling tiles or panels is an exciting step as it transforms the bare ceiling grid into a finished surface. Once complete, you will be able to see the immediate impact it has on the overall aesthetics of your basement space.
Step 7: Install Lighting Fixtures
Proper lighting is crucial in creating a functional and inviting space in your finished basement. Installing lighting fixtures not only enhances the atmosphere but also ensures adequate illumination for various activities. Here’s how to install lighting fixtures in your basement ceiling:
- Plan the Lighting Layout: Determine the desired placement and type of lighting fixtures for your basement. Consider the size and layout of the room, as well as the specific areas that require lighting, such as seating areas, workspaces, or entertainment zones.
- Consult an Electrician (if necessary): If you are not experienced with electrical work, it is recommended to consult a licensed electrician to ensure proper wiring and adherence to local electrical codes. They can help you determine the best options for lighting fixtures and handle any electrical connections if needed.
- Turn off the Power: Before starting any electrical work, switch off the power to the basement lighting circuit from the main electrical panel. This prevents the risk of electric shock while working on the fixtures.
- Install Mounting Brackets: Depending on the type of lighting fixtures you have chosen, you may need to install mounting brackets or frames onto the ceiling. Follow the manufacturer’s instructions to securely attach them in the desired locations.
- Wire and Connect the Fixtures: Carefully wire and connect the lighting fixtures according to the manufacturer’s instructions. Ensure that all connections are secure and follow proper electrical wiring techniques. If in doubt, hire a professional electrician to handle the wiring for you.
- Mount the Fixtures: Once the wiring is complete, mount the lighting fixtures onto the installed brackets or frames. Make sure they are level and positioned correctly before securing them in place.
- Test the Lighting: Once all the fixtures are installed, restore the power to the basement lighting circuit and test each fixture to ensure proper functionality. Check for any flickering or issues and address them before proceeding.
Remember to consider the style and functionality of the lighting fixtures to enhance the overall ambiance of your finished basement. Choose fixtures that suit your personal preferences and complement the design scheme of the space.
Installing the right lighting fixtures in your basement ceiling is the final touch that brings the space to life. It provides both practical illumination and enhances the overall aesthetics, ensuring that your finished basement is a bright and inviting area for various activities.
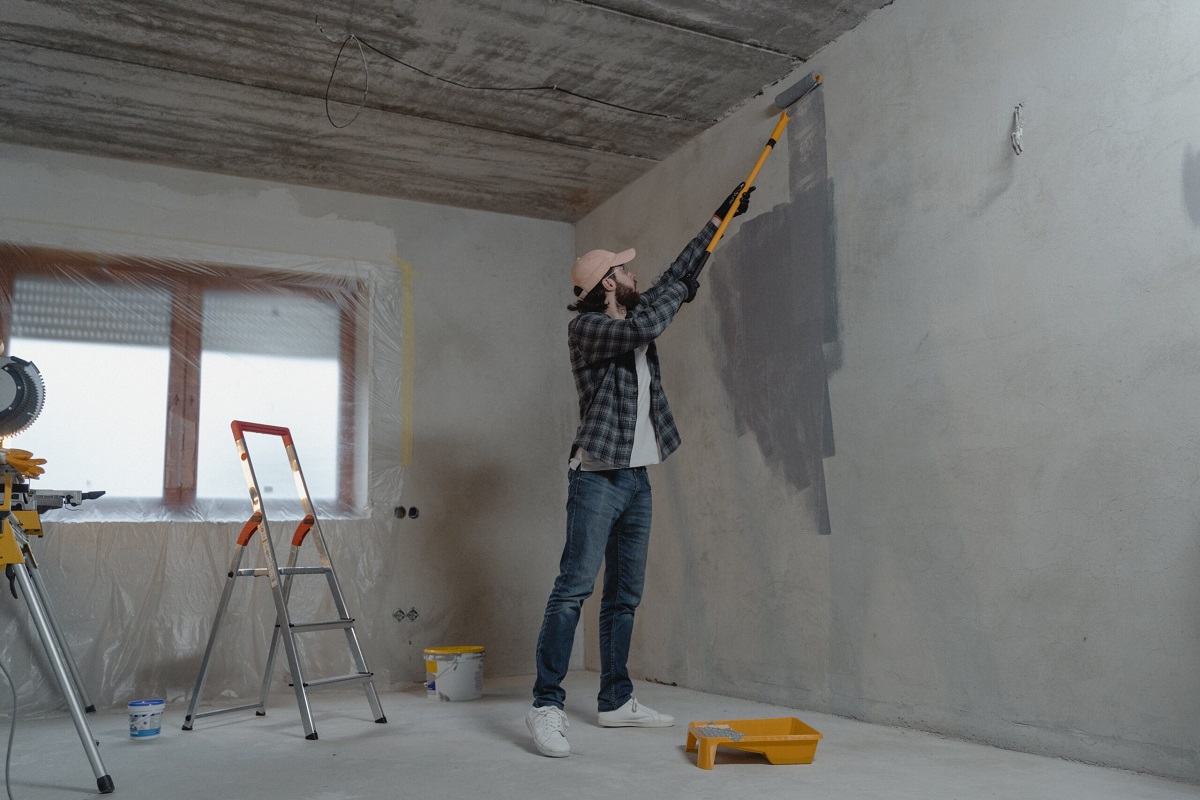
Step 8: Finish and Paint the Ceiling
Finishing and painting the ceiling is the final step in completing your basement renovation project. This step helps create a cohesive and polished look while adding the finishing touches to your space. Here’s how to finish and paint your basement ceiling:
- Prepare the Surface: Ensure the ceiling is clean and free from any dust, debris, or loose particles. Use a broom or vacuum to remove any dirt or cobwebs. Patch and repair any imperfections or cracks in the ceiling surface using filler or joint compound. Allow the repairs to dry completely before proceeding.
- Choose the Right Paint: Select a high-quality paint that is suitable for ceilings and meets your preferences in terms of color, finish, and durability. Consider using a paint with a matte or flat sheen to minimize the appearance of imperfections and create a smooth look.
- Protect the Surrounding Areas: Cover the walls, floors, and any furniture or fixtures in the space with drop cloths or plastic sheets to protect them from paint splatters or drips.
- Prime the Ceiling (if necessary): If your ceiling has not been previously painted or is in need of extra adhesion, consider applying a coat of primer before painting. This will ensure proper paint adhesion and enhance the longevity of the paint job.
- Apply the Paint: Start by cutting in the edges of the ceiling with a brush or small roller. Then, use a larger roller to cover the rest of the ceiling in smooth, overlapping strokes. Ensure even coverage and avoid applying too much pressure to prevent streaks or unevenness.
- Allow the Paint to Dry: Follow the manufacturer’s instructions for drying time. Ensure the paint is completely dry before moving or applying a second coat if necessary.
- Inspect and Touch Up: Once the paint has dried, inspect the entire ceiling for any missed spots, drips, or uneven areas. Touch up these areas with a small brush or roller as needed.
- Clean Up: Remove drop cloths and plastic sheets, and clean any paint brushes or rollers according to the manufacturer’s instructions. Dispose of any empty paint cans or used materials responsibly.
Don’t forget that proper ventilation is crucial when painting, so make sure the basement area is well-ventilated to aid in drying and prevent any fumes from accumulating.
By finishing and painting the ceiling, you create a cohesive and visually appealing space that ties the entire basement renovation together. It adds a final layer of refinement and elevates the overall aesthetics of your finished basement.
Read more: How To Finish A Basement Window
Step 9: Final Touches and Clean-up
Once you have finished painting the ceiling, it’s time to add the final touches and complete the clean-up process. This step ensures that your newly finished basement ceiling is ready to be enjoyed. Here’s what you need to do:
- Remove any Remaining Protective Coverings: Take off the drop cloths or plastic sheets that were used to protect the walls, floors, and furniture during the painting process. Fold them carefully and store them for future use or dispose of them properly.
- Inspect the Ceiling: Carefully examine the ceiling to ensure that all areas are properly finished and painted. Look for any touch-up spots, drips, or other imperfections that might need attention. Address these issues by using a small brush or roller to touch up the paint as necessary.
- Install Trim or Crown Molding (Optional): If desired, consider installing trim or crown molding around the perimeter of the ceiling. This can provide an added decorative touch and define the transition between the ceiling and walls.
- Replace Light Fixtures and Accessories: Reinstall any light fixtures, ceiling fans, or other accessories that were temporarily removed during the finishing process. Make sure they are securely in place and functioning properly.
- Organize and Arrange the Space: Take the opportunity to organize your finished basement and arrange furniture, decorations, and any other items that belong in the space. Create a welcoming and comfortable atmosphere that suits your needs and preferences.
- Perform a Final Clean-up: Thoroughly clean the entire basement, including the ceiling, floors, and any remaining construction debris. Vacuum or sweep the floors, dust any surfaces, and wipe down the walls if necessary. This will help you start enjoying your newly finished basement with a fresh and clean environment.
Take a moment to step back and admire your completed basement ceiling. Appreciate the transformation and the hard work you’ve put into creating a beautiful and functional space. Now you can start enjoying your finished basement and make the most of the additional living area.
Remember to follow any manufacturer’s instructions for maintenance and care of the ceiling material or finishes you have chosen. This will help preserve the quality and appearance of your newly finished basement ceiling for years to come.
Conclusion
Finishing a basement ceiling is a key step in transforming your basement into a usable and attractive space. By following the steps outlined in this article, you can achieve a well-finished and visually appealing ceiling that complements the rest of your basement renovations.
From evaluating the existing ceiling and determining the desired finish to installing insulation, ceiling grids, and lighting fixtures, each step plays a crucial role in creating a comfortable and functional space. The final touches, such as painting the ceiling and adding trim or crown molding, add the finishing touches that bring the entire project together.
Throughout the process, it’s important to prioritize safety, seek professional assistance if needed, and carefully follow manufacturer’s instructions for the materials and fixtures you choose. Attention to detail and proper planning will ensure a successful and long-lasting result.
Remember to consider your personal preferences, the overall design of your basement, and the functionality you desire when making decisions about the ceiling finish. Whether it’s a drywall finish for a seamless look, a suspended ceiling for easy access to utilities, or tongue and groove wood planks for a rustic ambiance, choose the option that best suits your style and needs.
By finishing your basement ceiling, you not only enhance the aesthetics of the space but also improve insulation, soundproofing, and energy efficiency. This ultimately adds value to your home and expands your usable living area.
So, roll up your sleeves, gather your tools, and embark on the journey of finishing your basement ceiling. With careful planning, attention to detail, and a little bit of creativity, you can create a beautiful and functional space that you can enjoy for years to come.
Frequently Asked Questions about How To Finish A Basement Ceiling
Was this page helpful?
At Storables.com, we guarantee accurate and reliable information. Our content, validated by Expert Board Contributors, is crafted following stringent Editorial Policies. We're committed to providing you with well-researched, expert-backed insights for all your informational needs.


0 thoughts on “How To Finish A Basement Ceiling”