Articles
How To Install Drop Ceiling In The Basement
Modified: August 27, 2024
Learn how to install a drop ceiling in your basement with these helpful articles. Transform your space with ease and create a polished look.
(Many of the links in this article redirect to a specific reviewed product. Your purchase of these products through affiliate links helps to generate commission for Storables.com, at no extra cost. Learn more)
Introduction
Installing a drop ceiling in your basement can be a great way to enhance the overall look and functionality of the space. Whether you’re looking to cover up unsightly pipes and wires or create a more finished and polished appearance, a drop ceiling is a practical and visually appealing solution.
A drop ceiling, also known as a suspended ceiling, consists of a grid system that is suspended from the original ceiling. Ceiling tiles are then inserted into the grid, providing a clean and uniform surface. This type of ceiling is not only easy to install, but it also allows for easy access to the area above for maintenance and repairs.
In this article, we will guide you through the step-by-step process of installing a drop ceiling in your basement. From measuring and planning to adding the finishing touches, we will cover everything you need to know to successfully complete this project.
Before we begin, it’s important to gather all the necessary materials and tools. Let’s take a look at what you’ll need:
Key Takeaways:
- Transform your basement with a drop ceiling by carefully measuring, planning, and installing the grid system. Add lighting and ventilation for functionality, and finish with attention to detail for a polished look.
- Safety is crucial throughout the installation process. Consult professionals if unsure, and personalize the space with decorative molding or trim for an inviting and visually appealing basement.
Read more: How To Install Can Lights In A Drop Ceiling
Materials Needed
Before you start installing a drop ceiling in your basement, it’s important to gather all the necessary materials and tools. Here’s a list of what you’ll need:
- Ceiling tiles
- Main runners
- Cross tees
- Wall angle trim
- Wire hangers
- Screws
- Level
- Measuring tape
- Pencil
- Drop ceiling cutting tool or a utility knife
- Safety glasses
- Ladder or scaffold
- Drill
- Lighting fixtures or recessed lights (if desired)
- Ventilation vents (if desired)
Make sure you have all the materials and tools ready before you begin the installation process. This will ensure a smooth and efficient workflow. Additionally, it’s important to wear safety glasses and exercise caution when handling tools and equipment.
Step 1: Measure and Plan
The first step in installing a drop ceiling in your basement is to accurately measure the dimensions of the space and create a detailed plan. This will help ensure that you purchase the correct amount of materials and create a layout that fits seamlessly within your basement.
Start by measuring the length and width of the room. Use a measuring tape to get precise measurements, and jot them down on a piece of paper. Next, determine the desired height of the drop ceiling. This will depend on the height of your basement and personal preference. Keep in mind that you’ll need to maintain enough clearance for any existing fixtures or ductwork.
Once you have the measurements, use graph paper or design software to create a scale drawing of your basement. This will serve as your blueprint throughout the installation process. Take note of any obstructions such as pipes, vents, or electrical outlets and plan accordingly to work around them.
It’s important to consider the layout of your ceiling tiles as well. Decide on the size and pattern you want to achieve, whether it’s a simple grid or something more intricate. This will help you determine the number of tiles and their placement within the grid system.
Lastly, make a list of the materials you’ll need based on your measurements and plan. This will ensure that you have everything required before you begin the installation process. It’s always a good idea to purchase a few extra materials to account for any mistakes or adjustments that may need to be made.
By measuring and planning carefully, you’ll set yourself up for a successful drop ceiling installation in your basement. It will save you time, money, and frustration down the line.
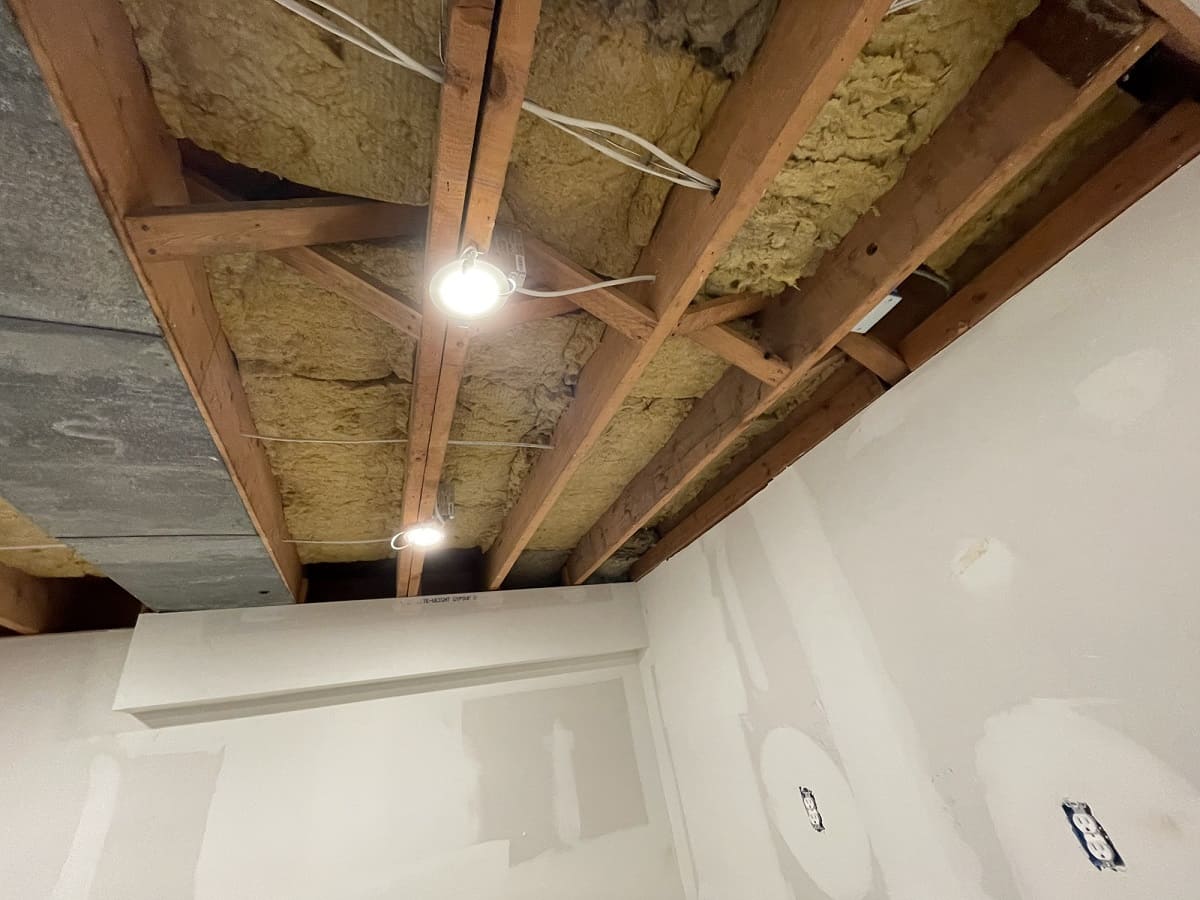
Step 2: Locate Ceiling Joists
Before you can start installing the drop ceiling grid, it’s crucial to locate and mark the position of the ceiling joists in your basement. The ceiling joists are the horizontal beams that support the weight of the ceiling and any structures above it.
To find the ceiling joists, you can use a stud finder, a device specifically designed to detect the location of joists and other structural components within walls and ceilings. Turn on the stud finder and scan the ceiling surface. The device will emit a sound or light indicator when it detects a joist.
Alternatively, you can use a tapping method to locate the joists. By lightly tapping the ceiling surface with your knuckles or a small hammer, you can listen for a firmer and more solid sound, indicating the presence of a joist beneath.
Once you have located the first joist, measure and mark its exact position on the adjacent wall. This mark will serve as a reference point for the rest of the joists. Use a level to draw a straight line along the wall, connecting all the marked points. This line will be the starting point for your drop ceiling installation.
Continue locating and marking the position of each ceiling joist along the wall, ensuring that the marks are aligned with the initial reference point. You may need to use a measuring tape and level for accuracy.
Keep in mind that the standard joist spacing is usually 16 or 24 inches, but it can vary depending on the construction of your basement. Therefore, it’s important to double-check the spacing between the marked joists to ensure consistency throughout the installation process.
By accurately locating and marking the ceiling joists, you’ll create a solid foundation for the drop ceiling grid. This step is essential for maintaining the structural integrity and stability of your finished ceiling.
Step 3: Set up a Level Line
In order to ensure the proper installation of your drop ceiling, it’s important to establish a level line across the basement walls. This line will serve as a guide to ensure that the drop ceiling grid is installed evenly and straight.
Start by selecting a starting point on one of the walls where you want your drop ceiling to begin. This point should be aligned with one of the marked joists from the previous step. Use a measuring tape to measure the distance between the starting point and the desired height of the drop ceiling.
Once you have determined the height, use a level and a pencil to mark a horizontal line across the basement walls at that measurement. This line will be your reference point for the installation of the main runners.
Double-check the levelness of the line by placing the level along the marked line. Adjust as necessary until the bubble in the level is centered, indicating a level surface.
Follow the same process on the adjacent walls, ensuring that the line is parallel to the initial reference line. This will help maintain a consistent height and levelness for your drop ceiling installation.
Keep in mind that basements may have uneven or sloping walls, so it’s important to adjust your level line accordingly to ensure a visually appealing and balanced drop ceiling.
By setting up a level line, you’ll ensure that your drop ceiling grid is installed accurately and evenly. This step is crucial for creating a professional and polished look in your basement space.
Step 4: Install Wall Angle Trim
Installing wall angle trim is an important step in securing the perimeter of your drop ceiling. The wall angle trim acts as a support for the main runners and helps create a clean and finished transition between the walls and the ceiling tiles.
Start by measuring the length of the walls where you will be installing the wall angle trim. Use a saw or a metal snip to cut the trim to the appropriate length. Make sure to wear safety glasses and cut the trim on a stable surface.
Next, position the trim along the walls, aligning its top edge with the level line you established in the previous step. Use a level to ensure that the trim is straight and even. If necessary, use shims or adjustable clips to support the trim and maintain its levelness.
Secure the trim to the wall by drilling pilot holes every few inches along its length. Use screws that are suitable for the type of wall material you have (such as drywall or concrete). Make sure the trim is securely attached to the wall, as it will support the weight of the drop ceiling grid.
Continue installing the wall angle trim along all the walls where the drop ceiling will be present. Make sure to properly align each piece and keep them level with each other. Trim any excess length using a saw or metal snip.
Finally, double-check the levelness of the installed wall angle trim. Adjust as needed to ensure a consistent and professional appearance.
By installing wall angle trim, you will provide stability, support, and a clean edge to your drop ceiling. This step is crucial in creating a durable and visually appealing finished result in your basement.
When installing a drop ceiling in a basement, make sure to measure and plan the layout carefully to ensure a proper fit around obstacles like ductwork and pipes. Use a laser level to ensure the grid is installed evenly.
Step 5: Install Main Runners
Now that the wall angle trim is securely in place, it’s time to install the main runners for your drop ceiling. The main runners are long metal tracks that run parallel to each other and support the cross tees and ceiling tiles.
Start by measuring the distance between the two walls where the main runners will be installed. Cut the main runners to the appropriate length using a hacksaw or metal snips. Make sure to wear safety glasses and use a stable surface for cutting.
Position the first main runner perpendicular to the joists, aligning it with the wall angle trim. Secure it to the trim by drilling pilot holes and using appropriate screws for the type of material you are working with.
Continue installing the main runners along the length of the room, spacing them evenly according to the layout and dimensions of your drop ceiling plan. Use a level to ensure they are straight and aligned with the wall angle trim.
Attach additional main runners by connecting them to the preceding runner using the provided connectors or clips. These connectors will ensure a secure and seamless connection between the main runners.
Make sure to cut the last main runner to fit the remaining space, leaving a small gap between the end of the runner and the wall. This will allow for expansion and contraction of the materials as needed.
Double-check the levelness of the installed main runners, making any necessary adjustments to ensure a uniform and professional appearance.
By installing the main runners, you will establish the framework for your drop ceiling grid. This step is essential for ensuring the stability and integrity of the ceiling system and preparing it for the installation of the cross tees and ceiling tiles.
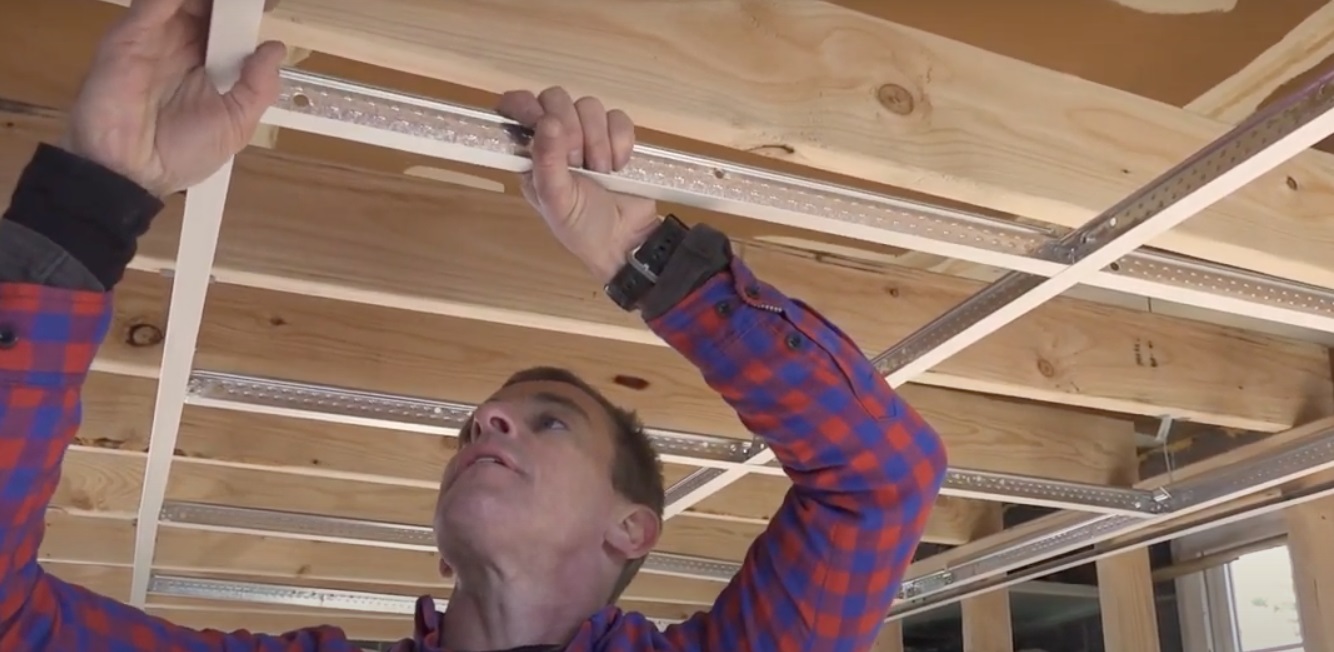
Step 6: Install Cross Tees
With the main runners securely in place, it’s time to install the cross tees for your drop ceiling. The cross tees are shorter metal pieces that connect to the main runners and support the ceiling tiles.
Start by measuring the distance between the main runners to determine the length of the cross tees. Use a hacksaw or metal snips to cut the cross tees to the appropriate length. Remember to wear safety glasses and use a stable surface for cutting.
Begin at one end of the room and insert the first cross tee into the slots of the main runners, perpendicular to the main runner’s alignment. Push it until it securely locks into place.
Continue installing the cross tees along the entire length of the main runners, keeping them evenly spaced according to your drop ceiling plan. Most cross tees have a small tab or clip that locks into the main runner, providing stability and ensuring a level surface.
Make sure the cross tees are securely connected to the main runners, with all tabs or clips engaged. This will prevent the cross tees from dislodging and ensure a secure foundation for the ceiling tiles.
If necessary, cut the last cross tee to fit the remaining space, similar to how you cut the last main runner. Leave a small gap between the end of the cross tee and the wall to allow for expansion and contraction.
Double-check the levelness and alignment of the installed cross tees, making any adjustments as needed to maintain a uniform and professional appearance.
By installing the cross tees, you are completing the frame for your drop ceiling grid. This step is crucial for creating a sturdy and reliable structure that will support the weight of the ceiling tiles.
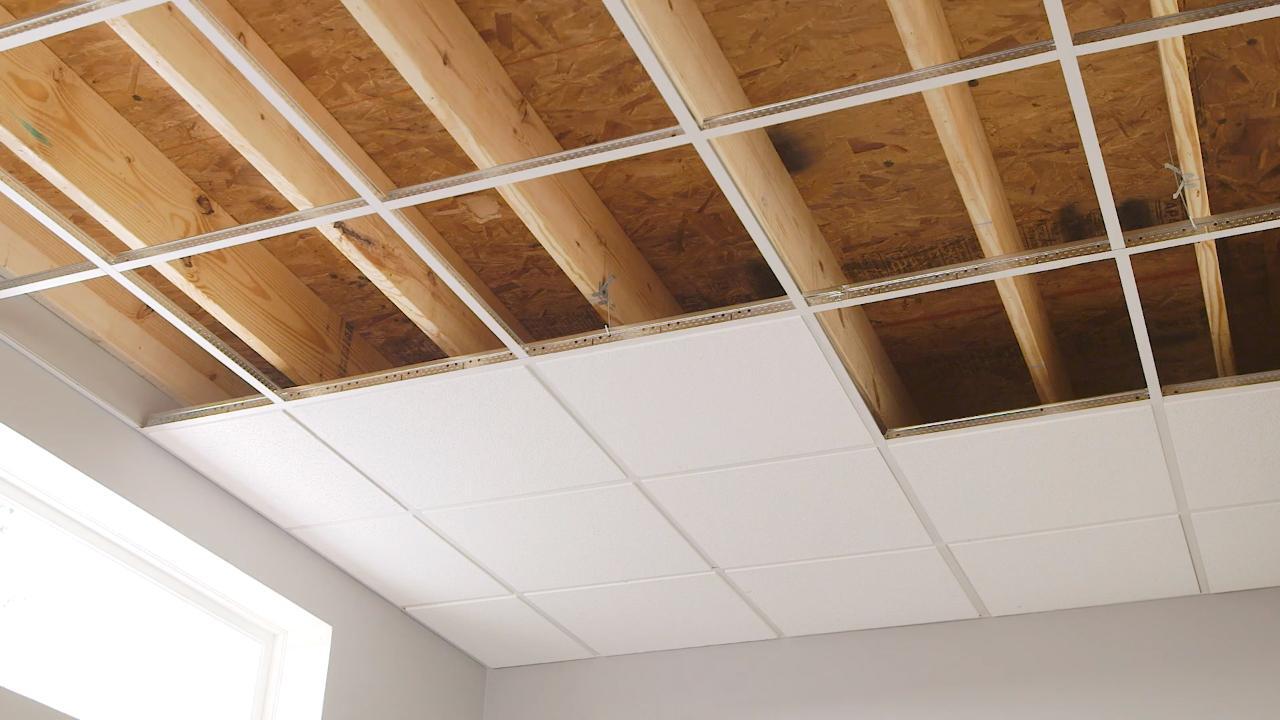
Step 7: Install Ceiling Tiles
Once the main runners and cross tees are in place, it’s time to install the ceiling tiles for your drop ceiling. The ceiling tiles will give your basement a clean and finished look while also providing acoustic insulation and hiding any unsightly elements above.
Start by taking one of the ceiling tiles and inserting it into the grid system. Make sure to twist it slightly as you slide it into place, ensuring that it fits securely within the opening of the grid.
Continue installing the ceiling tiles one by one, working in a systematic pattern and moving from one side of the room to the other. Make sure to align the edges of each tile with the grid system to create a seamless appearance.
If you encounter obstacles such as lights, vents, or other fixtures, you may need to trim certain ceiling tiles to fit around them. Use a drop ceiling cutting tool or a utility knife to carefully trim the tiles to the required size. Always wear safety glasses while cutting and handle sharp tools with caution.
As you install the ceiling tiles, take note of any damaged or irregular tiles. Replace them immediately to maintain the overall quality and aesthetic of your finished drop ceiling.
Continue installing the ceiling tiles until the entire grid is filled. Take a step back and make sure that all tiles are evenly aligned and in place. Adjust any tiles that may be slightly off-center or misaligned.
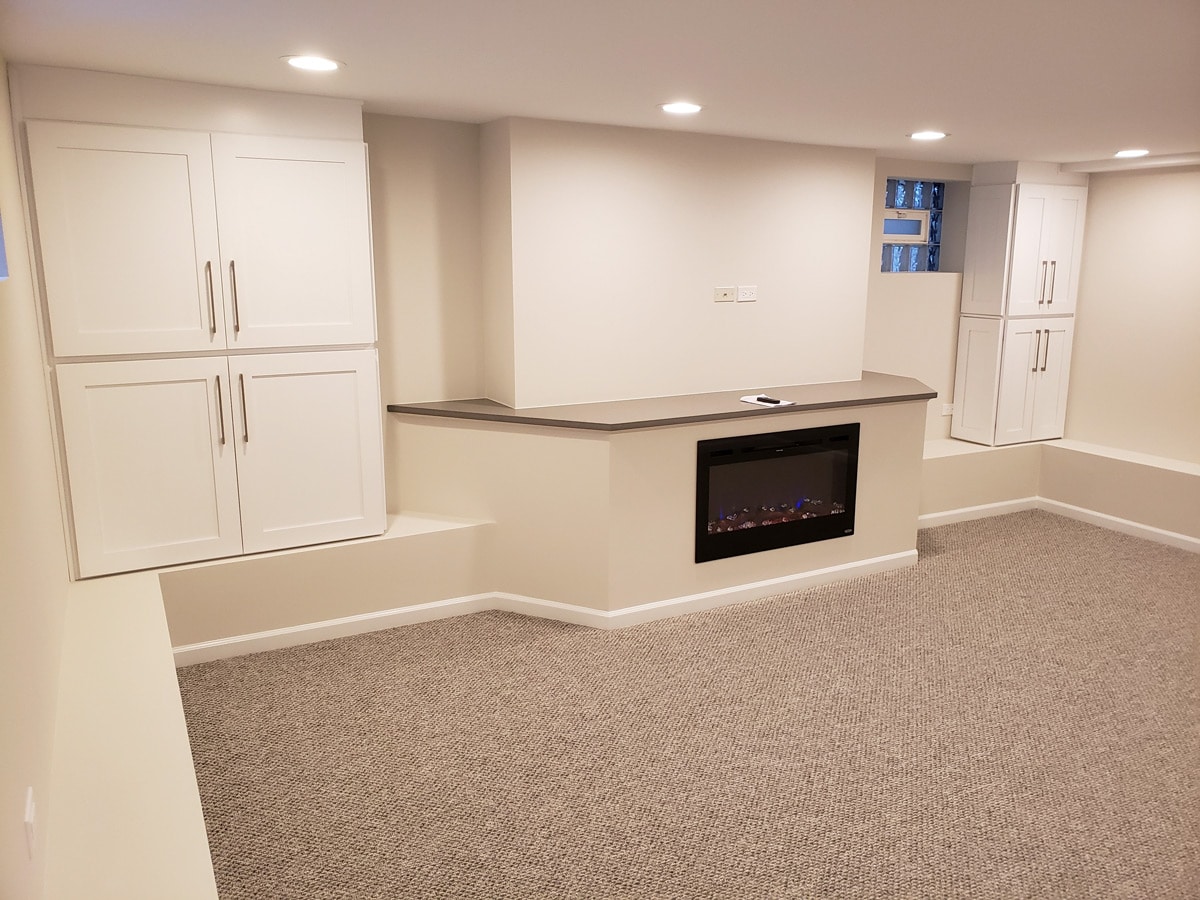
By installing the ceiling tiles, you will complete the visual transformation of your basement. The tiles will provide not only an attractive appearance but also enhance the acoustics and overall comfort of the space.
Read more: How To Remove A Drop Ceiling
Step 8: Add Lighting and Ventilation
Once the drop ceiling grid and tiles are installed, it’s time to add lighting fixtures and ventilation to further enhance the functionality and ambiance of your basement space.
If you want to incorporate lighting into your drop ceiling, you have several options. Recessed lights can be installed by cutting holes in the ceiling tiles and attaching the light fixtures to the ceiling structure above. Pendant lights or track lighting can also be suspended from the original ceiling or attached directly to the main runners of the drop ceiling. Consult with a qualified electrician if you are unsure about the installation process.
For ventilation, consider adding ventilation vents to ensure proper air circulation and prevent moisture build-up. Ventilation vents can be installed within the ceiling tiles, allowing air to flow in and out of the basement. This is especially important in basements that are prone to dampness or odors. Consult with a professional for guidance on the appropriate type and placement of vents for your specific basement needs.
When installing lighting fixtures or ventilation vents, it’s important to follow safety guidelines and local building codes. Be sure to turn off the electricity to the area before installing any electrical components and consult a professional if you are unsure about the installation process or require any additional wiring.
By adding lighting and ventilation, you will not only improve the functionality of your basement but also create a more comfortable and inviting environment.
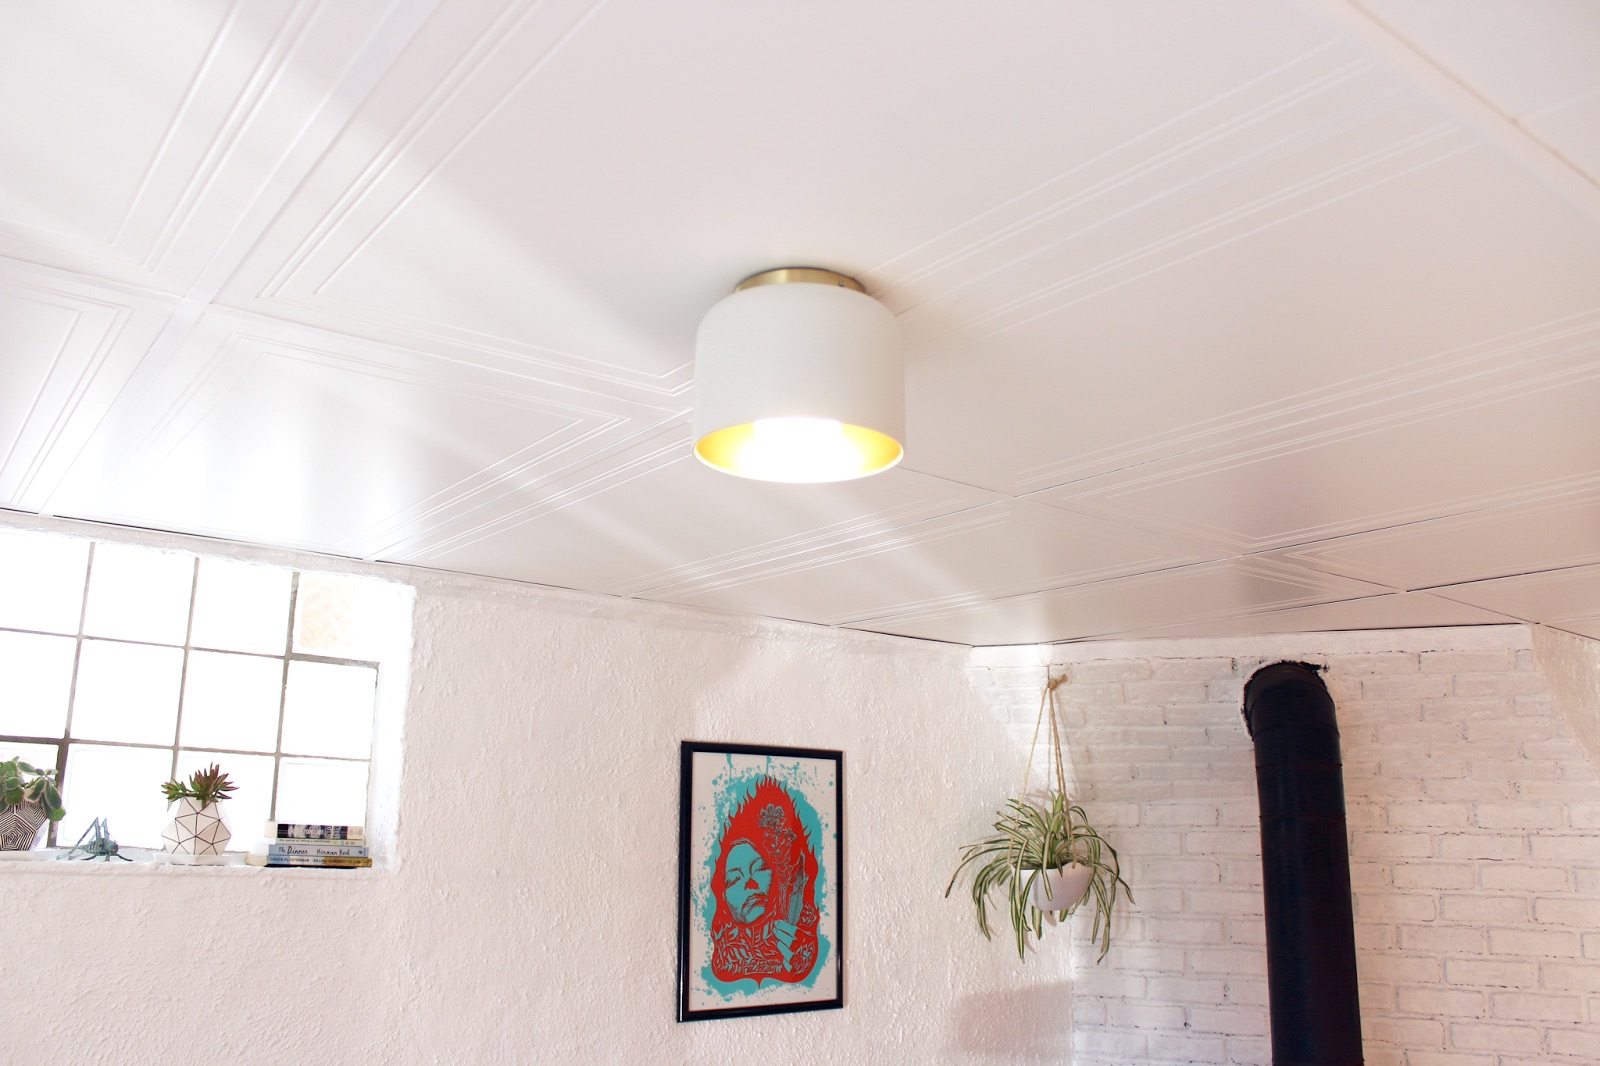
Step 9: Finishing Touches
With the drop ceiling, lighting, and ventilation in place, it’s time to add the finishing touches to complete the transformation of your basement.
First, take a close look at the overall appearance of the drop ceiling. Ensure that all tiles are properly aligned, leveled, and securely in place. Make any necessary adjustments to create a visually pleasing and cohesive look.
Inspect the walls surrounding the drop ceiling and touch up any paint or wallpaper that may have been affected during the installation process. This will help create a seamless transition between the drop ceiling and the walls.
Consider adding decorative molding or trim to the perimeter of the drop ceiling. This can provide an extra layer of aesthetic appeal and create a polished and finished look.
Lastly, take the time to clean up your workspace and remove any debris or unnecessary materials. This will help create a clean and organized environment, leaving you with a professional and pristine finished result.
By adding these finishing touches, you will elevate the overall look and feel of your basement and create a space that is both functional and aesthetically pleasing.
Conclusion
Installing a drop ceiling in your basement can greatly enhance the overall look, functionality, and value of the space. By following the step-by-step guide outlined in this article, you can successfully transform your basement into a more finished and professional-looking area.
Starting with careful measurement and planning, you can ensure that the drop ceiling fits seamlessly within your basement and accommodates any existing fixtures or obstructions. Locating and marking the ceiling joists is vital to providing a solid foundation for the drop ceiling grid.
Setting up a level line and installing the wall angle trim lay the groundwork for a level and straight drop ceiling. Installing the main runners and cross tees creates the framework for the ceiling tiles, making sure everything is securely in place.
Once the grid is complete, it’s time to install the ceiling tiles, paying attention to alignment and avoiding any damaged or irregular tiles. Adding lighting fixtures and ventilation further enhances the functionality and ambiance of your basement.
Finally, adding the finishing touches, such as inspecting the overall appearance, touching up the walls, and cleaning up the workspace, ensures a polished and professional finish.
Remember, safety is paramount throughout the installation process. If you are unsure about any steps or require assistance, it is always advisable to consult with professionals to ensure a successful and safe installation.
By following these steps and incorporating your personal style and preferences, you can transform your basement with a drop ceiling, creating a more inviting, functional, and visually appealing space.
Frequently Asked Questions about How To Install Drop Ceiling In The Basement
Was this page helpful?
At Storables.com, we guarantee accurate and reliable information. Our content, validated by Expert Board Contributors, is crafted following stringent Editorial Policies. We're committed to providing you with well-researched, expert-backed insights for all your informational needs.


0 thoughts on “How To Install Drop Ceiling In The Basement”