
Articles
How To Soundproof A Basement Ceiling
Modified: October 28, 2024
Learn how to soundproof your basement ceiling with these informative articles. Find tips and techniques to reduce noise and create a peaceful environment.
(Many of the links in this article redirect to a specific reviewed product. Your purchase of these products through affiliate links helps to generate commission for Storables.com, at no extra cost. Learn more)
Introduction
When it comes to creating a peaceful and quiet living space, soundproofing plays a crucial role. Whether you’re converting your basement into a home theater, a music studio, or simply a comfortable living area, soundproofing the ceiling can significantly reduce the noise transmission from above floors. This not only helps to create a serene environment but also ensures privacy and prevents disturbances from impacting other areas of your home.
Soundproofing a basement ceiling is a practical and effective solution to minimize unwanted noise, such as footsteps, voices, or electronic equipment. It involves using various materials and techniques to create a barrier that prevents sound waves from traveling between floors. By implementing soundproofing measures, you can enjoy your basement space without being bothered by external sounds or causing disturbance to the rest of your household.
In this comprehensive guide, we will explore the importance of soundproofing a basement ceiling, assess the soundproofing requirements of your basement, discuss different types of soundproofing materials and techniques that can be used, and provide a step-by-step guide on how to soundproof your basement ceiling. We will also address common challenges you may encounter during the process and provide tips for overcoming them. Additionally, we’ll discuss additional tips for maximizing the effectiveness of soundproofing and explain the cost considerations associated with this project. Finally, we’ll highlight the numerous benefits you can enjoy by soundproofing your basement ceiling.
So, if you’re ready to transform your basement space into a quiet and enjoyable oasis, let’s dive into the fascinating world of soundproofing and discover how to create the perfect acoustic environment.
Key Takeaways:
- Transform your basement into a peaceful oasis by soundproofing the ceiling, reducing noise pollution, enhancing privacy, and creating a versatile, enjoyable living space.
- With the right materials and techniques, soundproofing your basement ceiling can improve acoustics, reduce stress, and add long-term value to your home.
Read more: How To Soundproof A Ceiling In An Apartment
Understanding the Importance of Soundproofing a Basement Ceiling
A basement is a versatile and valuable space in any home. It can serve as an entertainment area, a home office, a gym, or even a guest bedroom. However, one common issue that homeowners face is the noise transmission from the floors above, which can disrupt the peacefulness and functionality of the basement. This is where soundproofing a basement ceiling comes into play.
Soundproofing the basement ceiling is essential for several reasons. First and foremost, it helps to create a quiet and peaceful environment within the basement area. Whether you’re watching a movie, recording music, or working from home, having a soundproofed ceiling ensures that external noises from footsteps, conversations, or appliances on the upper floors do not disturb your activities.
Furthermore, soundproofing the basement ceiling is important for maintaining privacy. If you have tenants or family members living above the basement, it’s crucial to prevent sound from traveling downwards and disturbing those using the basement space. Soundproofing the ceiling acts as a barrier, ensuring that conversations, activities, and even loud music or movies in the basement remain contained within that area.
In addition to creating a peaceful and private environment, soundproofing a basement ceiling can also add value to your home. If you decide to sell your property in the future, having a soundproofed basement is an attractive feature for potential buyers. It demonstrates that you have invested in improving the quality of living in your home and can be an appealing selling point for those seeking a quiet and functional living space.
Another significant benefit of soundproofing a basement ceiling is reducing noise pollution. External noises such as traffic, construction, or loud neighbors can infiltrate your home through the upper floors. By implementing soundproofing measures, you can create a barrier that blocks and absorbs these noises, providing a peaceful retreat within your basement.
Lastly, soundproofing the basement ceiling can have positive effects on your overall well-being. Unwanted noise can be a significant source of stress and anxiety, and having a quiet and tranquil space can contribute to a healthier and more relaxing home environment. Whether you’re seeking a sanctuary to unwind, focus on work, or pursue hobbies, a soundproofed basement ceiling can enhance your overall quality of life.
Now that we understand the importance of soundproofing a basement ceiling, let’s move on to assessing the soundproofing requirements of your basement and exploring the various materials and techniques available to create an effective sound barrier.
Assessing Your Basement for Soundproofing Requirements
Before you embark on soundproofing your basement ceiling, it’s important to assess the specific requirements of your space. Understanding the unique characteristics of your basement will help you choose the most appropriate materials and techniques to effectively soundproof the area.
Here are a few steps to consider when assessing your basement for soundproofing:
1. Identify the sources of noise: Take note of what is causing the most noise in your basement. Is it footsteps from above, voices, or machinery? Understanding the primary sources of noise will guide you in determining the best approach to soundproofing.
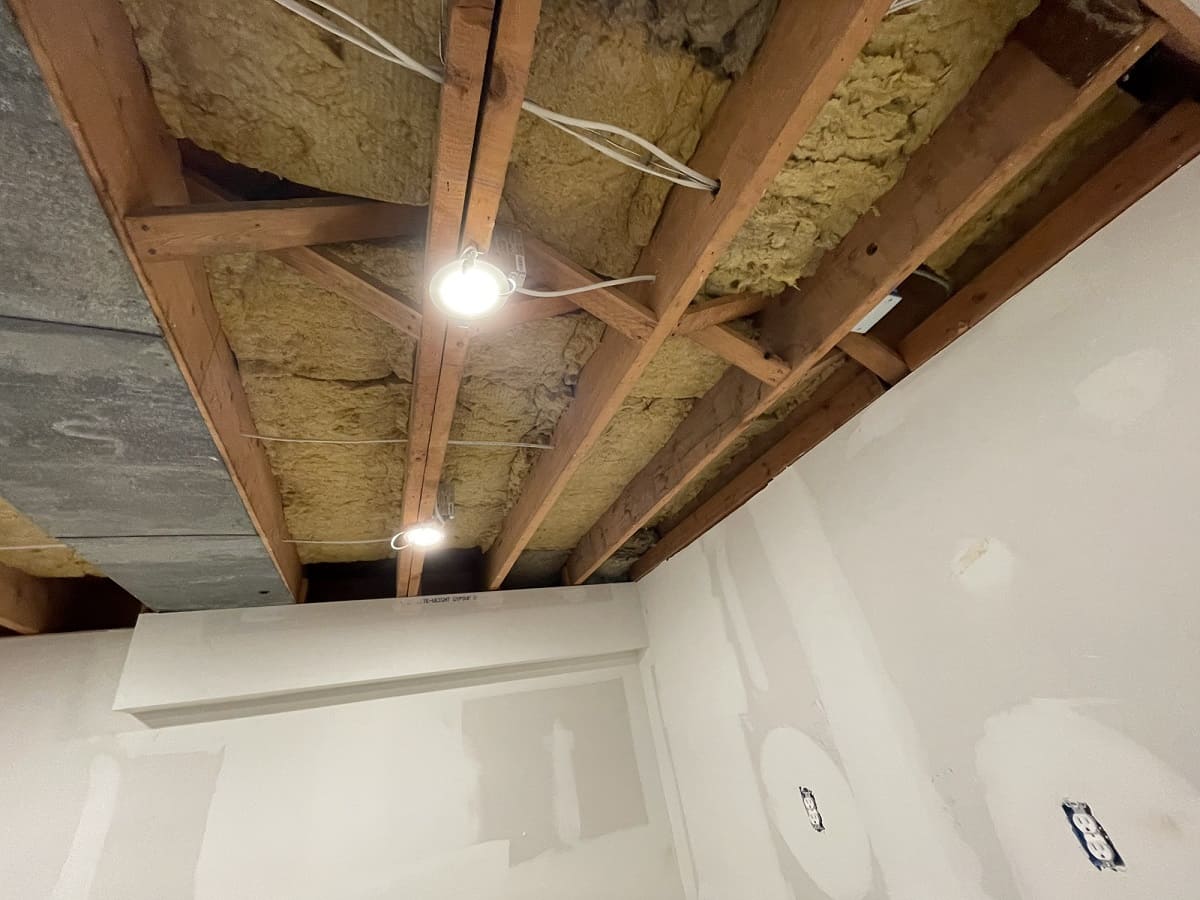
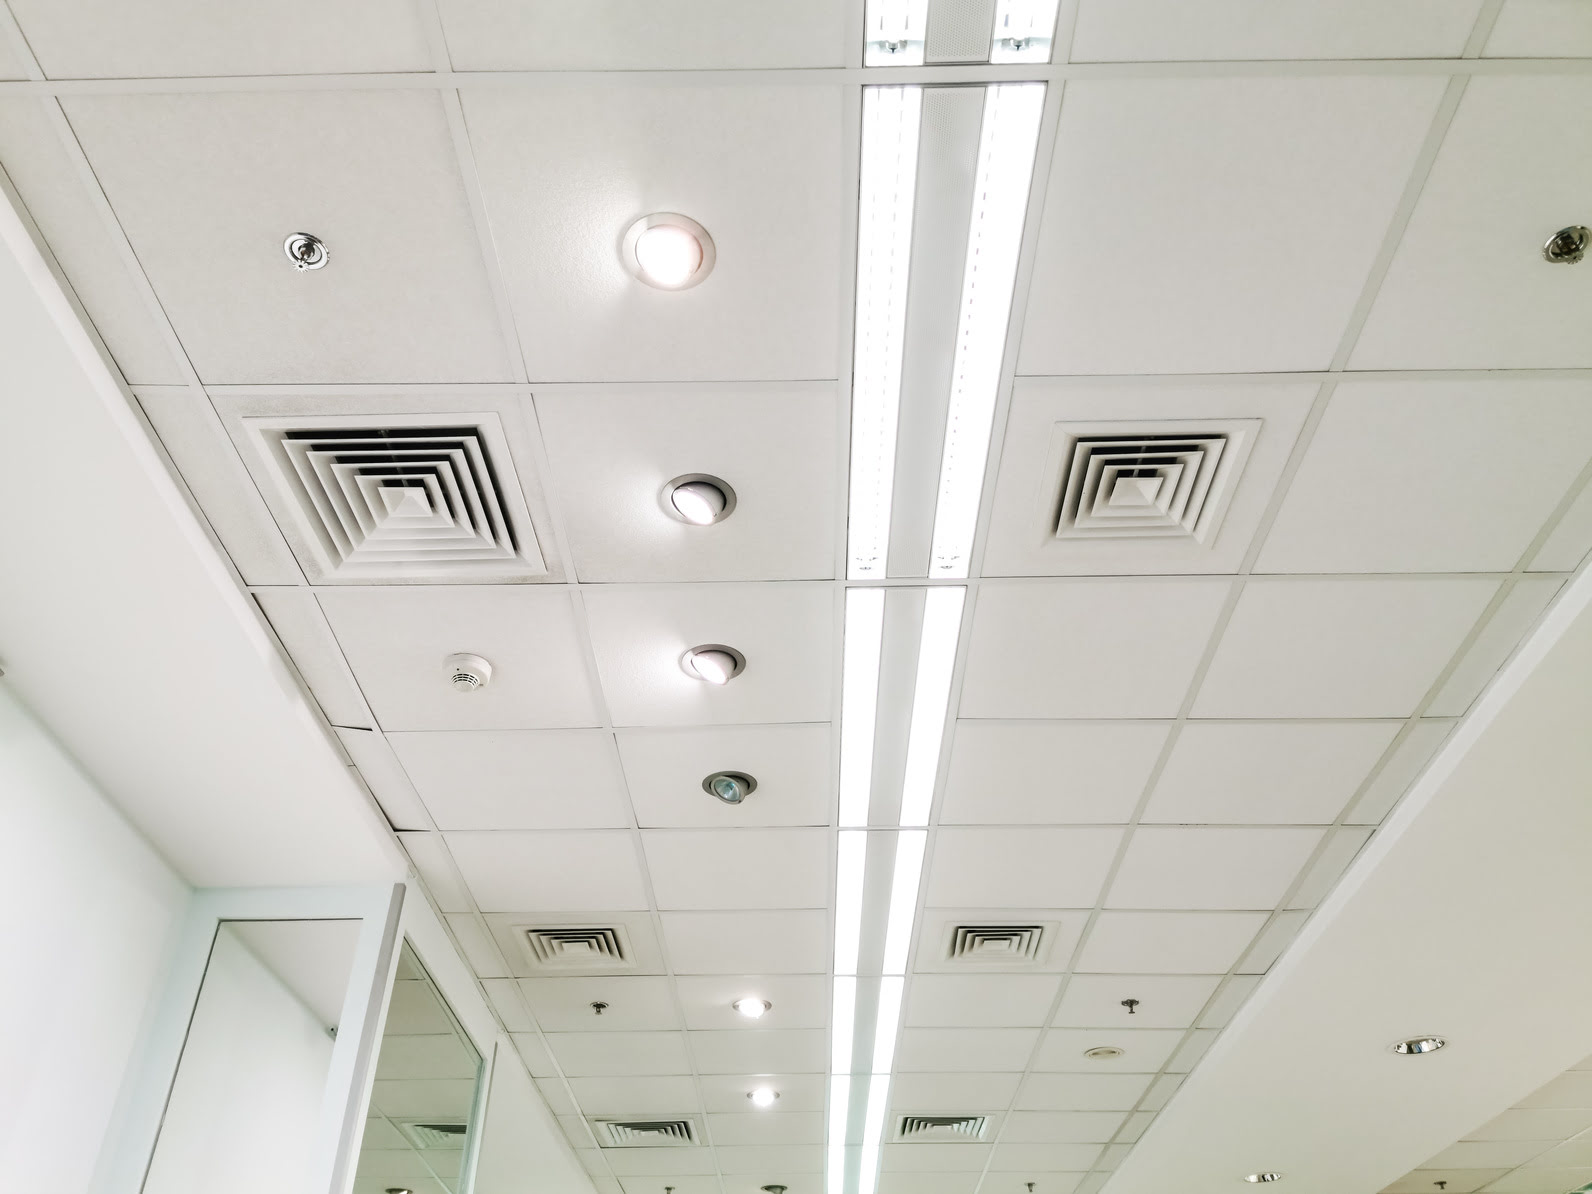
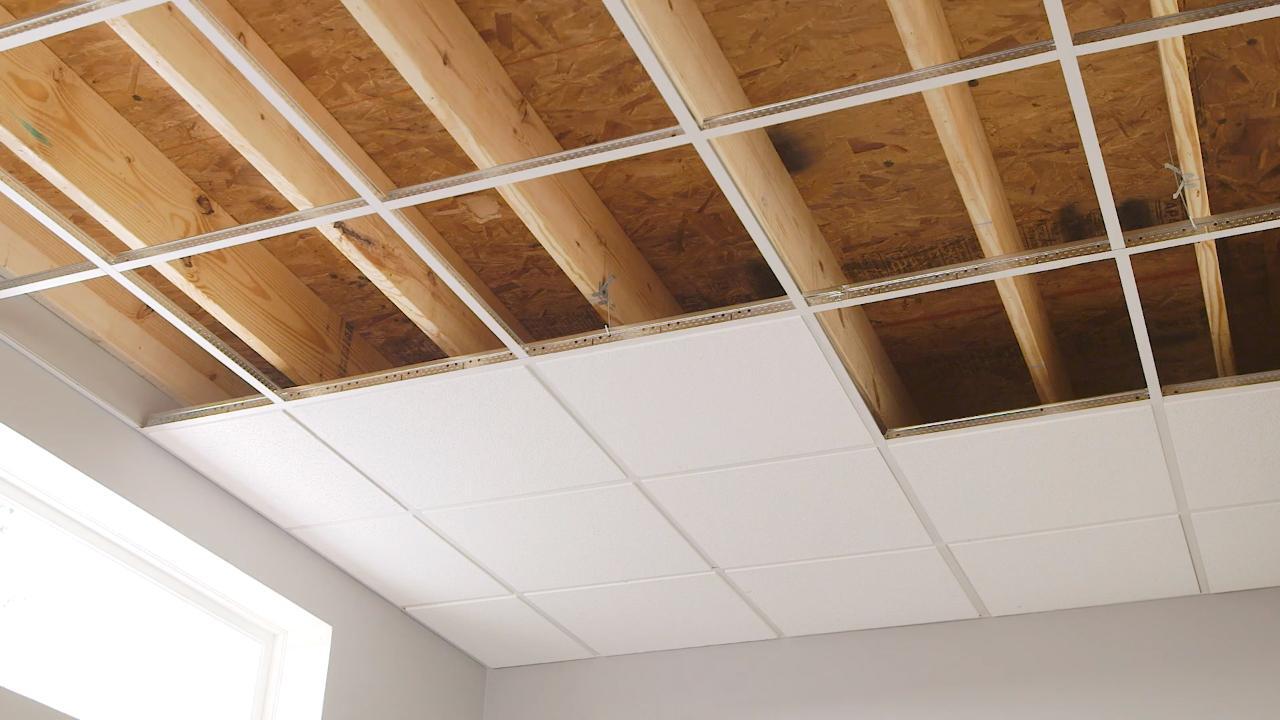
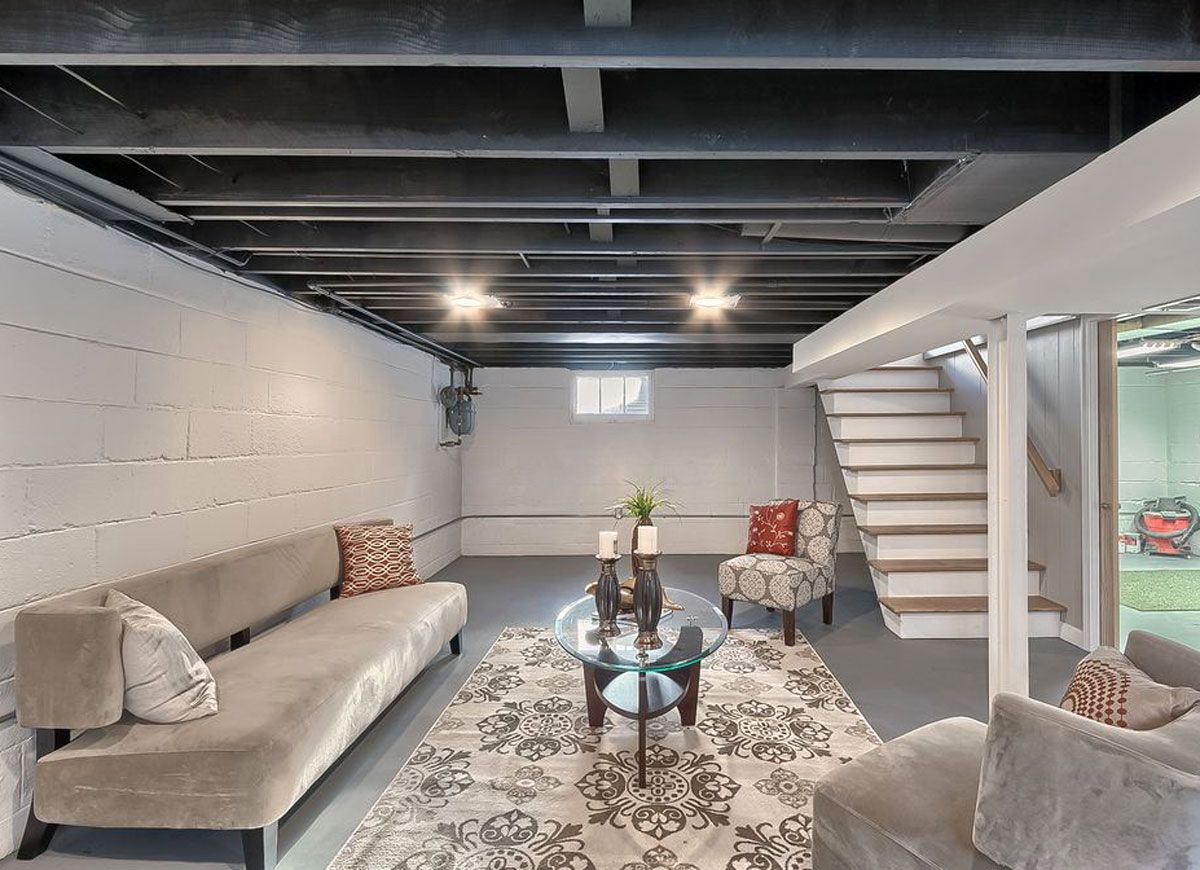
2. Inspect the existing ceiling: Examine the current condition of your basement ceiling. Is it drywall, suspended tiles, or exposed beams? This will impact the choice of soundproofing materials and techniques you can use.
3. Measure the ceiling height: Take accurate measurements of the ceiling height to ensure that any soundproofing materials or systems you choose will not cause a decrease in headroom or make the basement feel cramped.
4. Consider the ventilation and HVAC system: Take into account any ventilation or HVAC systems present in the basement. Ensure that these systems can function properly and are not hindered by the soundproofing materials.
5. Determine the desired outcome: Have a clear understanding of what you want to achieve with your soundproofing efforts. Are you looking to reduce noise transmission to a minimum or simply minimize it to a more tolerable level? This will help you set realistic expectations and select the appropriate materials and techniques.
6. Consult with a professional: If you’re unsure about the soundproofing requirements of your basement or need guidance on the best solutions to use, consider consulting with a professional soundproofing expert. They can assess your space and provide tailored recommendations based on your specific needs and budget.
Taking the time to assess your basement for soundproofing requirements is a crucial first step. It will ensure that you make informed decisions and choose the most effective soundproofing solutions for your basement ceiling. Once you have a clear understanding of what you need, you’ll be ready to explore the different types of soundproofing materials and techniques available to create an acoustic barrier in your basement.
Types of Soundproofing Materials and Techniques for Basement Ceilings
When it comes to soundproofing a basement ceiling, there are various materials and techniques you can use to effectively reduce noise transmission. The choice of materials and techniques will depend on the specific requirements of your basement and your desired level of soundproofing. Here are some commonly used options:
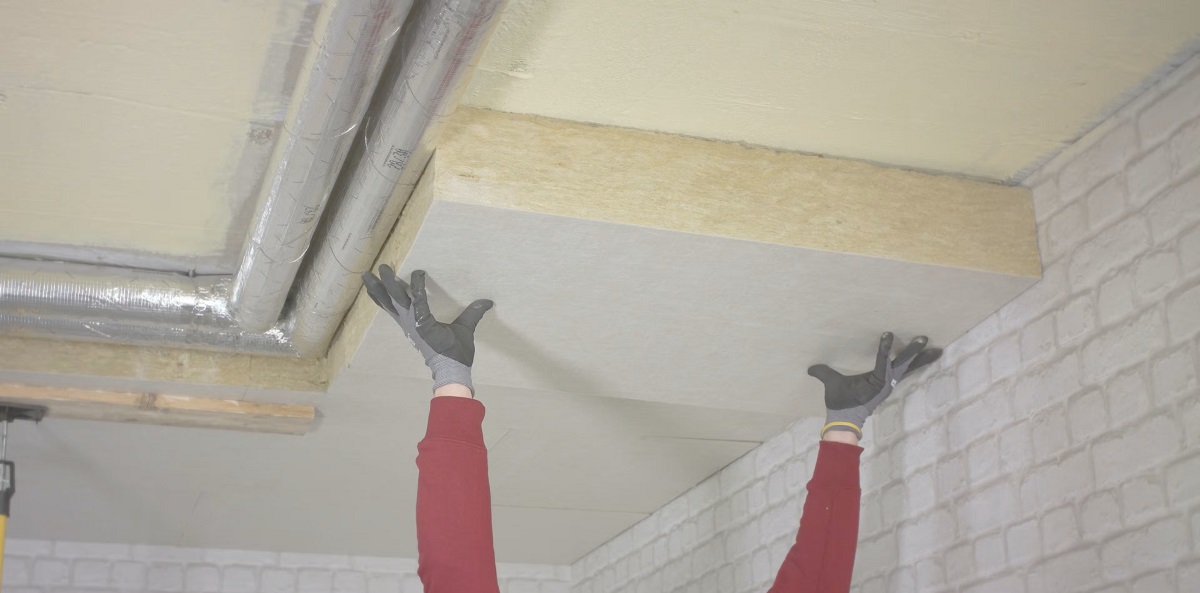
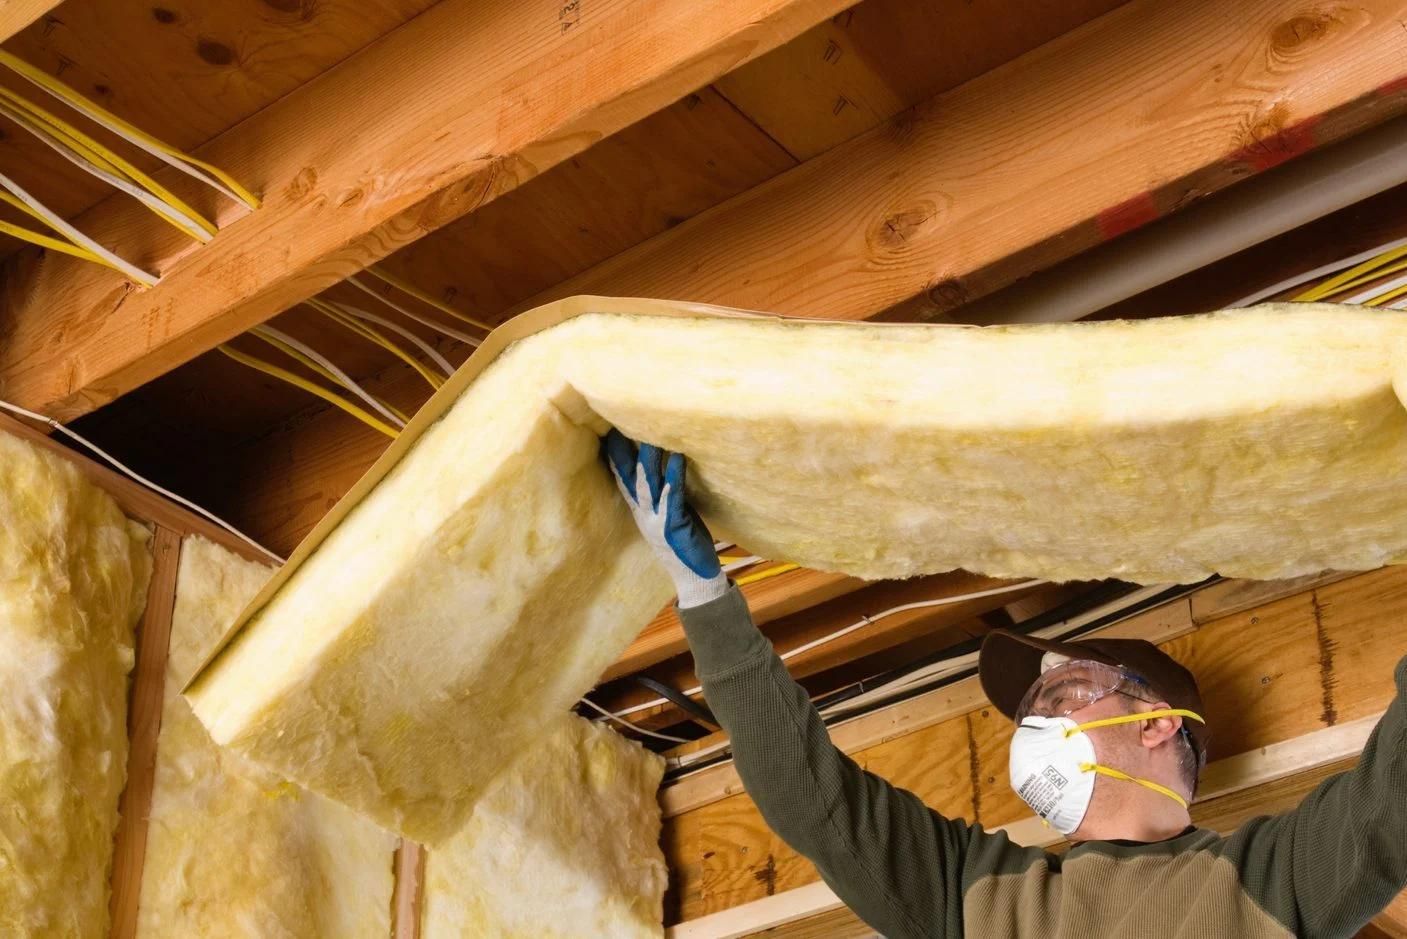
1. Acoustic Insulation: Acoustic insulation is an excellent starting point for soundproofing a basement ceiling. It is typically made of materials like mineral wool or fiberglass, which are designed to absorb sound waves. Installing acoustic insulation between the ceiling joists helps to reduce airborne noise transmission from the upper floors.
2. Mass-Loaded Vinyl (MLV): MLV is a dense, flexible material that acts as a sound barrier. It is placed on top of the ceiling or between drywall layers to add mass and block sound. MLV effectively reduces both airborne and impact noise, making it a popular choice for soundproofing ceilings.
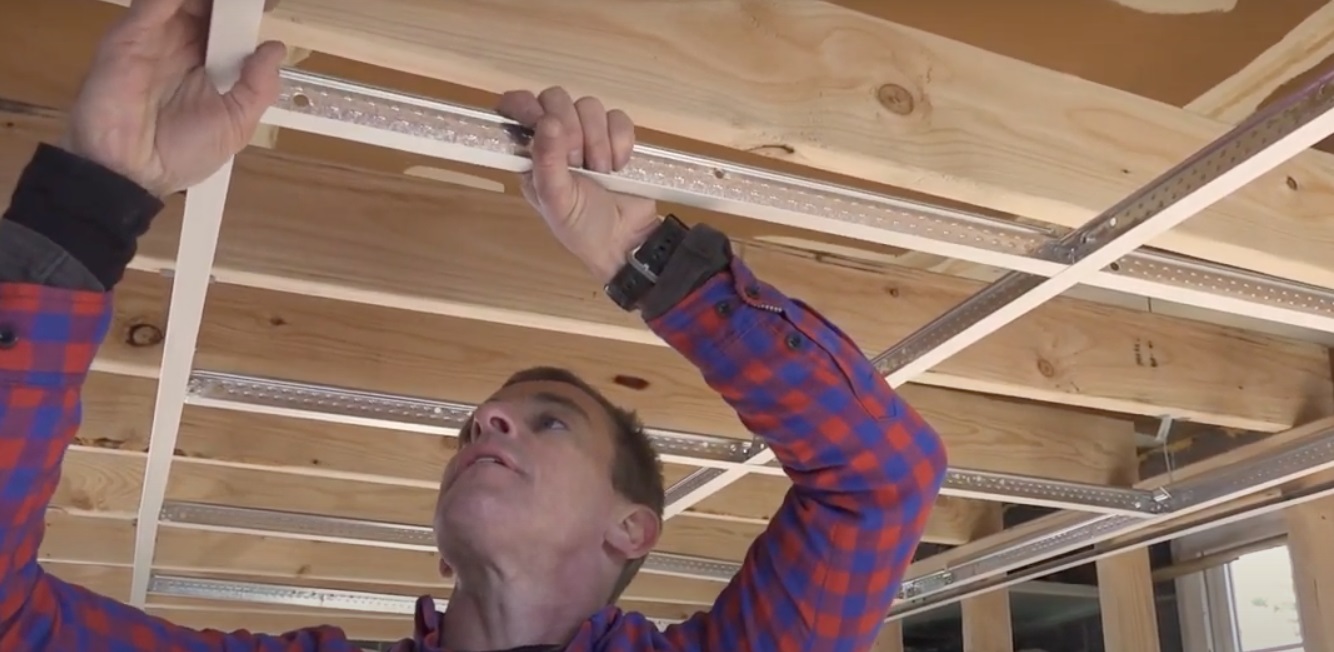
3. Resilient Channels: Resilient channels are metal strips or channels that are installed perpendicular to the ceiling joists. They decouple the drywall from the structure, reducing the transmission of vibrations and sound. This helps to prevent sound waves from traveling through the ceiling and into the basement.
4. Double Drywall: Installing a second layer of drywall on the basement ceiling can significantly improve soundproofing. The two layers, separated by a gap or resilient channels, create an extra barrier that absorbs and blocks sound waves. This technique is particularly effective in reducing airborne noise.
5. Green Glue: Green Glue is a viscoelastic compound that is applied between layers of drywall to dampen vibrations and dissipate sound energy. It provides an additional soundproofing layer when used in conjunction with double drywall or other construction materials.
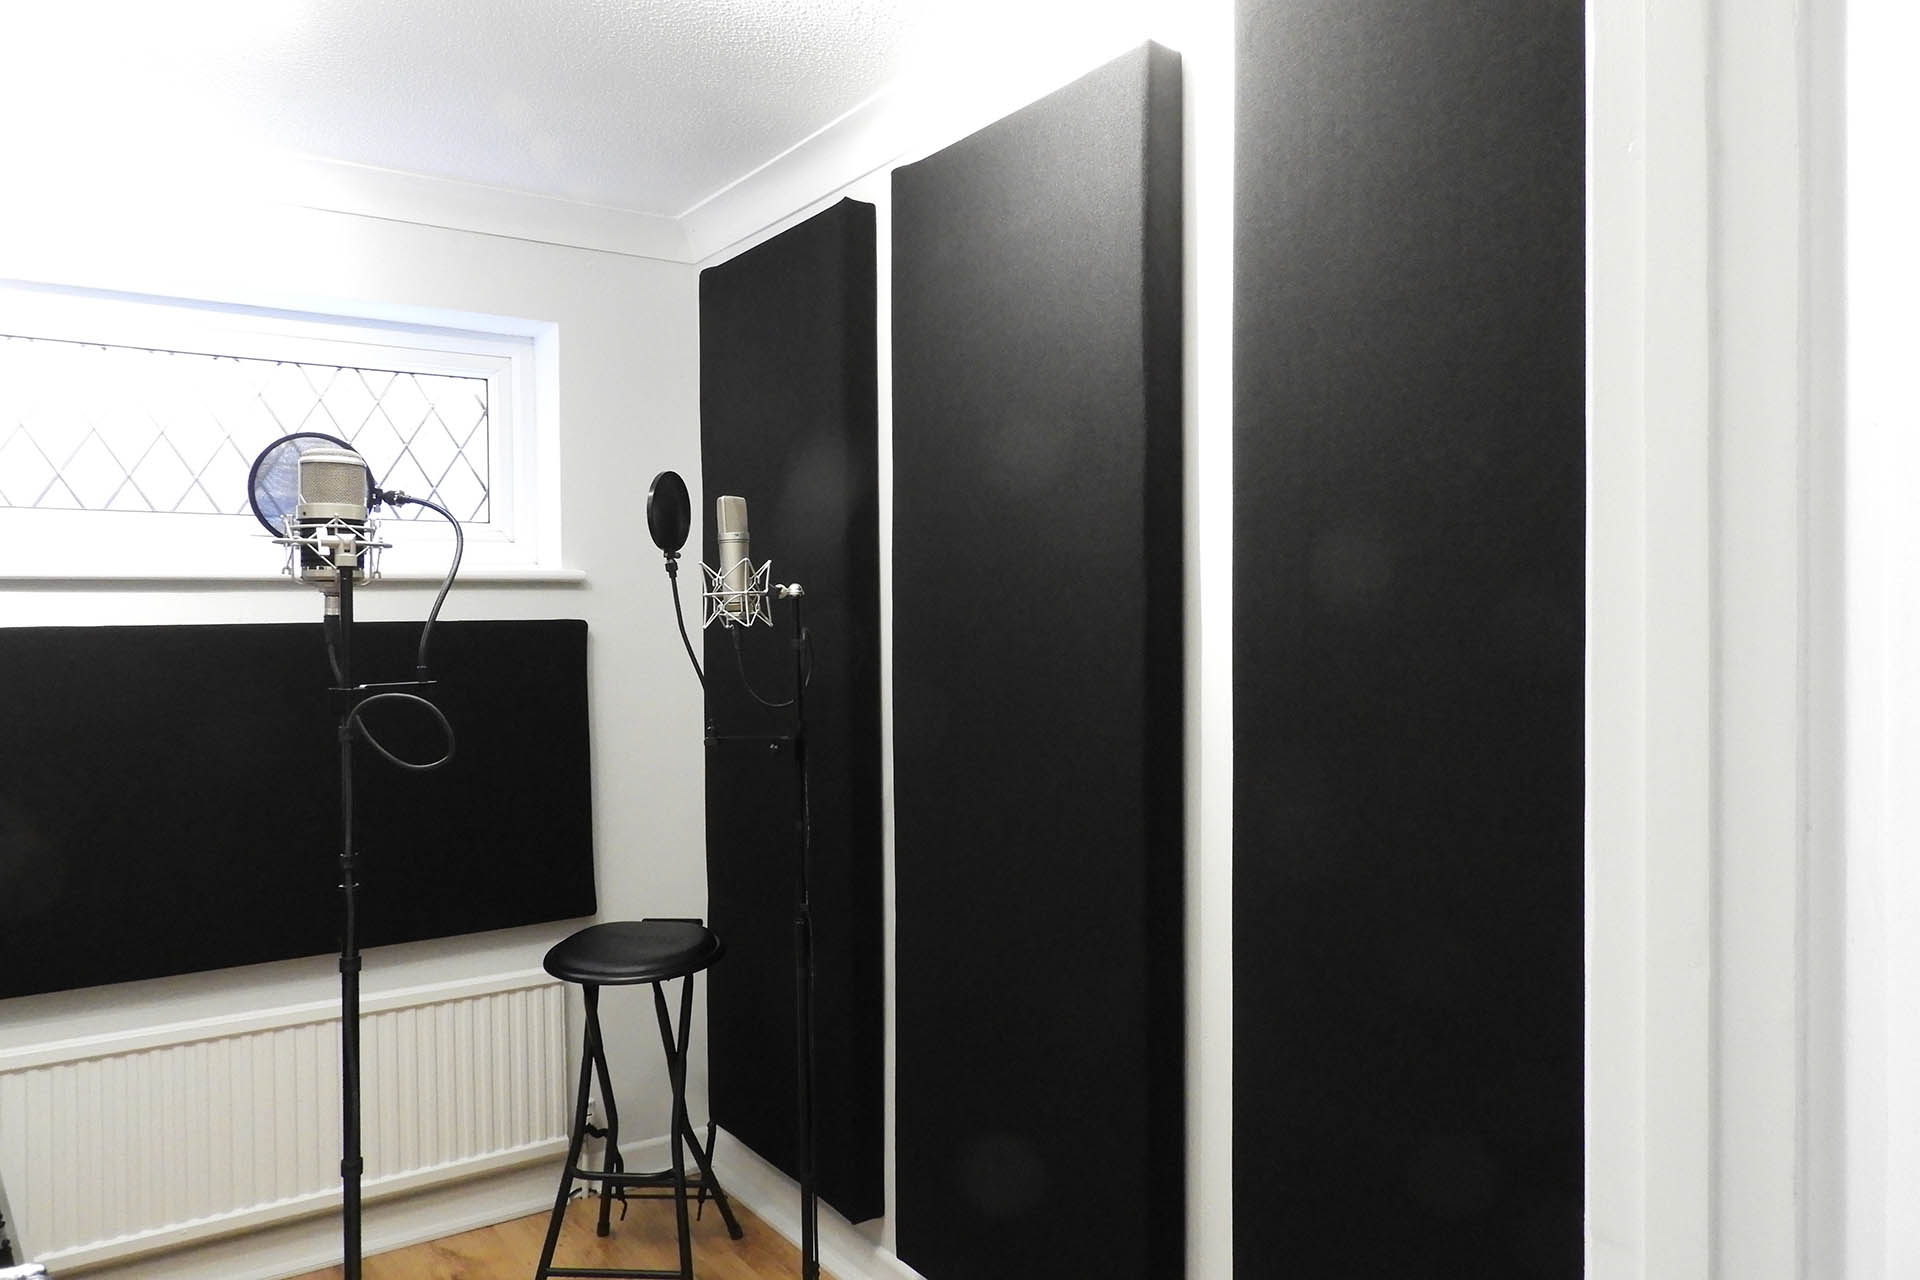
6. Ceiling Clouds: Ceiling clouds are hanging panels or baffles that are suspended from the ceiling. These panels are designed to absorb and scatter sound waves, reducing echo and improving acoustics in the basement. Ceiling clouds are particularly effective in spaces where the ceiling cannot be easily modified.
7. Soundproofing Paint: Soundproofing paint contains additional sound-dampening materials that help to reduce noise transmission. It can be applied to the basement ceiling to add an extra layer of soundproofing while maintaining a visually appealing finish.
8. Sealing Air Leaks: In addition to using specific soundproofing materials, it’s vital to seal any air leaks or gaps in the basement ceiling. Sound waves can easily penetrate through openings, so sealing gaps with caulking or weatherstripping helps to improve overall soundproofing effectiveness.
Remember, soundproofing is often most effective when using a combination of materials and techniques. The choice of materials will depend on factors such as your budget, the severity of the noise issue, and the construction of your basement ceiling. Understanding the different options available allows you to select the most appropriate soundproofing methods for your specific basement requirements.
Step-by-Step Guide on How to Soundproof a Basement Ceiling
Now that you have assessed your basement and identified the soundproofing materials and techniques that best suit your needs, it’s time to dive into the step-by-step process of soundproofing your basement ceiling. Here is a comprehensive guide to help you through the process:
1. Clean and Prepare: Begin by clearing out the basement space and removing any obstacles or furniture that may get in the way during the soundproofing process. This will ensure a clean and accessible area to work in.
2. Seal Air Leaks: Inspect the basement ceiling for any air leaks or gaps. Use caulking or weatherstripping to seal these areas to prevent sound leakage.
3. Install Acoustic Insulation: Measure the dimensions between the ceiling joists and cut pieces of acoustic insulation to fit snugly in between. Place the insulation, such as mineral wool or fiberglass, ensuring full coverage of the ceiling area. Use a staple gun or adhesive to secure the insulation in place.
4. Apply Mass-Loaded Vinyl (MLV): Cut sections of MLV to fit the dimensions of the ceiling space. Apply the MLV over the acoustic insulation layer, ensuring full coverage. Use adhesive or nails designed for MLV installation to secure it to the ceiling.
5. Install Resilient Channels: Attach resilient channels perpendicular to the ceiling joists, spacing them according to the manufacturer’s guidelines. Ensure they are securely fastened to the joists using appropriate screws or clips.
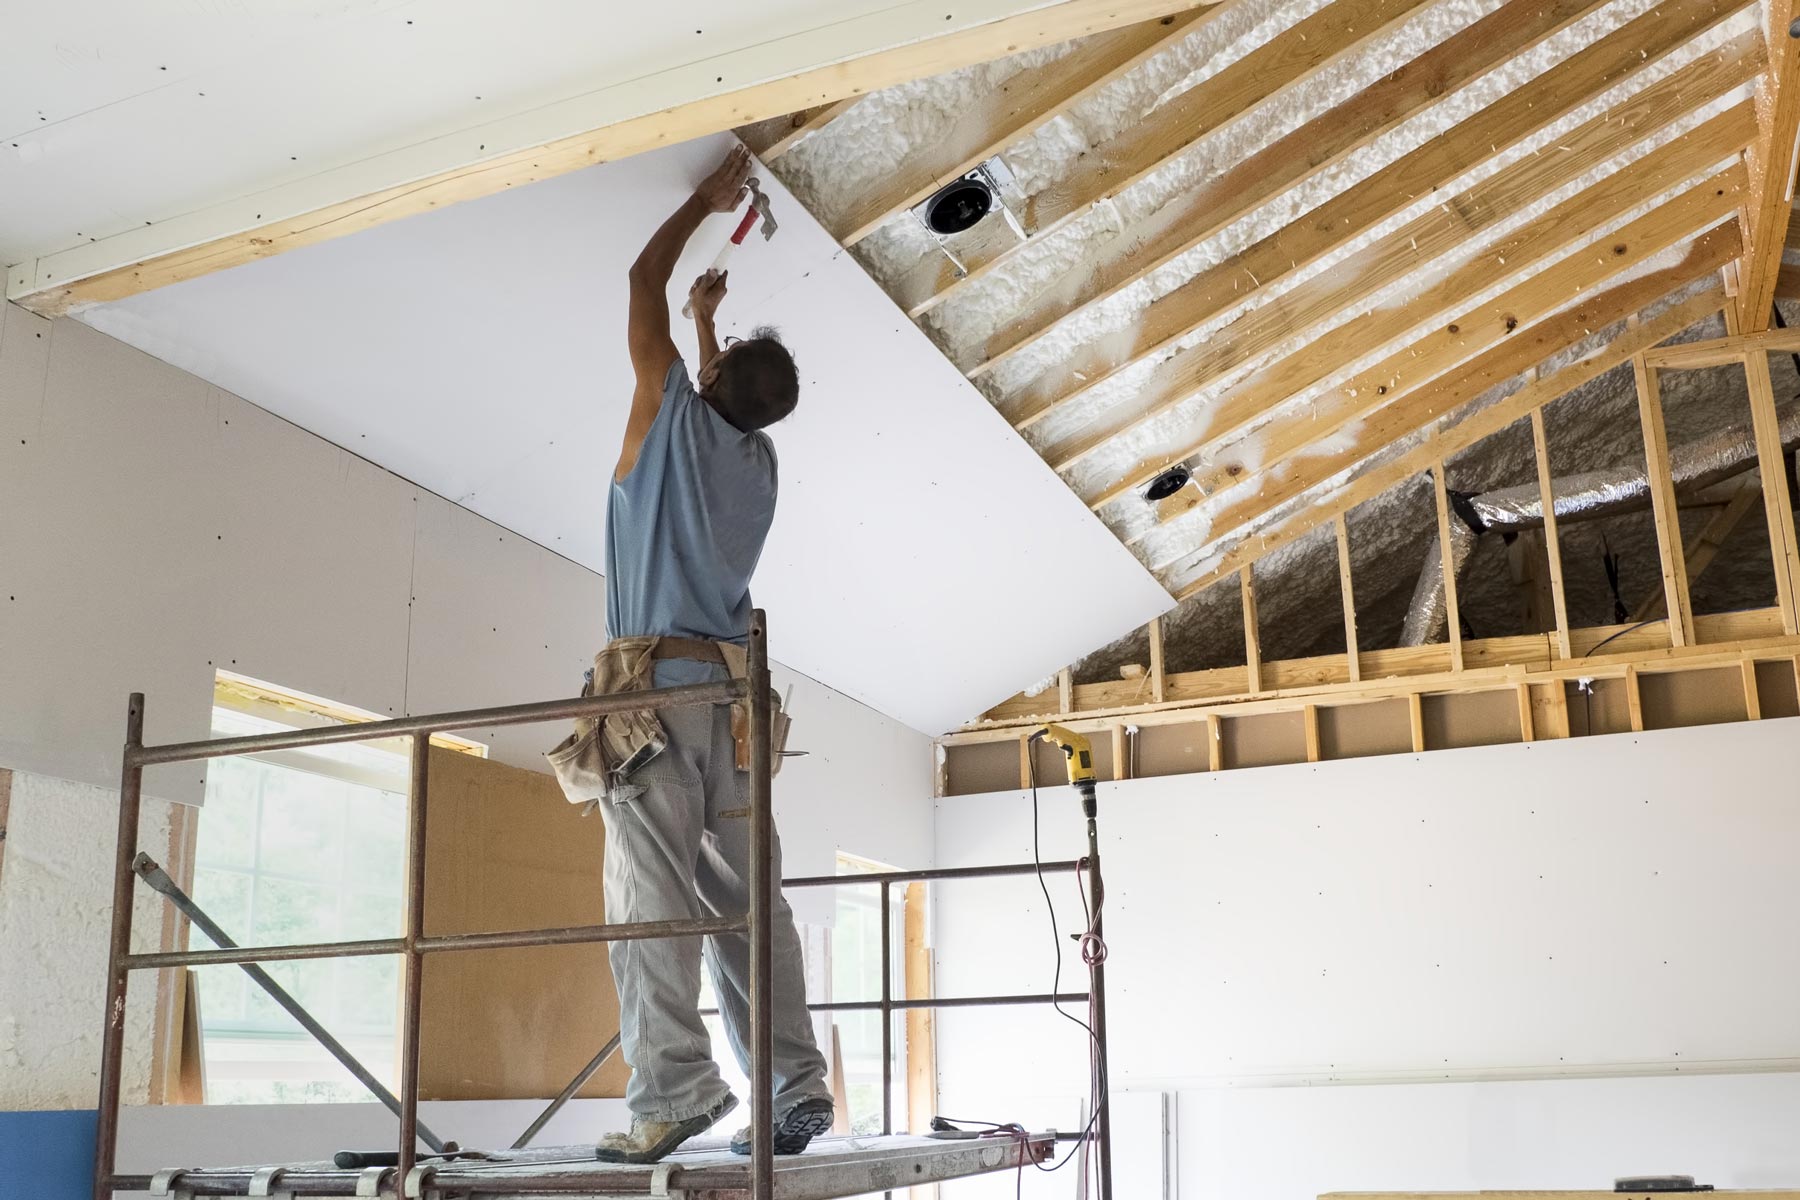
6. Mount Drywall: Measure and cut sheets of drywall to fit the ceiling dimensions. Attach the drywall to the resilient channels using screws, making sure to leave a small gap between the drywall and walls to prevent sound transmission through the walls. Repeat this step for each layer of drywall you plan to install.
7. Apply Green Glue: Apply Green Glue compound to the back of each subsequent layer of drywall before mounting it on the existing layer. This will create a dampening barrier that absorbs sound vibrations.
8. Seal Joints and Edges: Use acoustical caulking or sealant to seal any gaps between drywall sheets and around the edges of the ceiling. This will enhance soundproofing effectiveness and prevent sound leakage.
9. Consider Additional Soundproofing Measures: Depending on your specific requirements, you may want to incorporate other soundproofing techniques such as ceiling clouds or soundproofing paint. Follow the manufacturer’s instructions for installation and application.
10. Finish the Ceiling: Once the soundproofing measures are complete, you can proceed with finishing the ceiling. Apply a coat of paint or other desired ceiling finish to create a visually appealing and cohesive space.
Remember to follow safety precautions when working with tools and materials. If you’re unfamiliar with any steps or techniques, it is advisable to consult a professional or seek guidance from experts in the field.
By following this step-by-step guide, you can effectively soundproof your basement ceiling and create a peaceful and quiet space that is free from external noise interference.
Use soundproofing materials like acoustic panels, insulation, and resilient channels to reduce noise transmission through the basement ceiling. Consider hiring a professional for best results.
Common Challenges and Tips for Overcoming Them
While soundproofing a basement ceiling can greatly improve the acoustic environment, it’s important to be aware of the common challenges that may arise during the process. By being prepared and implementing the following tips, you can overcome these challenges and achieve optimal soundproofing results:
1. Limited Ceiling Height: If you have limited ceiling height in your basement, it can be challenging to incorporate soundproofing materials without compromising headroom. Consider using thinner materials like acoustic insulation with higher sound absorption coefficients or exploring alternative methods such as soundproofing paints or other surface treatments that don’t require significant ceiling thickness.
2. Existing HVAC Systems: HVAC systems can create noise and vibrations that may compromise the effectiveness of soundproofing efforts. To minimize this issue, ensure that HVAC systems are properly isolated from the basement ceiling using vibration pads and insulated vents or ducts. Seek professional guidance if needed.
3. Electrical Fixtures and Wiring: Existing electrical fixtures and wiring can pose challenges when installing soundproofing materials. Take extra care to avoid damaging or interfering with electrical components. Hire a qualified electrician if necessary to make adjustments or relocate fixtures to accommodate the soundproofing process.
4. Structural Limitations: In some cases, the structural design of the basement ceiling may limit the use of certain soundproofing techniques. Resilient channels, for example, require sufficient space between the ceiling joists. If your ceiling structure doesn’t allow for this, consider alternative methods such as acoustic panels or MLV.
5. Sound Leakage: Even with effective soundproofing measures, sound leakage can still occur through openings or gaps. Be thorough in sealing any cracks, joints, or edges with acoustical caulking or weatherstripping to prevent sound from seeping through. Pay attention to electrical outlets, light fixtures, and ventilation openings.
6. Budget Constraints: Soundproofing a basement ceiling can be costly, especially if you opt for high-quality materials or professional installation. Prioritize the areas that require the most soundproofing and consider a phased approach if budget constraints are a concern. Research different options and explore DIY solutions to keep costs down.
7. Acoustical Performance: Different soundproofing materials and techniques offer varying levels of performance. Research and compare the sound transmission class (STC) and noise reduction coefficient (NRC) ratings of materials to ensure they meet your desired level of soundproofing. Additionally, consider consulting with acoustic experts to assess the acoustical requirements of your specific basement.
8. Building Codes and Permits: Check local building codes and regulations before starting your soundproofing project. Some municipalities may have specific requirements for soundproofing in residential buildings. Obtain any necessary permits and ensure compliance with regulations to avoid issues in the future.
By being aware of these common challenges and implementing the tips provided, you can overcome obstacles that may arise during the soundproofing process. Remember to plan ahead, conduct thorough research, and seek professional guidance when needed to ensure a successful and effective soundproofing project for your basement ceiling.
Additional Tips for Maximizing Soundproofing Effectiveness
While following the basic soundproofing techniques discussed earlier will significantly improve the acoustic performance of your basement ceiling, there are additional tips you can implement to further enhance soundproofing effectiveness. Consider the following suggestions to maximize the results:
1. Use a Combination of Techniques: Incorporating multiple soundproofing techniques can provide better results than relying on a single method alone. For example, combining acoustic insulation with resilient channels and double drywall can create a more comprehensive sound barrier.
2. Close Off Openings: Ensure that any openings, such as windows or air vents, are properly sealed to prevent sound leakage. Use weatherstripping or acoustic-rated materials to close off these areas, minimizing sound transfer.
3. Address Impact Noise: Impact noise, such as footsteps or dropped objects, can be challenging to address with traditional soundproofing methods alone. Consider using sound-dampening underlayment or carpet padding on the upper floors to reduce the transmission of impact noise.
4. Soundproof Doors: If you have doors leading to the basement, consider installing soundproof doors or adding soundproofing materials like door sweeps and weatherstripping to minimize sound leakage through these entry points.
5. Treat Walls and Floors: While the focus is on the basement ceiling, treating the walls and floors can also contribute to overall soundproofing effectiveness. Installing sound-dampening wall panels or adding carpeting or rugs on the basement floor can further reduce noise transmission.
6. Minimize Vibrations: Vibrations can transfer sound through structural elements, compromising soundproofing efforts. Use vibration isolation pads or inserts for appliances, speakers, or other equipment in the basement to minimize vibrations and prevent their transmission through the ceiling.
7. Consider Soundproofing Windows: If your basement has windows, consider using soundproof glass or installing secondary window panels to further reduce sound penetration.
8. Use Acoustic Caulking: Ensure that all gaps and joints between materials are properly sealed with acoustical caulking. Pay attention to seams between drywall sheets, corners, and any other areas where sound may escape.
9. Eliminate Reverberation: Excessive reverberation can make the basement space feel echoic. To minimize this, incorporate sound-absorbing materials such as acoustic panels, ceiling clouds, or heavy curtains to help absorb sound reflections.
10. Test and Adjust: After completing the soundproofing process, perform sound tests within the space to identify any remaining noise leakage points. Make adjustments as necessary by adding supplementary materials or sealing any overlooked gaps.
Remember, achieving complete soundproofing may not be entirely possible. The goal is to create a significant reduction in noise transmission and improve the overall acoustics of the basement space. By implementing these additional tips, you can further enhance the effectiveness of your soundproofing efforts and create a quiet and enjoyable environment in your basement.
Cost Considerations for Soundproofing a Basement Ceiling
Before embarking on a soundproofing project for your basement ceiling, it’s essential to consider the associated costs. The total cost will depend on various factors, including the size of your basement, the extent of soundproofing required, the materials and techniques used, and whether you choose to hire professionals or undertake the project yourself. Here are some cost considerations to keep in mind:
1. Materials: The cost of materials is a significant component of soundproofing expenses. The type and quality of materials you select will impact the overall cost. Acoustic insulation, mass-loaded vinyl (MLV), resilient channels, drywall, Green Glue, and other soundproofing materials can vary in price. It’s important to research different options and consider their effectiveness and affordability.
2. Professional Services: If you lack the skills or confidence to undertake the soundproofing project on your own, hiring professionals can ensure a high-quality installation. However, professional services come at an additional cost. This includes consultation fees, labor charges, and the cost of hiring specialized soundproofing contractors. Obtain multiple quotes and compare the services offered to find the best balance between quality and affordability.
3. Tools and Equipment: You may need to invest in specific tools and equipment to complete the soundproofing project. This includes items such as a staple gun, saw, drill, screws, adhesive, level, and other basic construction tools. Consider whether you already own these tools or if you need to purchase or rent them, factoring in these costs accordingly.
4. Permits and Inspections: Depending on your local regulations, obtaining permits and undergoing inspections may be necessary for soundproofing projects. Permit costs and inspection fees can vary, so it’s important to research and budget for these expenses.
5. Additional Soundproofing Measures: Depending on your specific requirements, you may consider incorporating additional soundproofing measures such as ceiling clouds, soundproof doors, or soundproof windows. These additional features will have their own associated costs, so it’s important to include them in your overall budget.
6. DIY vs. Professional Installation: Undertaking the soundproofing project yourself can save you money on labor costs. However, it’s essential to assess your skills and knowledge to determine if you’re capable of achieving effective soundproofing results. Poor installation can lead to inefficiencies and the need for costly revisions. If in doubt, it may be worth investing in professional installation to ensure the best outcome.
7. Cost vs. Effectiveness: Consider the cost-effectiveness of various soundproofing techniques and materials. Compare the performance, durability, and longevity of different options to make an informed decision. Sometimes, investing in higher-quality materials upfront may provide better long-term results and ultimately save you money on future repairs or replacements.
It’s important to note that the cost of soundproofing a basement ceiling can vary significantly depending on individual circumstances and preferences. It’s advisable to set a realistic budget, obtain multiple quotes, and thoroughly research materials and techniques to make informed decisions and achieve your desired level of soundproofing within your financial means.
Remember that soundproofing is an investment in your comfort and the value of your home. Creating a quiet and peaceful basement space can greatly enhance your quality of life and provide long-term benefits.
Benefits of Soundproofing Your Basement Ceiling
Soundproofing your basement ceiling offers numerous advantages that contribute to a more peaceful, enjoyable, and functional living space. Here are some key benefits of soundproofing your basement ceiling:
1. Noise Reduction: One of the primary benefits of soundproofing is significant noise reduction. Whether it’s footsteps, conversations, or household activities, soundproofing the ceiling helps prevent noise transmission from the upper floors. This creates a quieter and more serene environment in the basement, allowing you to focus, relax, or engage in activities without disturbances.
2. Improved Privacy: Soundproofing the basement ceiling adds a layer of privacy for both the basement occupants and those on the upper floors. It ensures conversations, music, or other sounds in the basement are contained within the space, preventing disturbances to the rest of the household. This is particularly beneficial if you have tenants or family members living above the basement.
3. Enhanced Acoustic Experience: If you’re using the basement as a home theater, music studio, or gaming room, soundproofing the ceiling can greatly enhance the overall acoustic experience. By limiting external noise and improving sound absorption within the room, you can enjoy high-quality sound with minimal interference or echo.
4. Reduced Noise Pollution: Soundproofing not only blocks noise from entering the basement but also prevents noise from escaping and affecting other areas of your home. By creating a sound barrier, you contribute to reducing noise pollution within your household, creating a more harmonious living environment.
5. Increased Home Value: Soundproofing your basement ceiling can add value to your home. In today’s real estate market, buyers often prioritize quiet and functional living spaces. A well-insulated and soundproofed basement is seen as an attractive feature, potentially increasing the desirability and market value of your property.
6. Improved Concentration and Productivity: Whether you’re working from home, studying, or engaging in creative pursuits in the basement, soundproofing helps create an environment conducive to concentration and productivity. The reduction in external noise distractions allows for improved focus and mental clarity, boosting your performance and efficiency.
7. Health and Well-being: Unwanted noise can be a significant source of stress and anxiety. By soundproofing your basement ceiling, you create a peaceful and tranquil space that promotes relaxation and well-being. A quieter environment can contribute to better sleep quality, reduced stress levels, and an overall improvement in mental and physical health.
8. Flexibility in Basement Use: Soundproofing the ceiling offers flexibility in how you utilize the basement space. Whether it’s a home office, a gym, a play area, or a guest room, having a soundproofed environment allows for versatile and uninterrupted use of the basement. You have the freedom to use the area according to your needs, without worrying about disturbing others or being disturbed by external noises.
9. Protection of Sensitive Equipment: If you have sensitive equipment in the basement, such as audio recording gear or electronic instruments, soundproofing helps protect it from external vibrations and interference. By minimizing sound transmission, you can ensure the equipment functions optimally and avoid any disruptions or degradation in performance.
Soundproofing your basement ceiling offers a range of benefits that enhance comfort, privacy, and quality of life. It creates a peaceful oasis where you can enjoy your activities without the intrusion of unwanted noise. Consider soundproofing as an investment that not only improves your immediate living space but also contributes to the long-term value and desirability of your home.
Read more: How To Finish A Basement Ceiling
Conclusion
Soundproofing your basement ceiling is a valuable investment that brings a multitude of benefits to your living space. By implementing soundproofing measures, you can create a peaceful and quiet environment, free from the disturbances of external noise. Not only does this enhance your comfort and privacy, but it also improves the functionality and usability of your basement.
Throughout this guide, we have explored the importance of soundproofing your basement ceiling and provided a step-by-step process to help you achieve effective results. We have discussed the various materials and techniques available, as well as common challenges that may arise during the soundproofing journey. Additionally, we have highlighted cost considerations and the numerous advantages you can enjoy by soundproofing your basement ceiling.
From reducing noise pollution and enhancing privacy to improving concentration and productivity, soundproofing offers a host of benefits. It creates a tranquil space where you can enjoy hobbies, work, study, or simply relax without being disturbed by external sounds. Furthermore, soundproofing enhances the overall acoustics of your basement, allowing for an immersive audio experience if used as a home theater or music studio.
Whether you choose to tackle the project yourself or hire professionals, soundproofing your basement ceiling is a worthwhile endeavor. It adds value to your home, promotes a healthier and more peaceful living environment, and provides long-lasting benefits for you and your family.
As you embark on your soundproofing journey, remember to assess your specific requirements, research materials and techniques, and adapt the process to suit your budget and preferences. By implementing the tips and techniques outlined in this guide, you can effectively soundproof your basement ceiling and create a space that truly reflects your desired ambiance.
Now, it’s time to transform your basement into a haven of tranquility and enjoy the multitude of benefits that soundproofing brings. Take the first step and experience the difference that soundproofing can make in your basement today.
Now that you've got the lowdown on quieting that noisy basement ceiling, why not tackle the next big project? Timing is everything, and understanding how long a full makeover might take could help streamline your plans. Check out our detailed guide on basement renovations, packed with insights to keep your project on track without unexpected hitches. With practical advice and timelines, you'll be well-equipped to manage your renovation efficiently.
Frequently Asked Questions about How To Soundproof A Basement Ceiling
Was this page helpful?
At Storables.com, we guarantee accurate and reliable information. Our content, validated by Expert Board Contributors, is crafted following stringent Editorial Policies. We're committed to providing you with well-researched, expert-backed insights for all your informational needs.


0 thoughts on “How To Soundproof A Basement Ceiling”