Articles
How To Cover A Basement Ceiling
Modified: February 24, 2024
Discover helpful articles on how to cover your basement ceiling and transform your space. Find step-by-step guides and creative ideas for a stunning basement makeover.
(Many of the links in this article redirect to a specific reviewed product. Your purchase of these products through affiliate links helps to generate commission for Storables.com, at no extra cost. Learn more)
Introduction
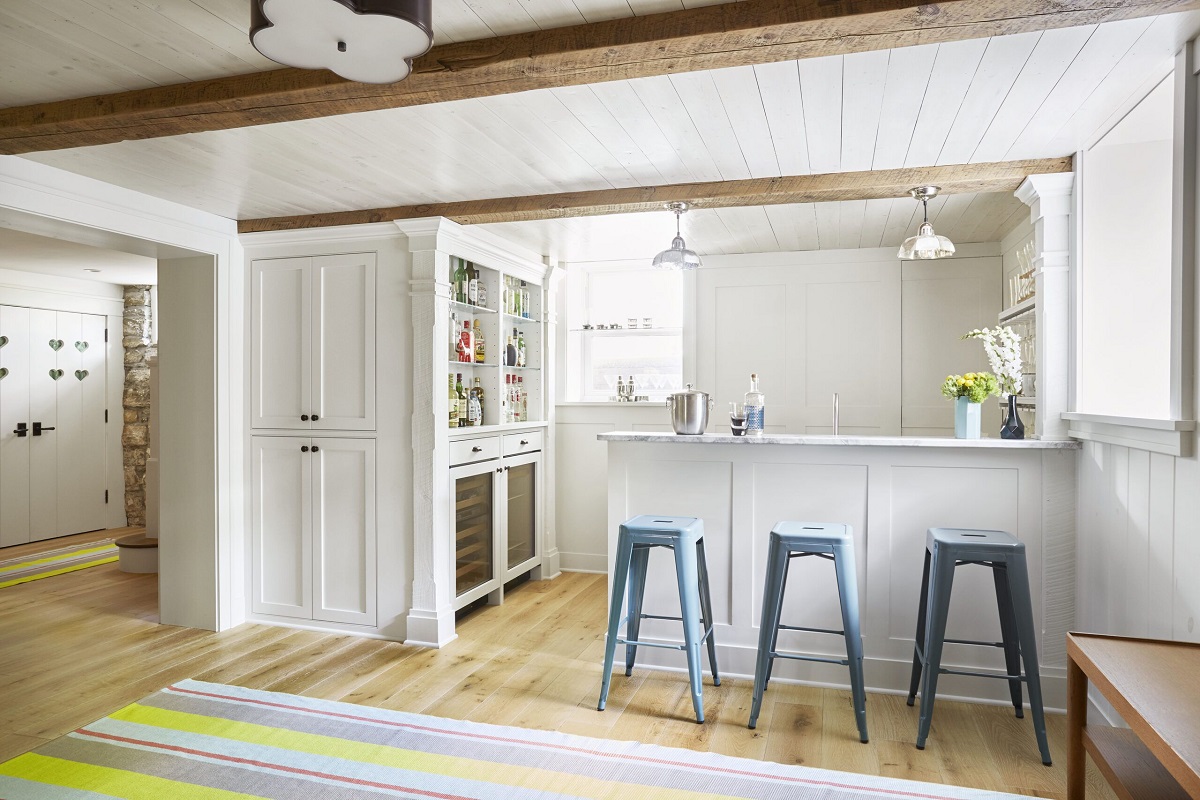
In many homes, the basement is an often neglected and overlooked space. It’s commonly used for storage or left unfinished, with exposed beams and pipes creating an unsightly ceiling. However, with a little creativity and effort, you can transform your basement into a functional and inviting space by covering the ceiling.
Covering a basement ceiling not only improves the overall aesthetics of the room but also serves practical purposes such as reducing noise, hiding ductwork and wiring, and adding insulation to improve energy efficiency. Whether you’re planning to create an additional living area, a home office, or a recreational space, covering the basement ceiling is a crucial step in the renovation process.
In this article, we’ll guide you through the process of covering a basement ceiling, discussing the various options available and providing step-by-step instructions on how to achieve a finished and polished look. From assessing the current state of your basement ceiling to selecting the right materials, preparing the ceiling, installing the desired coverings, and adding finishing touches, we’ll cover everything you need to know to successfully complete this project.
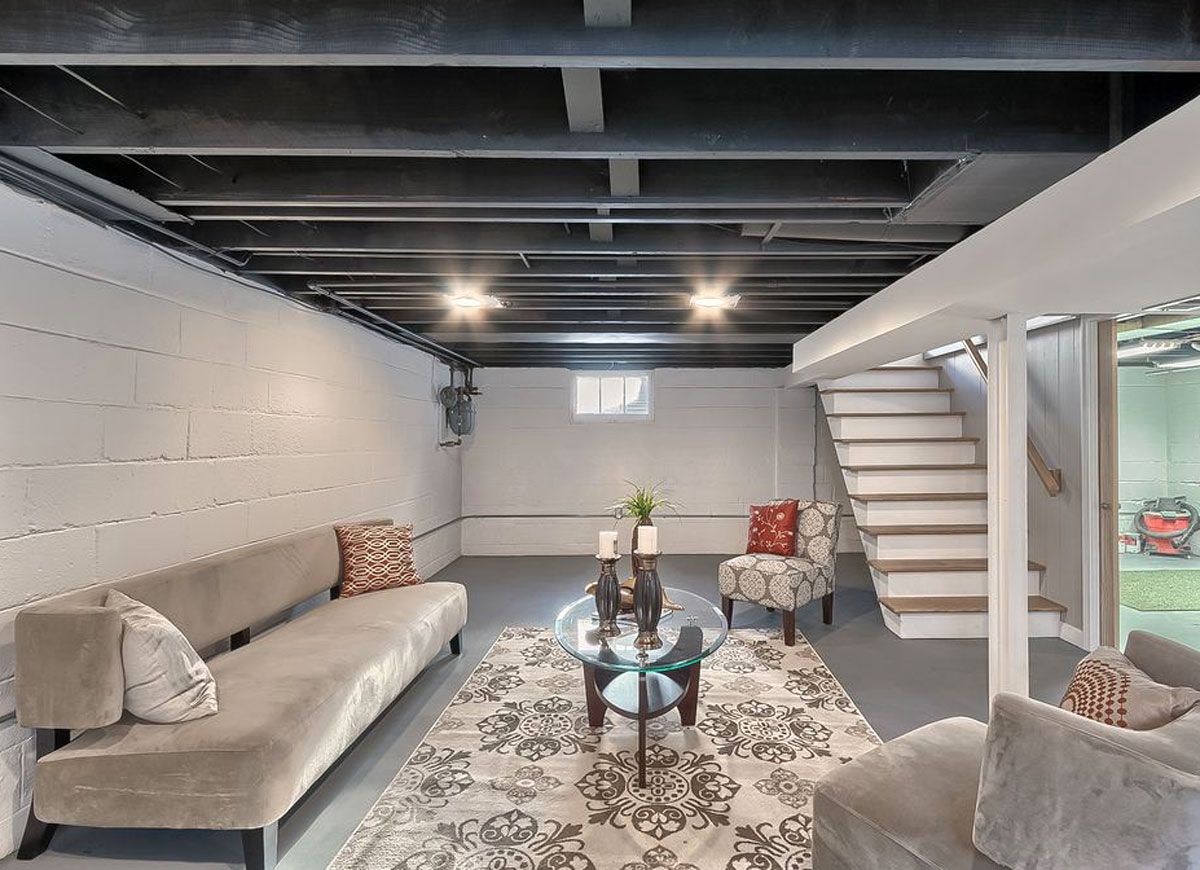
Before diving into the specific steps, it’s important to note that the method you choose for covering your basement ceiling will depend on several factors such as your budget, personal preference, and the overall style you want to achieve. Some common options include installing a drop ceiling, using drywall or paneling, or even creating a more industrial look with exposed pipes and beams.
Now let’s get started on the journey of transforming your basement ceiling from a dull and unfinished space to a beautiful and functional part of your home.
Key Takeaways:
- Transform your neglected basement into a functional and inviting space by covering the ceiling. Consider materials, lighting, and personal touches to achieve a polished and cohesive look that complements your home’s design.
- Prioritize safety, accessibility, and aesthetics when covering your basement ceiling. Assess the condition, choose the right materials, and conceal pipes and wires to create a finished and functional space that reflects your style.
Read more: How To Cover Basement Ceiling
Step 1: Assessing the Basement Ceiling
Before you begin covering your basement ceiling, it’s crucial to assess its current condition and identify any underlying issues. This step will help you determine the best approach for covering the ceiling and ensure that any necessary repairs are made beforehand.
Start by inspecting the ceiling for any signs of water damage, leaks, or mold. Addressing these issues is essential before proceeding with any covering materials to prevent further damage and maintain a healthy environment in your basement.
Next, take note of the height and shape of your basement ceiling. Some ceilings may have low clearance or irregular shapes due to ductwork, beams, or other structural elements. This information will influence your choice of covering materials and installation methods.
If you have existing ductwork, plumbing, or electrical wiring running along the ceiling, evaluate whether they need to be rerouted or concealed. This step is crucial for both safety and aesthetics. Depending on your skill level and preference, you may choose to hide these elements behind a covering or incorporate them into the design.
Additionally, consider the purpose and function of your basement. If you’re planning to use it as a living area, you may want to prioritize soundproofing to minimize noise transmission from the floors above. If it’s a recreational space, proper insulation and temperature control may be essential.
Finally, take into account your personal style and the overall design theme of your home. Your basement ceiling covering should complement the existing décor and create a cohesive look throughout the house.
By thoroughly assessing your basement ceiling, you’ll have a clear understanding of its condition, any necessary repairs or modifications, and the specific requirements for your covering project. This initial step will save you time, effort, and potential issues down the line, ensuring a smooth and successful transformation of your basement ceiling.
Step 2: Determine the Desired Look
Once you have assessed the condition of your basement ceiling, the next step is to determine the desired look and style you want to achieve. This decision will guide your material choices and installation methods.
Consider the overall aesthetic you want for your basement. Do you prefer a clean and modern look? Or perhaps a rustic and industrial vibe? Understanding your preferred style will help you narrow down your options and make informed decisions throughout the process.
Take into account the height of your basement ceiling as well. If you have limited clearance, certain covering options may not be suitable. In this case, you may need to consider options that maximize headroom while still achieving the desired aesthetic.
Think about the level of maintenance and durability you require. Some covering materials may require more upkeep than others. If you anticipate heavy use of your basement or have young children or pets, durability should be a key consideration.
Lighting is another important aspect to think about. Different ceiling coverings may affect the way light is distributed throughout the space. Consider how lighting fixtures will be installed and how they will interact with your chosen ceiling covering.
If you’re unsure about the design direction, gather inspiration from various sources. Look for ideas in home improvement magazines, online platforms, or even consult with an interior designer. Consider creating a mood board or collecting samples to visualize different concepts and help you make a decision.
Remember that the desired look of your basement ceiling should harmonize with the rest of your home. It should feel like a natural extension of the overall design and complement the style of the adjacent rooms.
By determining the desired look in advance, you’ll have a clear vision of the final outcome, enabling you to select the most appropriate materials and installation methods to bring your basement ceiling to life.
Step 3: Choose the Right Materials
Choosing the right materials is crucial for achieving the desired look and functionality of your covered basement ceiling. There are several options available, each with its own advantages and considerations.
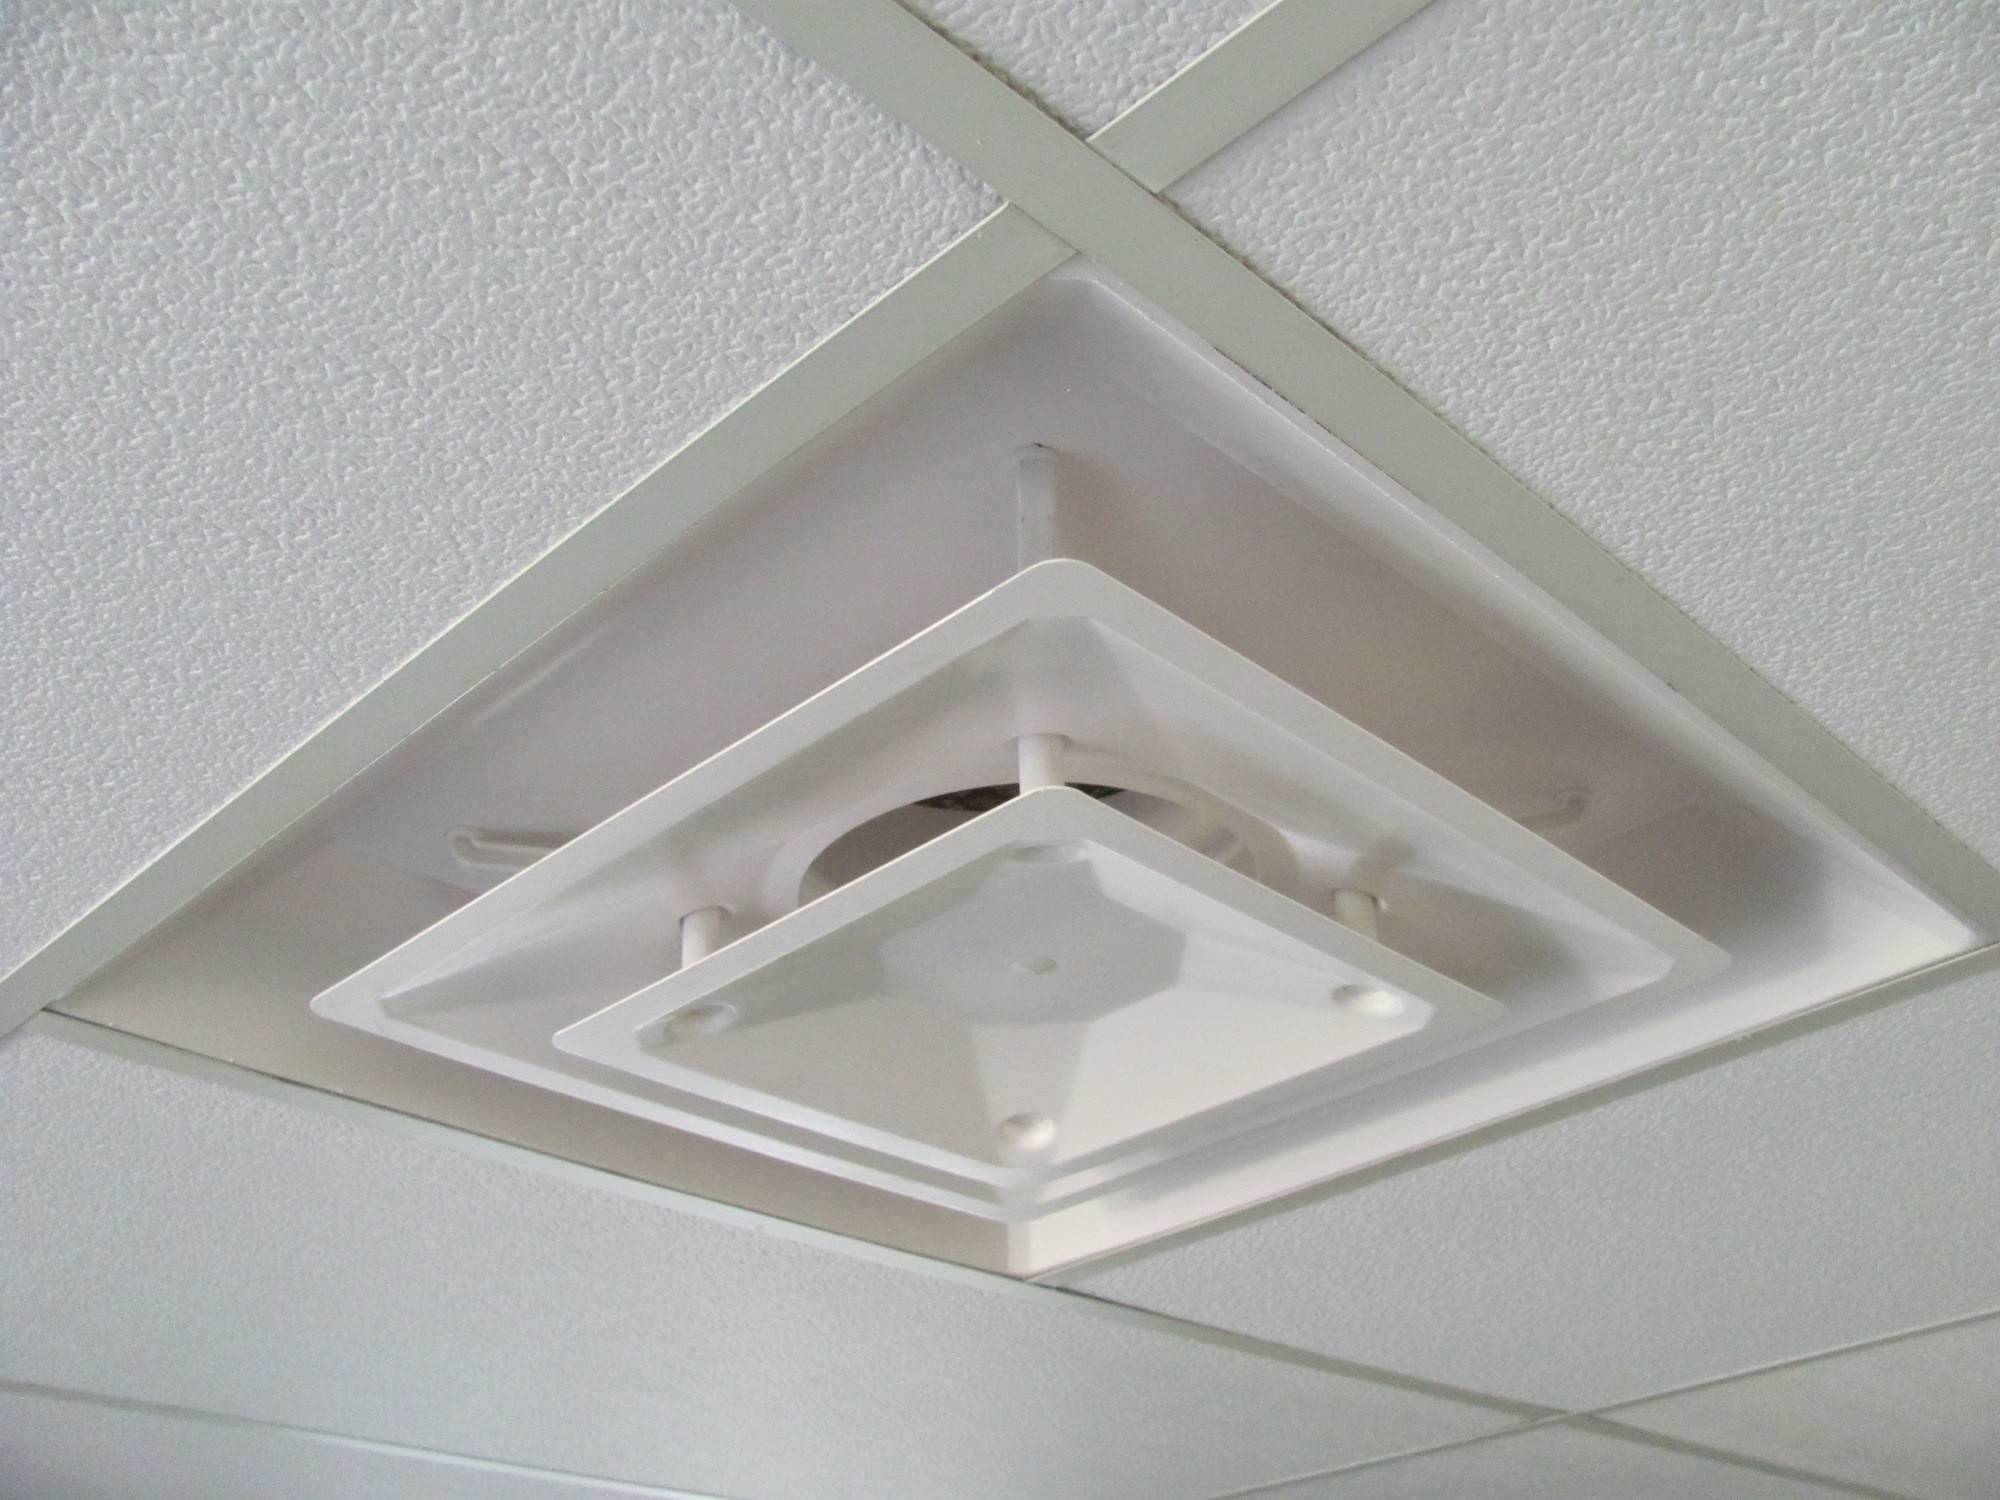
1. Drop Ceiling Tiles: Drop ceiling tiles, also known as acoustic tiles or suspended ceilings, are a popular choice for covering basement ceilings. They are lightweight, easy to install, and provide easy access to utilities like plumbing or electrical wiring. Drop ceiling tiles come in a variety of styles, colors, and textures, allowing you to create a customized look.
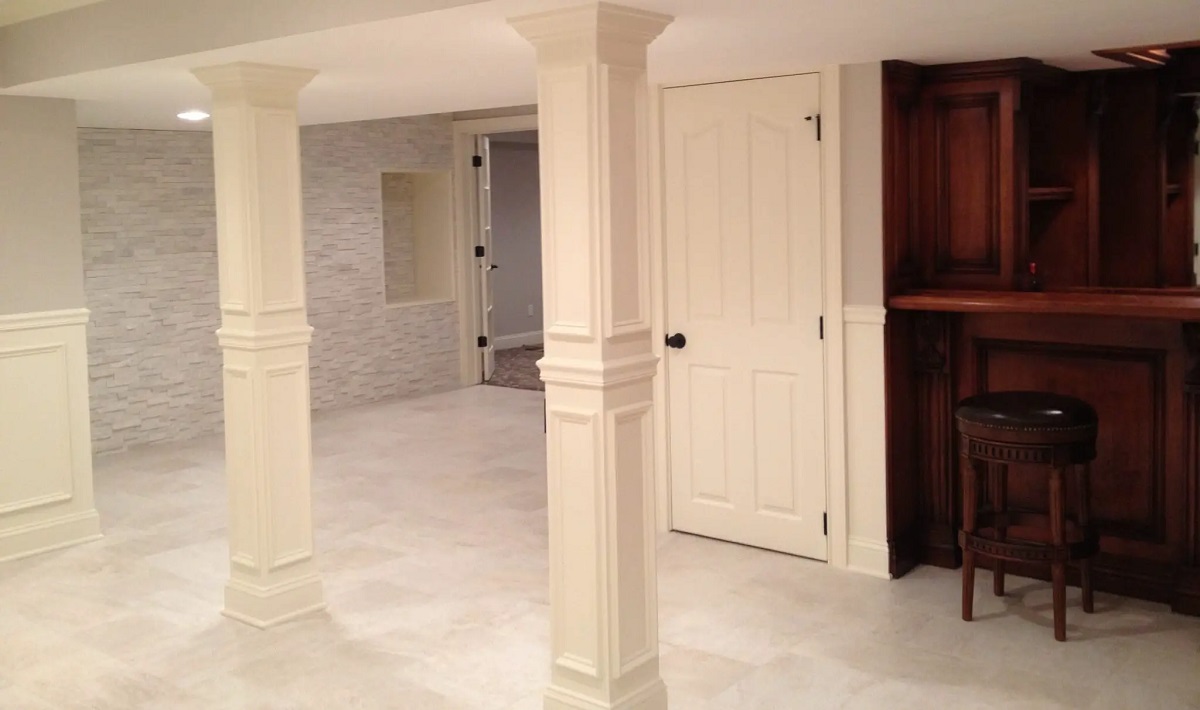
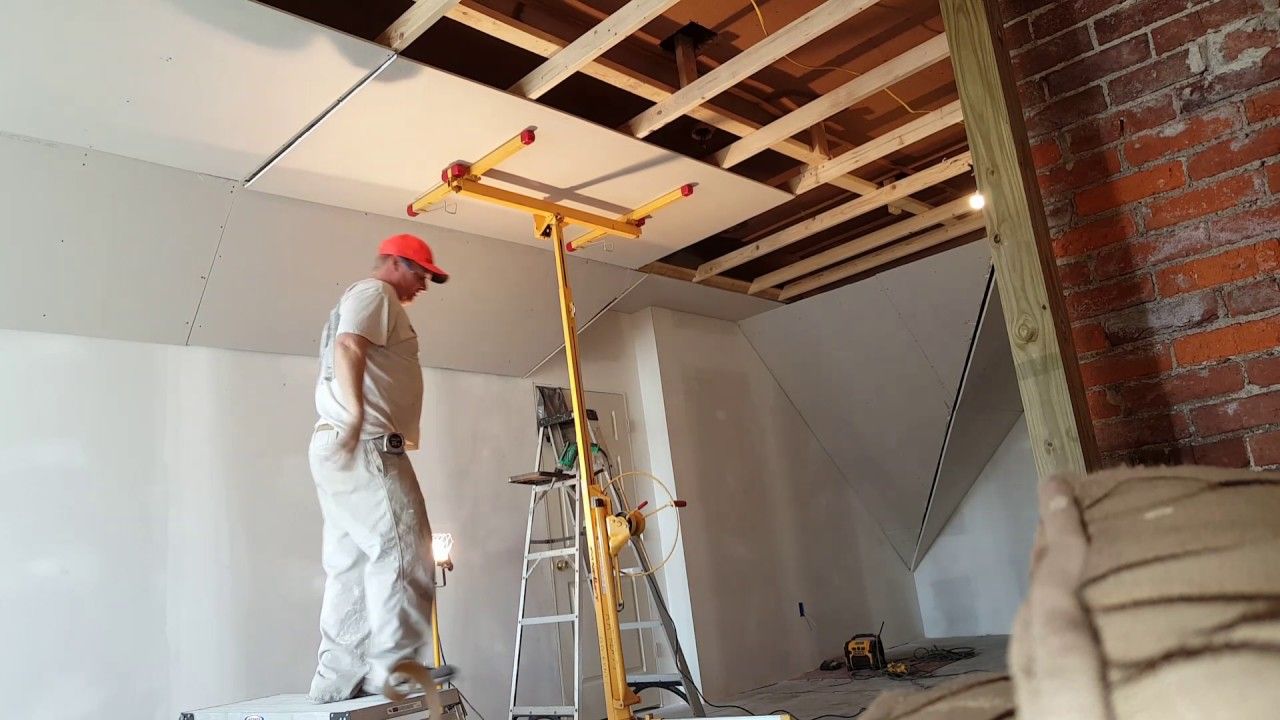
2. Drywall: Drywall is a more traditional option for covering basement ceilings. It provides a seamless and polished look, and can be easily painted or finished to match the rest of the space. However, installing drywall requires more labor and skill compared to other materials.
3. Paneling: Paneling, such as wood or faux brick panels, can add warmth and texture to your basement ceiling. They are relatively easy to install and come in a variety of styles, allowing you to achieve a specific aesthetic. Paneling also provides additional insulation and soundproofing.
4. Exposed Beams and Pipes: If you prefer an industrial or rustic look, you can embrace the exposed beams and pipes in your basement ceiling. This option requires minimal work and allows for maximum headroom. However, it may not be suitable if you have significant ductwork or wiring that needs to be hidden.
In addition to the covering materials, consider the necessary accessories and hardware. For drop ceiling tiles, you will need a grid system and suspension wires. Drywall requires joint compound, tape, and sandpaper for finishing. Paneling often requires adhesive and nails or screws for installation.
It’s important to evaluate each material option based on factors such as durability, maintenance requirements, cost, and compatibility with the overall design. Keep in mind the specific needs and limitations of your basement, such as moisture resistance or fire safety regulations.
If you’re unsure about the best materials for your project, consult with professionals or visit a local home improvement store for guidance. They can provide valuable insights and help you make an informed decision based on your unique situation and preferences.
By choosing the right materials, you’ll ensure that your covered basement ceiling not only looks great but also serves its intended purpose for years to come.
Step 4: Preparing the Ceiling
Before you begin the actual installation of your chosen ceiling covering, it’s important to properly prepare the surface of your basement ceiling. This step ensures that the covering adheres well, prevents any future issues, and helps you achieve a professional-looking result.
Start by clearing out the basement and removing any furniture, objects, or debris from the ceiling area. This will provide you with a clean and unobstructed workspace.
Next, thoroughly clean the ceiling surface to remove any dust, dirt, or cobwebs. Use a broom, vacuum with a brush attachment, or a damp cloth to ensure a clean and smooth base for the covering material.
If you’re covering a drop ceiling, assess the existing grid system. Replace any damaged or rusted parts and make sure the framework is sturdy and level. This will provide a stable foundation for the new tiles.
If your plan involves installing drywall or paneling, consider whether any repairs or modifications are necessary. Patch any holes or cracks, and sand down uneven sections to create a smooth surface. You may also need to add furring strips or nailers to provide additional support for the installation of the covering material.
For exposed beams and pipes, clean and inspect them for any signs of damage or corrosion. If needed, sand or paint the surfaces to match your desired aesthetic. Ensure that the exposed elements are securely attached and not interfering with the stability of the ceiling.
Before proceeding, take accurate measurements of the ceiling and plan out the layout of the covering material. This will help you minimize waste and ensure a precise fit. Mark any reference points or guidelines on the ceiling surface to guide the installation process.
Lastly, if you have any utilities such as plumbing or electrical wiring running along the ceiling, consult with a professional to ensure they are properly insulated, protected, and meet all safety codes. If necessary, reroute or conceal these elements before proceeding with the covering installation.
By properly preparing your basement ceiling, you create a solid foundation for the next steps of the project. This ensures a smoother installation process and a finished look that will stand the test of time.
Read more: How To Cover Insulation In Basement Ceiling
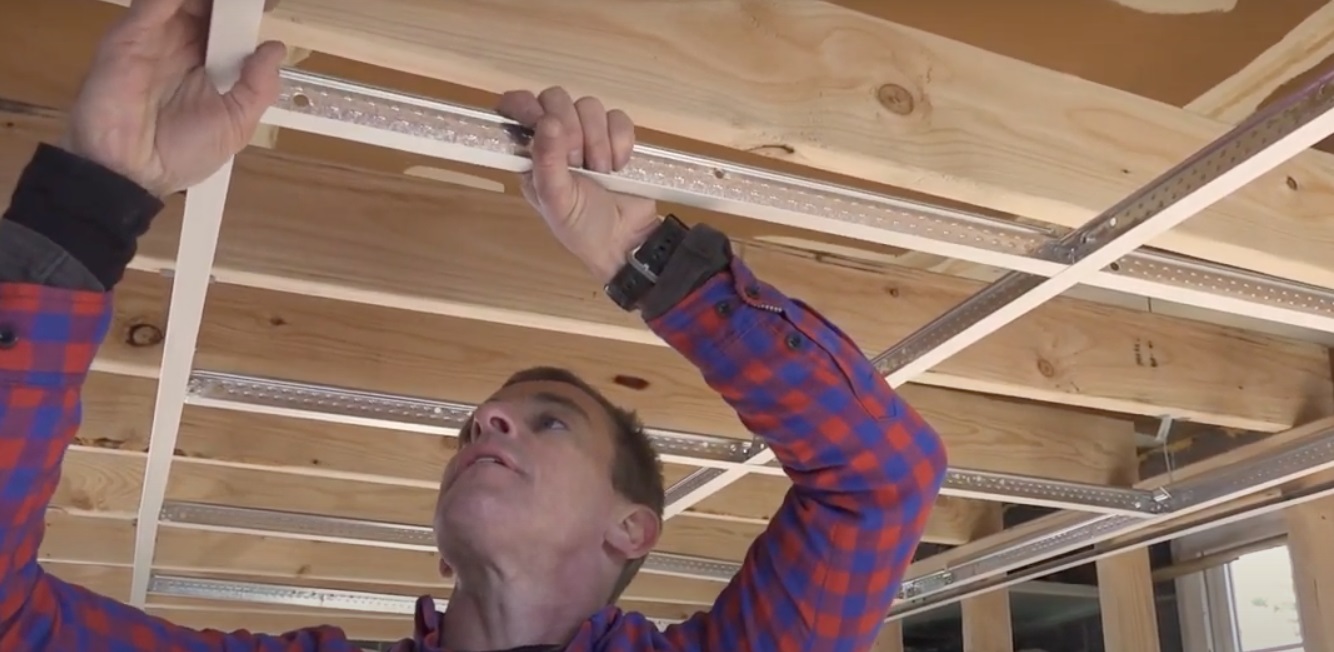
Step 5: Installing a Drop Ceiling
A drop ceiling, also known as a suspended ceiling, is a popular choice for covering basement ceilings due to its ease of installation and flexibility. Follow these steps to install a drop ceiling and achieve a clean and professional finish.
1. Measure and plan: Start by measuring the dimensions of your basement and determining the layout of the drop ceiling grid. Take into account any obstructions such as pipes or ductwork that may require special accommodations.
2. Install the main runners: Begin by installing the main runners, which are the long metal tracks that form the primary support for the drop ceiling. Attach them to the existing ceiling joists using screws or ceiling clips. Make sure they are level and evenly spaced.
3. Install the cross tees: Once the main runners are in place, install the cross tees, which are the shorter metal bars that connect between the main runners. These will form the grid pattern for the drop ceiling. Cut the cross tees to the appropriate length using tin snips, ensuring they fit securely into the main runners. Attach them by sliding them into the slots on the main runners.
4. Install the ceiling tiles: With the grid in place, it’s time to install the ceiling tiles. Choose tiles that match your desired aesthetic and fit the grid dimensions. Start by inserting the tiles into the grid, starting from one corner and working your way across. Gently push them up into the grid until they are firmly in place.
5. Add the finishing touches: Once all the tiles are installed, trim the perimeter edges using a utility knife to ensure a neat and even finish. Install any ceiling moldings or trim pieces along the edges to give the drop ceiling a polished look.
6. Install lighting fixtures: If desired, now is the time to install lighting fixtures in the drop ceiling. Consult with a professional electrician to ensure the proper installation and wiring of the fixtures. Cut holes in the ceiling tiles to accommodate the fixtures, if necessary.
7. Inspect and make adjustments: Step back and inspect the drop ceiling for any gaps, misalignments, or unevenness. Make any necessary adjustments to ensure a seamless and level appearance.
A drop ceiling is a versatile and practical solution for covering a basement ceiling, providing easy access to utilities while improving the overall aesthetics of the space. By following these steps, you can successfully install a drop ceiling and transform your basement into a finished and functional area.
Consider using drop ceiling tiles or drywall to cover a basement ceiling. Drop ceiling tiles are easy to install and provide access to utilities, while drywall offers a more finished look.
Step 6: Installing Drywall or Paneling
If you prefer a more traditional or decorative look for your basement ceiling, installing drywall or paneling can be an excellent choice. Follow these steps to successfully install drywall or paneling and achieve a polished and stylish finish.
1. Measure and plan: Measure the dimensions of your basement ceiling and plan the layout of the drywall or paneling. Take into account any obstructions such as pipes, ductwork, or electrical outlets that may require special accommodations.
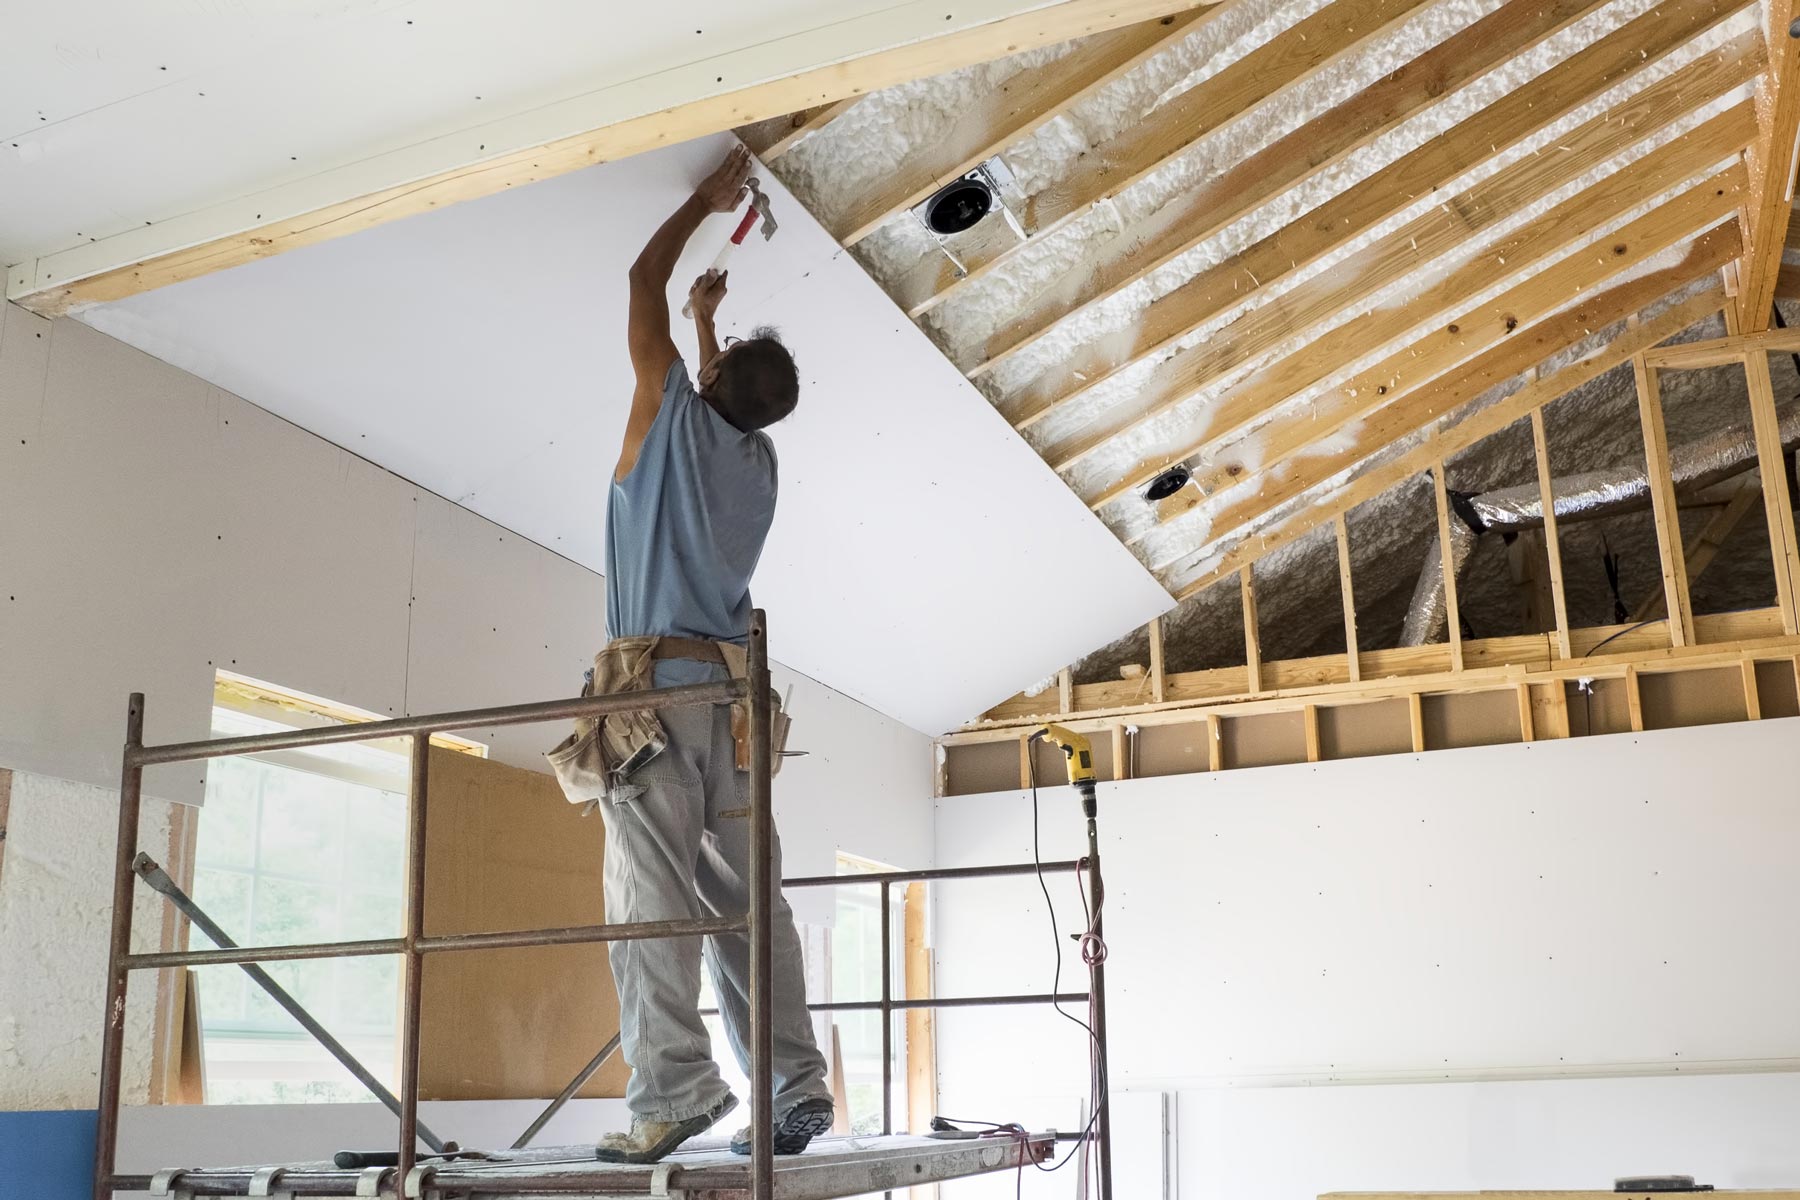
2. Prepare the drywall or paneling: If you’re using drywall, cut it to the appropriate sizes using a utility knife or a drywall saw. Ensure that the edges are clean and smooth. If you’re using paneling, clean the panels and inspect them for any defects or damage.
3. Install furring strips or nailers: If your basement ceiling does not have secure attachment points for the drywall or paneling, install furring strips or nailers. These wooden strips or boards provide a stable surface for attaching the covering material. Screw or nail the strips into the ceiling joists, ensuring they are level and evenly spaced.
4. Attach the drywall or paneling: Starting from one corner, hold the drywall or paneling against the basement ceiling and secure it into place using nails or screws. If using drywall, drive the nails or screws into the furring strips or nailers. For paneling, use adhesive or specific fastening methods recommended by the manufacturer. Continue attaching the drywall or paneling, making sure to leave appropriate gaps for expansion and contraction.
5. Fill joints and seams: For drywall, use joint compound and drywall tape to cover the joints and seams between the panels. Apply a thin layer of joint compound using a trowel, and then press the drywall tape into the compound. Smooth out any excess compound and let it dry. Sand the joints and seams for a seamless finish. For paneling, follow the manufacturer’s instructions for filling any gaps or seams.
6. Sand and finish: Once the joint compound is dry, sand the surface of the drywall to create a smooth finish. For paneling, ensure that any exposed edges or rough areas are sanded down. Prime the surface with a primer suitable for the covering material and then apply the desired paint or finish. Use paint rollers or brushes to evenly coat the entire ceiling surface.
7. Install any additional trim: If desired, install crown molding or other trim pieces along the edges of the ceiling to enhance the finished look. Measure and cut the trim to fit, then attach it using nails or adhesive.
8. Inspect and make adjustments: Step back and inspect the drywall or paneling for any imperfections, gaps, or unevenness. Make any necessary adjustments, such as filling in gaps or sanding down rough areas, to achieve a polished and professional appearance.
By following these steps, you can successfully install drywall or paneling and transform your basement ceiling into a visually appealing and personalized space that matches your desired style.
Step 7: Concealing Pipes and Wires
Concealing pipes and wires is an important step in creating a clean and finished look for your basement ceiling. Here are some methods to effectively hide and conceal these essential but unsightly elements:
1. Install a Soffit: A soffit is a drop-down ceiling-like structure that creates a uniform appearance and conceals pipes and wiring. Measure the length and width of the area where you want to install the soffit. Construct a wooden frame to fit the dimensions, and then attach drywall to the frame. Paint or finish the soffit to match the surrounding ceiling or your desired aesthetic.
2. Use Decorative Casings: Another option is to use decorative casings or channeling to hide the pipes and wires. These casings can be made from plastic, metal, or wood and come in various styles and sizes. Measure the dimensions of the pipes and wires and choose casings that fit snugly around them. Attach the casings to the ceiling using adhesive or screws to create an organized and streamlined look.
3. Create a Drop Ceiling: If your basement ceiling already has exposed pipes and wires, consider installing a drop ceiling. A drop ceiling, as discussed in a previous step, involves creating a grid and installing ceiling tiles that can hide and disguise overhead elements. This option provides easy access to pipes and wires for maintenance purposes while giving your basement a clean and finished appearance.
4. Use Cable Management Systems: For wires that are running across the ceiling, you can utilize cable management systems to neatly organize and conceal them. These systems consist of adhesive or screw-on tracks that hold the wires securely in place. Simply route the wires along the tracks, ensuring they are hidden from view and kept tidy.
5. Paint Pipes and Conduit: If concealing the pipes and wires is not feasible, consider painting them to match the ceiling or blend into the overall decor. Clean the pipes and wires thoroughly and use paint specifically designed for metal or plastic surfaces. Apply several coats of paint, allowing each coat to dry completely before applying the next.
When concealing pipes and wires, it’s essential to maintain accessibility for any necessary repairs or maintenance in the future. Be sure to consider building codes and regulations regarding clearances, fire safety, and ventilation requirements.
By effectively hiding and concealing pipes and wires, you can achieve a clean and polished look for your basement ceiling while maintaining functionality and accessibility.
Step 8: Painting or Finishing the Ceiling
Painting or finishing the ceiling is a crucial step in the basement ceiling covering process. It adds the final touch to your project, enhancing the overall look and feel of the space. Follow these steps to ensure a successful painting or finishing process:
1. Prepare the Surface: Before painting or finishing, make sure the ceiling surface is clean and free of any dust, debris, or imperfections. Use a broom or vacuum to remove any loose particles, and wipe down the surface with a damp cloth if necessary. Repair any cracks, holes, or uneven areas with spackling compound or joint compound, and sand them smooth after the compound has dried.
2. Choose the Right Paint or Finish: Select a paint or finish that is suitable for your basement ceiling and matches the desired aesthetic. Consider factors such as moisture resistance, durability, and ease of maintenance. Depending on the material used to cover the ceiling (e.g., drywall, paneling, or drop ceiling tiles), certain paints or finishes may be more appropriate than others. Consult with a professional or a paint specialist at your local home improvement store for guidance.
3. Prime the Surface (If Necessary): Depending on the condition of the ceiling and the type of paint or finish you’re using, priming may be necessary. Primer helps to create a smooth surface, enhances paint adhesion, and ensures a more consistent finish. Apply a coat of primer using a roller or brush, and let it dry completely before moving on to the next step.
4. Apply the Paint or Finish: Once the surface is properly prepared, it’s time to apply the paint or finish. Begin by cutting in along the edges of the ceiling using a brush, and then use a roller to apply the paint or finish to the larger areas. Work in small sections, maintaining a wet edge to avoid visible brush or roller marks. Apply additional coats as needed, allowing sufficient drying time between coats.
5. Consider Texture Options: If you want to add texture to the ceiling, there are various techniques you can employ. For example, you can use a textured roller or apply a textured paint to create a unique and visually appealing surface. Experiment with different textures and techniques to achieve the desired effect.
6. Pay Attention to Lighting: Consider how lighting will interact with the painted or finished ceiling. The paint color or finish sheen can affect how light is reflected in the space. Test the lighting under different conditions (natural and artificial) to ensure that the chosen color or finish complements the overall ambiance of the basement.
7. Touch Up and Inspect: After the paint or finish has completely dried, carefully inspect the ceiling for any missed spots, streaks, or imperfections. Touch up any areas that require attention, using a small brush or roller to blend the touch-up seamlessly with the rest of the ceiling.
By following these steps, you can achieve a beautifully painted or finished basement ceiling that enhances the overall aesthetics and creates a cohesive look within the space.
Step 9: Adding Lighting Fixtures
Adding lighting fixtures to your basement ceiling is a crucial step in creating a functional and well-lit space. Proper lighting enhances the atmosphere, increases visibility, and adds a finishing touch to your basement renovation. Follow these steps to successfully add lighting fixtures to your covered basement ceiling:
1. Plan the Lighting Layout: Start by determining the locations and types of lighting fixtures you want to install. Consider the purpose and function of the space, and create a lighting plan that ensures adequate illumination for each area. Take into account factors such as ceiling height, desired ambiance, and the tasks performed in each area.
2. Consult a Professional: If you’re not experienced in electrical work, it’s advisable to consult with a professional electrician. They will ensure the safe installation of the lighting fixtures, provide expert advice on wiring requirements, and ensure compliance with building codes and safety standards.
3. Install Junction Boxes: Install junction boxes in the predetermined locations for each lighting fixture. Junction boxes serve as a connecting point for the fixture’s wiring and provide support for the fixture itself. Ensure that the junction boxes are securely attached to the ceiling.
4. Run Electrical Wiring: Run electrical wiring from the main electrical panel to the junction boxes. This step requires knowledge of electrical wiring or assistance from a qualified electrician. It’s crucial to follow local electrical codes and safety guidelines to ensure a safe and efficient electrical connection.
5. Install Lighting Fixtures: Once the wiring is in place, it’s time to install the lighting fixtures. Follow the manufacturer’s instructions for each specific fixture. Some fixtures may require additional mounting hardware, such as brackets or screws. Ensure that the fixtures are securely attached to the junction boxes and aligned correctly.
6. Test the Lighting: After the installation, test each lighting fixture to ensure proper functionality. Turn on the power and check that all fixtures are working as intended. If any issues arise, seek professional assistance to diagnose and resolve any electrical problems.
7. Consider Dimmers and Controls: To enhance the flexibility and ambiance of your lighting, consider installing dimmers or lighting controls. Dimmers allow you to adjust the brightness of the lights, while controls enable you to control multiple fixtures or create lighting scenes to suit different moods or activities.
8. Ensure Proper Insulation: Make sure that all wiring connections are properly insulated and secured. Ensure that any exposed electrical wire is covered by electrical tape or enclosed in conduit to prevent accidents or damage.
Proper lighting is essential for transforming your covered basement ceiling into a functional and inviting space. By following these steps, you can safely and effectively add lighting fixtures that enhance the overall ambiance and functionality of your basement.
Step 10: Additional Tips and Considerations
As you near the completion of your basement ceiling covering project, there are some additional tips and considerations to keep in mind to ensure a successful and satisfying outcome. These tips will help you add the final touches and address any potential challenges that may arise:
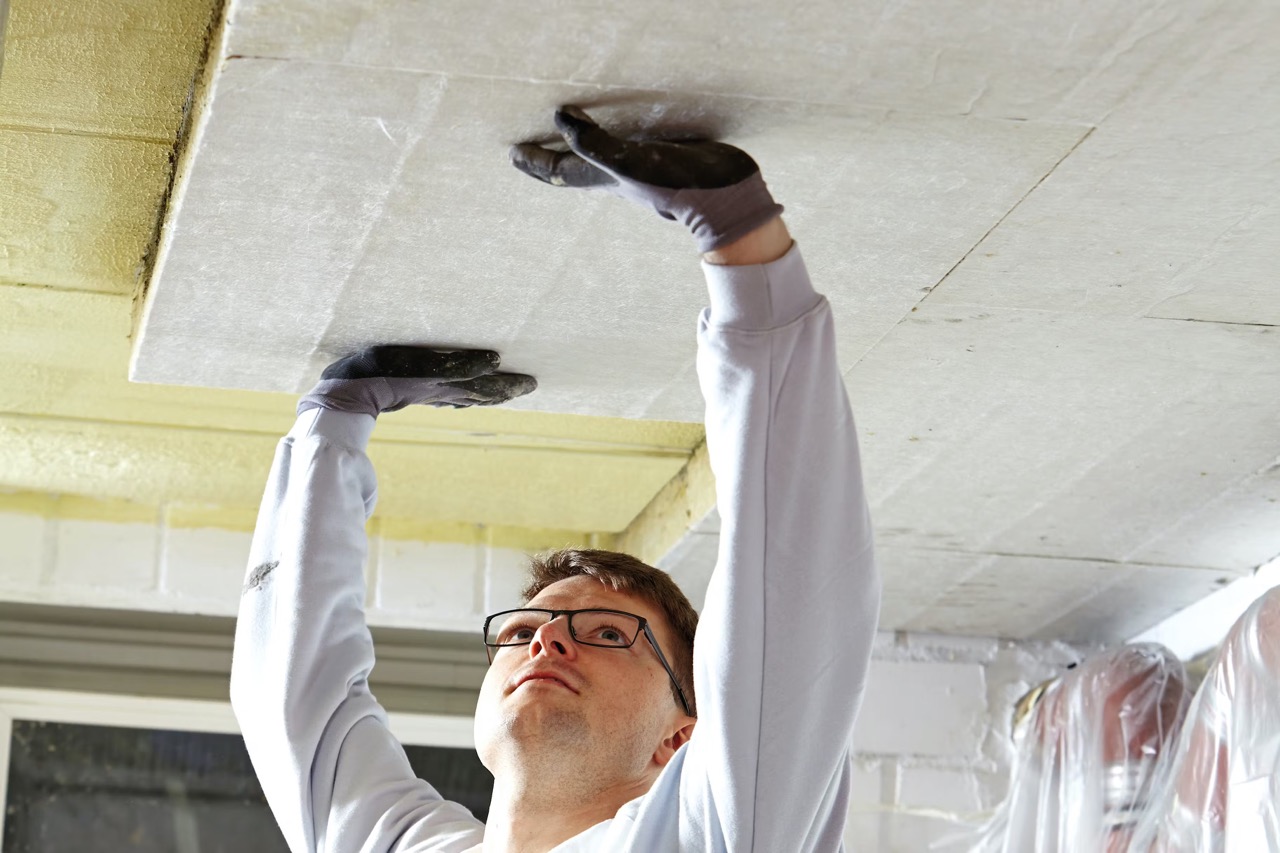
1. Consider Acoustic Insulation: If noise reduction is a priority, consider adding acoustic insulation to your basement ceiling. Soundproofing materials, such as insulation boards or acoustic panels, can help minimize noise transmission from the floors above and create a more peaceful environment.
2. Incorporate Access Panels: Depending on the covering material you choose, it may be beneficial to incorporate access panels for easy access to utilities, such as plumbing or electrical systems. Access panels can be discreetly integrated into the ceiling design and provide convenient maintenance or repair access.
3. Pay Attention to Fire Safety: Ensure that your chosen covering materials comply with fire safety regulations. Some materials may have fire-resistant properties or require additional fireproofing measures. Consult local building codes and regulations to ensure compliance.
4. Evaluate Ventilation and HVAC: Consider how your covered basement ceiling may impact ventilation and HVAC systems. Ensure that airflow is not obstructed by covering materials and that vents and ducts are properly positioned and maintained for optimal air circulation.
5. Enhance Insulation and Energy Efficiency: Depending on your climate and energy efficiency goals, consider adding additional insulation to the basement ceiling. Proper insulation can help regulate temperature, reduce energy consumption, and improve overall comfort in the basement space.
6. Maintain Access to Utilities: Regardless of the covering option you choose, it’s crucial to maintain access to essential utilities. Label or document the locations of shut-off valves, electrical panels, or any other utility connections for easy identification and accessibility in case of emergencies or maintenance needs.
7. Test for Moisture and Mold: Before covering your basement ceiling, conduct a thorough inspection for any signs of moisture or mold. Address any existing issues and ensure that the environment is dry and free from mold to prevent future damage or health concerns.
8. Anchor Heavy Fixtures Securely: If you plan to hang heavy fixtures, such as chandeliers or ceiling fans, make sure they are anchored securely to the ceiling structure. Use appropriate hardware and follow the manufacturer’s instructions to ensure stability and safety.
9. Add Personal Touches: Finally, don’t forget to add personal touches to your covered basement ceiling. Incorporate decorative elements, such as pendant lights, artwork, or faux finishes, to reflect your unique style and create a welcoming space.
By considering these additional tips and factors, you can ensure a successful and well-executed basement ceiling covering project. Enjoy the process and the transformation of your basement into a functional and inviting space that adds value and comfort to your home.
Conclusion
Covering your basement ceiling is a transformative project that can turn a neglected and unfinished space into a functional and visually appealing part of your home. By following the steps outlined in this guide, you can successfully cover your basement ceiling, creating a polished and inviting atmosphere while addressing practical considerations.
From assessing the current condition of your basement ceiling to determining the desired look and choosing the right materials, each step plays a vital role in the overall success of the project. Properly preparing the ceiling, whether it’s cleaning, repairing, or rerouting utilities, ensures a smooth installation process and a long-lasting outcome.
Whether you choose to install a drop ceiling, drywall, paneling, or embrace the industrial charm of exposed pipes and beams, the selection of materials greatly influences the final look and feel of your covered basement ceiling. Consider factors such as durability, maintenance, and compatibility with the overall design of your home.
Additionally, concealing pipes and wires, painting or finishing the ceiling, and adding lighting fixtures contribute to the functionality and aesthetics of your basement space. Attention to detail and adherence to safety guidelines are paramount throughout these steps to ensure a successful outcome.
As you complete the project, remember to consider additional tips and considerations, such as acoustic insulation, fire safety, ventilation, and maintenance access. These factors ensure a well-rounded and sustainable basement ceiling covering that meets your specific needs and goals.
The completion of your basement ceiling covering project is an exciting achievement that reflects your vision and creativity. Take pride in the transformation and enjoy the newfound functionality and beauty of your covered basement ceiling.
Now it’s time to step back, relax, and make the most of your newly renovated basement – whether it’s a welcoming entertainment space, a productive home office, or an inviting living area, your covered basement ceiling will serve as the foundation for years of enjoyment and comfort.
Frequently Asked Questions about How To Cover A Basement Ceiling
Was this page helpful?
At Storables.com, we guarantee accurate and reliable information. Our content, validated by Expert Board Contributors, is crafted following stringent Editorial Policies. We're committed to providing you with well-researched, expert-backed insights for all your informational needs.


0 thoughts on “How To Cover A Basement Ceiling”