Articles
How To Cover Basement Ceiling
Modified: October 28, 2024
Learn how to cover your basement ceiling with our informative articles. Create a more stylish and functional space with our step-by-step guides and expert tips.
(Many of the links in this article redirect to a specific reviewed product. Your purchase of these products through affiliate links helps to generate commission for Storables.com, at no extra cost. Learn more)
Introduction
When it comes to home renovation projects, the basement often takes a backseat. However, with a little bit of imagination and effort, this often overlooked space can be transformed into a functional and appealing area of your home. One aspect of basement renovation that can make a significant impact is covering the basement ceiling.
There are several reasons why you might want to cover your basement ceiling. First and foremost, it’s a matter of aesthetics. Exposed ductwork, pipes, and electrical wires can make a basement feel unfinished and uninviting. By covering the ceiling, you can create a clean and polished look that adds to the overall appeal of the space.
Another benefit of covering the basement ceiling is insulation. Since basements are typically colder than the rest of the house, adding insulation to the ceiling can help regulate the temperature and make the space more comfortable. Insulation also aids in energy efficiency, reducing heating and cooling costs.
Noise reduction is another consideration when covering the basement ceiling. Whether you plan to use the basement as a recreational area, a home office, or a guest room, reducing noise from the floors above can enhance the usability of the space.
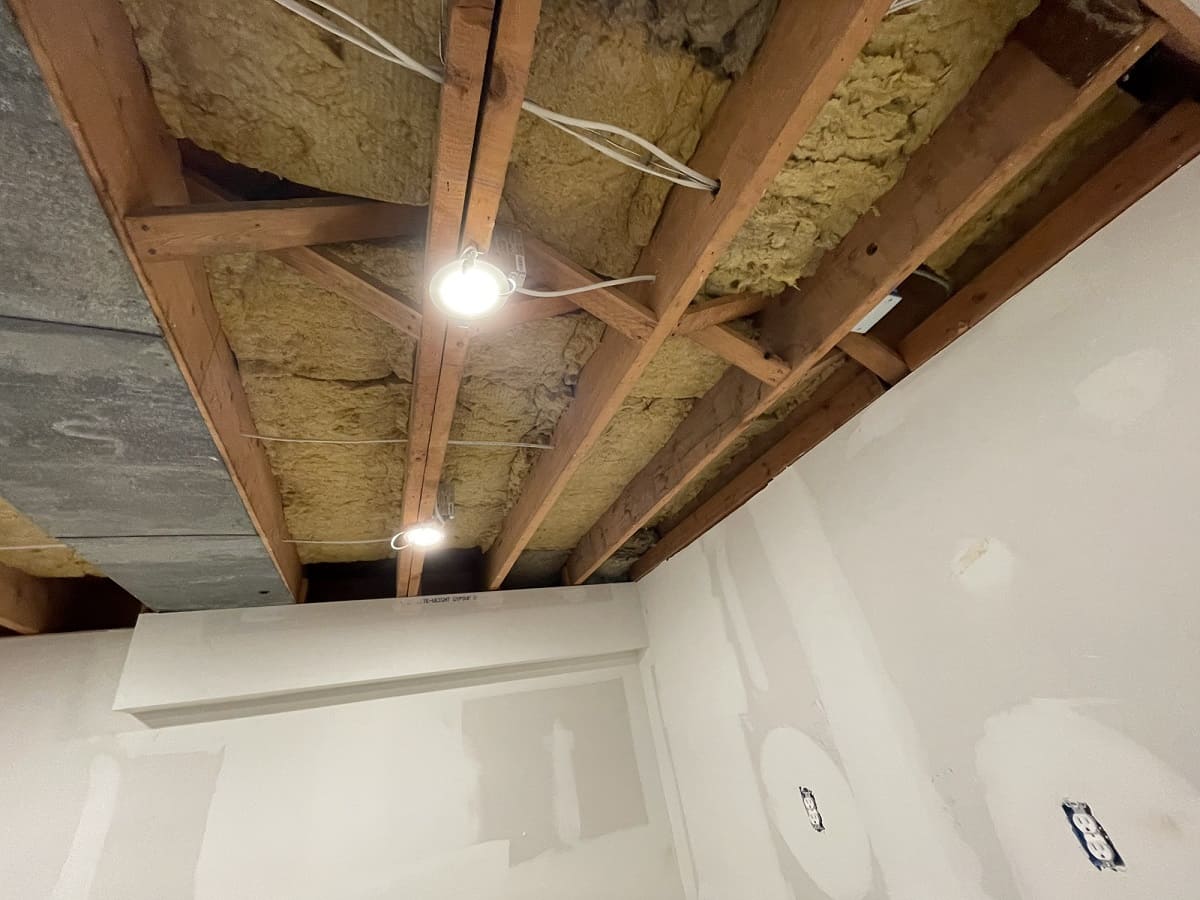
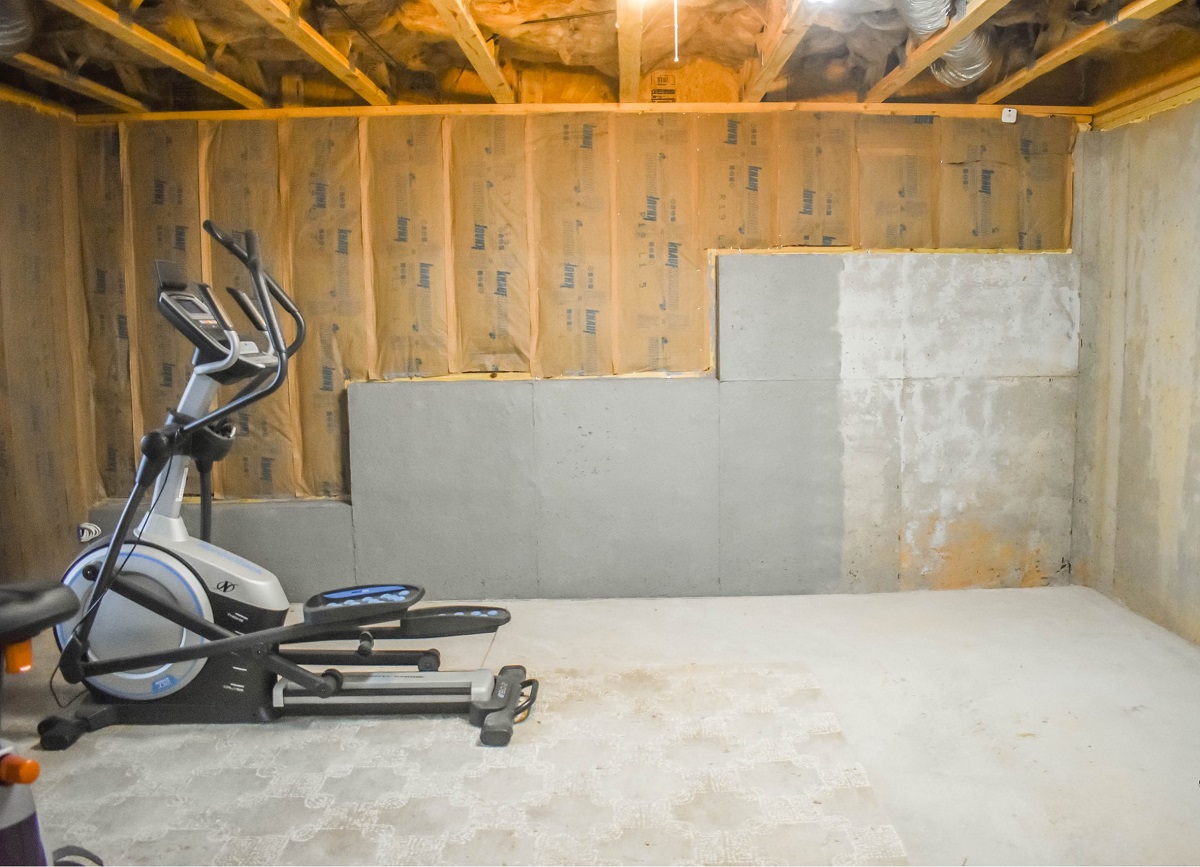
Before you embark on covering your basement ceiling, it’s essential to assess the condition of the existing ceiling. Inspect for any signs of damage, such as leaks or mold. Addressing these issues before covering the ceiling will ensure a solid foundation for your project.
Measuring the ceiling height and layout is another crucial step. This information will help you determine the best approach for covering your basement ceiling, considering factors such as available headroom and the placement of light fixtures or ventilation systems.
Once you’ve assessed your basement ceiling and have a clear understanding of your requirements, the next step is choosing the right ceiling coverings. There are various options to consider, each with its own advantages and style:
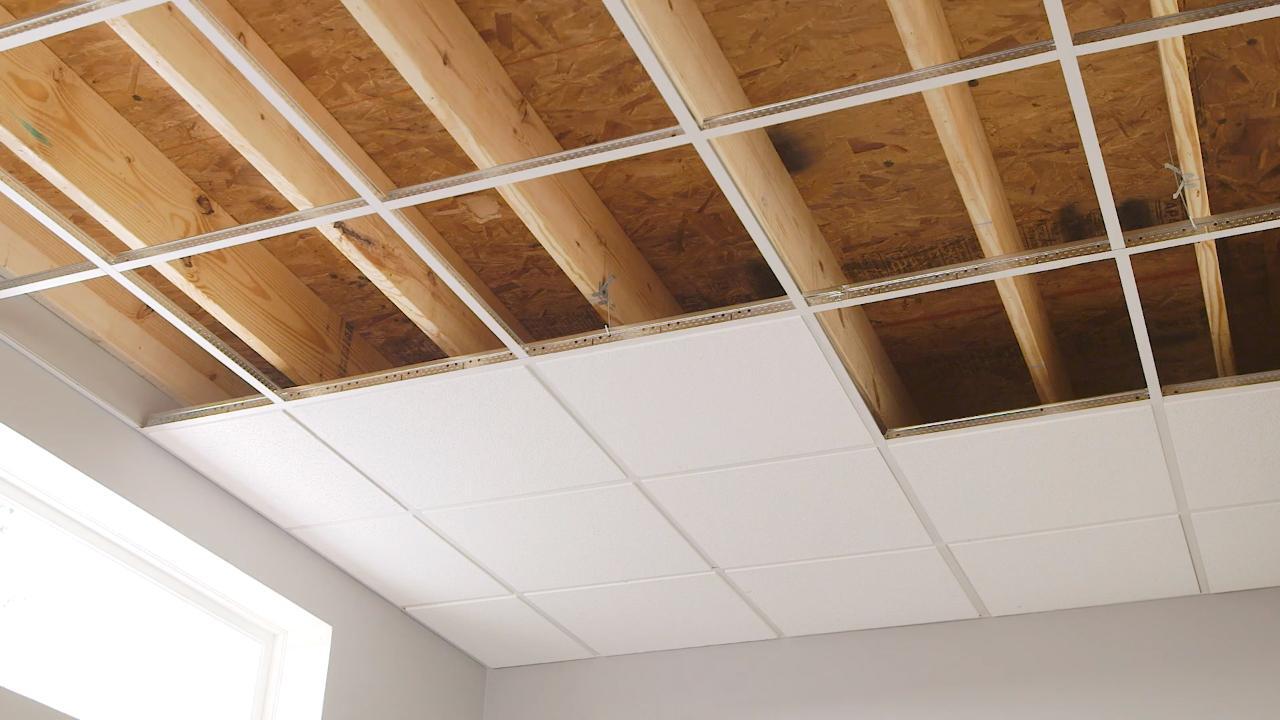
- Suspended ceiling tiles: Also known as drop ceilings, these consist of a grid framework that holds individual ceiling tiles. They offer easy access to utilities while providing a clean and finished look.
- Drywall: A popular choice for basement ceilings, drywall provides a seamless and polished finish. It requires advanced DIY skills or professional installation.
- Beadboard: This type of covering adds a classic and rustic touch to your basement ceiling. It’s relatively easy to install and can be painted or stained to match your desired aesthetic.
- Paneling: Similar to beadboard, paneling can be used to cover the basement ceiling and offers a variety of design options. It’s a cost-effective choice that can be installed with basic tools and skills.
Once you’ve chosen the right ceiling covering for your basement, you’ll need to prepare for the installation process. Start by clearing the basement space, removing any existing fixtures, and taking inventory of any repairs that need to be done. This preparation will ensure a smooth and efficient installation.
In the upcoming sections, we’ll explore the step-by-step process for installing various types of basement ceiling coverings, including suspended ceilings, drywall, beadboard, and paneling. We’ll also discuss finishing touches, such as painting or staining, and additional considerations such as lighting fixture installation and dealing with HVAC and other obstacles. By the end of this guide, you’ll have all the knowledge and inspiration you need to transform your basement ceiling into a stunning feature of your home.
Key Takeaways:
- Transform your basement into a functional and inviting space by covering the ceiling. Enhance aesthetics, insulation, and noise reduction while choosing from options like suspended ceiling tiles, drywall, beadboard, or paneling.
- Assess your basement ceiling for damage, measure accurately, and choose the right covering material. Prepare the space, follow installation steps, and add finishing touches for a stunning and practical basement ceiling transformation.
Read more: How To Cover Insulation In Basement Ceiling
Reasons to cover a basement ceiling
When it comes to renovating your basement, one area that often gets overlooked is the ceiling. However, covering your basement ceiling can have several benefits that make it a worthwhile project. Let’s explore some of the key reasons why you should consider covering your basement ceiling:
- Aesthetics: One of the primary reasons to cover your basement ceiling is aesthetics. Unfinished basements with exposed ductwork, pipes, and electrical wires can give a cold and unfinished look to the space. By covering the ceiling, you can create a clean and polished appearance, transforming your basement into an inviting and usable area. Whether you opt for suspended ceiling tiles, drywall, beadboard, or paneling, each option can enhance the overall aesthetic appeal of your basement.
- Insulation: Another significant benefit of covering your basement ceiling is insulation. Basements tend to be colder than the rest of the house due to their below-ground location. By adding insulation to the ceiling, you can help regulate the temperature and make your basement more comfortable. Insulated ceilings also contribute to energy efficiency by reducing heat loss in the winter and heat gain in the summer, reducing your heating and cooling costs.
- Noise reduction: If you plan to use your basement as a recreational area, home office, or guest room, noise reduction becomes crucial. By covering your basement ceiling, you can significantly reduce noise from the floors above. This is especially beneficial if you have a busy household or if you often host gatherings in your basement. Whether it’s the sound of footsteps, music, or conversations, a covered ceiling can provide a more peaceful and quiet environment in your basement.
By considering these reasons, you can see that covering your basement ceiling is much more than just a cosmetic upgrade. It brings practical advantages like enhanced insulation and noise reduction, while also providing a visually appealing and finished look to your basement. So, if you want to create a cozy, inviting, and functional space, covering your basement ceiling is a step in the right direction.
Assessing your basement ceiling
Before you can begin the process of covering your basement ceiling, it’s important to assess the condition of the existing ceiling and take measurements to ensure a smooth and successful installation. Here are two critical steps to follow when assessing your basement ceiling:
- Inspecting for damage: Start by thoroughly inspecting your basement ceiling for any signs of damage. Look for cracks, water stains, mold, or any other issues that could affect the integrity of the ceiling or cause future problems. It’s crucial to address any existing damage before proceeding with the covering process to prevent further issues down the line. Consult with a professional if you discover significant damage that requires repair or replacement.
- Measuring ceiling height and layout: After ensuring that the ceiling is structurally sound, it’s time to measure the height and layout of the basement ceiling. This step is crucial, as it will help you determine the best approach for covering the ceiling and ensure that there is enough headroom for comfortable use of the space. Measure the distance from the floor to the ceiling at various points to account for any variations in height. Additionally, take note of the position of light fixtures, ventilation systems, and any other obstacles that may impact the installation process. These measurements will guide you in selecting the appropriate covering materials and help you plan the layout for a seamless installation.
By inspecting your basement ceiling for damage and taking accurate measurements, you can address any existing issues and determine the best way to cover your basement ceiling. This careful assessment will help you avoid potential problems during the installation process and ensure that your finished basement ceiling is both visually appealing and structurally sound.
Choosing the right ceiling coverings
Once you have assessed your basement ceiling and are ready to cover it, the next step is choosing the right type of ceiling covering. Various options are available, each with its own advantages and style. Here are some popular choices to consider:
- Suspended ceiling tiles: Also known as drop ceilings, suspended ceiling tiles are a popular choice for basement ceilings. They consist of a grid framework that holds individual ceiling tiles in place. Suspended ceilings offer several benefits, including easy access to utilities, soundproofing qualities, and a polished finish. They come in various materials, styles, and colors, allowing you to personalize the look of your basement. Additionally, suspended ceiling tiles are relatively easy to install, making them a practical choice for DIY enthusiasts.
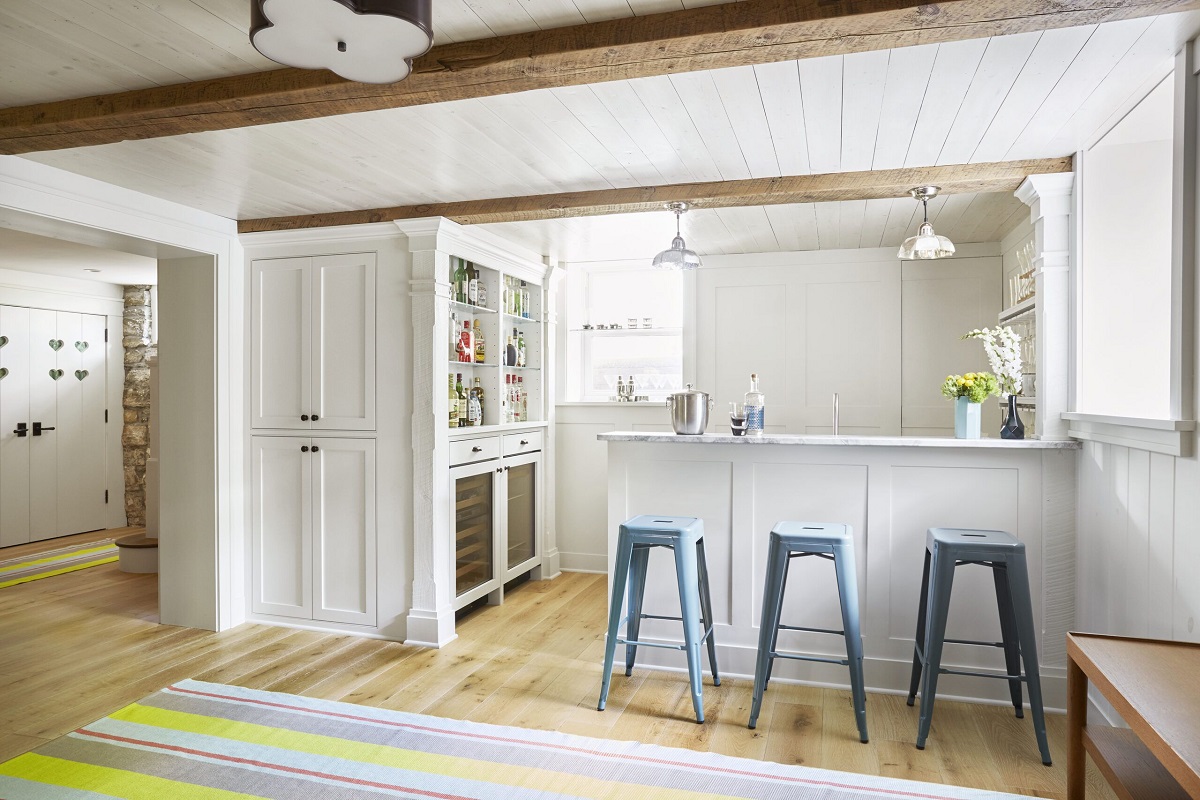
- Drywall: Drywall is a traditional and versatile choice for covering basement ceilings. It provides a seamless and polished finish, creating a clean and modern look. While drywall installation requires advanced DIY skills or professional assistance, it offers a timeless and professional appearance. Drywall can be painted, textured, or even adorned with decorative molding for added visual interest. Keep in mind that using drywall may slightly reduce the available headroom in your basement, so it’s essential to consider the ceiling height and available space before choosing this option.
- Beadboard: If you prefer a more rustic or cottage-style look, beadboard is an excellent choice for covering your basement ceiling. Made from narrow, tongue-and-groove boards, beadboard adds charm and character to the space. It can be painted or stained to match your desired aesthetic and is relatively easy to install. Beadboard also offers the option of installing strategic access panels to reach utilities if needed. This type of ceiling covering is perfect for creating a cozy and inviting atmosphere in your basement.
- Paneling: Paneling is another versatile option for covering basement ceilings. It comes in various materials, such as wood, PVC, or fiberboard, and offers a range of styles and designs to suit different preferences. Paneling is relatively easy to install and can be painted or left unpainted to create a unique and customized look. It is an affordable choice that can add texture and visual interest to your basement ceiling. Consider the style and theme of your basement space when choosing paneling to ensure a cohesive design.
When selecting the right ceiling covering for your basement, consider factors such as your desired aesthetic, the level of DIY skills required, the available headroom, and the overall functionality of the space. Each option has its own advantages and considerations, so take the time to explore different materials and designs to find the perfect fit for your basement ceiling.
Preparing for the installation process
Before you begin the installation of your chosen ceiling covering, it’s important to properly prepare the space. This preparation ensures a smooth and efficient installation process and helps to achieve the desired end result. Here are some essential steps to follow when preparing for the installation:
- Clearing the space: Start by clearing the basement area underneath the ceiling. Remove any furniture, storage items, or other belongings to provide ample space for the installation process. This step will also help protect your belongings from debris or damage during the installation.
- Removing existing fixtures: If there are any existing light fixtures, fans, or other fixtures attached to the ceiling, carefully remove them before covering the ceiling. This will prevent damage to the fixtures and make the installation process easier. Ensure that power to the fixtures is switched off before disconnecting and removing them. If you’re unsure about electrical work, it is recommended to consult a licensed electrician to safely handle the removal and reinstallation of fixtures.
- Repairing any damage: Take the time to inspect the ceiling for any damages or imperfections that need to be addressed before installation. Repair any cracks, holes, or water damage to ensure a smooth and even surface for the covering material. Use appropriate fillers, adhesives, or patching compounds to fix these issues. It’s vital to address any existing problems to prevent further damage or complications after the ceiling covering is installed.
By thoroughly clearing the space, removing existing fixtures, and repairing any damage, you set the stage for a successful installation and ensure a clean and polished look for your basement ceiling. This preparation work will help you achieve professional results and maximize the lifespan and performance of your chosen ceiling covering.
Consider using drop ceiling tiles or drywall to cover a basement ceiling. Drop ceiling tiles are easy to install and provide access to utilities, while drywall creates a seamless look.
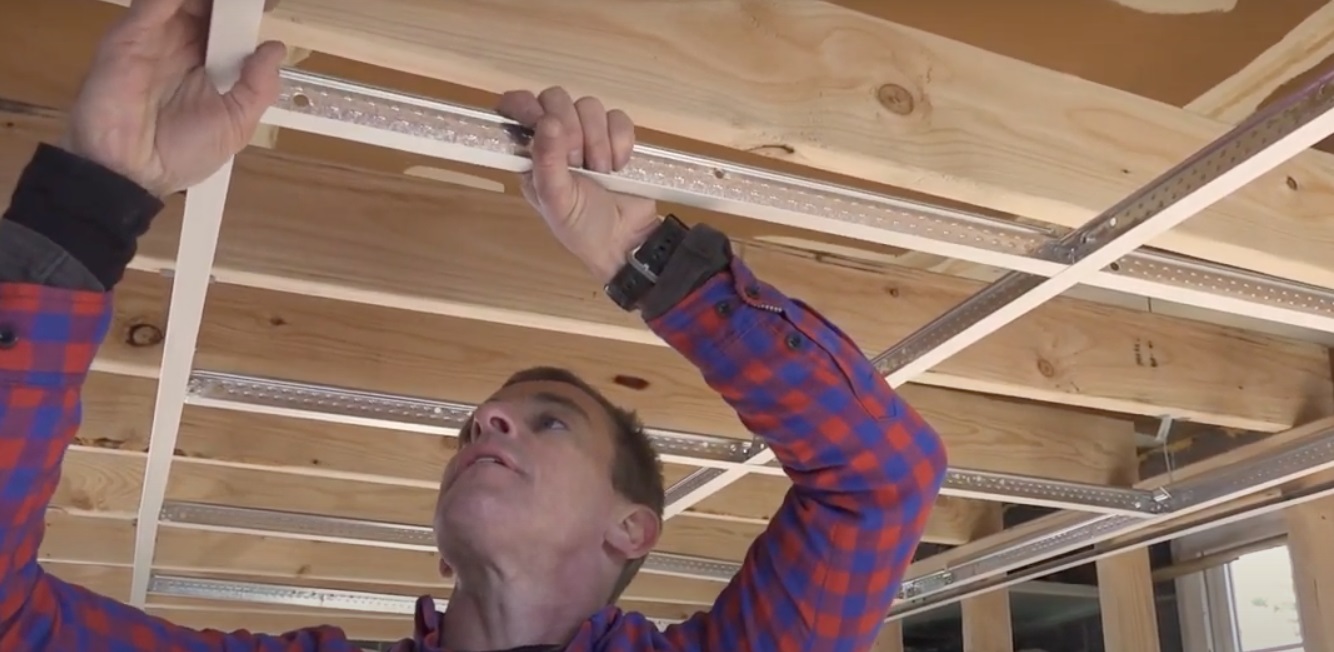
Installing a suspended ceiling
If you have chosen to install a suspended ceiling in your basement, follow these step-by-step instructions to ensure a successful installation:
- Measuring and marking the grid: Start by measuring and marking the layout of the grid on the walls. Determine the desired height of the ceiling and use a level to ensure accuracy. Mark the positions of the main runners and cross tees along the walls, ensuring they are evenly spaced. This step is crucial to establish a precise grid pattern for the suspended ceiling.
- Installing the main runners and cross tees: Begin by attaching the main runners to the walls using a suitable wall angle. Secure them with screws or nails, ensuring they align with the marked positions. Next, install the cross tees perpendicular to the main runners, fitting them into the slots. Use a level to ensure they are level and secure them with clips or hangers. The cross tees should fall into the grid pattern marked on the walls. Repeat this process until the entire grid is installed.
- Placing and securing the ceiling tiles: Once the grid is installed, it’s time to place the ceiling tiles. Start by inserting the tiles into the grid, ensuring they fit comfortably and are aligned with the surrounding tiles. If necessary, cut the tiles to fit using a utility knife or a specialized tile cutter. As you place each tile, ensure they are securely seated in the grid and properly supported by the main runners and cross tees. Continue this process until all the tiles are in place, creating a seamless and finished ceiling.
Installing a suspended ceiling requires accuracy and attention to detail. By carefully measuring and marking the grid, installing the main runners and cross tees correctly, and securely placing the ceiling tiles, you can achieve a professional-looking and functional suspended ceiling for your basement.
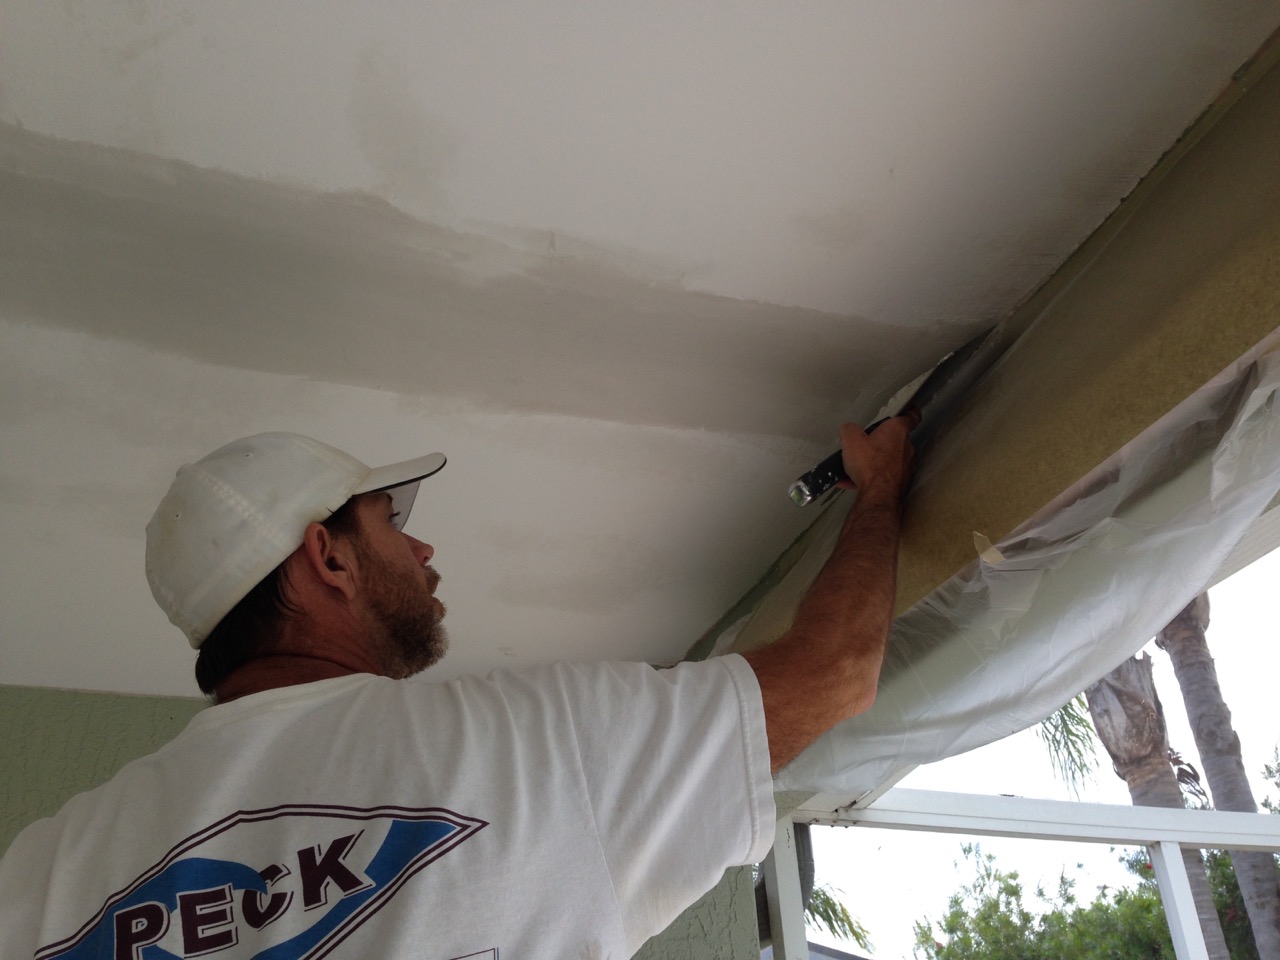
Installing drywall on a basement ceiling
If you have decided to use drywall to cover your basement ceiling, follow these steps to effectively install it:
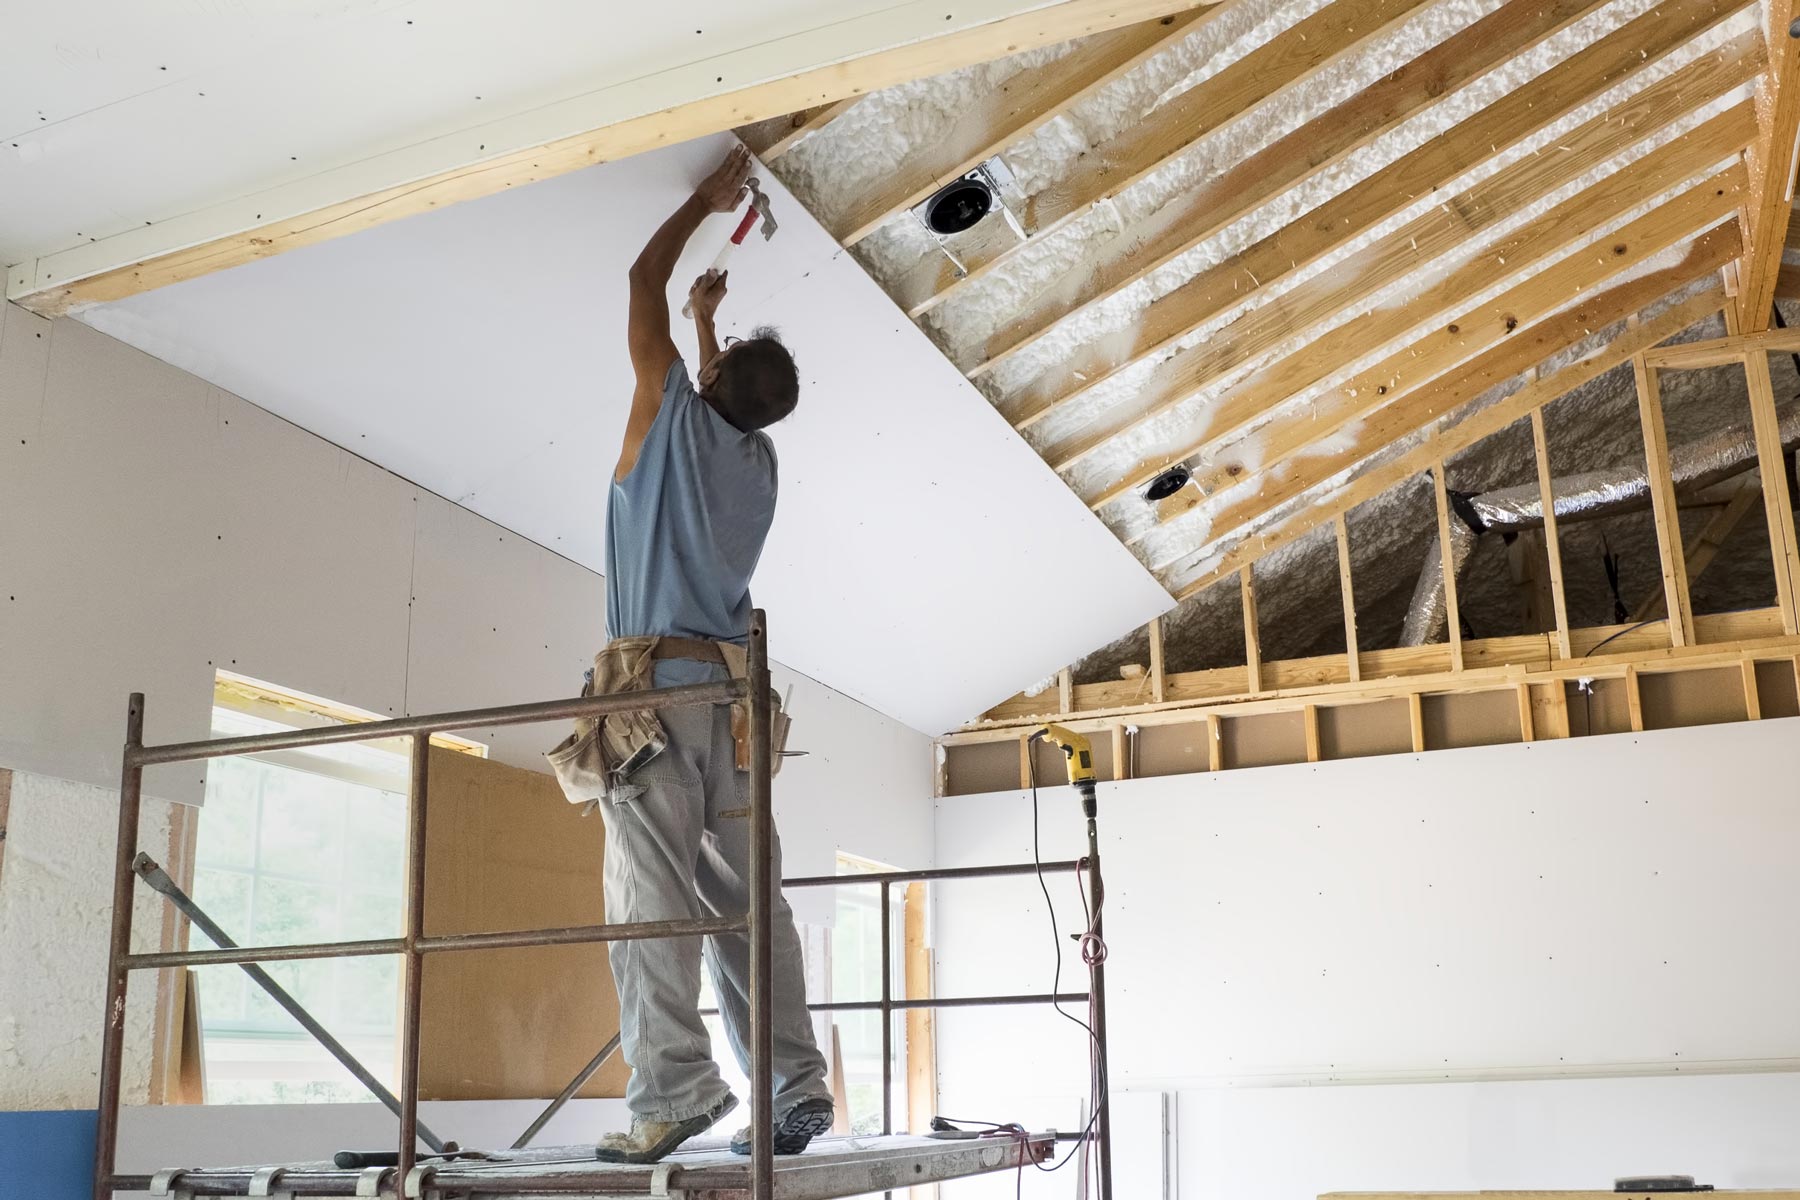
- Gathering necessary tools and materials: Before starting the installation, gather all the necessary tools and materials. This may include drywall sheets, a drywall saw or utility knife, a measuring tape, a screw gun or drill, drywall screws, and a ladder or scaffolding for reaching the ceiling.
- Measuring and cutting drywall sheets: Begin by accurately measuring the dimensions of the areas where the drywall sheets will be installed. Take into account any obstacles such as light fixtures or HVAC vents. Transfer those measurements onto the drywall sheets and use a drywall saw or utility knife to cut the sheets to the appropriate sizes. Be sure to wear protective eyewear and a dust mask when cutting drywall.
- Attaching the drywall to the ceiling: With the drywall sheets cut to size, it’s time to attach them to the ceiling. Start by holding the first sheet against the ceiling and use a drill or screw gun to secure it in place with drywall screws. Place screws along the edges and into the joists or furring strips above. Continue this process for each subsequent sheet, making sure to stagger the seams for added stability. Be mindful of any electrical wiring or other utilities, and make necessary cutouts to accommodate them if needed.
When attaching drywall to the ceiling, it’s important to ensure that it is properly secured and supported. Use enough screws to hold each sheet in place, while avoiding over-tightening, which can damage the drywall. Additionally, consider adding support in the form of furring strips or a drywall adhesive to help distribute the weight of the drywall and prevent sagging or cracking over time.
Remember to take appropriate safety precautions throughout the process, such as wearing goggles and a dust mask and using proper lifting techniques when handling heavy drywall sheets. By following these steps and taking necessary precautions, you can successfully install drywall on your basement ceiling, creating a seamless and polished finish.
Installing beadboard or paneling
If you have chosen to install beadboard or paneling to cover your basement ceiling, follow these steps for a successful installation:
- Preparing the surface: Start by preparing the surface of your basement ceiling. Ensure it is clean and free from any dust or debris. If there are any existing fixtures attached to the ceiling, remove them before installation. Repair any damage or imperfections on the ceiling to create a smooth and even surface.
- Measuring and cutting the panels: Take accurate measurements of the ceiling to determine the size of the beadboard or paneling panels needed. It’s important to carefully measure and mark the dimensions for each panel before cutting. Use a jigsaw, circular saw, or hand saw to make clean and precise cuts. Be sure to wear safety goggles and follow proper safety measures when using cutting tools.
- Attaching and finishing the panels: Once the panels are cut to size, it’s time to attach them to the ceiling. Apply an appropriate adhesive or use finishing nails to secure the panels in place. Follow the manufacturer’s instructions for the chosen adhesive or nail placement. Ensure that the panels are level and evenly spaced as you go along. Use a level to check for any inconsistencies and adjust as needed. If using beadboard, apply beadboard paneling adhesive to the backs of the panels before installation.
Once the panels are attached, you may need to fill any gaps or seams with caulk or a wood filler to create a seamless appearance. Sand any rough edges or imperfections before applying any finishing touches such as priming and painting or staining the beadboard or paneling. Consider using a paintable caulk or filler to match the chosen finish.
Installing beadboard or paneling on your basement ceiling can add a touch of style and texture to the space. By carefully preparing the surface, accurately measuring and cutting the panels, and securely attaching and finishing the panels, you can achieve a visually appealing and finished look for your basement ceiling.
Finishing touches and additional considerations
Once you have installed the desired ceiling covering in your basement, there are a few finishing touches and additional considerations that can further enhance the overall look and functionality of the space. Let’s explore these final steps:
- Painting or staining: Depending on the material you have chosen for your basement ceiling, you may want to consider painting or staining it to achieve the desired look. For materials like drywall, beadboard, or paneling, applying a fresh coat of paint or stain can bring a cohesive and polished appearance to the entire space. Choose a color or finish that complements the overall theme and style of your basement. Be sure to allow adequate drying time before using the space.
- Installing lighting fixtures: Adequate lighting is essential for transforming your basement into a functional and inviting area. Consider installing recessed lights, pendant lights, or track lighting to provide ample illumination throughout the space. Plan the placement of the fixtures carefully, taking into account the layout of the basement and the location of any existing electrical wiring. Consult with a licensed electrician to ensure safe installation of the lighting fixtures.
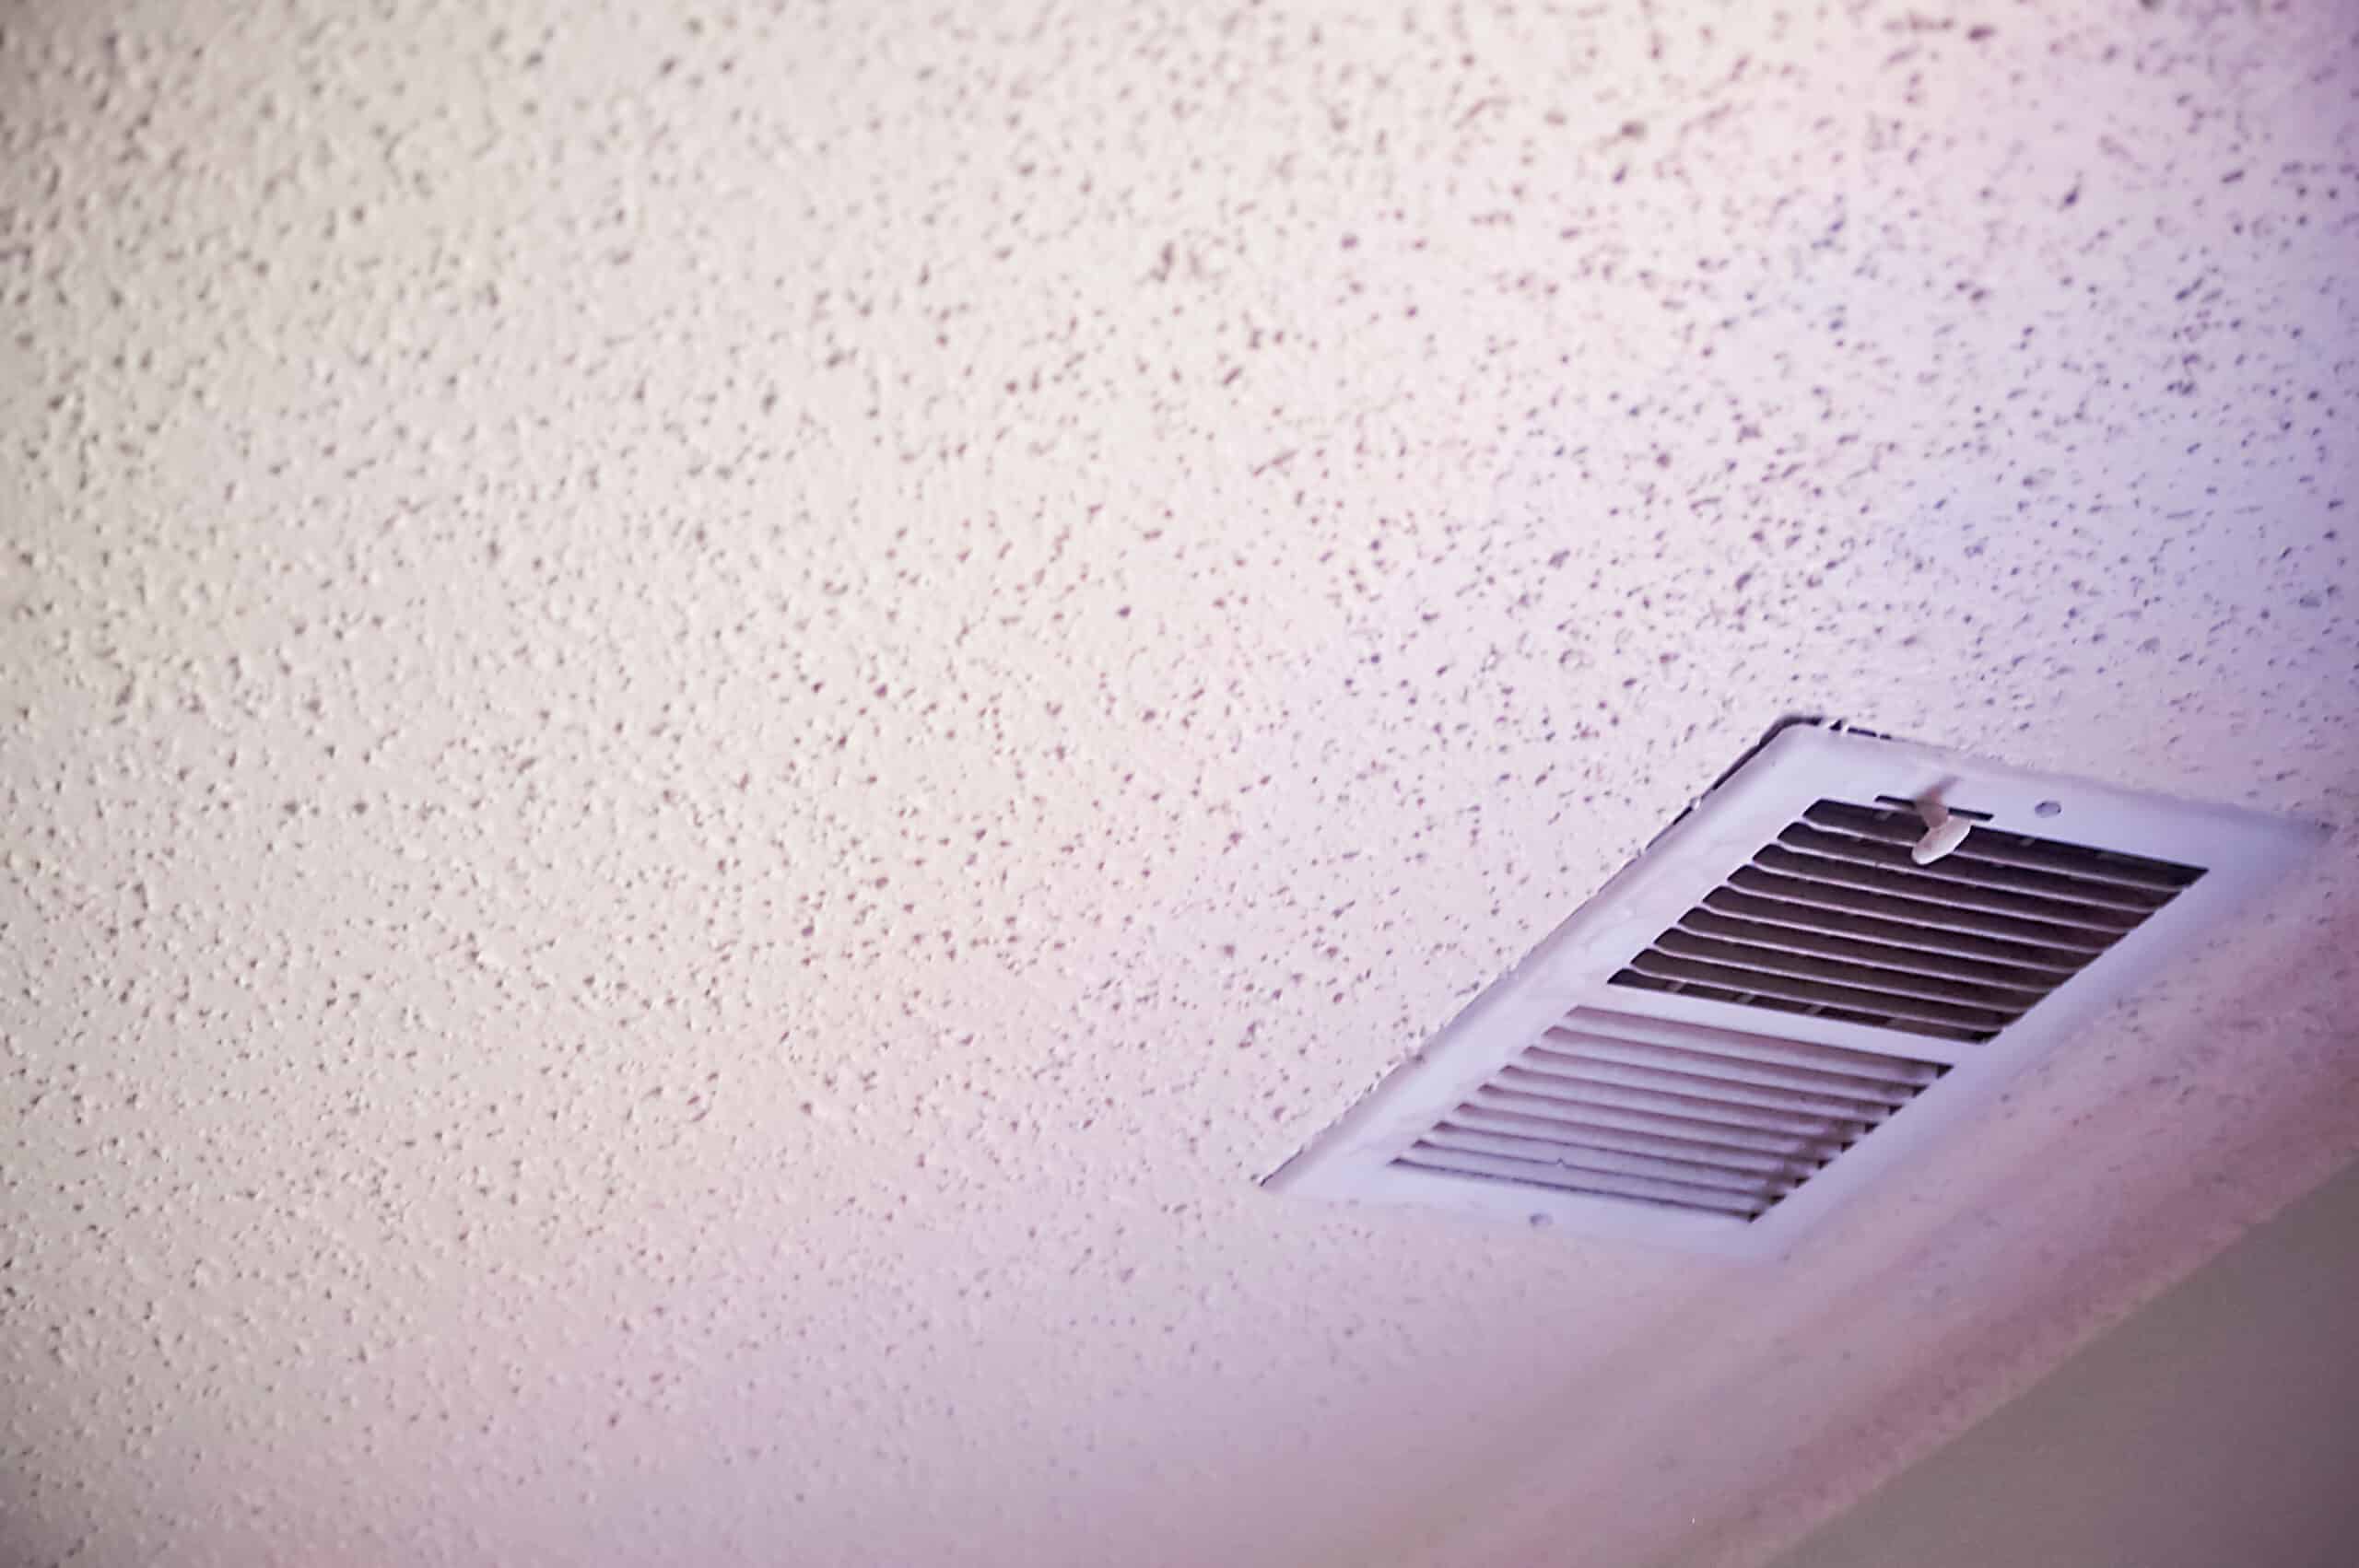
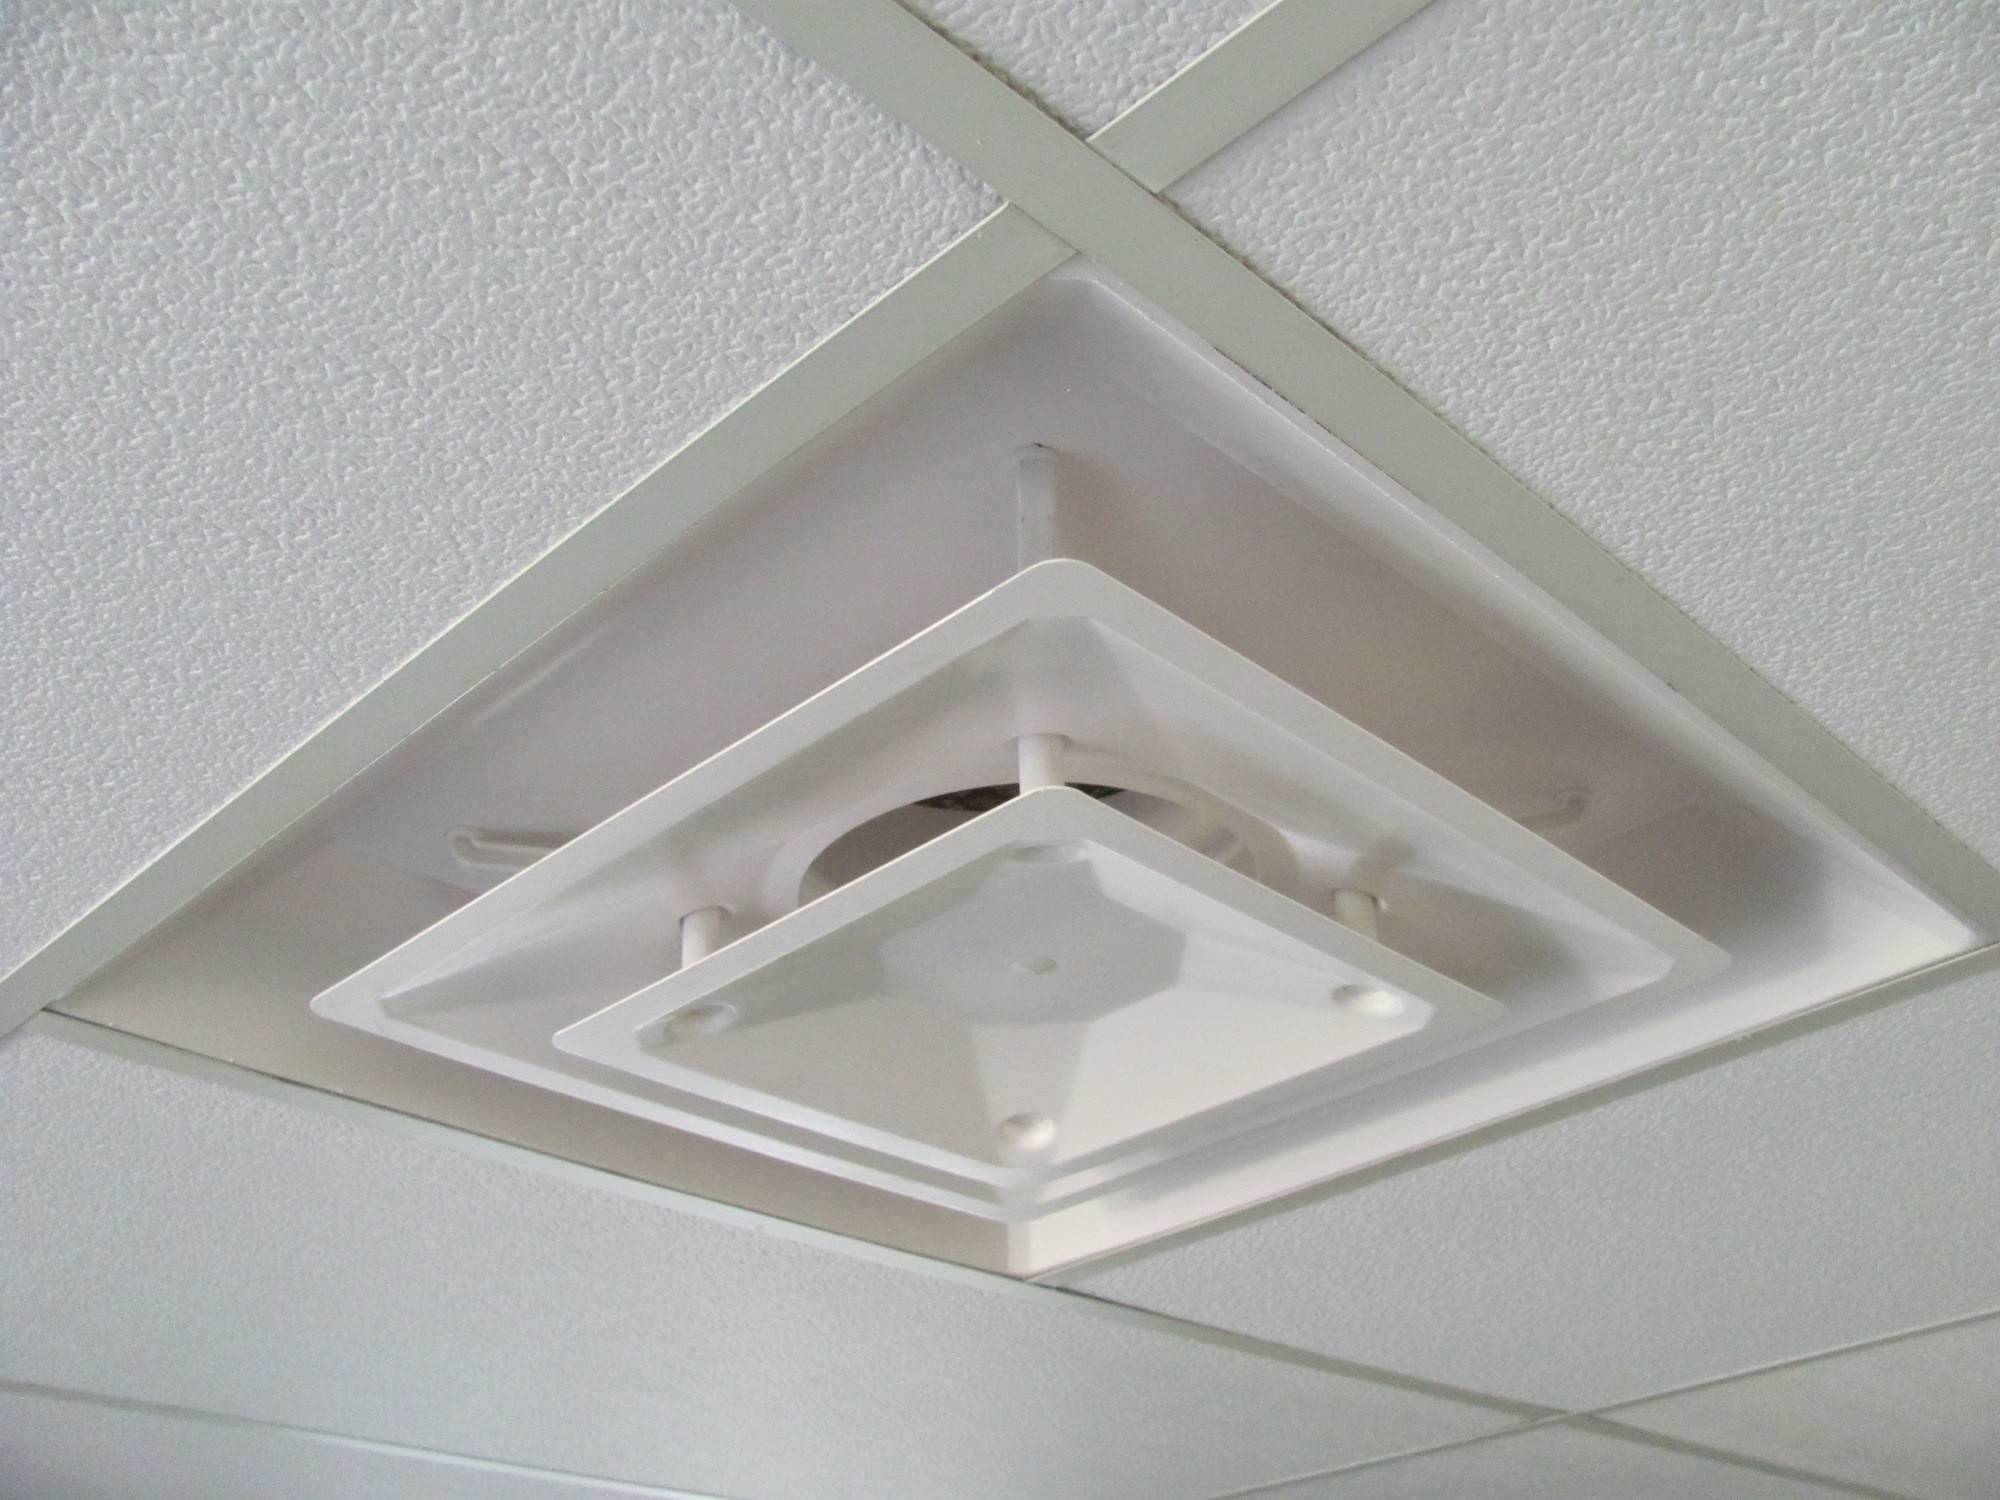
- Dealing with HVAC and other obstacles: Basements often house utility systems such as HVAC ducts, pipes, and electrical wirings. When covering the ceiling, it’s important to consider these obstacles and make necessary accommodations. Ensure that the covering material allows access to the utilities if needed for maintenance or repair. Strategically cut or install access panels to provide convenient access while maintaining the overall aesthetics of the space. Consult with professionals if you are uncertain about dealing with specific obstacles.
These finishing touches and additional considerations can greatly contribute to the overall functionality and visual appeal of your basement ceiling. By painting or staining the covering material, installing suitable lighting fixtures, and addressing obstacles like HVAC systems, you can create a cohesive and comfortable space that reflects your personal style.
Remember to consult relevant professionals, such as electricians or contractors, for any advanced wiring or construction work to ensure safety and compliance with building codes. With careful attention to these final details, you can fully transform your basement ceiling into a functional and visually appealing part of your home.
Read more: How To Cover Basement Pole
Conclusion
Covering your basement ceiling is a transformative project that can enhance the aesthetics, insulation, and noise reduction in your basement. By assessing your basement ceiling, choosing the right ceiling covering, preparing the space, and installing the chosen material, you can create a finished and inviting space that adds value to your home.
Whether you opt for suspended ceiling tiles, drywall, beadboard, or paneling, each option has its own advantages and style. Consider factors such as your desired aesthetic, DIY skills, available headroom, and overall functionality to select the best option for your basement ceiling covering.
Before installation, it is essential to inspect the ceiling for any damage and measure the height and layout of the space. This ensures a solid foundation for the covering and helps you plan the installation process effectively.
Throughout the installation, follow the specific instructions for the chosen ceiling covering. Securely attach the materials, ensuring they are level, well-spaced, and properly supported. Take necessary precautions and wear appropriate safety gear when cutting and handling materials.
Once the covering is installed, consider adding finishing touches such as painting or staining to achieve the desired look. Installing lighting fixtures and addressing obstacles like HVAC systems further enhance the functionality and appeal of your basement ceiling.
In conclusion, covering your basement ceiling is a worthwhile endeavor that can significantly transform your basement space. By carefully considering the options, preparing the space, and following the installation process, you can achieve a finished and inviting basement that adds value and enjoyment to your home for years to come.
Frequently Asked Questions about How To Cover Basement Ceiling
Was this page helpful?
At Storables.com, we guarantee accurate and reliable information. Our content, validated by Expert Board Contributors, is crafted following stringent Editorial Policies. We're committed to providing you with well-researched, expert-backed insights for all your informational needs.


0 thoughts on “How To Cover Basement Ceiling”