Articles
How To Paint Your Stairs
Modified: December 7, 2023
Learn how to transform your stairs with our step-by-step articles on painting. Get expert tips and advice to achieve stunning results.
(Many of the links in this article redirect to a specific reviewed product. Your purchase of these products through affiliate links helps to generate commission for Storables.com, at no extra cost. Learn more)
Introduction
Painting your stairs can be a simple and cost-effective way to transform the look of your home. Whether you want to freshen up the existing paint or completely change the color, a fresh coat of paint can breathe new life into your staircase.
However, painting stairs requires careful preparation and execution to achieve the desired results. In this article, we will guide you through the step-by-step process of painting your stairs, from preparation to adding a protective finish.
By following these instructions, you can create a stylish and durable finish that will withstand daily wear and tear.
Before you begin, gather all the necessary materials, including paint, primer, sandpaper, paintbrushes, and a drop cloth to protect your floors. Additionally, make sure you have proper ventilation in the area where you will be working.
Now, let’s dive into the step-by-step process of painting your stairs and creating a stunning focal point in your home!
Key Takeaways:
- Transform your home with a stylish and durable staircase by following the step-by-step process of painting your stairs. From preparation to protective finish, create a stunning focal point with professional-looking results.
- Choose high-quality materials, consider color and finish, and allow sufficient drying time to achieve long-lasting and beautiful painted stairs. Enjoy the rewarding journey of transforming your home with a fresh and vibrant staircase.
Read more: How To Paint Basement Stairs
Step 1: Preparing the Stairs
Before you start painting your stairs, you need to prepare them properly to ensure a smooth and long-lasting finish. Here’s how:
- Clear the area: Start by removing any furniture, rugs, or obstacles near the stairs. This will give you ample space to work and prevent any accidental paint spills or damage to your belongings.
- Protect your surroundings: Use drop cloths or plastic sheets to cover the floors, walls, and any other adjacent surfaces to protect them from paint splatters.
- Remove the carpet: If your stairs are carpeted, you will need to remove the carpet before painting. Carefully lift the carpet from one corner and roll it up. Dispose of it properly or, if it’s in good condition, consider donating or repurposing it.
- Inspect the stairs: Take a close look at the condition of the stairs. Look for any loose or damaged boards, cracks, or uneven surfaces. If you notice any issues, address them before proceeding with the paint job. Tighten loose boards, repair cracks, and sand down any rough spots.
- Fill in gaps and holes: Fill any gaps, holes, or dents in the stairs with wood putty or filler. Use a putty knife to apply the filler and smooth it out. Let it dry completely before moving on to the next step.
By properly preparing your stairs, you’re creating a solid foundation for the paint and ensuring a professional-looking result. Once you have completed these steps, you’re ready to move on to the next stage of the painting process.
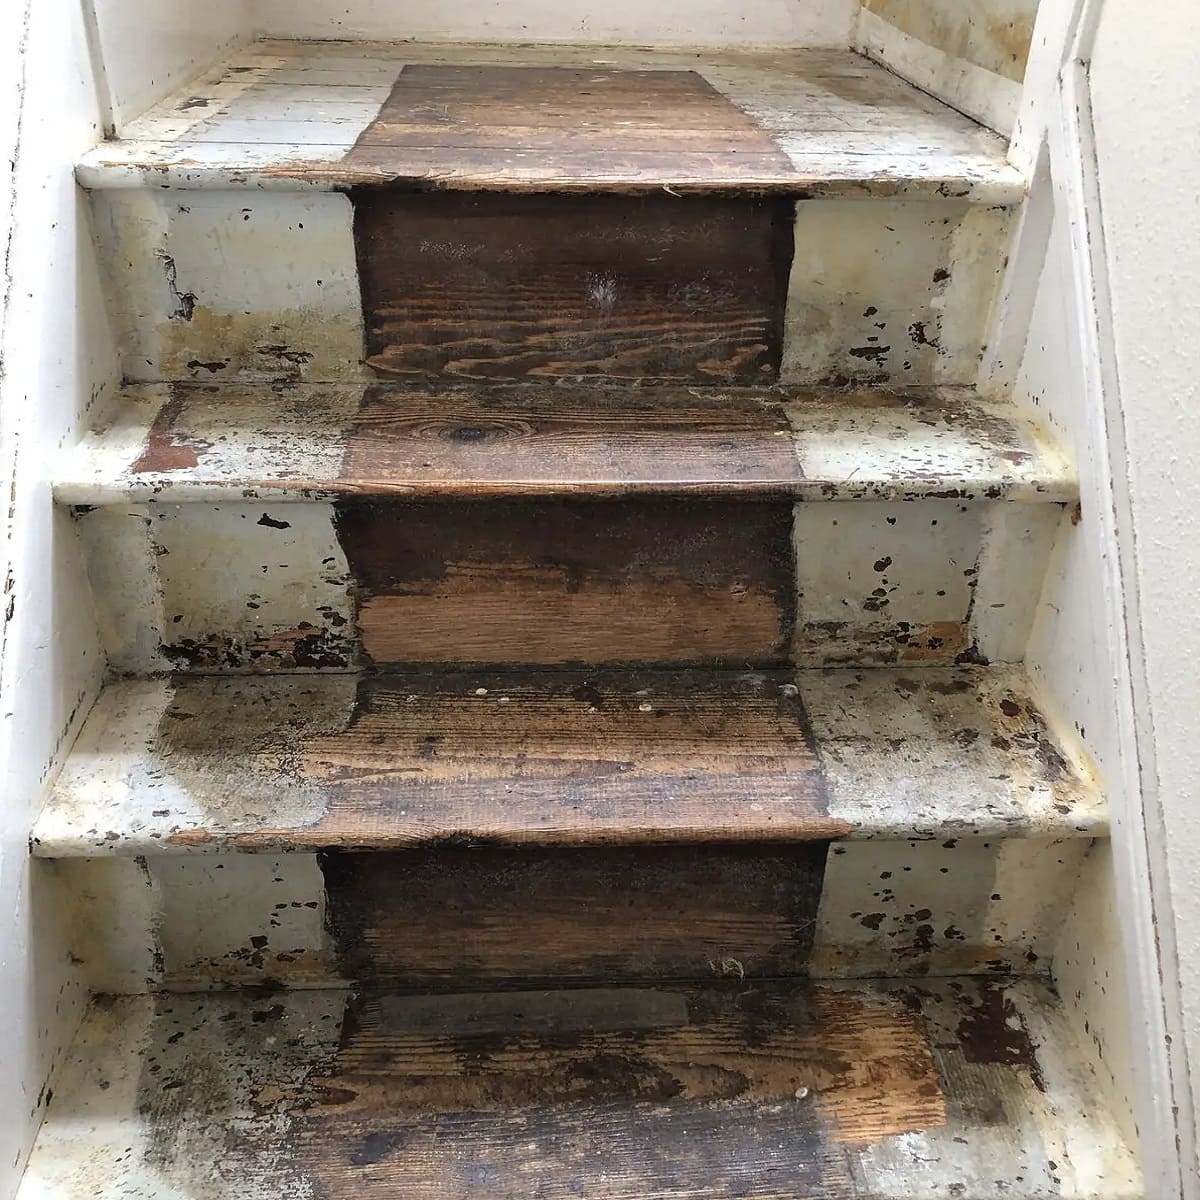
Step 2: Removing any Existing Paint or Finish
If your stairs have any existing paint or finish, it’s essential to remove it before applying a new coat. Removing the old paint will help the new paint adhere better and result in a smoother finish. Here’s how to remove existing paint or finish:
- Prepare the area: Ensure proper ventilation in the workspace by opening windows or using fans. Cover the surrounding area with drop cloths or plastic sheets to catch any paint chips or dust.
- Choose the appropriate method: Depending on the type of paint or finish on your stairs, you can use different methods to remove it. Common options include chemical paint strippers, heat guns, or sanding.
- Chemical paint strippers: If you opt for a chemical stripper, apply it as per the manufacturer’s instructions. Use a brush to evenly coat the paint stripper on the stairs and let it sit for the recommended time. Afterward, use a scraper to gently remove the softened paint. Be sure to wear gloves and goggles for safety.
- Heat guns: Heat guns can be effective in removing paint, especially if the paint is thick or stubborn. Use the heat gun to warm up the paint, then scrape it off with a putty knife. Be cautious not to overheat the paint, as it can release harmful fumes.
- Sanding: If the paint or finish is not too thick, sanding can be a viable option. Use medium-grit sandpaper or a sanding block to gently sand the surface until the old paint is removed. Be sure to sand evenly and avoid applying excessive pressure.
- Clean the stairs: Once the paint or finish is removed, thoroughly clean the stairs using a vacuum or a damp cloth to remove any dust or debris.
Removing any existing paint or finish is a critical step in preparing the surface for a fresh coat. By taking the time to remove the old paint properly, you will ensure a clean and smooth surface to work with. Once this step is complete, you’re ready to move on to the next stage of the stair painting process.
Step 3: Sanding the Stairs
After removing the old paint or finish, the next step in painting your stairs is sanding. Sanding helps smooth out any remaining imperfections and creates a proper surface for the new paint to adhere to. Here’s how to sand your stairs:
- Choose the right sandpaper: Select a sandpaper with a medium grit, around 120-150 grit, for the initial sanding. If you have stubborn areas or rough surfaces, you may also need a finer grit sandpaper for a smoother finish.
- Start with the handrail: If your staircase has a handrail, begin sanding it first. Use the sandpaper to sand in the direction of the grain, removing any rough spots or unevenness.
- Sand the treads and risers: Moving on to the treads and risers, sand each step evenly and consistently. Use long, smooth strokes along the length of the stairs, going with the grain of the wood. This will help prevent any scratches or marks.
- Pay attention to detail: Pay special attention to corners, edges, and any intricate detailing on the stairs. Use sandpaper wrapped around a small block or a sanding sponge to access hard-to-reach areas.
- Remove the sanding dust: After sanding, use a vacuum cleaner or a damp cloth to remove any sanding dust from the stairs. It’s important to have a clean surface before moving on to the next step.
Sanding is a crucial step in achieving a smooth and professional-looking finish. It helps create a uniform surface, ensuring that the paint will adhere properly. By taking the time to sand your stairs, you’ll be one step closer to a beautifully painted staircase.
Step 4: Cleaning the Stairs
Once you have finished sanding the stairs, it’s important to thoroughly clean the surface before applying any paint. Cleaning the stairs will remove any remaining dust, debris, or residue, ensuring a clean and pristine surface for the paint to adhere to. Here’s how to clean your stairs:
- Prepare a cleaning solution: In a bucket, mix warm water with a mild detergent or wood cleaner. Avoid using harsh chemicals or bleach, as they can damage the wood.
- Dip a soft cloth or sponge: Submerge a soft cloth or sponge into the cleaning solution, then wring out any excess liquid. You want the cloth or sponge to be damp, not soaked.
- Clean the stairs: Starting from the top step, gently scrub each tread, riser, and handrail with the damp cloth or sponge. Pay attention to any stains or areas of dirt buildup. Be sure to clean in the direction of the wood grain.
- Rinse with clean water: After cleaning, rinse the stairs with clean water to remove any soapy residue. You can use a separate damp cloth or sponge for this step, or simply rinse with a clean, damp cloth.
- Dry the stairs: Use a clean towel or allow the stairs to air dry completely before moving on to the next step. Ensure that no moisture remains on the surface, as it can interfere with the adhesion of the paint.
By cleaning the stairs thoroughly, you are creating an ideal surface for the paint to adhere to. This step will help ensure that your paint job lasts longer and remains in pristine condition. Once the stairs are dry, you are ready to proceed with the next stage of the painting process.
Read more: How To Paint Railings On Stairs
Step 5: Priming the Stairs
Before you start applying the paint, it’s crucial to prime the stairs. Priming creates a smooth and even surface, enhances paint adhesion, and helps the paint color appear vibrant. Here’s how to properly prime your stairs:
- Choose the right primer: Select a high-quality primer that is specifically formulated for wood surfaces. Look for a primer that is recommended for use on stairs and provides good adhesion.
- Prepare the primer: Stir the primer well to ensure that it is properly mixed. If the primer is too thick, you can thin it slightly with the appropriate thinning agent recommended by the manufacturer.
- Start with the handrail: Begin priming the handrail first, using a paintbrush or a small roller. Apply a smooth and even coat, following the direction of the wood grain.
- Prime the treads and risers: Move on to priming the treads and risers. Use a paintbrush or a roller, depending on your preference and the size of the surface. Apply an even and consistent coat of primer, working in the direction of the wood grain.
- Pay attention to detail: Take care to reach all the nooks, corners, and edges of the stairs. Use a smaller brush or a foam brush to ensure thorough coverage in hard-to-reach areas.
- Allow the primer to dry: Follow the manufacturer’s instructions for drying time. Typically, primer needs several hours to dry completely before you can proceed with applying the paint.
- Inspect your work: Once the primer is dry, examine the stairs for any areas that may require touch-ups or additional priming. If needed, apply a second coat of primer to ensure proper coverage and adhesion.
Priming your stairs is an essential step in the painting process. It sets the foundation for the paint and helps achieve a professional and long-lasting finish. After the primer has dried, you’re ready to move on to the exciting part: applying the paint!
Before painting your stairs, make sure to thoroughly clean and sand the surface to ensure the paint adheres properly and lasts longer. Use a high-quality primer to create a smooth base for the paint.
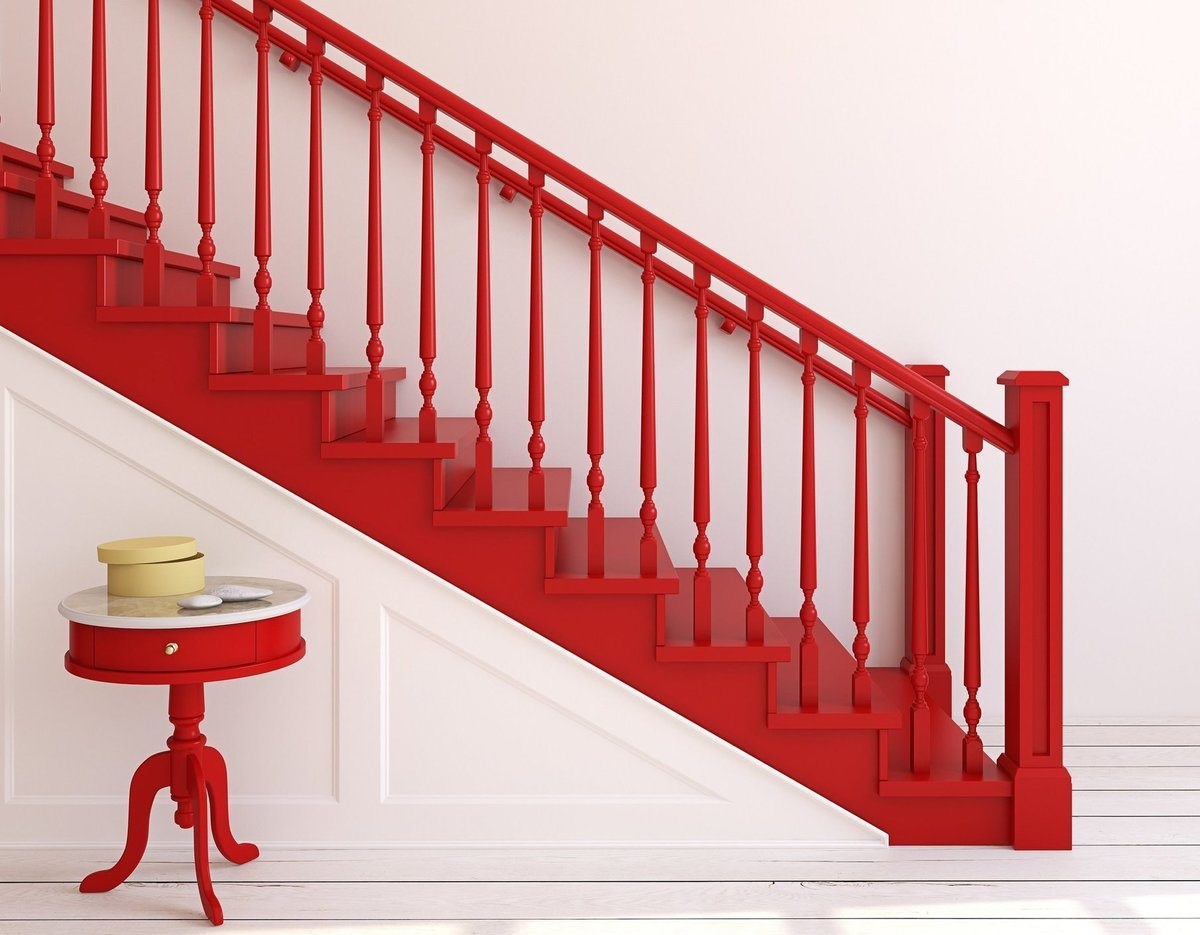
Step 6: Choosing the Right Paint
Choosing the right paint for your stairs is crucial to achieving the desired look and ensuring its durability. Here are some factors to consider when selecting the paint:
- Type of paint: Opt for a high-quality, durable paint that is specifically formulated for use on stairs and high-traffic areas. Look for paints labeled as “floor and porch paint” or “trim and door paint” as they are designed to withstand heavy use and provide excellent coverage.
- Finish: Consider the desired finish for your stairs. You can choose from a range of finishes, including matte, satin, semi-gloss, or gloss. Keep in mind that glossier finishes tend to be more durable and easier to clean. However, matte or satin finishes can help hide imperfections and give a more subtle look.
- Color: Select a color that complements your overall interior design scheme. Consider the color of the walls, flooring, and other elements in the space. Lighter colors can make the area appear more spacious, while darker colors can add drama and sophistication. Test the paint color on a small area or use color swatches to ensure it looks just right.
- Paint quality: Invest in high-quality paint that will provide better coverage, durability, and a smoother finish. This can save you time and effort in the long run, as you may need fewer coats and experience less chipping or peeling.
- Consider the type of wood: Different types of wood may require specific types of paint or additional preparation. For example, if you are painting over a wood with a lot of tannins, such as oak, you may need to use a stain-blocking primer to prevent bleed-through.
When choosing the right paint, it’s important to consider both aesthetics and durability. Take your time to research and select a paint that meets your specific needs and preferences. With the right paint, you can ensure a long-lasting and beautiful finish for your stairs.
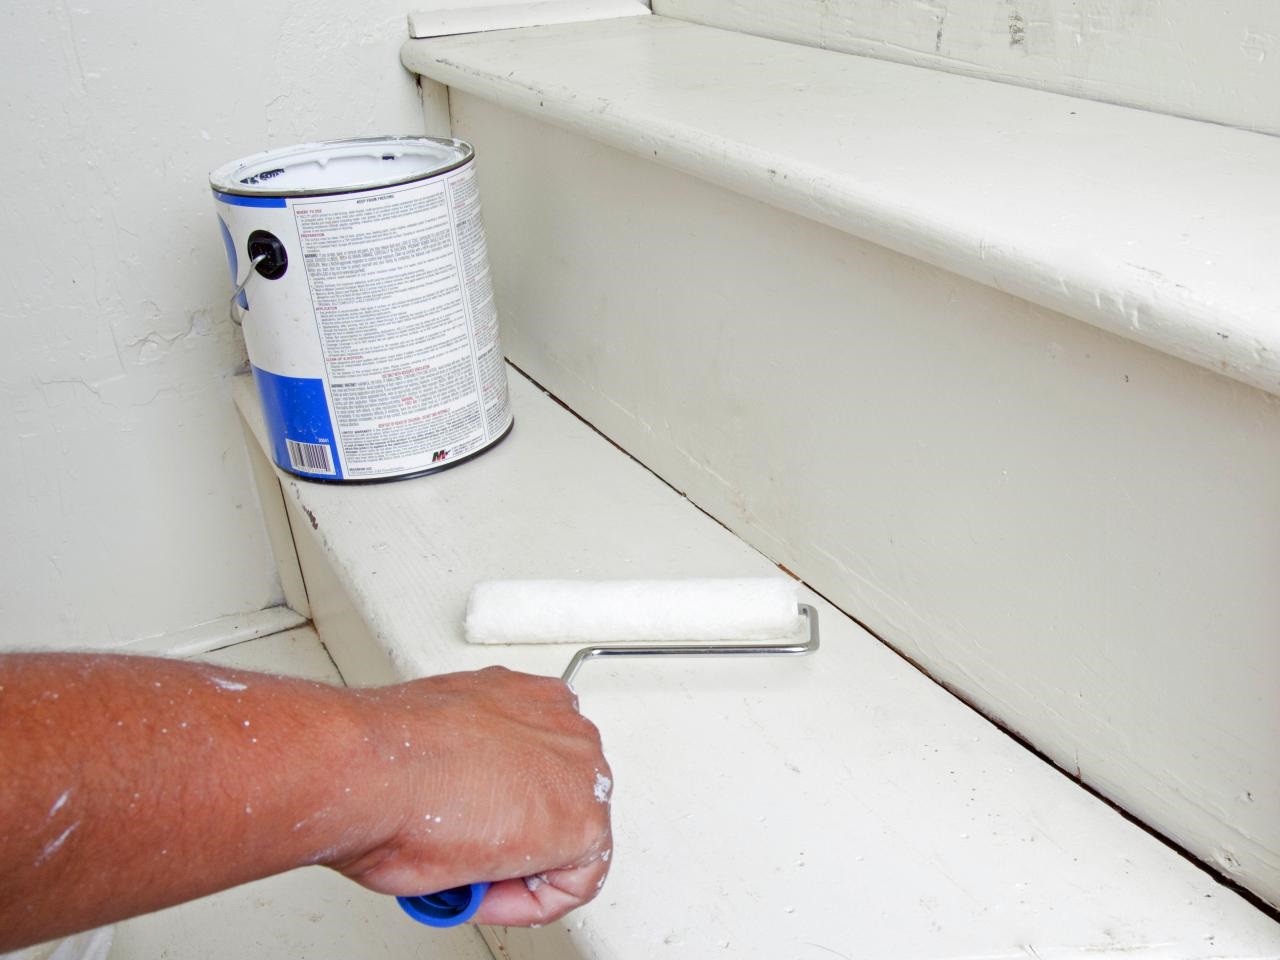
Step 7: Painting the Stairs
Now that you have prepared the stairs and chosen the right paint, it’s time to start painting! Follow these steps to achieve a smooth and professional-looking finish:
- Prepare your tools: Gather all the necessary painting tools, including paintbrushes, rollers, paint trays, and painter’s tape.
- Start with the handrail: Begin by painting the handrail, using a paintbrush or a small roller. Apply a thin and even coat, following the direction of the wood grain.
- Paint the treads and risers: Move on to painting the treads and risers. If using a brush, start from the top step and work your way down. If using a roller, apply the paint in long, smooth strokes, going in the direction of the wood grain.
- Apply thin coats: It’s generally better to apply multiple thin coats rather than one thick coat. This helps minimize drips, allows for better drying, and ensures a more even finish. Allow each coat to dry completely before applying the next one.
- Be mindful of drying time: Follow the recommended drying time mentioned on the paint can. Avoid walking on the painted stairs until they are fully dry to prevent smudging or ruining the finish.
- Paint in sections: If your staircase has multiple flights or landings, consider painting them in sections. This will help you maintain a neat and consistent finish throughout the project.
- Use painter’s tape: If necessary, use painter’s tape to create clean lines and protect the areas you don’t want to be painted, such as walls or trim.
- Apply even pressure: Whether using a brush or a roller, apply even pressure while painting to ensure a smooth and even application of the paint. Avoid using too much force, as it can cause streaks or unevenness.
- Watch for drips and smudges: Keep an eye out for any drips or smudges as you paint. If you notice any, gently smooth them out or remove excess paint with a clean brush or cloth.
- Take your time: Painting stairs can be a time-consuming process, so be patient and take your time. Rushing through the job can lead to uneven application and unsatisfactory results.
Remember, the key to a successful paint job is patience, attention to detail, and proper technique. By following these steps, you’ll be well on your way to having beautifully painted stairs that enhance the overall look of your home.
Step 8: Applying Additional Coats (If Necessary)
Depending on the desired color and coverage, you may need to apply multiple coats of paint to achieve the desired result. Applying additional coats helps ensure an even and durable finish. Here’s what you need to know about applying additional coats:
- Assess the coverage: After the first coat of paint has dried completely, evaluate the coverage. If the color is not fully opaque or if there are any uneven areas, you may need to apply an additional coat.
- Lightly sand between coats: Before applying the next coat of paint, lightly sand the surface with a fine-grit sandpaper. This helps create a smooth surface and promotes better adhesion between coats. Be sure to clean off any sanding dust before proceeding.
- Apply subsequent coats: Apply subsequent coats of paint following the same technique as the initial coat. Use even strokes and maintain a consistent application. Allow each coat to dry completely before applying the next one.
- Observe drying time: Follow the recommended drying time mentioned on the paint can between coats. Rushing the process can result in improper drying and can affect the final finish.
- Check for consistency: If you notice any areas that require touch-ups or additional coverage, apply touch-up paint with a small brush or foam brush. This will ensure a seamless and consistent appearance.
- Inspect the final result: Once you have applied all the necessary coats, thoroughly inspect the stairs for any imperfections or areas that may need additional attention. Touch up any spots as needed before moving on to the next step.
Applying additional coats of paint is often necessary to achieve a flawless and long-lasting finish. Take the time to assess the coverage and make any necessary touch-ups to ensure the stairs look their best. Remember, multiple thin coats will provide a more durable and aesthetically pleasing result.
Read more: How To Redo Your Stairs
Step 9: Adding a Protective Finish
To enhance the durability and longevity of your painted stairs, it’s essential to add a protective finish. A protective finish not only safeguards the paintwork but also makes it easier to clean and maintain. Here’s how to add a protective finish to your stairs:
- Select the appropriate finish: Choose a finish that is compatible with the type of paint you have used on your stairs. Common options include polyurethane, varnish, or clear topcoat. Consider factors such as the level of durability and the desired sheen.
- Prepare the stairs: Ensure that the paint is fully dry before applying the protective finish. Lightly sand the surface to smooth out any imperfections or bumps. Thoroughly clean the stairs to remove any dust or debris, and allow them to dry completely.
- Apply the protective finish: Using a clean brush or roller, apply an even coat of the protective finish. Follow the manufacturer’s instructions regarding the application technique and drying time.
- Allow drying time: Let the protective finish dry completely before applying any additional coats. This ensures that the finish cures properly and provides optimal protection.
- Inspect and touch up if necessary: Once the protective finish has dried, inspect the stairs for any areas that may require touch-ups or additional coats. Apply touch-up paint or additional protective finish as needed.
- Allow for sufficient curing time: Depending on the type of finish, it may take several days or even weeks for it to fully cure. Avoid heavy traffic on the stairs during this time to allow the protective finish to harden and provide maximum durability.
Adding a protective finish not only preserves the beauty of your painted stairs but also protects them from everyday wear and tear. By following these steps, you can ensure that your stairs maintain their appearance and withstand the test of time.
Step 10: Allowing Sufficient Drying Time
After completing the painting and application of any protective finish, it is vital to allow sufficient drying time for your painted stairs. Allowing proper drying time ensures that the paint fully cures, creating a durable and long-lasting finish. Here’s what you need to know about drying time:
- Follow manufacturer’s instructions: Refer to the instructions provided by the paint and protective finish manufacturers for specific drying times. These guidelines are important as drying times can vary based on the type of paint, finish, and environmental factors.
- Avoid premature use: It’s crucial to resist the urge to use or walk on the stairs before the paint and protective finish have fully dried. Premature use can lead to smudges, scratches, or damage to the finish, compromising the final result.
- Consider temperature and humidity: Factors such as temperature and humidity level can affect drying time. Warmer temperatures and lower humidity generally promote faster drying. Ensure proper ventilation in the area while the stairs are drying to facilitate the process.
- Plan for adequate drying time: Plan accordingly and allow ample time for the paint and protective finish to dry before resuming regular use of the stairs. Check the recommended drying time for each coat and factor in additional time for multiple coats. It’s better to be patient and give the stairs enough time to cure properly.
- Monitor for any issues: As the stairs dry, keep an eye out for any abnormalities such as bubbling, cracking, or uneven drying. If you notice any issues, consult the manufacturer’s instructions or seek professional advice to address the problem promptly.
By allowing sufficient drying time, you ensure the longevity and durability of your painted stairs. It’s worth the wait to achieve a beautiful and flawless finish. Once the paint and protective finish have completely dried, you can safely enjoy your newly transformed staircase.
Conclusion
Painting your stairs can be a rewarding and transformative project that adds beauty and style to your home. By following the step-by-step process outlined in this article, you can achieve professional-looking results while ensuring the durability of your newly painted stairs.
From preparing the stairs and removing any existing paint or finish to sanding, cleaning, priming, and finally, painting and adding a protective finish, each step plays a crucial role in creating a stunning focal point in your home. It’s important to take your time with each stage, ensuring thoroughness and attention to detail.
Remember to choose high-quality materials, including the right paint and protective finish for your specific needs. Consider factors such as color, finish, and compatibility to achieve the desired look and durability. Additionally, allowing sufficient drying time between coats and after the final finish application is key to enjoying long-lasting results.
Throughout the process, keep in mind the importance of proper ventilation, protecting your surroundings, and using the right tools for the job. Safety precautions, such as wearing gloves and goggles when working with chemicals or heat guns, should not be overlooked.
By investing time in proper preparation and execution, you can transform your stairs into a stunning feature that enhances the overall aesthetic of your home. Whether you’re refreshing the existing paint or completely changing the color, a beautifully painted staircase can make a significant impact.
So, roll up your sleeves, gather your materials, and embark on the journey of painting your stairs. Enjoy the process and the satisfaction that comes with successfully completing this rewarding project!
Frequently Asked Questions about How To Paint Your Stairs
Was this page helpful?
At Storables.com, we guarantee accurate and reliable information. Our content, validated by Expert Board Contributors, is crafted following stringent Editorial Policies. We're committed to providing you with well-researched, expert-backed insights for all your informational needs.


0 thoughts on “How To Paint Your Stairs”