Home>Furniture>Outdoor Furniture>How To Paint Your Concrete Patio

Outdoor Furniture
How To Paint Your Concrete Patio
Modified: September 1, 2024
Learn how to transform your concrete patio with a fresh coat of paint. Enhance your outdoor furniture and create a vibrant space for relaxation and entertainment.
(Many of the links in this article redirect to a specific reviewed product. Your purchase of these products through affiliate links helps to generate commission for Storables.com, at no extra cost. Learn more)
Introduction
Welcome to our comprehensive guide on how to paint your concrete patio! Whether you’re looking to spruce up an old patio or add a pop of color to a newly poured surface, painting your concrete patio can completely transform your outdoor space. Not only does it add aesthetic appeal, but it also helps to protect the concrete from environmental damage, such as UV rays, moisture, and general wear and tear.
In this article, we will walk you through the step-by-step process of painting your concrete patio, including essential materials and tools needed, cleaning and preparation techniques, selecting the right paint, application methods, and finishing touches.
But before we dive into the nitty-gritty details, let’s discuss why painting your concrete patio is a great idea. First and foremost, it allows you to unleash your creativity and personalize your outdoor environment to suit your style and preferences. Whether you want a serene and relaxing space or a vibrant and energetic atmosphere, paint can help you achieve the desired look and feel.
Additionally, painting your concrete patio can help to protect the surface from various elements. Concrete is naturally porous and susceptible to damage from moisture, freeze-thaw cycles, and UV rays. A layer of high-quality paint acts as a protective barrier, preventing these elements from penetrating the surface and causing cracks, discoloration, or structural issues.
Furthermore, painting your concrete patio is a cost-effective alternative to other flooring options, such as tiles, bricks, or pavers. With the right materials and techniques, you can achieve a beautiful, long-lasting finish at a fraction of the cost.
Now that we’ve covered the benefits of painting your concrete patio, let’s get started on the step-by-step process. Grab your materials and tools, and let’s transform that dull concrete into a stunning outdoor oasis!
Key Takeaways:
- Transform your concrete patio into a vibrant outdoor oasis by following our step-by-step guide. Painting not only adds aesthetic appeal but also protects against UV rays and moisture, creating a personalized space at a fraction of the cost of other flooring options.
- Choose the right exterior-grade paint, apply it in thin, even coats, and consider adding designs or patterns for a unique touch. Sealing the paint provides added protection, ensuring a long-lasting and visually appealing finish.
Read more: How To Smooth A Concrete Patio
Materials and Tools Needed
Before you begin painting your concrete patio, it’s important to gather all the necessary materials and tools. Having everything ready will save you time and ensure a smooth painting process. Here are the essential items you’ll need:
- Pressure washer or hose: A pressure washer or a hose with a high-pressure nozzle will help you clean the surface effectively. It’s crucial to remove any dirt, grime, or loose debris before painting.
- Cleaning solution: Depending on the condition of your patio, you may need a cleaning solution to remove stubborn stains or mold. Choose a cleaner that is specifically designed for concrete surfaces.
- Broom or brush: Use a broom or a stiff brush to scrub the surface and remove any remaining dirt or debris after pressure washing.
- Concrete patching compound: If there are any cracks or damaged areas on your patio, you’ll need a concrete patching compound to fill and repair them. Make sure to choose a patching compound suitable for outdoor use.
- Putty knife or trowel: These tools are necessary for applying the patching compound and smoothing it out for a seamless repair.
- Concrete primer: Applying a primer is crucial for ensuring proper adhesion of the paint to the concrete surface. Choose a primer that is compatible with both the paint you’re using and outdoor conditions.
- Concrete paint: Selecting the right paint is essential for achieving a durable and long-lasting finish. Opt for a concrete paint that is specifically formulated for exterior use and offers UV protection.
- Paint rollers or brushes: Depending on your preference and the size of your patio, you can choose between paint rollers or brushes. Rollers are ideal for larger areas, while brushes provide more control for detailed work.
- Paint tray: A paint tray will come in handy for loading your roller or brush with paint and removing any excess.
- Painter’s tape: Use painter’s tape to protect any areas you don’t want to paint, such as edges, trim, or plants.
- Safety gear: Don’t forget to prioritize safety. Wear protective clothing, gloves, goggles, and a mask to protect yourself from fumes and chemicals.
Gathering these materials and tools beforehand will ensure a smoother painting process and help you achieve professional-looking results. Once you have everything ready, it’s time to move on to the next steps: preparing and cleaning your patio.
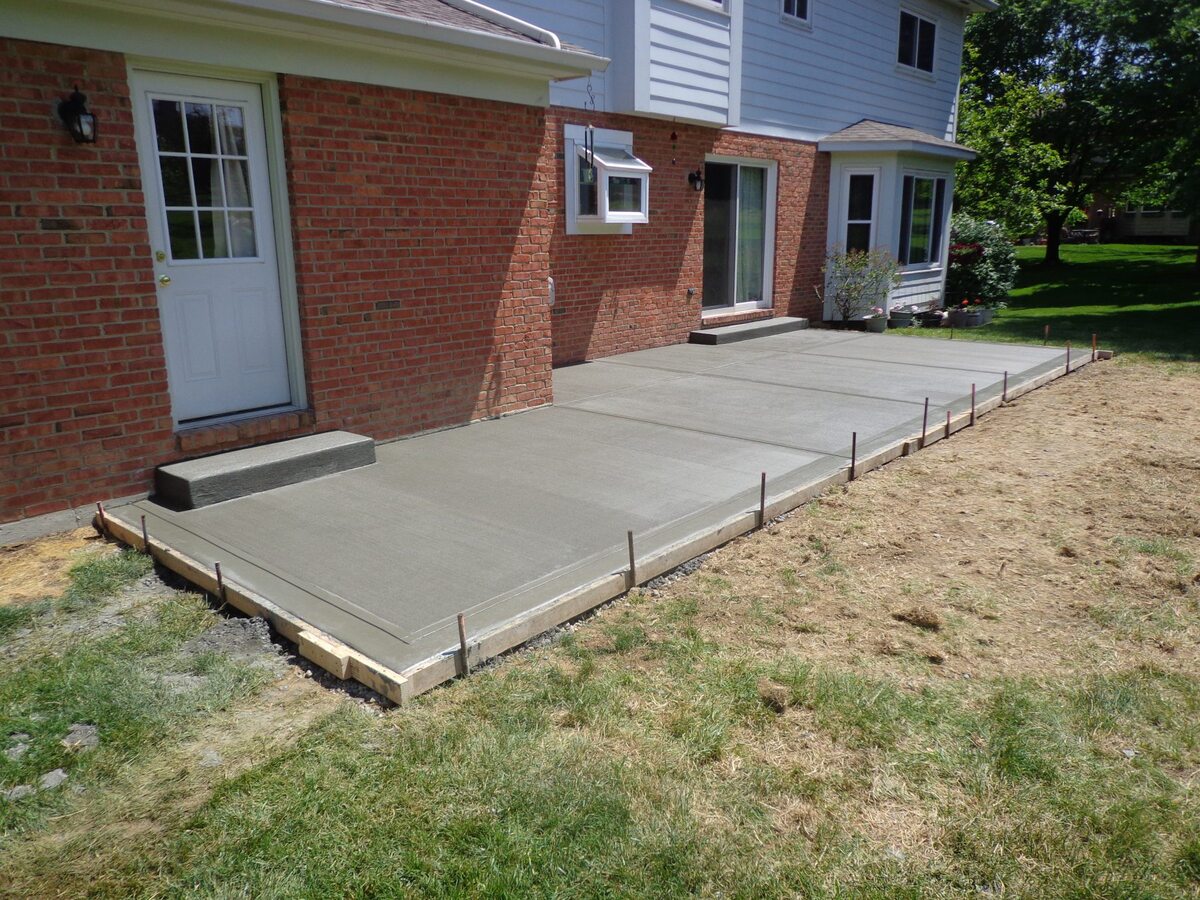
Step 1: Preparing the Patio
Proper preparation is the key to achieving a successful and long-lasting paint job on your concrete patio. Before you start painting, you need to make sure that the surface is clean, dry, and free from any obstructions. Here’s how to prepare your patio:
- Remove furniture and plants: Clear the patio of any furniture, plants, or other objects that may hinder your painting process. This will give you a clean and spacious area to work on.
- Sweep the surface: Use a broom to sweep away loose dirt, leaves, debris, and any other particles from the patio. Pay attention to corners and crevices where dirt tends to accumulate.
- Inspect for damages: Take a close look at the concrete surface and check for any cracks, chips, or areas that require repair. Note down the location and extent of these damages as you will address them in the next step.
- Check for efflorescence: Efflorescence is a white powdery substance that appears on the surface of concrete due to moisture. If you spot any efflorescence, use a stiff brush or scraper to remove it. You may also need to treat the area with an efflorescence cleaner for better adhesion of the paint.
- Assess drainage: Ensure that your patio has proper drainage to prevent water from pooling on the surface. If there are any low spots or areas with inadequate drainage, you may need to level the surface by adding a concrete mix or consulting a professional.
- Protect surrounding areas: If there are adjacent areas, such as walls, fences, or plants, that you want to protect from accidental paint splatters, use painter’s tape to cover and secure them.
By taking the time to prepare your patio thoroughly, you create a clean and smooth surface for the paint to adhere to. This will result in a more even and durable finish. Once you have completed the necessary preparations, you’re ready to move on to the next step: cleaning the surface.
Step 2: Cleaning the Surface
Before you can start painting your concrete patio, it’s crucial to thoroughly clean the surface. Proper cleaning will remove any dirt, stains, mold, or other contaminants that could hinder paint adhesion. Here’s how to clean your patio:
- Pressure wash the surface: If you have access to a pressure washer, use it to remove dirt, grime, and any loose particles from the patio surface. Start from one end and work your way across, ensuring even coverage. Use a wide-angle spray pattern and keep the nozzle at a safe distance to prevent any damage to the concrete.
- Use a cleaning solution: In case there are stubborn stains or mold on your concrete patio, apply a suitable cleaning solution. Follow the manufacturer’s instructions and allow the cleaner to penetrate the surface for the recommended amount of time.
- Scrub the surface: After applying the cleaning solution, use a brush or a broom with stiff bristles to scrub the surface. Pay extra attention to areas with stains or heavy dirt buildup. This will help loosen and remove any remaining contaminants.
- Rinse thoroughly: Once you have scrubbed the patio, rinse it thoroughly with clean water. This step is crucial to remove any residue from the cleaning solution and ensure a clean surface for painting.
- Allow the patio to dry: After rinsing, give the patio ample time to dry completely. The drying time can vary depending on weather conditions, so be patient. Avoid painting on a damp or wet surface, as it can interfere with the adhesion and drying of the paint.
Cleaning the surface of your concrete patio ensures that the paint adheres properly and prevents any future issues. It also creates a fresh canvas for your paint color choice. Once the patio is clean and dry, you’re ready to move on to the next step: repairing any cracks or damages.
Step 3: Repairing Cracks and Damages
Before you begin painting your concrete patio, it’s important to address any cracks, chips, or other damages on the surface. Repairing these flaws will not only improve the appearance of your patio but also ensure a smooth and even paint application. Here’s how to repair cracks and damages:
- Clean out the cracks: Use a wire brush or a scraper to remove any loose debris, dirt, or old paint from the cracks. This will help ensure that the patching compound adheres properly.
- Apply a concrete patching compound: Using a putty knife or trowel, apply a concrete patching compound to fill the cracks. Make sure to follow the manufacturer’s instructions for mixing and applying the compound. Smooth it out evenly, ensuring that it is level with the surrounding surface.
- Allow the compound to dry: Give the patching compound sufficient time to dry and cure. The drying time will vary depending on the product used, so refer to the manufacturer’s instructions for guidance. Avoid walking or placing any heavy objects on the repaired areas during this time.
- Sand the patched areas: Once the patching compound has dried, use sandpaper or a sanding block to smooth out any rough edges or imperfections. This will help create a seamless surface for painting.
- Remove dust and debris: After sanding, clean the surface of the patio using a broom or a brush to remove any sanding dust or debris. You want to ensure a clean surface before moving on to the next step.
Repairing cracks and damages is essential to maintain the structural integrity of your concrete patio and ensure a professional-looking paint job. By taking the time to address these issues, you’ll create a solid foundation for the paint to adhere to. Once you have completed the necessary repairs and cleaned the surface, you’re ready to move on to the next step: applying the primer.
Read more: How To Level A Concrete Patio
Step 4: Applying Primer
Before you start applying paint to your concrete patio, it’s crucial to apply a primer. Primer acts as a bonding agent between the concrete surface and the paint, ensuring better adhesion and a longer-lasting finish. Here’s how to apply primer to your patio:
- Choose the right primer: Select a high-quality concrete primer that is suitable for exterior use and compatible with the paint you’ll be using. Check the manufacturer’s instructions and make sure the primer is specifically formulated for concrete surfaces.
- Mix the primer (if necessary): Some primers may need to be mixed before use. Follow the manufacturer’s instructions for proper mixing and ensure that the primer is well-blended.
- Apply the primer: Using a paint roller or a brush, apply the primer to the cleaned and repaired surface of the patio. Start from one end and work your way across, ensuring even coverage. Use smooth, overlapping strokes to create a consistent layer of primer.
- Pay attention to edges and corners: Use a brush to reach areas that cannot be easily coated with a roller, such as edges, corners, and crevices. Make sure to apply an even coat of primer to these hard-to-reach areas.
- Allow the primer to dry: Follow the manufacturer’s instructions for the recommended drying time. Typically, it takes a few hours for the primer to dry. Avoid walking or placing objects on the primed surface during this time.
- Inspect the primed surface: After the primer has dried, inspect the surface for any uneven areas or missed spots. If necessary, apply a second coat of primer to ensure complete coverage.
Applying primer is an essential step in the painting process, as it enhances adhesion and improves the overall durability of your paint job. By preparing the patio and applying primer, you create a solid foundation for the paint to adhere to and extend the lifespan of your newly painted concrete surface.
Now that you’ve applied the primer and allowed it to dry, you’re ready to move on to the next step: choosing the paint for your concrete patio.
Step 5: Choosing the Paint
Choosing the right paint for your concrete patio is crucial for achieving a beautiful and long-lasting finish. With so many options available, it’s important to consider factors such as durability, color options, and suitability for outdoor use. Here’s how to choose the right paint for your patio:
- Look for exterior-grade paint: When selecting paint for your concrete patio, opt for a high-quality paint that is specifically formulated for exterior use. Exterior-grade paints are designed to withstand outdoor elements, such as UV rays, moisture, and temperature fluctuations.
- Consider durability: Since your patio is a high-traffic area, choose a paint that is durable and resistant to chipping, peeling, and fading. Look for paint that offers excellent adhesion and is designed for heavy-duty use.
- Check for UV protection: Exposure to sunlight can cause paint to fade and lose its vibrant color. To ensure a long-lasting finish, select a paint that offers UV protection. This will help to maintain the color and vibrancy of your patio over time.
- Explore color options: Paint allows you to unleash your creativity and personalize your patio. Consider the overall look and feel you want to achieve and choose a color that complements your outdoor space. Whether you prefer vibrant hues or earthy tones, there are numerous color options available.
- Read reviews and recommendations: Before making a final decision, do a bit of research. Read customer reviews and seek recommendations from professionals or fellow DIY enthusiasts. Their experiences can provide valuable insights and help you make an informed choice.
- Consult a paint specialist: If you’re unsure about which paint to choose, don’t hesitate to consult a paint specialist at your local home improvement store. They can provide expert advice based on your specific needs and guide you in selecting the right paint for your patio.
By considering these factors and doing your due diligence, you can confidently choose a paint that will not only enhance the appearance of your concrete patio but also withstand the test of time. Once you have selected the paint, you’re ready to move on to the next step: mixing the paint for application.
Before painting your concrete patio, make sure to thoroughly clean and repair any cracks or damage. Use a concrete primer before applying the paint to ensure better adhesion and longer-lasting results.
Step 6: Mixing the Paint
Before you can begin applying paint to your concrete patio, it’s important to properly mix the paint to ensure a consistent and even color. Mixing the paint thoroughly will help achieve optimal coverage and a professional finish. Here’s how to mix the paint for your patio:
- Read the manufacturer’s instructions: Start by carefully reading the instructions provided by the paint manufacturer. They will specify the recommended mixing ratio and any specific instructions for that particular paint product.
- Prepare the paint: Open the paint can or container and use a stirring stick or paint paddle to stir the paint. Make sure to scrape the bottom and sides of the container to ensure all components are thoroughly mixed.
- Check for color consistency: While stirring, pay attention to the color consistency of the paint. Ensure that there are no streaks or clumps and that the color is uniform throughout the container.
- Adjust the consistency (if necessary): If the paint seems too thick, you can add a small amount of water to thin it out. Add only a little water at a time and mix well until you achieve the desired consistency. Avoid adding too much water, as it may affect the durability and adhesion properties of the paint.
- Use a paint strainer (optional): If you notice any lumps or debris in the paint, you can strain it through a mesh paint strainer before applying it to the patio. This will help ensure a smoother application and prevent any unwanted imperfections on the painted surface.
- Prepare the paint application tools: Once you have mixed the paint to the desired consistency, pour it into a paint tray. This will make it easier to load your paint roller or brush for application.
Thoroughly mixing the paint is essential for achieving a consistent color and ensuring that the paint is ready for application. Taking the time to properly mix the paint will result in a more professional-looking finish on your concrete patio. Now that the paint is mixed and ready to go, you’re ready to move on to the next step: applying the first coat of paint.
Step 7: Applying the First Coat
Now that you have your paint mixed and prepared, it’s time to start applying the first coat to your concrete patio. Applying the paint in thin, even layers ensures a smooth and professional-looking finish. Here’s how to apply the first coat:
- Start with the edges: Begin by using a brush to carefully cut in along the edges of your patio. This will create a neat and clean boundary between the painted surface and any adjacent areas, such as walls or trim.
- Load your paint roller or brush: Dip your paint roller into the paint tray, making sure to coat it evenly with paint. If you’re using a brush, load it by dipping the bristles about one-third of the way into the paint and tapping off any excess.
- Apply the paint: Starting from one corner of the patio, work your way across the surface, applying the paint in thin, overlapping strokes. Use a smooth back-and-forth motion to ensure even coverage. Avoid applying too much pressure, as it may result in streaks or an uneven application.
- Work in small sections: To prevent the paint from drying too quickly, work in small sections of the patio. This will allow you to maintain a wet edge and ensure a seamless finish. Continue applying the paint section by section until the entire patio is covered.
- Check for drips or pooling: Throughout the painting process, keep an eye out for any drips or pooling of paint. If you notice any, use a brush or roller to smooth them out immediately. This will help avoid noticeable brush marks or uneven areas.
- Allow the first coat to dry: Follow the paint manufacturer’s instructions for the recommended drying time. Keep in mind that drying times can vary depending on factors such as temperature and humidity. Avoid walking on the freshly painted surface until it is completely dry.
- Assess the coverage: After the first coat has dried, step back and assess the coverage. If there are any areas that appear thin or uneven, you can apply a second coat for better color saturation and durability. Wait for the recommended drying time before proceeding to the next coat.
Applying the first coat of paint to your concrete patio is an exciting step towards transforming your outdoor space. By working in small sections and ensuring even coverage, you’ll achieve a professional-looking finish. Once the first coat is dry and you’re satisfied with the coverage, you can move on to applying the second coat (if necessary). We’ll discuss this in the next step.
Step 8: Applying the Second Coat
After the first coat of paint has fully dried, it’s time to apply the second coat to your concrete patio. The second coat adds depth, improves color saturation, and enhances the durability of the paint job. Here’s how to apply the second coat:
- Inspect the first coat: Before applying the second coat, carefully examine the first coat for any areas that may need touch-ups or further coverage. If there are any visible thin spots or uneven areas, use a brush or roller to apply additional paint as needed.
- Prepare the paint (if necessary): If your paint has been sitting for a while or has started to separate, take the time to stir it thoroughly to ensure a consistent color and texture.
- Load your paint roller or brush: Similar to the first coat, dip your paint roller or brush into the paint tray and evenly coat it with paint. Remove any excess paint by lightly tapping or scraping it against the side of the tray.
- Apply the second coat: Starting from the same corner or edge where you began with the first coat, apply the second coat of paint in the same manner. Use thin, overlapping strokes to achieve even coverage across the entire patio’s surface.
- Work in small sections: As with the first coat, it’s best to work in small sections to maintain a wet edge and achieve a seamless finish. Apply the paint section by section until the entire patio is covered with the second coat.
- Check for drips or pooling: As you apply the second coat, be vigilant for any drips or pooling of paint. Smooth them out immediately using a brush or roller to ensure a consistent appearance.
- Allow the second coat to dry: Follow the paint manufacturer’s instructions for the recommended drying time of the second coat. Make sure the paint is fully dry before walking on or placing any objects on the newly painted patio.
- Inspect the final appearance: Once the second coat has dried, step back and assess the final appearance of your painted concrete patio. Check for any missed spots or areas that may require touch-ups. If needed, apply additional paint to ensure full coverage.
Applying the second coat of paint adds an extra layer of protection and ensures a more vibrant and durable finish on your concrete patio. By diligently following the same techniques used for the first coat, you’ll achieve a visually appealing and long-lasting result. After the second coat is dry and you’re content with the outcome, you can proceed to the optional step of adding design or patterns to further enhance your patio’s aesthetic. We’ll discuss this in the next step.
Step 9: Adding Design or Patterns (optional)
If you want to add a touch of uniqueness and style to your concrete patio, you have the option to incorporate designs or patterns into the painted surface. This step allows you to further personalize your outdoor space and create a visually stunning patio. Here’s how to add design or patterns to your concrete patio:
- Plan your design: Before you start adding any designs or patterns, take some time to plan out the layout and style you want to achieve. Consider the overall theme of your outdoor space and how you want the design to complement the surroundings.
- Choose a stencil or template: Stencils or templates are a popular choice for adding patterns to concrete surfaces. You can find a wide variety of pre-made stencils or create your own using cardboard or plastic sheets.
- Place the stencil or template: Position the stencil or template on the desired area of your painted patio. Secure it in place using painter’s tape or weights to prevent any movement during the painting process.
- Apply the paint: Use a brush or a roller to carefully apply the paint inside the stencil or template. Make sure to apply an even layer of paint, covering the designated area completely. Take your time and pay attention to detail to achieve clean and crisp lines.
- Remove the stencil or template: Once you have finished applying paint to the designated area, carefully remove the stencil or template while the paint is still wet. Peel it off gently to avoid smudging or smearing the design.
- Allow the paint to dry: Let the painted design or pattern dry completely before moving or applying any additional layers. Follow the paint manufacturer’s instructions for the recommended drying time.
- Repeat for other areas (if desired): If you want to incorporate multiple designs or patterns, repeat the process for each area. Make sure to clean the stencil or template between uses to prevent any unwanted transfer of paint.
Adding design or patterns to your painted concrete patio can transform it into a unique and eye-catching outdoor space. Whether you prefer geometric shapes, floral motifs, or intricate patterns, the possibilities are endless. Take your time during this step and enjoy the creativity it allows. Once your designs have dried, you can move on to the final step: sealing the paint for added protection and longevity.
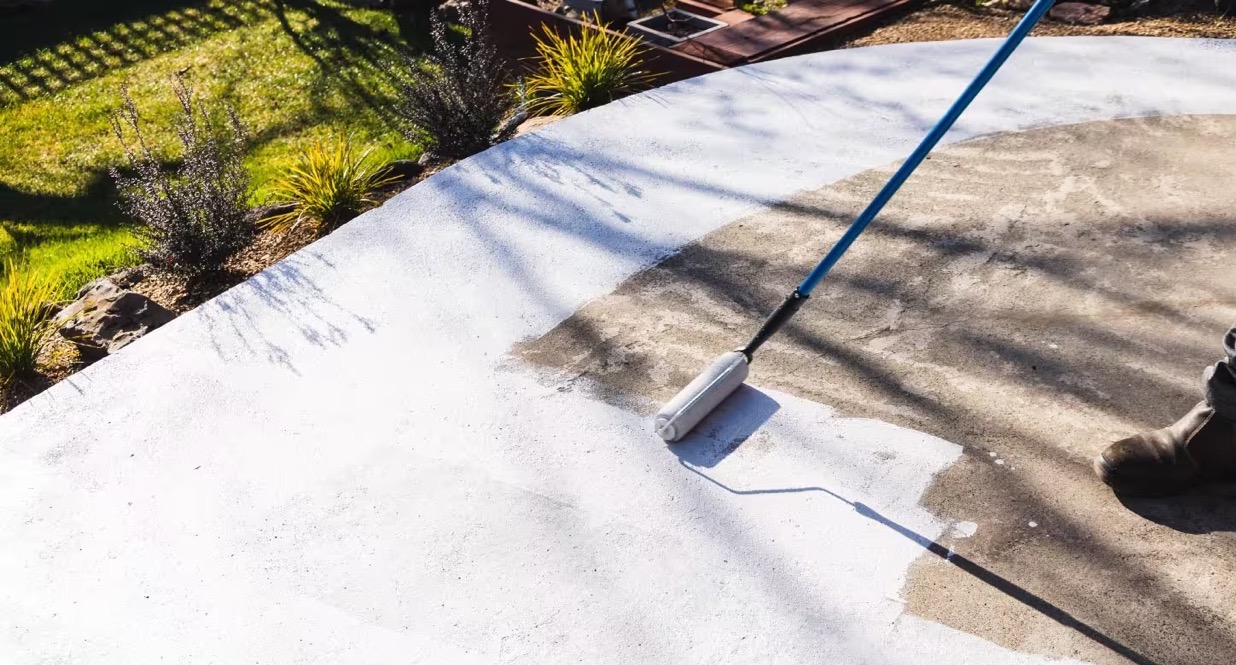
Step 10: Sealing the Paint
Sealing the paint on your concrete patio is essential for enhancing durability and providing long-lasting protection against external elements. Sealer acts as a barrier, preventing moisture, UV rays, and general wear and tear from damaging the painted surface. Here’s how to seal the paint on your patio:
- Select the right sealer: There are different types of sealers available for concrete surfaces, including acrylic-based, epoxy, or polyurethane sealers. Choose a sealer that is compatible with the type of paint you’ve used and suitable for outdoor use. Read the manufacturer’s instructions and select the appropriate sealer for your patio.
- Prepare the patio: Ensure that the painted surface is clean and completely dry before applying the sealer. Remove any debris or dust using a broom or brush.
- Apply the sealer: Pour the sealer into a paint tray and use a paint roller or brush to apply it evenly to the painted surface. Work in small sections, maintaining a wet edge to avoid visible lines or unevenness. Apply a thin, even coat of sealer, following the manufacturer’s recommended instructions for application.
- Allow the sealer to dry: Let the initial coat of sealer dry according to the manufacturer’s instructions. This typically takes a few hours. Avoid walking on the surface or placing any objects on it during the drying process.
- Apply additional coats (if necessary): Depending on the type of sealer used and the level of protection desired, you may need to apply additional coats. Follow the manufacturer’s instructions for the recommended number of coats, drying time between coats, and application method.
- Cure the sealer: Once all the coats of sealer have been applied, allow the patio to cure. Curing time varies depending on the sealer, so refer to the manufacturer’s instructions for specific guidance. Avoid any heavy traffic or exposure to excessive moisture during the curing period.
- Maintain the sealed surface: To prolong the life of the sealed surface, follow proper maintenance practices. Regularly clean the patio with mild soap and water, avoid using abrasive cleaners or tools that could damage the sealer, and periodically apply a fresh coat of sealer as recommended by the manufacturer.
Sealing the paint on your concrete patio provides an added layer of protection and helps prolong the life and beauty of your freshly painted surface. By following these steps to properly seal the paint, you can enjoy your vibrant and durable patio for years to come.
Now that you have completed the final step of sealing the paint, your concrete patio transformation is complete! Sit back, relax, and enjoy your newly painted and protected outdoor oasis.
Conclusion
Congratulations! You have successfully transformed your concrete patio into a vibrant and inviting outdoor space through the power of paint. By following the step-by-step guide provided in this article, you have learned how to prepare, clean, repair, prime, paint, and seal your patio, resulting in a long-lasting and visually appealing finish.
Painting your concrete patio not only enhances its aesthetic appeal but also provides protection against environmental factors such as UV rays, moisture, and general wear and tear. With the right materials, tools, and techniques, you have the ability to create a unique and personalized outdoor space that reflects your style and taste.
Remember to consider key factors such as durability, color options, and compatibility with outdoor conditions when choosing your paint. Taking the time to properly clean, repair, and prime the surface ensures a strong foundation for the paint to adhere to. Applying thin, even coats of paint and incorporating designs or patterns (if desired) adds depth and character to your patio. Finally, sealing the paint provides an extra layer of protection, prolonging the life and beauty of your newly painted surface.
As you enjoy your transformed patio, make sure to maintain it properly by following the manufacturer’s guidelines for cleaning and maintenance. Regular cleaning, avoiding abrasive cleaners, and periodic resealing will help preserve the vibrancy and durability of your painted patio.
Now, go out and enjoy your outdoor oasis! Whether you’re hosting gatherings, enjoying morning coffee, or simply relaxing with a book, your newly painted patio will be a welcoming and beautiful space for you and your loved ones to enjoy throughout the seasons.
Frequently Asked Questions about How To Paint Your Concrete Patio
Was this page helpful?
At Storables.com, we guarantee accurate and reliable information. Our content, validated by Expert Board Contributors, is crafted following stringent Editorial Policies. We're committed to providing you with well-researched, expert-backed insights for all your informational needs.


0 thoughts on “How To Paint Your Concrete Patio”