Articles
How To Redo Your Stairs
Modified: October 20, 2024
Discover helpful articles on how to redo your stairs and transform your home. Find expert tips, step-by-step guides, and DIY tutorials for a stunning staircase renovation.
(Many of the links in this article redirect to a specific reviewed product. Your purchase of these products through affiliate links helps to generate commission for Storables.com, at no extra cost. Learn more)
Introduction
Are your stairs looking outdated, worn-out, or just in need of a fresh new look? Redoing your stairs can be a great way to revitalize your home’s interior and add a touch of style and sophistication. Whether you want to replace the worn-out carpet with gleaming hardwood or give your stairs a fresh coat of paint, this comprehensive guide will provide you with the knowledge and steps needed to transform your stairs.
Redoing your stairs may seem like a daunting task, but with proper planning, the right tools, and a little bit of patience, it can be a rewarding DIY project. Not only will it transform the aesthetic appeal of your home, but it can also increase your property’s value. So, if you’re ready to take on the challenge, let’s dive into the process of redoing your stairs.
Before you embark on this project, it’s important to assess the condition of your stairs and determine the best course of action. This will help you decide whether you need to repair or replace any damaged parts, as well as choose the appropriate materials and tools for the job. Let’s start by examining the current state of your stairs.
Key Takeaways:
- Revitalize your home’s interior by redoing your stairs with the right materials, tools, and safety precautions. Achieve a stylish and sophisticated look while prioritizing functionality and safety.
- Transform your stairs into a focal point of your home with hardwood, laminate, or carpet options. Follow the step-by-step guide for a rewarding DIY project that adds value and aesthetic appeal.
Read more: How To Redo Stairs That Had Carpet
Assessing the Condition of Your Stairs
Before you begin the process of redoing your stairs, it is crucial to assess their current condition. This will help you determine the extent of the renovations needed and guide your decision-making process when it comes to choosing materials and tools.
First, carefully inspect each step, riser, and landing to identify any signs of damage or wear. Look for cracks, loose boards, or squeaky parts that may need repair. Pay close attention to any structural issues, such as uneven steps or unstable handrails, as these may require professional intervention.
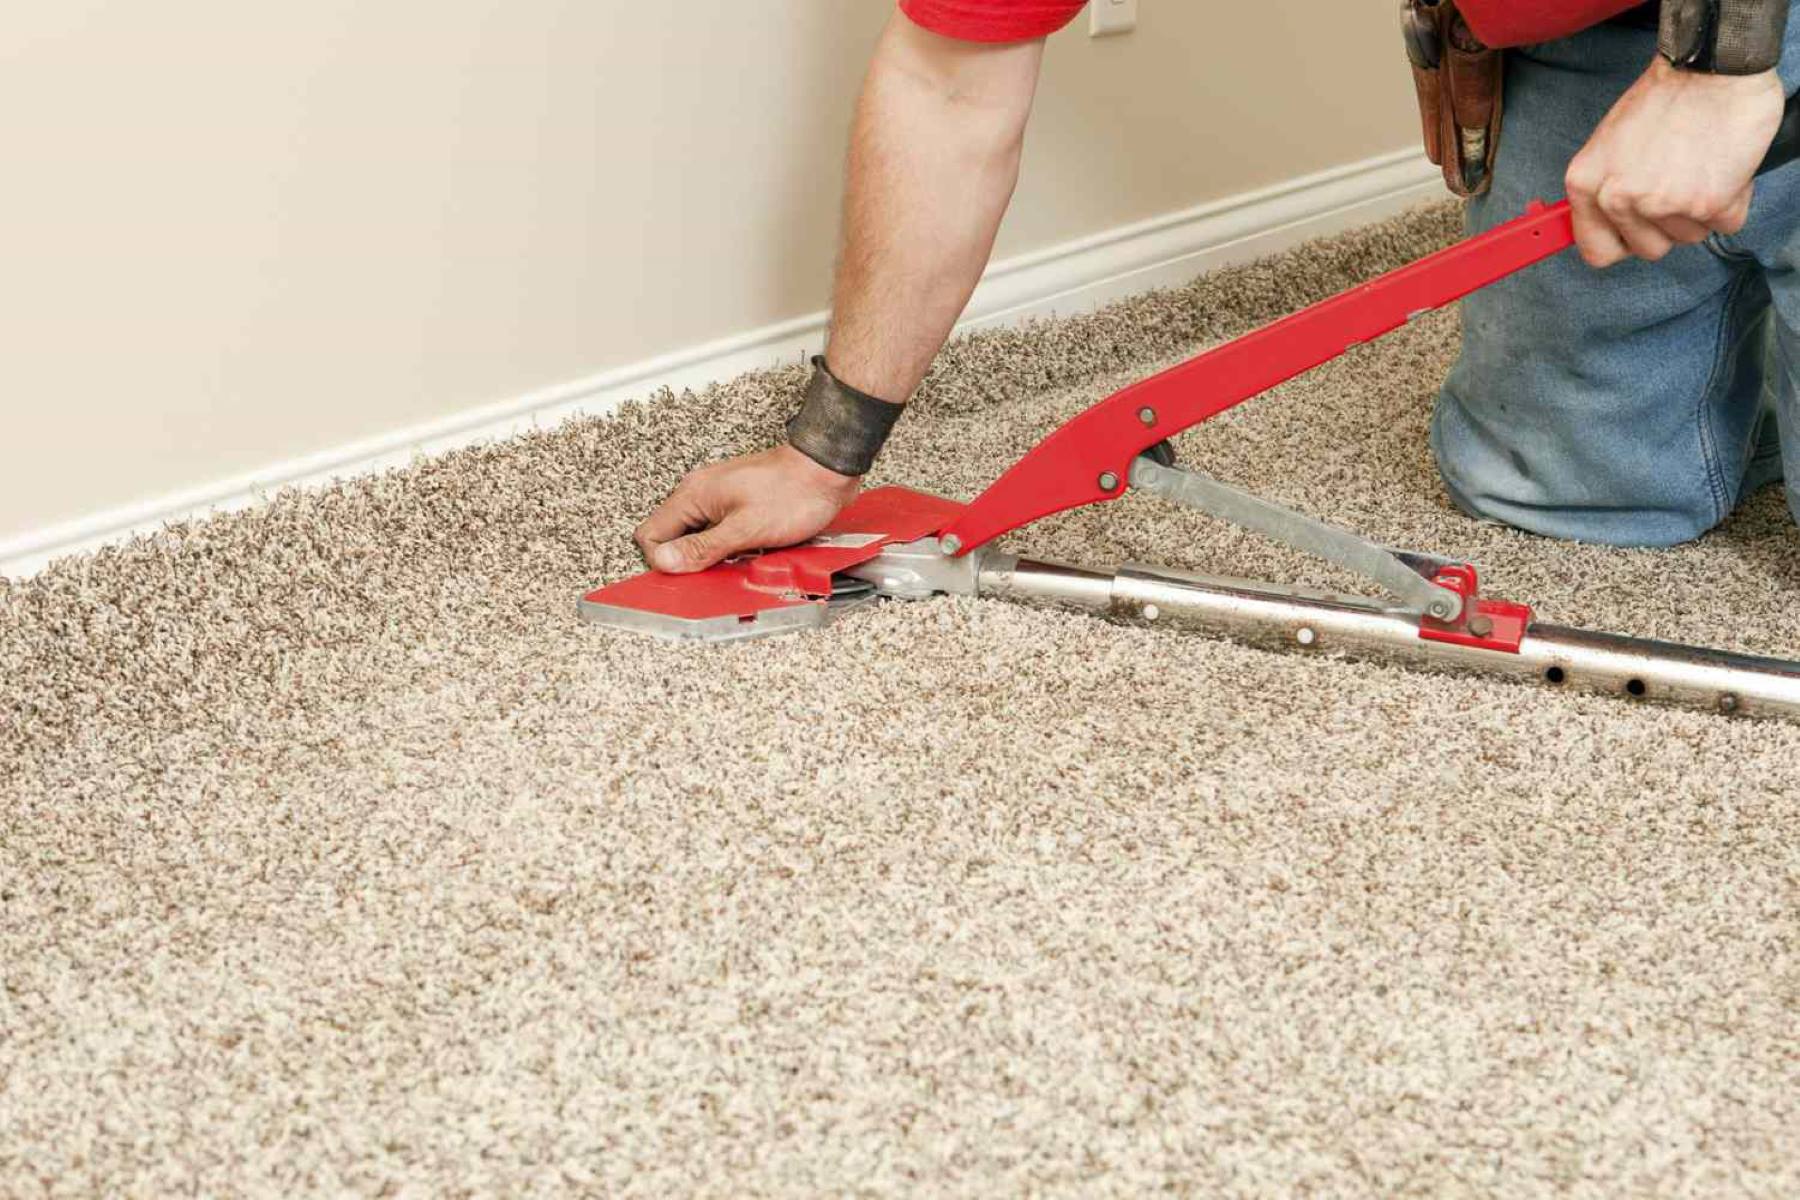
If you have carpeted stairs, remove the carpet to assess the condition of the underlying wood or substrate. Check for any signs of rot, water damage, or insect infestations. This is also a good time to determine whether the existing wood can be salvaged or if it needs to be replaced entirely.
In addition to the condition of the stairs themselves, consider the overall aesthetic and style of your home. Think about the desired look you want to achieve and how the newly redone stairs will complement the existing décor. This will help you make informed decisions regarding the choice of materials, finishes, and colors.
It’s important to note that assessing the condition of your stairs may require removing parts of the existing finish or even disassembling sections. Take measurements and photographs along the way to use as references later on in the process.
After a thorough assessment, you should have a clear understanding of the necessary repairs and renovations. This will guide you in selecting the appropriate materials and tools for the job. Whether you need to replace a few boards, reinforce the structure, or completely overhaul the staircase, being aware of the current condition is essential to the success of your project.
Now that you have assessed the condition of your stairs, it’s time to move on to the next step: choosing the right materials.
Choosing the Right Materials
When it comes to redoing your stairs, selecting the right materials is key to achieving the desired aesthetic and durability. The choice of materials will depend on your personal preference, budget, and the overall style of your home. Let’s explore some of the popular options for stair renovations:
- Hardwood: Hardwood is a timeless and elegant choice for stairs. It adds warmth and sophistication to any space. Oak, maple, and walnut are popular hardwood options due to their durability and visual appeal. Hardwood stairs can be left natural or stained to complement your interior design.
- Laminate: Laminate is a cost-effective alternative to hardwood. It mimics the look of real wood but is more resistant to scratches and wear. Laminate stairs come in a variety of finishes, including wood grain patterns and solid colors, allowing you to achieve the desired aesthetic without breaking the bank.
- Carpet: Carpeted stairs provide comfort, sound insulation, and a softer feel underfoot. They come in a wide range of colors, patterns, and textures, allowing you to customize the look to match your style. However, it’s important to choose a high-quality carpet that is specifically designed for stairs to ensure its longevity and safety.
- Tile: For a sleek and modern look, consider using tiles on your stairs. Tile stairs are durable, easy to clean, and come in various styles and designs. They are particularly suitable for high-traffic areas and can withstand moisture, making them a great choice for outdoor or basement stairs.
In addition to the tread material, you’ll also need to consider the finish and color of the risers, handrails, and balusters. These elements contribute to the overall visual impact of your stairs. You can choose to match or contrast the materials and finishes for a unique and personalized look.
When selecting materials, it’s essential to consider their durability and maintenance requirements. Stairs endure daily foot traffic, so choosing materials that can withstand wear and tear is crucial. Additionally, factor in your lifestyle and the amount of maintenance you’re willing to invest in your stairs.
Lastly, keep in mind local building codes and safety regulations when choosing materials. Ensure that the materials you select meet the necessary standards for load-bearing capacity, slip resistance, and fire safety.
Now that you have an idea of the materials available for your stair renovation, it’s time to gather the necessary tools to complete the project.
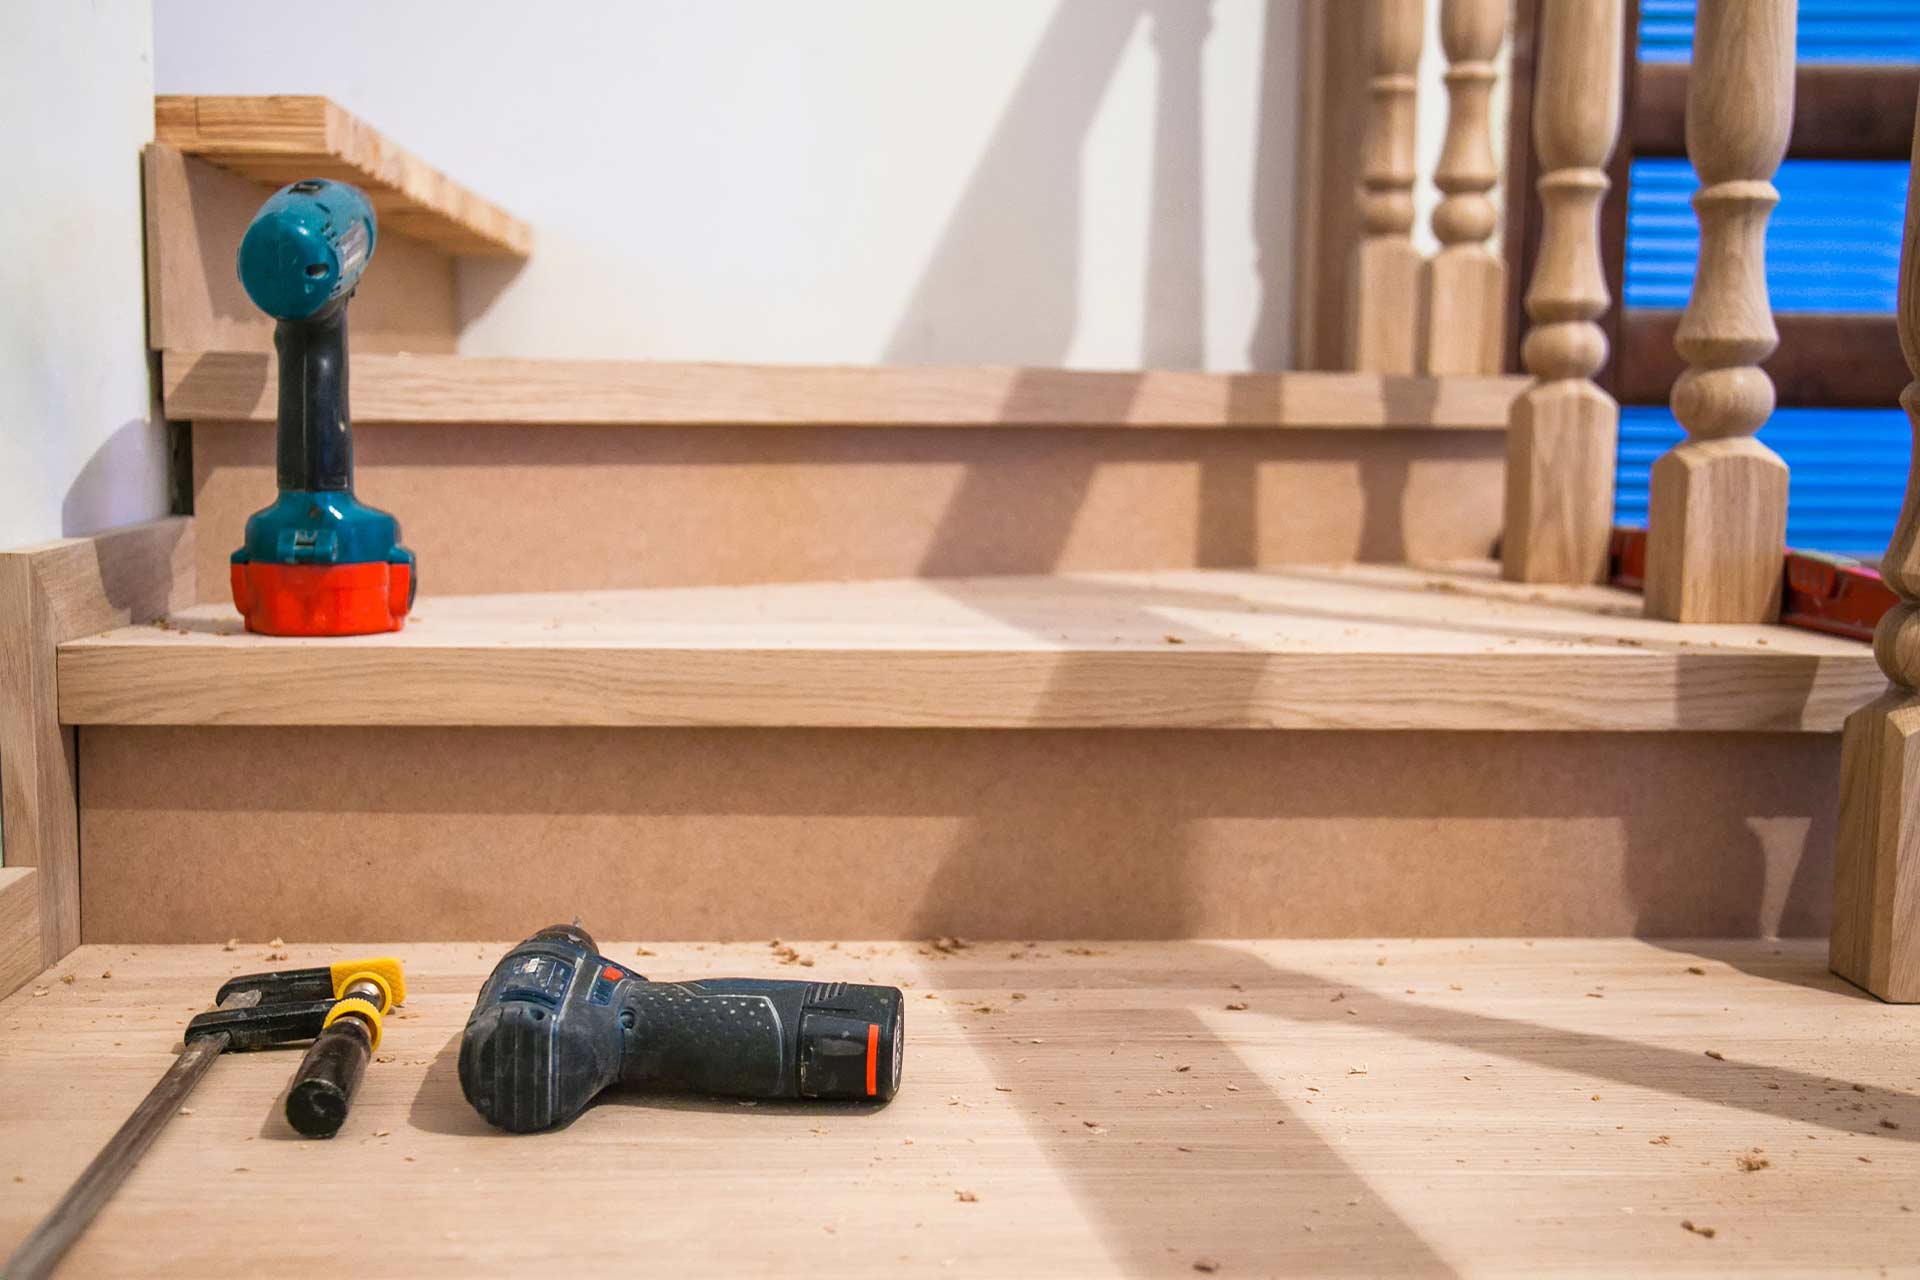
Gathering the Necessary Tools
Before you dive into the process of redoing your stairs, it’s important to gather all the necessary tools. Having the right tools on hand will make the project more efficient and ensure that you can tackle any challenges that may arise along the way. Here are some essential tools you’ll need:
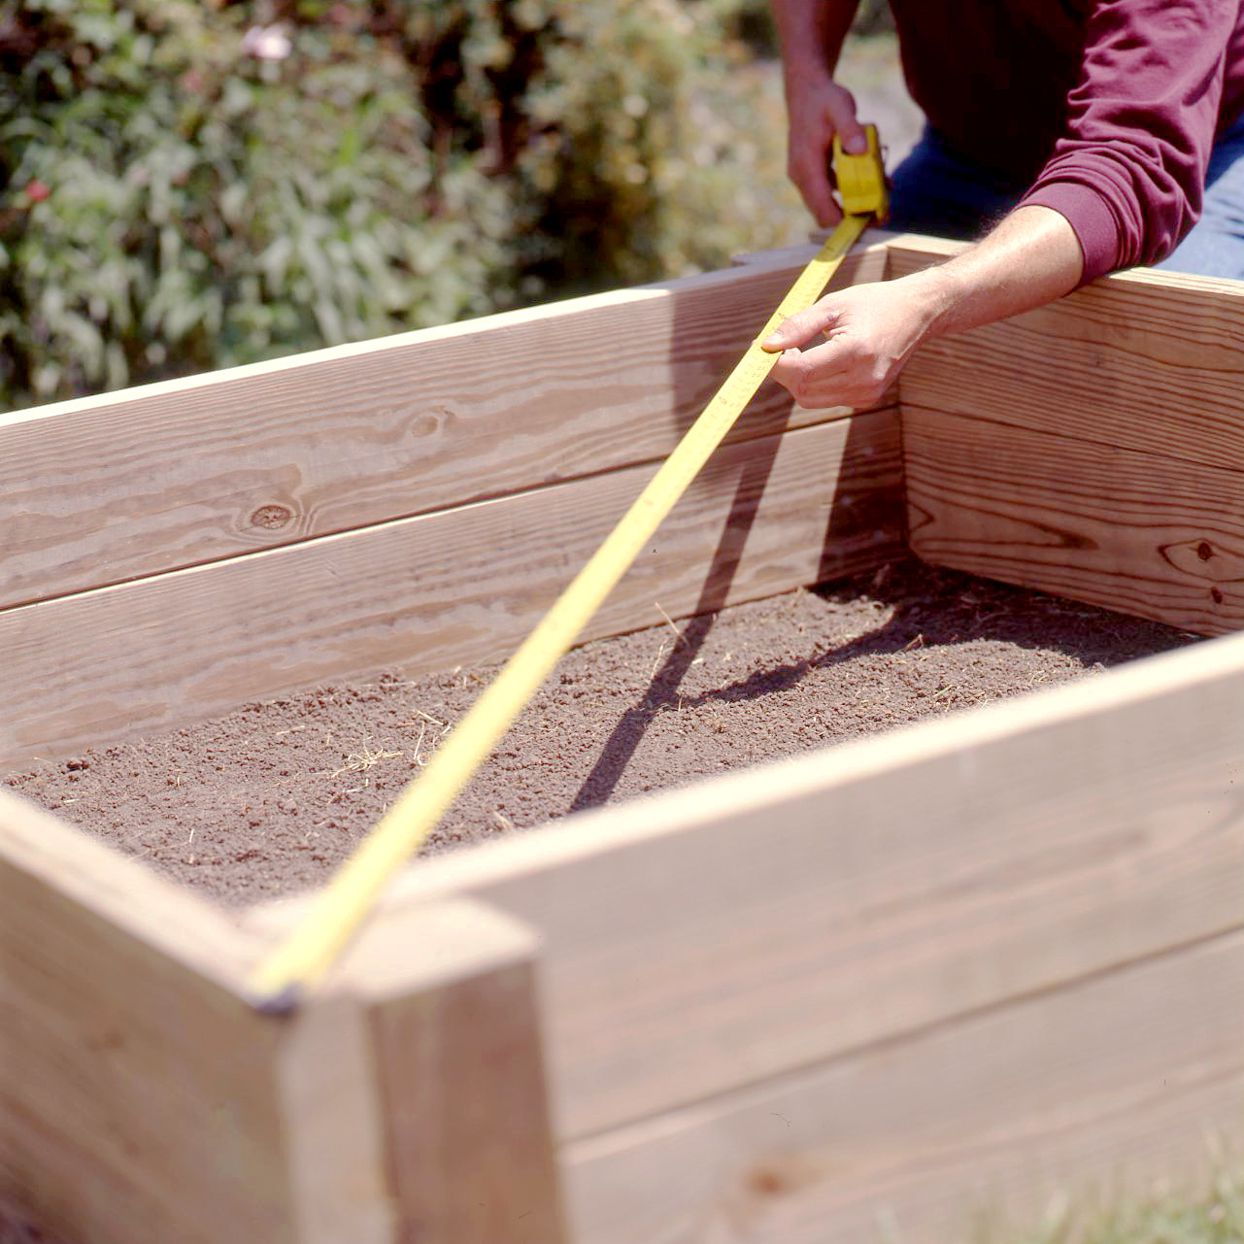
- Tape Measure: Accurate measurements are crucial to ensuring a proper fit for your new materials. A tape measure will help you measure the dimensions of your stairs and guide your material selection.
- Power Tools: Depending on the scope of your project, you may need a variety of power tools such as a circular saw, jigsaw, or miter saw. These tools will assist you in cutting materials to size and achieving precise and clean edges.
- Hand Tools: Some common hand tools you will need include a hammer, screwdriver, chisel, pry bar, and utility knife. These tools will be helpful for removing and replacing any damaged parts, as well as making adjustments during the installation process.
- Sander: A sander, such as a belt sander or orbital sander, is necessary for smoothing the surface of your stairs. It will help remove any existing finish, imperfections, or rough edges, allowing for a clean and polished look.
- Paintbrushes and Rollers: If you’re planning to paint your stairs, make sure to have a variety of paintbrush sizes and rollers handy. This will ensure smooth and even application of paint or stain.
- Level: A level is essential for checking the alignment and slope of your stairs. It will help you ensure that each step is level and safe to walk on.
- Safety Equipment: Redoing stairs can involve working with tools and materials that may pose safety risks. Be sure to have appropriate safety gear, such as goggles, dust masks, and gloves, to protect yourself during the project.
- Fasteners and Adhesives: Depending on the materials you choose, you may need nails, screws, or adhesives to secure the treads and risers in place. Make sure to have the appropriate fasteners and adhesives for your specific project.
These are just a few of the essential tools needed for redoing your stairs. The specific tools required may vary depending on the extent of your renovations and the materials you’re working with. Before you begin, make a thorough list of the tools you’ll need and ensure you have them on hand.
Now that you have gathered all the necessary tools, it’s time to move on to the next step: preparing your stairs for the renovation process.
Preparing Your Stairs
Before you can start the actual renovation process, it’s crucial to properly prepare your stairs. This step ensures that the surface is clean, smooth, and suitable for the installation of new materials. Here are the steps to prepare your stairs:
- Clear the Area: Begin by removing any obstacles or furniture near the stairs. This will provide you with ample working space and prevent any accidental damage or tripping hazards.
- Protect Surrounding Surfaces: Use drop cloths or plastic sheeting to cover the areas surrounding the stairs. This will protect any adjacent walls, floors, or fixtures from dust, debris, or accidental spills during the renovation process.
- Remove the Existing Finish: If your stairs have a previous finish, such as paint or varnish, you’ll need to remove it before applying new materials. Use a paint stripper or sander to strip away the old finish. Follow the manufacturer’s instructions and take appropriate safety precautions when using chemical strippers.
- Repair any Damage: Inspect your stairs for any signs of damage or wear, such as loose boards, cracks, or gaps. Repair any issues by replacing damaged boards, reinforcing loose sections, or filling gaps with wood filler. Ensure that the stairs are structurally sound before moving forward with the renovation process.
- Clean the Surface: Use a broom or vacuum to remove any dust, debris, or loose particles from the stairs. For a more thorough clean, you can wipe down the surface with a damp cloth or use a mild cleaner. Make sure the stairs are completely dry before proceeding.
- Smooth the Surface: Use a sander to smooth the surface of the stairs. This will remove any rough edges, imperfections, or remnants of the previous finish. Sand in the direction of the wood grain for the best results. Start with a coarse grit sandpaper and gradually switch to finer grits for a smooth and even finish.
- Fill Nail Holes: If you’re working with wooden stairs, fill any nail holes or imperfections with wood filler. Smooth out the filler with a putty knife and let it dry according to the manufacturer’s instructions. Sand the filled areas to achieve a seamless and uniform surface.
By properly preparing your stairs, you’ll create a solid foundation for the renovation process. Taking the time to clean, repair, and smooth the surface will ensure that the new materials adhere properly and provide a professional-looking finish. Once the stairs are prepped, you’re ready to move on to the next step: removing the existing finish.
Read more: How To Redo Stairs From Carpet To Wood
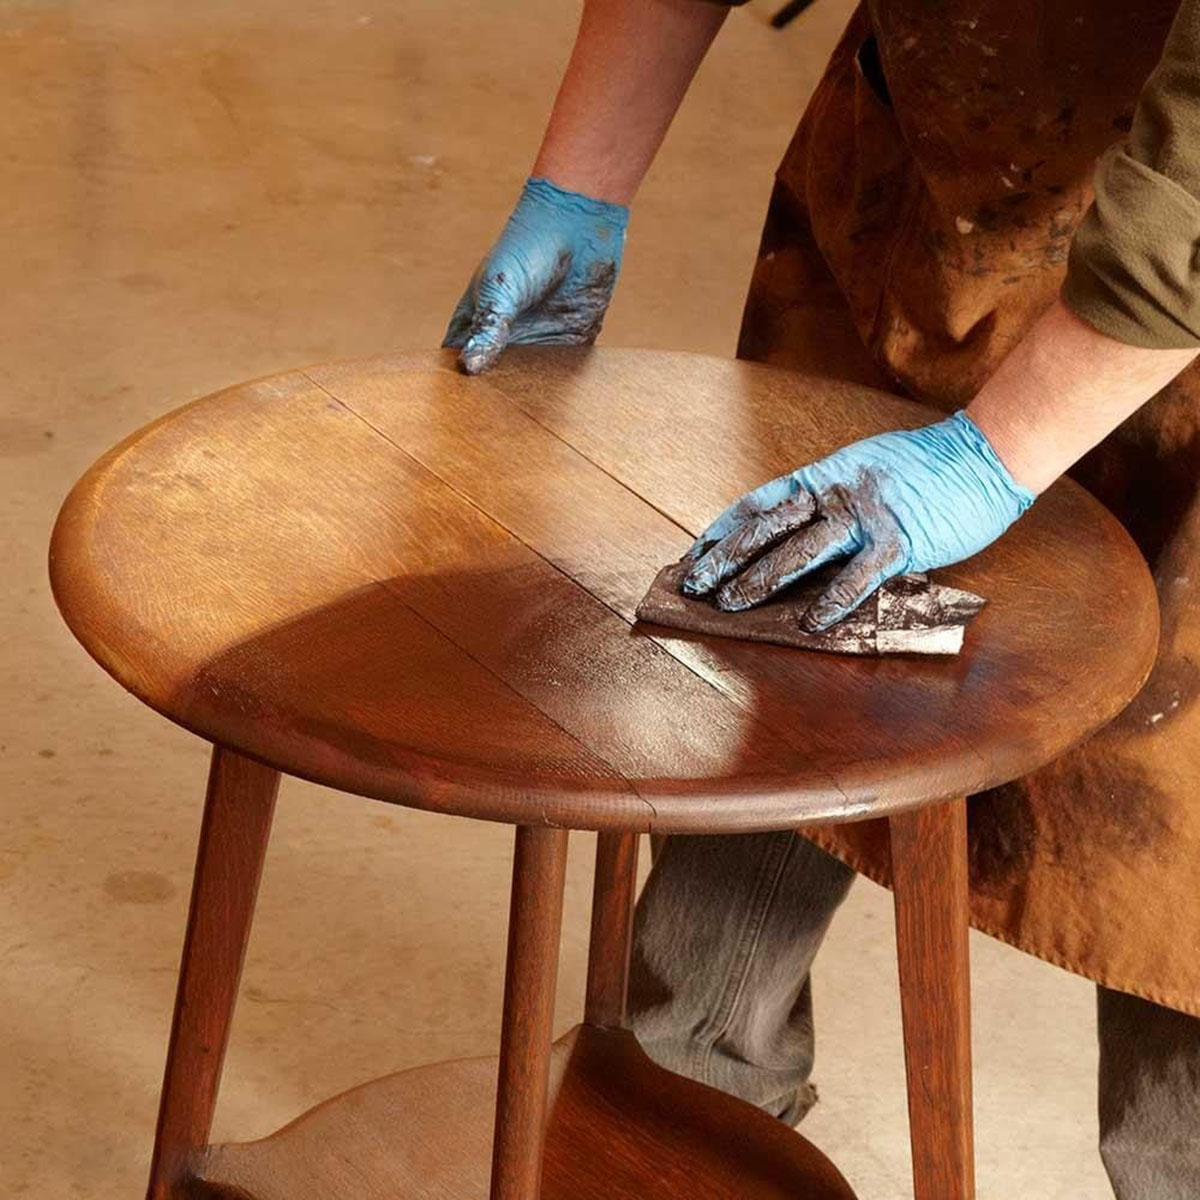
Removing the Existing Finish
Before you can proceed with applying new materials to your stairs, you’ll need to remove the existing finish. Whether it’s paint, varnish, or stain, properly removing the old finish is crucial for a smooth and long-lasting renovation. Here is how to remove the existing finish from your stairs:
- Protect Yourself and the Surrounding Area: Start by wearing appropriate safety gear, such as goggles and gloves, to protect yourself from any chemicals or flying debris. Cover the surrounding areas with drop cloths or plastic sheeting to prevent any accidental damage.
- Choose the Right Method: Depending on the type of finish on your stairs, you can select the most suitable method of removal. Here are a few common methods:
- Chemical Stripping: Use a paint or varnish stripper to dissolve the old finish. Apply the stripper according to the manufacturer’s instructions and wait for it to soften the finish. Then, use a scraper or putty knife to gently remove the softened finish. Be sure to work in well-ventilated areas and follow all safety precautions.
- Sanding: If the existing finish is not too thick or stubborn, you can opt to sand it off. Use a coarse-grit sandpaper or sanding pad to remove the top layer of finish. Work in the direction of the wood grain and gradually switch to finer grit sandpaper for a smoother finish.
- Heat Stripping: Heat stripping involves using a heat gun to soften the finish, making it easier to scrape off. Be cautious not to overheat the wood or stay in one area for too long, as it can damage the surface.
- Follow Proper Techniques: Whichever method you choose, it’s important to follow proper techniques for effective removal. Work in small sections at a time and apply consistent pressure to avoid damaging the wood. Keep a scraper or putty knife at a low angle to prevent gouging the surface. Remove the old finish completely, ensuring a clean and bare wood surface.
- Clean the Surface: After removing the old finish, thoroughly clean the surface of the stairs. Use a broom or vacuum to remove any dust or debris. Wipe the stairs down with a damp cloth to remove any residue from the removal process. Make sure to let it dry completely before proceeding.
Removing the existing finish may require some time and effort, but it’s a crucial step in the renovation process. By properly removing the old finish, you’ll create a clean and smooth surface for the application of new materials. Once the existing finish has been removed, you’re ready to move on to the next step: sanding and smoothing the surface.
Consider using a stair tread template to ensure accurate and consistent measurements when cutting new treads. This will help to create a professional and polished look for your staircase renovation.
Sanding and Smoothing the Surface
After removing the existing finish from your stairs, the next step is to sand and smooth the surface. Sanding is essential to create a clean, even, and polished surface for the application of new materials. Here’s how to sand and smooth the surface of your stairs:
- Choose the Right Sandpaper Grit: Start with a coarse-grit sandpaper, such as 60 or 80 grit, to remove any remaining finish, imperfections, or rough areas. As you progress, switch to medium-grit sandpaper, such as 120 or 150, for a finer sanding. Finally, use a fine-grit sandpaper, such as 220 or 240, for a smooth and polished finish.
- Prepare the Sanding Tools: Use a handheld power sander, such as a belt sander or orbital sander, for larger areas of your stairs. For corners, edges, and hard-to-reach places, you’ll need to sand by hand using sanding blocks or sandpaper wrapped around a wooden block.
- Sand in the Direction of the Grain: When sanding, always go with the grain of the wood to avoid scratches or uneven patches. Maintain constant movement and apply even pressure to achieve a consistent finish. Be cautious not to oversand as this can remove too much material and result in an uneven surface.
- Focus on Trouble Areas: Pay extra attention to areas where the old finish was particularly stubborn or where there are deeper imperfections. Take your time and sand these areas more thoroughly to ensure a smooth and uniform surface.
- Check for Smoothness: As you sand, periodically run your hand over the surface to assess its smoothness. Once the entire surface feels smooth to the touch and no rough spots or imperfections are noticeable, you can move on to the next step.
- Remove Dust: After sanding, it’s crucial to remove any dust or debris from the surface before proceeding. Use a brush or vacuum to remove loose particles, and wipe down the stairs with a damp cloth to eliminate any remaining dust. Make sure the stairs are completely dry before moving on.
Sanding and smoothing the surface of your stairs is a critical step to create the perfect base for further refinishing or the installation of new materials. By taking the time to sand carefully and achieve a polished finish, you’ll ensure that your stairs not only look great but also feel smooth and comfortable underfoot.
Once the surface is sanded and smooth, the next step is to apply a new stain or paint to enhance the appearance of your stairs. We’ll delve into the process of applying a new finish in the next section.
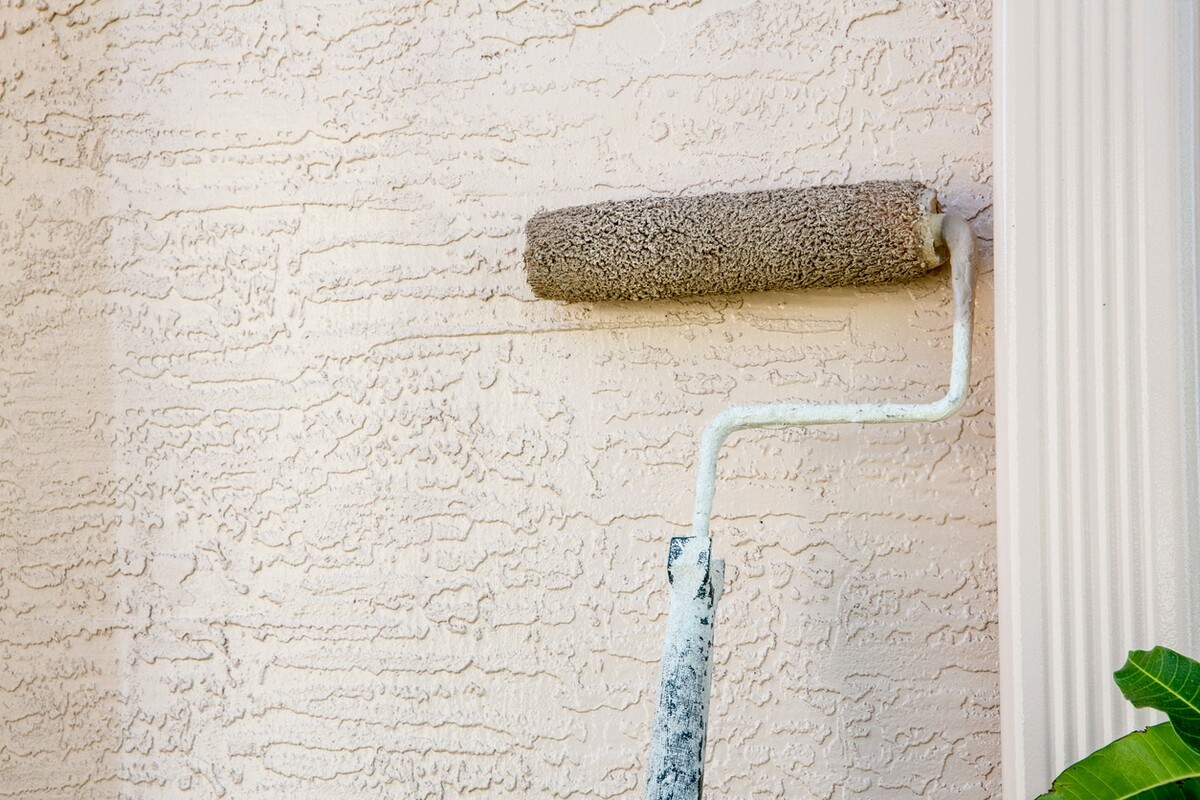
Applying New Stain or Paint
With the surface of your stairs sanded and smooth, it’s time to enhance their appearance by applying a new stain or paint. Whether you want to showcase the natural beauty of the wood with a stain or add a pop of color with paint, this step will give your stairs a fresh and updated look. Here’s how to apply a new stain or paint to your stairs:
- Choose the Right Product: Select a stain or paint that is specifically formulated for use on stairs. Consider factors such as durability, ease of application, and the desired finish. Read the instructions and recommendations provided by the manufacturer before proceeding.
- Prepare the Surface: Ensure that the surface of the stairs is clean and free from dust or debris. If needed, lightly sand the surface with a fine-grit sandpaper to smooth any rough spots that may have emerged during the sanding process. Remove any residual dust using a vacuum or a tack cloth.
- Protect the Surrounding Area: Use painter’s tape or masking tape to protect the surrounding walls, handrails, and any adjacent surfaces that you don’t want to be painted or stained.
- Apply a Primer (if necessary): Depending on the type of paint or stain you’re using, a primer may be required. Primer helps to create a smooth and even surface, enhances the adherence of the paint or stain, and improves the final result. Follow the manufacturer’s instructions for applying the primer and allow it to dry completely.
- Apply the Stain or Paint: Using a brush, roller, or sprayer, apply the stain or paint to the stairs. Work in small sections, starting from the top and working your way down. Follow the recommended application technique for the chosen product, making sure to evenly coat each tread and riser. Be mindful of drips or runs, and smooth them out with a brush or roller as you go.
- Allow for Drying and Curing: Follow the manufacturer’s instructions for drying and curing times. Ensure that each coat of paint or stain is completely dry before applying the next coat. This will help achieve a smooth and durable finish.
- Apply Multiple Coats (if necessary): Depending on the desired coverage and depth of color, you may need to apply multiple coats of paint or stain. Allow each coat to dry before applying the next, and lightly sand between coats using a fine-grit sandpaper to achieve a smooth finish.
- Remove the Protective Tape: Once the final coat is dry and cured, carefully remove the painter’s tape or masking tape from the surrounding areas. Take your time to ensure clean edges and lines.
Remember to follow all safety precautions and work in a well-ventilated area when applying paints or stains. Take your time and be patient during the application process to achieve the desired result. Your newly stained or painted stairs will breathe fresh life into your home and become a focal point in your space.
Now that your stairs have been transformed with a new finish, it’s time to move on to the next step: installing new treads and risers.
Installing New Treads and Risers
Installing new treads and risers is a significant step in the process of redoing your stairs. This step will not only enhance the aesthetic appeal of your stairs but also ensure a safe and sturdy structure. Here’s how to install new treads and risers:
- Measure and Cut: Start by measuring the dimensions of each tread and riser, taking into account any overhang or nosing. Use a tape measure to ensure precision. Transfer the measurements to your chosen material, whether it’s hardwood, laminate, or another option. Use a saw or a power tool to cut the treads and risers to the appropriate size.
- Apply Adhesive: For wooden treads and risers, apply a generous amount of construction adhesive to the backside of each piece. Make sure to follow the manufacturer’s instructions regarding the application technique and drying time. This adhesive will ensure a secure and long-lasting bond.
- Position and Secure: Once the adhesive is applied, carefully position each tread and riser in place. Use a level to ensure they are straight and level. Apply pressure to adhere them firmly to the stairs. If needed, use a rubber mallet or a hammer with a scrap piece of wood to tap them into place.
- Secure with Fasteners: For added stability, you can use finishing nails or screws to secure the treads and risers in place. Pre-drill holes to prevent splitting and ensure a precise and clean finish. Countersink the fasteners and fill the holes with wood filler for a seamless look.
- Let the Adhesive Cure: If you’re using construction adhesive, allow it to cure according to the manufacturer’s instructions before putting any weight or pressure on the newly installed treads and risers. This will ensure a strong and durable bond.
- Finish the Edges: Depending on the material and design of your new treads and risers, you may need to finish the edges to achieve a polished look. Use a router or a trim piece to cover the exposed edges or add a decorative element.
- Touch Up and Clean: Inspect the newly installed treads and risers for any imperfections or blemishes. Touch up with paint or stain, if necessary, to achieve a uniform finish. Clean the surface and remove any dust or debris from the installation process.
By following these steps, you’ll have successfully installed new treads and risers, transforming the appearance of your stairs. Take your time during the installation process to ensure accuracy and precision. The newly installed treads and risers will not only enhance the visual appeal of your stairs but also provide a durable and safe structure for years to come.
Now that the installation of new treads and risers is complete, it’s time to add the finishing touches and take necessary safety precautions. We’ll cover the final steps in the next section.
Read more: How To Redo Your Grass
Finishing Touches and Safety Precautions
With the main renovation steps completed, it’s time to add the finishing touches and ensure the safety of your newly redone stairs. Paying attention to these final details will enhance the overall appearance and functionality of your stairs. Here’s what you need to do:
- Apply a Finish: If you have chosen hardwood treads, applying a finish is essential to protect the wood and enhance its natural beauty. Use a clear polyurethane or a protective sealant to seal the wood. Follow the manufacturer’s instructions regarding the application technique and drying time. This will provide durability and make your stairs easier to clean and maintain.
- Add Skid-Resistant Treads: To enhance safety, especially for households with children or elderly individuals, consider adding skid-resistant treads to each step. These can be purchased as adhesive strips or mats that adhere to the surface of the treads, providing extra traction and reducing the risk of slipping.
- Install Handrail and Balusters: If your stairs did not have a handrail or balusters before the renovation, consider installing them for added safety and support. Choose a handrail style that complements the overall design of your stairs and ensure that it meets local building codes and safety requirements.
- Check for Loose Parts: After completing the renovation, inspect your stairs for any loose parts, such as handrails, balusters, or treads. Secure any loose components to ensure stability and safety.
- Keep the Stairs Clear: Maintain the safety of your stairs by keeping them free from clutter or obstructions. Avoid placing items on the stairs that could pose a tripping hazard or impede access and visibility.
- Regular Maintenance: To keep your newly redone stairs in optimal condition, establish a regular maintenance routine. This may include routine cleaning, periodic touch-ups, and addressing any signs of wear or damage promptly.
- Ensure Proper Lighting: Adequate lighting is crucial for safe staircase usage. Install proper lighting fixtures, such as wall sconces or overhead lights, to ensure that the entire staircase is well-lit and visible, especially during nighttime.
By paying attention to these finishing touches and safety precautions, you can enjoy your beautifully redone stairs with peace of mind. Remember, safety should always be a top priority when it comes to any renovation project.
Congratulations! You have successfully completed the renovation of your stairs. The transformation not only enhances the visual appeal of your home but also adds value and functionality. Take pride in your newly redone stairs and enjoy the improved overall look and feel of your space.
Now, sit back, relax, and revel in the satisfaction of a job well done!
Conclusion
Redoing your stairs can be a rewarding endeavor that transforms the look and feel of your home’s interior. By following the steps outlined in this comprehensive guide, you have learned how to assess the condition of your stairs, choose the right materials, gather the necessary tools, and properly prepare, sand, and apply a new finish to your stairs. Additionally, you have gained insights into installing new treads and risers, incorporating finishing touches, and implementing important safety precautions.
Throughout the renovation process, it’s important to strike a balance between aesthetics and functionality. Whether you opted for the timeless elegance of hardwood, the durability of laminate, or the cozy comfort of carpet, the materials you chose have significantly contributed to the overall appearance of your stairs. Adding a fresh coat of stain or paint breathed new life into the surface, while installing new treads and risers brought a sense of style and stability.
As you completed each step, you took the necessary precautions to ensure safety and adherence to local building codes. From assessing the condition of the stairs to checking for loose parts and implementing skid-resistant measures, you prioritized the well-being of everyone using the staircase on a daily basis.
Remember, the journey to redoing your stairs required careful planning, patience, and attention to detail. By incorporating your style preferences and following the steps outlined in this guide, you have successfully created a beautiful and functional staircase that adds value to your home.
Now, take a moment to admire your hard work and enjoy the transformation you have achieved. Whether you’re welcoming guests into your home or simply ascending the stairs at the end of the day, your newly redone stairs will continue to bring a sense of pride and satisfaction. Embrace the renewed ambiance and enhanced aesthetic appeal.
Thank you for joining us on this journey of stair redoing. We hope this guide has provided you with the knowledge and confidence to tackle your own stairs and create a space that truly reflects your personal style and vision.
Frequently Asked Questions about How To Redo Your Stairs
Was this page helpful?
At Storables.com, we guarantee accurate and reliable information. Our content, validated by Expert Board Contributors, is crafted following stringent Editorial Policies. We're committed to providing you with well-researched, expert-backed insights for all your informational needs.


0 thoughts on “How To Redo Your Stairs”