
Articles
How To Plaster Fireplace
Modified: October 18, 2024
Learn how to plaster your fireplace with our step-by-step articles. Get expert advice and tips for a flawless fireplace renovation.
(Many of the links in this article redirect to a specific reviewed product. Your purchase of these products through affiliate links helps to generate commission for Storables.com, at no extra cost. Learn more)
Introduction
Welcome to our comprehensive guide on how to plaster a fireplace. Plastering can transform the look of your fireplace, giving it a clean and polished finish that enhances the overall aesthetic of your living space. Whether you have a brick, stone, or concrete fireplace, plastering can help to create a smooth and even surface.
Plastering a fireplace may seem like a daunting task, but with the right tools, materials, and step-by-step instructions, it can be easily accomplished by both novice and experienced home improvement enthusiasts. In this article, we will walk you through the process of plastering a fireplace, from the necessary safety precautions to the finishing touches.
Before we begin, it’s important to note that plastering is a highly skilled craft that requires practice and precision. If you are unsure of your abilities or lack experience with plastering, it may be best to seek professional assistance. However, if you are up for the challenge and ready to give your fireplace a fresh new look, let’s get started!
Key Takeaways:
- Transform your fireplace with a polished finish by following safety precautions, preparing the surface, applying multiple coats of plaster, and adding the finishing touches for a stunning result.
- Achieve a professional and long-lasting finish for your fireplace by prioritizing safety, proper preparation, meticulous application of plaster, and thorough cleaning and maintenance.
Read more: How To Plaster Over Brick Fireplace
Safety Precautions
Prior to beginning any home improvement project, safety should always be a top priority. Plastering a fireplace involves working with potentially hazardous materials and tools, so it’s crucial to take the necessary precautions to protect yourself and others. Here are some safety measures to keep in mind:
- Use protective gear: Before you start plastering, make sure you have the appropriate safety equipment. This includes goggles or safety glasses to protect your eyes from debris, a dust mask to prevent inhalation of dust particles, and gloves to safeguard your hands.
- Prepare the work area: Clear the area surrounding the fireplace of any furniture or decorative items. Place drop cloths or plastic sheets on the floor and nearby surfaces to catch any plaster or debris that may fall during the process.
- Ensure proper ventilation: Plastering can produce dust and fumes, so it’s important to work in a well-ventilated area. If possible, open windows or doors to allow for fresh air circulation. If ventilation is limited, consider using a portable fan or wearing a respirator mask.
- Turn off utilities: If your fireplace is connected to gas, electricity, or water lines, make sure to turn off and disconnect them before starting the plastering process. This will prevent any accidents or damage to the utilities.
- Handle tools with care: Plastering requires the use of various tools, such as trowels and mixers. Handle them with caution, keeping blades and sharp edges away from your body and using them only for their intended purpose. Store tools properly when not in use.
- Beware of hot surfaces: If you have recently used your fireplace, allow it to cool down completely before you begin plastering. Touch the surface to ensure it is cool to the touch to avoid burns or injuries.
- Follow manufacturer’s instructions: When using plaster or other materials, carefully read and follow the manufacturer’s instructions for mixing ratios, drying times, and application techniques. Using products improperly can result in a poor finish or compromised safety.
By following these safety precautions, you can minimize the risk of accidents or injuries and create a safe environment for yourself and others during the plastering process. Once you have taken the necessary safety measures, you are ready to move on to the next step: gathering the materials.
Gathering Materials
Before you begin plastering your fireplace, it’s important to gather all the necessary materials. Having everything on hand will help streamline the process and ensure that you have everything you need to achieve a smooth and professional finish. Here are the materials you will need:
- Plaster: Choose a high-quality plaster suitable for fireplace applications. There are various types of plaster available, such as gypsum-based or cement-based plaster. Consider consulting with a professional or the staff at your local hardware store to determine the best option for your fireplace.
- Water: You will need water to mix with the plaster. Use clean, potable water to achieve the right consistency.
- Bucket: Use a sturdy bucket with a wide opening to mix the plaster. Avoid using plastic containers that may break or warp under the weight of the mixture.
- Trowels: Invest in a few high-quality trowels, including a larger one for applying the plaster and a smaller one for smoothing and finishing touches. Ensure that the trowels are clean, rust-free, and in good condition.
- Paddle mixer: A paddle mixer attached to a power drill will make the mixing process easier and faster. This tool ensures that the plaster is thoroughly mixed without any lumps or inconsistencies.
- Protective gear: As mentioned in the previous section, be sure to have goggles or safety glasses, a dust mask, and gloves to protect yourself during the plastering process.
- Dust sheets or drop cloths: Cover the floor, furniture, and surrounding areas with dust sheets or drop cloths to protect them from any plaster or debris that may fall during the application.
- Scraper or putty knife: A scraper or putty knife will come in handy for removing any loose or flaking paint, debris, or rough spots on the surface of the fireplace before applying the plaster.
- Sanding block or sandpaper: If needed, have a sanding block or sandpaper on hand to smooth out any imperfections on the fireplace surface.
- Cleaning supplies: Ensure you have a bucket of clean water, sponges, and rags to clean the fireplace surface before and after plastering.
By gathering all the necessary materials ahead of time, you can avoid interruptions during the plastering process and ensure that you have everything you need to achieve a professional and long-lasting finish. With your materials ready, it’s time to move on to the next step: preparing the fireplace.
Preparing the Fireplace
Preparing the fireplace before applying the plaster is an essential step that will ensure a successful and durable finish. Proper preparation will help the plaster adhere to the surface and prevent any issues that may arise later on. Follow these steps to prepare your fireplace:
- Clean the surface: Start by cleaning the fireplace surface thoroughly. Remove any loose debris, dirt, dust, or flaking paint using a scraper or putty knife. Make sure the surface is clean and free of any obstacles or obstructions.
- Repair any damages: Inspect the fireplace for any cracks, holes, or damaged areas. Fill any cracks or gaps with a suitable filler or patching compound, ensuring that it is smooth and level with the surrounding surface. Allow the filler to dry and sand it down if necessary.
- Smooth rough spots: If the fireplace surface is rough or uneven, use a sanding block or sandpaper to smooth out any imperfections. This step will help create a flat and even surface for the plaster, ensuring a consistent finish.
- Wipe down the surface: Use a damp sponge or cloth to wipe down the entire fireplace surface. This will remove any remaining dust or debris and ensure a clean base for the plaster to adhere to. Let the surface dry completely before proceeding to the next step.
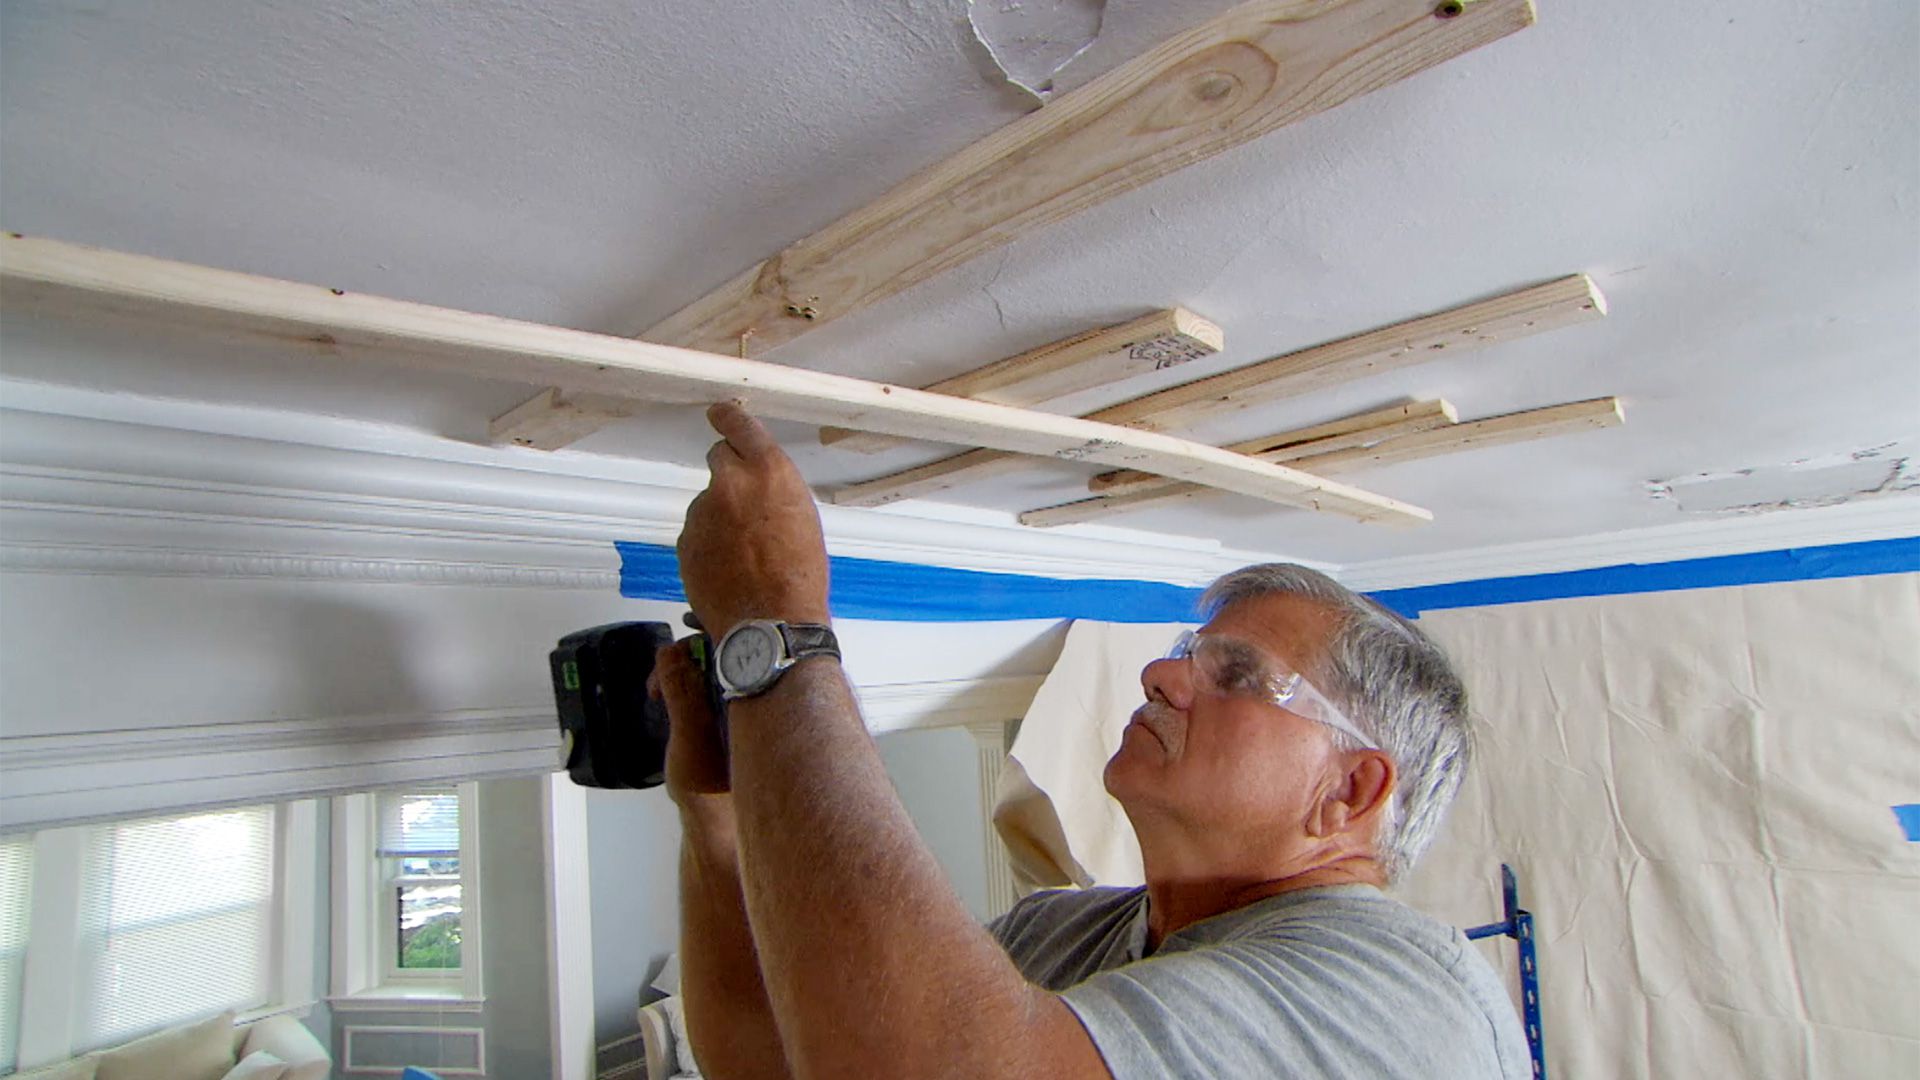
- Mask off adjacent areas: If there are any areas around the fireplace, such as walls or mantels, that you want to protect from accidental plaster application, cover them with masking tape or painter’s tape. This will prevent any unwanted plaster from getting onto these surfaces.
By properly preparing the fireplace surface, you are setting the stage for a successful plastering job. Taking the time to clean, repair, and smooth the surface will help ensure that the plaster adheres properly and provides a smooth and seamless finish. With the fireplace prepared, it’s time to move on to the next step: mixing the plaster.
Mixing the Plaster
Now that the fireplace is properly prepared, it’s time to mix the plaster. Mixing the plaster correctly is crucial to ensure a smooth and workable consistency that is easy to apply and will set properly. Follow these steps to mix the plaster:
- Read the manufacturer’s instructions: Before you begin mixing the plaster, carefully read and follow the instructions provided by the manufacturer. Different brands and types of plaster may have specific mixing ratios and instructions, so it’s important to adhere to them.
- Prepare the mixing area: Find a clean and well-ventilated area to mix the plaster. Lay down a sheet or drop cloth to catch any spills or splatters. Have a bucket of clean water nearby for adjusting the consistency if needed.
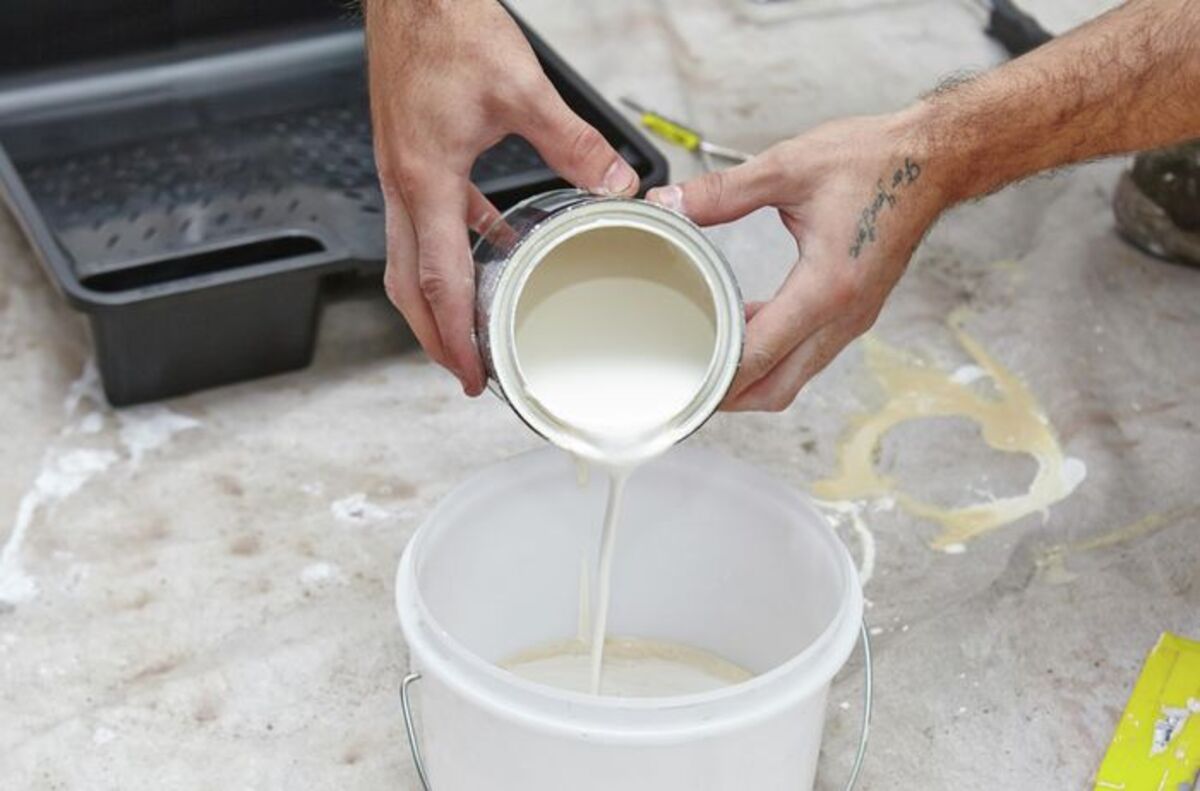
- Add plaster to water: Start by pouring the required amount of plaster into a clean bucket. Slowly add water while stirring continuously with a paddle mixer attached to a power drill. Follow the recommended water-to-plaster ratio to achieve the desired consistency.
- Continue mixing: As you add water, keep stirring the mixture until it reaches a smooth and creamy consistency. Avoid adding too much water at once, as this can make the plaster too thin and difficult to work with. If the mixture is too thick, gradually add small amounts of water until the desired consistency is reached.
- Check the consistency: To ensure that the plaster is at the right consistency, perform a slump test. Dip the edge of the trowel into the plaster and lift it up. The plaster should have a slightly stiff texture and hold its shape without crumbling or dripping excessively.
- Allow the plaster to rest: Once the plaster is mixed to the desired consistency, let it rest for a few minutes. This will allow any air bubbles to rise to the surface and allow the plaster to settle.
- Give it a final mix: After the rest period, give the plaster a final mix to ensure it is well combined and free of lumps or air pockets. Use a trowel or the paddle mixer to achieve a smooth and homogeneous mixture.
Remember, the key to mixing plaster is to follow the manufacturer’s instructions and achieve a consistency that is easy to work with. By taking the time to mix the plaster correctly, you will ensure a smooth and even application on your fireplace. With the plaster mixed to perfection, it’s time to move on to the next step: applying the first coat.
Read more: What Is Plastering In Construction
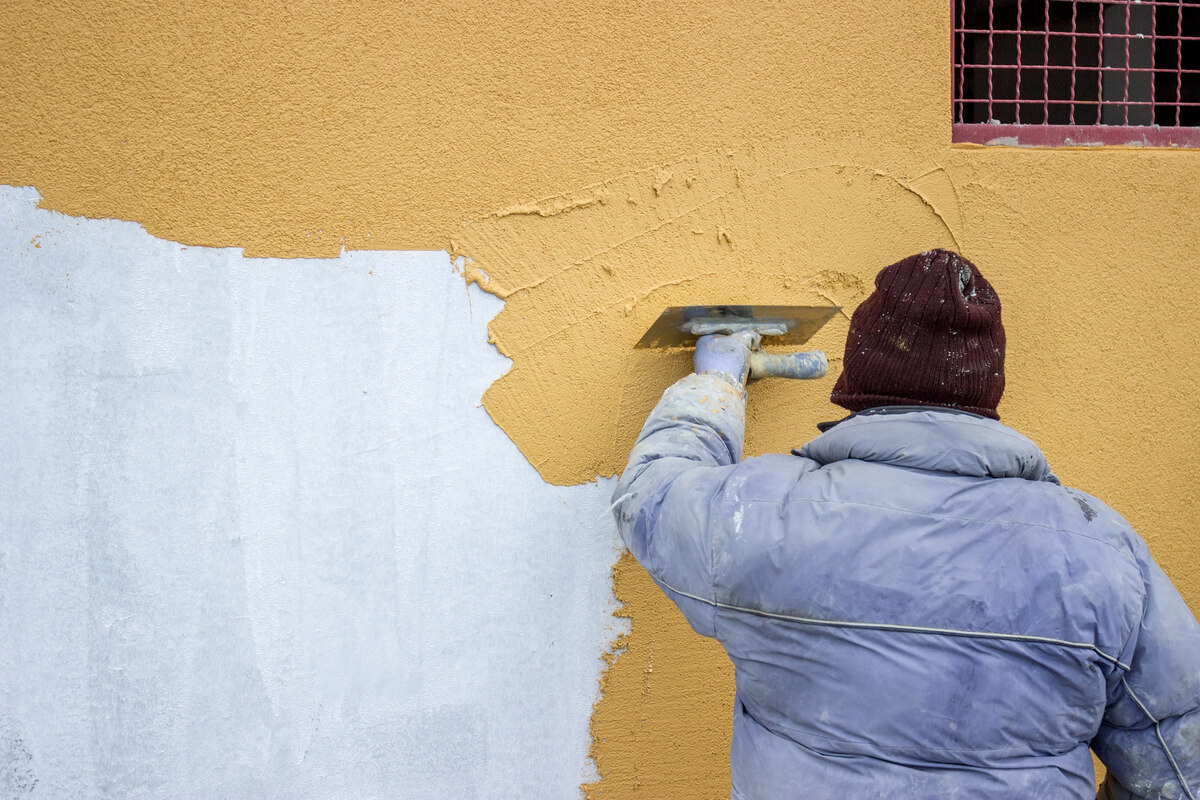
Applying the First Coat
Now that your plaster is mixed to the desired consistency, it’s time to apply the first coat to your fireplace. This initial coat is known as the scratch coat and serves as the base layer for the subsequent coats. Follow these steps to apply the first coat:
- Prepare your tools: Have your trowel and a bucket of clean water nearby. Wetting the trowel will help prevent the plaster from sticking to it.
- Dampen the surface: Before applying the plaster, lightly dampen the prepared fireplace surface with a sponge or cloth. This dampness will create a better bond between the plaster and the surface.
- Load the trowel: Using the trowel, scoop up a generous amount of plaster onto the blade. Hold the trowel at a slight angle to ensure an even load of plaster.
- Apply the plaster: Start at the bottom of the fireplace and work your way up. With a flicking motion, apply the plaster onto the surface, spreading it evenly. Use the flat side of the trowel to smooth and level the plaster as you go.
- Work in sections: To ensure the plaster doesn’t dry out too quickly, work in small sections at a time. Apply the plaster, smooth it out, and move on to the next section. Continue this process until the entire surface is covered.
- Scratch the surface: While the first coat of plaster is still wet, use a scratch comb or the tines of a plastic fork to create shallow horizontal scratches on the surface. This will provide a rough texture for the next coat to adhere to.
- Check for evenness: As you work, regularly step back and check for evenness and consistency in the application. Adjust the thickness and smoothness as needed to ensure a uniform coat.
- Smooth out any imperfections: If you notice any lumps, ridges, or uneven areas, use the trowel to smooth them out gently. Feather the edges of each section to create a seamless transition between them.
Remember to work efficiently but also take your time to ensure a quality application. The first coat is the foundation for the subsequent coats, so it’s important to achieve a smooth and even surface. With the first coat applied, it’s time to move on to the next step: applying the second coat.
Before plastering a fireplace, make sure to clean the surface thoroughly and apply a bonding agent to ensure the plaster adheres properly. Sand the surface lightly for a smooth finish.
Applying the Second Coat
With the first coat applied and dried, it’s time to move on to the second coat of plaster. This coat, often referred to as the skim coat, will provide a smooth and flawless finish to your fireplace. Here’s how to apply the second coat:
- Prepare your tools: Make sure your trowel is clean and moistened. Having a bucket of clean water nearby will help in smoothing out the plaster.
- Inspect the first coat: Before applying the second coat, carefully inspect the first coat for any imperfections such as ridges, bumps, or unevenness. Use sandpaper or a sanding block to gently smooth out any rough spots. Wipe the surface clean to remove any dust or debris.
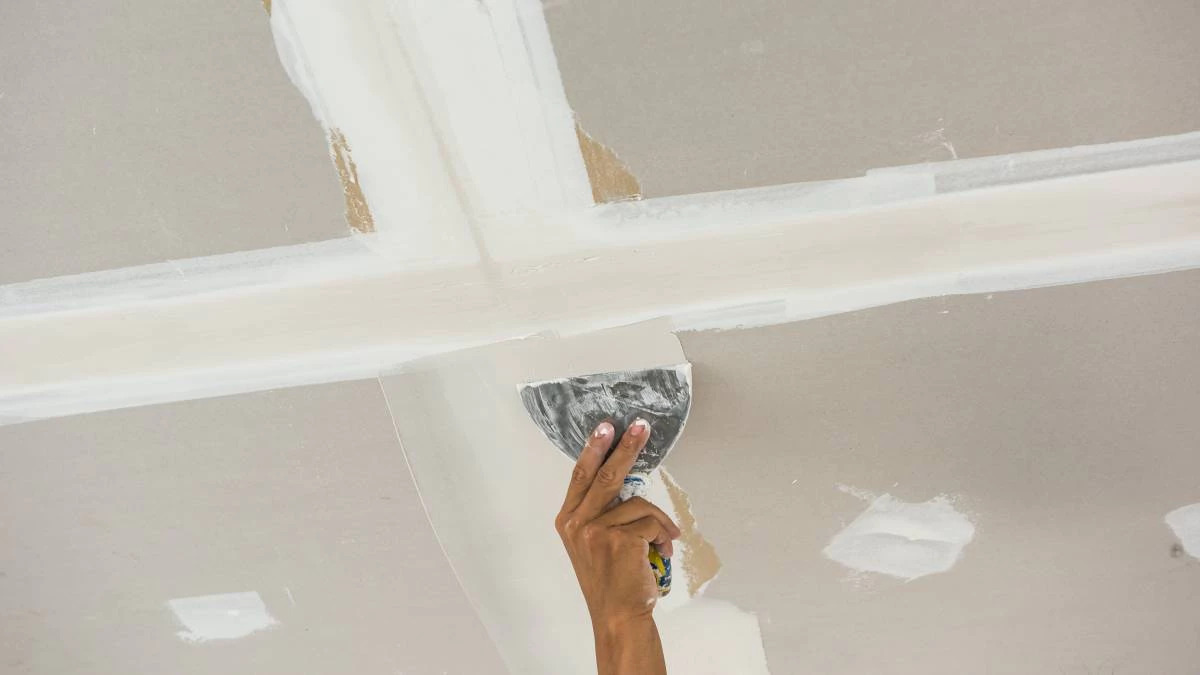
- Apply a thin layer: With the trowel, apply a thin layer of plaster onto the surface. Start from the top of the fireplace and work your way down, using smooth and even strokes. Try to maintain a consistent thickness throughout the application.
- Smooth and level: After you have applied the plaster, use the trowel to smooth and level the surface. Hold the trowel at a slight angle and apply light pressure to achieve an even and uniform finish. Smooth out any ridges or excess plaster as you go.
- Feather the edges: To create a seamless transition between the second coat and the surrounding areas, feather the edges of the plaster. Gradually taper the thickness of the plaster towards the edges, blending it into the adjacent surfaces.
- Check for uniformity: Step back and check the overall appearance of the second coat. Look for any areas that may need additional attention or smoothing. Address any imperfections promptly to achieve a professional finish.
- Allow the plaster to dry: Once the second coat is applied, allow the plaster to dry completely. Follow the manufacturer’s instructions for the recommended drying time. Avoid touching or disturbing the plaster during this period.
Applying the second coat of plaster requires attention to detail and a steady hand. Take your time to ensure a smooth and even application, as this coat will be the final layer that provides the polished look to your fireplace. With the second coat applied, it’s time to move on to the next step: smoothing and finishing touches.
Smoothing and Finishing Touches
After the second coat of plaster has dried, it’s time to focus on smoothing out any imperfections and adding the finishing touches to your fireplace. These final steps will help refine the surface and ensure a professional and flawless finish. Here’s what you need to do:
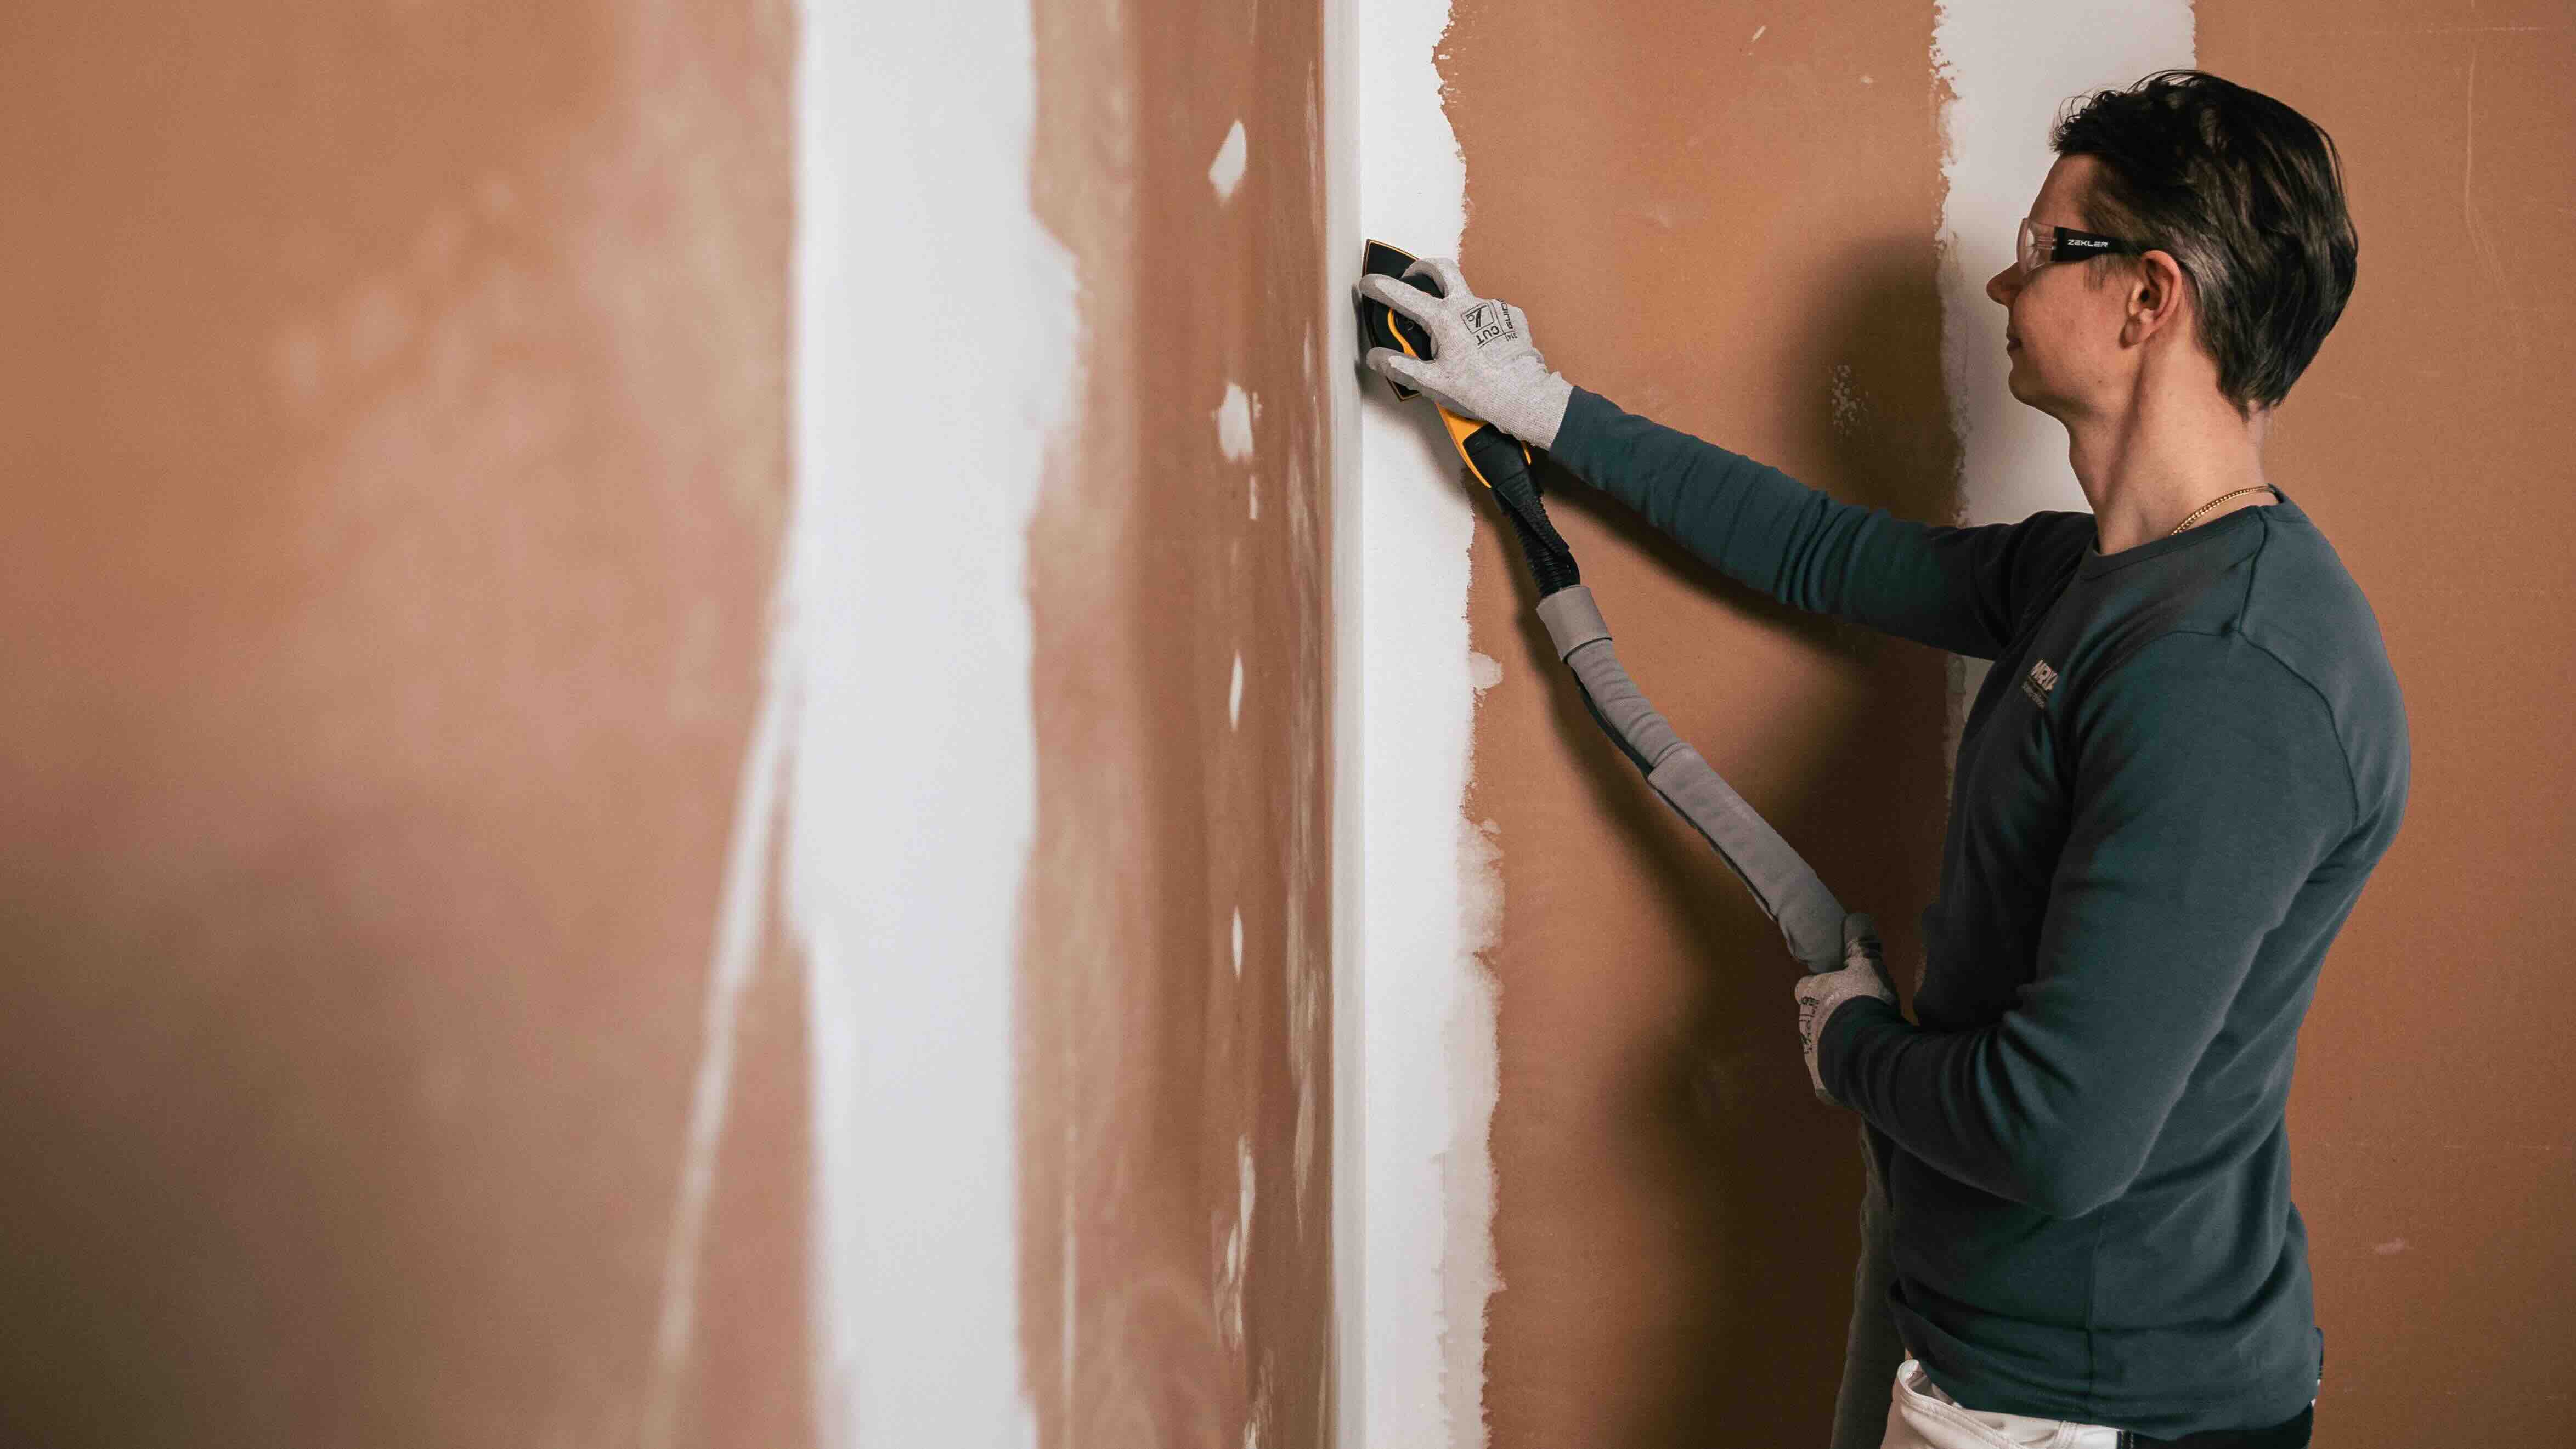
- Inspect the surface: Assess the dried second coat for any bumps, ridges, or uneven areas. Use sandpaper or a sanding block to gently smooth out these imperfections. Take care to maintain the evenness and integrity of the surface.
- Wipe down the surface: After sanding, use a clean, damp cloth or sponge to wipe down the fireplace surface. This will remove any dust or debris from the sanding process and give you a clean canvas for the next steps.
- Apply a final thin coat: If necessary, you can apply a thin final coat of plaster to achieve a flawless and polished finish. Follow the same techniques used for the second coat, applying the plaster evenly and smoothing it out with the trowel.
- Use a wet trowel for a smoother finish: Wet the trowel slightly with clean water to help achieve a smoother finish. The moisture will help reduce friction and create a sleek surface as you glide the trowel over the plaster.
- Feather the edges: Once the final coat is applied, feather the edges of the plaster to blend it seamlessly into the surrounding areas. This will create a cohesive and visually appealing finish.
- Check for uniformity: Step back and evaluate the overall appearance of the fireplace surface. Look for any remaining imperfections or uneven areas. Address them with light sanding or additional plaster, if necessary.
- Allow the plaster to fully cure: Once you are satisfied with the smoothness and finish, allow the plaster to fully cure according to the manufacturer’s instructions. This may take several days, so be patient and avoid touching or disturbing the surface during this time.
By focusing on smoothing out imperfections and adding the finishing touches, you can achieve a professional and refined look for your plastered fireplace. These final steps will enhance the overall appearance and ensure that your fireplace becomes a stunning focal point in your living space. With the smoothing and finishing touches complete, it’s time to move on to the next step: drying and curing.
Drying and Curing
After plastering your fireplace, it’s crucial to allow the plaster to properly dry and cure. This process ensures that the plaster sets and hardens, providing a durable and long-lasting finish. Follow these steps to ensure the drying and curing process is successful:
- Avoid touching the surface: Once the plaster is applied, avoid touching or disturbing the surface as it dries. Touching the plaster prematurely can leave marks or indentations and compromise the overall finish.
- Follow the manufacturer’s instructions: Observe the recommended drying time provided by the manufacturer. Different plasters may have varying drying times, so it’s important to adhere to specific instructions. This may range from a few hours to several days.
- Optimize airflow and ventilation: Proper airflow and ventilation can accelerate the drying process. Open windows or use fans to improve air circulation. However, avoid direct airflow that may cause the plaster to dry too quickly and result in cracking or weakening.
- Monitor the drying progress: Regularly check the fireplace surface for signs of drying. As the plaster dries, it will change from a darker color to a lighter shade. Touch the surface gently to assess its dryness. It should feel firm and cool to the touch.
- Allow ample curing time: While the plaster may dry within a few hours, it is essential to allow sufficient time for curing. Curing involves the chemical process of the plaster hardening and reaching its maximum strength. Follow the manufacturer’s guidelines for the recommended curing time, which can range from a few days to a week.
- Protect the drying plaster: During the drying and curing process, protect the plastered fireplace from accidental bumps, scrapes, or moisture. Avoid placing objects or decorations in close proximity that could potentially damage the surface.
- Monitor humidity levels: High humidity can prolong the drying and curing process. Maintain a moderate humidity level in the room to facilitate the drying process while ensuring the plaster doesn’t dry too rapidly and become prone to cracking.
- Observe drying and curing progress: As the plaster dries and cures, inspect the surface for any signs of cracks or imperfections. If any issues arise, consult with a professional to address them promptly and prevent further damage.
By allowing the plaster to dry and cure properly, you ensure that it achieves its optimal strength and durability. Proper drying and curing will result in a long-lasting and beautifully finished fireplace. With the drying and curing process underway, it’s time to move on to the final step: cleaning up.
Read more: How To Plaster A Swimming Pool
Cleaning Up
After successfully plastering your fireplace, it’s important to clean up the workspace and remove any debris or leftover materials. Cleaning up properly will not only leave your fireplace looking pristine but also ensure a safe and tidy environment. Follow these steps to clean up after plastering:
- Dispose of waste materials: Dispose of any leftover plaster, packaging, and other waste materials in accordance with local regulations. Bag them securely and place them in the appropriate disposal containers or schedule a pickup if necessary.
- Remove drop cloths or protective sheets: Carefully remove the drop cloths or protective sheets used to cover the surrounding area during the plastering process. Shake them outside to remove any plaster or debris, then fold or roll them up for cleaning or future use.
- Clean tools and equipment: Thoroughly clean your trowels, paddle mixer, and any other tools or equipment used during the plastering process. Use warm water and mild detergent to remove any plaster residue. Dry the tools completely to prevent rust or damage.
- Wipe down surfaces: Use a damp cloth or sponge to wipe down the fireplace and surrounding areas. Remove any plaster dust, fingerprints, or smudges. Pay attention to mantels, walls, and floors, ensuring they are clean and free from any plaster debris or marks.
- Store materials properly: If you have any leftover plaster, store it in a sealed container or bag to prevent it from drying out or becoming unusable. Keep it in a cool and dry place away from direct sunlight or extreme temperatures.
- Arrange for professional cleaning if necessary: If the plastering process has resulted in significant mess or damage to carpets, furniture, or other surfaces, consider hiring professional cleaners to ensure a thorough and proper restoration.
- Enjoy your newly plastered fireplace: With the cleaning process complete, take a moment to appreciate and enjoy your beautifully plastered fireplace. Admire the smooth and polished finish and the transformation it brings to your living space.
By cleaning up after plastering, you not only maintain a neat and organized workspace but also ensure the longevity and beauty of your newly plastered fireplace. Proper cleaning and maintenance will help preserve the finish and keep your fireplace looking its best for years to come. With the cleaning process done, you have successfully completed plastering your fireplace!
Remember to always follow the manufacturer’s instructions and take the necessary safety precautions throughout the plastering process. If you encounter any challenges or feel unsure about any step, it’s advisable to seek help from a professional to ensure the best results.
We hope this guide has been informative and helpful in achieving a stunning finish for your fireplace. Enjoy the beauty and warmth it adds to your home!
Conclusion
Plastering a fireplace can be a rewarding and transformative DIY project that can give your living space a fresh and polished look. By following the steps and precautions outlined in this comprehensive guide, you can achieve a professional and long-lasting finish for your fireplace. From safety precautions to gathering materials, preparing the surface, mixing and applying the plaster, and adding the finishing touches, each step plays a crucial role in creating a stunning result.
Throughout the process, it is important to prioritize safety by wearing protective gear and ensuring good ventilation. Take the time to prepare the surface properly by cleaning and repairing any damages to achieve a smooth and even canvas for the plaster. Mix the plaster to the right consistency and apply it in multiple coats, carefully smoothing and feathering the edges to create a seamless finish.
Once the plaster is applied, allow it to dry and cure according to the manufacturer’s instructions. Take care to monitor the drying progress and avoid touching the surface until it is fully hardened and cured. Finally, clean up the workspace, store materials properly, and admire the beauty of your newly plastered fireplace.
While plastering a fireplace may seem like a challenging task, with patience, attention to detail, and the information provided in this guide, you can achieve professional results. However, it’s important to remember that plastering is a skilled craft, and if you are unsure of your abilities or lack experience, it is always wise to seek professional assistance.
Thank you for reading our guide on how to plaster a fireplace. We hope that it has provided you with valuable insights and guidance to help you successfully complete your project. Now, it’s time for you to roll up your sleeves, gather your materials, and get started on transforming your fireplace into a stunning centerpiece of your home!
Frequently Asked Questions about How To Plaster Fireplace
Was this page helpful?
At Storables.com, we guarantee accurate and reliable information. Our content, validated by Expert Board Contributors, is crafted following stringent Editorial Policies. We're committed to providing you with well-researched, expert-backed insights for all your informational needs.

0 thoughts on “How To Plaster Fireplace”