
Articles
How To Prepare For A Garden
Modified: October 30, 2024
Discover the essential steps to prepare for gardening. Get expert tips on soil preparation, choosing the right plants, and maintaining a healthy garden. Start your gardening journey now!
(Many of the links in this article redirect to a specific reviewed product. Your purchase of these products through affiliate links helps to generate commission for Storables.com, at no extra cost. Learn more)
Introduction
Welcome to the wonderful world of gardening! Whether you have a spacious backyard or a small balcony, creating and maintaining a garden can bring immense joy and satisfaction. Not only does gardening allow you to reconnect with nature, but it also provides a sense of accomplishment as you witness the growth and beauty of your plants.
However, successful gardening requires careful planning and preparation. From selecting the right plants to mastering proper soil preparation techniques, there are several steps you need to follow to ensure your garden thrives.
In this article, we will guide you through the essential steps to prepare for a garden and offer valuable tips to create a thriving and beautiful green space. So, grab your gardening gloves and let’s get started!
Key Takeaways:
- Choose the right garden type, location, and plants to set the stage for a thriving garden. Assess soil quality, plan the layout, and prepare the soil meticulously for healthy plant growth and a bountiful harvest.
- Master the art of watering, mulching, and pest management to ensure the ongoing health and vitality of your garden. Embrace the joy of harvesting and savoring the fruits of your labor while sharing the abundance with loved ones.
Read more: How To Prepare A Vegetable Garden Bed
Step 1: Determine the Garden Type
Before you start preparing your garden, it’s important to determine the type of garden you want to create. This decision will depend on factors such as your available space, climate, and personal preferences. Here are a few common types of gardens you might consider:
- Vegetable Garden: If you have a passion for fresh produce and want to enjoy a bountiful harvest of fruits and vegetables, a vegetable garden is the perfect choice. You can grow a variety of vegetables based on your taste and dietary preferences.
- Flower Garden: For those who appreciate the beauty and fragrance of flowers, a flower garden can be a delightful addition to your home. You can choose from a wide range of flowering plants, including annuals and perennials, to create a visually stunning display.
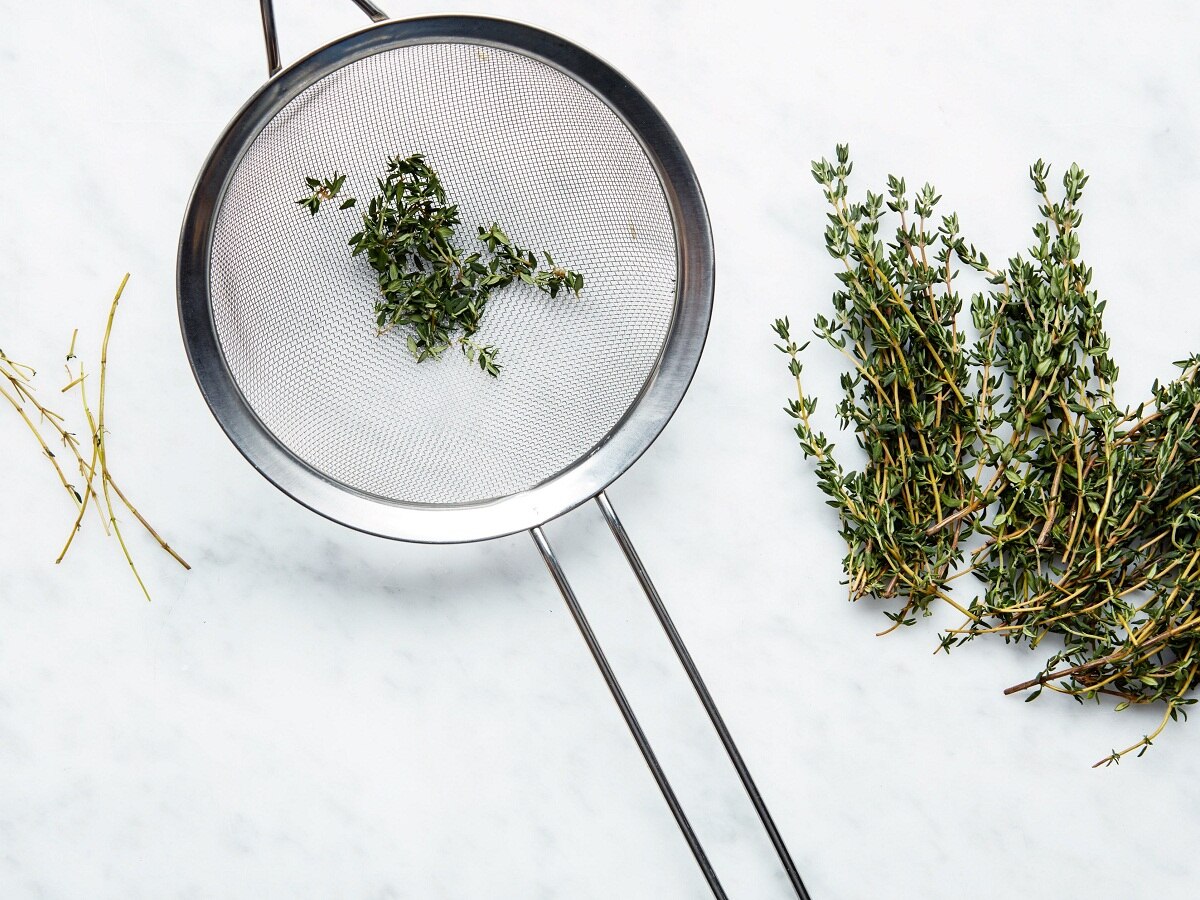
- Herb Garden: If you love cooking and want to have easy access to fresh herbs, an herb garden is a fantastic option. You can grow a variety of herbs like basil, oregano, and mint, which can be used to enhance the flavors of your culinary creations.
- Container Garden: If you have limited space or lack a dedicated garden area, a container garden is a practical solution. It involves growing plants in containers such as pots, hanging baskets, or window boxes, allowing you to beautify your space with plants even in small areas.
- Rock Garden: If you have a rocky or uneven terrain in your yard, a rock garden can transform it into a visually appealing and low-maintenance area. You can use a combination of rocks, gravel, and drought-tolerant plants to create a unique and naturalistic garden.
Take some time to think about your gardening goals and preferences. Consider the amount of time and effort you are willing to invest in your garden, as different garden types may require varying levels of maintenance. Once you have determined the type of garden you want, you can proceed to the next step of choosing the ideal location.
Step 2: Choose the Location
Choosing the right location for your garden is crucial for the success of your plants. Here are some factors to consider when selecting a location:
- Sun Exposure: Most plants require at least six hours of direct sunlight each day. Observe the sun patterns in your yard to identify areas that receive adequate sunlight. Keep in mind that different plants have varying sunlight requirements, so choose a location that suits the needs of the plants you plan to grow.
- Soil Drainage: Good soil drainage is essential for plant health. Avoid areas with heavy clay or compacted soil, as these can lead to waterlogging and root rot. Look for a location with well-drained soil, or consider amending the soil with organic matter to improve drainage.
- Proximity to Water Source: It’s important to have easy access to a water source for irrigation. Choose a location that is conveniently located near a water faucet or consider installing a drip irrigation system if a water source is not readily available.
- Proximity to the House: Consider how close you want your garden to be to your house. Having your garden near the house can make it easier to access and monitor, especially when it comes to watering and tending to the plants.
- Wind Protection: Strong winds can damage or uproot plants. Look for a location that offers some natural wind protection, such as a fence, hedgerow, or existing trees. Alternatively, you can create wind barriers using trellises or tall plants.
Once you have selected a location, mark it out and visualize how your garden will fit into the space. Take into consideration the size of the area and the number of plants you wish to grow. Planning the layout will help you make efficient use of the available space and ensure proper spacing between plants.
By choosing the right location for your garden, you are setting the foundation for healthy plant growth and a thriving garden. Next, we will explore the importance of assessing soil quality before planting.
Step 3: Assess Soil Quality
Assessing the quality of your soil is vital to determine its fertility and suitability for plant growth. By understanding the composition and characteristics of your soil, you can make informed decisions about necessary amendments and choose plants that thrive in particular soil conditions. Here’s how you can assess your soil quality:
- Soil Texture: Soil can be categorized into three main textures: sandy, loamy, and clay. Sandy soil feels gritty, loamy soil feels crumbly, and clay soil feels sticky. The ideal soil texture for most plants is loamy soil, which provides a balance of drainage and moisture retention.
Soil pH: Soil pH measures the acidity or alkalinity of the soil. A pH level of 7 is considered neutral, below 7 is acidic, and above 7 is alkaline. Different plants have different pH preferences. Conduct a soil pH test using a pH testing kit or send a soil sample to a local extension office for analysis.Nutrient Content: Nutrients are essential for plant growth. Soil testing can determine the nutrient content and identify any deficiencies or excesses. You can purchase a soil testing kit or send a soil sample to a laboratory for a detailed analysis. Based on the results, you can amend the soil with organic matter or specific fertilizers to ensure optimal plant nutrition.Drainage: Proper drainage is crucial for plant health. Observe the soil after watering or rainfall to determine how quickly the water drains. Excessively slow drainage can lead to waterlogged roots, while too fast drainage can result in dry soil. Amending the soil with organic matter such as compost can improve drainage in clay or sandy soils.Compaction: Compacted soil can impede root growth and nutrient uptake. Dig a small hole in the ground and assess how easily the soil crumbles. If it is hard and compacted, consider aerating the soil by loosening it with a garden fork or using a mechanical aerator.
By assessing your soil quality, you can identify any issues that need to be addressed before planting. Don’t get discouraged if your soil needs improvement – soil can be amended and improved over time with the right practices and amendments.
Now that you have a clear understanding of your soil, you are ready to move on to the next step: planning the layout of your garden.
Step 4: Plan the Garden Layout
Planning the layout of your garden is an exciting step that allows you to visualize how your plants will be arranged and how the overall design will come together. A well-planned garden layout ensures efficient use of space, proper sunlight exposure, and easy access to your plants for care and maintenance. Here are some essential considerations when planning your garden layout:
- Plant Spacing: Different plants have different spacing requirements. Refer to seed packets or plant labels for spacing recommendations. Proper spacing allows each plant to receive adequate sunlight, air circulation, and access to nutrients without overcrowding.
- Sun Exposure: Take note of the sun exposure in different areas of your garden throughout the day. Group plants with similar sunlight requirements together to ensure each plant gets the right amount of sunlight.
- Plant Height and Growth Habit: Consider the height and growth habit of your plants when deciding where to place them. Taller plants should be placed towards the back or center of the garden to avoid shading smaller plants.
- Companion Planting: Some plants have symbiotic relationships and can benefit from being planted together. Research companion planting combinations to maximize the health and productivity of your garden.
- Accessibility: Ensure that your garden layout allows for easy access to each plant for watering, harvesting, and maintenance tasks. Avoid placing plants too close to fences or walls that might hinder your ability to reach them.
- Aesthetic Appeal: Consider the overall aesthetic appeal of your garden. Think about color combinations, texture variations, and creating focal points to add visual interest and beauty to your outdoor space.
Sketch a rough plan of your garden layout on paper or use a garden design tool to visualize the arrangement. This will help you make adjustments and ensure a harmonious and balanced design.
Remember that a garden layout is not set in stone and can be modified as your garden evolves. As you gain experience and observe how your plants grow, you may decide to rearrange or reposition certain plants for better aesthetics or functionality.
With your garden layout planned out, you are now ready to move on to the next step: selecting and purchasing the seeds or seedlings for your garden.
Read more: How To Prepare For A Picnic
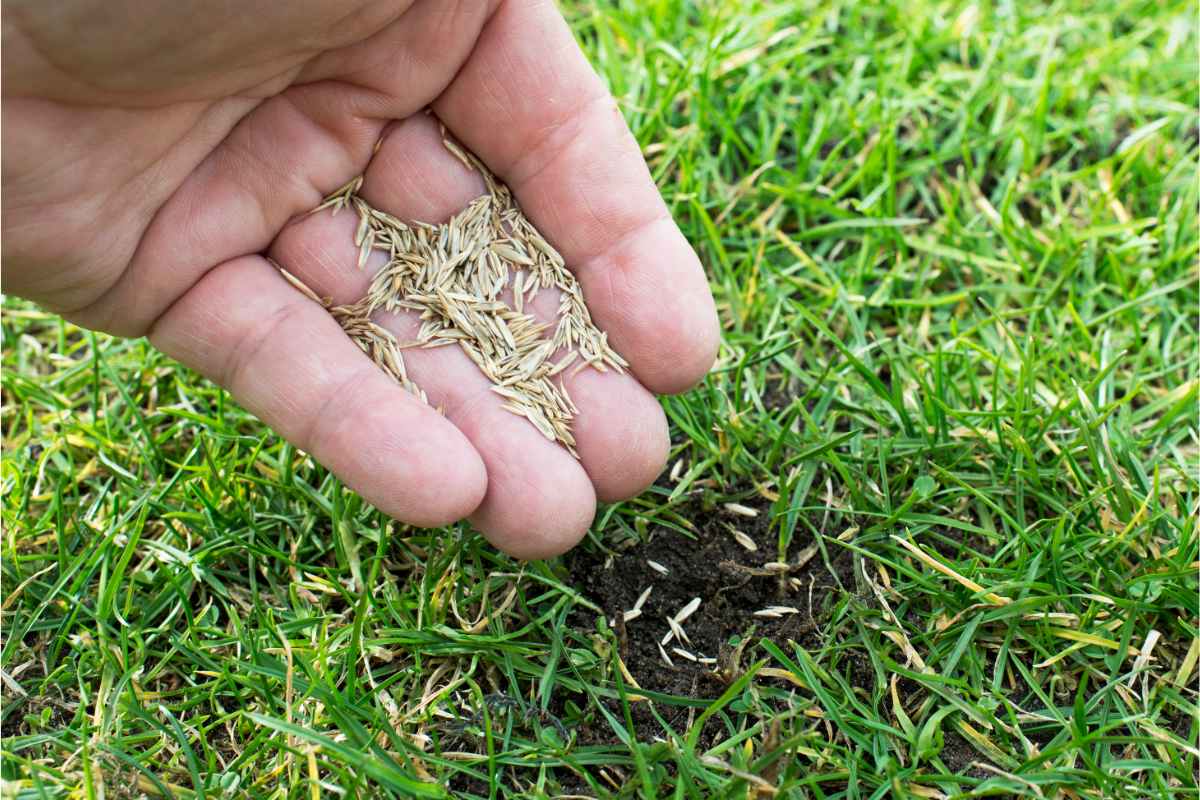
Step 5: Select and Purchase Seeds or Seedlings
Now that you have your garden layout planned, it’s time to choose the seeds or seedlings that will fill your garden with vibrant colors and delicious produce. Here are some tips to help you select and purchase the right seeds or seedlings:
- Determine Your Planting Method: Decide whether you want to start your plants from seeds or purchase already-grown seedlings. Growing plants from seeds offers a wider variety of options, and it can be a rewarding experience to watch your plants grow from the very beginning. However, it requires more time and attention. Purchasing seedlings, on the other hand, allows you to get a head start and reduces the waiting time for harvest.
- Consider Your Climate and Season: Choose plants that are suitable for your climate and growing season. Some plants thrive in cooler temperatures, while others prefer warm and sunny conditions. Consider the length of your growing season and select plants that have enough time to mature before the first frost or extreme heat.
- Read Plant Descriptions: Take the time to read the descriptions and growing requirements of each plant variety. Look for information about sun exposure, water requirements, and any special care instructions. This will ensure that you choose plants that will thrive in your garden’s conditions.
- Check Seed Packet or Plant Labels: Examine the seed packets or plant labels for important details such as plant height, spacing recommendations, and days to maturity. This information will help you determine how to space your plants and plan for consecutive plantings for a continuous harvest.
- Source from Reputable Suppliers: Purchase seeds or seedlings from reputable suppliers to ensure that you are getting high-quality and disease-free plants. Check online reviews, ask fellow gardeners for recommendations, or visit local nurseries and garden centers for a wide selection of healthy plants.
Once you have selected the seeds or seedlings, make sure to handle them with care during transportation and check them for any signs of damage or disease. Follow the recommended planting instructions for each variety and provide them with the appropriate growing conditions.
Remember that a well-selected variety of plants will not only provide visual appeal but also offer a diverse selection of fruits, vegetables, or blooms to enjoy throughout the season.
With your seeds or seedlings ready to go, it’s time to prepare the soil in the next step.
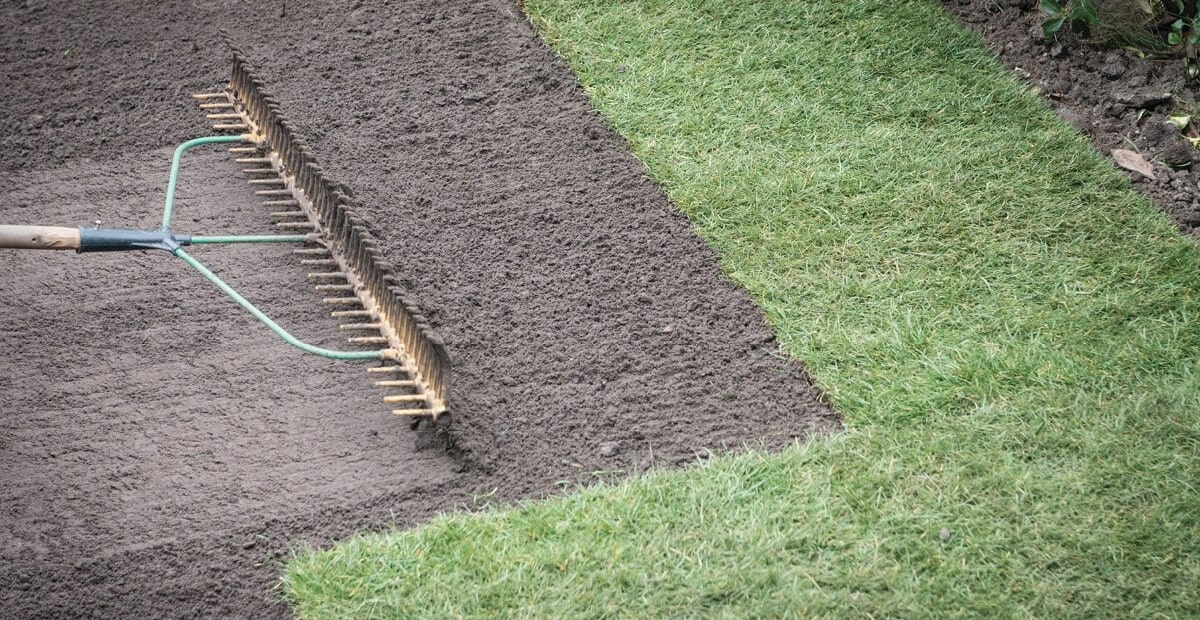
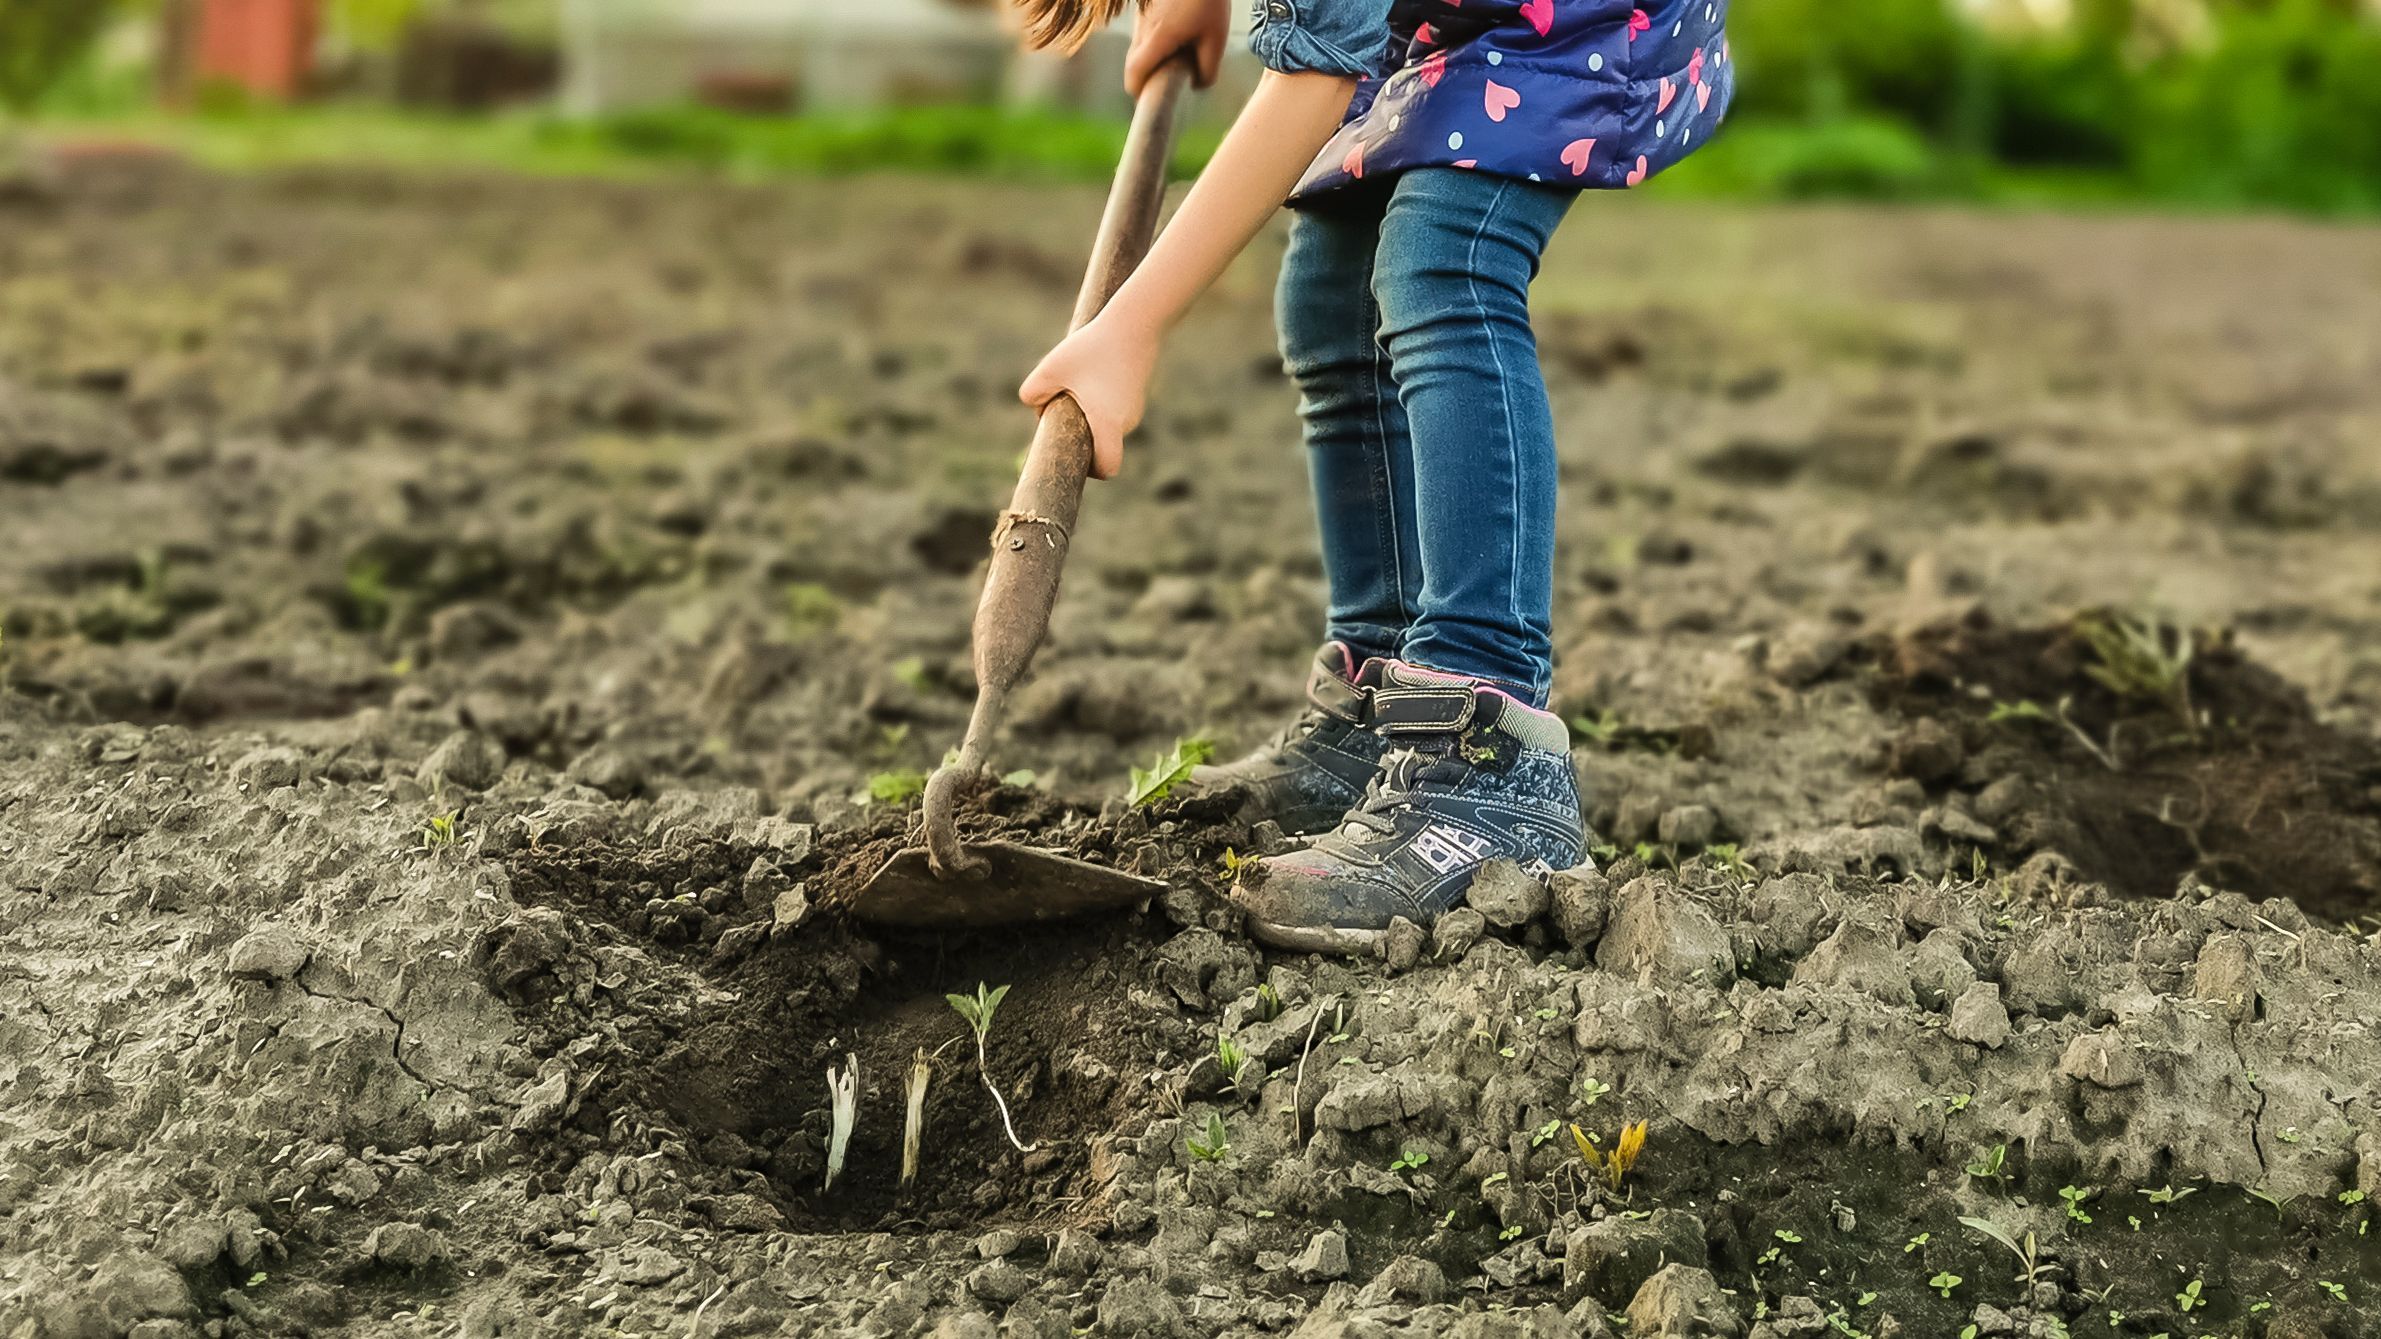
Step 6: Prepare the Soil
Preparing the soil is a crucial step in creating a healthy and thriving garden. Properly prepared soil provides a favorable environment for your plants to establish strong roots and access essential nutrients. Here’s how you can prepare your soil:
- Clear the Area: Remove any weeds, rocks, or debris from the garden area. Clearing the area will give your plants a clean slate and reduce competition for nutrients and space.
- Loosen the Soil: Use a garden fork or tiller to loosen the soil to a depth of about 8 to 12 inches. This process helps break up compacted soil, improves drainage, and allows the plant roots to penetrate easily.
- Add Organic Matter: Incorporate organic matter such as compost, well-rotted manure, or leaf mold into the soil. Organic matter improves soil structure, enhances water-holding capacity, and provides essential nutrients for plants to thrive.
- Test and Adjust pH: Test the pH of your soil using a soil testing kit or by sending a soil sample to a laboratory. Most plants prefer slightly acidic to neutral soil (pH 6-7). If the pH is too high or too low, you can adjust it by adding amendments like lime to raise the pH or sulfur to lower the pH.
- Apply Fertilizer: If your soil test indicates nutrient deficiencies, apply a balanced fertilizer or organic amendments to provide the necessary nutrients. Follow the recommended application rates and mix it into the soil prior to planting.
- Level and Smooth the Soil: Rake the soil to create a smooth and even surface. Leveling the soil helps with proper water distribution and ensures an aesthetically pleasing garden layout.
Remember to water the soil lightly after preparing it to help settle the amendments and provide initial moisture for the plants.
By preparing the soil properly, you are setting the foundation for healthy plant growth and productivity. The next step is to start planting your carefully chosen seeds or seedlings.
Start by clearing the area, testing the soil, and choosing the right plants for your climate. Plan out the layout and consider factors like sunlight and water access. Prepare the soil by adding compost and nutrients for healthy plant growth.
Step 7: Start Planting
Now that your soil is prepared, it’s time to bring your garden to life by planting your chosen seeds or seedlings. Follow these steps to ensure successful planting:
- Read Planting Instructions: Refer to the seed packets or plant labels for specific planting instructions. Pay attention to recommended planting depth, spacing, and any special requirements for each plant variety.
- Prepare Planting Holes: Dig planting holes according to the spacing requirements of your plants. Use a garden trowel or dibber to create holes of the appropriate depth, ensuring they are slightly larger than the root ball or seed.
- Transplant Seedlings: If you purchased seedlings, gently remove them from their containers and loosen the roots if they appear root-bound. Place each seedling in a planting hole, making sure it stands upright and the top of the root ball is level with or slightly above the soil surface.
- Sow Seeds: For planting seeds, follow the recommended planting depth and spacing guidelines. After sowing the seeds, lightly tamp down the soil to ensure good soil-to-seed contact.
- Water Thoroughly: After planting, water the newly planted seeds or seedlings thoroughly. This helps settle the soil and provides essential moisture for their initial establishment.
- Label and Track: It’s helpful to label your plants to keep track of what is planted where, especially if you have multiple varieties. This will guide you in providing appropriate care and monitoring their growth.
Ensure that your newly planted garden receives adequate water and monitor the soil moisture regularly. Follow specific watering instructions for different plant varieties, taking care not to overwater or underwater them.
Depending on the plant varieties you have chosen, you may need to provide additional supports such as stakes, trellises, or cages for proper plant growth and to prevent damage from wind or pests. Opt for organic or eco-friendly methods to protect your plants from common garden pests, if necessary.
Now that you have completed the planting process, it’s time to move on to the next step: watering and irrigation.
Step 8: Watering and Irrigation
Proper watering and irrigation are essential for the health and vitality of your plants. Water provides the necessary hydration for plants to grow, develop roots, and produce flowers or fruits. Here’s how you can effectively water and irrigate your garden:
- Understand Watering Needs: Different plants have varying watering needs. Some plants prefer consistently moist soil, while others thrive in slightly drier conditions. Research the watering requirements of each plant variety to determine how often and how much water they need.
- Water Deeply: When watering, aim to moisten the soil to a depth of 6 to 8 inches. This encourages plant roots to grow deeper, making them more resilient and less dependent on frequent watering.
- Time Your Watering: Water your garden early in the morning or late in the evening to minimize water loss due to evaporation. Avoid watering during the hottest part of the day, as the water may evaporate before it can fully penetrate the soil.
- Use Proper Watering Techniques: Use a watering can, garden hose, or drip irrigation system to deliver water directly to the base of the plants. Avoid overhead watering as it can lead to disease and wastage of water.
- Monitor Soil Moisture: Check the moisture level of the soil regularly by sticking your finger about an inch into the soil. If it feels dry at that depth, it’s time to water. If it’s still moist, hold off on watering for a bit longer.
- Mulch Your Garden: Applying a layer of organic mulch around your plants helps conserve moisture, reduces weed growth, and regulates soil temperature. Mulch also decreases the frequency of watering by reducing water evaporation from the soil surface.
- Consider Irrigation Systems: Installing a drip irrigation system or soaker hoses can provide efficient and targeted watering to your plants. These systems minimize water waste by delivering water directly to the root zone, reducing evaporation and runoff.
Remember that overwatering can be just as harmful as underwatering. Avoid waterlogged soil, as it can lead to root rot and other fungal diseases. Observe your plants for any signs of stress or wilting, as these may indicate that they need water.
By providing consistent and appropriate watering, you are ensuring the health and vitality of your plants. The next step is to learn about mulching and weed control.
Read more: How To Prepare For Home Renovation
Step 9: Mulching and Weed Control
Mulching and weed control are essential tasks to maintain a healthy and thriving garden. Mulch helps conserve moisture, regulate soil temperature, and suppress weed growth, while effective weed control prevents unwanted plants from competing with your garden plants for nutrients and space. Follow these steps to mulch your garden and keep weeds at bay:
- Choose the Right Mulch: Select a suitable mulch material based on your garden’s needs and aesthetics. Organic mulches like wood chips, straw, or compost not only help retain moisture but also enrich the soil as they break down over time.
- Prepare the Soil: Clear the area of any existing weeds before applying mulch. Pull out weeds by hand or use a hoe to remove them from the root. This ensures that the mulch is not covering weed seeds or allowing weeds to grow underneath.
- Apply Mulch: Spread a layer of mulch around your garden plants, making sure to leave a small gap around the plant stems to prevent moisture build-up and potential rot. Apply a thickness of around 2-4 inches of mulch, ensuring even coverage.
- Mulch Maintenance: Regularly check your mulch layer and replenish it as needed. Mulch can break down over time or be displaced by wind, rainfall, or foot traffic, so adding a fresh layer when necessary helps maintain its effectiveness.
- Implement Weed Control Measures: To prevent weed growth, consider implementing a few weed control techniques. Pull out weeds as soon as they appear, before they have a chance to establish deep roots. Use a hoe or hand weeder to remove weeds from the root system, minimizing the chances of regrowth. Additionally, utilizing landscape fabric or cardboard underneath the mulch can effectively block weed growth.
- Regularly Monitor and Maintain: Regularly inspect your garden for any new weed growth and take immediate action to control them. Stay vigilant and consistently practice weed control measures to avoid allowing weeds to take over your garden.
Mulching and weed control not only create a neater and more organized garden appearance but also minimize weed competition, conserve soil moisture, and reduce the effort required for weed removal. Regular maintenance in this step will significantly contribute to a thriving and healthy garden.
The next step focuses on the management of pests and diseases, ensuring your plants remain protected and vigorous.
Step 10: Pest and Disease Management
Pest and disease management is crucial in maintaining the health and vigor of your garden plants. By proactively addressing these issues, you can prevent or minimize damage caused by pests and diseases. Follow these steps to effectively manage pests and diseases in your garden:
- Regular Inspection: Conduct regular inspections of your garden, paying close attention to the leaves, stems, and fruits of your plants. Look for any signs of pest infestation, such as chewed leaves, holes, discoloration, or wilting. Also, check for any signs of diseases, such as spots, mold, or rot.
- Identification: Learn to identify common pests and diseases that affect garden plants in your region. This knowledge will help you take appropriate measures to prevent or treat infestations. Use gardening resources, plant identification guides, or seek assistance from local gardening experts if needed.
- Prevention: Implement preventive measures to reduce the likelihood of pest and disease problems. This includes practices such as cleaning up garden debris, practicing crop rotation, providing adequate spacing between plants to promote airflow, and improving soil health. Additionally, selecting disease-resistant plant varieties and using pest-resistant techniques like companion planting can help prevent infestations.
- Natural Controls: Employ natural pest control methods such as handpicking insects, using insecticidal soaps or oils, implementing traps, or introducing beneficial insects that prey on pests. Encourage a diverse ecosystem in your garden, inviting beneficial insects and birds that naturally keep pest populations in check.
- Organic and Chemical Controls: If pest or disease problems persist or become severe, consider using organic or chemical controls as a last resort. Organic options include neem oil, diatomaceous earth, or bacterial sprays. If chemical solutions are required, follow the recommended instructions carefully, and opt for environmentally-friendly and low-toxicity products.
- Regular Monitoring: Continuously monitor your plants for any changes or signs of pests and diseases. Early detection allows for timely intervention and increases the chances of effective control. Promptly address any issues that arise to prevent further damage and spread.
Remember that maintaining a healthy garden ecosystem is key to preventing pest and disease issues. By practicing good garden hygiene, promoting biodiversity, and implementing preventive measures, you can reduce the likelihood of outbreaks.
With effective pest and disease management, your garden can thrive and remain vibrant, allowing you to enjoy the fruits of your labor. The next step focuses on regular maintenance to ensure your garden stays in top shape.
Step 11: Regular Maintenance
Regular maintenance is essential to keep your garden in optimal condition and maximize its productivity. By staying on top of tasks such as watering, pruning, fertilizing, and monitoring for pests and diseases, you can ensure the continued health and beauty of your garden. Follow these steps for regular garden maintenance:
- Watering: Continuously monitor the moisture level of your garden soil and water as needed, ensuring plants receive the appropriate amount of hydration. Adjust watering frequency based on weather conditions and plant requirements.
- Pruning and Trimming: Regularly prune and trim your plants to maintain their shape, remove dead or diseased branches, and promote healthy growth. Pruning also helps improve airflow, reduce pest and disease risks, and stimulate better flower or fruit production.
- Fertilizing: Provide your plants with regular nutrients by applying organic fertilizers or compost according to their specific needs. This will help promote strong and vigorous growth.
- Weed Control: Routinely check for and remove any weeds that emerge in your garden. Regular weeding prevents weed competition for nutrients and reduces the risk of pests and diseases.
- Support and Training: As your plants grow, provide necessary support such as stakes, cages, or trellises for plants that need it. This will help prevent breakage due to heavy fruits or strong winds and promote healthier growth.
- Monitor for Pests and Diseases: Keep a close eye on your plants for any signs of pests or diseases. Early detection allows for prompt intervention and minimizes potential damage.
- Harvesting: Regularly harvest ripe fruits, vegetables, herbs, or flowers from your garden. Harvesting at the right time encourages continuous production and prevents overripening or waste.
- Tool Maintenance: Regularly clean and maintain your gardening tools, ensuring they are sharp and in good working condition. Cleaning tools after use helps prevent the spread of diseases between plants.
Maintaining a consistent and organized approach to garden maintenance will help you stay on top of tasks and ensure the long-term health and productivity of your plants. A well-maintained garden will bring you joy and satisfaction throughout the growing season.
Now that you have learned about regular maintenance, let’s move on to the final step: harvesting and enjoying the fruits of your labor.
Step 12: Harvesting and Enjoying the Garden
After all your hard work and dedication, it’s time to reap the rewards of your garden harvest. Harvesting your homegrown fruits, vegetables, and herbs is one of the most rewarding experiences in gardening. Here’s how to properly harvest and enjoy the bounty of your garden:
- Timing: Harvest your crops at the right time to ensure peak flavor and freshness. Refer to plant labels, seed packets, or gardening resources for specific harvesting guidelines for each crop to avoid picking them too early or too late.
- Tools: Use appropriate tools for harvest depending on the crop. Scissors or shears work well for herbs and delicate greens, while garden pruners or a sharp knife are suitable for vegetables, fruits, and larger plants.
- Harvesting Techniques: Be gentle when harvesting to minimize damage to the plants. Use a twisting motion when picking fruits or vegetables to avoid snapping stems, and cut herbs and greens just above a leaf node to encourage further growth.
- Storage: Properly store your harvested produce to maintain freshness and flavor. Some crops, like tomatoes and peppers, can be stored at room temperature, while others, such as leafy greens and herbs, benefit from refrigeration. Make sure to remove any damaged or overripe produce to prevent spoilage.
- Preservation: If you have an abundance of produce, consider preserving or canning them for later use. Techniques such as freezing, drying, or making jams and pickles allow you to enjoy your garden’s harvest year-round.
- Sharing: Share the fruits of your labor with family, friends, and neighbors. Giving away fresh produce not only fosters community connections but also spreads the joy of gardening.
- Enjoying: Finally, savor the flavors of your garden by incorporating the freshly harvested produce into your meals. The taste of homegrown vegetables, herbs, and fruits is unparalleled, and cooking with them adds an extra level of satisfaction and enjoyment to your culinary creations.
Remember to continue regular maintenance of your garden even as you enjoy the harvest. Proper care will ensure continuous production and prolong the lifespan of your garden throughout the growing season.
Congratulations on successfully completing all the steps of preparing and maintaining your garden. Your dedication and hard work have paid off, and now it’s time to relish the fruits of your labor. Happy gardening and enjoy the abundant delights of your beautiful garden!
Read more: How To Prepare Ground For Garden
Conclusion
Congratulations! You have now learned the essential steps to prepare for and maintain a thriving garden. By following these steps, you have set the foundation for a beautiful and productive outdoor space that will bring you joy, tranquility, and the satisfaction of growing your own plants.
Throughout this journey, you have determined the type of garden that suits your preferences and available space. You have carefully chosen the location, assessed soil quality, planned the garden layout, and selected the perfect seeds or seedlings. The soil has been prepared, and your plants have been successfully planted.
You have mastered the art of watering and irrigation, mulching, weed control, and pest and disease management. By conducting regular maintenance, you have ensured the ongoing health and vitality of your garden.
And now, the time has come to reap the rewards of your labor by harvesting and enjoying the fruits, vegetables, herbs, and flowers that have flourished in your garden. Take pleasure in incorporating your garden’s fresh produce into your meals and sharing the abundance with loved ones.
Remember, gardening is a continuous learning experience. Each year, you can expand your knowledge, try new plant varieties, and experiment with different gardening techniques. Through observation and adaptation, you will become an even more skilled gardener.
Embrace the joy that comes from getting your hands dirty, witnessing the growth of your plants, and connecting with nature. Cherish the moments spent tending to your garden, feeling the soil beneath your fingertips, and listening to the sounds of wildlife that your garden attracts.
Enjoy the serenity that your garden brings, whether it be a small balcony garden or a sprawling backyard oasis. Embrace the beauty of the plants, the vibrant colors of the flowers, and the fragrant scents that fill the air.
Keep in mind that gardening is not just a hobby but a journey of self-discovery, patience, and growth. It teaches us about nurturing, perseverance, and the interconnectedness of living beings.
So, continue to tend to your garden with love and dedication. Allow it to be a place of solace and inspiration, a sanctuary where you find peace and connect with the wonders of nature.
May your garden flourish, and may your green thumb continue to thrive. Happy gardening!
Frequently Asked Questions about How To Prepare For A Garden
Was this page helpful?
At Storables.com, we guarantee accurate and reliable information. Our content, validated by Expert Board Contributors, is crafted following stringent Editorial Policies. We're committed to providing you with well-researched, expert-backed insights for all your informational needs.


0 thoughts on “How To Prepare For A Garden”