
Articles
How To Prepare A Floor For Tile
Modified: December 7, 2023
Learn how to properly prepare your floor for tile installation with these informative articles. Create a sturdy and long-lasting foundation for your beautiful tile floors.
(Many of the links in this article redirect to a specific reviewed product. Your purchase of these products through affiliate links helps to generate commission for Storables.com, at no extra cost. Learn more)
Introduction
In any home renovation project, the floor is a critical element that can greatly enhance the overall look and functionality of a space. When it comes to tile flooring, proper preparation is key to achieving a durable and flawless finish. Whether you’re installing ceramic, porcelain, or natural stone tiles, taking the time to prepare the floor properly will ensure a successful and long-lasting installation.
In this article, we will guide you through the process of preparing a floor for tile. From gathering the necessary materials and tools to performing essential steps like removing furniture, inspecting and repairing the subfloor, and installing underlayment, we’ll cover everything you need to know to ensure a smooth and professional tile installation.
Before you start the preparation process, it’s important to have a clear vision of how you want your floor to look. Consider the style, color, and pattern of the tiles you plan to install, as well as the layout and overall design of the room. This will help you make informed decisions throughout the preparation process.
Now, let’s dive into each step involved in preparing a floor for tile to help you achieve a stunning and long-lasting result.
Key Takeaways:
- Properly preparing a floor for tile installation involves gathering materials, removing existing flooring, inspecting and repairing the subfloor, leveling the surface, and installing underlayment. Attention to detail and careful planning are essential for a successful and long-lasting tile installation.
- Measuring and planning the tile layout, followed by precise tile installation and grouting, are crucial for achieving a professional-looking finish. Attention to detail, proper cleaning, and finishing touches ensure a stunning and durable tiled floor.
Read more: How To Prepare A Concrete Floor For Painting
Gather Materials and Tools
Before you start preparing the floor for tile installation, it’s essential to gather all the necessary materials and tools. Having everything ready will save you time and ensure a seamless preparation process. Here are the key items you will need:
- Tiles: Purchase enough tiles to cover the desired area, allowing for some extras to account for cuts and breakage.
- Underlayment: Depending on your specific project, you may need underlayment materials such as cement backer board, plywood, or an uncoupling membrane.
- Thinset mortar: This adhesive is used to secure the tiles to the floor surface. Choose a thinset mortar that is appropriate for your tile type and substrate.
- Grout: Select a grout color that complements your tiles and matches the desired aesthetic of the room.
- Tile spacers: These small plastic wedges help maintain consistent spacing between tiles during installation.
- Trowel: A notched trowel is used to apply thinset mortar evenly onto the floor surface.
- Level: A level is essential to ensure the floor surface is flat and even.
- Tape measure: Accurate measurements are crucial for planning the tile layout and determining the placement of cuts.
- Hammer and chisel: These tools are needed for removing any existing flooring materials, such as vinyl or laminate.
- Power drill: A drill is useful for various tasks, including removing baseboards and installing underlayment.
- Safety equipment: Don’t forget to wear safety goggles, gloves, and a mask when working with adhesives, tools, and dust-producing materials.
Make sure to double-check your specific tile installation requirements and consult with your supplier or manufacturer if you have any doubts about the materials or tools needed for your project. Having the right supplies on hand will streamline the preparation process and help you achieve professional results.
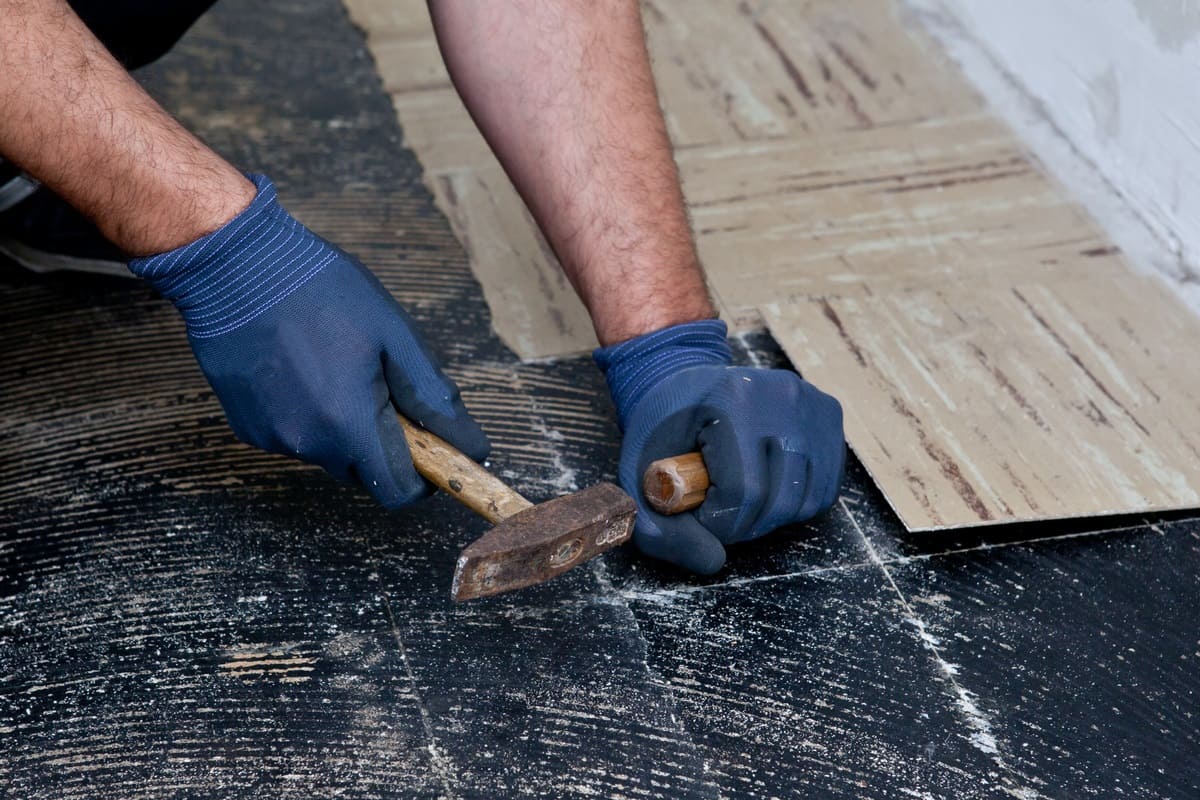
Remove Furniture and Existing Flooring
Before you can begin preparing the floor for tile installation, it’s crucial to create a clear and empty workspace. This involves removing any furniture and existing flooring materials that may be in the way. Here’s how to do it:
- Clear the area: Start by removing all furniture, appliances, and any other items from the room. This will give you ample space to work and prevent any obstacles during the preparation process.
- Protect your belongings: If there are large, heavy items that cannot be easily moved out of the room, cover them with plastic sheets or drop cloths to protect them from dust, debris, and potential damage.
- Remove the baseboards: Carefully remove the baseboards using a pry bar or a putty knife. This will ensure that the new tiles are installed flush against the wall, creating a seamless and professional finish. Take care not to damage the baseboards during removal, as they will be reinstalled later.
- Remove the existing flooring: Depending on the type of flooring you currently have, different methods may be required for removal. For example, if you have vinyl or laminate flooring, you can use a hammer and chisel to carefully pry up the edges and then pull up the rest of the material. Use caution to avoid damaging the subfloor. If you have carpet, remove it by cutting it into manageable sections and rolling them up for disposal.
- Clean the subfloor: Once the existing flooring is removed, thoroughly clean the subfloor to ensure a clean and even surface. Sweep or vacuum up any dust, dirt, or debris, and use a damp cloth to wipe away any remaining residue.
Removing furniture and existing flooring is an important step in preparing the floor for tile installation. It creates a blank canvas for the next stages of the project and ensures a smooth and level surface for the new tile. Remember to exercise caution when handling tools and heavy furniture, and protect any items that cannot be moved out of the room.
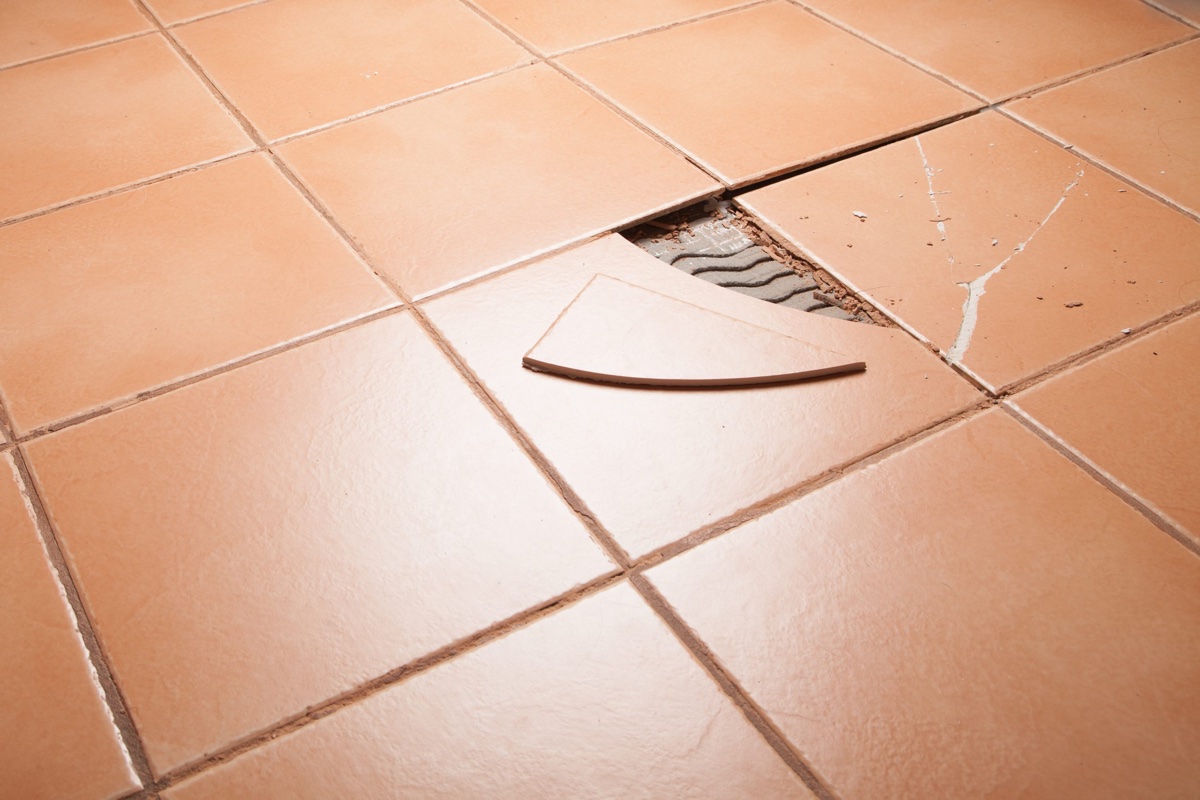
Inspect and Repair the Subfloor
Once you have cleared the room and removed the existing flooring, the next step in preparing the floor for tile installation is to inspect and repair the subfloor. The subfloor serves as the foundation for the tiles and needs to be structurally sound and free from any damage or deficiencies. Here’s what you should do:
- Check for stability: Walk around the room and pay attention to any areas that feel soft or uneven. Use a level to check the floor’s stability and ensure it is flat and level. If you notice any significant dips or slopes, you may need to address these issues before proceeding.
- Repair any damage: Inspect the subfloor for any signs of water damage, rot, or decay. If you come across any compromised areas, it’s crucial to repair them before proceeding with the tile installation. Depending on the extent of the damage, you may need to replace sections of the subfloor or reinforce weak spots.
- Screw loose or squeaky areas: Use a power drill and screws to secure any loose areas of the subfloor. This will help eliminate any squeaks or movement that could compromise the integrity of the tile installation.
- Address moisture concerns: Depending on your location and the specific room where the tiles are being installed, moisture can be a potential issue. If you are concerned about excessive moisture, consider using a moisture barrier or sealing the subfloor with a waterproofing product to protect against damage.
- Ensure proper ventilation: Adequate ventilation is essential to prevent moisture buildup and maintain the longevity of the tile installation. Check that there are vents or windows in the room to allow proper airflow.
It’s important to note that the subfloor should be clean and free from any debris before moving on to the next steps. Sweep or vacuum the floor to remove any dust or dirt that may interfere with the tile installation process.
By carefully inspecting and repairing the subfloor, you will ensure a solid and stable foundation for your tile installation. Taking the time to address any potential issues will help prevent future problems and ensure the longevity of your beautiful new floor.
Level the Subfloor
After inspecting and repairing the subfloor, the next important step in preparing the floor for tile installation is to ensure that it is level. A level subfloor is crucial to avoid any unevenness or imperfections in the final tile installation. Here’s how you can achieve a level subfloor:
- Identify high and low spots: Use a long straightedge or level to identify any areas that are higher or lower than the rest of the floor. This can be done by placing the level across various sections of the subfloor and checking for gaps or unevenness.
- Fill low spots: If you find any low spots, you will need to fill them in to create a level surface. You can use a self-leveling compound, which is a cement-based product that smooths out and levels the subfloor. Follow the manufacturer’s instructions to mix and apply the compound. Make sure to work quickly, as the self-leveling compound has a limited working time.
- Sand down high spots: If you come across any high spots on the subfloor, you can use a belt sander or a floor grinder to carefully sand them down. Be cautious not to remove too much material, as this can cause the subfloor to become uneven in other areas.
- Recheck for levelness: Once you have filled in the low spots and sanded down the high spots, use the straightedge or level to recheck the subfloor for levelness. Continue adjusting and smoothing the surface until you achieve a flat and even result.
It’s crucial to note that achieving a perfectly level subfloor may not always be possible, especially in older homes. However, the goal is to minimize any significant deviations or inconsistencies to ensure a smooth tile installation.
Remember to allow the self-leveling compound to fully dry and cure before proceeding with the tile installation. Follow the manufacturer’s guidelines for drying time, as it can vary depending on the product and environment.
By leveling the subfloor, you will create a solid and even surface for your tile installation. Taking the time to properly level the subfloor will help ensure that your tiles lay flat and adhere properly, resulting in a professional-looking and durable floor.
Read more: How To Put Tile On Floor
Install Underlayment
After leveling the subfloor, the next step in preparing the floor for tile installation is to install underlayment. Underlayment serves as a protective layer between the subfloor and the tiles, providing stability, soundproofing, and moisture resistance. The type of underlayment you need will depend on your specific project requirements. Here are some common types of underlayment and the steps to install them:
Cement Backer Board:
- Measure and cut the cement backer board to fit the room. Use a circular saw or a score-and-snap cutter to cut the board to the desired size.
- Apply a layer of thinset mortar to the subfloor using a notched trowel.
- Place the cement backer board over the thinset mortar, leaving a small gap between each board for expansion. Make sure to stagger the seams for optimal stability.
- Secure the backer board to the subfloor with screws, making sure they are countersunk and flush with the surface of the board.
- Apply a layer of alkaline-resistant mesh tape to the seams of the backer board.
- Apply a second layer of thinset mortar over the mesh tape, using a trowel to smooth it out and create a consistent surface.
Plywood Underlayment:
- Measure and cut the plywood sheets to fit the room, leaving a small gap between each sheet for expansion.
- Apply a layer of construction adhesive to the subfloor using a trowel.
- Place the plywood sheets over the construction adhesive, making sure they are properly aligned.
- Secure the plywood sheets to the subfloor with screws, ensuring they are countersunk and flush with the surface of the plywood.
- Fill any gaps or seams with wood filler, and sand the surface of the plywood to create a smooth and level underlayment.
Uncoupling Membrane:
- Measure and cut the uncoupling membrane to fit the room, leaving a small gap between each section for expansion.
- Apply a layer of thinset mortar to the exposed subfloor using a notched trowel.
- Place the uncoupling membrane over the thinset mortar, pressing it firmly and smoothing out any air pockets or wrinkles.
- Secure the uncoupling membrane to the subfloor using a roller or a flooring trowel to ensure proper adhesion.
Make sure to follow the manufacturer’s instructions for the specific underlayment product you are using. Allow adequate drying time before proceeding with the tile installation.
Installing underlayment is a crucial step in preparing the floor for tile installation. It helps create a stable and moisture-resistant surface, enhancing the longevity and performance of your tile floor.
Before tiling, ensure the floor is clean, level, and free of any cracks or damage. Use a self-leveling compound if needed and apply a waterproofing membrane for added protection.
Clean and Prep the Surface
Once the underlayment is installed, the next step in preparing the floor for tile installation is to clean and prep the surface. This ensures that the surface is free from any dust, debris, and contaminants that may interfere with the adhesion of the tiles. Here’s how to clean and prep the surface:
- Sweep or vacuum the floor: Use a broom or vacuum cleaner to remove any loose dirt, dust, or debris from the surface. Pay special attention to corners, edges, and hard-to-reach areas.
- Wipe the surface: Use a damp sponge or mop to wipe down the floor, removing any remaining dirt or residue. This will create a clean and dust-free surface.
- Remove any adhesive or residue: If there are any traces of adhesive or residue from the underlayment installation, use a suitable adhesive remover or a scraper to ensure a smooth and even surface. Follow the manufacturer’s instructions for the adhesive remover, and take care not to damage the subfloor.
- Allow the surface to dry: After cleaning, allow the surface to dry completely before proceeding with the tile installation. This ensures that the tiles adhere properly and that moisture won’t compromise the quality of the installation.
- Apply a primer (if needed): Depending on the type of flooring and the specific product you are using, you may need to apply a primer to enhance the adhesion of the tiles. Follow the manufacturer’s instructions to apply the primer and allow it to dry according to the recommended time.
Preparing the surface by cleaning and prepping it is crucial for a successful tile installation. A clean and dry surface provides the optimal conditions for the adhesive to bond with the tiles and ensures a long-lasting and professional-looking result.
Remember to wear appropriate safety gear, such as gloves and eye protection, when using adhesive removers or cleaning solutions. Proper ventilation is also important to ensure a healthy working environment.
Once the surface is prepped and ready, you can move on to measuring and planning the tile layout for your project.
Measure and Plan the Tile Layout
Before you start laying the tiles, it’s essential to measure and plan the tile layout. Proper tile layout ensures a balanced and visually appealing result, minimizes tile cutting, and helps you determine the starting point for installation. Here’s how to measure and plan the tile layout:
- Determine the tile size: Measure the dimensions of the tiles you’re using. This will help you calculate the number of tiles needed and determine the spacing between them.
- Measure the floor area: Measure the length and width of the room where you’re installing the tiles. Multiply the two measurements to determine the total square footage of the area.
- Consider the tile placement: Visualize how you want the tiles to be placed in the room. Will they be laid in a straight pattern, diagonal pattern, or another design? Consider the overall aesthetic and the size and shape of the room.
- Find the center point: Use a measuring tape to determine the center point of the room’s length and width. This will be your starting point for laying the tiles.
- Make layout lines: Use a chalk line to create layout lines from the center point. This will serve as a guide for laying the tiles and ensure a symmetrical and balanced layout.
- Dry-fit the tiles: Place a few tiles along the layout lines to see how they fit and make any necessary adjustments. This step will help you determine if any cuts are required and ensure that the tiles align properly.
- Plan the tile cuts: Measure the spaces where you’ll need to make tile cuts, such as around corners, edges, or obstacles like cabinets or appliances. Use a tile cutter or a wet saw to make precise cuts.
- Consider grout line spacing: Decide on the width of the grout lines between each tile. This can vary depending on personal preference, tile size, and the overall look you want to achieve.
- Double-check your measurements: Once you have the layout planned, double-check your measurements and calculations to ensure accuracy. It’s better to catch any errors or discrepancies before you start laying the tiles.
Properly measuring and planning the tile layout is crucial to achieving a successful tile installation. Taking the time to carefully plan the layout will help you ensure a visually pleasing result and minimize the need for excessive tile cutting or adjustments.
Note that it’s always wise to purchase an extra 10% of tiles to account for any mistakes, breakage, or future replacements.
Once you have the layout planned, you can start the exciting process of laying the tiles on the prepared floor.
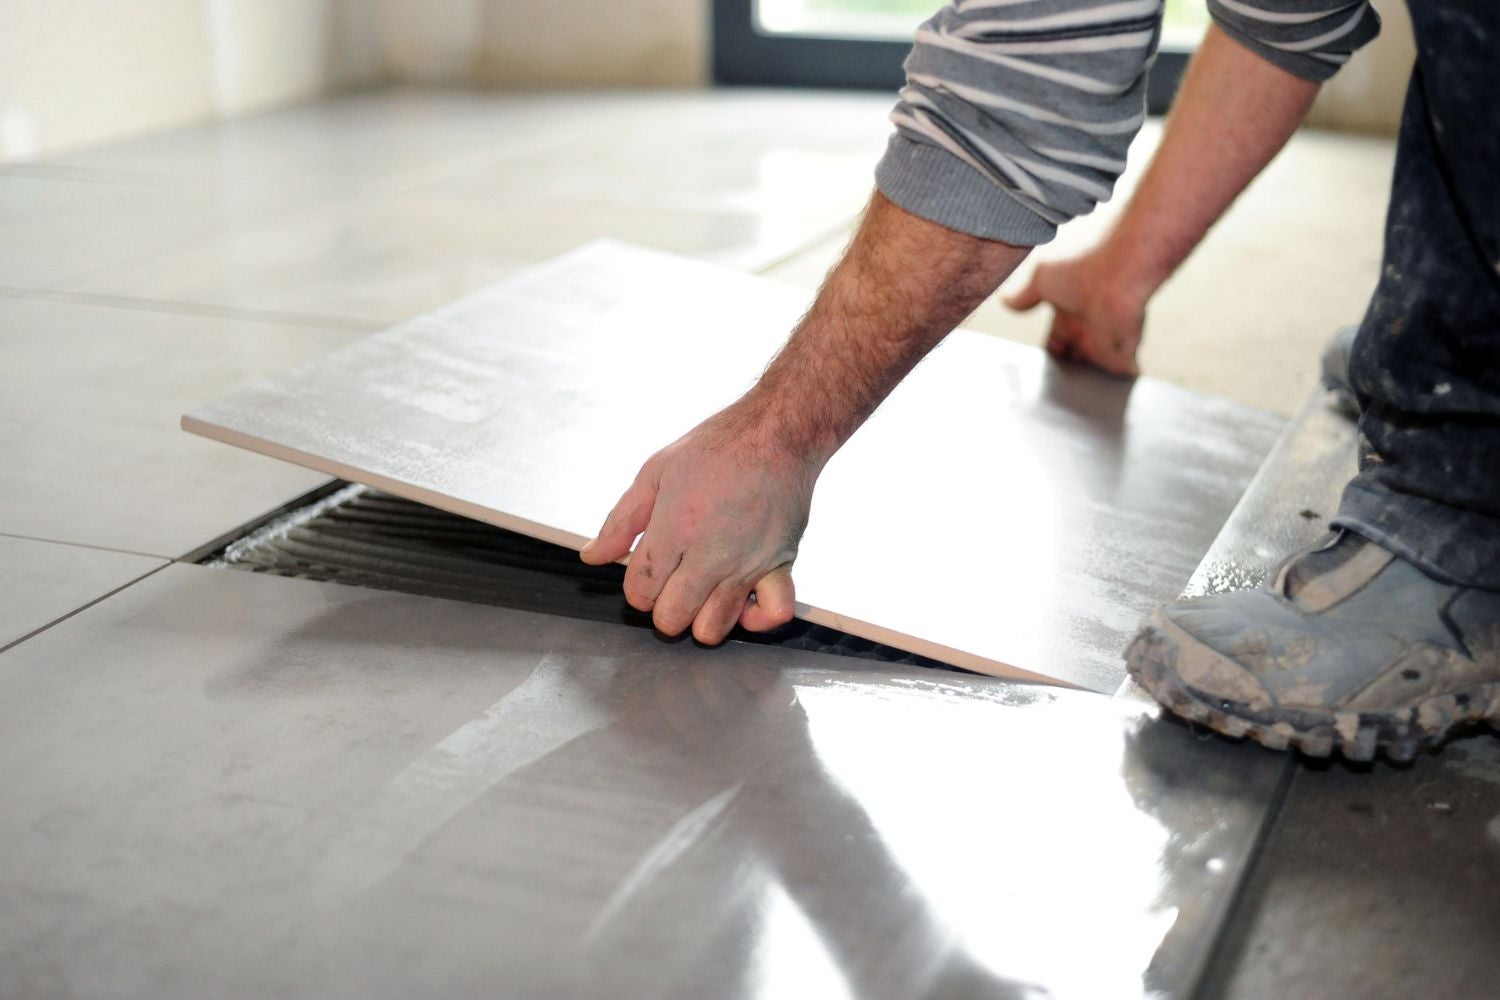
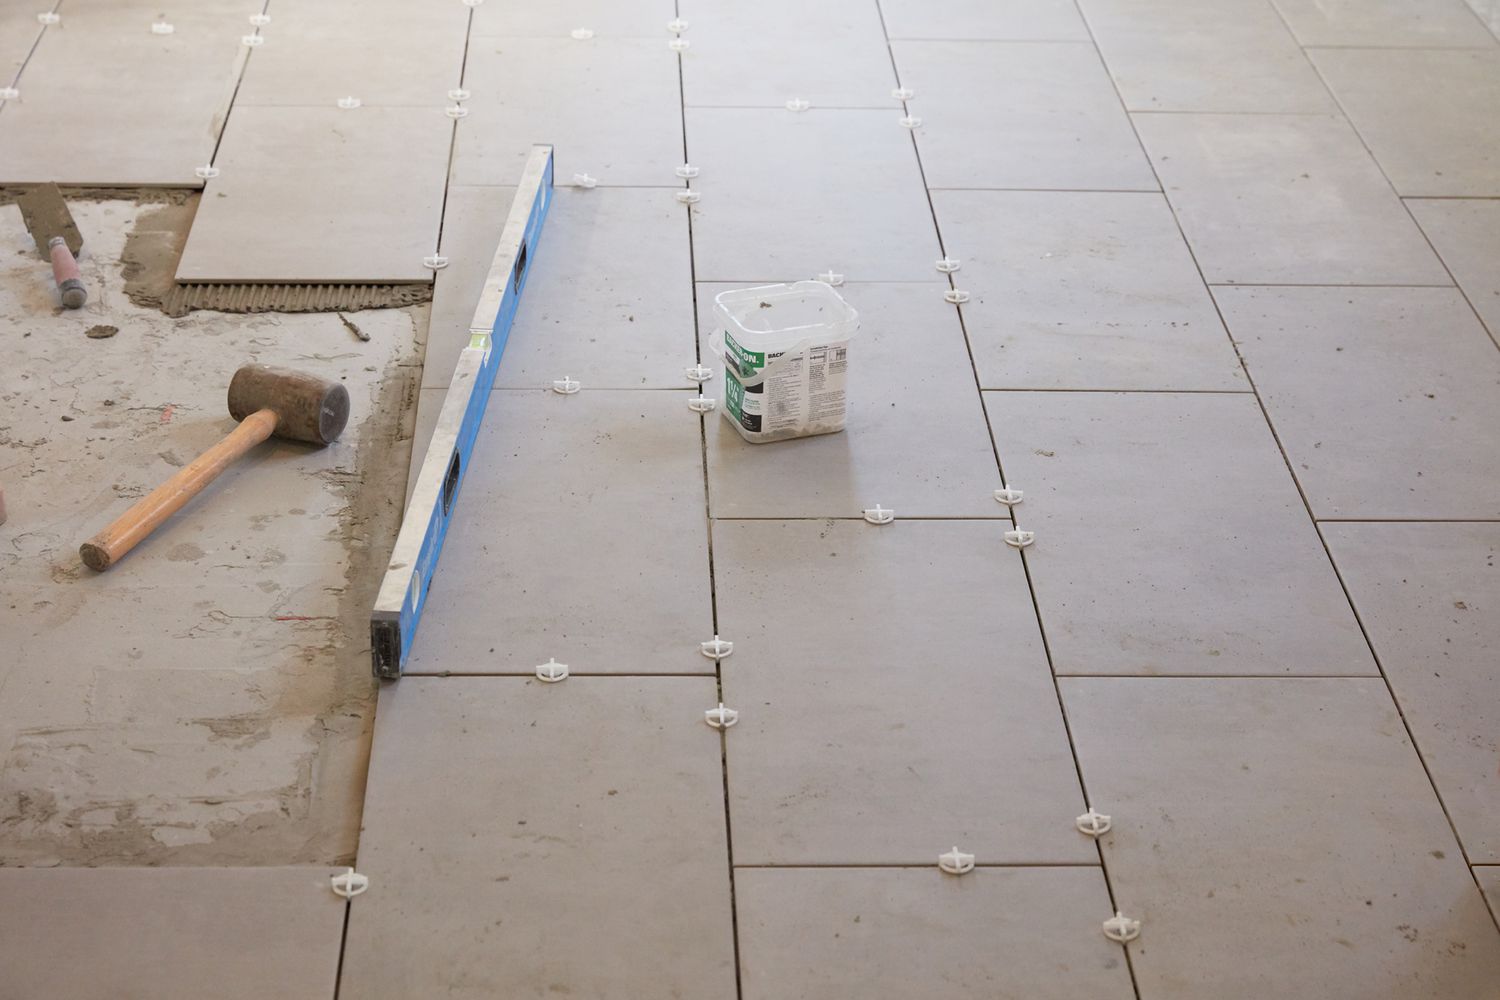
Begin Tile Installation
With the floor prepped and the tile layout planned, it’s time to begin the tile installation process. Follow these steps to ensure a smooth and successful tile installation:
- Mix the thinset mortar: Follow the manufacturer’s instructions to mix the thinset mortar to the desired consistency. Use a notched trowel to apply the mortar onto the floor, starting at the centerline where you made the layout lines.
- Place the tiles: Lay the tiles onto the thinset mortar, pressing them firmly and twisting them slightly to ensure proper adhesion. Start at the center and work your way outwards, following the layout lines and maintaining consistent spacing between the tiles using tile spacers.
- Make any necessary cuts: Use a tile cutter or wet saw to make precise cuts for tiles that need to fit around corners, edges, or obstacles. Take your time to ensure accurate cuts and test-fit each tile before applying adhesive.
- Continue laying the tiles: Work in small sections, spreading the thinset mortar and laying the tiles until the entire floor is covered. Periodically check for levelness and adjust the tile placement as needed.
- Allow the thinset to dry: Give the thinset mortar adequate time to dry and cure according to the manufacturer’s instructions. Avoid walking on the tiles or applying pressure until the thinset has fully hardened.
Throughout the tile installation process, periodically check your work to ensure that the tiles are properly aligned, level, and spaced. Use a level or straightedge to check for any unevenness or lippage between the tiles. Make any necessary adjustments as you go to ensure a professional and uniform result.
Remember to work in sections and clean off any excess thinset mortar from the surface of the tiles before it dries. This will make grouting easier and help create a clean and polished finished look.
Once the tile installation is complete and the thinset has fully cured, you can proceed to the next step—grouting.
Read more: How Thick Are Floor Tiles
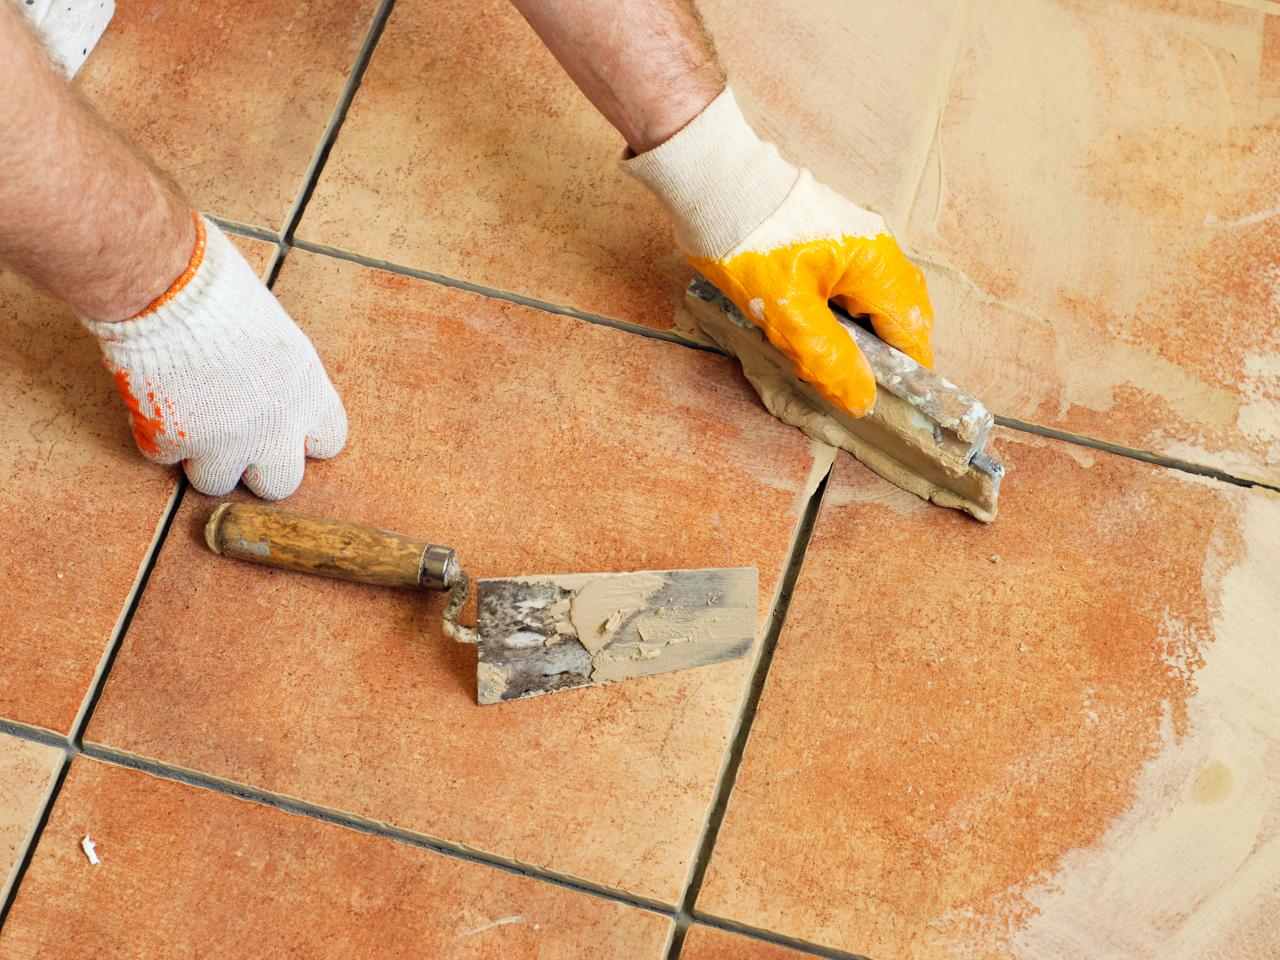
Grouting and Finishing Touches
After the tiles have been installed and the thinset has fully cured, it’s time to move on to the grouting and finishing touches. Grouting not only fills the gaps between the tiles but also enhances the overall look and durability of the floor. Here’s how to grout and complete the final touches:
- Select the grout: Choose a grout color that complements the tiles and aligns with your desired aesthetic. Read the manufacturer’s instructions for proper mixing and application.
- Mix the grout: Mix the grout according to the manufacturer’s instructions, ensuring a smooth and consistent consistency. Use a grout float or a trowel to spread the grout evenly across the tiles, working diagonally to fill the grout lines completely.
- Remove excess grout: After spreading the grout, use the edge of the grout float or a grout sponge to remove the excess grout from the tile surfaces. Wipe diagonally across the tiles to avoid pulling out grout from the joints.
- Clean and polish the tiles: Once the grout has set for a few minutes, use a clean, damp sponge to gently wipe away any haze or residue on the tile surfaces. Rinse the sponge frequently to ensure a clean and streak-free finish.
- Allow the grout to cure: Follow the manufacturer’s instructions for curing time. Avoid stepping on the freshly grouted floor or allowing excess moisture on the surface until the grout has fully cured.
- Apply grout sealer (if needed): Depending on the type of grout used, you may need to apply a grout sealer to protect it from stains and discoloration. Follow the manufacturer’s instructions to apply the sealer and allow it to dry completely.
- Reinstall baseboards: Once the grout and sealer have fully cured, it’s time to reinstall the baseboards. Use a nail gun or screws to secure them back into place, ensuring they are flush with the newly tiled floor.
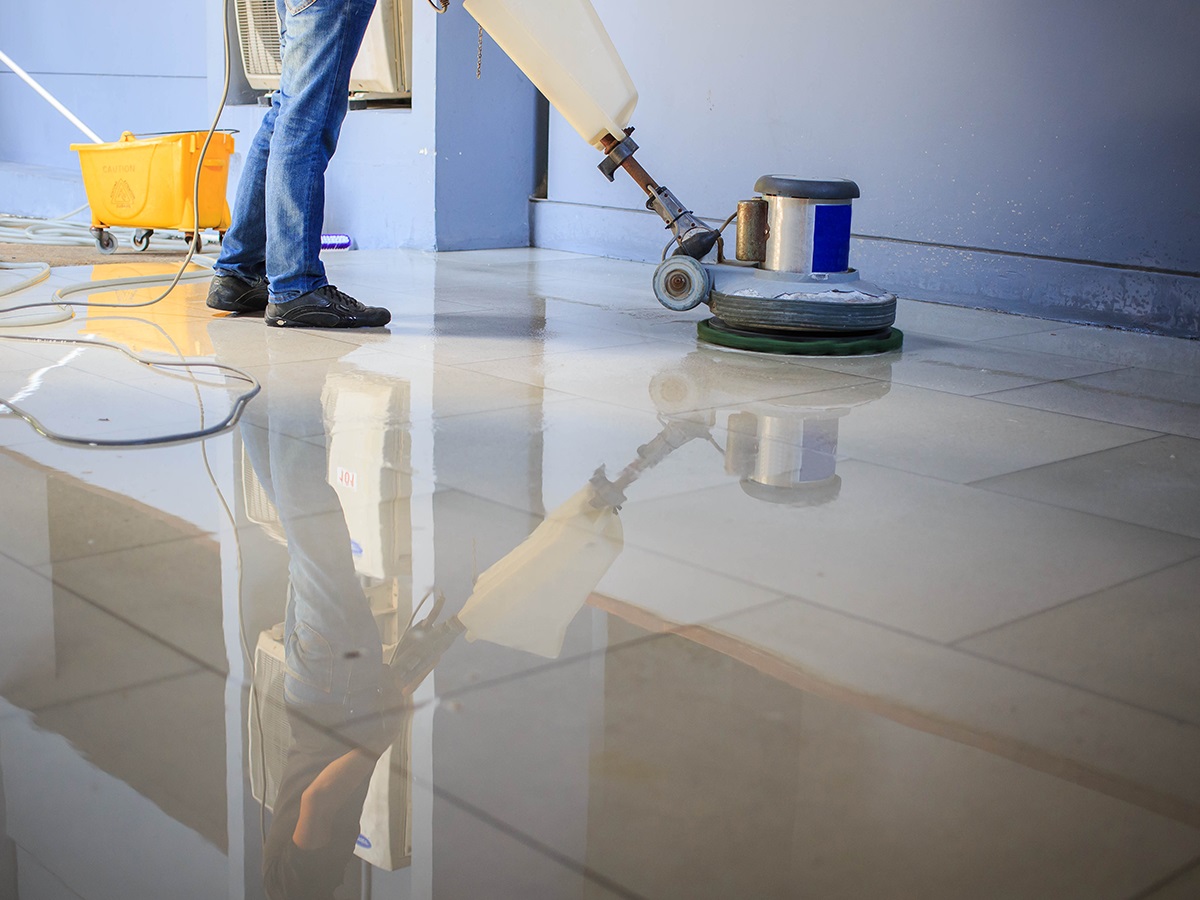
- Clean and enjoy: Give the floor a final cleaning to remove any remaining dust or grout residue. Once clean, step back, and admire your beautifully tiled floor.
Completing the grouting and the finishing touches brings the tile installation process to a close. With the grout cured and the floor cleaned, you can now enjoy your stunning and durable tiled floor. Remember to follow proper maintenance and cleaning practices to preserve the appearance and longevity of your tiles.
Congratulations on your successful tile installation!
Conclusion
Preparing a floor for tile installation requires careful planning, attention to detail, and the right tools and materials. By following the step-by-step process outlined in this article, you can ensure a successful and long-lasting tile installation that adds beauty and functionality to your space.
From gathering the necessary materials and tools to removing furniture and existing flooring, inspecting and repairing the subfloor, leveling the surface, and installing underlayment, each step plays a crucial role in creating a solid foundation for the tiles.
Once the surface is prepped, cleaning and preparing it ensures optimal adhesion and a smooth tile installation. Measuring and planning the tile layout helps achieve a balanced and visually pleasing result, minimizing cuts and maximizing the efficiency of your project.
When it comes to tile installation, attention to detail is key. Properly applying thinset mortar, laying the tiles, and grouting with precision contribute to achieving a professional-looking finish. Taking the time to clean off excess grout and applying a sealer, if necessary, adds the final touch to your beautifully tiled floor.
Remember to prioritize safety throughout the process, wear appropriate protective equipment, and consult with professionals or manufacturers if you have any specific questions or concerns.
By following these steps and putting in the necessary time and effort, you can confidently prepare a floor for tile installation and enjoy a stunning, functional, and long-lasting tile floor that enhances the look and value of your home.
Frequently Asked Questions about How To Prepare A Floor For Tile
Was this page helpful?
At Storables.com, we guarantee accurate and reliable information. Our content, validated by Expert Board Contributors, is crafted following stringent Editorial Policies. We're committed to providing you with well-researched, expert-backed insights for all your informational needs.


0 thoughts on “How To Prepare A Floor For Tile”