Home>Home Maintenance>How To Prepare For Home Inspection

Home Maintenance
How To Prepare For Home Inspection
Modified: October 18, 2024
Learn how to prepare for a comprehensive home inspection with our expert tips and advice. Ensure your home maintenance is up to par to avoid any surprises.
(Many of the links in this article redirect to a specific reviewed product. Your purchase of these products through affiliate links helps to generate commission for Storables.com, at no extra cost. Learn more)
Introduction
When it comes to maintaining and caring for your home, conducting regular inspections is a crucial step. Not only does it help you identify potential issues and address them before they become major problems, but it also ensures that your home remains safe, secure, and in good condition. One important type of inspection that every homeowner should consider is a home inspection.
Unlike routine maintenance tasks, a home inspection is a comprehensive examination of your property that is typically carried out by a certified professional. The main objective of a home inspection is to evaluate the overall condition of your home, including its structural integrity and the functionality of its various systems and components.
Understanding the purpose of a home inspection is essential. It helps homeowners prioritize necessary repairs and maintenance tasks, provides valuable insights into the health of a property, and can even influence the value of the home in the eyes of potential buyers.
In this article, we will discuss the importance of home inspections and guide you through the process of preparing for one. We will delve into the various aspects of the inspection process, including what to expect from a qualified home inspector and how to make necessary preparations to ensure a smooth and efficient inspection.
So, whether you are a homeowner planning to sell your property, a buyer looking to make an informed decision, or simply a homeowner who wants to stay on top of home maintenance, this article will provide valuable insights and tips on how to prepare for a home inspection.
Key Takeaways:
- Don’t overlook home inspections! They help identify issues, maintain safety, and influence property value. Prepare your home, choose a qualified inspector, and address any concerns promptly.
- From the roof to the basement, a thorough inspection covers every aspect of your home. Stay proactive, address issues, and maintain your property for long-term well-being and value.
Understanding the Purpose of Home Inspection
A home inspection serves multiple purposes and can provide homeowners with invaluable information about the condition of their property. Here are some key reasons why a home inspection is important:
- Identifying Issues: The primary goal of a home inspection is to identify any existing or potential issues with your property. This includes structural concerns, safety hazards, plumbing and electrical problems, and more. A thorough inspection can catch these issues early on, allowing you to address them promptly and prevent further damage or costly repairs.
- Budgeting for Repairs: By knowing the condition of your home, you can better estimate the cost of necessary repairs and maintenance. This helps you budget accordingly and plan for any upcoming expenses.
- Negotiating Power: For home sellers, a pre-listing inspection can provide an opportunity to address any issues before putting the property on the market. This can increase buyer confidence and potentially lead to a higher selling price. For home buyers, a thorough inspection report can be used as a negotiating tool to request repairs or negotiate a lower purchase price.
- Maintaining Safety: A home inspection helps ensure the safety of your property. It can uncover potential hazards, such as faulty electrical wiring, mold growth, or structural instability, that may pose risks to you and your family. Identifying these hazards allows you to take appropriate action to mitigate them and create a safer living environment.
- Insurance and Warranty Claims: If you have homeowner’s insurance or a warranty on your property, a home inspection report can be crucial in substantiating any claims you may need to make in the future. It provides documented evidence of the condition of your home at the time of the inspection, which can be useful in case of damage or disputes.
It’s important to note that a home inspection is not a guarantee or warranty on the home’s condition. Instead, it is a professional evaluation of the visible and accessible aspects of the property at the time of the inspection. The inspector will provide insights and recommendations based on their expertise, but it’s ultimately up to the homeowner to decide how to proceed.
Now that we understand the purpose and importance of a home inspection, let’s move on to the next step: choosing a qualified home inspector.
Choosing a Qualified Home Inspector
When it comes to selecting a home inspector, it’s crucial to choose someone who is qualified, experienced, and thorough. Here are a few factors to consider when choosing a qualified home inspector:
- Certification and Licensing: Look for a home inspector who is certified by a reputable organization, such as the International Association of Certified Home Inspectors (InterNACHI) or the American Society of Home Inspectors (ASHI). Additionally, ensure that they are licensed if it is required in your area.
- Experience and Expertise: It’s important to hire an inspector with a solid track record of experience and expertise in the field. Ask about their years of experience, the number of inspections they have conducted, and any specialized knowledge they possess. An experienced inspector is more likely to have a keen eye for potential issues and provide accurate assessments.
- Professionalism: A professional home inspector should conduct themselves in a knowledgeable and thorough manner. They should be well-prepared, prompt, and able to communicate effectively with you throughout the inspection process. Take the time to read reviews or ask for recommendations to gauge their professionalism and customer satisfaction.
- Sample Inspection Report: Request a sample inspection report from prospective inspectors. Review the format and level of detail provided in the report. A comprehensive and easy-to-understand report is essential for you to fully comprehend the inspector’s findings and make informed decisions.
- Insurance and Liability Coverage: Inquire about the inspector’s insurance and liability coverage. This is important for your protection, as well as the inspector’s, in case any damage or errors occur during the inspection process. A reputable inspector should have adequate insurance coverage.
- Availability and Scheduling: Consider the availability and scheduling options of the inspector. It’s important to find someone who can accommodate your timeline and work with you to ensure a convenient inspection date. Prompt scheduling is crucial, especially if you are in a time-sensitive real estate transaction.
Take the time to interview multiple inspectors, ask for references, and compare their qualifications and pricing. Remember that the cost of the inspection should not be the sole determining factor; the quality and expertise of the inspector should be the primary consideration.
By choosing a qualified home inspector, you can have peace of mind knowing that your property will be thoroughly assessed and any potential issues will be identified. With the right inspector by your side, you’ll be well-prepared to make informed decisions regarding your home’s maintenance and repair needs.
Next, we’ll discuss the steps you need to take to make necessary preparations for the day of the home inspection.
Making Preparations for the Inspection Day
Preparing your home for a thorough inspection is essential to ensure that the process goes smoothly and that the inspector can access all areas of the property. Here are some key steps to take when making preparations for the inspection day:
- Clean and Declutter: Before the inspection, tidy up your home and remove any clutter that may obstruct the inspector’s view or access to different areas. Clearing away personal items and organizing the space will make it easier for the inspector to navigate and assess the property.
- Provide Access: Ensure that the inspector has easy access to all areas of your home, including the attic, basement, crawlspaces, and utility rooms. Clear any obstructions such as furniture, boxes, or belongings that may block access to these areas.
- Unlock Doors and Gates: Make sure that all doors, gates, and access points to the property are unlocked. This includes any exterior gates, garage doors, sheds, or storage areas. The inspector will need to examine these areas, so it’s important that they can be accessed easily.
- Access to Utilities: Ensure that all utilities, such as water, gas, and electricity, are turned on and easily accessible. The inspector will need to test the functionality of these systems, so having them operational is essential for a thorough inspection.
- Pets and Children: Make arrangements for your pets and children to be out of the house during the inspection. This not only ensures their safety but also allows the inspector to focus on their work without distractions. It’s best to have them stay with a friend, family member, or in a pet daycare facility.
- Documentation: Gather any documentation related to repairs, renovations, or warranties for the property. This can include receipts, invoices, permits, or manuals. Providing this information to the inspector can give them a better understanding of the history and condition of the home.
- Prepare Questions: Take the time to compile a list of questions or concerns you may have about your home. This could include specific areas of concern, potential issues you’ve noticed, or anything you would like the inspector to pay extra attention to. Having these questions ready will help you make the most of the inspection process.
By following these preparations, you will ensure that the home inspector can thoroughly assess your property without any unnecessary obstacles. Preparing your home in advance demonstrates your commitment to a smooth and efficient inspection process, allowing you to get the most accurate evaluation of your home’s condition.
Now that you’ve prepared your home for the inspection, it’s time to move on to the actual inspection process. In the next sections, we will provide you with checklists for both the exterior and interior inspections.
Exterior Inspection Checklist
When performing a home inspection, the exterior of your property plays a crucial role in assessing its overall condition. Here is a checklist to guide you through the process of inspecting the exterior of your home:
- Roof: Start by examining the roof for any signs of damage, such as missing or damaged shingles, cracked tiles, or signs of leaking. Check for proper flashing around chimneys, skylights, and vents.
- Gutters and Downspouts: Inspect the gutters and downspouts for any clogs, damage, or improper drainage. Ensure that they are securely attached to the roof and properly directing water away from the foundation of the house.
- Siding or Exterior Finishes: Check the siding or exterior finishes for any cracks, rot, or peeling paint. Look for signs of water damage, insect infestations, or mold growth.
- Windows and Doors: Inspect the windows and doors for proper sealing, functioning locks, and any signs of moisture or drafts. Look for cracked glass, damaged frames, or loose hinges.
- Foundation: Examine the foundation for any cracks, bulges, or signs of settling. Pay close attention to the corners of the house and areas where the foundation meets the ground.
- Driveways and Walkways: Check for any cracks, uneven surfaces, or deterioration in the driveways and walkways leading to your home. Look for potential trip hazards or areas in need of repair.
- Deck and Patio: Inspect the deck and patio for any signs of rot, loose boards, or unstable railings. Look for boards, posts, or beams that may need to be replaced or repaired.
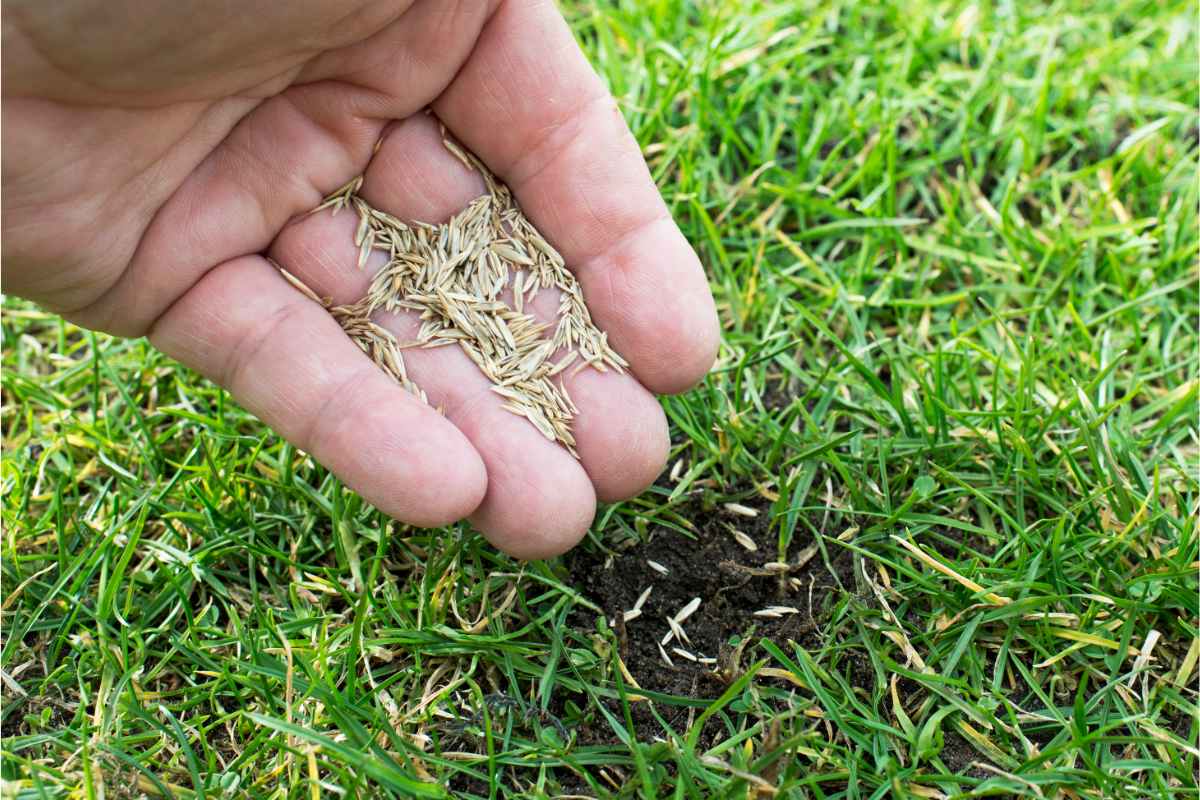
- Landscaping and Drainage: Evaluate the landscaping and drainage around your home. Check for proper grading to ensure that water is directed away from the foundation. Look for signs of standing water or excessive moisture.
- Fences and Gates: Inspect fences and gates for stability and any signs of damage. Ensure that gates can open and close properly and that fencing is secure.
- Outdoor HVAC Units: Check the outdoor HVAC units for any damage, debris, or signs of improper functioning. Remove any vegetation or debris that may obstruct airflow.
It’s important to take detailed notes and, if necessary, document any areas of concern with photographs. This will help you accurately communicate any issues to your home inspector or contractor.
Remember, this checklist is not exhaustive, and there may be additional items specific to your property that you need to inspect. By thoroughly examining the exterior of your home, you’ll gain valuable insights into its condition and identify any necessary maintenance or repairs.
Next, we will move on to the interior inspection checklist to ensure a comprehensive assessment of your property.
Read more: How To Prepare For A Garden
Interior Inspection Checklist
Continuing with the home inspection process, the interior of your property provides important insights into the overall condition of your home. Use this checklist to guide you through the interior inspection:
- Walls, Ceiling, and Floors: Inspect the walls, ceilings, and floors for any cracks, water stains, or signs of unevenness. Look for peeling or bubbling paint, sagging ceilings, or damaged flooring.
- Windows and Doors: Check the windows and doors for proper sealing, functioning locks, and any signs of moisture or drafts. Assess the condition of the frames, hinges, and screens.
- Electrical Outlets and Switches: Test all electrical outlets and switches to ensure they are functioning properly. Look for any loose or exposed wiring, as well as any signs of burn marks or overheating.
- Plumbing Fixtures: Check all plumbing fixtures, including sinks, toilets, and bathtubs, for leaks, proper drainage, and adequate water pressure. Inspect the seals and caulking around the fixtures.
- Kitchen Appliances: Inspect the kitchen appliances, such as the stove, refrigerator, dishwasher, and microwave, for proper functioning and any signs of wear or damage.
- Heating and Cooling Systems: Evaluate the heating and cooling systems, including the furnace, air conditioning unit, and ventilation. Check for proper functioning, airflow, and any signs of damage or leaks.
- Smoke and Carbon Monoxide Detectors: Test all smoke and carbon monoxide detectors in the home to ensure they are in working order. Replace batteries if necessary.
- Attic: Inspect the attic for any signs of water leaks, pests, or insulation issues. Look for proper ventilation and check for adequate insulation.
- Basement: Evaluate the basement for any signs of water intrusion, cracks in the foundation, or dampness. Check for proper insulation and ventilation.
- Stairs and Railings: Inspect all stairs and railings for stability and any signs of damage or wear. Ensure that handrails are securely attached.
As you go through each room, make note of any visible issues and areas that may require further inspection or professional assessment. Take photos if necessary to document any concerns.
Remember, this checklist is a general guide, and there may be specific items unique to your home that you need to inspect. By conducting a thorough interior inspection, you’ll have a clearer understanding of the condition of your home’s internal systems and components.
In the following sections, we will go into detail on how to inspect specific systems in your home, such as the plumbing, electrical, HVAC, roof, attic, and foundation.
Plumbing System Inspection
When conducting a home inspection, examining the plumbing system is crucial to ensure proper functionality and identify potential issues. Here are some steps to follow for a thorough plumbing system inspection:
- Check for Leaks: Inspect all visible plumbing pipes, including those under sinks, behind toilets, and in the basement or crawlspaces. Look for any signs of leaks, such as water stains, dampness, or dripping water.
- Test Drains: Run water in sinks, showers, and tubs to test the drainage. Look for any slow drains or backups that may indicate clogs or blockages in the plumbing system.
- Inspect Water Pressure: Turn on faucets in the kitchen, bathroom, and other areas to check the water pressure. Low water pressure could indicate a problem with the water supply or issues with the plumbing pipes.
- Check for Proper Ventilation: Inspect the plumbing vents to ensure they are clear of debris and functioning properly. Blocked or improperly vented plumbing can cause issues with drainage and lead to foul odors or gurgling sounds.
- Inspect Toilets: Check each toilet for proper flushing and check for any signs of leaks around the base or at the water supply connections. Flush toilets to make sure they are functioning correctly and there are no water leaks or running toilets.
- Examine Water Heater: Inspect the water heater for signs of corrosion, leaks, or rust. Check the temperature and pressure relief valve and ensure proper operation. Take note of the age of the water heater, as it may need to be replaced soon.
- Inspect Supply Lines and Shut-Off Valves: Examine the supply lines and shut-off valves for the plumbing fixtures. Look for any signs of leaks, rust, or corrosion. Test the shut-off valves to ensure they are working properly.
- Inspect Sump Pump: If your home has a sump pump, ensure that it is functioning correctly by checking for any signs of leaks, abnormal noises, or inadequate drainage. Test the pump to make sure it turns on and removes water as intended.
- Look for Water Stains: Check for any water stains or discoloration on walls, ceilings, or floors. These could indicate past or current leaks in the plumbing system.
- Inspect Outdoor Plumbing: Examine outdoor faucets, sprinkler systems, and hoses for leaks or damage. Ensure that outdoor faucets are functioning correctly and not leaking when turned off.
It’s important to note any issues or concerns discovered during the inspection and to address them promptly. If you encounter significant plumbing issues or are unsure about the condition of the plumbing system, it may be beneficial to consult with a professional plumber for a more in-depth evaluation.
Now that we’ve covered the plumbing system inspection, let’s move on to the electrical system inspection to ensure the safety and proper functioning of this important aspect of your home.
Make sure to clean and declutter your home before the inspection. This will make it easier for the inspector to access and evaluate different areas of your home.
Electrical System Inspection
When conducting a home inspection, evaluating the electrical system is crucial for both safety and functionality. Here are some key steps to follow during an electrical system inspection:
- Check Circuit Breaker Panel: Inspect the circuit breaker panel and ensure that it is properly labeled. Verify that the breakers are tightly secured and not showing signs of damage or overheating.
- Test Ground Fault Circuit Interrupters (GFCIs): Test all GFCIs in the home, including those in the bathrooms, kitchen, garage, and outdoor areas. Press the “test” button and ensure that power is cut off and then restored when the reset button is pressed.
- Inspect Outlets and Switches: Inspect all outlets and switches for any signs of damage, loose connections, or overheating. Check for proper grounding and ensure that outlets are not overloaded with too many devices.
- Test Light Fixtures: Turn on and off all light fixtures to ensure they are functioning correctly. Check for flickering lights or signs of loose connections.
- Check for Proper Grounding: Verify that all electrical systems, including the main service panel, are properly grounded. Look for grounding wires and ensure they are securely connected.
- Examine Wiring: Inspect visible wiring for any signs of damage, such as frayed insulation or exposed wires. Look for any amateur or DIY electrical work that may not meet safety standards.
- Test Smoke Detectors and Carbon Monoxide Alarms: Check that all smoke detectors and carbon monoxide alarms are in working order. Test them by pressing the test button and replace batteries if necessary.
- Check for Proper Light Switch Wiring: Ensure that light switches are wired correctly and function properly. Look for any signs of loose connections or improperly installed switches.
- Inspect Electrical Panels and Disconnects: Inspect any electrical panels or disconnects outside the home, such as for air conditioning units or other outdoor equipment. Look for signs of damage, corrosion, or improper connections.
- Verify Outdoor Electrical Systems: Check outdoor electrical systems, such as outlets, lighting fixtures, and electrical wiring for pools or spas. Ensure that all outdoor electrical systems are in good working order and free from damage.
During the electrical system inspection, take note of any visible issues or concerns. If you encounter any major electrical issues or are unsure about the safety of the electrical system, it is advisable to consult with a licensed electrician for a more detailed evaluation and necessary repairs.
Now that we have covered the electrical system inspection, let’s move on to the HVAC system inspection, which is essential for maintaining a comfortable and efficient living environment.
HVAC System Inspection
As part of a comprehensive home inspection, evaluating the HVAC (Heating, Ventilation, and Air Conditioning) system is essential to ensure optimal comfort and efficiency. Here are the key steps to follow during an HVAC system inspection:
- Inspect Air Filters: Check the air filters in the HVAC system and determine if they need to be cleaned or replaced. Dirty or clogged filters can affect air quality and reduce system efficiency.
- Inspect Thermostats: Test all thermostats in the home to ensure they are functioning correctly. Make sure they respond to changes in temperature settings and are accurately maintaining desired temperatures.
- Check Air Ducts and Vents: Inspect the air ducts for any signs of damage, leaks, or blockages. Ensure that all vents are clean, open, and properly distributing air throughout the home.
- Examine Heating System: Check the heating system, including the furnace or heat pump, for proper functioning and signs of wear or damage. Look for unusual noises, odors, or inefficient heating performance.
- Inspect Cooling System: Assess the cooling system, such as the air conditioner or heat pump, for proper functioning and signs of wear or damage. Look for cool air output, proper temperature control, and efficient cooling performance.
- Test Thermostat Accuracy: Use a separate thermometer to compare the temperature readings of the thermostats in different areas of the home. Ensure that the thermostats are accurately detecting and maintaining the desired temperature.
- Check Outdoor Units: Inspect the outdoor units of the HVAC system, including the condenser and compressor, for any signs of damage, debris, or blockages. Ensure that they are clean, properly ventilated, and not obstructed by vegetation.
- Inspect Refrigerant Lines: Examine the refrigerant lines for any signs of leaks, damage, or inadequate insulation. Leaking refrigerant can lead to inefficient cooling and potential system breakdown.
- Test System Operation: Run the HVAC system in both heating and cooling modes and note its performance. Listen for any unusual noises, vibrations, or odors that may indicate potential issues.
- Check Safety Features: Verify that all safety features, such as pressure switches and emergency shut-off switches, are functioning properly. These features are important for the safe operation of the HVAC system.
It’s important to remember that while a home inspection can provide valuable insights into the condition of the HVAC system, it may not reveal all hidden or internal issues. If any significant concerns are identified, it is advisable to consult with an HVAC professional for a more in-depth evaluation and necessary repairs.
Now that we have covered the HVAC system inspection, let’s move on to the roof inspection, as it plays a crucial role in protecting your home from the elements.
Read more: How To Prepare For A Picnic
Roof Inspection
Conducting a thorough roof inspection is an important part of assessing the overall condition and integrity of your home. Here are the key steps to follow during a roof inspection:
- Visually Examine the Roof: Inspect the roof from ground level, looking for any obvious signs of damage, such as missing or damaged shingles, cracked tiles, or curling edges. Take note of any areas that appear to be sagging or out of alignment.
- Check for Debris and Ponding Water: Look for any buildup of leaves, branches, or other debris on the roof. Excessive debris can lead to moisture retention and damage to the roofing materials. Additionally, check for areas where water may be pooling on the surface, as this can indicate poor drainage.
- Assess Flashing and Sealants: Inspect the flashing, which is the material used to seal gaps and joints around the roof, such as chimneys, vents, and skylights. Check for signs of cracking, lifting, or deterioration. Note any areas where the sealant may need to be replaced or repaired.
- Inspect Gutters and Downspouts: Examine the gutters and downspouts for any signs of damage or blockage. Ensure that they are securely attached to the roof and effectively directing water away from the foundation. Clean out any debris or leaves that may be obstructing the flow of water.
- Check for Water Stains and Interior Damage: Inspect the interior walls and ceilings of your home for any signs of water stains or damage. These can indicate potential roof leaks. Look for any cracks, peeling paint, or discoloration that may be related to roofing issues.
- Examine Ventilation: Assess the ventilation system of the roof, including vents and attic fans. Ensure that they are free from obstructions and functioning properly. Proper ventilation helps prevent the buildup of heat and moisture, which can cause damage to the roof structure.
- Consider the Age of the Roof: Take into account the age of the roof and its expected lifespan. If the roof is nearing the end of its lifespan or has significant damage, it may require repairs or replacement.
- Consult a Professional Inspector: If you are uncertain about the condition of your roof or if there are signs of significant damage, it is advisable to consult a professional roofing inspector. They can provide a more detailed assessment and offer recommendations for repairs or replacement.
Remember, roof inspections are best conducted by professionals with the necessary expertise and safety equipment. They can thoroughly assess the roof’s condition, identify any underlying issues, and provide guidance on necessary repairs or maintenance.
Now that we have covered the roof inspection, let’s move on to the attic and insulation inspection, which are important for energy efficiency and maintaining a comfortable living environment.
Attic and Insulation Inspection
When conducting a comprehensive home inspection, it’s important not to overlook the attic and insulation. Here are the key steps to follow during an attic and insulation inspection:
- Assess Insulation Levels: Inspect the insulation levels in the attic. Check for adequate coverage and uniformity throughout the space. Insulation helps regulate temperature and improve energy efficiency.
- Look for Signs of Moisture: Examine the attic for any signs of moisture or water damage. Look for water stains, mold growth, or dampness that could indicate a leak in the roof or improper ventilation.
- Check for Proper Ventilation: Assess the attic’s ventilation system, including vents, soffits, and exhaust fans. Adequate ventilation helps prevent moisture buildup, which can lead to mold growth and damage to the roof structure.
- Inspect Roof Penetrations: Check around any roof penetrations, such as vents, pipes, or chimneys, for signs of proper sealing. Ensure that there are no gaps or cracks that could allow moisture or pests to enter the attic space.
- Examine Structural Components: Assess the condition of the attic’s structural components, such as beams, trusses, and rafters. Look for any signs of damage, such as sagging or cracks, which may require further evaluation by a professional.
- Check for Proper Insulation Coverage: Ensure that insulation is properly installed and covers all areas, including corners, edges, and eaves. Pay special attention to insulation around light fixtures, electrical wiring, and vents.
- Look for Animal or Pest Activity: Inspect the attic for signs of animal or pest infestation, such as droppings, chewed insulation, or nests. These can cause damage to the insulation and potentially other structural components.
- Evaluate Attic Access: Check the condition of the attic access point, such as a hatch or pull-down stairs. Ensure that it is properly insulated and sealed to minimize heat loss or gain.
- Consider Energy Efficiency: Evaluate the attic’s overall energy efficiency. Proper insulation and ventilation play a significant role in reducing energy consumption and maintaining a comfortable indoor environment.
- Consult a Professional: If you are unsure about the condition of the attic or insulation, or if there are signs of significant issues, it is advisable to consult a professional home inspector or insulation specialist for a more detailed assessment.
Proper attic and insulation maintenance contribute to energy efficiency, prevent moisture-related damage, and help create a comfortable living environment. By conducting a thorough inspection, you can identify any areas that may require attention or improvement.
Now that we have covered the attic and insulation inspection, let’s move on to the basement and foundation inspection as we continue with our comprehensive home inspection.
Basement and Foundation Inspection
The basement and foundation are crucial components of your home’s overall structure, and it’s important to conduct a thorough inspection to ensure their integrity. Here are the key steps to follow during a basement and foundation inspection:
- Check for Signs of Water Intrusion: Inspect the basement walls and floor for any signs of water intrusion. Look for water stains, dampness, or mold growth. These can indicate potential issues with foundation drainage or waterproofing.
- Evaluate Foundation Walls: Examine the foundation walls for any cracks, bulges, or shifting. Pay attention to both the interior and exterior walls. Small cracks are common, but large or widening cracks may indicate structural concerns.
- Inspect Basement Windows and Doors: Check the condition of basement windows and doors. Look for proper sealing, functioning locks, and any signs of moisture around these openings.
- Assess Floor and Wall Support: Evaluate the floor and wall support in the basement. Look for any signs of sagging, unevenness, or separation between walls and floors. These issues may indicate foundation settling or structural problems.
- Look for Proper Ventilation: Check for adequate ventilation in the basement. Ensure that there are vents or fans to prevent moisture buildup and improve air circulation. Poor ventilation can lead to mold growth and musty odors.
- Inspect Sump Pump and Drainage System: If your basement has a sump pump and drainage system, inspect them to ensure they are functioning properly. Test the sump pump to verify that it activates and removes water as intended.
- Examine Support Columns and Beams: Inspect support columns and beams in the basement for signs of damage, such as rot, cracks, or shifting. These structural elements provide stability and should be in good condition.
- Check for Pest Infestation: Look for any signs of pest infestation in the basement, such as termite damage or rodent droppings. Pests can cause significant damage to the foundation and other structural components.
- Evaluate Insulation and Vapor Barrier: Assess the insulation and vapor barrier in the basement. Insulation helps regulate temperature, while a vapor barrier prevents moisture infiltration. Ensure that they are in good condition and properly installed.
- Consider Professional Evaluation: If you notice significant issues, such as major cracks, foundation movement, or water infiltration, it is advisable to consult a professional structural engineer or home inspector. They can provide a detailed assessment and recommendations for repairs or further evaluation.
By carefully inspecting the basement and foundation, you can identify any potential structural issues or moisture concerns. Prompt attention to these matters is essential to maintain the stability and overall condition of your home.
Now that we have covered the basement and foundation inspection, let’s conclude our comprehensive home inspection with a summary of the key points we have discussed.
Conclusion
Conducting a thorough home inspection is a critical step in maintaining the safety, functionality, and value of your property. From understanding the purpose of a home inspection to preparing for the inspection day, inspecting the exterior and interior, plumbing and electrical systems, HVAC, roof, attic, basement, and foundation, each aspect plays a vital role in ensuring your home is in optimal condition.
By choosing a qualified home inspector, you can trust that their expertise will provide valuable insights into the condition of your property. Making necessary preparations, such as cleaning and decluttering, providing access to all areas, and gathering documentation, helps facilitate a smooth inspection process.
During the inspection, paying attention to the exterior will uncover any issues with the roof, siding, gutters, and landscaping. Examining the interior allows you to evaluate the walls, flooring, windows, plumbing, and electrical systems, among others.
A comprehensive inspection of the plumbing system helps identify leaks, drainage problems, and issues with fixtures and water supply. Similarly, an inspection of the electrical system ensures the safety and proper functioning of switches, outlets, and the main panel.
Evaluating the HVAC system helps maintain comfort and energy efficiency by checking filters, thermostats, ventilation, and heating and cooling equipment. The roof inspection looks for damage, leaks, and proper sealing to protect your home from the elements.
The attic and insulation inspection focuses on insulation levels, ventilation, moisture, and pest infestation, contributing to energy efficiency and a comfortable living environment. Lastly, the basement and foundation inspection assesses water intrusion, structural stability, support, and potential pest problems.
Remember, while a home inspection provides valuable information, it does not replace in-depth evaluations by specialized professionals. If significant issues are identified during the inspection, it’s important to consult the appropriate experts for further assessment and necessary repairs.
By conducting regular home inspections, addressing identified issues promptly, and maintaining your property, you can ensure the long-term well-being and value of your home.
So, whether you’re a homeowner looking to stay on top of maintenance or a buyer seeking a thorough examination before making a purchase, a comprehensive home inspection is an essential tool for understanding the condition and needs of your home.
Frequently Asked Questions about How To Prepare For Home Inspection
Was this page helpful?
At Storables.com, we guarantee accurate and reliable information. Our content, validated by Expert Board Contributors, is crafted following stringent Editorial Policies. We're committed to providing you with well-researched, expert-backed insights for all your informational needs.


0 thoughts on “How To Prepare For Home Inspection”