Articles
How To Prepare Exterior Walls For Painting
Modified: October 28, 2024
Learn expert tips and techniques for preparing the exterior walls of your home for painting in this informative articles. Get ready to transform your space with a fresh coat of paint!
(Many of the links in this article redirect to a specific reviewed product. Your purchase of these products through affiliate links helps to generate commission for Storables.com, at no extra cost. Learn more)
Introduction
When it’s time to give your home’s exterior a fresh new look, painting the walls can make a huge difference. Whether you’re looking to boost curb appeal or protect the exterior from the elements, proper preparation is key to achieving long-lasting, professional-looking results. By taking the time to assess the condition of your exterior walls and following a few essential steps, you can ensure that your paint job will not only look great but also stand the test of time.
In this article, we will guide you through the process of preparing your exterior walls for painting. We will cover everything from assessing the condition of the walls to applying the paint and caring for the freshly painted surface. So let’s dive in and get your exterior walls ready for a stunning transformation!
Key Takeaways:
- Properly preparing exterior walls for painting is crucial for achieving a long-lasting, professional finish. From assessing and repairing to priming and applying paint, attention to detail is key.
- Choosing the right exterior paint and caring for freshly painted walls are essential for maintaining the beauty and longevity of your home’s exterior. Attention to detail and proper maintenance ensure stunning, long-lasting results.
Read more: How To Prepare Interior Walls For Painting
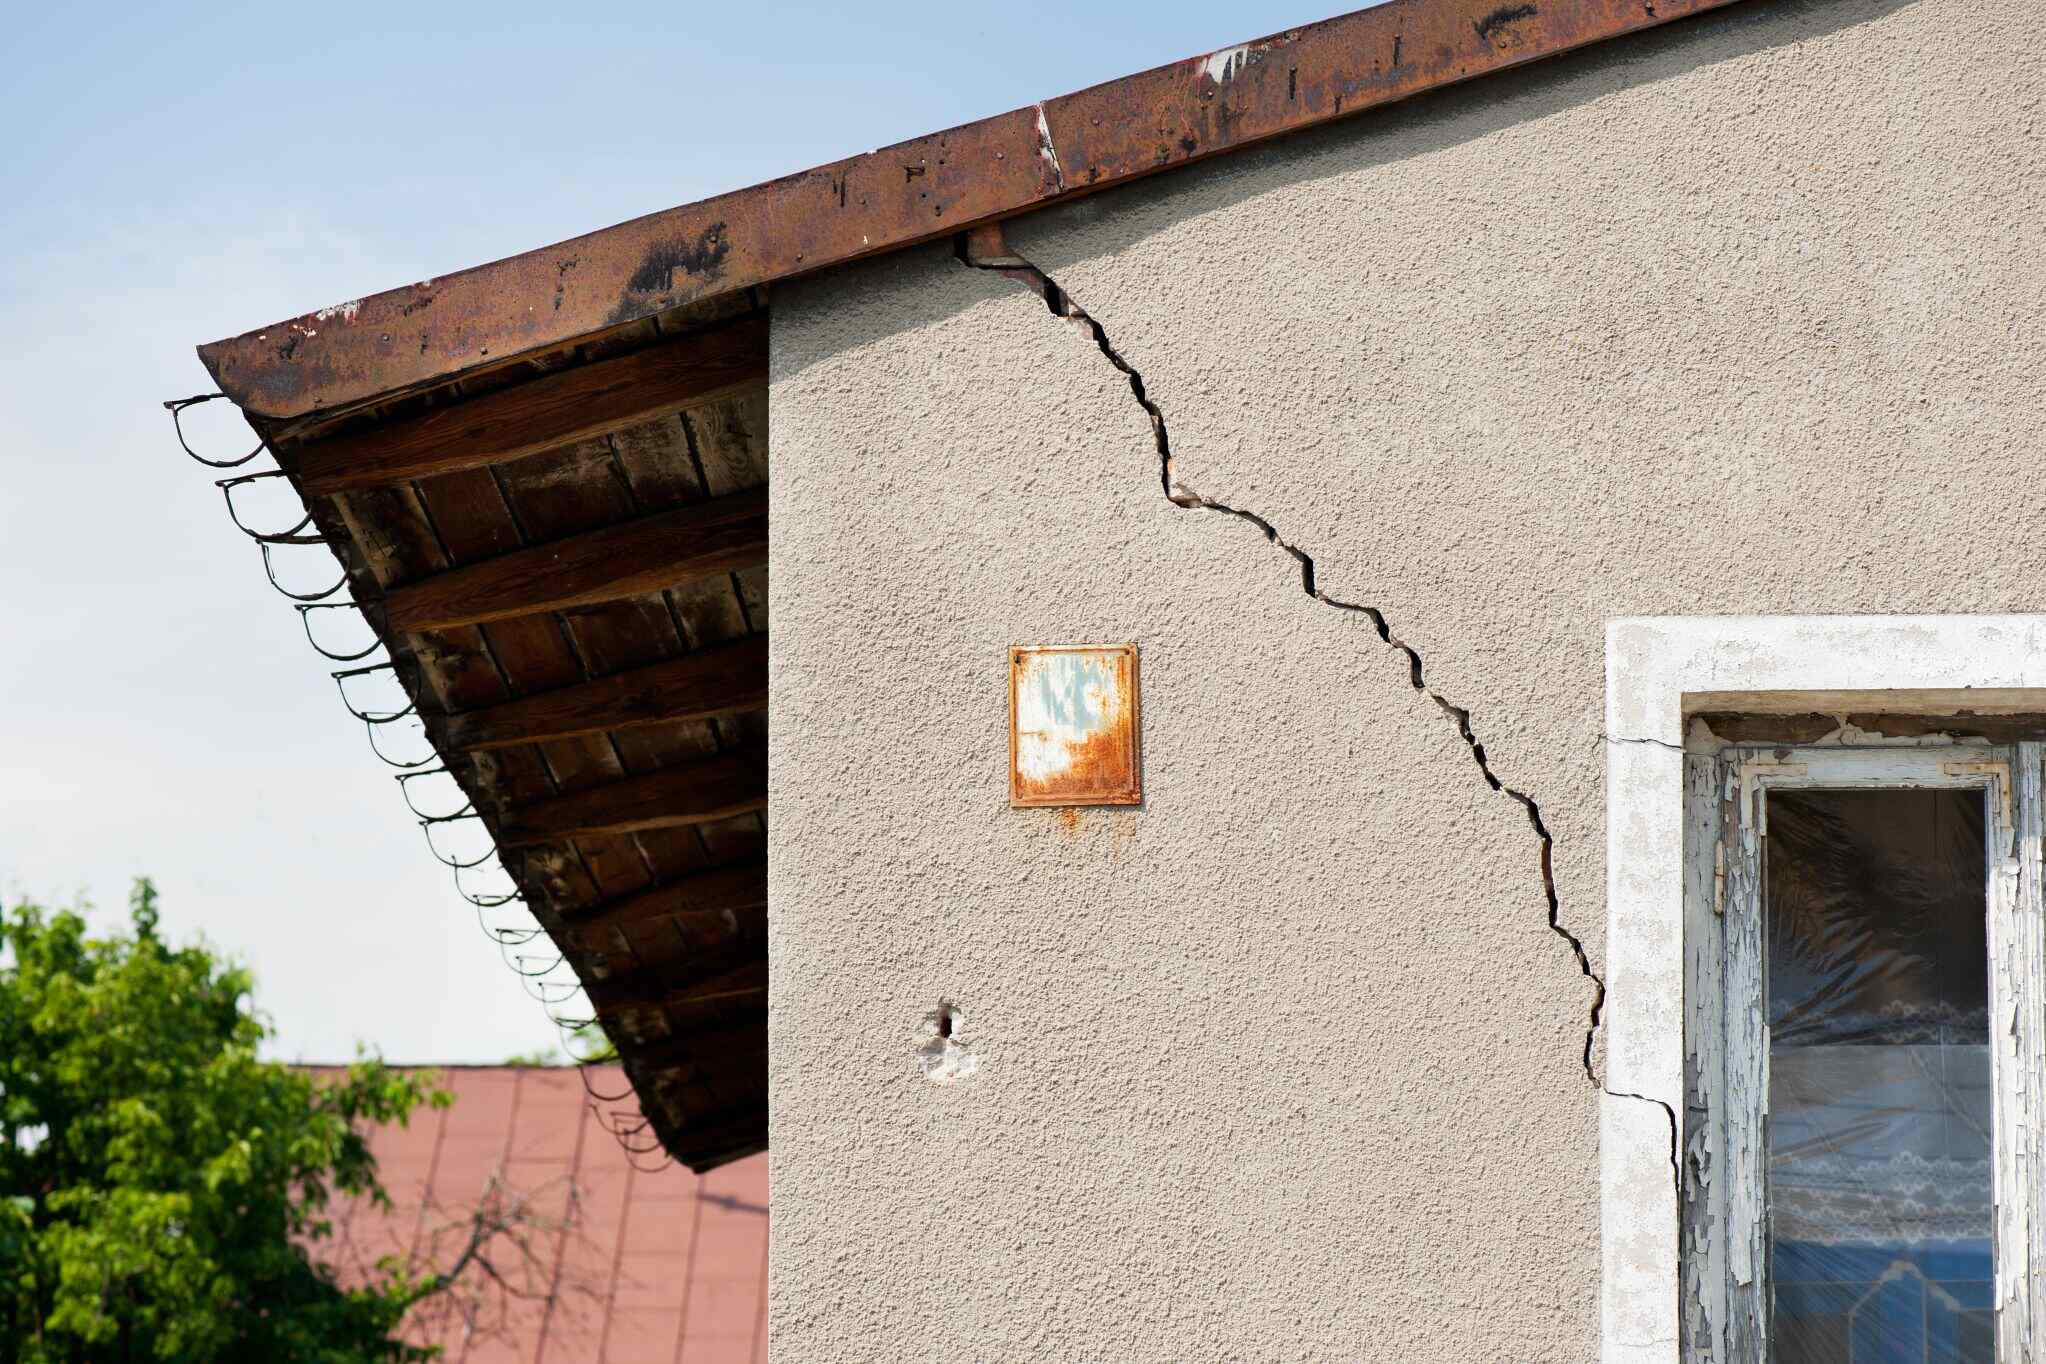
Assessing the condition of the exterior walls
Before you start any painting project, it’s crucial to assess the condition of your exterior walls. This step will help you identify any issues that need to be addressed before applying the paint. Here are some key factors to consider during the assessment process:
- Cracks and holes: Inspect the walls for any cracks or holes. These can be a result of settling, weather damage, or general wear and tear. Large cracks should be filled and repaired, while smaller cracks can be addressed during the painting process.
- Peeling or bubbling paint: Look for areas where the paint is peeling or bubbling. This could be a sign of moisture issues or improper previous paint application. These areas will need to be scraped and sanded to create a smooth surface for the new paint.
- Mold or mildew: Check for any signs of mold or mildew growth on the walls. These fungal infestations can cause significant damage to the paint and underlying structure if left untreated. Use a mold cleaner or a mixture of bleach and water to remove any mold or mildew before proceeding with the painting project.
- Surface condition: Examine the overall condition of the walls. If they are dirty, covered in grime, or have an uneven texture, they will need proper cleaning and surface preparation. A smooth and clean surface is essential for achieving a flawless finish.
- Moisture issues: Look for any signs of water damage or moisture issues, such as stains, discoloration, or rotting wood. These issues should be addressed and repaired before painting to prevent further damage and ensure the longevity of the new paint job.
By thoroughly assessing the condition of your exterior walls, you can identify any underlying issues that need attention. This will allow you to prioritize repairs and plan your painting project accordingly. Remember, addressing these issues before painting will help you achieve better results and prolong the life of your paint job.
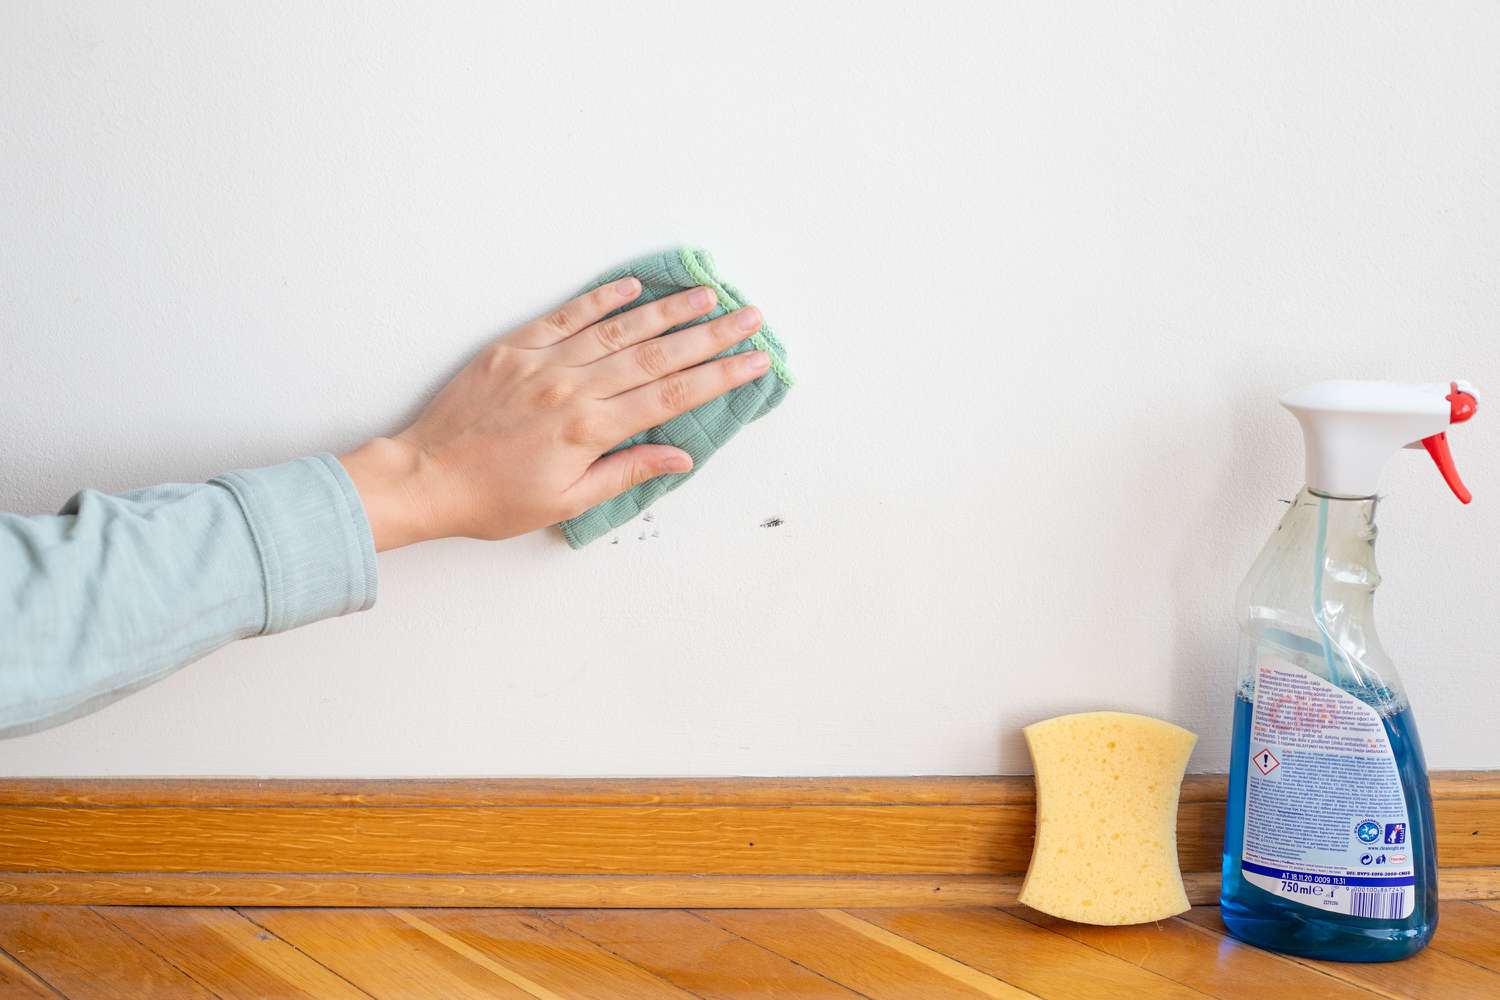
Cleaning the exterior walls
Once you have assessed the condition of your exterior walls, the next step is to thoroughly clean them. Cleaning is a crucial part of the preparation process as it helps remove dirt, grime, and any loose debris that could interfere with the adhesion of the new paint. Here’s how you can clean your exterior walls effectively:
- Gather your materials: Start by gathering the necessary cleaning supplies. You will need a bucket, a stiff-bristle brush or a scrub brush, a hose or pressure washer, mild detergent or a specialized exterior wall cleaner, and protective gloves.
- Remove loose dirt and debris: Begin by using a dry brush or broom to remove any loose dirt, cobwebs, and debris from the walls. This will make the cleaning process more efficient and prevent the dirt from smearing or scratching the surface.
- Mix the cleaning solution: Fill the bucket with water and add a mild detergent or an exterior wall cleaner according to the manufacturer’s instructions. Mix the solution well to create a soapy mixture.
- Apply the cleaning solution: Dip the brush into the soapy solution and start scrubbing the walls in a scrubbing motion. Work in sections, starting from the top and working your way down, to ensure thorough cleaning.
- Persistent stains: For stubborn stains, you may need to use a more potent cleaning solution or spot treat the area with a specialized stain remover. Follow the manufacturer’s instructions and be careful not to damage the surface.
- Rinse the walls: Once you have scrubbed the entire wall, use a hose or a pressure washer to rinse off the cleaning solution and any remaining dirt. Start from the top and work your way down, ensuring all the soap residue is thoroughly removed.
- Drying the walls: Allow the walls to air dry completely before moving on to the next step. This ensures that the surface is dry and ready for any necessary repairs or paint application.
Cleaning the exterior walls will not only improve the appearance of your home but also create a clean and smooth surface for the paint to adhere properly. It is essential to remove all dirt and grime to ensure a long-lasting and flawless paint job.
Repairing any damages
After cleaning the exterior walls, the next step in preparing them for painting is to address any damages. Repairing these issues is crucial as it helps to ensure a smooth and even surface for the paint to adhere to. Here are some common damages that you may encounter and how to repair them:
- Cracks and holes: If your walls have any cracks or holes, it’s important to fill and repair them before painting. Start by cleaning out the crack or hole, removing any loose debris or old filler. Then, use a suitable exterior patching compound or filler to fill the damaged area. Follow the manufacturer’s instructions for mixing and applying the patching compound, and use a putty knife to create a smooth surface. Allow the filler to dry completely before moving on to the next step.
- Rotting wood: If you come across any rotten or decaying wood on your exterior walls, it’s crucial to replace or repair these areas. Remove the rotten section of wood using a chisel or a saw, and then replace it with a new piece of wood that is properly treated for outdoor use. Secure the new piece of wood in place using nails or screws, and make sure it is flush with the surrounding surface. Lastly, sand the area to create a smooth finish.
- Damaged or loose siding: If you have siding on your exterior walls, check for any damaged or loose pieces. Replace any cracked or broken siding panels, and securely reattach any loose ones. Use suitable nails or screws to secure the siding in place, ensuring a tight fit. If necessary, caulk around the edges of the siding to create a seamless appearance.
- Weathered or damaged trim: Inspect the trim around windows, doors, and other architectural features for any signs of damage or wear. Replace any rotten or damaged trim pieces with new ones that match the existing style. Sand and smooth the edges of the trim to ensure a seamless transition between the trim and the wall surface.
- Structural issues: If you notice any significant structural issues with your exterior walls, such as sagging or instability, it is crucial to consult with a professional contractor or structural engineer. These issues may require specialized solutions to ensure the stability and safety of your home.
By repairing any damages on your exterior walls, you create a solid foundation for your paint job. This step ensures that the surface is smooth, even, and ready to receive the fresh coat of paint, resulting in a professional-looking finish that will last for years to come.
Removing loose paint
Before you can apply a new coat of paint to your exterior walls, it’s important to remove any loose or peeling paint. Leaving loose paint in place can lead to an uneven finish and poor adhesion of the new paint. Here are some methods you can use to remove loose paint:
- Scraping: The most common method to remove loose paint is by scraping it off using a paint scraper or putty knife. Start by holding the scraping tool at a slight angle against the wall and apply firm pressure to scrape away the loose paint. Work in small sections and be careful not to damage the underlying surface. For safety, wear protective gloves, safety glasses, and a dust mask to avoid inhaling paint dust or debris.
- Heat gun: A heat gun can be used to soften the paint and make it easier to scrape off. Hold the heat gun a few inches away from the painted surface and move it continuously to prevent scorching or damaging the wall. As the paint starts to soften, use a scraping tool to gently remove the loosened paint. Be cautious when using a heat gun and follow the manufacturer’s instructions to ensure safe and effective use.
- Power sanding: If you have a large area with extensive peeling paint, power sanding can be a time-saving option. Use a power sander equipped with coarse-grit sandpaper to remove the loose paint. Move the sander in a back-and-forth motion, applying even pressure. Avoid staying in one spot for too long, as it can damage the surface. After sanding, wipe away the dust using a clean cloth or vacuum.
- Chemical paint strippers: Another option for removing loose paint is to use a chemical paint stripper. Apply the paint stripper according to the manufacturer’s instructions, ensuring proper ventilation and wearing protective gloves and eyewear. Let the stripper sit for the recommended timeframe to allow it to loosen the paint. Use a scraper or brush to gently remove the softened paint. After removing the paint, wash the surface with water to remove any residue left behind by the stripper.
Remember to always work in a well-ventilated area when removing paint and to follow safety precautions. Once you have removed the loose paint, make sure to smooth the edges of the remaining paint to create a seamless surface for the new coat of paint.
By removing loose paint, you create a solid foundation for your exterior paint job. This step ensures that the new paint will adhere well and provide a beautiful, long-lasting finish for your home’s exterior.
Read more: How To Paint High Exterior Walls
Sanding the surface
After removing the loose paint from your exterior walls, the next step in preparing them for painting is to sand the surface. Sanding helps to create a smooth and even texture, allowing the new paint to adhere properly and resulting in a professional-looking finish. Here’s how you can effectively sand the surface of your exterior walls:
- Gather the tools: Start by gathering the necessary tools for sanding. You will need sandpaper or a sanding block, a sanding pole or ladder for hard-to-reach areas, and a dust mask for respiratory protection.
- Select the appropriate sandpaper: Depending on the condition of your walls and the level of roughness, choose the appropriate grit of sandpaper. Coarse grit (60-80) is suitable for removing rough paint, while finer grit (120-220) is ideal for smoothing the surface.
- Protective measures: Before you begin sanding, it’s important to protect yourself and the surrounding area. Wear a dust mask to avoid inhaling dust particles, and cover nearby plants or objects with a drop cloth to prevent them from getting damaged by the sanding debris.
- Sanding technique: Hold the sandpaper or sanding block firmly and use smooth, even strokes to sand the surface. Sand in a circular or back-and-forth motion, following the grain of the wood or the wall surface. Apply consistent pressure without pressing too hard, as this can damage the underlying surface.
- Focus on rough areas: Pay particular attention to areas with rough or uneven texture, such as repaired patches or areas where the paint has been scraped off. These areas may require more sanding to create a smooth surface.
- Check your progress: Periodically stop and evaluate your progress as you sand. Look for areas where the surface is smooth and even, and ensure that any remaining paint is firmly adhered to the wall.
- Clean the surface: After sanding, it’s important to remove any sanding dust and debris from the walls. Use a brush or a clean cloth to wipe away the dust, and consider vacuuming or using compressed air to thoroughly clean the surface.
By sanding the surface of your exterior walls, you create a smooth and even canvas for the new coat of paint. This step helps to ensure better adhesion and results in a professional-looking finish that will enhance the overall appearance of your home’s exterior.
Priming the walls
After cleaning, repairing, and sanding the surface of your exterior walls, the next important step in the preparation process is priming. Priming helps to create a uniform and stable surface for the paint, enhances adhesion, and promotes the longevity of the paint job. Here’s how you can effectively prime your exterior walls:
- Select the right primer: Choose a high-quality exterior primer that is suitable for the type of surface you are painting. If your walls are made of wood, opt for a primer specifically formulated for wood. Similarly, if you have masonry or concrete walls, choose a primer designed for those surfaces.
- Gather the materials: Along with the primer, you’ll need a paintbrush or a roller, a paint tray, and drop cloths or plastic sheets to protect surrounding surfaces.
- Prepare the surface: Ensure that the surface of your walls is clean and free of any dust or debris. If there are any remaining loose paint chips or rough areas, gently sand them to create a smoother surface before priming.
- Stir the primer: Thoroughly stir the primer with a stir stick to ensure an even consistency. This will help the primer adhere better and perform optimally.
- Apply the primer: Start by cutting in along the edges of the walls using a paintbrush, applying a generous coat of primer. Then, using a roller, apply the primer to the rest of the wall in a smooth, even motion. Work in manageable sections, ensuring complete coverage.
- Allow drying time: Follow the manufacturer’s instructions on the primer can to determine the drying time. Typically, exterior primers require several hours to dry completely. Make sure to wait until the primer is completely dry before moving on to the next step.
- Inspect for coverage: Once the primer is dry, inspect the walls for any spots that may need touch-ups. If you notice any areas with inadequate coverage, apply an additional coat of primer to ensure uniformity.
Priming your exterior walls provides a solid base for the paint, enhances color accuracy, and promotes a longer-lasting finish. It also helps to seal porous surfaces, prevent moisture penetration, and improve overall paint adhesion.
Remember, choosing a high-quality primer and applying it correctly is essential for the success of your paint job. By investing the time and effort into proper priming, you will achieve professional-looking results and ensure that your exterior paint job stands the test of time.
Before painting exterior walls, make sure to clean the surface thoroughly to remove dirt, mildew, and loose paint. Use a pressure washer or a scrub brush and mild detergent to ensure a clean and smooth surface for the paint to adhere to.
Caulking any gaps or cracks
One of the important steps in preparing your exterior walls for painting is caulking any gaps or cracks. Caulking helps to seal openings and creates a smooth, seamless surface, preventing moisture infiltration and improving the overall appearance of your walls. Here’s how you can effectively caulk any gaps or cracks:
- Gather the necessary supplies: You will need a caulk gun, exterior-grade caulk, a caulk smoothing tool or a damp cloth, and a utility knife.
- Inspect the walls: Carefully examine the exterior walls for any visible gaps or cracks. Pay close attention to areas around windows, doors, trim, and other architectural features.
- Clean the area: Before caulking, ensure that the area is clean and free from dust, debris, and loose paint. Use a brush or a clean cloth to remove any dirt or grime.
- Load the caulk gun: Load the caulk gun with the exterior-grade caulk. Cut the tip of the caulk tube at a 45-degree angle to create a small opening. Insert the caulk tube into the caulk gun and apply steady pressure on the trigger to start the flow of caulk.
- Apply the caulk: Hold the caulk gun at a 45-degree angle and slowly move along the gap or crack, applying a continuous bead of caulk. Make sure to fill the entire gap or crack without leaving any gaps or breaks in the caulk line.
- Smooth the caulk: Immediately after applying the caulk, use a caulk smoothing tool or a damp cloth to smooth and level the caulk line. This will create a clean, finished look and ensure a proper seal. If using a damp cloth, make sure to wet it with water and wring out any excess moisture to avoid spreading caulk.
- Clean up: Remove any excess caulk from the area by wiping it with a damp cloth or by using a utility knife. Be careful not to disturb the freshly applied caulk. Allow the caulk to dry and cure according to the manufacturer’s instructions.
Caulking any gaps or cracks on your exterior walls not only improves the appearance but also helps to prevent water infiltration, reduce heat loss, and increase energy efficiency. It is an essential step in ensuring the longevity and durability of your paint job.
Take the time to thoroughly inspect your walls and apply caulk to any areas in need. By properly caulking, you will achieve a professional-looking finish and enhance the overall integrity of your exterior walls.
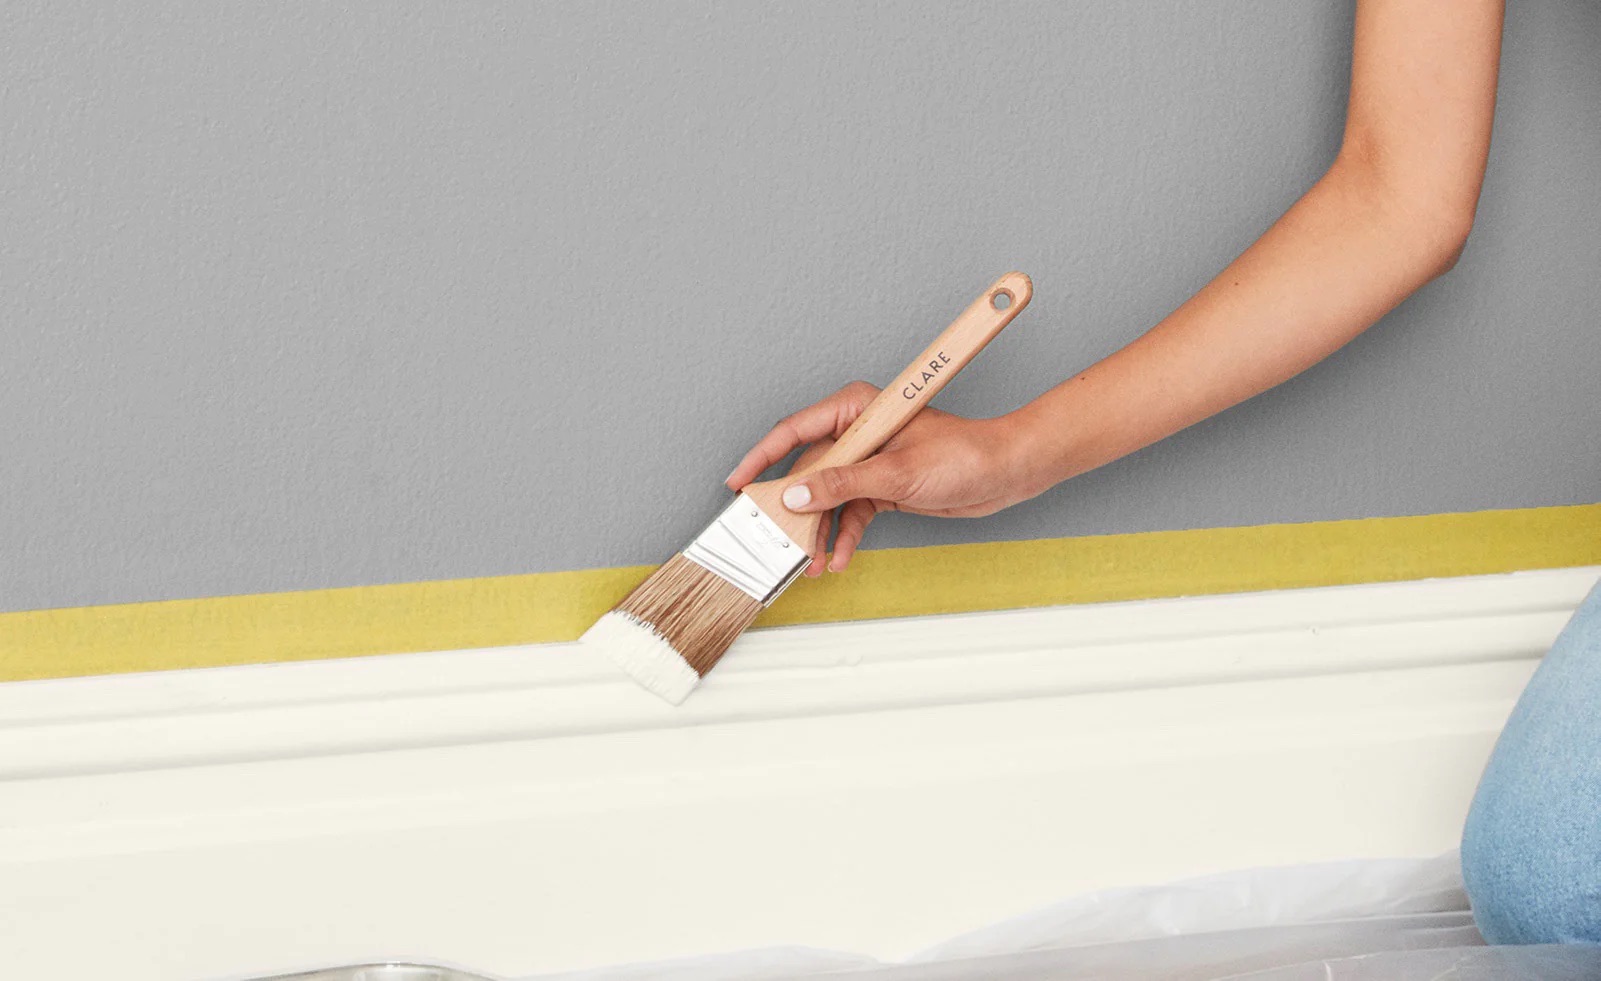
Masking off areas
When preparing to paint your exterior walls, it’s important to properly mask off areas that you don’t want to be painted. Masking off ensures clean lines, protects surfaces from accidental paint splatters, and makes the painting process more efficient. Here are the steps to effectively mask off areas:
- Gather the necessary supplies: You will need painter’s tape, a ladder or step stool, and plastic sheets or drop cloths to cover larger areas.
- Identify the areas to be masked: Determine which areas you want to protect from paint, such as windows, doors, trim, fixtures, or adjacent surfaces. It’s important to clearly define the boundaries of each area to be masked off.
- Clean the surfaces: Before applying the painter’s tape, make sure the surfaces are clean and free from dust and debris. Use a cloth or a brush to remove any dirt or grime, allowing the tape to adhere properly.
- Start applying the painter’s tape: Begin by applying the painter’s tape along the edges or boundaries of the area you want to mask off. Press the tape firmly to ensure a secure bond. For delicate surfaces, use a low-adhesive painter’s tape to prevent any damage upon removal.
- Use a leveling tool: To ensure straight, even lines, use a leveling tool or a straight edge to guide the placement of the painter’s tape. This will help achieve professional-looking results.
- Cover larger areas: For larger areas, such as outdoor furniture or plants, use plastic sheets or drop cloths to cover and protect them from paint splatters. Secure the sheets or cloths in place using tape or clips.
- Trim the edges: Use a utility knife to trim any excess tape, ensuring clean and precise lines. Be careful not to damage any underlying surfaces or remove the tape prematurely.
Properly masking off areas can save you time and effort in the long run, as it prevents tedious touch-ups and ensures a neat and professional finish. Take the time to mask off areas that require protection, such as windows, doors, trim, and other delicate surfaces.
Remember, removing the painter’s tape should be done carefully and immediately after painting while the paint is still wet to prevent any peeling or tearing. By masking off areas effectively, you can achieve clean lines and a flawless paint job for your exterior walls.
Choosing the right exterior paint
Choosing the right exterior paint is essential for achieving a beautiful and long-lasting finish on your walls. The right paint not only enhances the appearance of your home but also provides protection against the elements. Here are some factors to consider when selecting the right exterior paint:
- Durability: Look for exterior paint that is specifically formulated to withstand the harsh outdoor conditions. Consider paints that are resistant to fading, cracking, peeling, and mold growth. High-quality acrylic or latex-based paints are commonly used for exterior applications due to their durability.
- Weather resistance: Consider the climate in which you live and choose a paint that can withstand the weather conditions. If you experience extreme heat or cold, choose a paint with excellent thermal expansion and contraction properties. In areas with high humidity or heavy rainfall, opt for a paint that is moisture-resistant and has anti-fungal properties.
- UV protection: Look for exterior paints that offer UV protection to prevent the paint from fading or deteriorating over time when exposed to sunlight. UV-resistant pigments help to maintain the vibrant color of the paint for longer periods.
- Sheen level: Consider the desired sheen level for your exterior walls. Flat or satin finishes are ideal for hiding surface imperfections, while semi-gloss or gloss finishes provide a more vibrant and reflective appearance. Choose a sheen level that suits your aesthetic preferences and fits well with the style of your home.
- Color selection: Selecting the right color for your exterior paint is important for achieving the desired look and enhancing curb appeal. Consider factors such as the architectural style of your home, the surrounding environment, and any homeowner association guidelines or restrictions. Test out paint samples on a small area of your walls to see how they look under different lighting conditions.
- Environmental impact: Consider choosing an exterior paint with low VOC (volatile organic compound) content. Low VOC paints are not only better for the environment but also improve indoor air quality and minimize any potential health risks associated with paint fumes.
- Brand reputation: Look for reputable paint brands known for their quality and performance. Read customer reviews and seek recommendations from professionals or trusted sources. Quality paint from a reputable brand often provides better coverage, durability, and color retention.
It’s important to invest in high-quality exterior paint that meets your specific needs and preferences. Consider the factors mentioned above and consult with paint professionals or experts to help you make an informed decision.
By choosing the right exterior paint, you can ensure a beautiful and long-lasting finish on your walls, enhancing the overall appearance and protection of your home’s exterior.
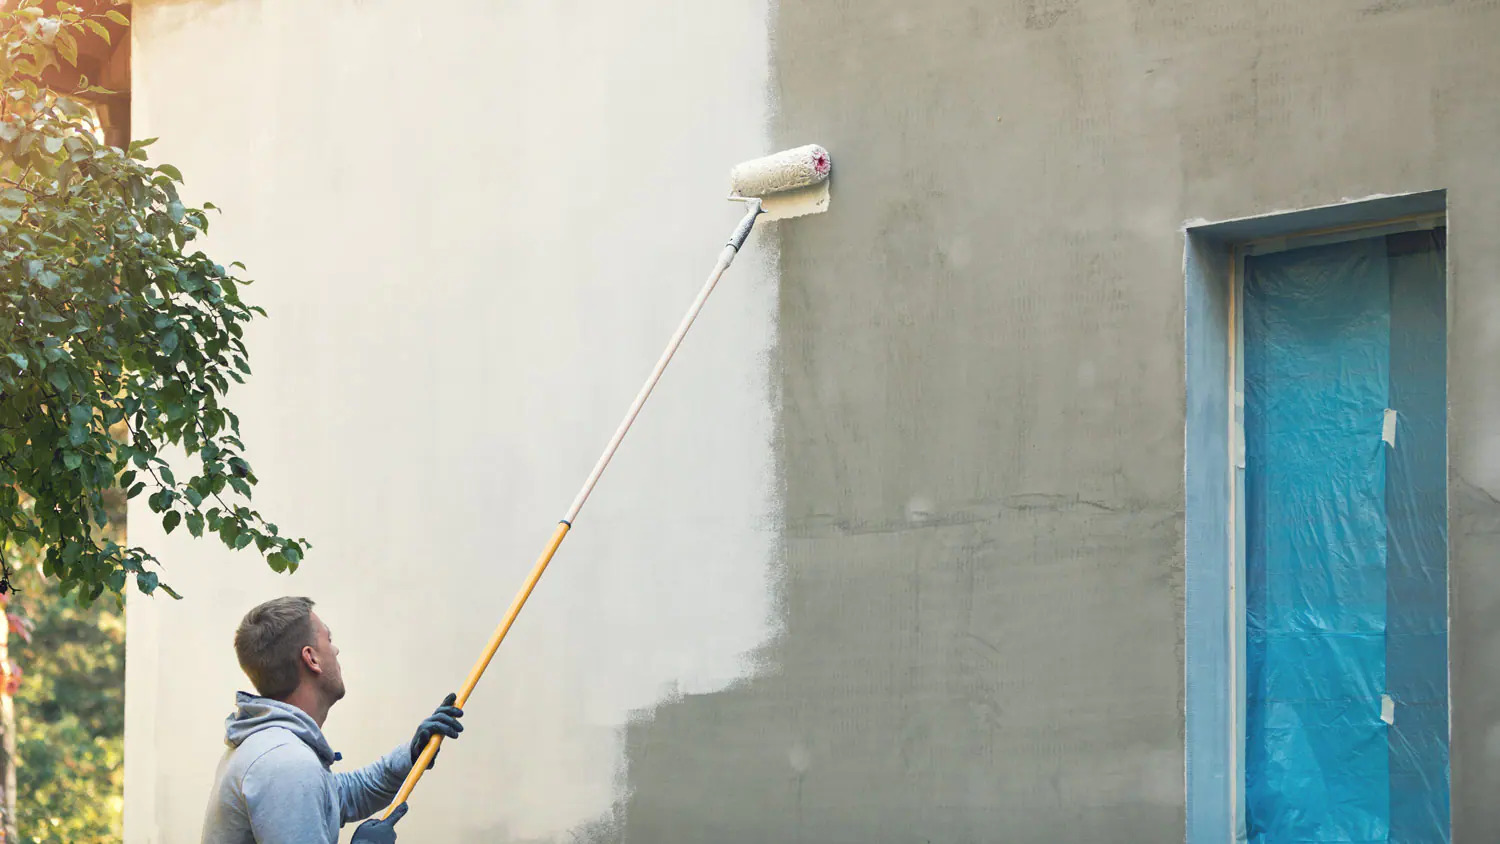
Applying the paint
After properly preparing your exterior walls, it’s time to apply the paint and bring your vision to life. The application process plays a crucial role in achieving a smooth and professional-looking finish. Here are the steps to effectively apply the paint:
- Gather the necessary supplies: You will need your chosen exterior paint, a paint roller and tray, paintbrushes in various sizes, and an extension pole if needed for hard-to-reach areas.
- Stir the paint: Thoroughly stir the paint using a stir stick to ensure an even consistency. This helps in distributing the color pigments and any settled particles throughout the paint.
- Start with cutting in: Begin by “cutting in” the edges of the walls using a paintbrush. Apply a thin and even coat of paint along the edges where the roller cannot reach, such as corners, trim, and around windows and doors. Take your time to ensure clean lines and avoid getting paint on neighboring surfaces.
- Paint the larger areas: Once the edges are done, it’s time to paint the larger areas using a paint roller. Pour the paint into a tray and evenly load the roller with paint. Begin rolling the paint onto the walls in a “W” or “M” motion to ensure even coverage. Work in sections, starting from the top and working your way down, to prevent any drips or uneven patches.
- Work in manageable sections: Paint one section at a time, maintaining a “wet edge” as you move along. This means overlapping each freshly painted area with the previously painted area while the paint is still wet. This helps to avoid visible lines or variations in color when the paint dries.
- Apply multiple coats if necessary: Depending on the color and coverage desired, you may need to apply multiple coats of paint. Allow each coat to dry completely according to the manufacturer’s instructions before applying the next coat. This will ensure a solid and even color throughout.
- Check for uniformity: After painting, step back and inspect the walls for any uneven patches, missed spots, or visible brush or roller marks. Touch up as needed and ensure a smooth, consistent finish.
- Clean up: Clean your brushes, rollers, and trays according to the paint manufacturer’s instructions. Dispose of leftover paint and any other debris responsibly.
During the painting process, it’s important to work with patience and precision. Take breaks as needed, and be mindful of the weather conditions, such as excessive heat or direct sunlight, which can affect the paint’s drying time.
By following these steps and applying the paint with care and attention to detail, you can achieve a beautifully painted exterior that enhances the curb appeal and longevity of your home.
Caring for the freshly painted walls
Once you have finished painting your exterior walls, it’s important to take proper care of the freshly painted surface to ensure its longevity and maintain its beautiful appearance. Here are some tips for caring for your newly painted walls:
- Avoid touching or leaning against the walls: It’s best to avoid touching or leaning against the walls for at least a few days after painting. This allows the paint to fully cure and prevents smudges or dents.
- Protect the painted surface: If you need to move furniture or other objects near the walls, use caution and cover the surfaces with protective materials, such as drop cloths or cardboard, to prevent accidental scratches or scuffs.
- Avoid harsh cleaning chemicals: For routine cleaning, use a mild detergent mixed with water and a soft cloth or sponge. Avoid using abrasive cleaners or harsh chemicals that could damage the painted surface. Gently wipe the walls to remove any dirt or smudges.
- Handle stains promptly: If you notice any stains or spills on the painted walls, address them promptly. Blot the stain gently with a clean cloth or sponge, using mild soap and water if necessary. Avoid rubbing the stain, as it may cause the paint to fade or become damaged.
- Maintain proper ventilation: Proper ventilation is crucial for allowing the paint to fully cure and reduce the risk of moisture-related issues. Keep windows open or use fans to ensure adequate airflow in the painted areas.
- Inspect for any damage: Periodically check the painted walls for any signs of damage, such as chipping, peeling, or cracking. Promptly address any issues by touching up or repainting the affected areas to maintain the integrity of the paint job.
- Regular maintenance: Over time, the exterior walls may accumulate dirt, dust, or grime. Regularly clean the painted surface with a gentle wash using a hose or pressure washer at a low setting. This helps to remove built-up dirt and maintain the overall appearance of the exterior paint.
- Consider applying a protective coating: To further enhance the durability and longevity of your exterior paint, you may consider applying a clear protective coating or sealer recommended by the paint manufacturer. This protective layer can provide an extra shield against UV rays, moisture, and harsh weather conditions.
By following these care tips, you can keep your freshly painted walls looking their best and help maintain their vibrant color and finish for years to come. Proper care and maintenance will ensure that your exterior paint job remains a standout feature of your home’s exterior aesthetic.
Conclusion
Preparing your exterior walls for painting is a crucial step in achieving a beautiful, long-lasting, and professional-looking finish. By following the necessary steps and taking the time to assess, clean, repair, and prime the walls, you create a solid foundation for your paint job. Removing loose paint, sanding the surface, caulking any gaps or cracks, and masking off areas ensure a smooth and seamless surface ready for the application of the paint.
Choosing the right exterior paint is key, considering factors such as durability, weather resistance, UV protection, sheen level, color selection, environmental impact, and brand reputation. Applying the paint with care, using proper techniques such as cutting in and rolling, helps achieve an even and flawless finish.
After completing the painting process, caring for the freshly painted walls is essential. Avoid touching or leaning against the walls, protect the surface from scratches or stains, clean gently using mild detergent, handle stains promptly, maintain proper ventilation, inspect for damage, and consider applying a protective coating to enhance the durability and longevity of the paint job.
By following these steps, you can transform the exterior of your home, enhancing its curb appeal and protecting it from the elements. Remember, proper preparation and care are just as important as the actual painting process. Take the time to prepare your exterior walls correctly, choose quality materials, and give them the attention they need for a beautiful and long-lasting paint job.
So, roll up your sleeves, gather your supplies, and embark on your exterior painting project with confidence, knowing that you have the knowledge and guidance to achieve stunning results.
Frequently Asked Questions about How To Prepare Exterior Walls For Painting
Was this page helpful?
At Storables.com, we guarantee accurate and reliable information. Our content, validated by Expert Board Contributors, is crafted following stringent Editorial Policies. We're committed to providing you with well-researched, expert-backed insights for all your informational needs.


0 thoughts on “How To Prepare Exterior Walls For Painting”