
Articles
How To Reinforce Stairs From Underneath
Modified: October 22, 2024
Looking for articles on how to reinforce stairs from underneath? Find expert tips and step-by-step guides to strengthen your stairs and ensure safety.
(Many of the links in this article redirect to a specific reviewed product. Your purchase of these products through affiliate links helps to generate commission for Storables.com, at no extra cost. Learn more)
Introduction
Stairs are an essential feature in any multi-story structure, providing a means of vertical movement between different levels. Over time, however, stairs can weaken and become less stable, posing safety risks for those who use them. To ensure the long-term durability and safety of your stairs, it is important to reinforce them from underneath.
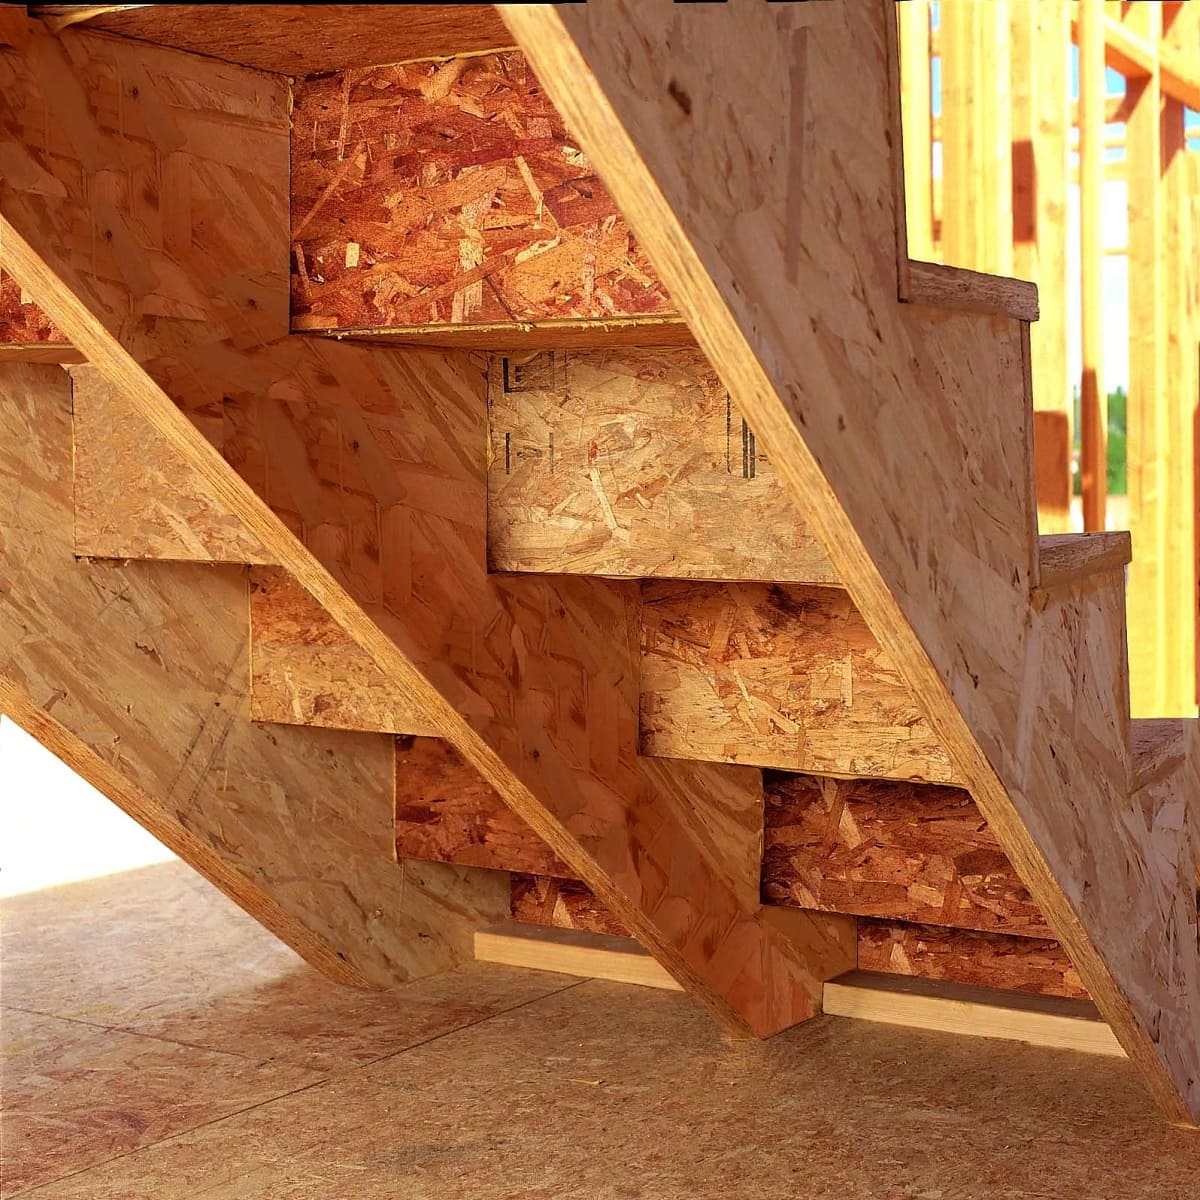
Reinforcing stairs from underneath involves strengthening the structural components that support the stairs, such as the stringers, treads, risers, and support beams. By doing so, you can enhance their load-bearing capacity and minimize the risk of accidents or damage.
In this article, we will guide you through the step-by-step process of reinforcing stairs from underneath. We will discuss the tools and materials you will need, as well as the techniques necessary for a successful reinforcement project. Whether you are a DIY enthusiast or a homeowner looking to improve the safety of your staircase, this article will provide you with the knowledge and guidance you need.
Before we dive into the specific steps, it is important to note that reinforcing stairs should be approached with caution. If you are unsure about your ability to perform the necessary tasks, it is always advisable to seek professional assistance. Safety should be your top priority throughout the entire process.
Now that we have set the stage, let’s move on to the first step: assessing the condition of the stairs. This initial evaluation will help you determine the extent of reinforcement required and identify any underlying issues that need to be addressed.
Remember, a strong and stable staircase is essential for the safety of everyone in your home or building. By taking the time to reinforce your stairs from underneath, you can have peace of mind knowing that you have taken the necessary steps to ensure their longevity and stability. So, let’s begin our journey towards safer and sturdier stairs!
Key Takeaways:
- Reinforcing stairs from underneath involves assessing their condition, gathering necessary tools and materials, and securing support beams and brackets. Prioritize safety and seek professional help if unsure.
- By reinforcing treads, risers, and stringers, you enhance the stability and durability of your staircase. Thoroughly check for stability and make necessary adjustments to ensure a safe and reliable outcome.
Read more: What Is Underneath The Carpet
Step 1: Assessing the Condition of the Stairs
Before you start reinforcing your stairs from underneath, it is crucial to assess their current condition. This step allows you to identify any areas of concern and determine the appropriate course of action for reinforcement. Here are the key aspects to consider during the assessment process:
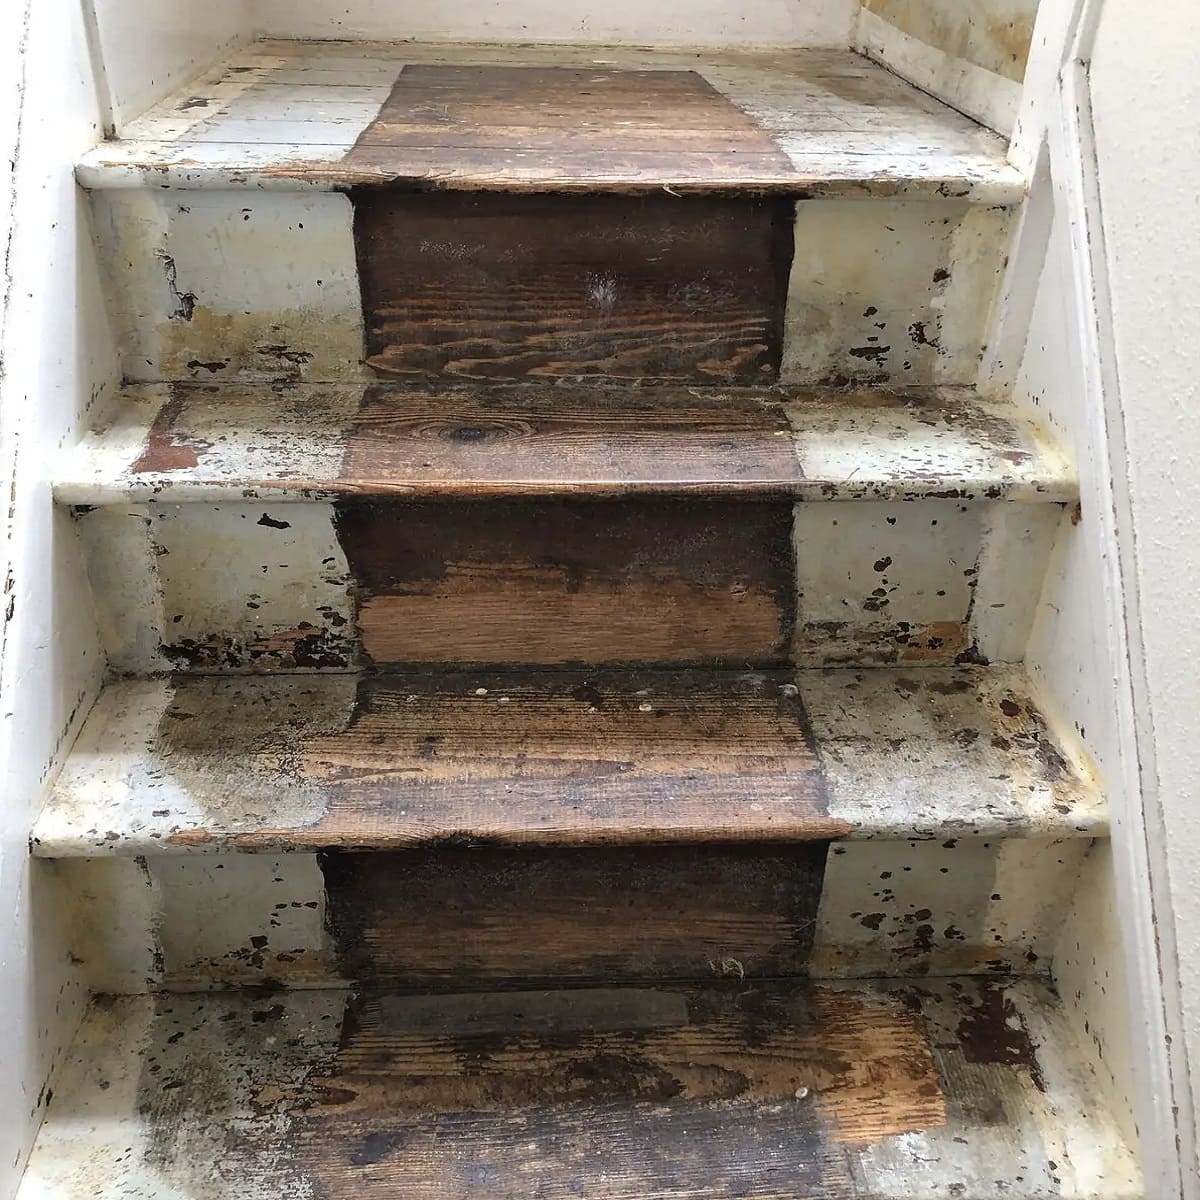
1. Visual Inspection: Begin by visually examining the stairs from top to bottom. Look for signs of wear, such as cracks, sagging, or loose components. Pay attention to the treads, risers, and stringers, as these are the primary elements that support the weight of the staircase.
2. Structural Stability: Test the stability of the stairs by walking up and down them carefully. Notice any creaking or bouncing that indicates a lack of stability. Also, pay attention to any noticeable movement or wobbling when pressure is applied to the stairs.
3. Measurements: Take measurements of the stairs to determine their dimensions and angles. This information will be helpful when selecting the appropriate reinforcement materials and calculating the required support.
4. Consider the Age and Usage: Consider the age of the stairs and the level of usage they have endured. Older stairs that have seen heavy traffic over the years may require more extensive reinforcement compared to newer ones.
5. Identify Problematic Areas: Look for specific areas or components that show signs of weakness or damage. These may include cracked treads, loose risers, or deteriorated support beams. Take note of these areas as they will require special attention during the reinforcement process.
It is important to note that assessing the condition of the stairs should not be limited to visual inspection alone. If you suspect underlying issues or if the stairs have had a history of structural problems, it is highly recommended to consult with a structural engineer or a qualified professional who can provide a more in-depth assessment.
Once you have thoroughly assessed the condition of the stairs and identified any problem areas, you will be better equipped to move on to the next steps of reinforcing the stairs from underneath. Remember, safety should always be your top priority, so ensure that you have a clear understanding of the condition of your stairs before proceeding with the reinforcement process.
Step 2: Gathering the Necessary Tools and Materials
After assessing the condition of your stairs, the next step in reinforcing them from underneath is to gather the tools and materials required for the project. Having the right equipment will ensure that the reinforcement process goes smoothly and efficiently. Here are the essential tools and materials you’ll need:
Tools:
1. Measuring tape: Used to accurately measure dimensions and angles of the stairs.
2. Level: Used to check the horizontal and vertical alignment of the stairs.
3. Circular saw or jigsaw: Depending on the type of cuts required, you will need a saw to make precise and clean cuts.
4. Drill: A power drill is essential for drilling pilot holes and driving screws.
5. Screwdriver: Both a manual and a power screwdriver will be handy for tightening screws and fasteners.
6. Chisel: A chisel will be needed for shaping and trimming wood.
7. Hammer: Used for various tasks, such as removing existing nails or tapping components into place.
8. Safety equipment: Always prioritize safety, so make sure you have safety goggles, gloves, and a dust mask to protect yourself during the process.
Materials:
1. Support beams: These will provide additional strength and support to the stair structure. Opt for sturdy and durable beams, such as pressure-treated lumber or steel beams.
2. Support brackets: These metal attachments are used to secure the support beams to the stringers and the floor.
3. Fasteners: You will need screws, nails, and/or bolts to attach the various components securely. Select fasteners that are appropriate for the materials you are working with.
4. Wood filler: Necessary for filling any gaps or cracks in the existing staircase, ensuring a smooth and seamless finish.
5. Reinforcement plates: These metal plates will reinforce weak areas, such as cracked stringers or loose treads.
6. Shims: Used to level and adjust components to ensure proper alignment and stability.
Always refer to the specific requirements of your stairs and the recommendations of experts or professionals to determine the exact tools and materials you will need for your specific reinforcement project. It is also essential to ensure that all materials are of high quality and suitable for the type of stairs you have.
By gathering the necessary tools and materials, you can eliminate any interruptions during the reinforcement process and work efficiently. Proper preparation will contribute to the success and durability of your reinforced stairs. So, take the time to gather all the required items before moving on to the next steps.
Step 3: Preparing the Work Area
Before diving into the process of reinforcing your stairs from underneath, it is crucial to prepare the work area adequately. Proper preparation will ensure a safe and efficient workflow, allowing you to focus on the task at hand. Here are the necessary steps to prepare the work area:
1. Clean the Area: Start by removing any objects or obstacles around the staircase that may hinder your movement or pose a safety risk. Clear away debris, tools, and furniture to give yourself ample space to work.
2. Protect Surfaces: Cover the surrounding areas, such as the walls and floors, with drop cloths or plastic sheets to prevent any damage or stains during the reinforcement process. Stairs can be challenging to work on, and accidental spills or scratches may occur, so taking these precautions is essential.
3. Secure Access: If your stairs are located in a high-traffic area of your home or building, consider restricting access to the staircase during the reinforcement project. This precaution will prevent accidents and ensure that no one inadvertently interferes with your work.
4. Set Up Proper Lighting: Good visibility is key to working safely and accurately. Ensure that the work area is well-lit, and consider using portable work lights or additional light sources if needed. This will help you see any problematic areas more clearly and ensure precise work during reinforcement.
5. Gather Necessary Safety Equipment: As mentioned in the tools section, it is essential to have safety equipment on hand. Wear safety goggles to protect your eyes from potential debris, gloves to protect your hands, and a dust mask if you anticipate working with materials that may generate dust or particles.
6. Organize Your Tools and Materials: As you gather your tools and materials, organize them in a way that allows easy access during the reinforcement process. Having a well-organized work area will save you time and prevent unnecessary frustration when searching for specific items.
By taking the time to properly prepare the work area, you create a safe and efficient environment for reinforcing your stairs. This step sets the foundation for a successful project and ensures smooth progress throughout the remaining steps. Remember that safety is paramount, so always prioritize the well-being of yourself and others by creating a hazard-free work zone.
Step 4: Identifying the Weak Points of the Stairs
To effectively reinforce your stairs from underneath, it is crucial to identify the weak points in the structure. This step allows you to focus on the areas that require the most attention and ensure that the reinforcement efforts are targeted and effective. Here are the key aspects to consider when identifying the weak points of the stairs:
1. Visual Inspection: Carefully examine each step, riser, and stringer of the staircase. Look for any signs of damage, such as cracks, splits, or deterioration. Pay close attention to areas near supporting joints and connections, as they are more prone to weakening over time.
2. Check for Movement: Walk up and down the stairs while observing any noticeable movement or noticeable creaking sounds. Excessive movement or instability can be a clear indication of weak points that need reinforcement.
3. Inspect Fasteners: Examine the screws, nails, or bolts that secure the treads, risers, and stringers. Loose or damaged fasteners can be a sign of weakened connections, and they should be addressed to improve the overall stability of the stairs.
4. Evaluate Compression and Load Distribution: Assess how the weight is distributed across the steps. Look for any signs of compressions or dents, as these may indicate areas of weakness. Uneven load distribution can lead to stress concentrations, potentially compromising the overall strength of the stairs.
5. Consider Age and Material: Take into account the age of the stairs and the materials used in their construction. Older stairs or those made from inferior quality materials can be more prone to damage and require additional reinforcement.
6. Consult with Experts: If you are uncertain about identifying the weak points or if you suspect underlying structural issues, it is advisable to consult with a structural engineer or a qualified professional. Their expertise can provide valuable insight into problem areas and guide you in formulating an effective reinforcement plan.
By identifying the weak points of your stairs, you can focus your reinforcement efforts where they are most needed. This targeted approach ensures that the structural integrity of your staircase is improved, making it safer and more durable over time. Remember to document and make note of the problem areas to refer to during the actual reinforcement process.
Once you have identified the weak points, you are ready to move on to the next steps and start reinforcing your stairs from underneath.
Read more: How To Remove Carpet From Stairs
Step 5: Adding Support Beams
Adding support beams is a crucial step in reinforcing your stairs from underneath. These beams will provide additional strength and stability to the staircase structure, ensuring its durability and safety. Here’s a guide on how to add support beams effectively:
1. Measure and Cut: Begin by measuring the length and width of the area where the support beams will be installed. Use a circular saw or jigsaw to cut the beams to the appropriate size. Ensure that the cuts are clean and accurate for a precise fit.
2. Position the Beams: Place the support beams vertically against the stringers, which are the diagonal supports that hold the steps in place. Position the beams at equal intervals along the length of the stairs. It is recommended to install at least two support beams per step for maximum stability.
3. Secure the Beams: Attach the support beams to the stringers using appropriate fasteners, such as screws or bolts. Ensure that the beams are securely attached to the stringers and that they provide a solid foundation for the steps.
4. Check for Levelness: Use a level to ensure that the support beams are perfectly vertical and aligned with the steps. Adjust as necessary to maintain a level and even surface for the reinforcement.
5. Consider Load Distribution: Distribute the weight evenly across the support beams to prevent excessive stress on any one beam. This will promote a balanced and stable structure.
6. Consider Material Options: Choose the material for the support beams based on your specific needs and preferences. Pressure-treated lumber and steel beams are common options known for their strength and durability. Consult with experts or professionals to determine the most suitable choice for your staircase.
Adding support beams provides crucial reinforcement to your stairs, enhancing their load-bearing capacity and overall stability. By ensuring that the beams are securely attached and properly aligned, you effectively strengthen the structure and reduce the risk of accidents or damage. Once the support beams are in place, you can proceed to the next steps of the reinforcement process with confidence.
Remember to take appropriate safety precautions throughout the process, such as wearing protective equipment and following proper tool handling procedures. Safety should always be a top priority when working on any construction or renovation project.
Consider adding additional support beams or braces underneath the stairs to reinforce them. This can help distribute weight more evenly and prevent sagging or damage over time.
Step 6: Installing Support Brackets
Installing support brackets is an essential step in reinforcing your stairs from underneath. These brackets provide additional stability by securely connecting the support beams to the stringers and the floor. Here’s a guide on how to install support brackets effectively:
1. Choose the Right Brackets: Select support brackets that are designed for stair reinforcement and are suitable for the materials you’re working with. Consider factors such as load-bearing capacity, material compatibility, and ease of installation.
2. Measure and Mark: Measure and mark the locations where the support brackets will be installed. Ideally, there should be one bracket per support beam, positioned near the center of each beam for optimal support.
3. Pre-drill Holes: Use a drill to pre-drill pilot holes at the marked locations. This will prevent the wood from splitting when you attach the support brackets.
4. Attach the Brackets: Align the support brackets with the pilot holes and secure them using screws or appropriate fasteners. Ensure that the brackets are tightly and securely attached to the support beams and the stringers.
5. Secure to the Floor: Depending on the design of the support brackets, you may need to secure them to the floor as well. Use screws or anchors suitable for the floor material to ensure a strong connection.
6. Check for Stability: Once all the support brackets are installed, check for stability by applying pressure to different parts of the stairs. Ensure that the brackets and support beams do not move or shift.
7. Make Adjustments: If you notice any wobbling or instability, make necessary adjustments by tightening the screws or reinforcing the brackets. It is essential to achieve a solid and stable connection between the support beams, brackets, and stringers.
By installing support brackets, you reinforce the connection between the support beams, stringers, and the floor, enhancing the overall stability of your stairs. This step is crucial for ensuring long-term durability and safety. The brackets distribute the weight more evenly and prevent excessive stress on any single component.
Always follow the manufacturer’s instructions when it comes to installing the support brackets, as different brackets may have specific requirements. Additionally, consult with experts or professionals if you have any doubts or concerns throughout the installation process.
Once the support brackets are securely installed, you’re ready to move on to the next steps of reinforcing your stairs from underneath. Take pride in knowing that you have taken important measures to enhance the structural integrity of your staircase.
Step 7: Reinforcing Treads and Risers
Reinforcing the treads and risers of your stairs is an essential step to ensure their strength and longevity. The treads are the horizontal steps that you walk on, while the risers are the vertical components that connect the treads. Here’s a guide on how to reinforce treads and risers effectively:
1. Assess the Condition: Thoroughly examine each tread and riser for any signs of wear, damage, or weakness. Look for cracked or warped treads, loose or wobbly risers, or any other issues that need attention.
2. Repair or Replace: If you identify any damaged or deteriorated treads or risers, prioritize repairing or replacing them before reinforcing. Repair cracked treads with wood filler or replace them entirely if necessary.
3. Apply Wood Glue: Apply wood glue to the joints where the treads and risers meet the stringers. This will reinforce the connection and help prevent any loosening or separation over time.
4. Add Reinforcement Plates: If you notice weakened sections or cracks in the treads or risers, consider adding reinforcement plates for extra support. These metal plates can be attached using screws or nails to strengthen the compromised areas.
5. Install Angle Brackets: To further reinforce the connection between treads and risers, install angle brackets at each joint. These brackets are positioned underneath the treads and risers and secured using screws or nails.
6. Secure with Screws: Use screws to secure the treads and risers to the stringers. Ensure that the screws are of appropriate length and thickness, and drill pilot holes to prevent splitting.
7. Apply Wood Filler: Fill any gaps, cracks, or voids in the treads and risers with wood filler. This step not only enhances the appearance but also strengthens the overall structure.
8. Allow for Drying Time: Follow the manufacturer’s instructions for the wood glue and wood filler regarding curing and drying time. Allow sufficient drying time before putting weight or pressure on the reinforced treads and risers.
By reinforcing the treads and risers, you enhance the stability and durability of your staircase. This step helps prevent further deterioration and strengthens the connection between the individual components. It is essential to prioritize the repair and reinforcement of any damaged or weakened treads and risers to maintain the overall integrity of the stairs.
Throughout the process, pay attention to detail and ensure that all components are securely fastened and aligned correctly. If you encounter any challenging repairs or have concerns about the structural integrity of your stairs, it is advisable to consult with professionals to ensure the best course of action.
Once you have reinforced the treads and risers, you can proceed confidently to the final steps of reinforcing your stairs from underneath, knowing that you have taken the necessary measures to improve their strength and stability.
Step 8: Securing Stair Stringers
Securing the stair stringers is a critical step in reinforcing your stairs from underneath. The stringers, which are the diagonal support structures that hold the steps in place, need to be securely fastened to ensure the overall stability and safety of the staircase. Here’s a guide on how to secure stair stringers effectively:
1. Inspect Stringers: Examine the condition of the stringers to ensure they are structurally sound. Look for any signs of damage, such as cracks, splits, or weakened joints. It is important to address any issues before proceeding with the reinforcement.
2. Measure and Mark: Use a measuring tape to determine the precise locations for securing the stringers. Mark these areas on both the stringers and the adjacent surfaces, such as the floor or wall, as reference points for the fasteners.
3. Pre-drill Pilot Holes: To prevent the wood from splitting, use a drill to pre-drill pilot holes in the marked locations on both the stringers and the adjoining surfaces. The size of the pilot holes should match the size of the fasteners you will be using.
4. Attach Stringers to Floor: Position the stringers against the floor, ensuring they are aligned with the marked locations. Insert the screws or appropriate fasteners through the pre-drilled pilot holes and secure the stringers to the floor. Make sure the stringers are flush against the floor surface for a solid connection.
5. Secure Stringers to Walls: If the stringers are meant to be attached to a wall, repeat the previous step by aligning them with the marked locations on the wall. Insert screws or other fasteners into the pre-drilled pilot holes to secure the stringers to the wall.
6. Double-check Alignment: Use a level or plumb line to ensure that the stringers are perfectly vertical and aligned. Adjust as needed before tightening the fasteners.
7. Attach Stringers to Treads and Risers: Secure the stringers to the treads and risers using suitable fasteners. Insert screws or nails into the pre-drilled holes to securely attach the stringers to the steps. Ensure a tight connection to provide stability and prevent any movement or wobbling.
8. Counter-sink and Fill Holes: If necessary, countersink the screw or nail heads slightly below the surface of the wood to create a smooth finish. Fill the holes with wood filler, which can be sanded and painted for a seamless appearance.
By securing the stair stringers properly, you ensure the strength and stability of the entire staircase. The secure attachment of the stringers to both the floor and the wall provides a solid foundation for the steps and reduces the risk of any structural issues or accidents.
Throughout this process, always use appropriate fasteners and follow the manufacturer’s guidelines for their installation. If you are unsure about the best fastening method or encounter any challenges, it is advisable to consult with professionals or experts who can offer guidance specific to your staircase.
Once the stringers are securely fastened, you can proceed to the final step of checking for stability and making any necessary adjustments before enjoying the reinforced and stable stairs.
Read more: How To Block Cats From Stairs
Step 9: Checking for Stability and Making Adjustments
Once you have completed all the previous steps of reinforcing your stairs from underneath, the final step is to check for stability and make any necessary adjustments. This step ensures that your reinforced stairs are sturdy and safe for use. Here’s how to check for stability and make necessary adjustments:
1. Walk and Test: Carefully walk up and down the stairs, applying pressure and testing each step. Pay close attention to any movement, creaking, or vibrations. Test the stability of the handrails, if applicable, as well.
2. Listen for Unusual Sounds: Listen for any unusual sounds, such as squeaks or creaks, that may indicate areas of weakness or movement. These sounds can be signs that further reinforcement or adjustment is needed.
3. Inspect Connections: Thoroughly inspect all connections, including support beams, support brackets, treads, risers, and stringers. Look for any signs of looseness or shifting of components. It is important to address such issues promptly to prevent further damage or instability.
4. Tighten Fasteners: If you notice any loose screws, bolts, or nails, tighten them to ensure a secure connection. Use appropriate tools, such as screwdrivers or wrenches, to tighten the fasteners until they are snug.
5. Reinforce Problematic Areas: If you identify any areas that still exhibit signs of weakness or movement, reinforce them further. This may involve adding additional support brackets, reinforcing plates, or securement devices as needed. Consult with professionals if you require guidance on the best approach for reinforcing specific areas.
6. Level and Align: Use a level or plumb line to check that the stairs are level and aligned properly. Adjust as necessary by manipulating the support beams, brackets, or other components. It is crucial to maintain a level and aligned structure for optimal stability.
7. Ensure Handrail Stability: If your stairs have a handrail, ensure that it is securely fastened to the wall or support posts. Test the strength and stability of the handrail by applying pressure and verifying that it does not wobble or move unexpectedly.
8. Seek Professional Advice: If you encounter persistent issues or if you are unsure about the stability of your reinforced stairs, consider seeking advice from professionals or experts in the field. They can offer valuable insights and guidance to help address any stability concerns.
By thoroughly checking for stability and making necessary adjustments, you ensure that your reinforced stairs are safe and reliable. This final step allows you to address any remaining areas of weakness or movement, providing peace of mind and long-term durability.
Remember, safety should always be a priority. If at any point you are uncertain about the stability or structural integrity of your stairs, do not hesitate to seek professional help. Ensuring the safety of yourself and others when using the staircase is of utmost importance.
Conclusion
Reinforcing your stairs from underneath is a crucial step in ensuring their longevity, strength, and safety. By following the steps outlined in this guide, you have taken important measures to reinforce the structural components of your staircase. From assessing the condition of the stairs to securing the stringers and making necessary adjustments, each step plays a vital role in creating a stable and durable staircase.
Throughout the reinforcement process, it is important to prioritize safety. Take the time to gather the necessary tools and materials, prepare the work area properly, and wear appropriate safety equipment. If you feel unsure about any aspect of the project, consult with professionals or experts who can provide guidance for your specific situation.
By reinforcing stairs from underneath, you enhance their load-bearing capacity and minimize the risk of accidents or damage. The added support beams, brackets, and strengthened connections significantly improve the overall stability and safety of the staircase. You can now have confidence in the long-term durability and functionality of your stairs.
Remember to periodically inspect your reinforced stairs and make any necessary repairs or adjustments. Regular maintenance will help maintain their stability and ensure their continued performance for years to come. Additionally, taking care to promptly address any signs of wear or damage will prevent the need for extensive repairs or replacements in the future.
Reinforcing your stairs is a worthwhile investment in the safety and value of your home or building. By following the step-by-step process in this guide and considering professional guidance when needed, you have taken an important step toward creating a sturdy and secure staircase. Enjoy the peace of mind that comes with knowing your stairs are reinforced and ready to withstand the tests of time.
Remember, safety should always be a top priority. If you have any concerns or doubts about performing the reinforcement yourself, seeking the assistance of a professional is a wise decision. By doing so, you can ensure that your stairs are reinforced correctly and that you have taken the necessary steps to protect yourself and those who use the staircase.
Reinforce your stairs from underneath today and enjoy the benefits of a strong and stable staircase for years to come. Your efforts in enhancing the structural integrity of your stairs will provide a safer environment for everyone.
Frequently Asked Questions about How To Reinforce Stairs From Underneath
Was this page helpful?
At Storables.com, we guarantee accurate and reliable information. Our content, validated by Expert Board Contributors, is crafted following stringent Editorial Policies. We're committed to providing you with well-researched, expert-backed insights for all your informational needs.





0 thoughts on “How To Reinforce Stairs From Underneath”