Home>Articles>How To Install A Conduit In Reinforced Concrete
Articles
How To Install A Conduit In Reinforced Concrete
Modified: October 21, 2024
Discover the best articles on installing conduit in reinforced concrete. Get expert tips and techniques for a successful installation.
(Many of the links in this article redirect to a specific reviewed product. Your purchase of these products through affiliate links helps to generate commission for Storables.com, at no extra cost. Learn more)
Introduction
When it comes to installing conduit in reinforced concrete, it is important to approach the task with caution and precision. The process of running electrical, data, or communication cables through concrete can present unique challenges and require a specific set of tools and techniques. In this article, we will explore the factors to consider, the tools and materials needed, and provide a step-by-step guide to help you successfully install conduit in reinforced concrete.
Before delving into the technicalities, let’s understand what conduit is and its significance in construction projects. Conduit is a protective tube or channel that houses electrical wires or other types of cables. It acts as a barrier, safeguarding the cables from damage and providing a clear pathway for their installation and maintenance.
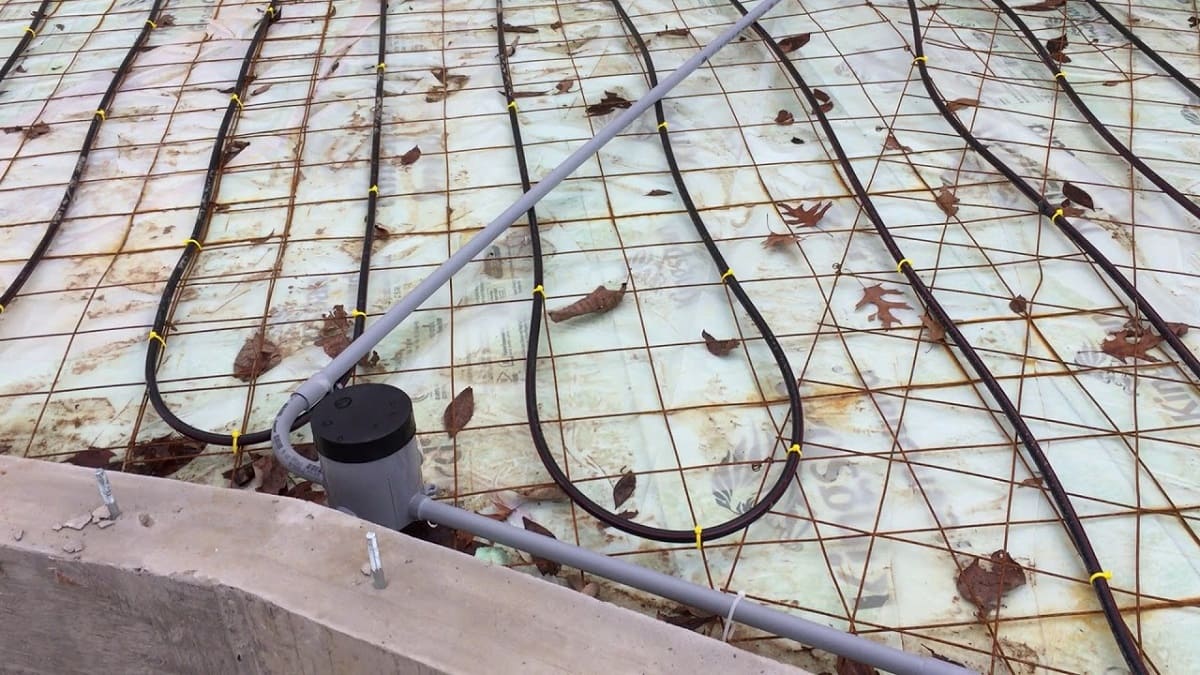
Now, when it comes to reinforced concrete, the challenges are twofold. Reinforced concrete consists of a combination of concrete and embedded steel reinforcement bars, commonly known as rebar. The presence of rebar adds strength to the concrete structure but can also complicate the installation of conduit. The installation process must not only navigate through the dense concrete material but also carefully maneuver around the rebar to prevent any damage or compromise to the structure.
Additionally, working with reinforced concrete requires careful planning and consideration due to its durability and strength. Once the concrete sets, it becomes significantly harder to make any modifications or additions. Therefore, it is crucial to plan the conduit installation thoroughly and ensure that all necessary cables and connections are accounted for prior to pouring the concrete.
In the following sections, we will discuss the factors to consider before installing conduit, the tools and materials required, a step-by-step guide for the installation process, the benefits of using a specific type of conduit for reinforced concrete installations, and the precautions to take to ensure a successful and durable conduit installation.
Key Takeaways:
- Proper planning, careful handling of conduit, and adherence to building codes are crucial for successful conduit installation in reinforced concrete, ensuring a reliable and durable electrical or communication pathway.
- Choosing PVC conduit offers benefits such as lightweight design, corrosion resistance, cost-effectiveness, and easy maintenance, making it an ideal choice for installation in reinforced concrete structures.
Read more: How To Install Conduit In Concrete Slab
Factors to Consider Before Installing Conduit in Reinforced Concrete
Before embarking on the installation of conduit in reinforced concrete, several important factors should be taken into consideration. These factors will determine the success and efficiency of the installation process, as well as the long-term performance and durability of the conduit system.
1. Conduit Size and Capacity: One of the primary factors to consider is the size and capacity of the conduit. It is essential to determine the appropriate size based on the number and types of cables that will run through it. Additionally, considering future expansion needs is crucial to ensure that the conduit can accommodate any potential upgrades or modifications.
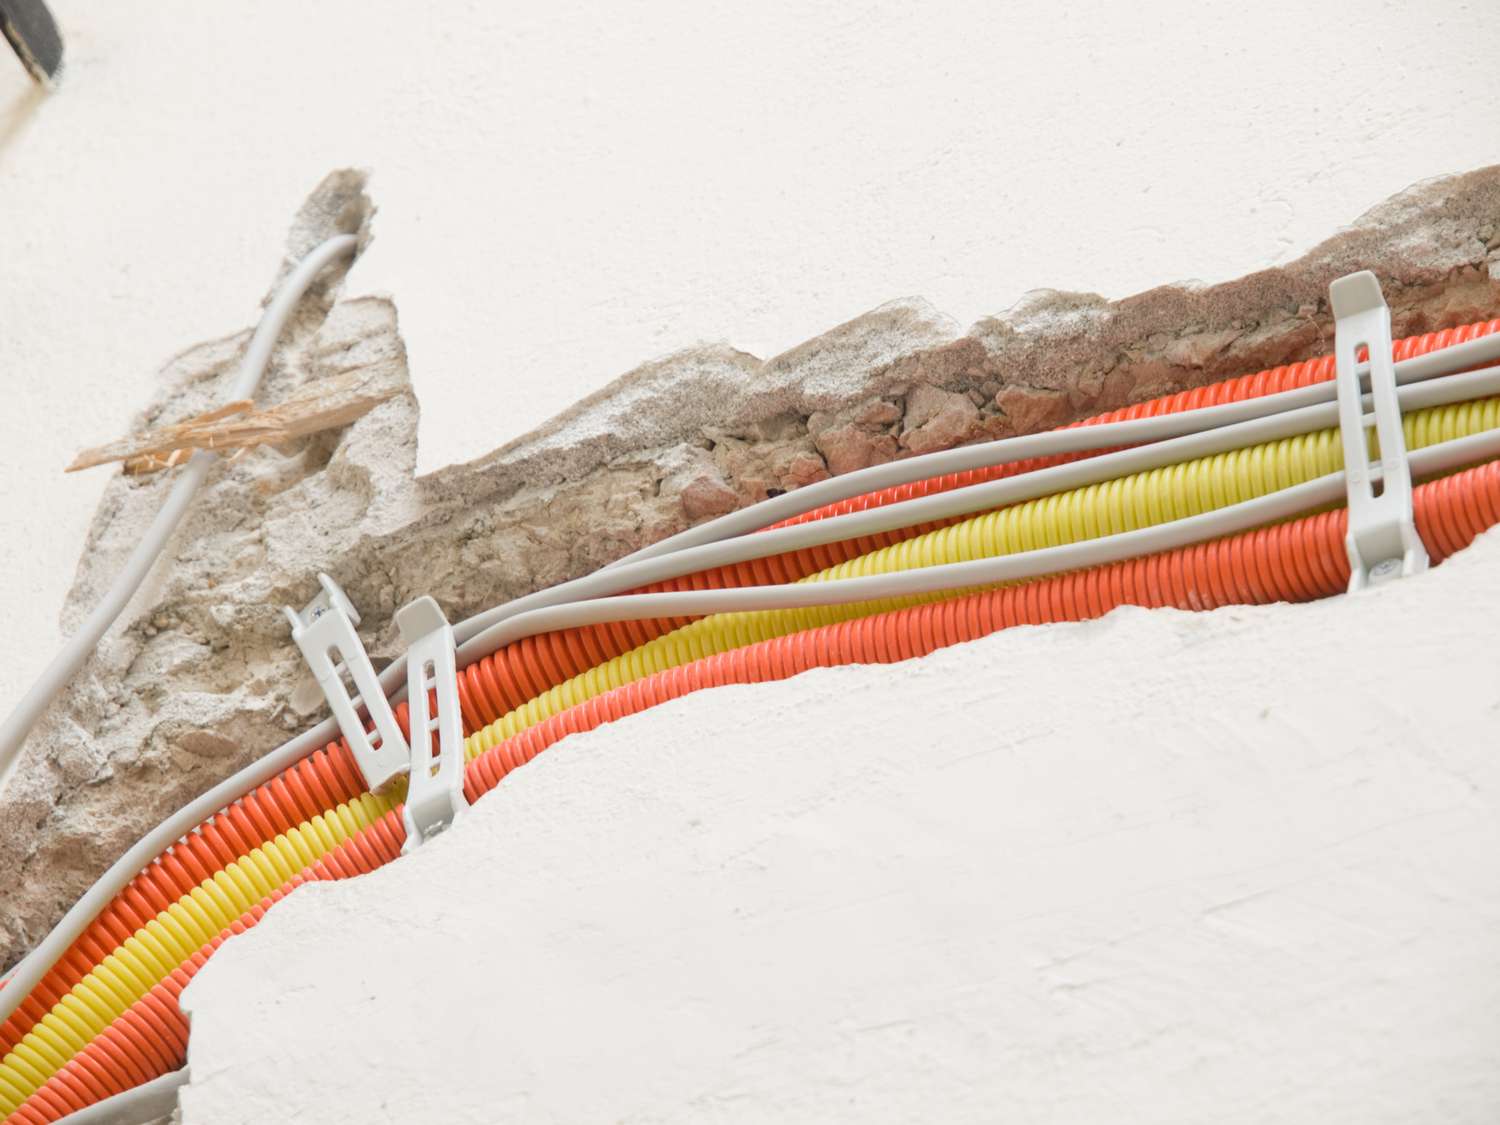
2. Conduit Type: The choice of conduit material is also an important consideration. Common options include PVC (polyvinyl chloride) and steel conduits. PVC conduits are lightweight, easy to handle, and corrosion-resistant, making them suitable for many applications. Steel conduits, on the other hand, offer greater strength and durability, making them ideal for more demanding conditions.
3. Conduit Routing: Careful planning of the conduit routing is essential to avoid obstacles and ensure efficient cable installation. It is important to consider the shortest and most direct path while avoiding clashes with structural elements, such as rebar or other services already installed in the concrete structure.
4. Accessibility: Accessibility for future maintenance and repairs should be considered during the conduit installation. Leaving access points or removable panels in strategic locations can greatly facilitate any necessary future modifications or troubleshooting without causing damage to the concrete structure.
5. Permits and Codes: It is essential to comply with local building codes and obtain the necessary permits before installing conduit in reinforced concrete. These regulations ensure the safety and compliance of the installation and help avoid potential penalties or issues during inspections.
6. Moisture Protection: Proper sealing and moisture protection measures are crucial when installing conduit in reinforced concrete, especially in areas prone to moisture or high humidity. Using appropriate sealing materials and techniques will prevent water infiltration, corrosion, and potential damage to the cables inside.
7. Collaboration with Professionals: It is advisable to collaborate with experienced professionals, such as electrical contractors or engineers, during the planning and installation process. Their expertise and knowledge can provide valuable insights, ensure compliance with industry standards, and help overcome any challenges that may arise during the installation.
By carefully considering these factors before installing conduit in reinforced concrete, you can ensure a successful and efficient installation that meets the specific needs of your project and provides a reliable conduit system for your electrical or communication cables.
Tools and Materials Needed for Installing Conduit in Reinforced Concrete
Installing conduit in reinforced concrete requires specialized tools and materials to ensure a precise and efficient installation. Here are the essential items you will need for the process:
1. Conduit: Select the appropriate type and size of conduit for your specific application. PVC and steel conduits are the most common options, each with its own advantages and suitability for different conditions.
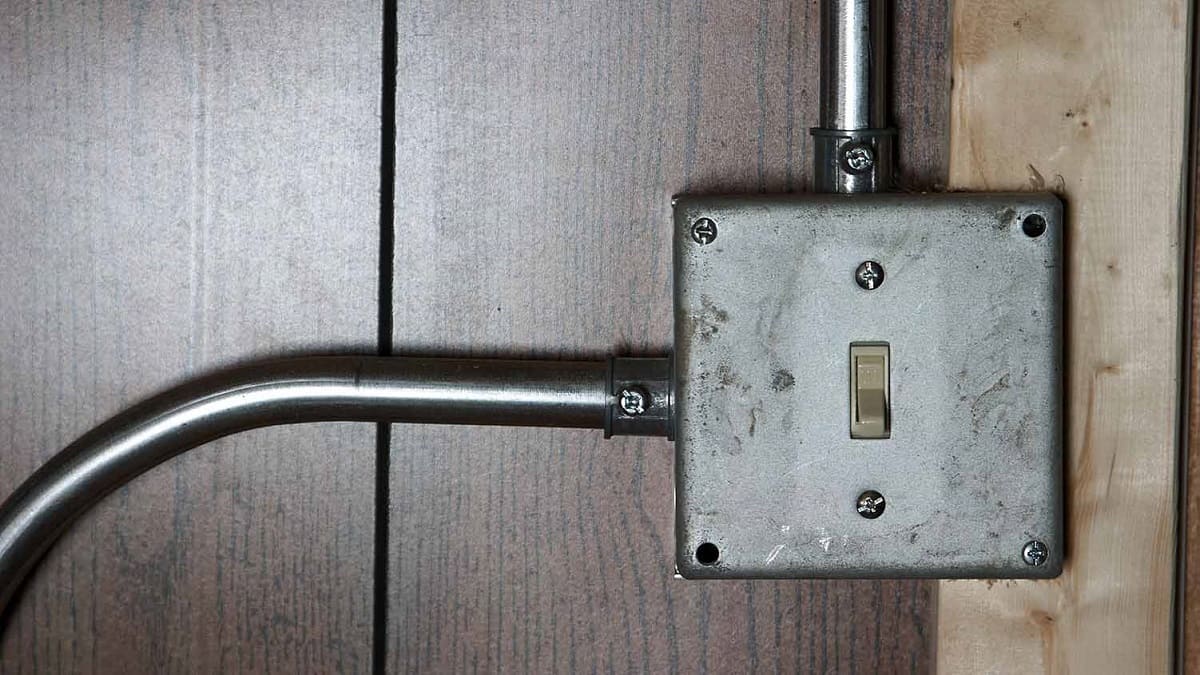
2. Conduit Couplings and Connectors: These fittings are used to join sections of conduit together and to connect the conduit to other electrical or junction boxes. They ensure a secure and watertight connection.
3. Conduit Benders: If you need to make bends in the conduit, a conduit bender is essential. This tool allows you to create precise bends at specific angles without damaging the conduit or weakening its structural integrity.
4. Rebar Cutters: Reinforced concrete often contains steel reinforcement bars (rebar). In order to create a pathway for the conduit, you may need to cut or remove sections of rebar. A rebar cutter or grinder will facilitate this task.
5. Hammer Drill: To make holes in the concrete for conduit placement, a hammer drill is necessary. This tool uses a percussive mechanism to power through the hard concrete material and create clean, precise holes.
6. Drill Bits: High-quality masonry drill bits are essential for drilling into reinforced concrete. These bits are designed to withstand the demanding conditions of concrete drilling and create clean, accurate holes.
7. Concrete Anchors: Anchors are used to secure the conduit to the concrete surface. They provide stability and prevent movement or displacement of the conduit, ensuring a secure and reliable installation.
8. Wire Pulling Tools: When installing cables through the conduit, wire pulling tools such as fish tapes, cable lubricants, and cable pulling grips are essential. These tools help guide and maneuver the cables through the conduit system, minimizing friction and ensuring a smooth installation.
9. Sealing Materials: To protect the conduit system from moisture and water infiltration, sealing materials such as conduit sealant or waterproofing compound are necessary. These materials create a secure and watertight seal around the conduit connections and entry points in the concrete.
10. Personal Protective Equipment (PPE): It is crucial to prioritize safety during the installation process. Ensure that you have appropriate PPE, including safety glasses, gloves, and protective clothing, to protect yourself from potential hazards or injuries.
Remember to follow the manufacturer’s instructions for all tools and materials, and always prioritize safety throughout the installation process. By having the necessary tools and materials at hand, you can confidently and efficiently install conduit in reinforced concrete, ensuring a reliable and durable electrical or communication pathway for your project.
Step-by-Step Guide for Installing Conduit in Reinforced Concrete
Installing conduit in reinforced concrete requires careful planning and execution to ensure a successful and durable installation. Follow this step-by-step guide to tackle the process efficiently:
Step 1: Marking the Conduit Route
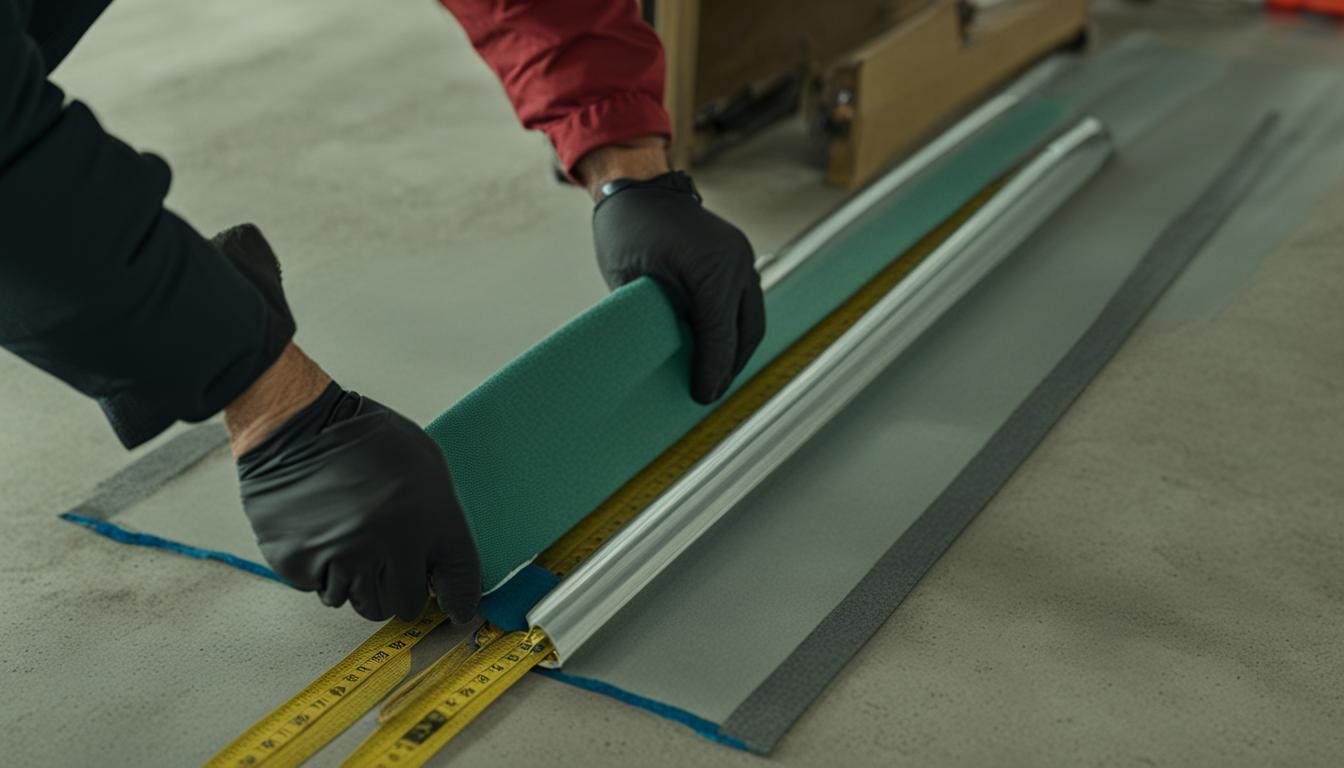
Start by marking the desired route of the conduit on the surface of the concrete. Use a measuring tape and a permanent marker to create clear and accurate guidelines. Consider any existing structural elements or obstacles that may influence the conduit routing.
Step 2: Preparing the Concrete Surface
Clean the concrete surface where the conduit will be installed. Remove any dirt, debris, or loose particles. This will provide a clean and even surface for the conduit placement and ensure proper adhesion of sealing materials.
Step 3: Drilling Holes
Using a hammer drill equipped with a suitable masonry drill bit, carefully drill holes at the marked locations. The size of the holes should match the diameter of the conduit. Take care to avoid damaging rebar or other structural elements in the concrete.
Step 4: Cutting and Removing Rebar (if necessary)
If the conduit route intersects with rebar, use a rebar cutter or grinder to cut and remove the sections obstructing the pathway. Take caution to avoid damaging any adjacent reinforcement or compromising the structural integrity of the concrete.
Step 5: Placing and Securing the Conduit
Insert the conduit into the drilled holes, ensuring it fits snugly. Align the conduit with the marked route and secure it to the concrete surface using appropriate concrete anchors or fasteners. Ensure the conduit is straight and level throughout the installation.
Step 6: Connecting Conduit Sections
If your conduit installation requires multiple sections, use conduit couplings or connectors to join them together. Apply a suitable conduit adhesive or sealant to ensure a secure and watertight connection between the sections.
Step 7: Pulling Cables Through the Conduit
Using wire pulling tools, such as fish tapes, cable lubricants, and cable pulling grips, carefully feed the cables through the conduit system. Take care to avoid pulling with excessive force or causing any damage to the cables or the conduit itself.
Step 8: Sealing the Conduit Connections and Entry Points
Apply a high-quality conduit sealant or waterproofing compound to seal the conduit connections and any entry points in the concrete. This will protect the conduit system from moisture and ensure its long-term durability.
Step 9: Testing and Verifying the Conduit System
Before finalizing the installation, test the conduit system to ensure proper operation. Check for any obstructions or blockages and confirm that the cables are running smoothly through the conduit. Use appropriate testing tools or equipment to validate the integrity of the installation.
Step 10: Documenting and Maintaining the Installation
Record the details of the conduit installation, including the cable types, sizes, and any junction boxes or connections made. This documentation will be useful for future reference, maintenance, or any necessary modifications to the conduit system.
By following these step-by-step instructions and paying attention to detail throughout the installation process, you can ensure a successful and reliable conduit installation in reinforced concrete, providing a secure and efficient pathway for your electrical, data, or communication cables.
When installing conduit in reinforced concrete, it is best to use a diamond core drill bit designed for concrete to ensure clean and precise holes. This will make the installation process easier and more efficient.
Benefits of Using PVC Conduit for Installation in Reinforced Concrete
When it comes to installing conduit in reinforced concrete, choosing the right type of conduit is essential for a successful and efficient installation. One popular option is PVC (polyvinyl chloride) conduit, known for its versatility and durability. Here are the benefits of using PVC conduit for installation in reinforced concrete:
1. Lightweight and Easy to Handle: PVC conduit is significantly lighter than steel conduit, making it easier to transport and handle during the installation process. This can save time and effort, especially when working with long runs of conduit or in areas with limited access.
2. Corrosion-Resistant: PVC conduit is highly resistant to corrosion, making it ideal for installation in environments with high moisture levels or exposure to chemicals. Unlike steel conduit, PVC does not rust or corrode, ensuring long-term durability and protection for the cables inside.
3. Cost-Effective: PVC conduit is generally more cost-effective compared to other types of conduit, such as steel or aluminum. The lower material and installation costs can make it a budget-friendly choice for many construction projects, while still providing reliable protection for the cables.
4. Electrical Insulation: PVC is an excellent electrical insulator, offering a high level of protection to the cables running inside the conduit. It helps prevent electrical leakage and interference, reducing the risk of short circuits, electrical shocks, or disruptions to the system.
5. Impact and UV Resistance: PVC conduit is resistant to impact and can withstand various weather conditions, including exposure to ultraviolet (UV) rays. This makes it suitable for both indoor and outdoor applications, ensuring the conduit’s structural integrity and protecting the cables from damage or degradation.
6. Flexible and Versatile: PVC conduit is available in a variety of sizes and can be easily bent or shaped to accommodate complex routing requirements. This flexibility allows for easier installation around corners, bends, or obstacles within the concrete structure, providing greater design flexibility for the conduit system.
7. Easy Maintenance: PVC conduit requires minimal maintenance once installed. Unlike steel conduit, it does not require periodic painting or coating to prevent corrosion. Regular inspections and cleaning are typically sufficient to ensure the conduit remains in good condition and that the cables are protected.
8. Smooth Interior Surface: PVC conduit has a smooth interior surface, reducing friction and making it easier to pull cables through. The smooth surface minimizes the risk of cable damage or snagging during the installation and future maintenance or cable upgrades.
Overall, using PVC conduit for installation in reinforced concrete offers numerous benefits, including its lightweight design, corrosion resistance, cost-effectiveness, electrical insulation properties, impact and UV resistance, flexibility, ease of maintenance, and smooth interior surface. Consider these advantages when planning your conduit installation to ensure a reliable and efficient solution for your project’s electrical or communication needs.
Read more: How To Install Turf Reinforcement Mats
Precautions to Take When Installing Conduit in Reinforced Concrete
Installing conduit in reinforced concrete requires careful attention to detail and adherence to certain precautions to ensure a successful and durable installation. Here are important precautions to consider:
1. Proper Planning and Design: Thoroughly plan and design the conduit installation before pouring the concrete. Consider factors such as conduit size, routing, positioning of access points, and future expansion needs. This proactive approach will prevent costly and time-consuming modifications or repairs after the concrete has set.
2. Compliance with Building Codes and Permits: Ensure that the conduit installation complies with local building codes and regulations. Obtain the necessary permits to ensure that the installation meets safety standards and is approved by relevant authorities.
3. Careful Handling of Conduit: Handle the conduit with care to avoid any damage during transportation or installation. Avoid dropping or bending the conduit excessively, as it can compromise its integrity and minimize its protective capabilities.
4. Accurate Measurement and Marking: Measure and mark the conduit placement accurately on the concrete surface before drilling. Take into consideration any obstacles or structural elements that may interfere with the conduit route. This will prevent unnecessary mistakes and ensure an efficient installation.
5. Safe and Proper Use of Tools: Always use tools and equipment correctly and follow the manufacturer’s instructions. Wear appropriate personal protective equipment (PPE), including safety glasses, gloves, and protective clothing, to protect against potential hazards or injuries.
6. Precautionary Measures for Rebar: Take caution when cutting or removing rebar to create space for the conduit. Avoid damaging nearby reinforcement bars or compromising the structural integrity of the concrete. Follow proper safety procedures and use appropriate tools for cutting and handling rebar.
7. Use of Suitable Anchoring Methods: Secure the conduit to the concrete surface using appropriate anchors or fasteners. Ensure that the chosen anchoring method provides sufficient stability and prevents movement or displacement of the conduit, especially in areas with high foot traffic or vibration.
8. Proper Sealing: Apply appropriate sealing materials, such as conduit sealant or waterproofing compound, to protect the conduit connections and entry points in the concrete from moisture infiltration. This will prevent corrosion and potential damage to the cables inside.
9. Attention to Cable Pulling: Take care when pulling cables through the conduit to avoid excessive force or causing damage to the cables or the conduit itself. Use proper wire pulling tools and lubricants to ensure a smooth and safe installation process.
10. Regular Inspection and Maintenance: Perform regular inspections of the conduit system to ensure there are no signs of damage, corrosion, or water infiltration. Schedule routine maintenance to clean the conduit and remove any debris that may obstruct the pathway or affect performance.
By taking these precautions, you can ensure a safe and successful installation of conduit in reinforced concrete. Always prioritize safety, follow best practices, and consult with professionals if needed to ensure the longevity and performance of the conduit system.
Conclusion
Installing conduit in reinforced concrete can present unique challenges, but with the right knowledge and precautions, it can be accomplished successfully. By considering factors such as conduit size and capacity, conduit type, routing, accessibility, permits, moisture protection, and collaboration with professionals, you can ensure a smooth and efficient installation process.
Having the right tools and materials, including conduit, couplings, connectors, conduit benders, rebar cutters, hammer drills, drill bits, concrete anchors, wire pulling tools, and sealing materials, is essential for a precise and reliable installation. These items enable you to work effectively and efficiently, ensuring the durability and performance of the conduit system.
Following a step-by-step guide that involves marking the conduit route, preparing the concrete surface, drilling holes, placing and securing the conduit, connecting conduit sections, pulling cables through, sealing the connections, and testing the system will facilitate a successful installation. Each step is crucial for a safe and reliable conduit pathway within the reinforced concrete structure.
Choosing the right type of conduit, such as PVC conduit, brings its own set of benefits, including its lightweight and easy-to-handle nature, corrosion resistance, cost-effectiveness, electrical insulation properties, impact and UV resistance, flexibility, easy maintenance, and smooth interior surface.
Lastly, taking precautions, such as proper planning and design, compliance with building codes and permits, careful handling of conduit, accurate measurement and marking, safe use of tools, precautionary measures for rebar, appropriate anchoring methods, proper sealing, attention to cable pulling, and regular inspection and maintenance, is crucial for a successful installation and the long-term durability of the conduit system.
By considering these factors, following safety guidelines, and implementing the necessary precautions, you can ensure a reliable and efficient conduit installation in reinforced concrete. This will provide a secure pathway for electrical, data, or communication cables, meeting the specific needs of your project while ensuring the integrity and longevity of the installation.
Eager to expand your DIY skills into new areas? Dive into our detailed guide on "how to install conduit in wall," perfect for anyone seeking to enhance their home's electrical setup. This article offers clear, practical advice and step-by-step instructions to ensure you handle wall installations like a pro. Whether it's refining your technique or starting from scratch, this read is indispensable for anyone interested in home improvement.
Frequently Asked Questions about How To Install A Conduit In Reinforced Concrete
Was this page helpful?
At Storables.com, we guarantee accurate and reliable information. Our content, validated by Expert Board Contributors, is crafted following stringent Editorial Policies. We're committed to providing you with well-researched, expert-backed insights for all your informational needs.


0 thoughts on “How To Install A Conduit In Reinforced Concrete”