Articles
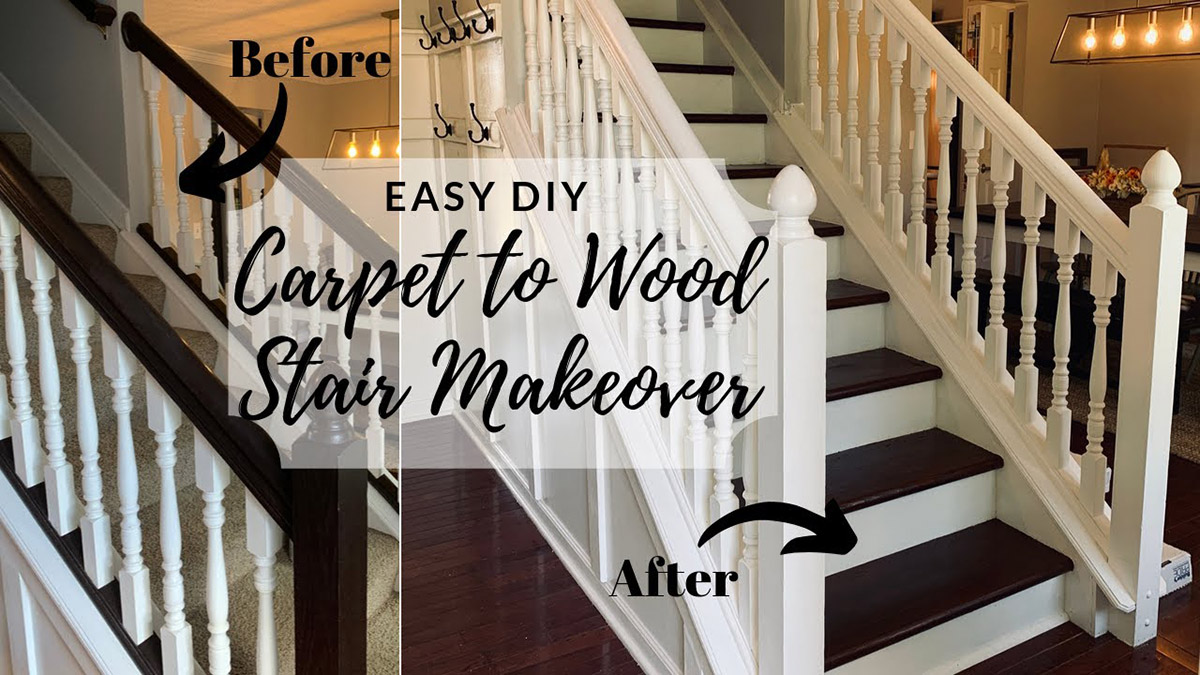
How To Redo Stairs From Carpet To Wood
Modified: February 23, 2024
Learn how to transform your carpeted stairs into beautiful wooden stairs with this step-by-step guide. Read articles on our website for expert tips and tricks.
(Many of the links in this article redirect to a specific reviewed product. Your purchase of these products through affiliate links helps to generate commission for Storables.com, at no extra cost. Learn more)
Introduction
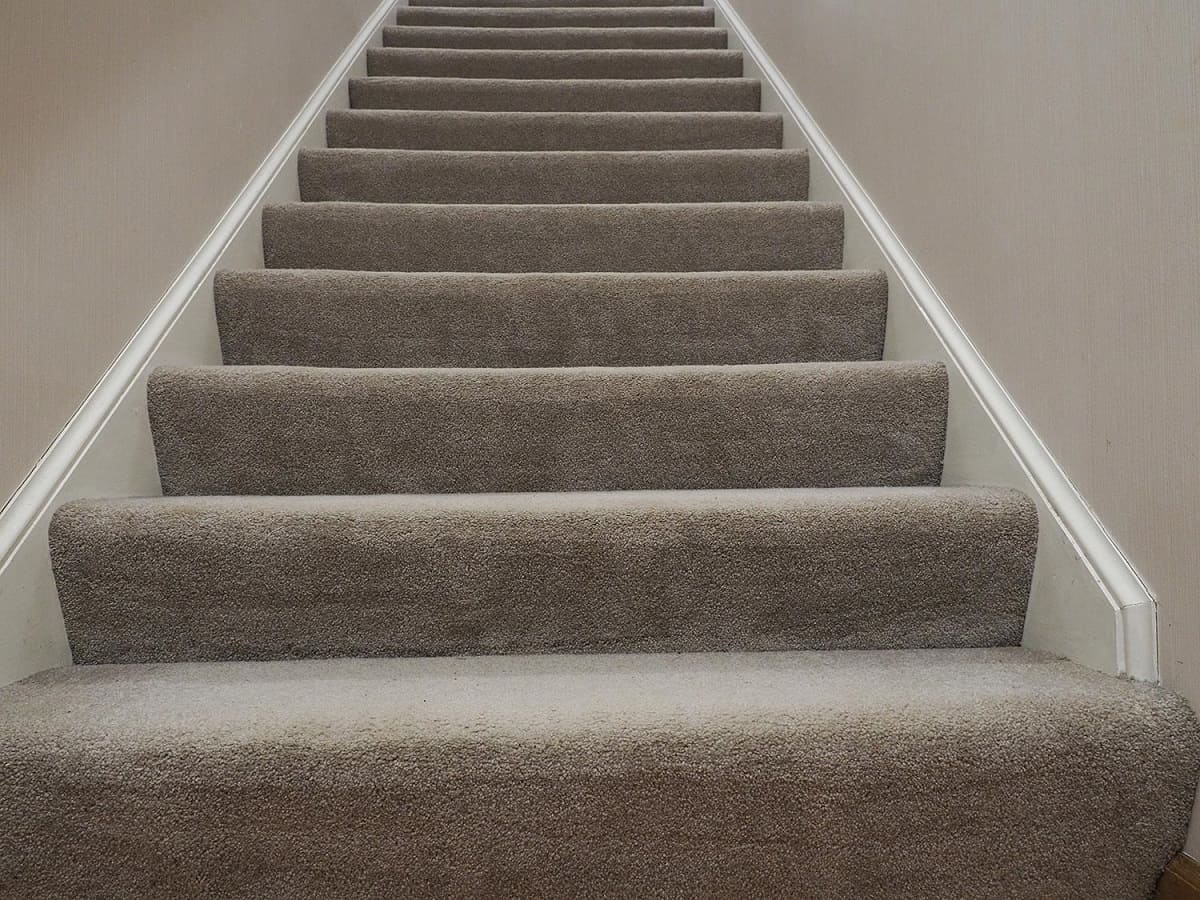
Welcome to our comprehensive guide on how to redo stairs from carpet to wood. If you’re looking to upgrade the look of your staircase and add a touch of elegance to your home, replacing carpeted stairs with wood is a fantastic option. Not only does it offer a more modern and sophisticated aesthetic, but it also provides durability and easy maintenance.
Carpeted stairs can become worn, stained, and outdated over time, and replacing them with wood not only improves the overall appearance of your home but also increases its value. Converting your stairs from carpet to wood adds a timeless charm that can enhance the beauty of any interior design style.
Before embarking on this project, it is important to evaluate the condition of your existing stairs and gather the necessary materials. Preparing your stairs properly and following the correct procedures will ensure a successful and long-lasting transformation.
In this guide, we will walk you through each step of the process, from evaluating and preparing the stairs to installing and finishing the wood treads. By the end of this article, you will have the knowledge and confidence to effectively redo your stairs from carpet to wood and enjoy the stunning results.
So, if you’re ready to take your staircase to the next level, let’s dive into the details and get started on transforming your carpeted stairs into a beautiful wooden masterpiece.
Key Takeaways:
- Transforming your carpeted stairs to wood adds elegance, durability, and value to your home. Follow the comprehensive guide to achieve a stunning and timeless staircase that will leave a lasting impression.
- From evaluating and preparing the stairs to installing and finishing the wood treads, this guide provides the knowledge and confidence to successfully redo your stairs from carpet to wood. Enjoy the beauty of your new wood staircase!
Read more: How To Redo Stairs That Had Carpet
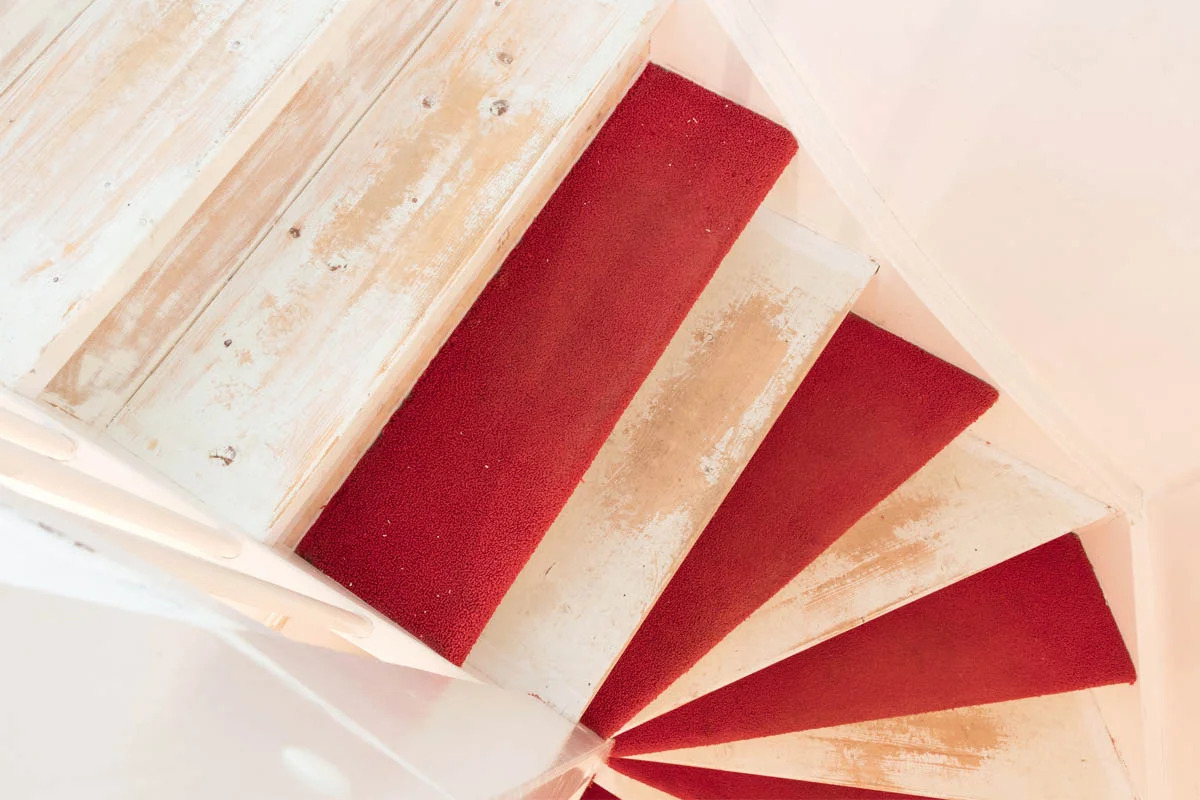
Evaluating the Stairs
Before you begin the process of redoing your stairs from carpet to wood, it is crucial to evaluate the condition of your existing stairs. This step is essential to ensure that your project goes smoothly and that the final result is safe and visually appealing.
Start by inspecting the structure of your stairs. Check for any damages, such as loose or squeaky steps, wobbly handrails, or compromised supports. It is important to address these issues before proceeding with the carpet removal process.
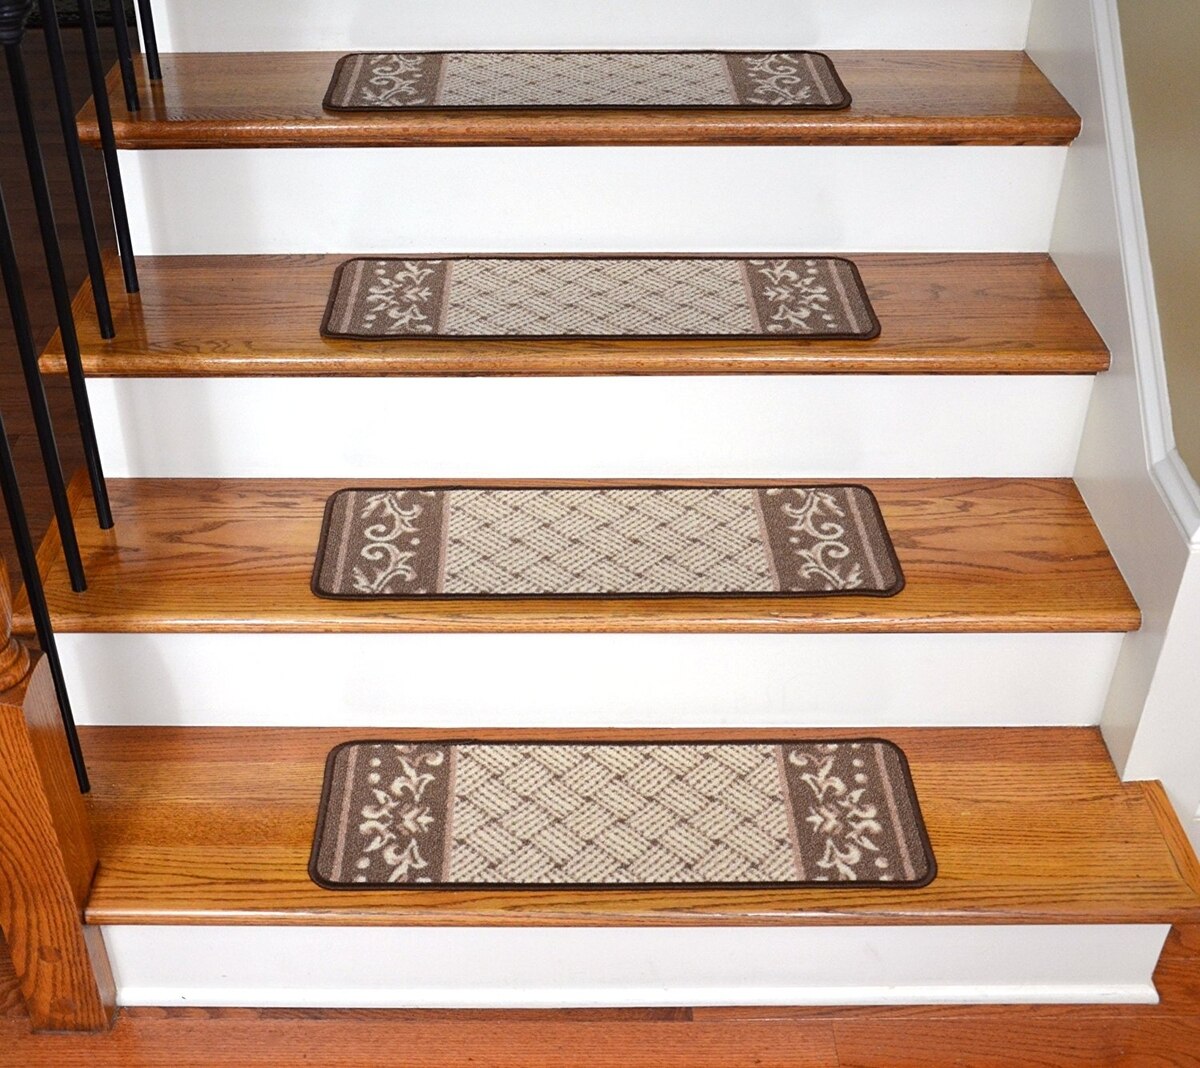
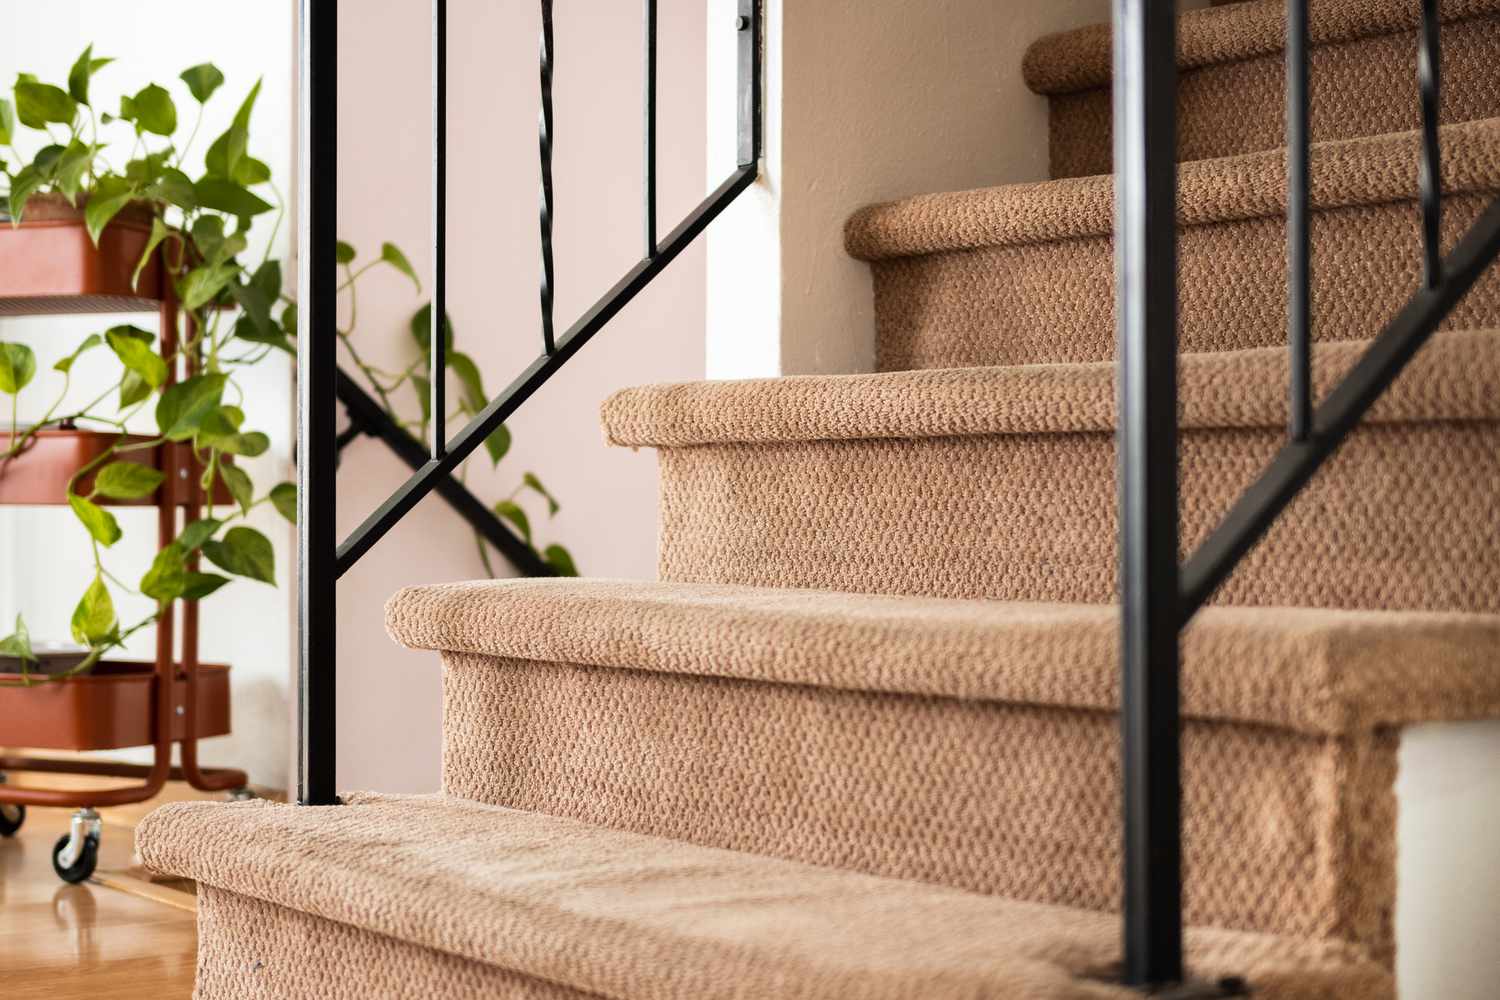
Next, assess the condition of the carpet. Look for signs of wear, stains, or odors that may have seeped into the underlying structure. If the carpet is in good condition and you wish to preserve it, you may want to consider other options, such as adding a carpet runner or applying a wood veneer over the steps.
Consider the style and functionality of your staircase. Are you satisfied with the current design, or do you want to make any changes? This is an excellent opportunity to reimagine the look and feel of your stairs. You can choose from various wood types, finishes, and tread designs to match your aesthetic preferences and create a cohesive look with the rest of your home’s interior.
Lastly, evaluate the feasibility of the project. Assess your skill level and determine if you have the necessary tools and expertise to complete the job on your own. If you are unsure or feel overwhelmed, it may be wise to consult with a professional contractor who specializes in stair renovation.
Overall, evaluating the condition of your stairs and your desired outcome will help you formulate a clear plan and gather the necessary materials to ensure a successful transition from carpet to wood. Once you have thoroughly assessed your stairs, you can confidently move on to the next steps of the process.
Gathering the Necessary Materials
Once you have evaluated your stairs and decided to proceed with the project of redoing your stairs from carpet to wood, it is time to gather the necessary materials. Having all the supplies and tools ready before starting the renovation will streamline the process and ensure that you have everything you need.
Here is a list of materials and tools you will likely need for this project:
- Wood treads: Choose the type of wood that suits your taste and budget. Popular choices include oak, maple, and pine.
- Wood risers (optional): If you prefer a closed riser design, you will need wood risers to cover the gap between the steps.
- Adhesive: Select a high-quality adhesive that is specifically designed for stair installation.
- Nails or screws: Depending on the type of wood treads you choose, you may need nails or screws to secure them to the existing staircase.
- Measuring tape: Essential for accurately measuring the dimensions of each step.
- Saw: A circular saw or a miter saw will be necessary for cutting the wood treads to the correct size.
- Sanding materials: Sandpaper or a sanding machine will be required to smooth out the wood treads and risers.
- Finishing materials: Choose a stain or paint that matches your desired aesthetic. You will also need brushes or rollers for application.
- Protective finish: Polyurethane or a similar protective coating will help preserve the wood and provide durability.
- Safety equipment: Remember to prioritize safety by wearing safety glasses, gloves, and a dust mask when working with wood and chemicals.
It is essential to have all the materials on hand before you start the renovation project. This will not only save you time but also allow you to plan and budget effectively. If you are unsure about any specific materials or tools needed, it is recommended to consult with a professional or a knowledgeable salesperson at your local home improvement store.
By gathering all the necessary materials and tools upfront, you will be ready to tackle the next steps of the process with confidence and efficiency.
Preparing the Stairs
Before you can begin removing the carpet and installing the wood treads, it is essential to properly prepare the stairs. This step will ensure a smooth and seamless transition from carpet to wood and help to achieve a professional-looking result.
Here are the steps to prepare your stairs for the transformation:
- Clear the area: Start by removing any obstacles from the staircase area, including furniture, rugs, and decor items. This will provide you with a clear and unobstructed workspace.
- Protect the surrounding areas: Use drop cloths or plastic sheets to cover the adjacent walls, floors, and any valuable items nearby. This will protect them from dust, debris, and potential damage during the renovation process.
- Remove the base shoe molding: If your staircase has base shoe molding, carefully remove it using a pry bar or a putty knife. This will allow for a clean installation of the wood treads later on.
- Inspect and repair the existing stairs: Take the time to thoroughly inspect the condition of your stairs. Check for loose or cracked steps, damaged risers, or any other structural issues. Repair or reinforce any problematic areas before proceeding.
- Clean the stairs: Vacuum or sweep the stairs to remove any dirt, dust, or loose debris. Use a damp cloth to wipe down the surfaces and ensure they are free from residue.
- Fill in any gaps or holes: If you notice any gaps or holes in the steps or risers, fill them in using wood filler. Smooth out the filler with a putty knife and let it dry according to the manufacturer’s instructions.
- Sand the existing surface: If the existing stairs have a glossy finish or rough surface, use sandpaper or a sanding machine to lightly sand them. This will create a better surface for the adhesive to bond with.
By properly preparing the stairs, you are setting the foundation for a successful transition to wood treads. This step ensures that the installation process goes smoothly and that the end result is both aesthetically pleasing and functional.
Once you have thoroughly prepared the stairs, you are ready to move on to the exciting part of the renovation process: removing the carpet and installing the wood treads. Stay tuned for the next steps in our comprehensive guide on how to redo stairs from carpet to wood.
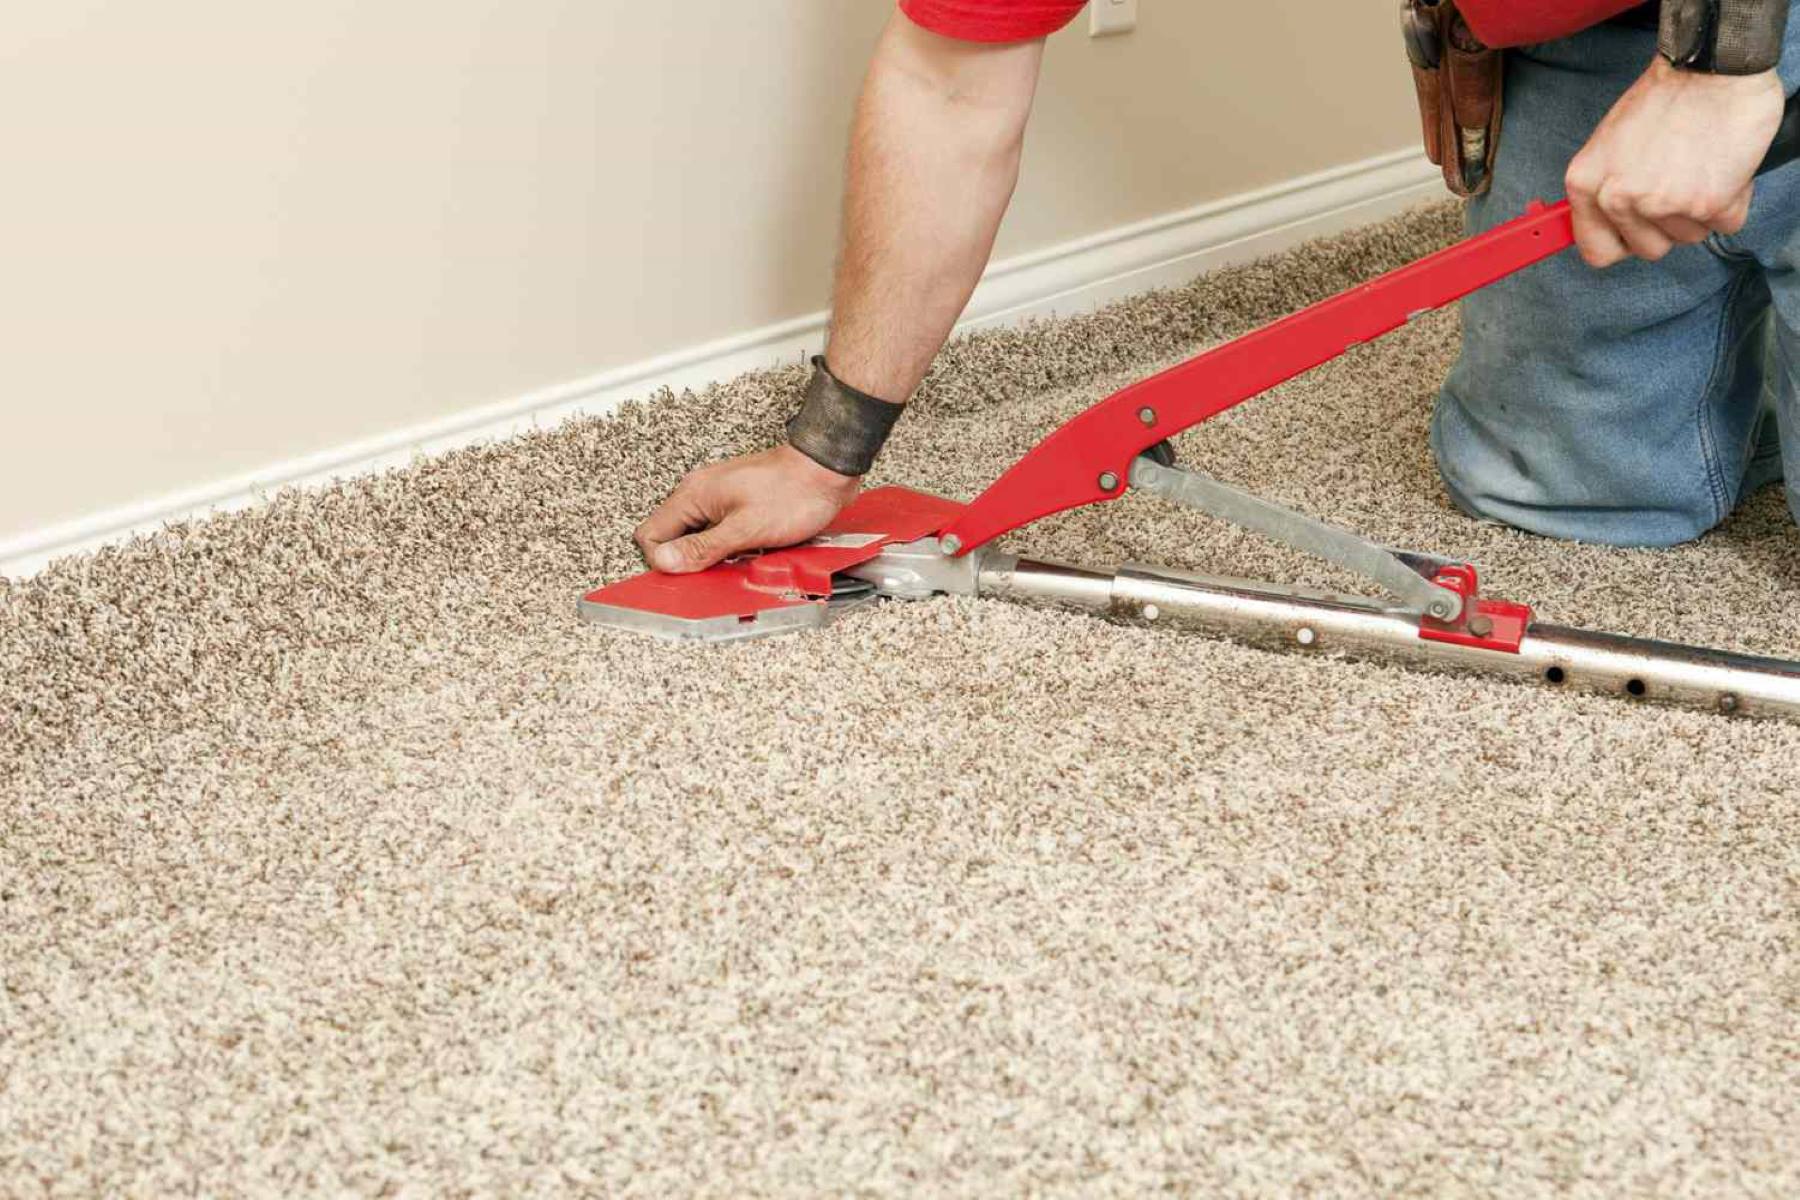
Removing the Carpet
Now that you have prepared the stairs, it’s time to remove the carpet and uncover the underlying structure. Removing the carpet is a crucial step in the process of redoing stairs from carpet to wood, as it allows for a clean and smooth installation of the wood treads.
Here’s a step-by-step guide on how to remove the carpet from your stairs:
- Start at the top: Begin by removing any trim or molding at the top of the staircase. Use a pry bar or a putty knife to carefully pry it off the wall.
- Locate the carpet edge: Look for the edge of the carpet; it should be tucked under the trim or molding you just removed. Gently pull up a corner of the carpet to expose the underlying carpet padding.
- Remove the carpet padding: Once you have exposed the carpet padding, carefully peel it back and gradually remove it from each step. You may need to cut it into smaller sections for easier removal.
- Work your way down: As you remove the carpet padding, pull up the carpet along with it. Start at the top step and work your way down, one step at a time.
- Dispose of the materials: Place the removed carpet and padding in garbage bags for easy disposal. If your local waste management requires special handling for carpet disposal, be sure to adhere to their guidelines.
- Inspect the steps: Once the carpet and padding are removed, inspect the steps for any residual adhesive or staples. Use pliers or a scraper to remove any remaining residue.
During the process of removing the carpet, you may encounter staples or tack strips that were used to secure the carpet to the stairs. Take your time and be cautious when handling these items to avoid injury. Use pliers or a hammer and pry bar to remove any staples or nails that are still in place.
Removing the carpet is a satisfying step as it reveals the potential of your stairs and prepares them for the transformation to wood treads. With the carpet completely removed and the steps exposed, you’re now ready to move on to the next phase of the project.
In the following sections, we will guide you through the next steps, including cleaning the stairs, measuring and cutting the wood, and installing the wood treads. Stay tuned for the detailed instructions on how to achieve stunning wood stairs in your home.
Read more: How To Change Stairs From Carpet To Wood
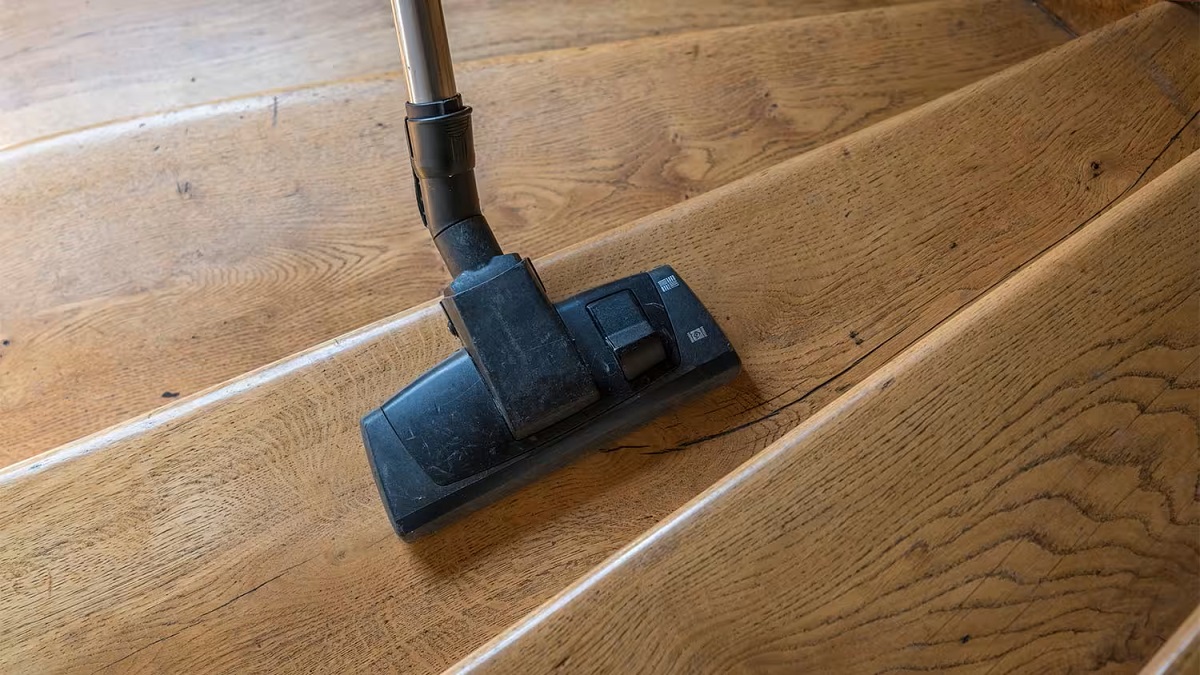
Cleaning the Stairs
After removing the carpet and padding from your stairs, it’s time to thoroughly clean the surface to ensure a smooth and flawless installation of the wood treads. Cleaning the stairs will remove any dirt, dust, residue, or adhesive that may hinder the bonding process.
Here’s a step-by-step guide on how to clean the stairs effectively:
- Vacuum or sweep the stairs: Use a vacuum or broom to remove any loose dirt, dust, or debris from the steps. Pay attention to the edges and corners where build-up is common.
- Wipe down the surface: Take a damp cloth or sponge and wipe down each step, riser, and the surrounding area. This will help eliminate any remaining dirt or residue that the vacuum or broom may have missed.
- Remove adhesive residue: If there is any leftover adhesive from the carpet padding, use a suitable adhesive remover or solvent to remove it. Follow the manufacturer’s instructions and use a scraper or scrub brush to gently scrape away the residue.
- Spot-clean stains: If there are any stubborn stains on the stairs, use a carpet stain remover or a mild detergent mixed with water. Apply the solution to a clean cloth and gently dab or scrub the stained area. Rinse with clean water and dry thoroughly.
- Allow ample drying time: After cleaning the stairs, ensure that they are completely dry before proceeding with the wood installation. Moisture can affect the adhesive’s ability to bond, so it’s important to allow the stairs to dry naturally or use fans to expedite the process.
By cleaning the stairs thoroughly, you create an optimal surface for the wood treads to adhere to. This will ensure a secure and long-lasting installation. Additionally, a clean surface will showcase the natural beauty of the wood and provide a fresh canvas for your staircase transformation.
Once you have cleaned the stairs and allowed them to dry, you’re ready to move on to the next steps in the process: measuring and cutting the wood, and installing the wood treads. Stay tuned for the detailed instructions on how to achieve a stunning wood staircase in your home.
When redoing stairs from carpet to wood, make sure to measure and cut the wood precisely to fit each step. Use a high-quality wood adhesive to secure the wood in place for a durable finish.
Measuring and Cutting the Wood
With the stairs cleaned and prepared, it’s time to measure and cut the wood for your new treads. Proper measurements and accurate cuts are crucial to ensure a seamless fit and a professional-looking staircase. Taking your time during this step will result in a beautiful and structurally sound finished product.
Here’s a step-by-step guide on how to measure and cut the wood for your stairs:
- Measure each step: Use a measuring tape to measure the depth, width, and length of each step. It’s important to measure each step individually, as they may vary slightly in size.
- Add the nosing allowance: To create a finished look, add the desired nosing allowance to the depth of each step. The nosing allowance is the extension of the wood beyond the riser or the front edge of the step.
- Calculate the total length: Multiply the width by the length and add the nosing allowance. This will give you the total length of each tread.
- Transfer measurements to the wood: Mark the measurements on your chosen wood material. Use a straight edge and a pencil to create precise lines for cutting.
- Set up your cutting tools: Ensure that your cutting tools, whether a circular saw or a miter saw, are set up correctly and aligned with the marked lines. Follow the manufacturer’s instructions for safety and accuracy.
- Cut the wood treads: Carefully cut along the marked lines, using slow and steady movements. Take your time to achieve clean and accurate cuts. Remember to wear appropriate safety equipment, such as safety glasses and gloves, during this step.
- Double-check the fit: Once you have cut all the wood treads, place them on the steps and check for any adjustments or minor trimming that may be required. It’s better to make small adjustments now to ensure a precise fit.
Remember, accuracy is key when measuring and cutting the wood for your stairs. Even small errors can make a noticeable difference in the final appearance and fit. Take your time, double-check your measurements, and make precise cuts to achieve the best results.
With the wood treads cut and ready to be installed, you’re one step closer to completing your staircase transformation. In the next section, we will guide you through the process of installing the wood treads and adding the wood risers if desired. Stay tuned for the detailed instructions on how to achieve a stunning wood staircase in your home.
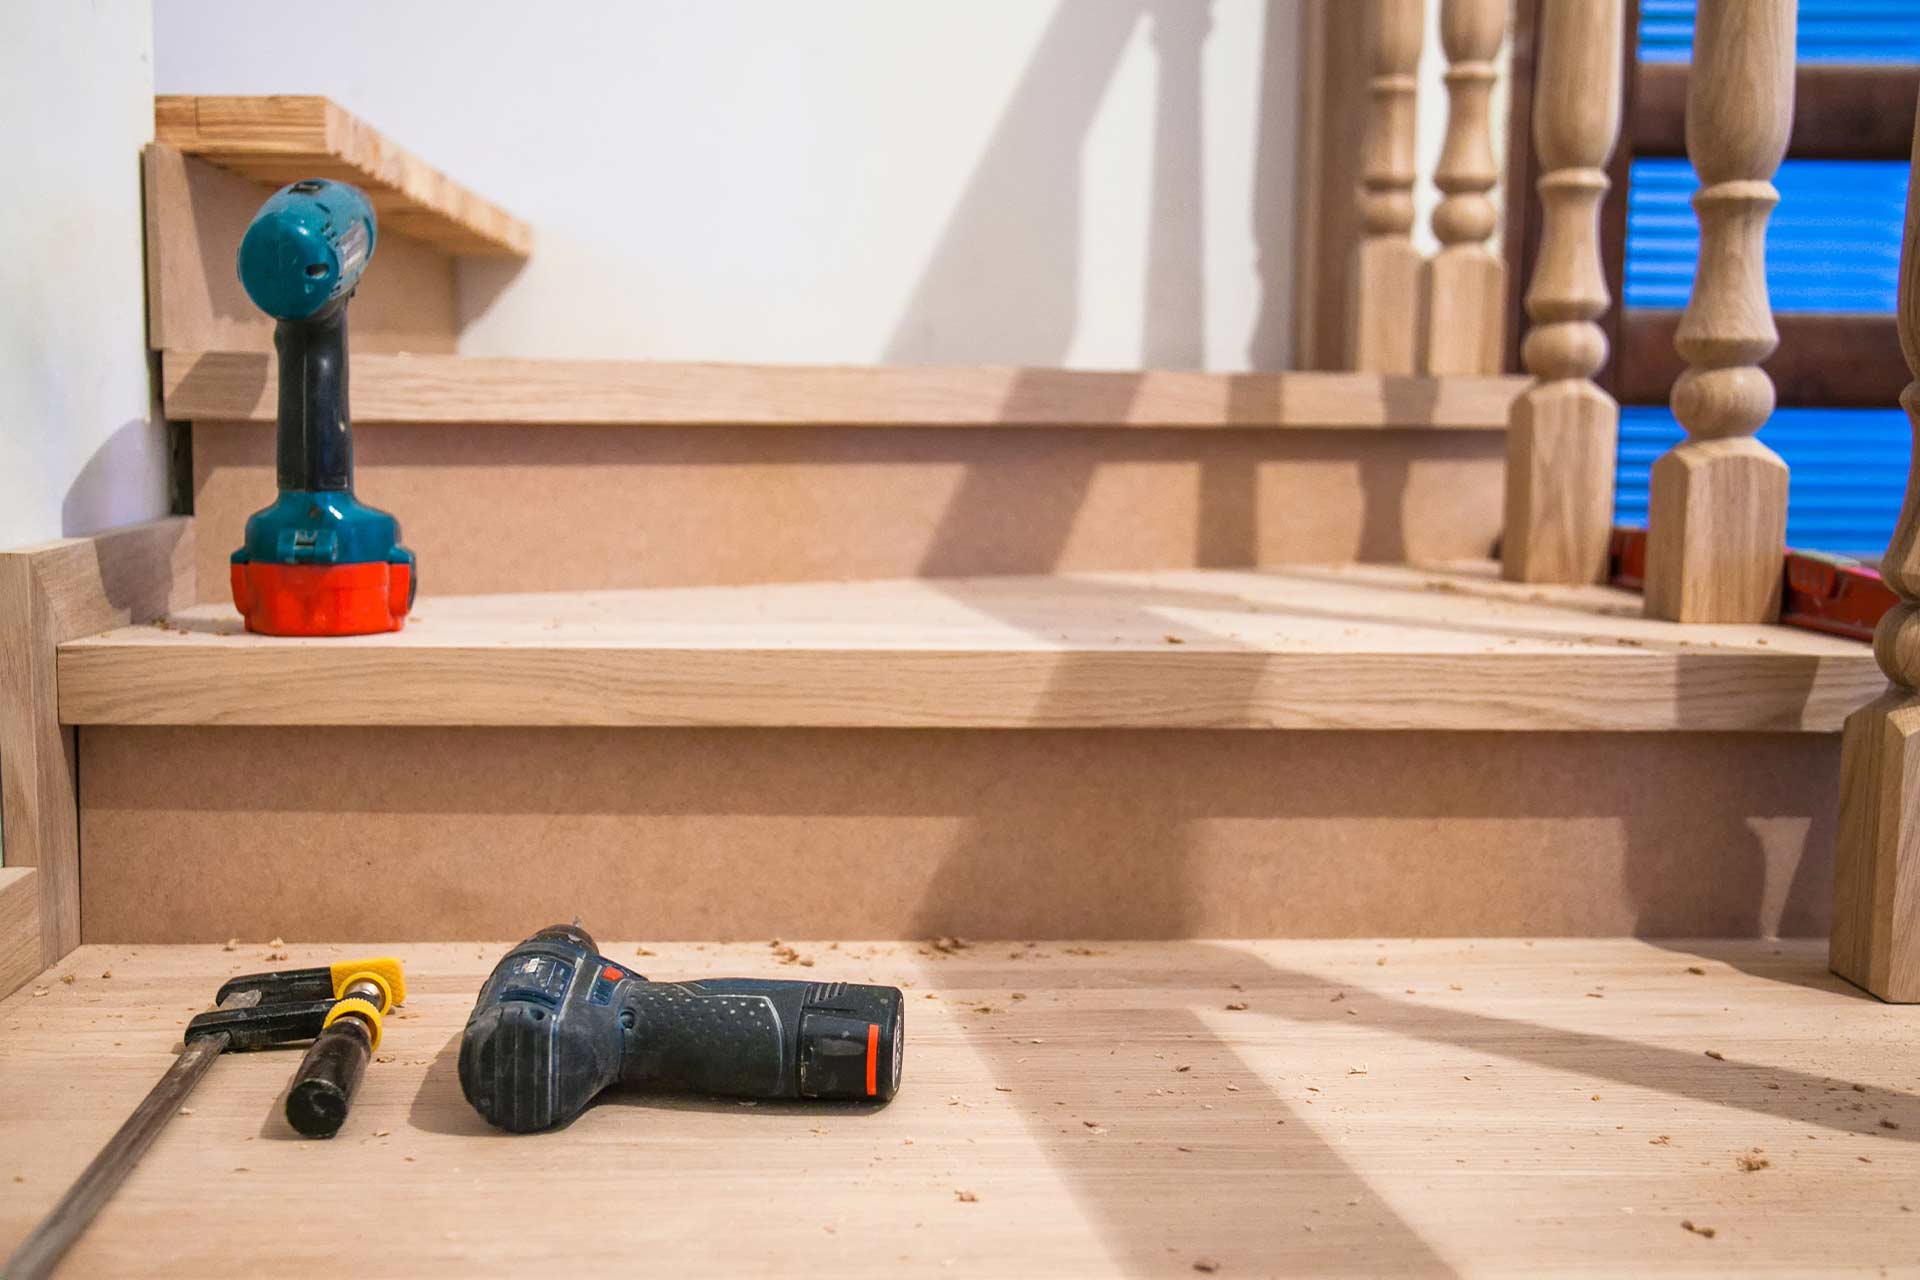
Installing the Wood Treads
With the wood treads cut to the correct size, it’s time to install them onto your staircase. The installation process requires precision and attention to detail to ensure a secure and visually appealing result. By following these steps, you’ll complete the transformation of your stairs from carpet to wood.
Here’s a step-by-step guide on how to install the wood treads:
- Apply adhesive: Apply a generous amount of adhesive to the surface of each step, ensuring even coverage. Use an adhesive recommended for stair installation and follow the manufacturer’s instructions.
- Position the wood tread: Carefully place the wood tread onto the step, ensuring it fits snugly and aligns properly with the front edge and sides. Press down firmly to ensure proper adhesion.
- Secure the wood tread: Depending on the type of wood and the manufacturer’s recommendations, either nail or screw the wood tread into place. Use nails or screws specifically designed for wood installation to secure the tread securely to the step.
- Repeat the process: Continue applying adhesive, positioning the wood treads, and securing them in place, one step at a time. Take your time to ensure each tread fits correctly and is securely attached.
- Check for proper alignment: As you install each wood tread, periodically check for proper alignment and adjust as necessary. This will ensure that the treads are evenly positioned and create a visually pleasing staircase.
- Allow for curing time: After completing the installation, allow the adhesive to cure according to the manufacturer’s instructions. This curing process is crucial for a strong bond between the wood treads and the steps.
Remember, safety is paramount during the installation process. Use caution when working with adhesives and power tools, and always follow the manufacturer’s instructions for proper usage and safety guidelines.
By following these steps and taking your time with the installation, you can achieve a beautiful and professionally installed wood staircase. With the wood treads securely in place, your stairs will now have a timeless charm and a lasting durability.
In the next section, we will discuss the option of adding wood risers to your staircase for a finished and cohesive look. Stay tuned for instructions on how to complete the transformation of your stairs from carpet to wood.
Adding the Wood Risers
If you desire a closed riser design or want to achieve a more finished look for your staircase, adding wood risers is a great option. Wood risers provide a cohesive and polished appearance, complementing the wood treads and completing the transformation from carpeted stairs to beautiful wooden steps.
Here’s a step-by-step guide on how to add wood risers to your staircase:
- Measure the height: Use a measuring tape to measure the height of each riser. Make sure to measure from the bottom of the tread to the top of the next tread.
- Transfer measurements to the wood: Mark the measurements on your chosen wood material for the risers. Use a straight edge and a pencil to ensure accurate lines.
- Cut the wood risers: Carefully cut along the marked lines using a saw, ensuring precise and even cuts. Double-check the fit by placing each riser against the corresponding step.
- Apply adhesive: Apply adhesive to the back surface of each wood riser, ensuring to cover the entire surface. Use an adhesive suitable for wood installation and follow the manufacturer’s recommendations.
- Position the wood riser: Align the wood riser with the corresponding step, starting from the bottom and working your way up. Press firmly against the adhesive to ensure a strong bond.
- Secure the wood riser: To ensure a secure installation, use finishing nails, screws, or a combination of both to secure the wood riser to the step. This will provide additional stability and strength.
- Repeat the process: Continue measuring, cutting, applying adhesive, positioning, and securing each wood riser until you have completed the installation for all the steps.
- Allow for curing time: After installing the wood risers, allow the adhesive to cure according to the manufacturer’s instructions. This will ensure a secure bond between the wood risers and the steps.
Adding wood risers to your staircase not only enhances its visual appeal but also provides a uniform and finished look. With the wood risers in place, your stairs will exude elegance and sophistication, transforming the entire space.
Remember to take your time during the installation process, double-checking measurements and ensuring a secure attachment for each wood riser. Following these steps will ensure a flawless and professional result.
With the wood treads and risers securely installed, your staircase transformation is almost complete. In the next section, we will discuss the crucial steps of sanding and finishing the wood, bringing out the natural beauty and ensuring longevity. Stay tuned for the final steps of your journey from carpeted stairs to exquisite wooden steps.
Read more: How To Remove Carpet Glue From Wood Stairs
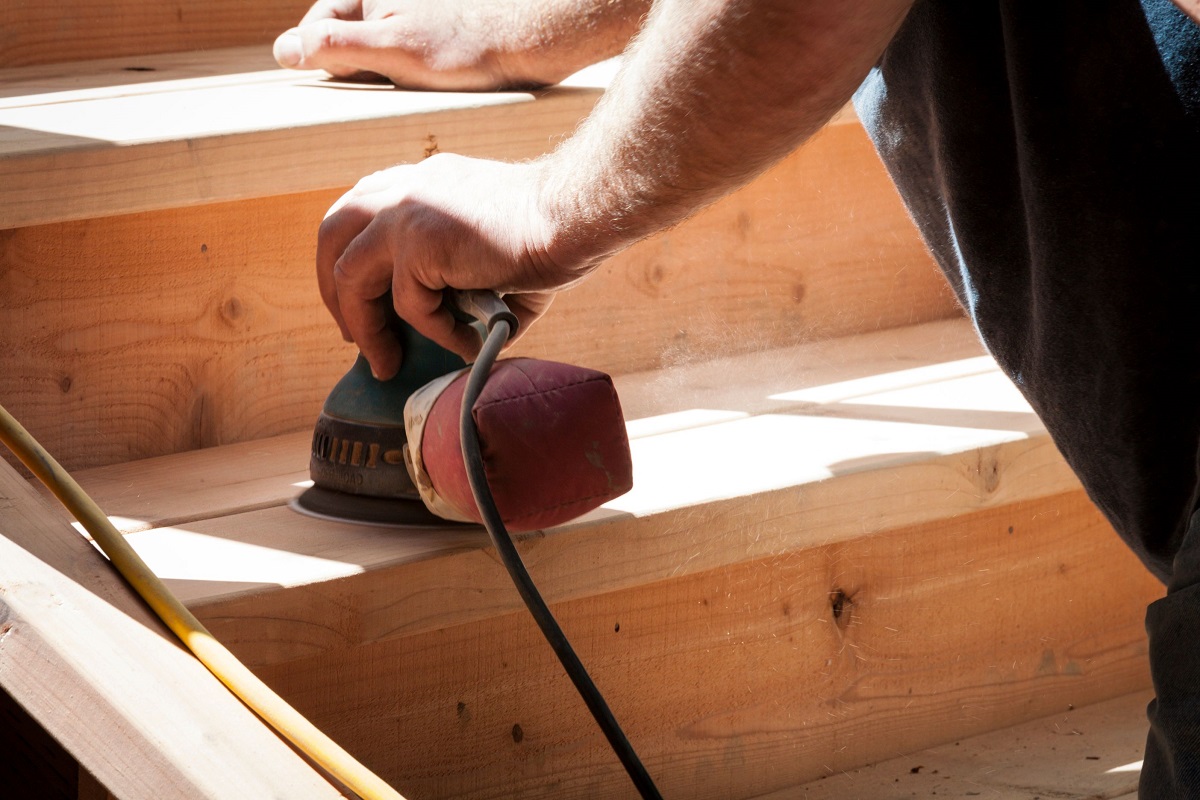
Sanding and Finishing the Wood
After installing the wood treads and risers, the next step in the transformation of your staircase from carpet to wood is sanding and finishing. This step is essential for creating a smooth and visually appealing surface while protecting the wood from wear and tear.
Follow these steps to sand and finish the wood for your stairs:
- Prep the area: Clear the surroundings of any furniture or objects that may interfere with the sanding process. Use drop cloths or plastic sheets to protect the adjacent areas from dust and debris.
- Sand the wood: Begin by using a coarse-grit sandpaper or a sanding machine to remove any rough spots, imperfections, or raised grain on the wood surface. Work along the grain of the wood, using even strokes and applying consistent pressure.
- Gradually switch to finer grits: As you progress, switch to finer grits of sandpaper to achieve a smoother finish. Gradually work your way to a medium-grit sandpaper, and then finish with a fine-grit sandpaper for a polished surface.
- Smooth the edges: Pay special attention to sanding the edges and corners of the wood treads and risers to ensure a seamless transition from one step to another.
- Clean the dust: Use a vacuum or a clean cloth to remove the sanding dust from the wood surface. Ensure that all dust particles are removed before proceeding to the finishing stage.
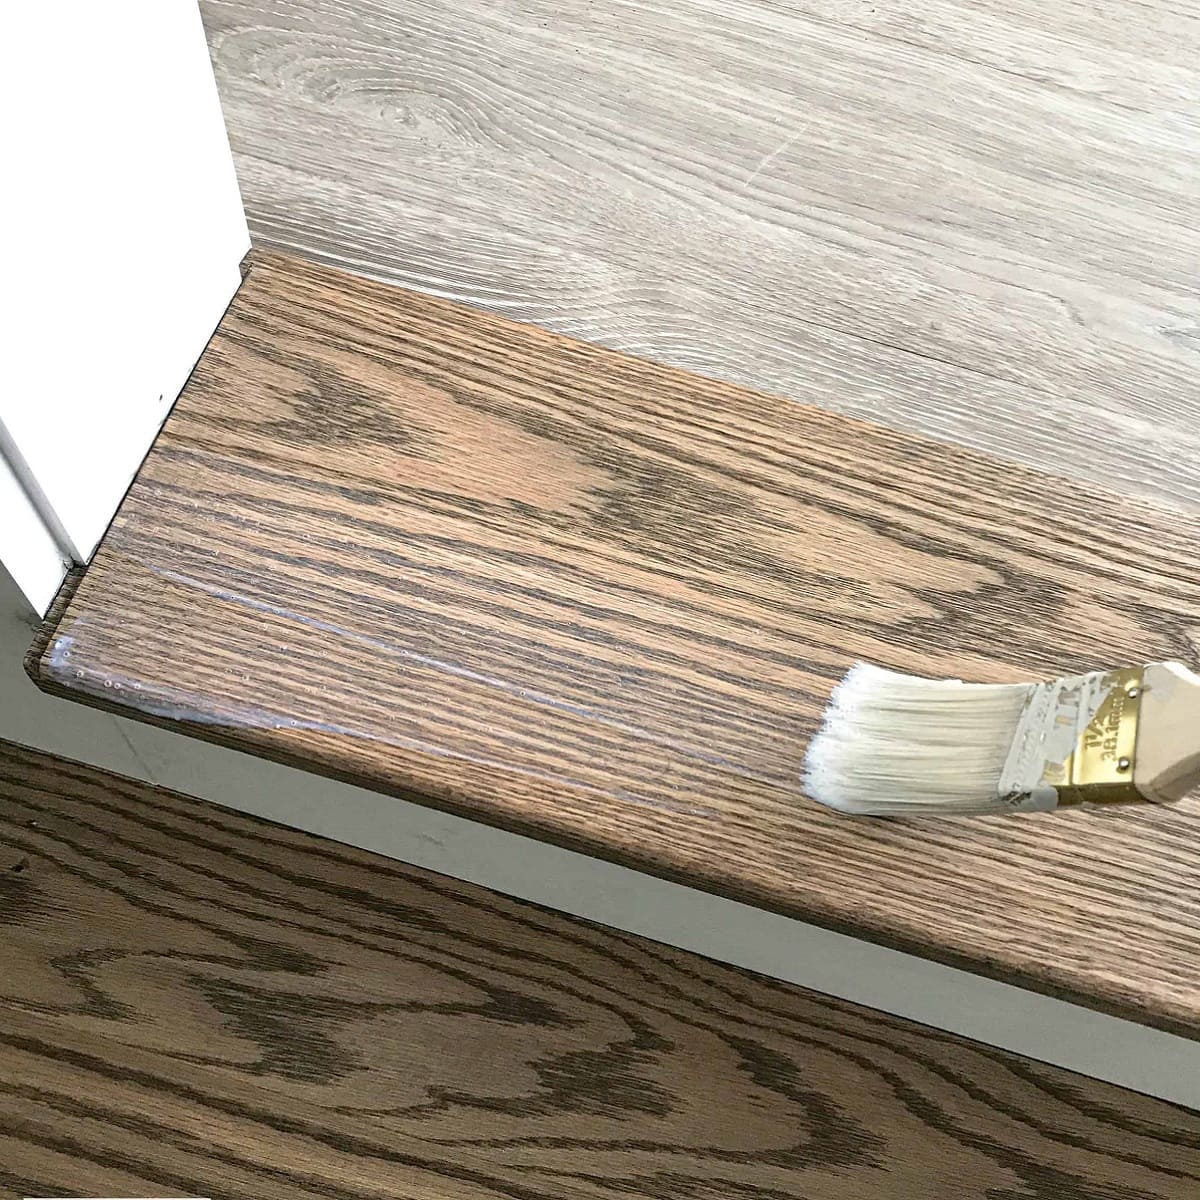
- Choose a finish: Select a finish that is suitable for the type of wood you are working with and matches your desired aesthetic. You have options such as stain, paint, or a clear finish that enhances the natural beauty of the wood.
- Apply the finish: Follow the manufacturer’s instructions and use a brush or a roller to apply the chosen finish to the wood treads and risers. Apply an even coat in the direction of the wood grain, allowing sufficient drying time between coats.
- Sand between coats (optional): If desired, lightly sand the wood between coats of finish for an even smoother surface. Use a fine-grit sandpaper and be gentle to avoid removing too much of the finish.
- Protect the finish: Once you have achieved the desired look, apply a protective topcoat to seal the finish and protect the wood from everyday wear and tear. Use a polyurethane or similar protective coating and follow the manufacturer’s recommendations.
By sanding and finishing the wood, you will enhance its natural beauty, create a more durable surface, and protect it for years to come. The finish will also bring out the richness of the wood grain, adding depth and character to your stairs.
Remember to work in a well-ventilated area and follow the safety guidelines provided by the manufacturer for the sandpaper, finish, and protective coat you choose. Taking your time and following these steps will ensure a stunning and long-lasting finish for your newly transformed staircase.
In the final section of our guide, we will discuss the importance of applying a protective finish and provide some concluding thoughts on your journey from carpeted stairs to beautiful wooden steps.
Applying a Protective Finish
After sanding and finishing the wood treads and risers, the final step in the process of redoing your stairs from carpet to wood is applying a protective finish. The protective coat not only enhances the aesthetic appeal of your staircase but also safeguards the wood from daily wear and tear.
Follow these steps to apply a protective finish to your wood stairs:
- Ensure the surface is clean: Before applying the protective finish, make sure the wood surface is free of dust, debris, or any particles left from the sanding process. Use a vacuum or a clean cloth to remove any residue.
- Choose a protective finish: Select a protective finish that is appropriate for the type of wood you are working with and matches your desired sheen. Options include polyurethane, varnish, shellac, or a penetrating oil finish.
- Prepare the protective finish: Follow the manufacturer’s instructions for preparing the protective finish, including any required mixing or dilution. Stir the finish well to ensure an even consistency.
- Apply the protective finish: Use a brush, roller, or sprayer to apply a thin and even coat of the protective finish to each wood tread and riser. Work in the direction of the wood grain, starting from the top step and working your way down.
- Allow drying time: Make sure to allow sufficient drying time between each coat of protective finish, as recommended by the manufacturer. This will ensure a proper bond and a durable surface.
- Lightly sand between coats (optional): If desired, lightly sand the surface between coats of protective finish to achieve an even smoother and more polished result. Use a fine-grit sandpaper and be gentle to avoid removing too much of the finish.
- Apply additional coats: Depending on the manufacturer’s instructions and your desired level of protection, apply additional coats of protective finish. Typically, two to three coats are recommended for optimal durability.
- Cure and dry: Once all coats of protective finish have been applied, allow the stairs to cure and dry completely before using them. Follow the manufacturer’s instructions for the recommended curing time.
Applying a protective finish to your wood stairs not only adds a layer of durability but also enhances the beauty of the wood. The finish provides a protective barrier against scratches, stains, and general wear, ensuring that your staircase retains its stunning appearance for years to come.
Remember to work in a well-ventilated area and follow the safety guidelines provided by the manufacturer for the protective finish you choose. Take your time, be patient, and follow these steps carefully to achieve a beautifully protected and visually appealing finish.
With the protective finish applied, your staircase transformation from carpet to wood is complete. Step back and admire the stunning results of your hard work and dedication. Your new wooden stairs will add elegance, warmth, and value to your home, making it a true focal point in your living space.
Congratulations on successfully redoing your stairs from carpet to wood!
Conclusion
Congratulations on completing the transformation of your stairs from carpet to wood! By following this comprehensive guide, you have successfully achieved a stunning and timeless look for your staircase. The process may have been challenging at times, but the end result is well worth the effort.
Redoing your stairs from carpet to wood not only enhances the aesthetic appeal of your home but also adds value and durability to your staircase. The elegance and warmth of the wood bring a sense of sophistication and charm to your living space, creating a focal point that will leave a lasting impression on anyone who enters your home.
Throughout this guide, we discussed the importance of evaluating your stairs, gathering the necessary materials, and preparing the surface. We guided you through the process of removing the carpet, cleaning the stairs, and measuring and cutting the wood treads. We then covered the installation of the wood treads and the option of adding wood risers for a finished look. Finally, we explored the steps of sanding and finishing the wood, and applying a protective coat to ensure the longevity of your staircase.
Whether you embarked on this project yourself or sought the assistance of a professional, you have created a beautiful and functional staircase that will bring joy and satisfaction for years to come. Take pride in your accomplishments and enjoy the beauty of your new wood stairs.
Remember to stay vigilant in maintaining the condition of your stairs. Regular cleaning and preventive maintenance will help preserve their beauty and prolong their lifespan. Be cautious of any signs of wear or damage and address them promptly to ensure the safety and longevity of your staircase.
We hope this guide has provided you with the knowledge and confidence to successfully redo your stairs from carpet to wood. May your newly transformed staircase become a centerpiece of your home and a source of pride.
Thank you for joining us on this journey, and best of luck with your stunning wood staircase!
Frequently Asked Questions about How To Redo Stairs From Carpet To Wood
Was this page helpful?
At Storables.com, we guarantee accurate and reliable information. Our content, validated by Expert Board Contributors, is crafted following stringent Editorial Policies. We're committed to providing you with well-researched, expert-backed insights for all your informational needs.