Home>Furniture>Outdoor Furniture>How To Create A Concrete Patio

Outdoor Furniture
How To Create A Concrete Patio
Modified: March 7, 2024
Learn how to create a stunning concrete patio for your outdoor furniture. Get step-by-step instructions and expert tips to transform your outdoor space.
(Many of the links in this article redirect to a specific reviewed product. Your purchase of these products through affiliate links helps to generate commission for Storables.com, at no extra cost. Learn more)
Introduction
Creating a concrete patio is a fantastic way to transform your outdoor space into a stylish and functional area for relaxation and entertainment. Whether you’re looking to update your existing patio or start from scratch, a concrete patio offers durability, versatility, and endless design possibilities.
Not only does a concrete patio provide a sturdy foundation for your outdoor furniture, but it also requires minimal maintenance compared to other patio materials. With proper planning, preparation, and execution, you can create a concrete patio that will withstand the test of time and enhance the beauty of your outdoor living area.
In this guide, we will take you through the step-by-step process of creating a concrete patio. From planning and preparation to the finishing touches and maintenance, you’ll learn everything you need to know to tackle this do-it-yourself project with confidence.
Before we dive into the steps, it’s important to note that creating a concrete patio requires some physical labor and attention to detail. If you’re not comfortable with these aspects or if you’re dealing with a complex patio design, it may be best to hire a professional contractor. However, if you’re up for the challenge and want to save some money, let’s get started!
Key Takeaways:
- Creating a concrete patio is a fun and rewarding DIY project that can turn your outdoor space into a stylish and durable area for relaxation and entertainment.
- From planning and preparation to adding finishing touches, each step is crucial in ensuring the success and longevity of your concrete patio.
Read more: How To Smooth A Concrete Patio
Step 1: Planning and Preparation
Planning is the crucial first step in creating a successful concrete patio. By taking the time to carefully plan and prepare, you’ll ensure that your patio meets your expectations and fits seamlessly into your outdoor space. Here are some key considerations:
- Design and Layout: Think about the size and shape of your patio. Consider factors such as the available space, the intended use of the patio, and any existing structures or landscaping that may impact the design. Sketch out your ideas and take measurements to determine the dimensions of the patio.
- Materials: Choose the type of concrete you want to use. There are different options available, including traditional gray concrete, colored concrete, and stamped or patterned concrete. Consider the aesthetic appeal, durability, and cost of each option.
- Permits and Regulations: Check with your local building department to determine if any permits are required for constructing a concrete patio. Also, familiarize yourself with any regulations or guidelines that may impact the design or construction process.
- Budget: Determine your budget for the project. This will help prioritize your options and guide your material and design choices.
- Utilities: Before starting the project, locate and mark any underground utilities, such as water pipes and electrical cables, to avoid damaging them during the excavation phase.
Once you have a clear plan in mind, it’s time to gather the necessary tools and materials for the project. Here’s a list of basic tools you’ll likely need:
- Shovel or excavator
- Wheelbarrow
- Tape measure
- Level
- Mason’s string and stakes
- Wood boards for formwork
- Rebar or wire mesh for reinforcement
- Concrete mix
- Float or trowel for finishing
- Broom for texture
- Polyethylene sheeting for curing
- Concrete sealer (optional)
With your plan and tools in hand, you’re ready to move on to the next step: site preparations. Stay tuned!
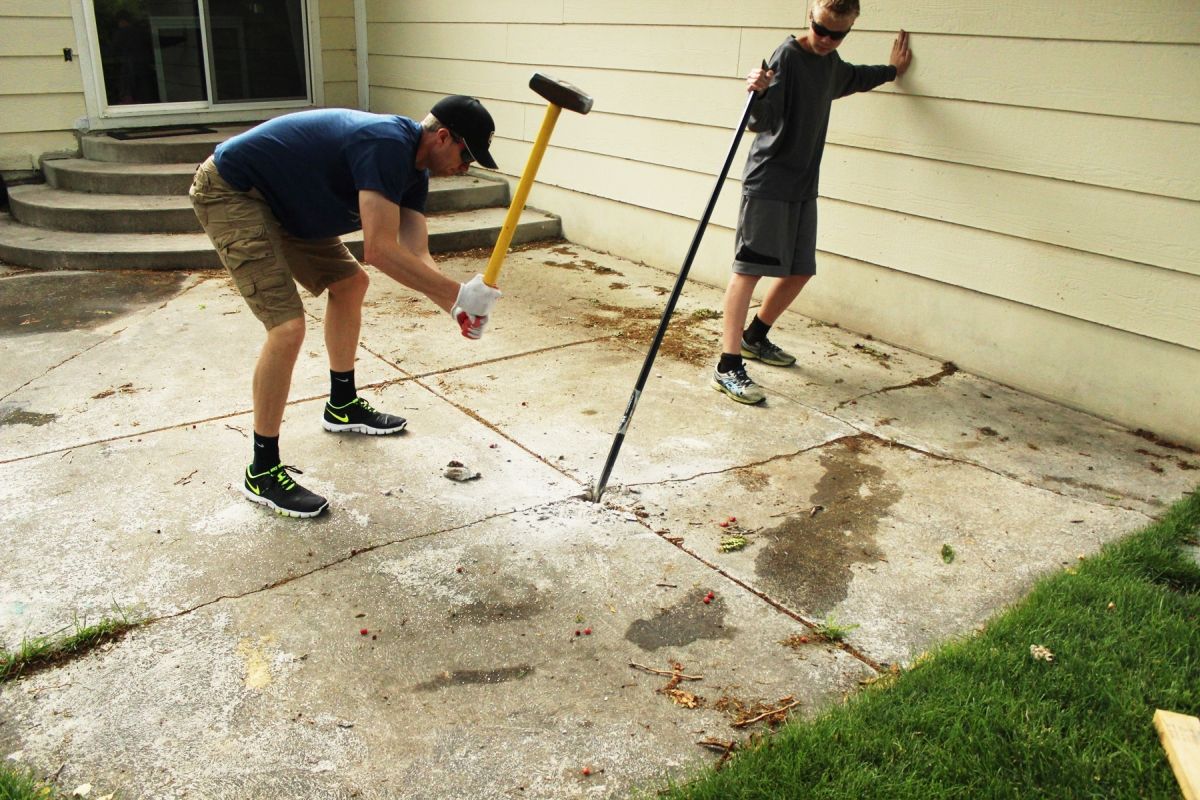
Step 2: Site Preparations
Before you can start building your concrete patio, you need to properly prepare the site. Site preparations involve clearing the area, marking the boundaries, and ensuring a solid foundation for your patio. Follow these steps:
- Clear the area: Remove any obstacles such as vegetation, rocks, or existing structures from the patio site. This will provide a clean slate for the construction process.
- Mark the boundaries: Use mason’s string and stakes to mark the boundaries of your patio. Measure the dimensions carefully to ensure accuracy.
- Excavation: Use a shovel or excavator to dig out the marked area to a depth of at least 6 inches. This will allow for a sufficient depth of compacted gravel and concrete.
- Grade the soil: Use a rake or shovel to level and grade the soil within the excavated area. Aim for a slight slope away from your house to promote proper drainage.
- Compact the soil: Use a compactor or tamper to compact the soil thoroughly. This will help prevent future settlement and ensure a stable base for your patio.
- Add gravel: Spread a layer of gravel over the compacted soil. The gravel should be about 4-6 inches thick and should provide good drainage for your patio.
- Compact the gravel: Use a compactor or tamper to compact the gravel layer, ensuring a solid and stable base for your patio.
Once you’ve completed these site preparations, you’re ready to move on to the next step: building the formwork. This step is critical for defining the shape and dimensions of your patio. Stay tuned!
Step 3: Building the Formwork
Formwork acts as a mold that holds the concrete in place until it hardens. Building the formwork is an essential step in creating a concrete patio with clean edges and defined dimensions. Follow these steps to build the formwork:
- Determine the shape: Based on your design and measurements, decide on the shape of your patio. Rectangular or square shapes are common, but you can also create curved or custom-shaped patios.
- Prepare the lumber: Cut the boards to the desired length for each side of the patio. The boards should be sturdy enough to withstand the pressure of the concrete.
- Set up the frames: Place the boards along the marked boundaries of your patio, securing them with stakes or braces. Ensure that the boards are level and tightly fitted together.
- Check for squareness: Use a tape measure and the 3-4-5 rule to ensure that the corners of the formwork are at right angles. This will help maintain the shape and symmetry of your patio.
- Secure the formwork: To prevent the formwork from shifting during the concrete pouring process, drive stakes or braces into the ground outside the formwork and attach them tightly to the boards.
- Install expansion joints: If your patio is larger than 10 feet in any direction, it’s important to incorporate expansion joints to allow for natural movement of the concrete. Place joint strips or boards along the formwork at regular intervals.
Building the formwork requires precision and attention to detail to ensure that your patio has clean and consistent edges. Take the time to double-check your measurements and make any necessary adjustments before proceeding to the next step: installing the reinforcement. Stay tuned!
Step 4: Installing the Reinforcement
Reinforcement is essential for strengthening your concrete patio and minimizing the risk of cracking and structural issues over time. Installing reinforcement, such as rebar or wire mesh, provides added strength and stability to your patio. Follow these steps to install the reinforcement:
- Determine the type of reinforcement: Choose between rebar or wire mesh as your reinforcement option. Rebar is a steel rod that provides structural support, while wire mesh is a grid-like pattern made of wire that reinforces the concrete.
- Prepare the reinforcement: Cut the rebar or wire mesh to fit within the formwork. Ensure that the reinforcement extends to the edges of the patio and is evenly distributed throughout the area.
- Place the reinforcement: Lay the reinforcement on top of the gravel base, ensuring that it’s slightly elevated from the bottom to be centered within the concrete slab.
- Secure the reinforcement: Use wire ties or zip ties to connect the pieces of rebar or wire mesh together. This will prevent them from shifting during the concrete pouring process.
- Elevate the reinforcement: To ensure proper concrete coverage and prevent the reinforcement from touching the ground, use small rocks or plastic chairs to elevate the reinforcement about 2-3 inches above the gravel base.
Installing reinforcement is a crucial step in creating a durable and long-lasting concrete patio. It provides structural integrity and helps distribute the weight and forces evenly across the surface. Once you have completed this step, you’re ready to move on to the exciting stage of mixing and pouring the concrete. Stay tuned!
Read more: How To Level A Concrete Patio
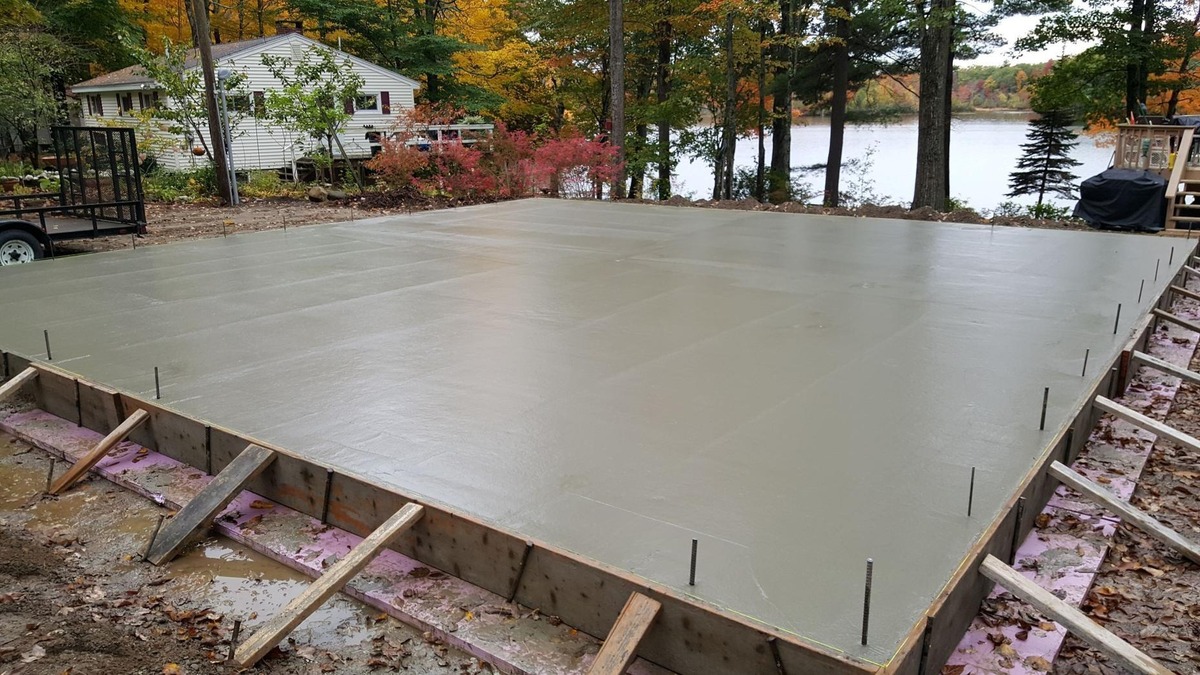
Step 5: Mixing and Pouring the Concrete
Mixing and pouring the concrete is where your patio really starts to take shape. This step requires careful attention to detail and proper technique to ensure a smooth and even finish. Follow these steps to mix and pour the concrete for your patio:
- Prepare the concrete mix: Follow the manufacturer’s instructions to mix the concrete. Typically, you’ll need to combine water, cement, and aggregate (such as sand or gravel) in the correct proportions. Use a concrete mixer or a wheelbarrow and shovel for smaller quantities.
- Add water gradually: Pour water into the mixer or wheelbarrow gradually while mixing the dry materials. Aim for a consistency that is workable but not too runny.
- Begin pouring: Start pouring the concrete into the formwork, starting from one corner and working your way across. Fill the formwork about halfway at first to ensure even distribution of the concrete.
- Distribute the concrete: Use a shovel or rake to spread the concrete evenly within the formwork. Ensure that it reaches all corners and edges, filling any voids or gaps.
- Consolidate the concrete: Use a vibrating screed or a piece of lumber to consolidate the concrete and remove any air bubbles or voids. Move the screed back and forth across the surface to level the concrete.
- Smooth the surface: Use a float or a trowel to smooth the surface of the concrete, working in long, sweeping motions. This will create a level and even surface for your patio.
As you pour and work with the concrete, ensure that it remains consistently wet and workable. Avoid overworking the concrete, as this can weaken the overall structure. Once you have finished pouring and smoothing the concrete, you’re ready to move on to the next step: leveling and smoothing the surface. Stay tuned!
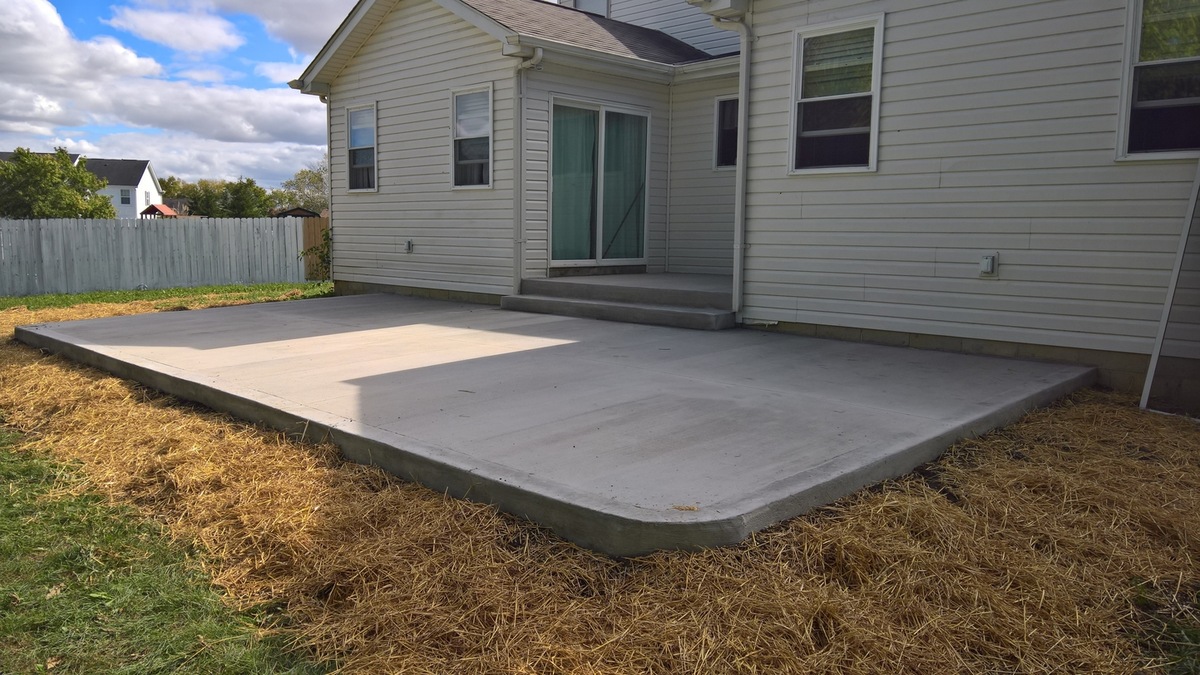
When creating a concrete patio, make sure to properly prepare the area by leveling the ground and adding a sturdy base. This will ensure a long-lasting and durable patio.
Step 6: Leveling and Smoothing the Surface
Leveling and smoothing the surface of your concrete patio is a critical step to ensure a polished and professional-looking finish. This step requires attention to detail and patience to achieve a level and smooth surface. Follow these steps to level and smooth the surface of your concrete patio:
- Assess the surface: Use a level and visually inspect the surface of the concrete patio. Identify areas that need to be leveled or smoothed out.
- Add or remove concrete: Depending on the assessment, add or remove small amounts of concrete to eliminate any high or low spots. Use a trowel or float to make adjustments.
- Use a bull float: Use a bull float to further level and smooth the surface of the concrete. Move the bull float in long, sweeping motions to fill in any low spots and remove excess material.
- Use a hand float: After using the bull float, switch to a hand float for finer smoothing. Move the hand float in a circular or back-and-forth motion to achieve a smooth and even surface.
- Smooth the edges: Use an edging tool or a trowel to smooth and round the edges of the patio. This will give your patio a finished and polished look.
- Check the slope: Use a level or a straightedge to check the slope of the patio. Ensure that it has a slight slope away from your house to promote proper drainage.
- Final check: Take a final look at the surface of your patio and make any necessary adjustments to achieve a level and smooth finish.
Leveling and smoothing the surface of your concrete patio is a crucial step to create a visually appealing and functional outdoor space. Once you are satisfied with the level and smoothness, you’re ready to move on to the next step: adding finishing touches to your patio. Stay tuned!
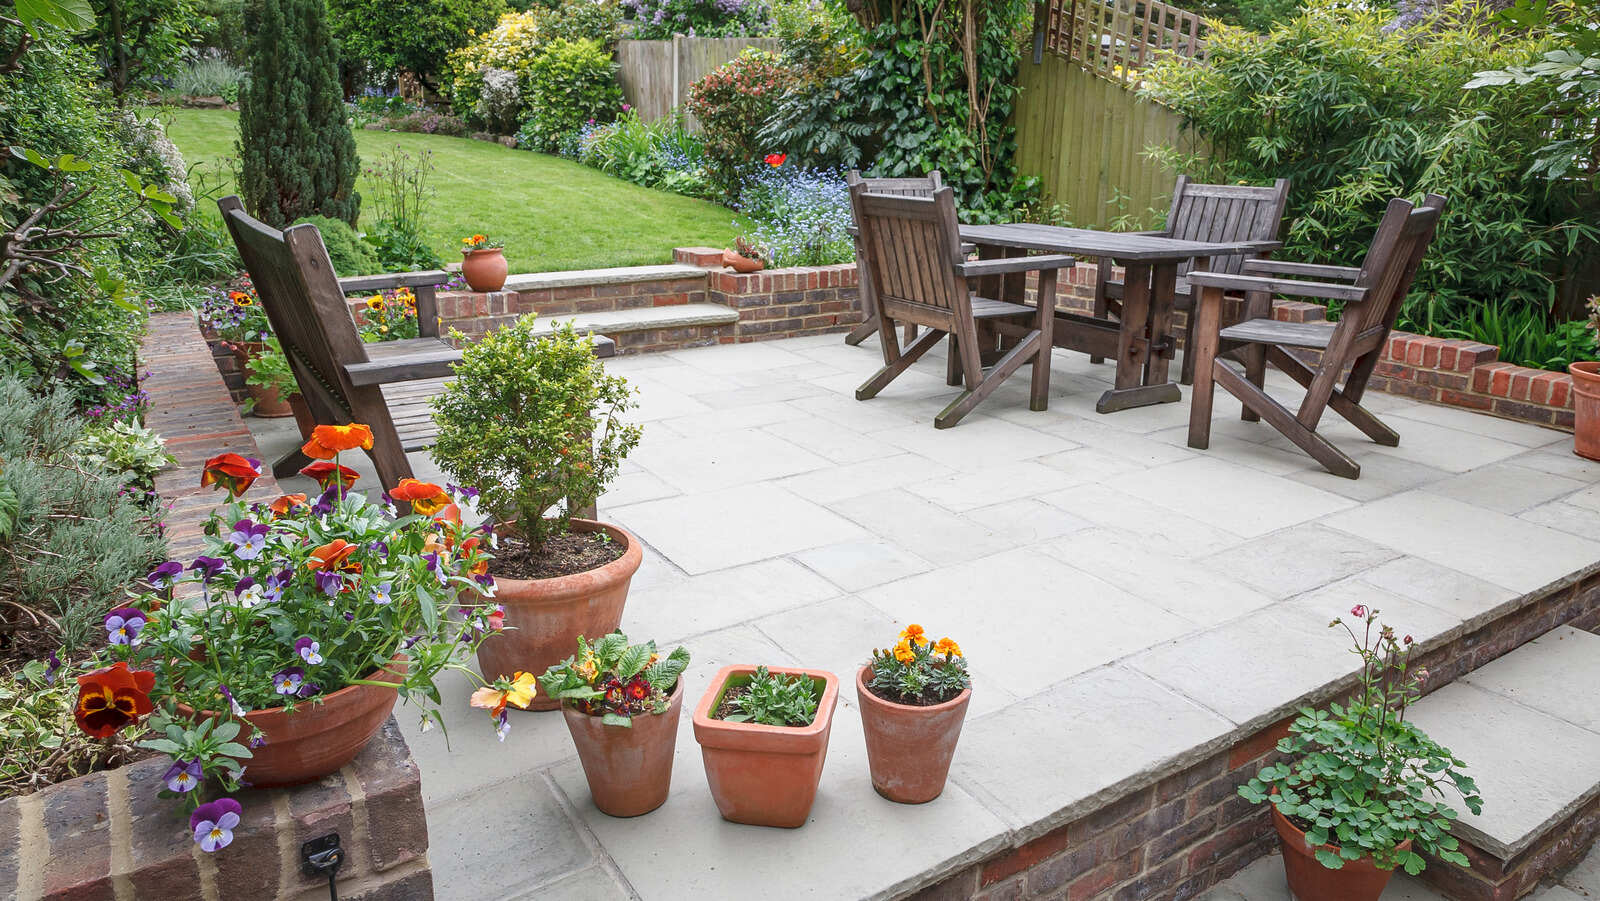
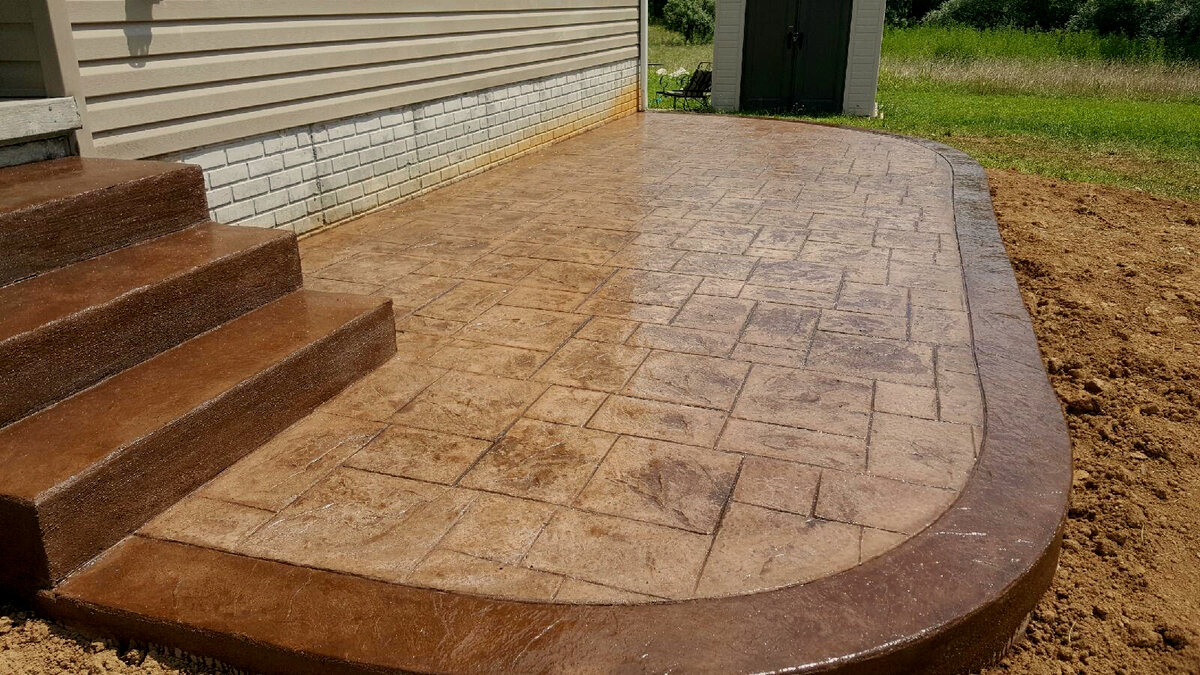
Step 7: Adding Finishing Touches
Adding finishing touches to your concrete patio will elevate its overall appearance and make it a welcoming and enjoyable outdoor space. This step involves adding decorative elements and considering additional features to enhance the functionality of your patio. Follow these steps to add the finishing touches to your concrete patio:
- Decorative options: Consider adding decorative finishes, such as stamped patterns, exposed aggregate, or colored concrete, to enhance the visual appeal of your patio. These options allow you to customize the look of your patio to match your personal style.
- Sealing the concrete: Applying a concrete sealer will protect your patio from stains, weathering, and general wear and tear. Choose a sealer that is compatible with your concrete type and follow the manufacturer’s instructions for application.
- Adding borders or edging: Install borders or edging around your patio to create defined boundaries and add a polished look. Choose materials such as pavers, bricks, or stones that complement the style of your patio.
- Incorporating lighting: Install outdoor lighting fixtures or string lights to create a warm and inviting ambiance for evening gatherings on your patio. Consider different lighting options such as overhead lighting, path lights, or accent lighting to highlight specific features.
- Enhancing with landscaping: Surround your patio with beautiful landscaping elements such as plants, shrubs, or a garden. These additions will not only enhance the aesthetic appeal but also provide privacy and create a harmonious outdoor environment.
- Adding functional features: Consider incorporating functional features into your patio design, such as a built-in fire pit, a seating area, or an outdoor kitchen. These additions will enrich your patio’s functionality and create an outdoor space that accommodates your needs.
- Accessorizing: Finally, accessorize your patio with outdoor furniture, cushions, rugs, and decorative accents to make it a comfortable and inviting space. Choose furniture and accessories that are suitable for outdoor use and can withstand various weather conditions.
By adding these finishing touches, you can transform your concrete patio into a stylish and functional outdoor oasis. Take the time to carefully select and incorporate these elements to create a patio space that truly reflects your personal style and enhances your outdoor experience. With the finishing touches complete, you’re ready to move on to the next step: curing the concrete. Stay tuned!
Step 8: Curing the Concrete
Curing is a vital step in the concrete patio construction process that ensures proper hydration and strength development. Curing involves maintaining optimal moisture and temperature conditions for the concrete to fully cure and achieve its maximum durability. Follow these steps to effectively cure your concrete patio:
- Cover the concrete: As soon as you finish the finishing touches, cover the entire surface of the concrete patio with plastic sheeting or a specialized curing compound. This helps retain moisture and prevent excessive evaporation during the curing process.
- Maintain moisture: Regularly check the moisture level of the concrete and moisten it if it starts to dry out. This can be done by lightly spraying water using a garden hose or by occasionally sprinkling water over the concrete surface.
- Avoid traffic and heavy objects: During the curing period, avoid walking or placing heavy objects on the concrete patio. This prevents cracking or damage to the freshly poured and curing concrete.
- Monitor temperature: Keep an eye on the temperature during the curing process. Extreme hot or cold temperatures can affect the curing process negatively. If necessary, provide shade or use insulating blankets to regulate the temperature.
- Length of curing: The curing time for concrete can vary, but generally, it takes about 7 to 14 days for the concrete to achieve sufficient strength. Follow the manufacturer’s guidelines to determine the recommended curing time for the specific type of concrete mix you used.
- Patience is key: Resist the temptation to use the patio before it has fully cured. It’s crucial to allow the concrete enough time to cure properly to ensure its longevity and strength.
Properly curing the concrete is essential to enhance its durability and longevity. By following these steps and giving your concrete patio the necessary time to cure, you’re ensuring that it will withstand the test of time and provide you with years of enjoyment. Once the concrete has fully cured, you’re ready to move on to the final step: sealing and maintenance. Stay tuned!
Read more: How To Demo A Concrete Patio
Step 9: Sealing and Maintenance
Sealing and regular maintenance are essential for preserving the beauty and longevity of your concrete patio. Sealing acts as a protective barrier, preventing stains, water damage, and deterioration, while regular maintenance helps maintain its appearance and structural integrity. Follow these steps to seal and maintain your concrete patio:
- Wait for full curing: It’s important to allow the concrete to fully cure before applying a sealer. Refer to the manufacturer’s instructions for the recommended curing time.
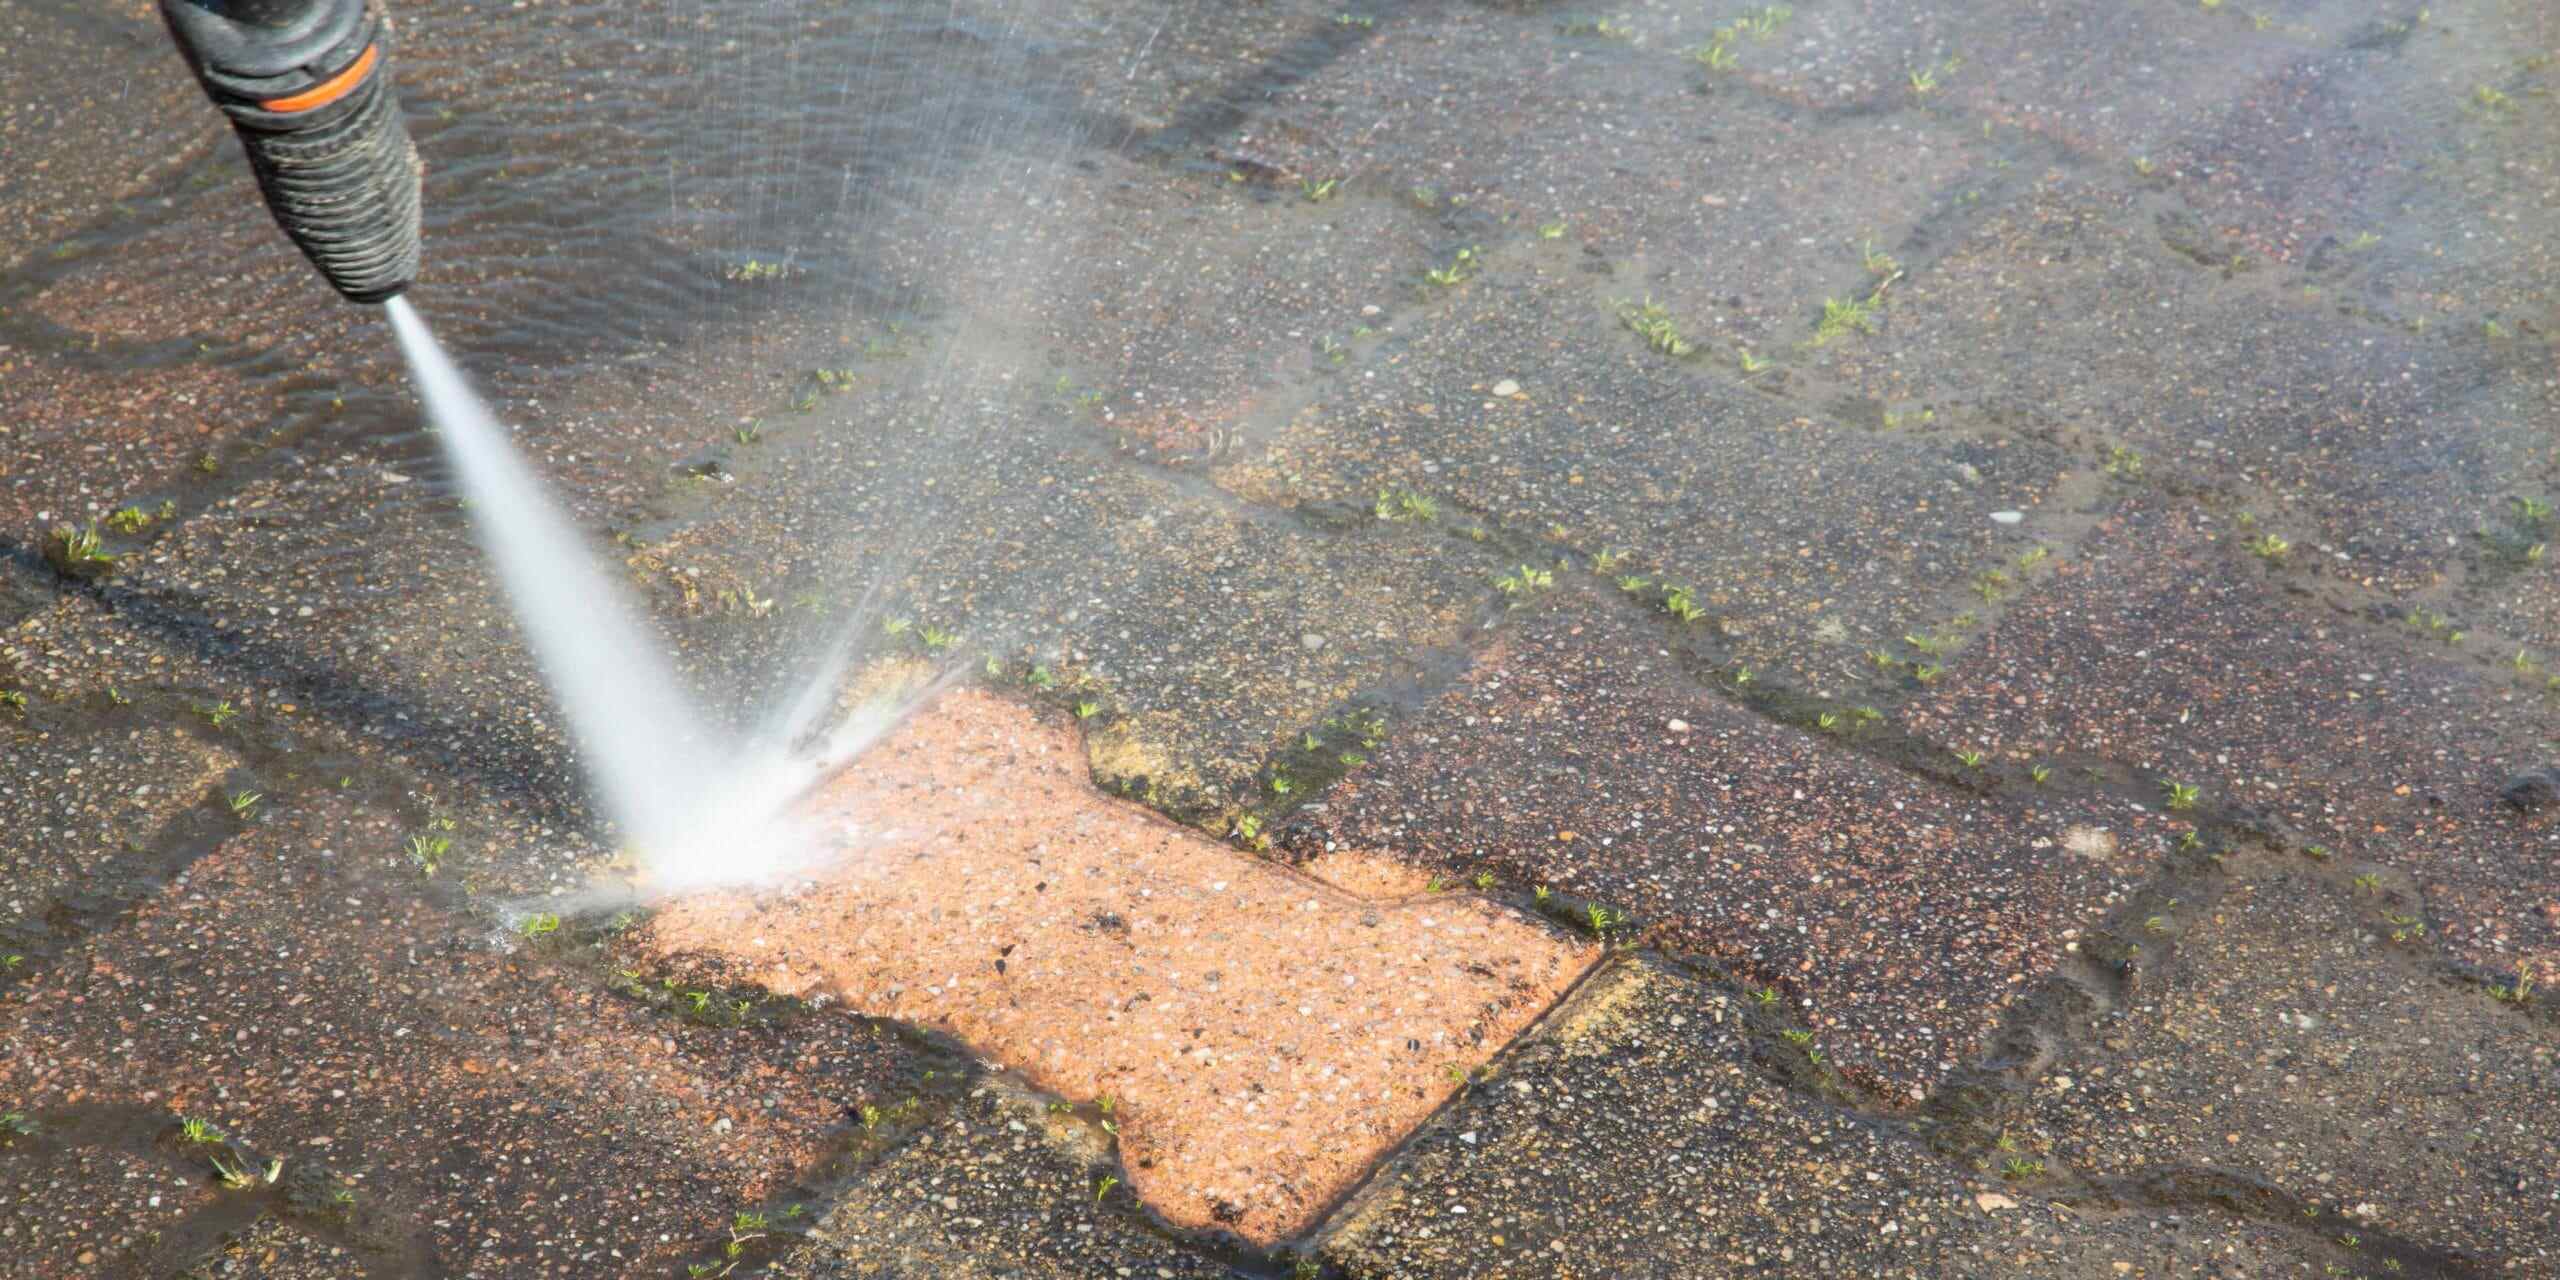
- Clean the surface: Thoroughly clean the patio surface before sealing. Remove any dirt, debris, or stains using a broom, brush, or pressure washer. Allow the surface to dry completely.
- Choose a sealer: Select a high-quality sealer that is suitable for outdoor concrete surfaces. There are various types available, including penetrating sealers or film-forming sealers. Follow the manufacturer’s instructions for application.
- Apply the sealer: Use a roller or sprayer to apply an even coat of sealer to the entire surface of the patio. Work in small sections and ensure that the sealer penetrates into the concrete for maximum protection.
- Allow for drying time: Follow the manufacturer’s instructions for drying and curing time. Avoid walking or placing heavy objects on the patio until the sealer has fully dried.
- Maintain regular cleaning: Keep your concrete patio clean by regularly sweeping or using a leaf blower to remove debris. Periodically wash the surface with a mild detergent and water to remove stains or dirt buildup.
- Address stains promptly: Attend to any spills or stains immediately to prevent them from penetrating and causing permanent discoloration. Use a gentle cleaner and a soft brush to treat stains, rinsing thoroughly afterward.
- Inspect for damage: Regularly inspect your patio for any signs of cracking, chipping, or deterioration. Promptly repair any damage to prevent it from spreading and compromising the structure of the patio.
- Reapply sealer: Over time, the sealer on your patio will wear off. Follow the manufacturer’s recommendations for reapplication, which is typically every few years.
By sealing and maintaining your concrete patio, you are protecting it from the elements and prolonging its lifespan. Regular cleaning and upkeep will ensure that your patio continues to be a beautiful and functional outdoor space for years to come. With these final steps complete, you can now enjoy your well-crafted concrete patio to the fullest!
Conclusion
Creating a concrete patio is a rewarding DIY project that can transform your outdoor space into a beautiful and functional area for relaxation and entertainment. By following the step-by-step guide we’ve provided, you can confidently plan, prepare, and construct a concrete patio that meets your design preferences and withstands the test of time.
From the initial planning and preparation stage to the final sealing and maintenance, each step plays a crucial role in ensuring the success and longevity of your concrete patio. Remember to pay attention to detail, take the time to properly level and smooth the surface, and select the appropriate decorative finishes and functional features to enhance your patio’s appeal and functionality.
Throughout the process, it’s important to prioritize safety and seek professional assistance if needed. While creating a concrete patio is a rewarding endeavor, it does require physical labor and expertise in handling concrete. Don’t hesitate to hire a professional contractor if you’re uncertain about any aspect of the project.
Once your concrete patio is complete, take the time to enjoy it. Furnish it with comfortable outdoor furniture, add greenery and lighting, and create a space that reflects your personal style and accommodates your outdoor living needs. Whether you’re hosting a backyard barbecue, enjoying a morning coffee, or simply unwinding after a long day, your concrete patio will be a cherished and well-utilized part of your home.
Remember, proper maintenance is key to preserving the longevity and appearance of your concrete patio. Regularly clean the surface, address stains promptly, and reapply a sealer as needed. By doing so, you’ll continue to enjoy your patio for many years to come.
So, roll up your sleeves, gather your tools, and embark on the journey of creating your concrete patio. With careful planning, meticulous execution, and a little bit of creativity, your outdoor space will be transformed into a stylish and inviting haven for you, your family, and your friends to enjoy for years to come.
Frequently Asked Questions about How To Create A Concrete Patio
Was this page helpful?
At Storables.com, we guarantee accurate and reliable information. Our content, validated by Expert Board Contributors, is crafted following stringent Editorial Policies. We're committed to providing you with well-researched, expert-backed insights for all your informational needs.


0 thoughts on “How To Create A Concrete Patio”