Articles
How To Remove Sink Trap
Modified: December 7, 2023
Learn the step-by-step process of removing a sink trap in this informative article, providing you with the knowledge and confidence to tackle this plumbing task on your own.
(Many of the links in this article redirect to a specific reviewed product. Your purchase of these products through affiliate links helps to generate commission for Storables.com, at no extra cost. Learn more)
Introduction
When it comes to maintaining a functional plumbing system in your home, knowing how to remove a sink trap can be a valuable skill. The sink trap, also known as a P-trap, is a curved section of pipe located under the sink that helps prevent foul odors from entering your living space and also traps debris to prevent clogs further down the line.
There are several reasons why you might need to remove a sink trap. Perhaps you are experiencing a persistent clog that requires you to inspect and clean the trap. Or maybe you are replacing the sink or doing a renovation that requires removing the trap temporarily. Whatever the reason, removing a sink trap is a relatively straightforward process that can be accomplished with a few basic tools and materials.
In this article, we will guide you through the step-by-step process of removing a sink trap successfully. We will also provide important safety precautions to follow and expert tips to ensure a smooth and hassle-free experience.
Before we dive into the details, let’s quickly take a look at the tools and materials you will need.
Key Takeaways:
- Regularly removing and cleaning the sink trap is essential for maintaining a healthy plumbing system, preventing clogs, foul odors, and potential plumbing issues. This simple maintenance task can save you from costly repairs in the long run.
- Prioritizing safety, gathering the necessary tools, and following the step-by-step process outlined in the article will equip you with the knowledge and skills to confidently remove and reassemble a sink trap whenever needed.
Read more: How To Clean Sink Trap
Tools and Materials Needed
Before you begin removing the sink trap, it’s important to gather all the necessary tools and materials. Here’s a list of items you’ll need:
- Adjustable wrench or pliers: These tools are essential for loosening and removing the slip nuts that secure the trap in place.
- Bucket or basin: To catch any water or debris that may spill out during the process.
- Towels or rags: Use these to wipe up any spills or leaks.
- Pipe joint compound: This is optional but can be applied to the threads of the slip nuts for a better seal.
Once you have gathered all the necessary tools and materials, you are ready to proceed with removing the sink trap.
Step 1: Gather necessary tools
Before you begin removing the sink trap, it’s important to gather all the necessary tools. Having the right tools on hand will make the process much easier and ensure a smoother experience. Here are the tools you will need for this task:
1. Adjustable wrench or pliers: An adjustable wrench or pliers will be used to loosen and remove the slip nuts that secure the sink trap in place. Make sure to choose a wrench or pliers that fit the size of the slip nuts for a better grip and easier removal.
2. Bucket or basin: Having a bucket or basin nearby is essential to catch any water or debris that may spill out during the process. This will help keep your work area clean and prevent any potential water damage.
3. Towels or rags: Keep some towels or rags handy to wipe up any spills or leaks that may occur during the removal process. This will help prevent water from spreading and damaging surrounding areas.
4. Pipe joint compound (optional): While not necessary, applying a pipe joint compound to the threads of the slip nuts can help create a better seal and prevent leaks in the future. If you have a compound available, it can be applied before reinstalling the sink trap.
By gathering these tools beforehand, you’ll be well-prepared and equipped to remove the sink trap with ease and efficiency. Once you have all the necessary tools ready, you can proceed to the next step, which is preparing for the removal process.
Step 2: Preparation
Before you dive into removing the sink trap, it’s important to make a few preparations to ensure a smooth and efficient process. Taking the time to prepare will help prevent any mishaps or damage while removing the trap. Here are the steps to follow in the preparation stage:
1. Clear the area: Start by clearing the area under the sink. Remove any items or objects that may obstruct your access to the sink trap. This will provide you with ample space to work and maneuver during the removal process.
2. Ensure proper lighting: Check the lighting in the area to ensure you can see clearly. It’s crucial to have good visibility while working to avoid any accidents or mistakes. If needed, bring in an additional light source or open nearby curtains to let in natural light.
3. Turn off the water supply: Before you begin removing the sink trap, it’s essential to turn off the water supply. Locate the shut-off valves located underneath the sink and twist them clockwise to shut off the water flow. This step will prevent any water from spilling out when you detach the sink trap.
4. Empty the sink: Make sure the sink is empty and clear of any dishes, debris, or standing water. This will minimize the chance of any unwanted items falling into the trap or causing a mess during the removal process.
5. Put on gloves and protective eyewear: To ensure your safety, it’s recommended to wear gloves and protective eyewear while working under the sink. This will protect your hands from any sharp edges or potential irritants and your eyes from any debris or splashing water.
By following these preparation steps, you’ll create a safe and organized environment for removing the sink trap. Once you have completed the preparations, you’re ready to move on to the next step, which involves taking necessary safety precautions.
Step 3: Safety precautions
When it comes to any plumbing task, including removing a sink trap, it’s important to prioritize safety. Taking the necessary safety precautions will help ensure your well-being and prevent any accidents or injuries. Here are some important safety measures to follow:
1. Turn off the water supply: As mentioned in the previous step, it’s crucial to turn off the water supply before attempting to remove the sink trap. This will prevent any water from spraying or leaking out during the process, reducing the risk of slips and falls.
2. Wear protective gear: Always wear gloves and protective eyewear when working under the sink. Gloves will protect your hands from sharp edges and potential irritants, while protective eyewear will shield your eyes from debris or splashing water.
3. Use caution when working with tools: Take care when using an adjustable wrench or pliers to loosen and remove the slip nuts. Ensure a firm grip on the tool to avoid slipping or causing damage to the surrounding area.
4. Be mindful of your posture: Working in a cramped space under the sink can be challenging. Maintain a proper posture to avoid strain and injury to your back, neck, or shoulders. Take breaks if needed and listen to your body’s signals.
5. Dispose of any hazardous materials properly: When cleaning out the sink trap, you may come across debris or substances that require special disposal, such as chemicals or grease. Follow local regulations and guidelines for the safe disposal of these hazardous materials.
6. Keep children and pets away: It’s important to create a safe work environment by keeping children and pets away from the area while you’re removing the sink trap. This will prevent any accidental harm to them or interference with your work.
By taking these safety precautions into consideration, you’ll minimize the risk of injury and create a secure environment for removing the sink trap. Now that you’re equipped with the necessary safety measures, it’s time to move on to locating and identifying the sink trap in the next step.
Read more: What Is The P-Trap Under The Sink
Step 4: Locate and identify the sink trap
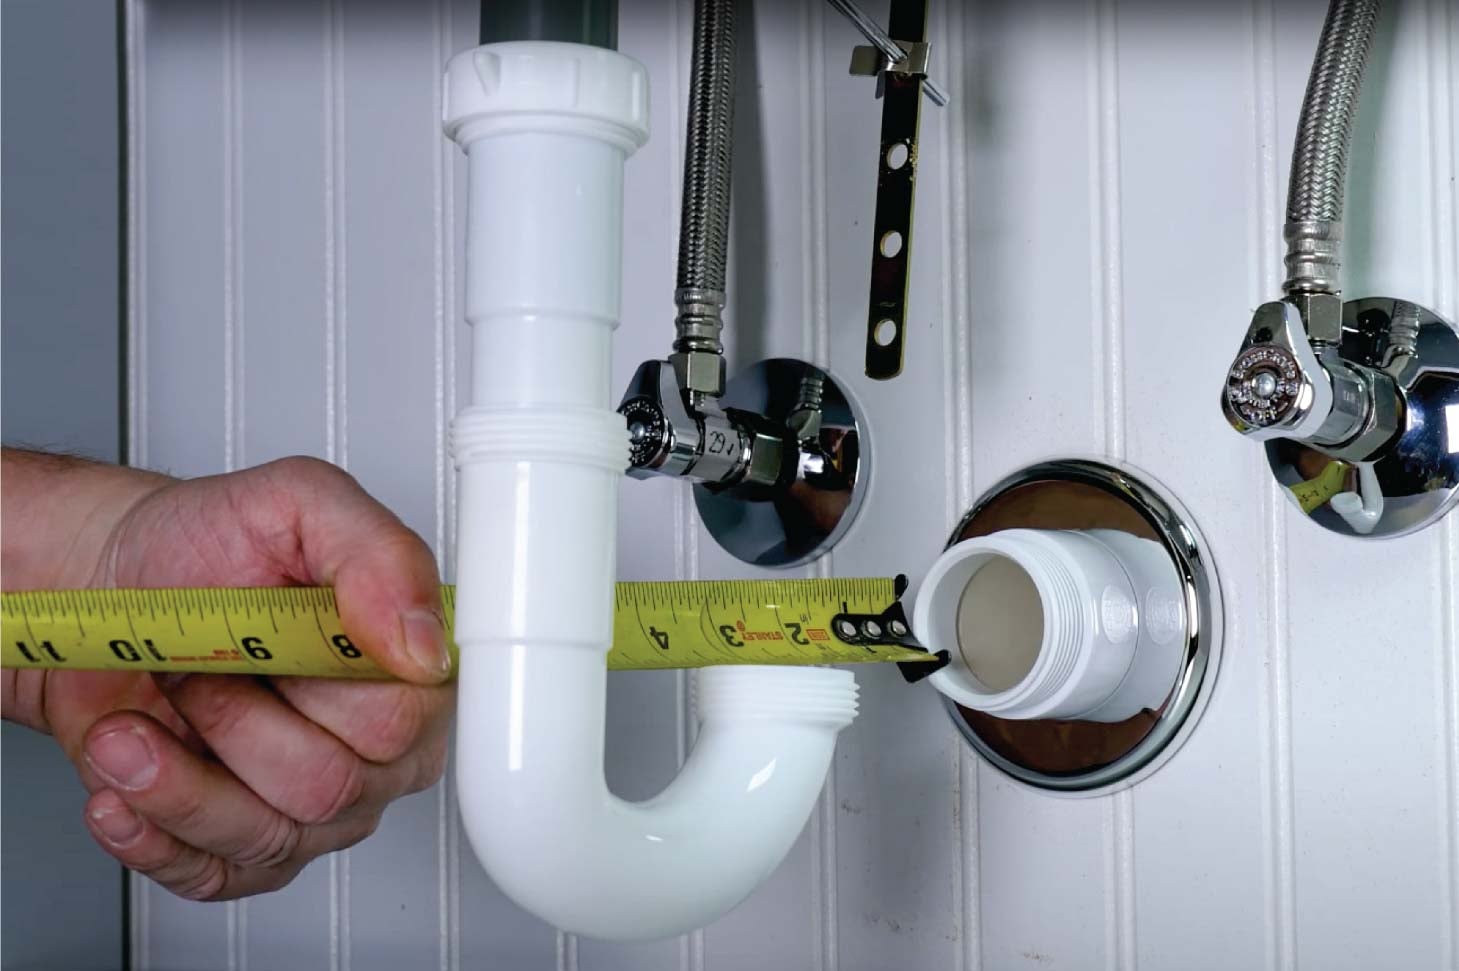
Before you can remove the sink trap, you need to locate and identify its position under the sink. The sink trap is a curved section of pipe that connects the drain pipe to the main plumbing line. Here’s how you can locate and identify the sink trap:
1. Examine the under-sink area: Take a look under the sink and familiarize yourself with the plumbing pipes and connections. The sink trap is typically located near the bottom of the sink, below the drain hole.
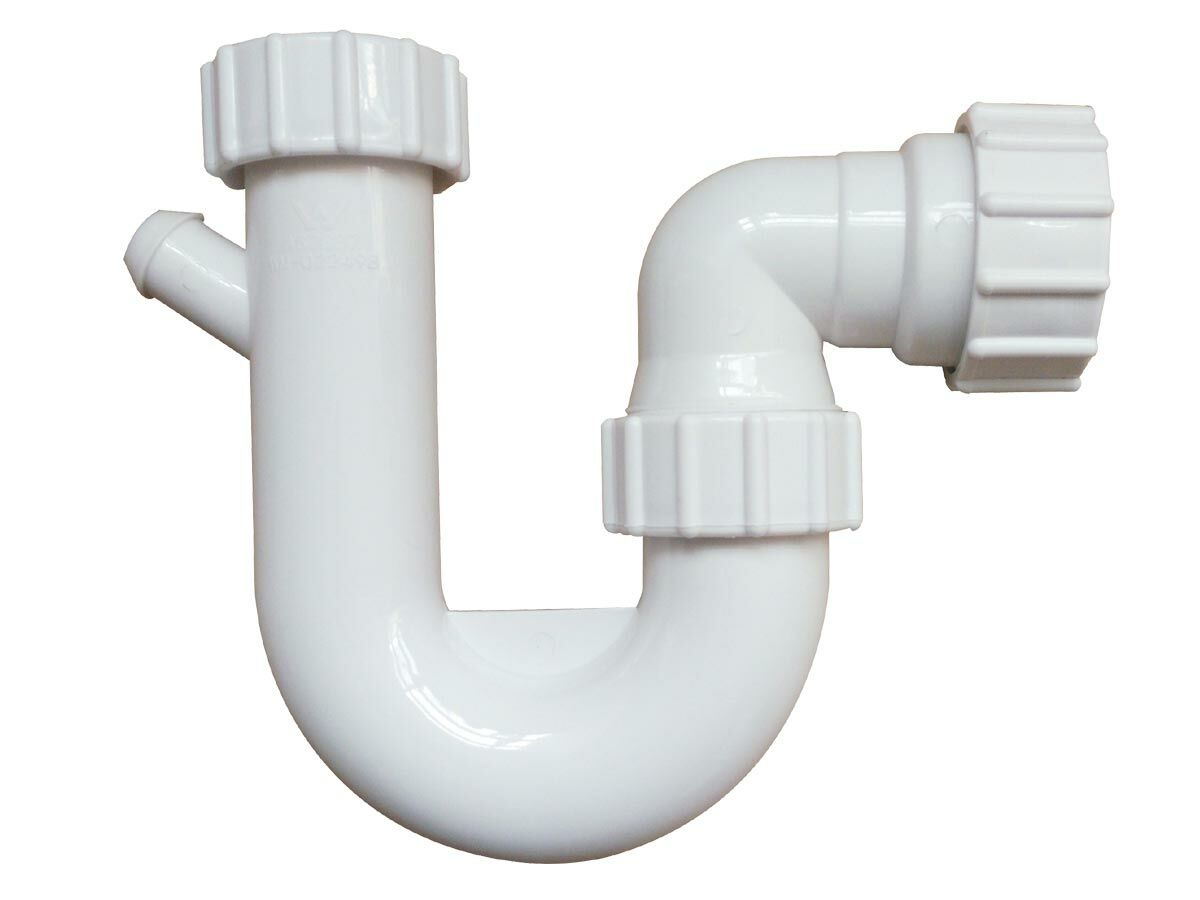
2. Look for a curved pipe: The sink trap will have a noticeable curved shape, resembling the letter “P.” It is designed this way to trap debris and prevent odors from entering your living space. The curved section of the trap is where you’ll be focusing your attention for removal.
3. Identify slip nuts: The sink trap is held in place by slip nuts. Slip nuts are typically located on both ends of the curved section, where the trap connects to the drain pipe and the main plumbing line. These slip nuts are what you’ll be loosening and removing to detach the sink trap.
4. Take note of the material: Sink traps can be made of various materials, such as PVC, metal, or even flexible pipes. Identifying the material of your sink trap will help you determine the appropriate tools and techniques for removal.
If you’re having trouble locating or identifying the sink trap, refer to the manufacturer’s instructions or consult a professional plumber for guidance. Once you have successfully located and identified the sink trap, you’re ready to proceed to the next step: loosening the slip nuts.
Step 5: Loosen the slip nuts
With the sink trap located and identified, it’s time to start removing it. The first step in the removal process is to loosen the slip nuts that secure the trap in place. Here’s how you can loosen the slip nuts:
1. Use an adjustable wrench or pliers: Grab your adjustable wrench or pliers and adjust them to fit the size of the slip nuts. It’s important to have a good grip on the slip nuts to effectively loosen them.
2. Position your tool: Place the adjustable wrench or pliers on the slip nut closest to the sink. This is the nut that connects the sink trap to the drain pipe underneath the sink.
3. Turn counterclockwise: Apply steady pressure in a counterclockwise direction to loosen the slip nut. Be cautious not to overtighten or use excessive force, as this could damage the pipes or fittings.
4. Repeat the process: Move to the slip nut on the other side of the sink trap, which connects the trap to the main plumbing line. Follow the same steps to loosen this slip nut as well.
5. If necessary, use lubrication: If the slip nuts are corroded or difficult to loosen, you can apply a lubricant, such as WD-40, to help loosen the connection. Spray or apply a small amount of lubricant to the slip nuts and let it sit for a few minutes before attempting to loosen them again.
6. Do not fully remove slip nuts: It’s important to note that you don’t need to fully remove the slip nuts at this stage. The goal is to loosen them enough to detach the sink trap from the pipes.
By following these steps, you’ll be able to effectively loosen the slip nuts on the sink trap. Once the slip nuts are adequately loosened, you can proceed to the next step, which involves removing the sink trap itself.
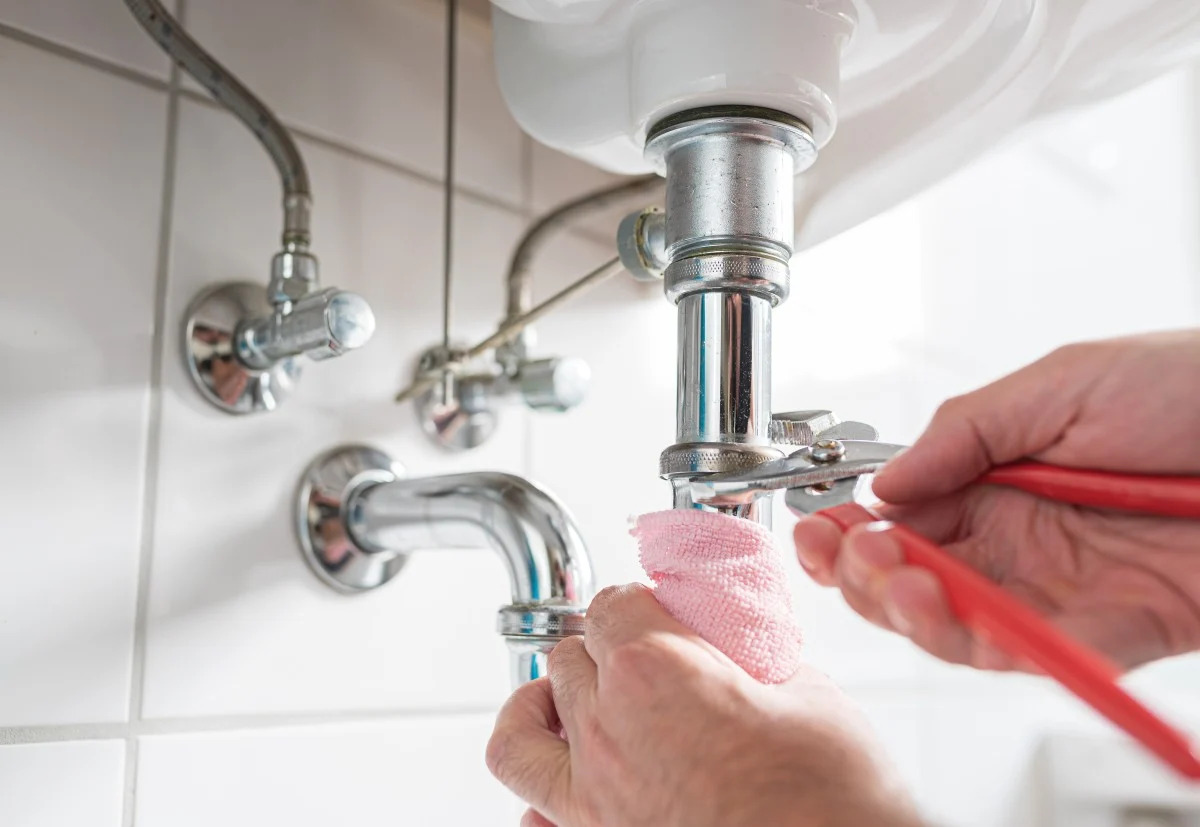
Use a pipe wrench to loosen the slip nuts on the trap. Place a bucket underneath to catch any water. Remove the trap and clean out any debris. Check for any damage or wear and replace if necessary.
Step 6: Remove the slip nuts
Now that the slip nuts are loosened, it’s time to remove them and detach the sink trap from the pipes. Here’s how you can remove the slip nuts:
1. Continue loosening the slip nuts: Using your adjustable wrench or pliers, continue turning the slip nuts counterclockwise until they are completely loose. Make sure to keep a firm grip on the slip nuts as you remove them to prevent them from falling into the sink or damaging any surrounding objects.
2. Slide the slip nuts off the pipes: Once the slip nuts are fully loosened, carefully slide them off the pipes. This will free the sink trap from the connections and allow you to remove it completely.
3. Remove the sink trap: With the slip nuts removed, you can now lift the sink trap out of the plumbing assembly. Be prepared for some water or debris to spill out, so it’s important to have a bucket or basin ready to catch any excess liquid.
4. Inspect the slip nuts and washers: Take a moment to inspect the slip nuts and washers for any signs of damage or wear. If necessary, replace them with new slip nuts and washers before reinstallation. It’s important to ensure a watertight seal to prevent any leaks.
5. Check for any additional connections: In some cases, there may be additional connections beyond the slip nuts holding the sink trap in place. Inspect the trap carefully to see if there are any additional fasteners or attachments, and remove them as needed.
By following these steps, you’ll be able to successfully remove the slip nuts and detach the sink trap from the pipes. With the sink trap removed, you can move on to the next step, which involves cleaning the sink trap itself.
Step 7: Remove the sink trap
With the slip nuts removed, it’s time to fully detach and remove the sink trap from the plumbing assembly. Here’s how you can remove the sink trap:
1. Detach the curved section: The sink trap consists of a curved section that is held in place by the slip nuts. Grasp the curved section of the trap firmly and gently pull it away from the pipes. If the trap feels stuck, you can twist it back and forth slightly to loosen it before pulling it free.
2. Remove any remaining connections: Some sink traps may have additional connections, such as a tailpiece or extension pipe. Inspect the trap and remove any remaining attachments or fasteners as needed. Pay close attention to any retaining clips or brackets that may be holding the trap in place.
3. Dispose of any debris or blockages: Once the sink trap is removed, take a moment to inspect it for any debris or blockages. Clear out any gunk, hair, food particles, or other materials that may have accumulated in the trap. You can use a brush or a small tool to dislodge and remove any stubborn build-up.
4. Clean the sink trap: After removing any debris, rinse the sink trap thoroughly with warm water to ensure it is clean. You can also use a mild detergent or vinegar solution to help eliminate any lingering odors. Allow the trap to dry completely before reinstallation.
5. Inspect the trap for damage: While cleaning the sink trap, inspect it for any signs of damage, such as cracks, leaks, or corrosion. If the trap is damaged, it’s recommended to replace it with a new one for optimal performance and to prevent future issues.
By following these steps, you’ll be able to remove the sink trap from the plumbing assembly and clean it properly. With the sink trap removed and cleaned, you can proceed to the next step, which involves reinstalling the trap.
Read more: How To Remove A Pedestal Sink
Step 8: Clean the sink trap
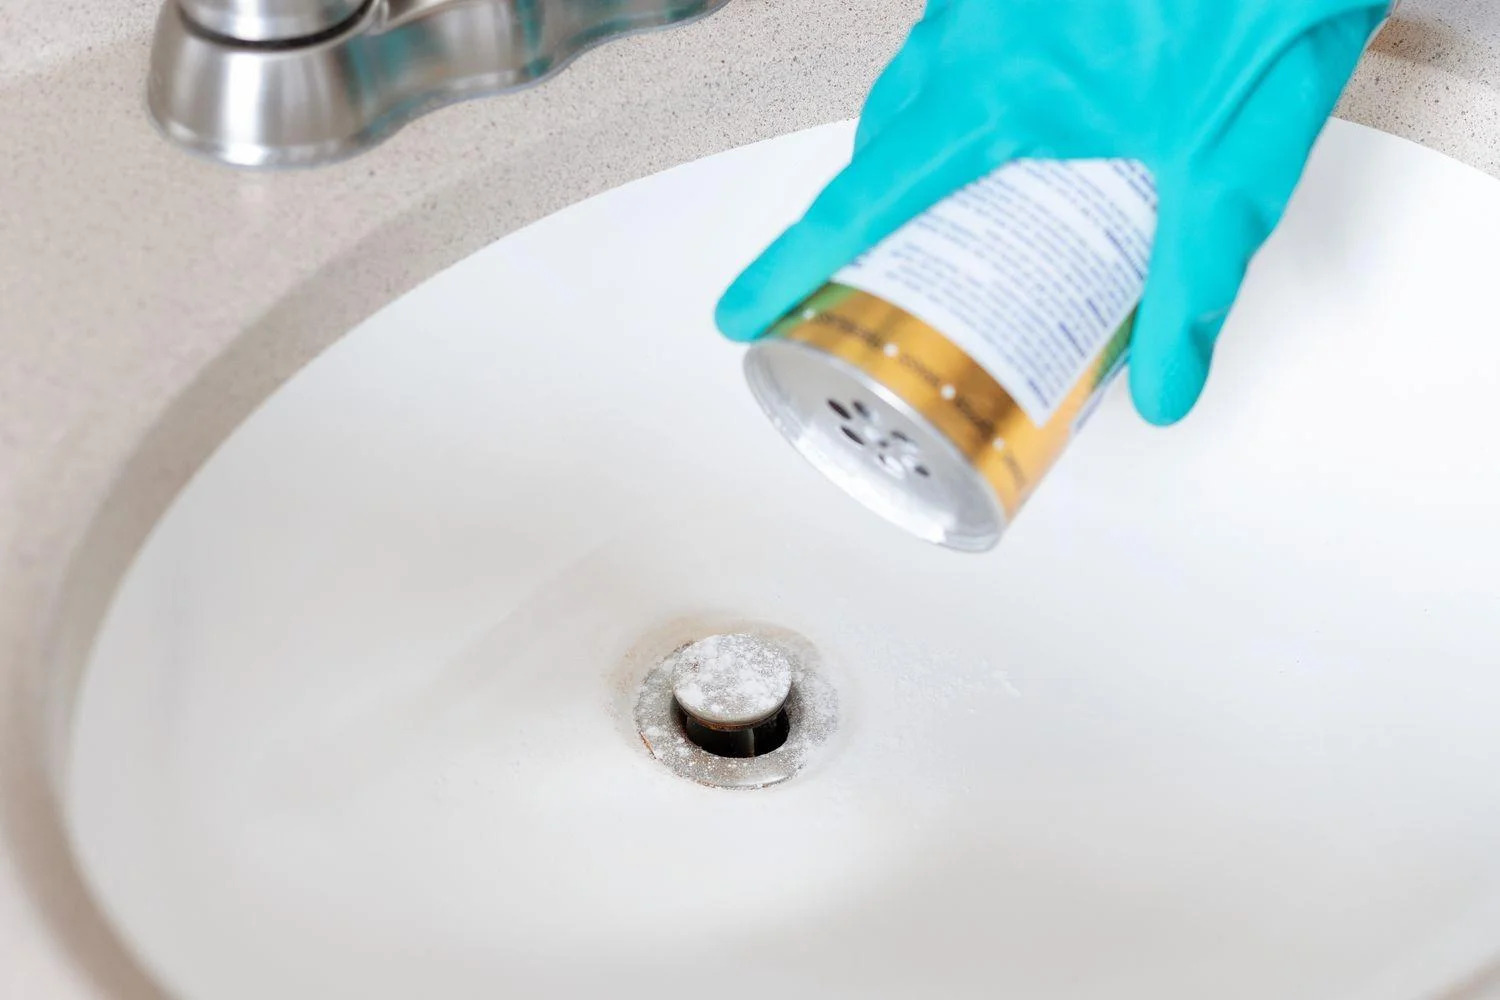
Now that the sink trap is removed, it’s important to clean it thoroughly to ensure optimal performance and prevent any clogs or foul odors. Cleaning the sink trap is a simple process that can be done using a few basic steps. Here’s how you can clean the sink trap:
1. Prepare a cleaning solution: Fill a basin or bucket with warm water and add a small amount of mild detergent or vinegar. This solution will help break down any grease, grime, or residue stuck in the trap.
2. Submerge the sink trap: Take the removed sink trap and submerge it in the cleaning solution. Make sure the trap is fully immersed, allowing the cleaning solution to penetrate all the internal surfaces.
3. Scrub the trap: Use a brush or a small tool, such as a toothbrush or pipe cleaner, to scrub the inside and outside of the sink trap. Pay special attention to the curves and crevices, as these areas are prone to accumulating debris. Scrub thoroughly to remove any stubborn build-up.
4. Rinse the trap: After scrubbing, rinse the sink trap with warm water to remove any remaining cleaning solution and loosened debris. Ensure that all soap or vinegar residue is thoroughly rinsed away.
5. Inspect for any remaining blockages: After cleaning, inspect the sink trap to ensure there are no remaining blockages or debris. If you notice any stubborn residue, you can repeat the cleaning process or use a pipe snake or auger to dislodge it.
6. Allow the trap to dry: Before reinstalling the sink trap, make sure it is completely dry. You can either let it air dry naturally or use a clean towel to pat it dry.
Cleaning the sink trap periodically will help maintain a healthy plumbing system and prevent any potential issues. Once the sink trap is clean and dry, you’re ready to move on to the next step: reinstalling the trap.
Step 9: Reinstall the sink trap
After cleaning the sink trap, it’s time to reinstall it back into the plumbing assembly. Follow these steps to properly reinstall the sink trap:
1. Apply pipe joint compound (optional): If desired, you can apply a small amount of pipe joint compound to the threads of the slip nuts. This compound helps create a better seal and reduces the risk of leaks. Apply the compound sparingly and evenly to the threads.
2. Position the sink trap: Align the sink trap with the connections under the sink. Make sure the curved section of the trap is facing downward and the slip nuts are positioned to screw onto the corresponding pipes.
3. Slide slip nuts onto the pipes: Slide the slip nuts onto the respective pipes, ensuring they fit snugly. Hand-tighten the slip nuts initially, holding the trap in place without overtightening them.
4. Use an adjustable wrench or pliers: With the slip nuts partially tightened, use an adjustable wrench or pliers to give each slip nut a final tightening. Turn them clockwise until they are secure but be careful not to overtighten, as this can damage the pipes or fittings.
5. Check alignment and levelness: Once the sink trap is securely fastened, check its alignment and levelness. Make sure the trap is straight and properly aligned with the drain and main plumbing line. Adjust as needed to ensure everything is properly connected.
6. Test for leaks: Turn on the water supply and let it run for a few minutes. During this time, closely inspect the connections and joints for any signs of leaks. If you notice any leaks, immediately shut off the water supply and tighten the slip nuts further until the leak is resolved.
By following these steps, you’ll be able to successfully reinstall the sink trap. It’s important to ensure a secure and watertight connection to prevent any leaks or issues. Once the trap is properly reinstalled, you can move on to the final step: testing for leaks.
Step 10: Test for leaks
After reinstalling the sink trap, it’s crucial to test for any potential leaks to ensure a secure and properly functioning plumbing system. Here’s how you can test for leaks:
1. Turn on the water supply: Slowly turn on the water supply, allowing water to flow through the sink and down the drain. Keep a close eye on the connections and joints of the sink trap as water starts to flow.
2. Check for visible leaks: Inspect the connections and joints for any visible signs of leaks. Look for drips, water pooling, or wetness around the slip nuts or other connection points.
3. Use a dry cloth or tissue: Take a dry cloth or tissue and gently run it along the connections and joints. This will help detect any hidden or subtle leaks that may not be easily visible. Pay attention to any wet spots or dampness on the cloth.
4. Ensure a watertight seal: If you notice any leaks, immediately tighten the slip nuts further using an adjustable wrench or pliers. Make sure to turn them clockwise to create a watertight seal. Repeat the testing process by running water again to check for resolved leaks.
5. Monitor for longer durations: It’s recommended to monitor the sink trap for leaks over a longer period of time, such as several hours or overnight. This will help ensure that the sink trap remains leak-free even under continuous water flow.
6. Seek professional help if needed: If you encounter persistent leaks or difficulties in resolving them, it may be necessary to seek assistance from a professional plumber. They have the expertise and tools to properly address any plumbing issues.
By carefully testing for leaks, you can identify and address any potential problems before they escalate. Ensuring a leak-free sink trap will provide peace of mind and maintain the integrity of your plumbing system.
With the final step completed, you have successfully removed, cleaned, and reinstalled the sink trap. Congratulations on your accomplishment! Remember, regular maintenance and proper care will help keep your plumbing system in optimal condition and prevent future issues.
Conclusion
Removing a sink trap may seem like a daunting task at first, but with the right tools, knowledge, and guidance, it can be a manageable DIY project. By following the step-by-step instructions outlined in this article, you have learned how to safely remove, clean, and reinstall a sink trap.
Understanding the importance of the sink trap and its role in preventing clogs and foul odors is essential for maintaining a functional plumbing system in your home. Regularly removing and cleaning the trap can help improve the efficiency of your sink and prevent plumbing issues down the line.
Throughout the process, it’s crucial to prioritize safety by following the necessary precautions, such as turning off the water supply, wearing protective gear, and using tools with caution. These measures help ensure your well-being and prevent any accidents or injuries.
Remember to gather all the necessary tools and materials before starting, including an adjustable wrench or pliers, a bucket or basin, towels or rags, and pipe joint compound (if desired). These items will make the removal process smoother and more efficient.
Once the sink trap is removed, taking the time to properly clean it will help maintain its functionality and prevent any potential blockages or foul odors. By using a cleaning solution, scrubbing the trap, and thoroughly rinsing it, you can ensure its optimal performance.
Reinstalling the sink trap involves aligning the trap with the connections, tightening the slip nuts, and checking for any leaks. Testing for leaks is a crucial final step to ensure a secure and watertight connection. If any leaks are detected, promptly tightening the slip nuts further will resolve the issue.
By completing these steps, you have gained the knowledge and skills to remove and reassemble a sink trap with confidence. However, if you encounter any difficulties or persistent leaks, it’s always advisable to seek professional assistance from a plumber.
Maintaining a healthy plumbing system is essential for the overall functionality and comfort of your home. By regularly removing and cleaning the sink trap, you can prevent clogs, foul odors, and potential plumbing issues. This simple maintenance task can prolong the lifespan of your plumbing system and save you from costly repairs in the long run.
With your newly acquired knowledge, you are now equipped to tackle the removal of a sink trap whenever the need arises. Remember to follow the safety precautions, gather the necessary tools, and take your time to ensure a successful removal process. Happy plumbing!
Frequently Asked Questions about How To Remove Sink Trap
Was this page helpful?
At Storables.com, we guarantee accurate and reliable information. Our content, validated by Expert Board Contributors, is crafted following stringent Editorial Policies. We're committed to providing you with well-researched, expert-backed insights for all your informational needs.


0 thoughts on “How To Remove Sink Trap”