Articles
How To Remove A Drop-In Sink
Modified: October 19, 2024
Learn how to remove a drop-in sink with step-by-step instructions and helpful tips. Our articles provide expert advice and guidance for this home improvement project.
(Many of the links in this article redirect to a specific reviewed product. Your purchase of these products through affiliate links helps to generate commission for Storables.com, at no extra cost. Learn more)
Introduction
Removing a drop-in sink can be a daunting task, but with the right tools and step-by-step instructions, it is a doable DIY project. Whether you want to upgrade to a new sink or make necessary repairs, knowing how to remove a drop-in sink is essential. This article will guide you through the process, ensuring that you can complete the task efficiently and without any hiccups.
Before you begin, it’s important to gather the necessary tools and materials. A few key items you’ll need include an adjustable wrench, a bucket or basin, plumber’s putty or silicone sealant, and a screwdriver. Additionally, make sure you have a towel or old cloth to protect your surface and prevent any damage.
Once you have the necessary tools, the first step is to turn off the water supply. Locate the shut-off valves beneath the sink and turn them clockwise until they are fully closed. This will ensure that no water flows while you’re working on removing the sink.
Next, it’s time to disconnect the plumbing connections. Use an adjustable wrench to loosen the nuts on the water supply lines and the drain pipe. Place a bucket or basin beneath the connections to catch any excess water that may be present.
Once the plumbing connections are disconnected, you’ll need to remove the countertop sealant. Gently scrape away the old sealant using a scraper or putty knife. Take care not to damage the countertop surface while doing this. If there are any stubborn sealant remnants, you can use a solvent or adhesive remover to help soften and remove them.
Now it’s time to tackle the sink clips. These clips hold the drop-in sink in place, so you’ll need to loosen them before you can remove the sink. Use a screwdriver to loosen the screws on the clips while supporting the sink from underneath. Once the screws are loose, you can lift the sink slightly to release it from the clips.
With the sink clips loosened, it’s time to lift and remove the drop-in sink. Make sure to have a firm grip on the sink and lift it straight up to avoid any damage. If the sink is heavy, it may require two people to safely lift and remove it. Place the sink aside in a safe area.
Once the sink is removed, take the opportunity to thoroughly clean the countertop surface. Remove any debris, old sealant, or adhesive remnants using a mild cleaner and a sponge or cloth. This will ensure a clean and smooth surface for installing a new sink or making any necessary repairs.
If you’re planning to install a new sink, make sure to choose one that fits the dimensions of the previous sink cutout. Measure the dimensions carefully and select a sink that matches those measurements.
If you’re not replacing the sink, but rather making repairs, now is the time to do so. Inspect the plumbing connections, the faucet, and any other components that may need attention. Replace or repair any damaged parts before proceeding.
Once the repairs or installation are complete, it’s time to reconnect the plumbing connections. Use the adjustable wrench to tighten the nuts on the water supply lines and the drain pipe. Double-check that all connections are secure and free of leaks.
Finally, turn on the water supply by turning the shut-off valves counterclockwise. Check for any leaks and ensure the water is flowing properly. If everything looks good, congratulations! You’ve successfully removed a drop-in sink.
To conclude, removing a drop-in sink may seem intimidating at first, but by following the step-by-step instructions outlined in this article, you can complete the task with confidence. Remember to gather the necessary tools, turn off the water supply, disconnect the plumbing connections, remove the countertop sealant, loosen the sink clips, lift and remove the sink, clean the countertop, and, if necessary, install a new sink or make repairs. By completing each of these steps carefully, you’ll achieve a successful removal of your drop-in sink. Happy DIY-ing!
Key Takeaways:
- Removing a drop-in sink is a manageable DIY project with the right tools and step-by-step guidance. From turning off the water supply to reconnecting plumbing connections, this article provides comprehensive instructions for a successful removal process.
- Whether installing a new sink or making repairs, following manufacturer’s instructions and taking time for thorough cleaning and testing ensures a functional and visually appealing sink area. Remember to appreciate your hard work and enjoy the benefits of a well-executed DIY project.
Read more: How To Remove A Drop Ceiling
Step 1: Gather the necessary tools and materials
Before you embark on the task of removing a drop-in sink, it’s crucial to gather all the tools and materials you’ll need. Having everything ready beforehand will save you time and ensure a smooth workflow. Here’s a list of the essential items:
- Adjustable wrench: This versatile tool will come in handy for loosening and tightening plumbing connections.
- Bucket or basin: You’ll need a container to catch any water that might spill out when disconnecting the plumbing.
- Plumber’s putty or silicone sealant: These sealants are necessary for creating a watertight seal between the sink and the countertop.
- Screwdriver: A screwdriver will be required to loosen the screws on the sink clips and potentially other parts of the sink.
- Towel or old cloth: This will serve as a protective layer for your surface, preventing any scratches or damage while you work.
- Scraper or putty knife: You’ll use this tool to remove the old sealant or adhesive from the countertop.
- Solvent or adhesive remover: In case there are stubborn remnants of sealant or adhesive, a solvent or adhesive remover can help dissolve them for easier removal.
Ensure that you have all these tools readily available before you start the removal process. This will save you from any frustrating last-minute trips to the hardware store.
Additionally, it’s a good idea to take note of the specific requirements for the sink you’re removing. Different sinks may have unique clips or fasteners, so it’s helpful to research the exact model or consult the manufacturer’s instructions if available.
Furthermore, it can be beneficial to wear protective gloves when handling sharp tools or working with sealants and chemicals. Safety goggles may be necessary if there’s a risk of debris or particles flying into your eyes.
By having all the necessary tools and materials in place, you’ll be well-prepared to tackle the task of removing a drop-in sink. With everything within reach, you can proceed efficiently and confidently to the next steps in the process.
Step 2: Turn off the water supply
Before you begin the process of removing a drop-in sink, it’s imperative to turn off the water supply. This step ensures that you won’t have any unexpected water leaks or flooding during the removal process. Here are the detailed steps to follow:
- Locate the shut-off valves: Look under your sink and find the shut-off valves. These valves are typically located near the water supply lines.
- Identify the hot and cold water shut-off valves: There are usually two valves, one for hot water and one for cold water. The hot water valve is typically on the left side, while the cold water valve is on the right side. Turn both valves clockwise to shut them off.
- Check if the water supply is completely shut off: After turning the shut-off valves clockwise, check if the water supply has stopped completely. You can do this by turning on the faucet to see if any water flows. If there’s no water coming out, you have successfully turned off the water supply.
It’s important to note that shutting off the water supply is crucial even if you don’t see any visible leaks. Water pressure can build up in the pipes, and removing the sink without turning off the water supply can result in water splashes or accidental spills, causing damage to your property or flooding.
By shutting off the water supply, you create a safe environment to work in, allowing you to focus on the removal process without any concerns about water-related accidents. Remember to turn off both the hot and cold water supply valves to ensure that all water flow is properly cut off.
It’s a good practice to double-check that the water supply has been shut off before proceeding to the next steps. This will give you peace of mind and help prevent any potential mishaps.
Once you’ve successfully turned off the water supply, you’re ready to move on to the next step of disconnecting the plumbing connections. With the water supply safely turned off, you can proceed with confidence, knowing that you’ve taken the necessary precautions to prevent any water-related incidents during the removal process.
Step 3: Disconnect the plumbing connections
After turning off the water supply, the next step in removing a drop-in sink is to disconnect the plumbing connections. This involves loosening and detaching the pipes and water supply lines connected to the sink. Here’s a detailed guide on how to do it:
- Prepare a bucket or basin: Place a bucket or basin beneath the sink to catch any water that may spill out during the disconnection process. This will help prevent any mess and make cleanup easier.
- Use an adjustable wrench: Grab an adjustable wrench, as it will be your go-to tool for loosening and tightening the nuts on the plumbing connections.
- Disconnect the water supply lines: Locate the water supply lines at the back of the sink. These are usually flexible hoses that connect the faucet to the shut-off valves. Use the adjustable wrench to loosen the nuts connecting the water supply lines to the shut-off valves. Once loosened, you should be able to detach the water supply lines with ease. Be mindful of any water that may still be present in the lines and direct it into the bucket or basin.
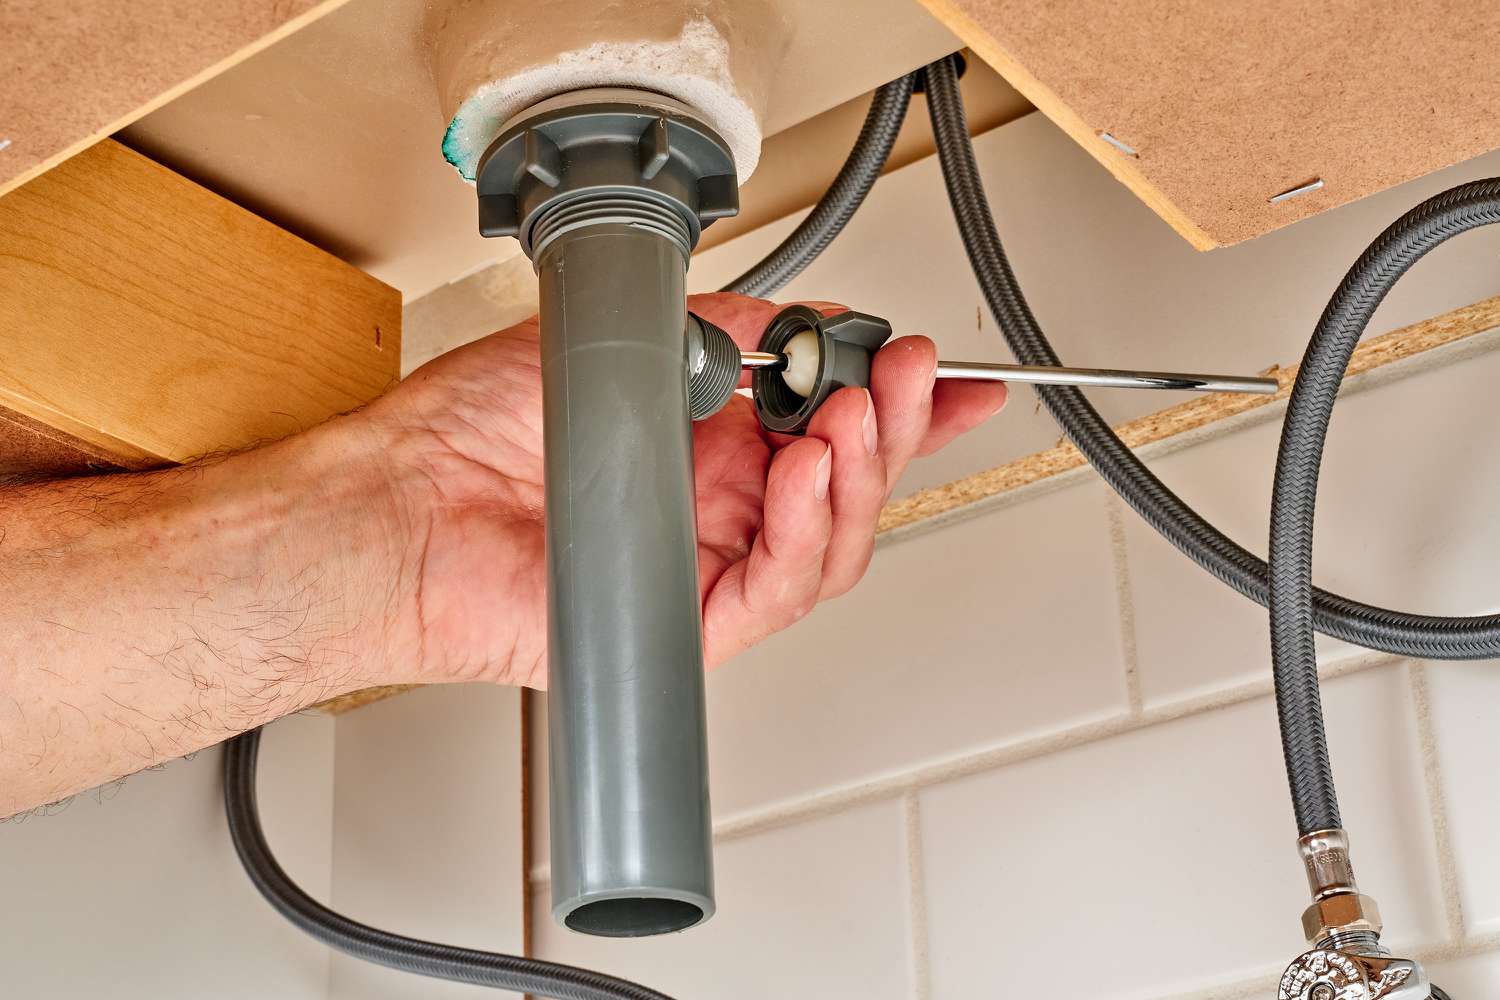
- Disconnect the drain pipe: Locate the drain pipe beneath the sink. Use the adjustable wrench to loosen the nut connecting the drain pipe to the sink’s drain outlet. Similar to the water supply lines, be prepared for any residual water in the drain pipe and catch it with the bucket or basin as you disconnect the pipe.
- Inspect the plumbing connections: Once all the connections are disconnected, take a moment to inspect the plumbing connections for any signs of damage or wear. This is a good opportunity to identify any components that may need to be replaced or repaired before reinstalling the sink.
It’s important to be cautious when disconnecting the plumbing connections, especially if you encounter resistance or difficulty in loosening the nuts. Applying excessive force can lead to damage or leaks. If you’re unsure or encounter any complications, it’s best to consult a professional plumber for assistance.
By following these steps to disconnect the plumbing connections, you’ll be one step closer to removing the drop-in sink. Remember to take your time and work carefully to ensure that the connections are properly detached without causing any damage to the pipes or surrounding fixtures.
Next, we’ll move on to Step 4, which involves removing the countertop sealant to prepare for the actual removal of the sink.
Step 4: Remove the countertop sealant
Before you can safely remove the drop-in sink, you need to remove the sealant that is holding it in place on the countertop. Here’s a step-by-step guide on how to remove the countertop sealant:
- Gather the necessary tools: To remove the countertop sealant, you’ll need a scraper or putty knife. Make sure you have one of these tools on hand before you proceed.
- Begin to scrape away the sealant: Starting at one end of the sink, gently insert the scraper or putty knife beneath the edge of the sink where it meets the countertop. Apply light pressure and slowly scrape away the sealant. Take care not to dig into the countertop surface and avoid using excessive force to prevent damage.
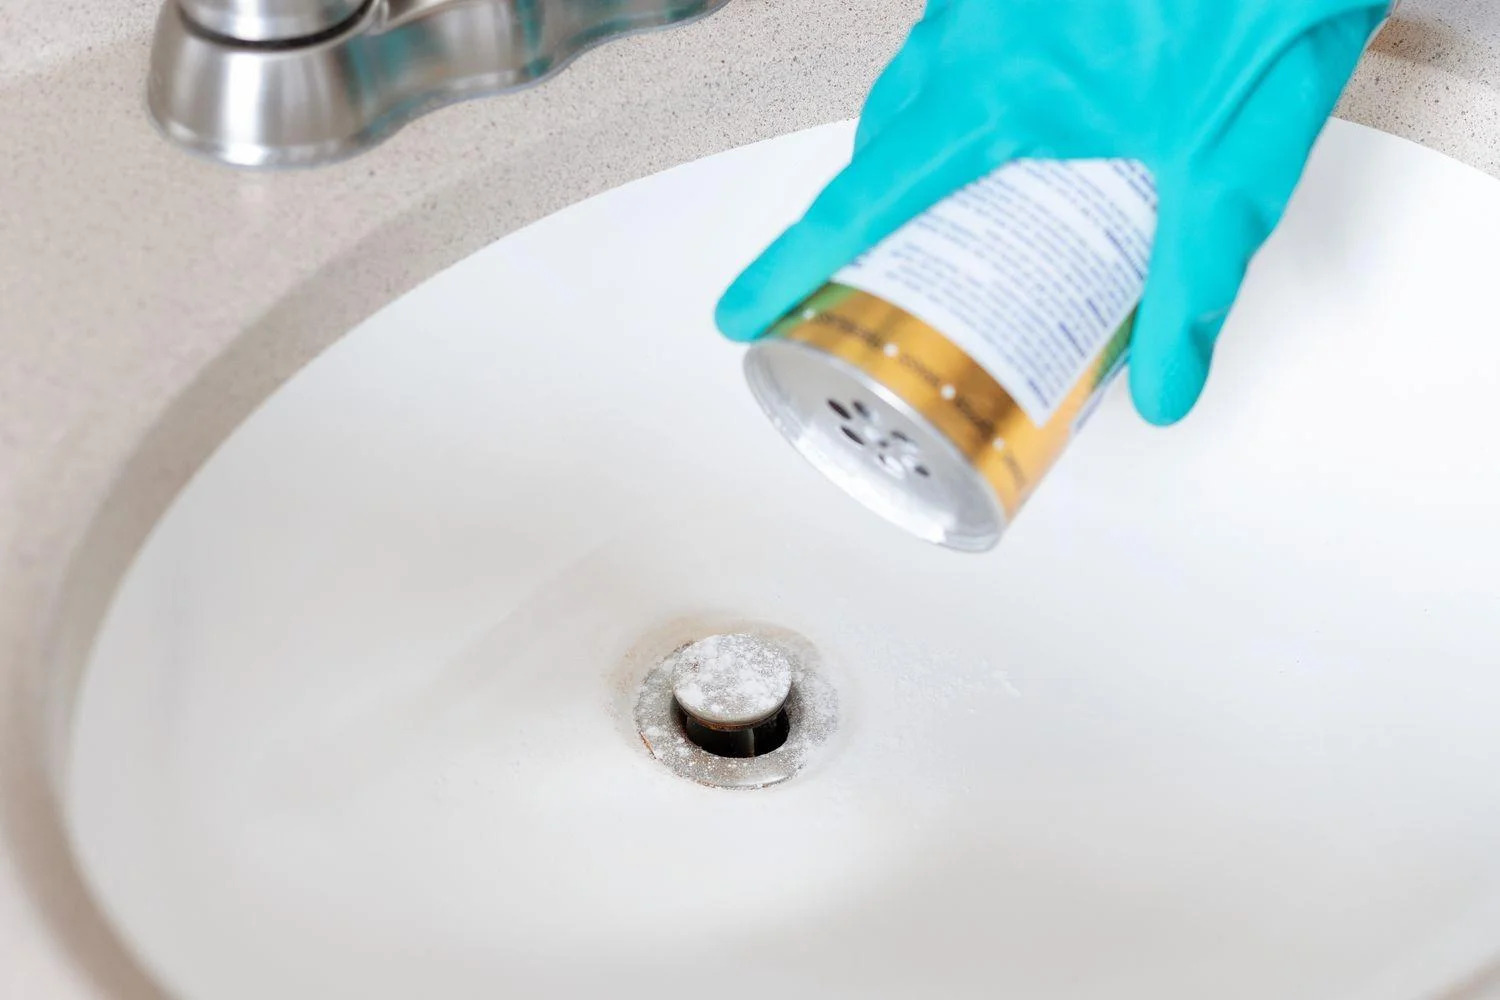
- Continue scraping around the sink: Gradually work your way around the sink, scraping away the sealant as you go. Be patient and thorough, ensuring you remove all traces of the sealant. If you encounter stubborn patches of sealant, you can use a solvent or adhesive remover to soften it, making it easier to scrape away.
- Dispose of the old sealant: Place any scraped-off sealant into a disposable bag or a trash container. This will help keep your work area clean and prevent any accidental transfer of the sealant to other surfaces.
- Clean the countertop: After you have removed the sealant, take a moment to clean the countertop surface. Use a mild cleaner and a sponge or cloth to wipe away any remaining residue from the old sealant. This will ensure a clean and smooth surface for the next steps of the removal process.
Removing the countertop sealant can be a time-consuming process, especially if the sealant is stubborn or has been in place for a long time. Take your time to scrape away the sealant carefully, ensuring you maintain the integrity of the countertop surface.
If the sealant proves to be particularly difficult to remove, you may need to use a solvent or adhesive remover to help soften it. Be sure to follow the manufacturer’s instructions and apply the solvent or adhesive remover with caution, as some products may have strong fumes or be harmful to certain countertop materials.
By removing the countertop sealant, you’re getting closer to successfully removing the drop-in sink. With the sealant gone, you can proceed to the next steps, which involve loosening the sink clips and lifting the sink out of the countertop.
Next, in Step 5, we’ll cover how to effectively loosen the sink clips to prepare for the actual removal of the sink.
Read more: How To Remove Sink Trap
Step 5: Loosen the sink clips
Loosening the sink clips is a crucial step in preparing to remove a drop-in sink. These clips hold the sink in place on the countertop, and by loosening them, you ensure that the sink is ready to be lifted out. Here’s a step-by-step guide on how to loosen the sink clips:
- Locate the sink clips: Take a look underneath the sink and locate the metal clips that secure the sink to the countertop. Typically, there will be a clip near each corner of the sink.
- Prepare a screwdriver: You’ll need a screwdriver to loosen the screws on the sink clips. Make sure you have a screwdriver that fits the screws properly to avoid slipping or stripping the screws.
- Support the sink: Before you begin loosening the sink clips, it’s important to provide support to the sink from underneath. You can use your hand or a wooden block to prevent the sink from dropping or tilting while you work.
- Loosen the screws: Using the screwdriver, start loosening the screws on the sink clips. Rotate the screws counterclockwise to release tension and loosen the clips. Take care not to fully remove the screws at this point, just loosen them enough to allow the sink to be lifted.
- Repeat for all sink clips: Work your way around the sink, loosening all the screws on the sink clips. Ensure that each clip is sufficiently loosened to allow the sink to be lifted free from the countertop.
While loosening the sink clips, it’s important to exercise caution and provide adequate support to prevent any accidental damage. By loosening the clips gradually, you ensure that the sink is safely secured until you’re ready to lift it out.
If you encounter any stubborn clips or screws that are difficult to loosen, you can try applying a lubricant, such as WD-40, to help loosen them. Allow the lubricant to penetrate for a few minutes before attempting to loosen the clips again.
Remember, each sink may have a different number and type of clips, so take note of the arrangement and keep track of the screws as you loosen them. This will make the reinstallation process easier if you’re replacing the sink or making repairs.
Once you have successfully loosened all the sink clips, you’re ready to move on to the next step of actually lifting and removing the drop-in sink. With the sink clips loosened, the removal process becomes much easier and safer.
Next, in Step 6, we’ll guide you through the process of lifting and removing the drop-in sink from the countertop.
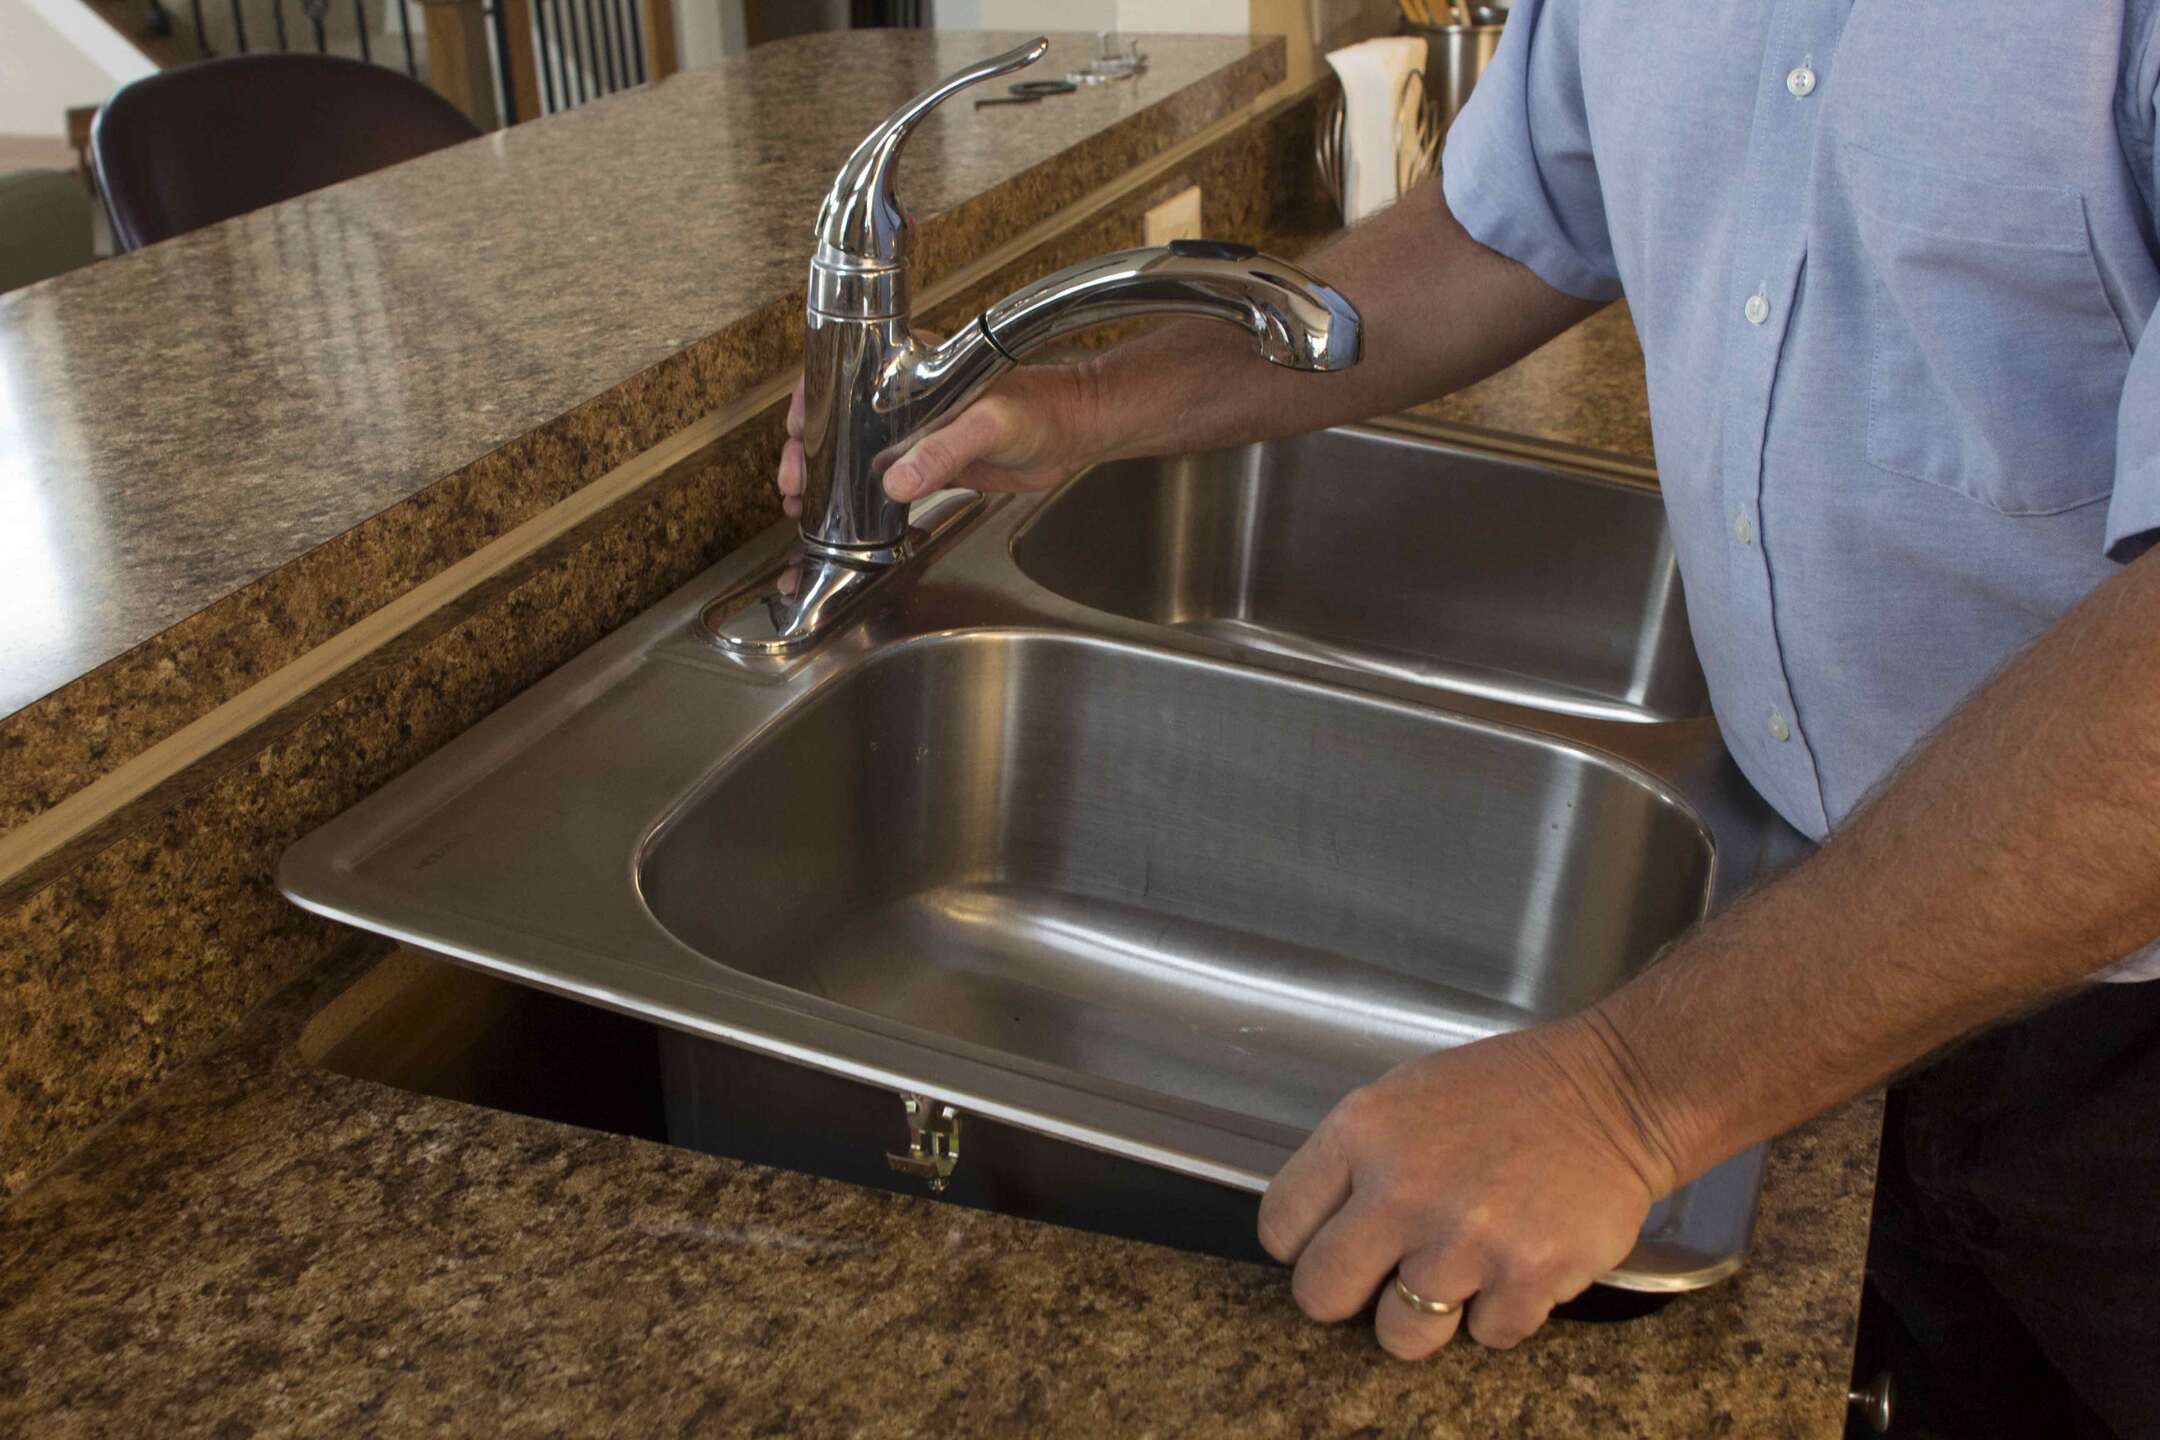
Step 6: Lift and remove the drop-in sink
Now that you’ve successfully loosened the sink clips, it’s time to lift and remove the drop-in sink from the countertop. This step requires caution and careful handling to prevent any damage to the sink or the surrounding area. Follow these steps to safely lift and remove the drop-in sink:
- Ensure the sink is properly supported: Before lifting the sink, make sure it is adequately supported from underneath. You can use your hand or a wooden block to provide support and stability.
- Position yourself for lifting: Stand or kneel in a comfortable position that allows you to lift the sink without straining your back or arms. Be mindful of your posture to avoid any injuries.
- Grip the sink firmly: Place your hands on the sides or edges of the sink, ensuring a firm grip. If the sink is heavy or large, it’s advisable to have someone assist you in lifting it to prevent any accidents or strain.
- Lift the sink straight upwards: Slowly and steadily lift the sink straight upwards, exerting equal pressure on both sides. Be careful not to tilt or twist the sink as you lift it to prevent any damage or spills.
- Clear the sink from the countertop: Once the sink is lifted, check for any obstructions or remaining clips that may be holding it in place. Gently clear any obstacles to ensure a smooth removal.
- Place the sink in a safe area: Set the removed sink aside in a safe and designated area to prevent any accidents or damage. Consider using a soft and clean surface, such as a towel or drop cloth, to protect the sink from scratches or dents.
When lifting the sink, always prioritize your safety and the protection of the surrounding area. Ensure that you have a firm grip and that the sink is lifted straight upwards. Keep in mind that some sinks can be quite heavy, so it’s important to use proper lifting techniques and seek assistance if needed.
Once the sink has been safely removed, take a moment to inspect the countertop for any signs of damage or wear. This is an ideal time to clean the area and prepare it for the installation of a new sink, if desired.
If you’re not replacing the sink and are instead making repairs, now is the time to carry out any necessary repairs or modifications. Inspect the plumbing connections, the faucet, and any other components that may require attention.
With the drop-in sink successfully lifted up and removed, you’ve completed a major milestone in the removal process. In the next step, we’ll guide you through the process of cleaning the countertop surface to prepare it for further work or installation.
When removing a drop-in sink, start by turning off the water supply and disconnecting the plumbing. Then, use a utility knife to cut through any caulk or adhesive holding the sink in place before carefully lifting it out.
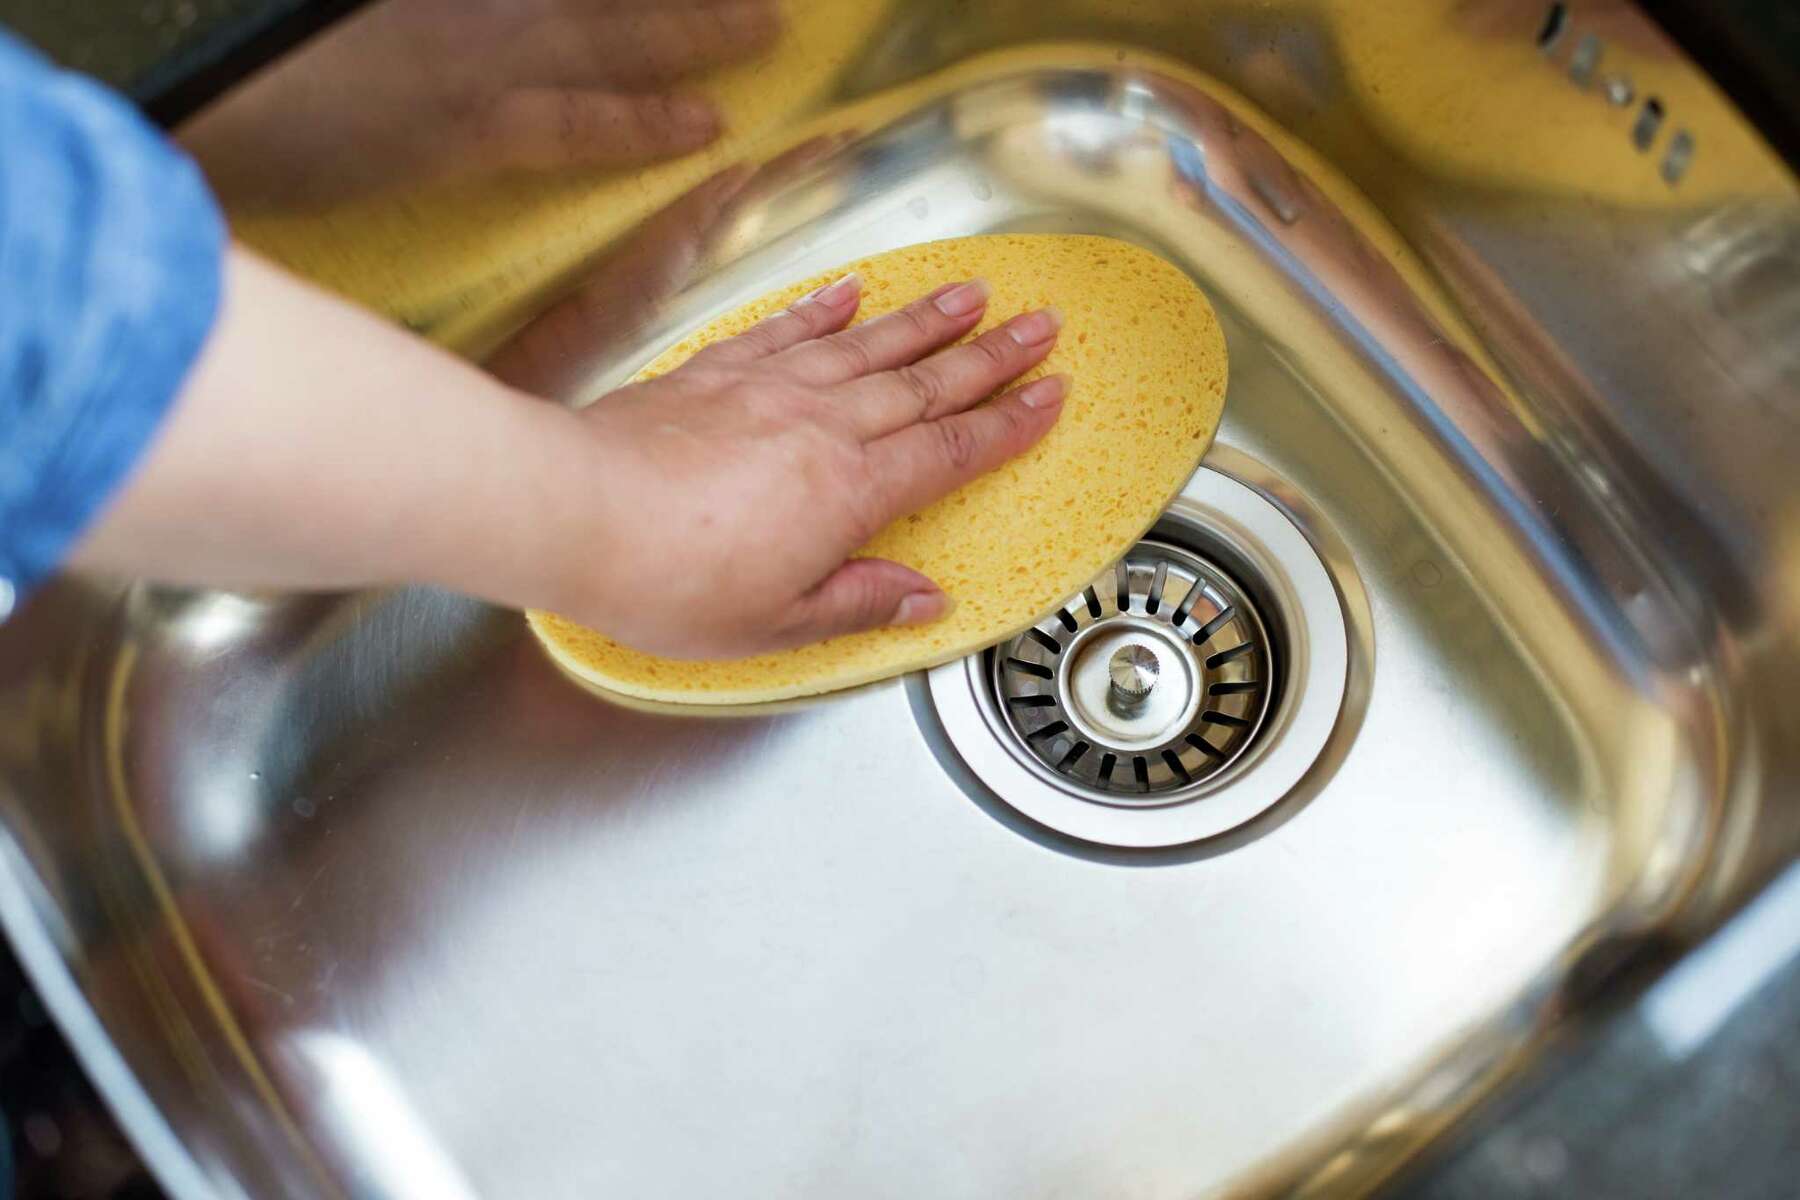
Step 7: Clean the countertop
After removing the drop-in sink, it’s important to take the time to clean the countertop surface. This step ensures that the area is free from any debris, old sealant, or adhesive remnants, providing a clean and smooth surface for future work or the installation of a new sink. Follow these steps to effectively clean the countertop:
- Remove any loose debris: Begin by removing any loose debris, such as dust, dirt, or small particles, from the countertop surface. Use a soft brush or a dry cloth to gently sweep away any residue. Avoid using abrasive materials that could scratch or damage the surface.
- Prepare a mild cleaner: Mix a mild cleaner with warm water in a bucket or spray bottle. Choose a cleaner that is safe for your countertop material and follow the manufacturer’s instructions for dilution ratios, if applicable.
- Apply the cleaner to the countertop: Use a sponge or cloth to apply the mild cleaner to the countertop surface. Start from one end and work your way across the entire area, ensuring even coverage. Allow the cleaner to sit for a few minutes to break down any residue or buildup.
- Scrub the countertop gently: Use a soft sponge or non-abrasive scrub brush to lightly scrub the countertop surface. Focus on areas that may have stubborn stains or residue. Be gentle to avoid scratching the countertop, especially if it is made of a delicate material.
- Rinse thoroughly: Rinse the countertop thoroughly with clean water to remove the cleaner and any remaining residue. Ensure that all the cleaner is completely washed away from the surface. Use a clean cloth or sponge to wipe away any excess moisture.
- Dry the countertop: Use a dry cloth or towel to dry the countertop surface completely. This will prevent the formation of water spots or streaks. Ensure that the countertop is completely dry before proceeding with any further work or the installation of a new sink.
By thoroughly cleaning the countertop, you create a clean and fresh surface for any future work. Removing any debris or residue ensures that the area is ready for the installation of a new sink, repairs, or any other modifications you have planned.
It’s important to note that different countertop materials may have specific cleaning requirements. Make sure to choose a cleaner that is safe for your specific countertop material, and consult the manufacturer’s instructions or guidelines if you are unsure.
With the countertop now cleaned and prepped, you’re ready to move forward with the installation of a new sink or any necessary repairs. Take the time to admire your clean and refreshed countertop, and proceed with confidence to the next step in the process.
In Step 8, we’ll provide guidance on installing a new sink or making necessary repairs, depending on your specific needs.
Step 8: Install a new sink or make necessary repairs
After removing the old sink and cleaning the countertop, you have the option to either install a new sink or make any necessary repairs to the existing one. This step will guide you through both scenarios, providing you with the instructions you need:
Read more: How To Remove A Pedestal Sink
Installing a new sink:
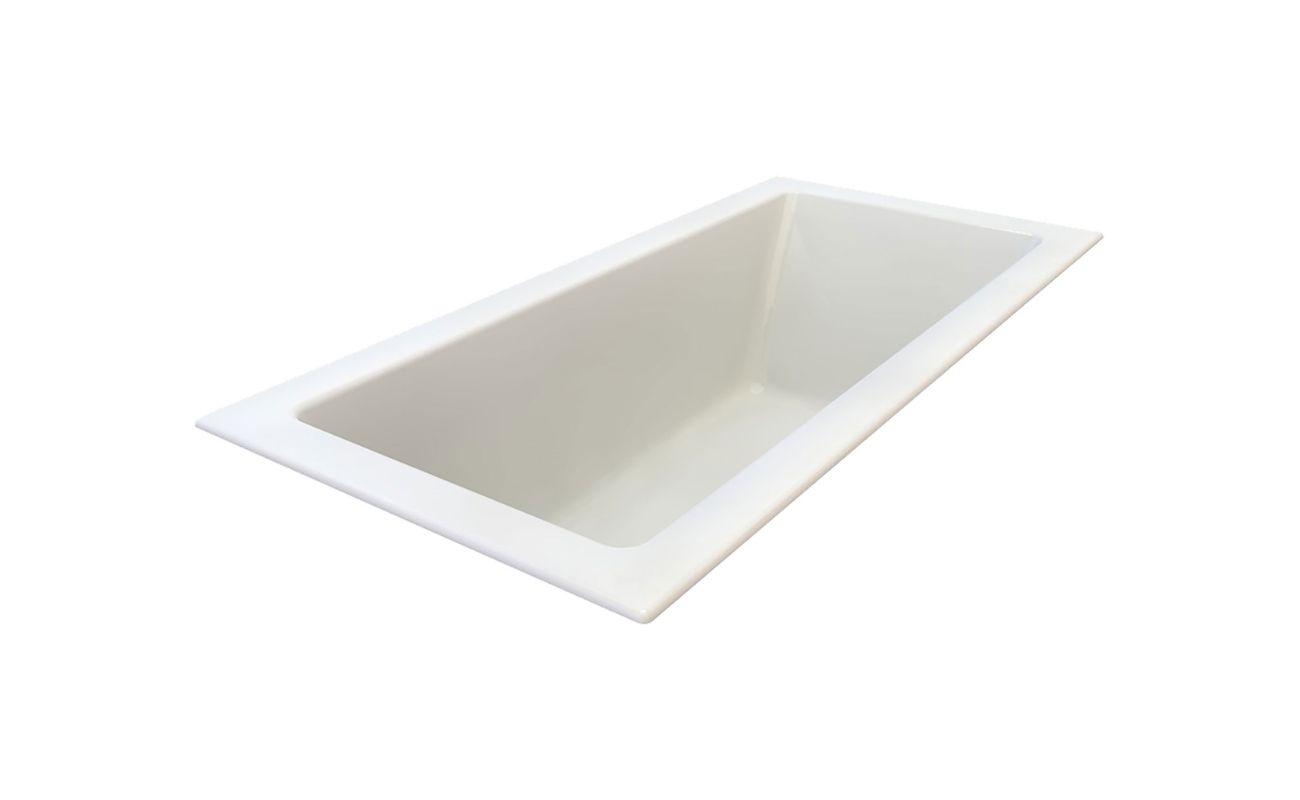
- Choose a new sink: Measure the dimensions of the previous sink cutout to ensure a proper fit for your new sink. Consider the style, material, and functionality of the sink as well. Once you have selected a suitable replacement sink, follow the manufacturer’s instructions for installation.
- Apply sealant or silicone: Apply a thin layer of plumber’s putty or silicone sealant along the edges of the sink cutout on the countertop. This will create a watertight seal between the sink and the countertop once the sink is in place.
- Lower the new sink into the cutout: Carefully lower the new sink into the cutout on the countertop. Make sure it is aligned properly and centered within the opening. Press down firmly to ensure a good seal with the sealant or silicone.
- Secure the sink with clips or brackets: Follow the manufacturer’s instructions to secure the sink in place using the provided clips or brackets. These will keep the sink stable and prevent any shifting or movement.
- Double-check the position and alignment: Once the sink is secured, double-check its position and alignment. Ensure that it is level and centered properly within the cutout. Make any necessary adjustments as needed.
Making necessary repairs:
- Inspect the plumbing connections: Assess the condition of the plumbing connections, including the supply lines and the drain pipe. Replace any damaged or worn-out components, such as valves, gaskets, or connectors.
- Examine the sink itself: Inspect the sink for any cracks, leaks, or other issues. Depending on the problem, you may be able to repair it by applying sealant or using specialized repair kits. If the damage is severe, it may be necessary to replace the entire sink.
- Replace any faulty parts: Replace any faulty or damaged parts, such as faucets or handles. Follow the manufacturer’s instructions for proper installation and use the appropriate tools and techniques.
- Reassemble the plumbing connections: Reconnect the plumbing connections, including the water supply lines and the drain pipe. Use an adjustable wrench to tighten the connections, ensuring they are secure and free from leaks.
Whether you’re installing a new sink or making repairs, it’s crucial to follow the manufacturer’s instructions and guidelines. This will ensure that the process is done correctly and that all components are properly installed and functioning.
It may be helpful to have a professional plumber assist you if you’re unfamiliar with the installation or repair process. They can provide expert advice and ensure that everything is done safely and according to industry standards.
By successfully installing a new sink or making necessary repairs, you’ll have a functional and visually appealing sink area that meets your specific needs. Proceed to the next step to reconnect the plumbing connections.
Step 9 will guide you through the process of reconnecting the plumbing connections to ensure that everything is properly connected and functioning.
Step 9: Reconnect the plumbing connections
After installing a new sink or making necessary repairs, the next step is to reconnect the plumbing connections. Properly connecting the water supply lines and drain pipe is essential for the sink to function correctly. Follow these steps to reconnect the plumbing connections:
- Prepare the plumbing connections: Ensure that the water supply lines and the drain pipe are clean and free from any debris or residue. Wipe them down with a clean cloth or sponge if necessary.
- Apply plumber’s tape: Wrap plumber’s tape clockwise around the threaded ends of the water supply lines and the drain pipe. This will create a watertight seal when the connections are tightened.
- Reconnect the water supply lines: Align the threaded ends of the water supply lines with the corresponding openings on the sink’s faucet. Hand-tighten the nuts onto the faucet connections, and then use an adjustable wrench to give them a final snug tightening. Be careful not to overtighten, as it can cause damage to the fittings or create leaks.
- Reconnect the drain pipe: Position the drain pipe beneath the sink’s drain opening. Insert the threaded end of the pipe into the drain opening and hand-tighten the nut onto it. Use an adjustable wrench to securely tighten the nut, ensuring a watertight connection.
- Inspect for leaks: Once the connections are tightened, turn on the water supply and check for any leaks. Carefully observe the connections and areas around them for any signs of water leakage. If you notice any leaks, tighten the connections further or make the necessary adjustments to achieve a secure seal.
It’s important to note that different sinks and plumbing systems may require specific connectors or adapters. Make sure you have the correct fittings for your specific setup, and consult the manufacturer’s instructions if you have any doubts.
Take your time when reconnecting the plumbing connections and ensure that each connection is properly tightened. An adequately secured connection will prevent leaks and ensure that the sink operates smoothly.
Once you have reconnected the plumbing connections, it’s essential to test the sink for proper functionality. Turn on the water supply and check for any leaks or irregularities in water flow. Verify that the hot and cold water settings work correctly and that the drain is functioning as intended.
With the plumbing connections successfully reconnected and the sink functioning properly, you’re almost done. Just one more step remains: turning on the water supply.
Please proceed to Step 10 for instructions on how to turn on the water supply to your newly installed or repaired sink.
Step 10: Turn on the water supply
The final step in the process of removing a drop-in sink and either installing a new sink or making necessary repairs is to turn on the water supply. This step ensures that water flows properly to the sink and allows you to check for any leaks or issues. Here’s a guide to turning on the water supply:
- Locate the shut-off valves: Locate the shut-off valves for the hot and cold water supply lines, typically located beneath the sink or in a nearby cabinet. The valves are usually round or lever-style and may be labeled “hot” and “cold.”
- Ensure the valves are fully open: Turn the shut-off valves counterclockwise to fully open them. This allows water to flow freely to the sink. Make sure both the hot and cold water valves are fully open.
- Check for leaks: After turning on the water supply, carefully inspect all the plumbing connections for any signs of leaks. Look for water droplets, dampness, or water pooling around the connections. If you notice a leak, tighten the connections further or make the necessary adjustments to achieve a secure seal.
- Test the water flow: Turn on the faucet and check the water flow. Run both hot and cold water to ensure that both sides work properly and that the water flows smoothly. Observe the water pressure and make sure it is consistent and satisfactory.
- Check the drain: While the water is running, double-check the drain for any issues. Ensure that the water drains properly without any blockages or slow draining. If you notice any problems, address them promptly to prevent potential plumbing issues.
- Inspect for any other issues: Take a moment to inspect the overall functioning of the sink. Look for any irregularities or potential issues, such as dripping faucets, loose handles, or unusual noises. Address any concerns or problems accordingly.
By turning on the water supply and testing the functionality of the sink, you can ensure that the installation or repair process is successful. This step allows you to identify and address any issues promptly, providing you with a fully operational and reliable sink.
If you notice any persistent leaks or encounter significant problems with the water flow or drain, it may be necessary to consult a professional plumber for further assistance. They can help diagnose and resolve the issues, ensuring that your sink functions optimally.
Congratulations! You have successfully removed a drop-in sink, installed a new sink, or made necessary repairs. By following these steps and taking the time to complete each task carefully, you’ve accomplished this DIY project with confidence and skill. Enjoy your newly renovated or repaired sink!
Read more: How To Remove Sink Soap Dispenser
Conclusion
Removing a drop-in sink may initially seem like a daunting task, but with the right tools, knowledge, and guidance, it’s a manageable DIY project. This step-by-step guide has provided you with comprehensive instructions on how to successfully remove a drop-in sink, whether you’re installing a new sink or making necessary repairs.
Throughout the process, we emphasized the importance of gathering the necessary tools and materials, turning off the water supply, disconnecting the plumbing connections, removing the countertop sealant, loosening the sink clips, lifting and removing the sink, cleaning the countertop, installing a new sink or making repairs, reconnecting the plumbing connections, and finally turning on the water supply.
By following these steps carefully, you can ensure a smooth and efficient removal process, minimize the risk of damage or accidents, and achieve a beautiful and functional sink area.
However, it’s important to note that every sink and plumbing system may have unique characteristics and requirements. It’s always a good idea to refer to the manufacturer’s instructions for specific guidance or consult a professional plumber if you feel uncertain or encounter any complications during the process.
Remember, taking the time to properly remove a drop-in sink allows for a clean and seamless transition to a new sink or improved functionality through repairs. It’s an opportunity to enhance the aesthetics and functionality of your kitchen or bathroom, making it more enjoyable and functional for years to come.
With the completion of this DIY project, take a moment to appreciate the hard work and effort you’ve put into removing the drop-in sink. Whether you’ve successfully installed a new sink or made necessary repairs, you can be proud of your accomplishment. Now, you can enjoy the benefits of a well-functioning and visually appealing sink area.
Thank you for following this guide, and we hope it has provided you with the knowledge and confidence to tackle your drop-in sink removal. Happy DIY-ing!
Frequently Asked Questions about How To Remove A Drop-In Sink
Was this page helpful?
At Storables.com, we guarantee accurate and reliable information. Our content, validated by Expert Board Contributors, is crafted following stringent Editorial Policies. We're committed to providing you with well-researched, expert-backed insights for all your informational needs.


0 thoughts on “How To Remove A Drop-In Sink”