Articles
How To Remove A Sink Faucet
Modified: March 1, 2024
Learn how to easily remove a sink faucet with our comprehensive step-by-step guide. Discover expert tips and tricks in our informative articles.
(Many of the links in this article redirect to a specific reviewed product. Your purchase of these products through affiliate links helps to generate commission for Storables.com, at no extra cost. Learn more)
Introduction
Replacing a sink faucet can be a daunting task for some, but with the right tools and a little bit of know-how, you can successfully remove an old faucet and install a new one in no time. Whether you’re looking to upgrade your bathroom or simply need to fix a leaky faucet, this step-by-step guide will walk you through the process and provide you with the confidence to tackle the project yourself.
Before you start, make sure you have all the necessary tools and materials on hand. This will save you time and frustration during the project. You will need the following:
- Adjustable wrench
- Basin wrench
- Plumber’s tape
- Screwdriver (or Allen wrench, depending on faucet type)
- Rag or towel
- New faucet
Once you have the necessary supplies, you’re ready to get started. The first step is to shut off the water supply to the faucet. This can usually be done by turning off the shut-off valves located under the sink. If you can’t find the shut-off valves or they are not functioning properly, you may need to turn off the main water supply to your home.
With the water supply shut off, you can proceed to disconnecting the water supply lines. Using an adjustable wrench, carefully loosen the nuts that connect the supply lines to the faucet. Be sure to have a rag or towel handy to catch any excess water that may come out.
Key Takeaways:
- Removing and replacing a sink faucet is a manageable DIY project with the right tools and knowledge. Follow the step-by-step guide for a successful installation, enhancing your sink’s appearance and functionality.
- Properly shutting off the water supply, cleaning the sink surface, and testing the new faucet are crucial steps. With thorough preparation and attention to detail, you can confidently tackle this DIY project.
Read more: How To Remove Faucet From Sink
Tools and Materials Needed
Before you begin removing your sink faucet, it’s important to gather all the necessary tools and materials. Here’s a list of what you’ll need:
- Adjustable wrench: This tool will be used to tighten or loosen nuts and bolts.
- Basin wrench: A basin wrench will come in handy when accessing hard-to-reach places, such as behind the sink.
- Plumber’s tape: Plumber’s tape, also known as Teflon tape, is essential for creating a watertight seal on threaded plumbing connections.
- Screwdriver or Allen wrench: Depending on the type of faucet you have, you may need either a screwdriver or an Allen wrench to remove screws or bolts.
- Rag or towel: Keep a rag or towel nearby to wipe up any excess water or to protect the sink surface.
- New faucet: Of course, you’ll need a new faucet to replace the old one. Make sure to choose a faucet that fits your sink and matches your aesthetic preferences.
Having these tools and materials at your disposal before you begin the removal process will save you time and frustration. It’s always better to be prepared!
Step 1: Shut off the Water Supply
The first step in removing a sink faucet is to shut off the water supply. This will prevent any water from flowing while you work on the faucet.
Underneath the sink, locate the shut-off valves for the hot and cold water lines. These are typically small valves with a round or lever handle. Turn the handles clockwise to shut off the water flow. If your sink doesn’t have individual shut-off valves, you may need to turn off the main water supply to your home.
After shutting off the water supply, turn on the faucet to release any remaining water in the lines. This will help alleviate any pressure and make the removal process easier.
It’s important to note that if you are turning off the main water supply, it will affect all the fixtures in your home. Make sure to inform other household members about the temporary water interruption.
Once the water supply is shut off, you can proceed to the next step of disconnecting the water supply lines.
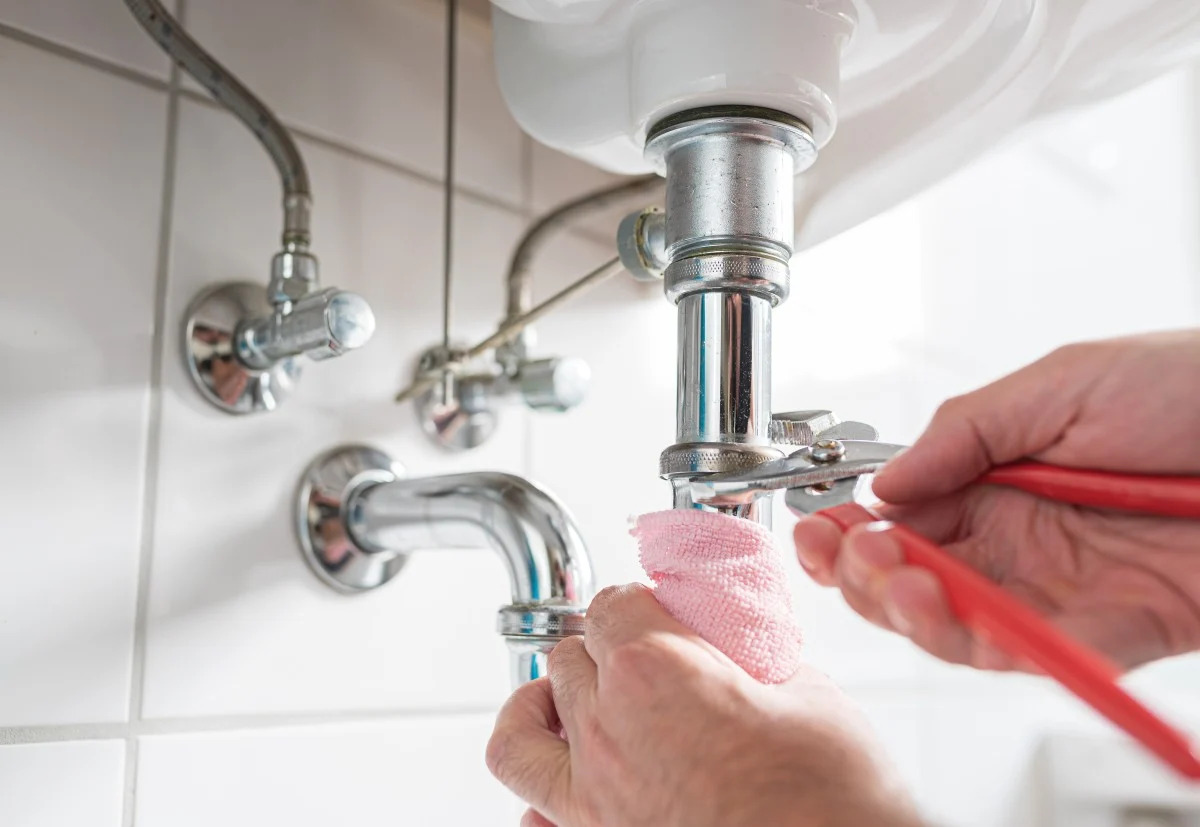
Step 2: Disconnect Water Supply Lines
Now that the water supply is shut off, it’s time to disconnect the water supply lines from the faucet. This step is crucial to ensure a smooth removal process.
Using an adjustable wrench, locate the nuts that connect the water supply lines to the faucet. These nuts are typically located near the base of the faucet or underneath the sink. Carefully loosen the nuts by turning them counterclockwise.
As you loosen the nuts, be prepared for some water to come out. It’s a good idea to have a rag or towel handy to catch any excess water and prevent it from spilling onto the floor or other surfaces.
Once the nuts are completely loosened, carefully remove the water supply lines from the faucet. Inspect the lines for any signs of damage or wear. If necessary, you may need to replace them with new supply lines before installing the new faucet.
After disconnecting the water supply lines, you can proceed to the next step of removing the drain stopper.
Note: If you encounter any difficulties in loosening the nuts or disconnecting the water supply lines, applying some penetrating oil like WD-40 can help loosen rusted or stuck connections. Allow the oil to sit for a few minutes before attempting to loosen the nuts again.
Step 3: Remove the Drain Stopper
Now that the water supply lines are disconnected, it’s time to remove the drain stopper. The drain stopper is the mechanism that allows you to close and open the sink drain.
To remove the drain stopper, start by locating the rod that connects the stopper to the back of the faucet. This rod is usually located behind the faucet, near the top of the sink. It is connected to a lever or knob that controls the movement of the stopper.
Use a screwdriver or Allen wrench to loosen the screw or bolt holding the rod in place. Once loosened, carefully slide the rod out of the notch or clip that holds it in place. This will free the drain stopper from the faucet.
With the rod removed, you can now lift the drain stopper out of the sink. Sometimes the stopper may be attached to a small chain. If this is the case, detach the chain from the stopper before removing it.
Inspect the drain stopper for any debris or buildup and clean it if necessary. Keeping the drain stopper clean will prevent any potential clogs in the future.
Now that the drain stopper is removed, you can proceed to the next step of loosening the mounting nuts.
Note: Depending on the type of faucet you have, the method of removing the drain stopper may vary slightly. Some faucets may have a different mechanism or no visible rod at all. In such cases, refer to the manufacturer’s instructions or consult a professional plumber for assistance.
Read more: How To Remove Sink Faucet Handle
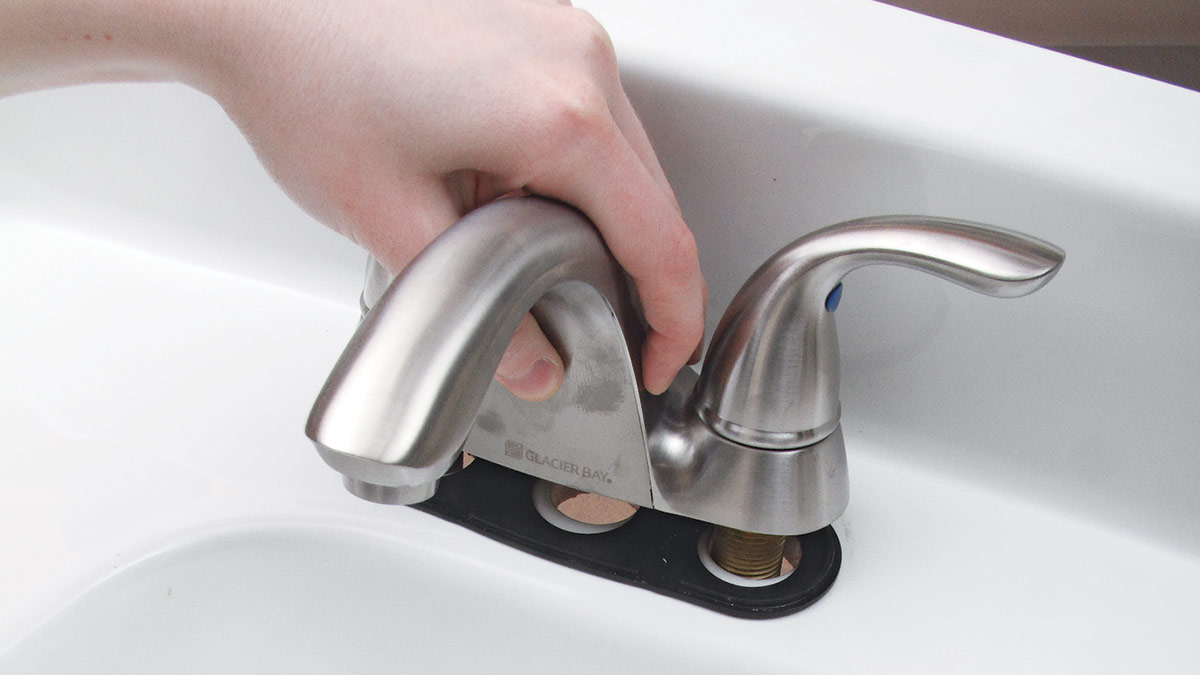
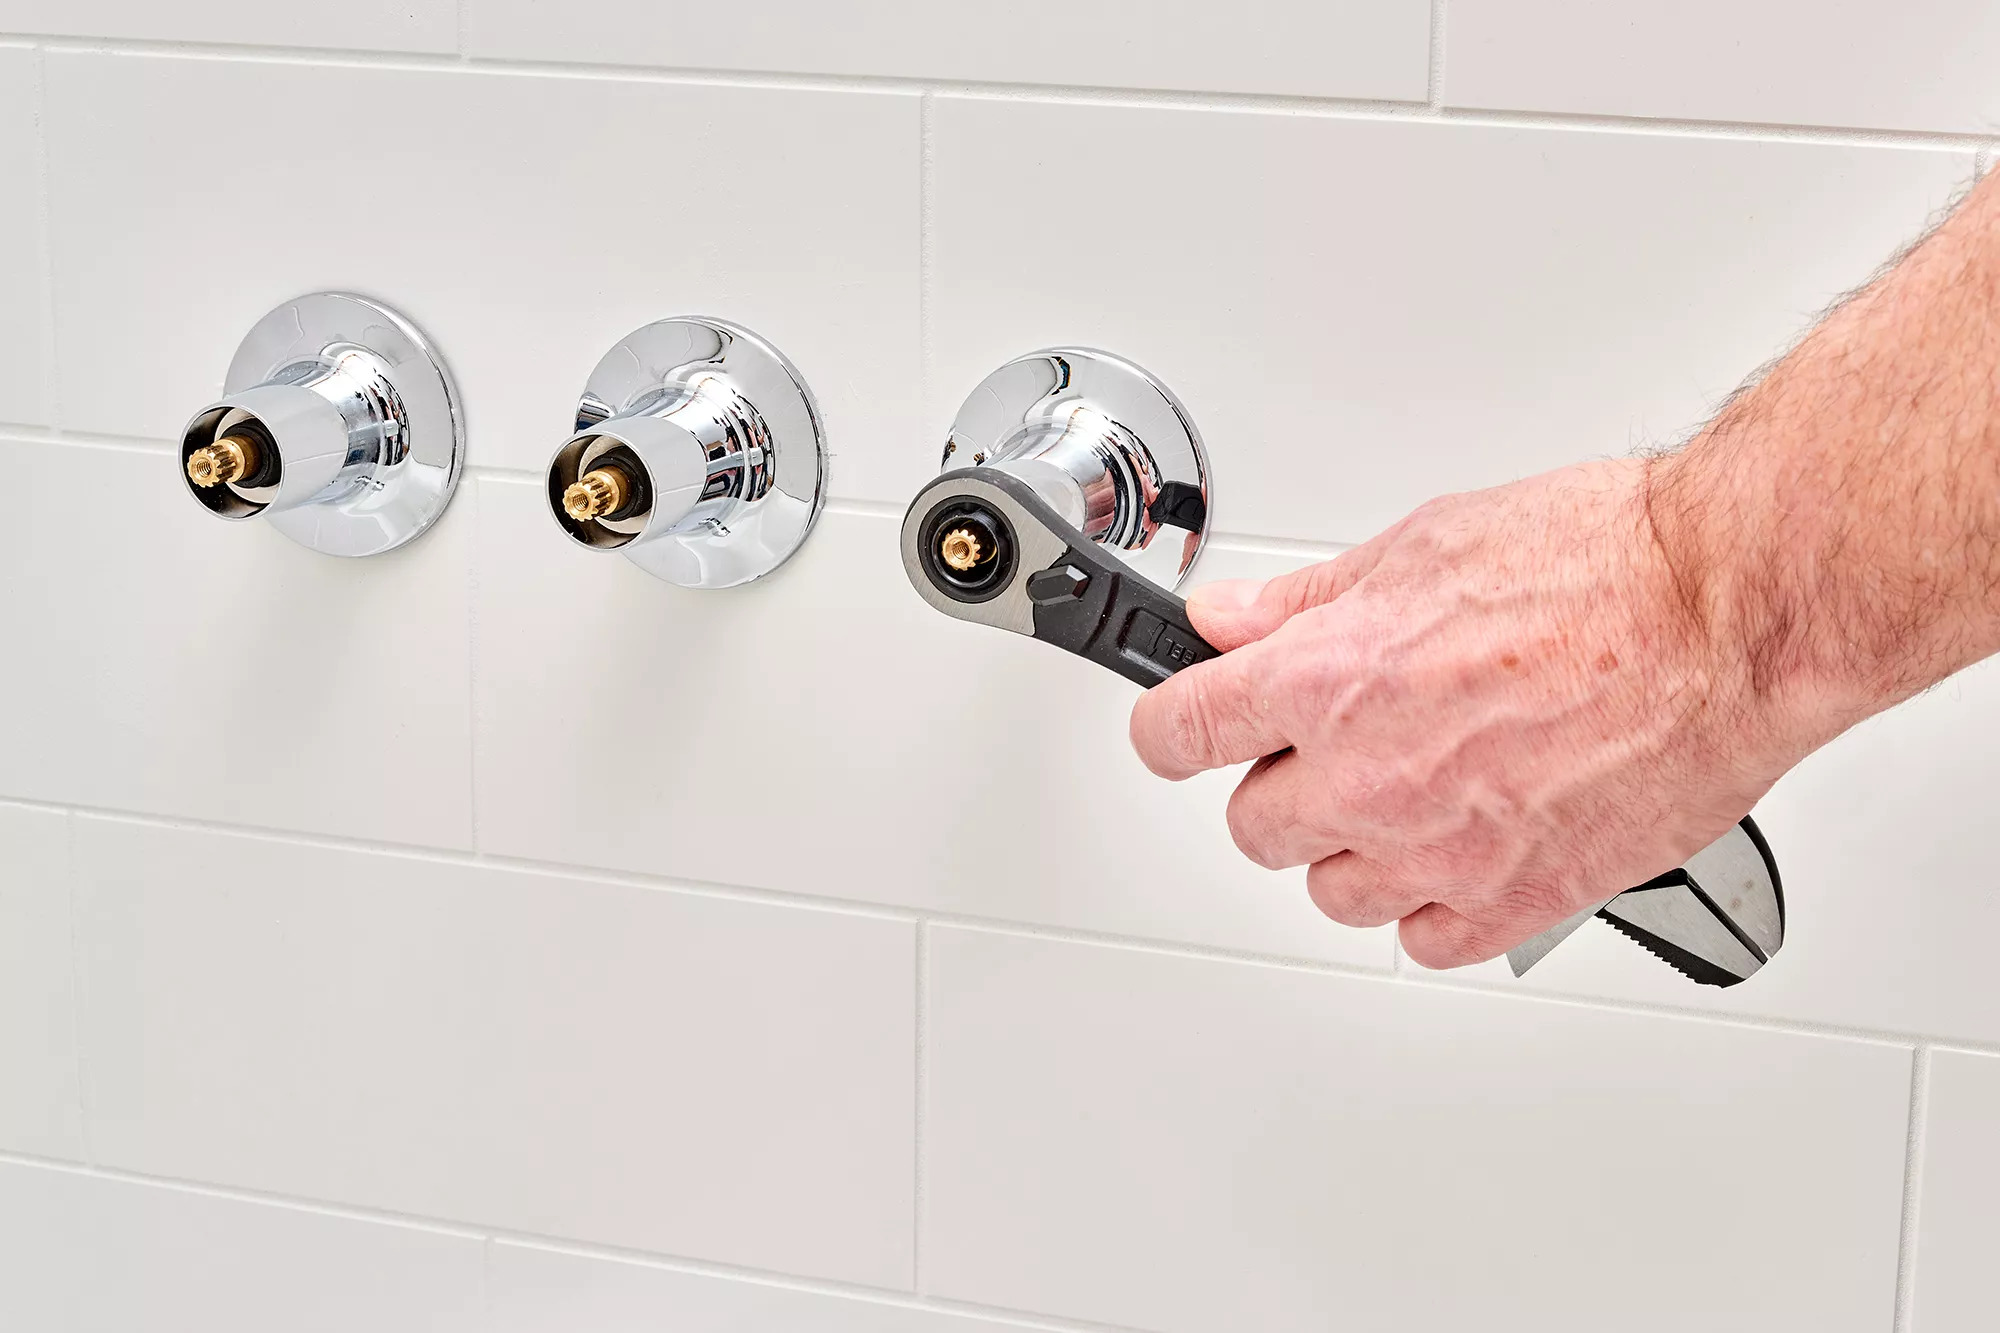
Step 4: Loosen the Mounting Nuts
With the water supply lines and drain stopper disconnected, it’s time to loosen the mounting nuts that secure the faucet to the sink. These mounting nuts hold the faucet in place and need to be loosened before the faucet can be removed.
Start by locating the mounting nuts underneath the sink. These nuts are usually located near the base of the faucet and can be accessed from underneath the sink. It may be helpful to use a basin wrench, as it allows for easier access in tight spaces.
Using the basin wrench or an adjustable wrench, turn the mounting nuts counterclockwise to loosen them. Depending on the type of faucet, there may be one or two mounting nuts to remove.
Loosen the nuts gradually, making sure not to apply excessive force that could damage the sink or the faucet. If the nuts are particularly tight or stubborn, applying a lubricant like WD-40 can help loosen them.
Once the mounting nuts are sufficiently loosened, you can proceed to the next step of removing the old faucet.
Note: Some faucets may have additional securing mechanisms such as clips or screws that need to be removed in addition to the mounting nuts. Refer to the manufacturer’s instructions or consult a professional plumber if you are unsure about any additional steps required for your specific faucet.
Before removing a sink faucet, turn off the water supply to the faucet. This will prevent any water from leaking out while you are working on removing the faucet.
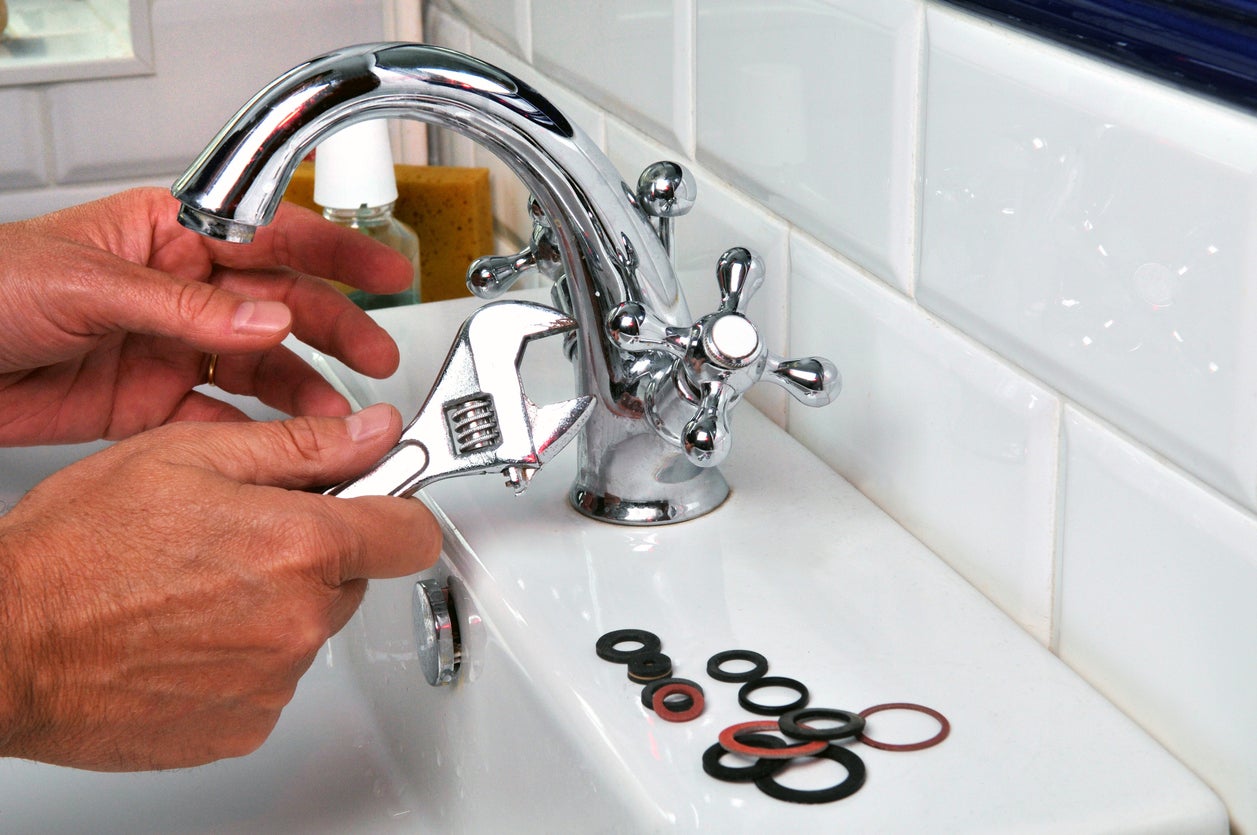
Step 5: Remove the Old Faucet
With the mounting nuts loosened, it’s time to remove the old faucet from the sink. This step requires a bit of caution and careful maneuvering to avoid damaging the sink or surrounding area.
Start by gently lifting the old faucet straight up, taking care to keep it level and prevent any unnecessary twisting or bending. As you lift, the faucet should detach from the sink surface.
If the old faucet seems stuck or difficult to remove, check for any remaining screws, clips, or other securing mechanisms that may still be holding it in place. Remove these additional components as needed before attempting to lift the faucet again.
Once the old faucet is successfully lifted away from the sink, carefully place it aside. You can now take a moment to inspect the area where the faucet was installed.
Check for any signs of corrosion or buildup around the faucet holes. If necessary, use a mild cleaning solution and a cloth or brush to remove any debris or residue.
At this point, you may also want to consider replacing the old faucet’s gasket or seal, which creates a watertight connection between the faucet and the sink. A worn or damaged gasket can lead to leaks, so it’s a good idea to replace it with a new one if needed.
With the old faucet removed and the sink surface cleaned and prepped, you’re ready to move on to the next step of cleaning the sink surface.
Note: It’s always a good idea to consult the manufacturer’s instructions for your specific faucet model if you have any doubts or encounter any difficulties during the removal process.
Step 6: Clean the Sink Surface
Now that the old faucet has been removed, it’s important to take the time to clean the sink surface before installing the new faucet. This step ensures a clean and debris-free surface for the new faucet’s installation.
Start by using a mild cleaning solution or dish soap and warm water to clean the entire sink surface. Pay close attention to the area around the faucet holes, as well as the surrounding countertop or vanity.
Use a non-abrasive sponge or cloth to gently scrub away any dirt, grime, or residue on the sink. Rinse the sink thoroughly with clean water to remove any cleaning solution or soap residue.
Inspect the sink surface for any stubborn stains or mineral deposits. If necessary, you can use a mixture of vinegar and water or a specialized cleaner for removing stains. Follow the manufacturer’s instructions for the specific cleaner and use a soft cloth or sponge for application.
After cleaning, dry the sink surface with a clean towel or cloth. Ensure that the area around the faucet holes is completely dry before proceeding with the installation of the new faucet.
Cleaning the sink surface not only provides a clean and fresh starting point for the new faucet but also helps to prevent any debris from interfering with the installation process. Taking the time to clean the sink surface will ensure a smooth and successful installation of the new faucet.
Now that the sink surface is clean and prepped, you’re ready to move on to the next step of installing the new faucet.
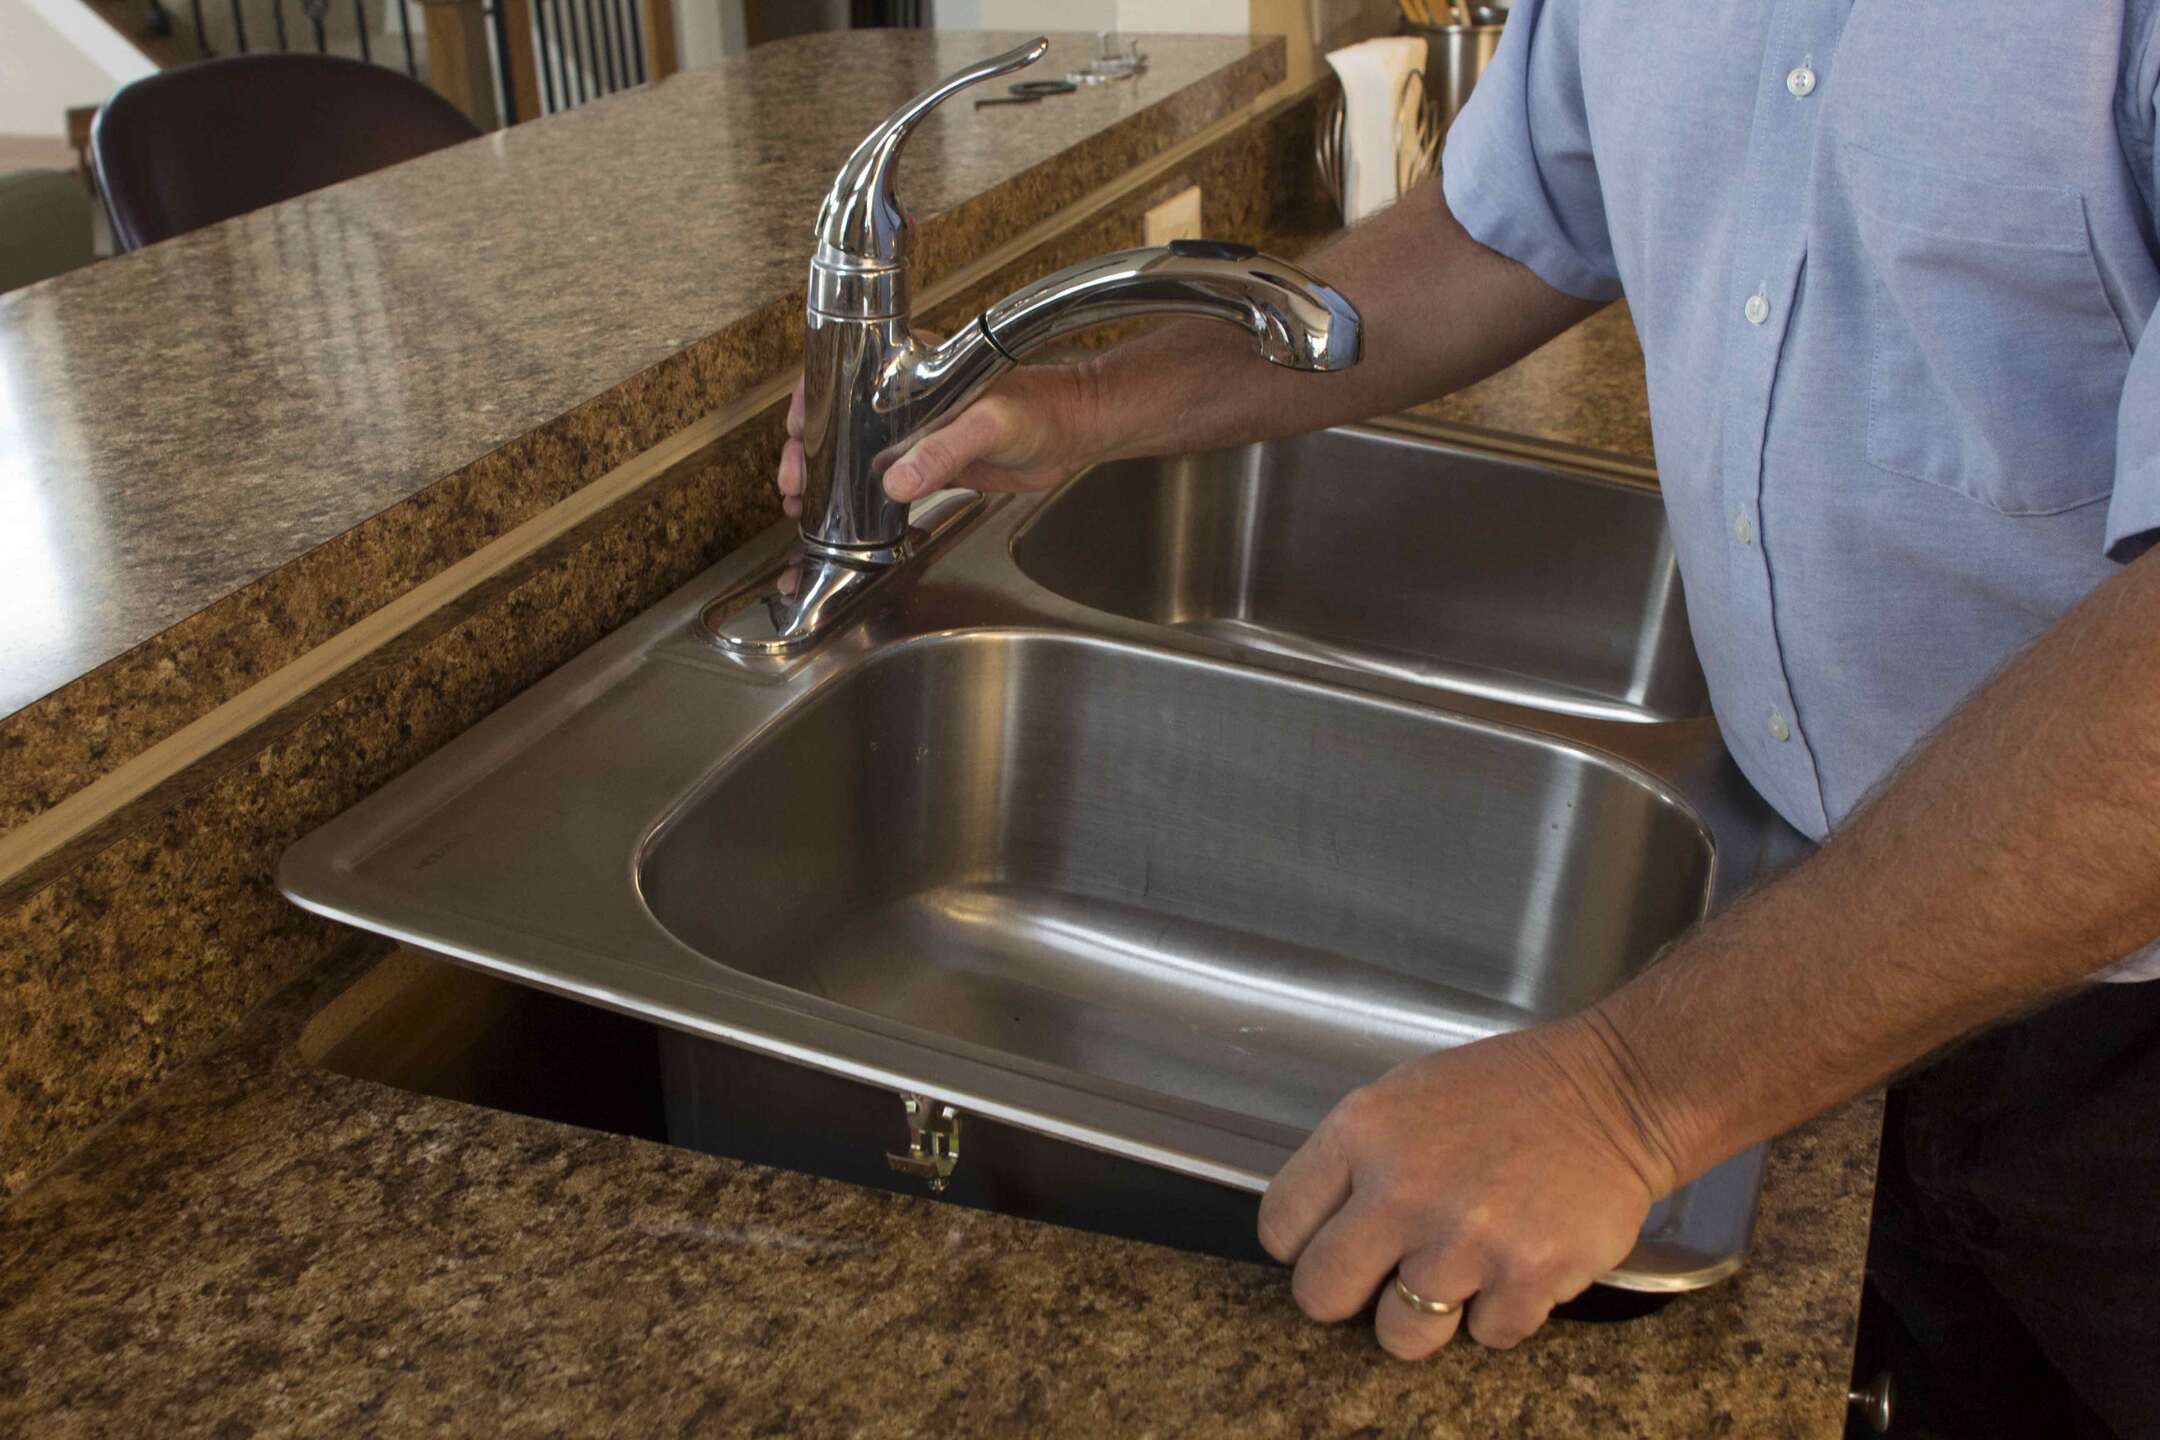
Step 7: Install the New Faucet
With the sink surface cleaned and prepped, it’s time to install the new faucet. Installing a new faucet can give your sink a fresh and updated look, as well as ensure proper functionality. Follow these steps to install your new faucet:
1. Start by carefully placing the new faucet into the corresponding holes in the sink. Make sure the faucet is aligned properly and centered in the sink.
2. Once the faucet is positioned correctly, locate the mounting nuts that came with the new faucet. These nuts are designed to secure the faucet to the sink.
3. With the mounting nuts in hand, thread them onto the faucet’s tailpieces. Use your fingers to tighten the nuts as much as possible.
4. Once the nuts are hand-tightened, use an adjustable wrench or basin wrench to further tighten them. Be careful not to overtighten, as this can damage the faucet or sink.
5. Check the alignment of the faucet and ensure it is still centered and straight in the sink. Make any necessary adjustments before proceeding.
6. If your new faucet has additional components such as a soap dispenser or side sprayer, follow the manufacturer’s instructions for their installation. This may involve connecting hoses or threading the components into the faucet base.
7. Once all the components are securely installed, give the faucet a gentle shake to ensure it is stable and firmly attached to the sink.
With the new faucet installed, you’re one step closer to enjoying a fully functioning and updated sink. However, there are still a few more steps to take before you can use the faucet. The next step is to reconnect the water supply lines.
Note: It’s important to follow the manufacturer’s instructions for your specific faucet model during the installation process. If you have any doubts or encounter any difficulties, consult a professional plumber for assistance.
Read more: How To Replace Sink Faucet
Step 8: Reconnect Water Supply Lines
Now that the new faucet is securely installed, it’s time to reconnect the water supply lines. Properly connecting the water supply lines is essential for the functionality and water flow of the new faucet. Follow these steps to reconnect the water supply lines:
1. Locate the water supply lines underneath the sink. These lines are typically flexible hoses that connect the shut-off valves to the faucet.
2. Take note of the hot and cold water supply lines. The hot water line is usually marked with a red indicator, while the cold water line is marked with a blue indicator.
3. Position the supply lines to reach the corresponding connections on the new faucet. Make sure the lines are not twisted or crossed to ensure proper water flow.
4. Slide the nuts (included with the faucet) onto the threaded ends of the supply lines. The nuts should fit snugly onto the threaded ends.
5. Carefully thread the nuts onto the faucet’s water inlets. Start by hand-tightening the nuts, and then use an adjustable wrench or basin wrench to further tighten them. Be cautious not to overtighten and risk damaging the connections.
6. Once the supply lines are securely connected to the faucet, turn on the shut-off valves underneath the sink. This will allow water to flow through the supply lines and into the faucet.
7. Check for any leaks around the connections. Inspect the supply line connections and faucet connections carefully. If you notice any leaks, tighten the connections slightly to stop the leakage. If the leak persists, consider using plumber’s tape to create a proper seal.
8. Once you’ve confirmed there are no leaks, let the water run for a few minutes to flush out any debris that may have accumulated during the installation process.
With the water supply lines reconnected and water flowing smoothly through the faucet, you’re almost done. The final step is to test the faucet and ensure it’s working properly.
Note: It’s important to follow any specific instructions provided by the faucet manufacturer during the water supply line connection process. If you’re unsure or encounter any issues, consult a professional plumber for assistance.
Step 9: Test the Faucet
After completing the installation and reconnecting the water supply lines, it’s time to test the faucet to ensure it’s working properly. Testing the faucet will help identify any issues or leaks that may need to be addressed before regular use. Follow these steps to test the faucet:
1. Turn on the hot and cold water handles or knobs. Allow the water to run for a few seconds to ensure a steady flow from both the hot and cold sides.
2. Check for any unusual noises, sputtering, or spurts in the water flow. These can indicate air trapped in the lines or another issue that may need attention.
3. Test the functionality of any additional components, such as a soap dispenser or side sprayer. Make sure they are working properly and dispensing or spraying as intended.
4. Check for any leaks around the faucet and water supply line connections. Carefully inspect the area under the sink and around the base of the faucet for any signs of water leakage.
5. Run your hand along the base of the faucet to feel for any moisture or drips. Even a small amount of water can indicate a leak that needs to be addressed.
6. If you discover any leaks or issues, turn off the water supply and tighten the affected connections. If the problem persists, consult a professional plumber for further assistance.
7. Once you’ve confirmed that the faucet is working properly and there are no leaks, congratulations! You have successfully installed and tested your new faucet.
With the faucet working flawlessly, take a moment to enjoy the refreshed look and improved functionality of your sink. Remember to periodically inspect the faucet and connections for any signs of leaks or issues, and address them promptly to prevent further damage.
By following these steps and conducting a thorough faucet test, you can ensure that your new faucet will provide reliable performance and enhance your daily use of the sink for years to come.
Conclusion
Removing and replacing a sink faucet may seem like a daunting task, but with the right tools, materials, and knowledge, it can be a manageable DIY project. By following the step-by-step guide outlined in this article, you can successfully remove an old faucet and install a new one, giving your sink a fresh and updated look while ensuring proper functionality.
Throughout the process, it’s important to take safety precautions and be mindful of the potential risks of working with plumbing fixtures. If you’re unsure or uncomfortable with any step, it’s always best to consult a professional plumber for assistance.
Remember to gather all the necessary tools and materials before starting the project, and follow the manufacturer’s instructions for your specific faucet model. Properly shutting off the water supply, disconnecting the water supply lines, and removing the old faucet set the foundation for a successful installation of the new faucet.
Take the time to clean the sink surface thoroughly before installing the new faucet to ensure a clean and debris-free installation. Follow the steps to securely install the new faucet, making sure to tighten all connections without overtightening.
Reconnecting the water supply lines and testing the faucet are crucial steps to ensure proper functionality and identify any potential issues or leaks. Conduct a thorough test, checking for steady water flow, functionality of additional components, and any signs of leaks or abnormal behavior.
With the faucet installed and tested successfully, you can enjoy the enhanced appearance and functionality of your sink. Remember to periodically inspect the faucet and connections for any signs of leaks or issues and address them promptly to prevent further damage.
By following this comprehensive guide, you have the knowledge and confidence to remove and install a sink faucet, saving both time and money. So go ahead, embark on this DIY project and transform your sink into a beautiful and functional centerpiece in your home.
Frequently Asked Questions about How To Remove A Sink Faucet
Was this page helpful?
At Storables.com, we guarantee accurate and reliable information. Our content, validated by Expert Board Contributors, is crafted following stringent Editorial Policies. We're committed to providing you with well-researched, expert-backed insights for all your informational needs.


0 thoughts on “How To Remove A Sink Faucet”