Articles
How To Remove Toilet Tank
Modified: October 20, 2024
Looking for articles on how to remove a toilet tank? Find expert tips and step-by-step guides in our comprehensive collection of articles.
(Many of the links in this article redirect to a specific reviewed product. Your purchase of these products through affiliate links helps to generate commission for Storables.com, at no extra cost. Learn more)
How To Remove Toilet Tank
Removing a toilet tank may be necessary for various reasons, such as repairing a leak, replacing a broken part, or renovating your bathroom. While the task may seem daunting, with the right tools and proper steps, you can easily remove the toilet tank without any hassle. In this article, we will guide you through the process, ensuring that you can complete the task safely and efficiently.
Read more: How To Clean Inside Toilet Tank
Importance of Following Proper Steps
It is crucial to follow the correct steps when removing a toilet tank. By doing so, you can avoid damaging any components and ensure that you can reinstall the tank properly. Additionally, following the proper process will help you stay safe and minimize the risk of accidents or injuries.
Safety Precautions
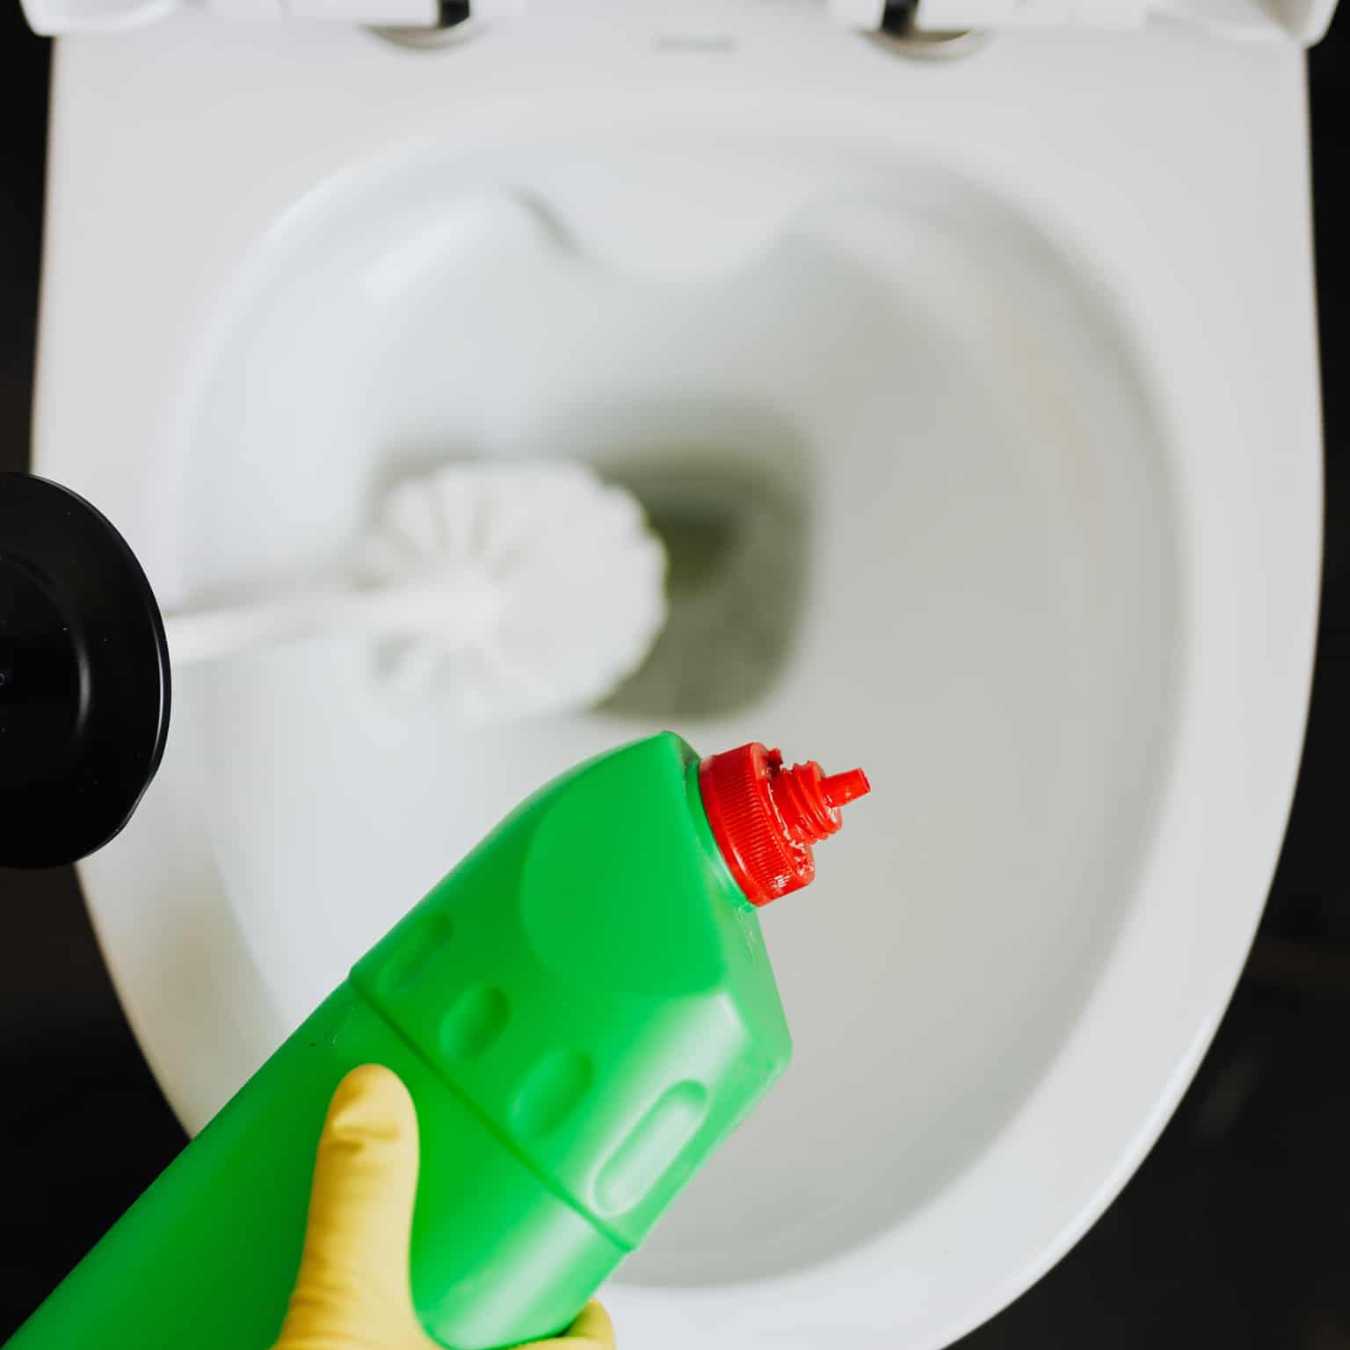
Before you start removing the toilet tank, it is essential to take some safety precautions. First, turn off the water supply to the toilet. This is typically done by turning the shut-off valve, usually located on the wall or floor near the toilet. It is also advisable to wear protective gloves and eyewear to prevent any potential injuries or exposure to harmful chemicals.
Tools and Materials Needed
To remove the toilet tank, you will need the following tools and materials:
– Adjustable wrench
– Screwdriver (flathead or Phillips, depending on the type of screws used)
– Towels or rags
– Bucket or container to collect water
– Plumbers tape (Teflon tape)
Each of these items is essential for the job. The adjustable wrench will help you disconnect the water supply line and remove the tank-to-bowl bolts. The screwdriver will be used to remove the tank lid and potentially detach other components. Towels or rags will come in handy to clean up any spills, while a bucket or container will be necessary to collect water from the tank. Plumbers tape (Teflon tape) will be useful for resealing connections when reinstalling the tank.
Step-by-Step Guide
1. Shutting off the water supply:
Locate the shut-off valve near the toilet and turn it clockwise to shut off the water supply.
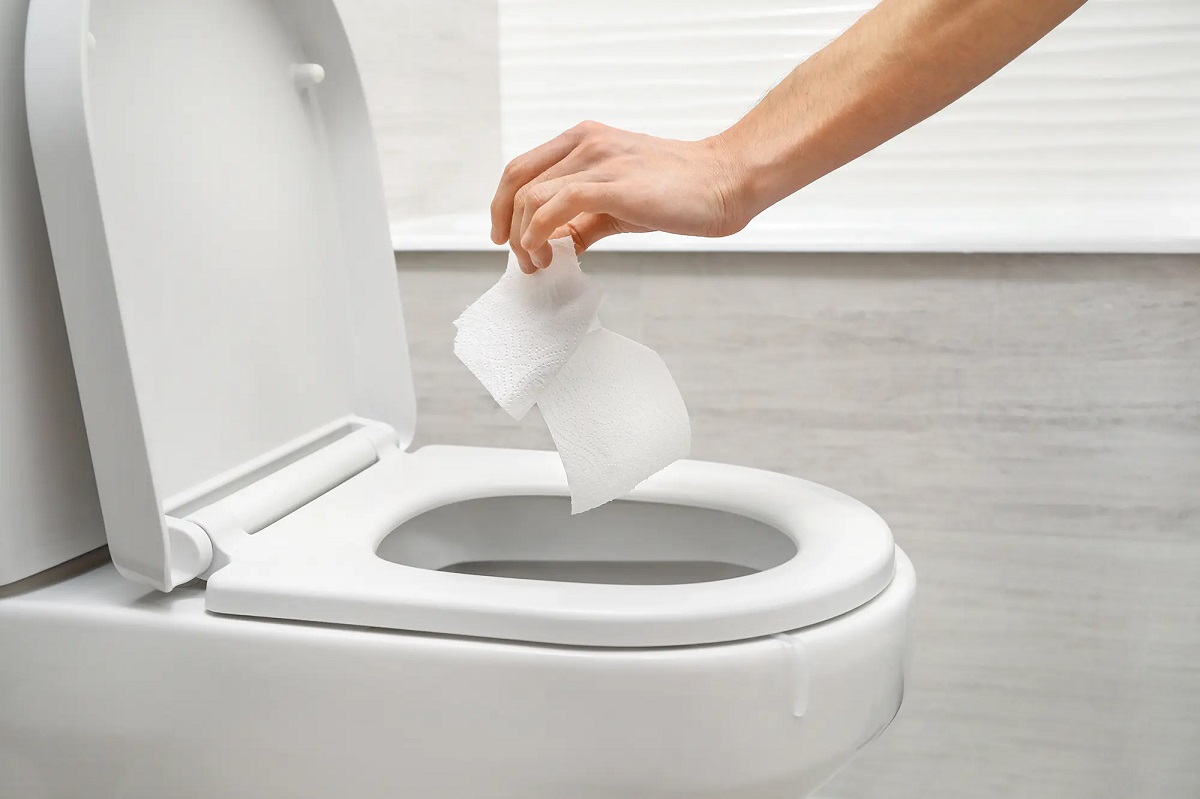
2. Draining the toilet tank:
Flush the toilet to drain as much water from the tank as possible. If the tank doesn’t completely drain, use a small container or sponge to soak up the remaining water.
3. Removing the toilet tank lid:
Carefully lift and remove the lid from the toilet tank. Set it aside in a safe place to avoid any accidental breakage.
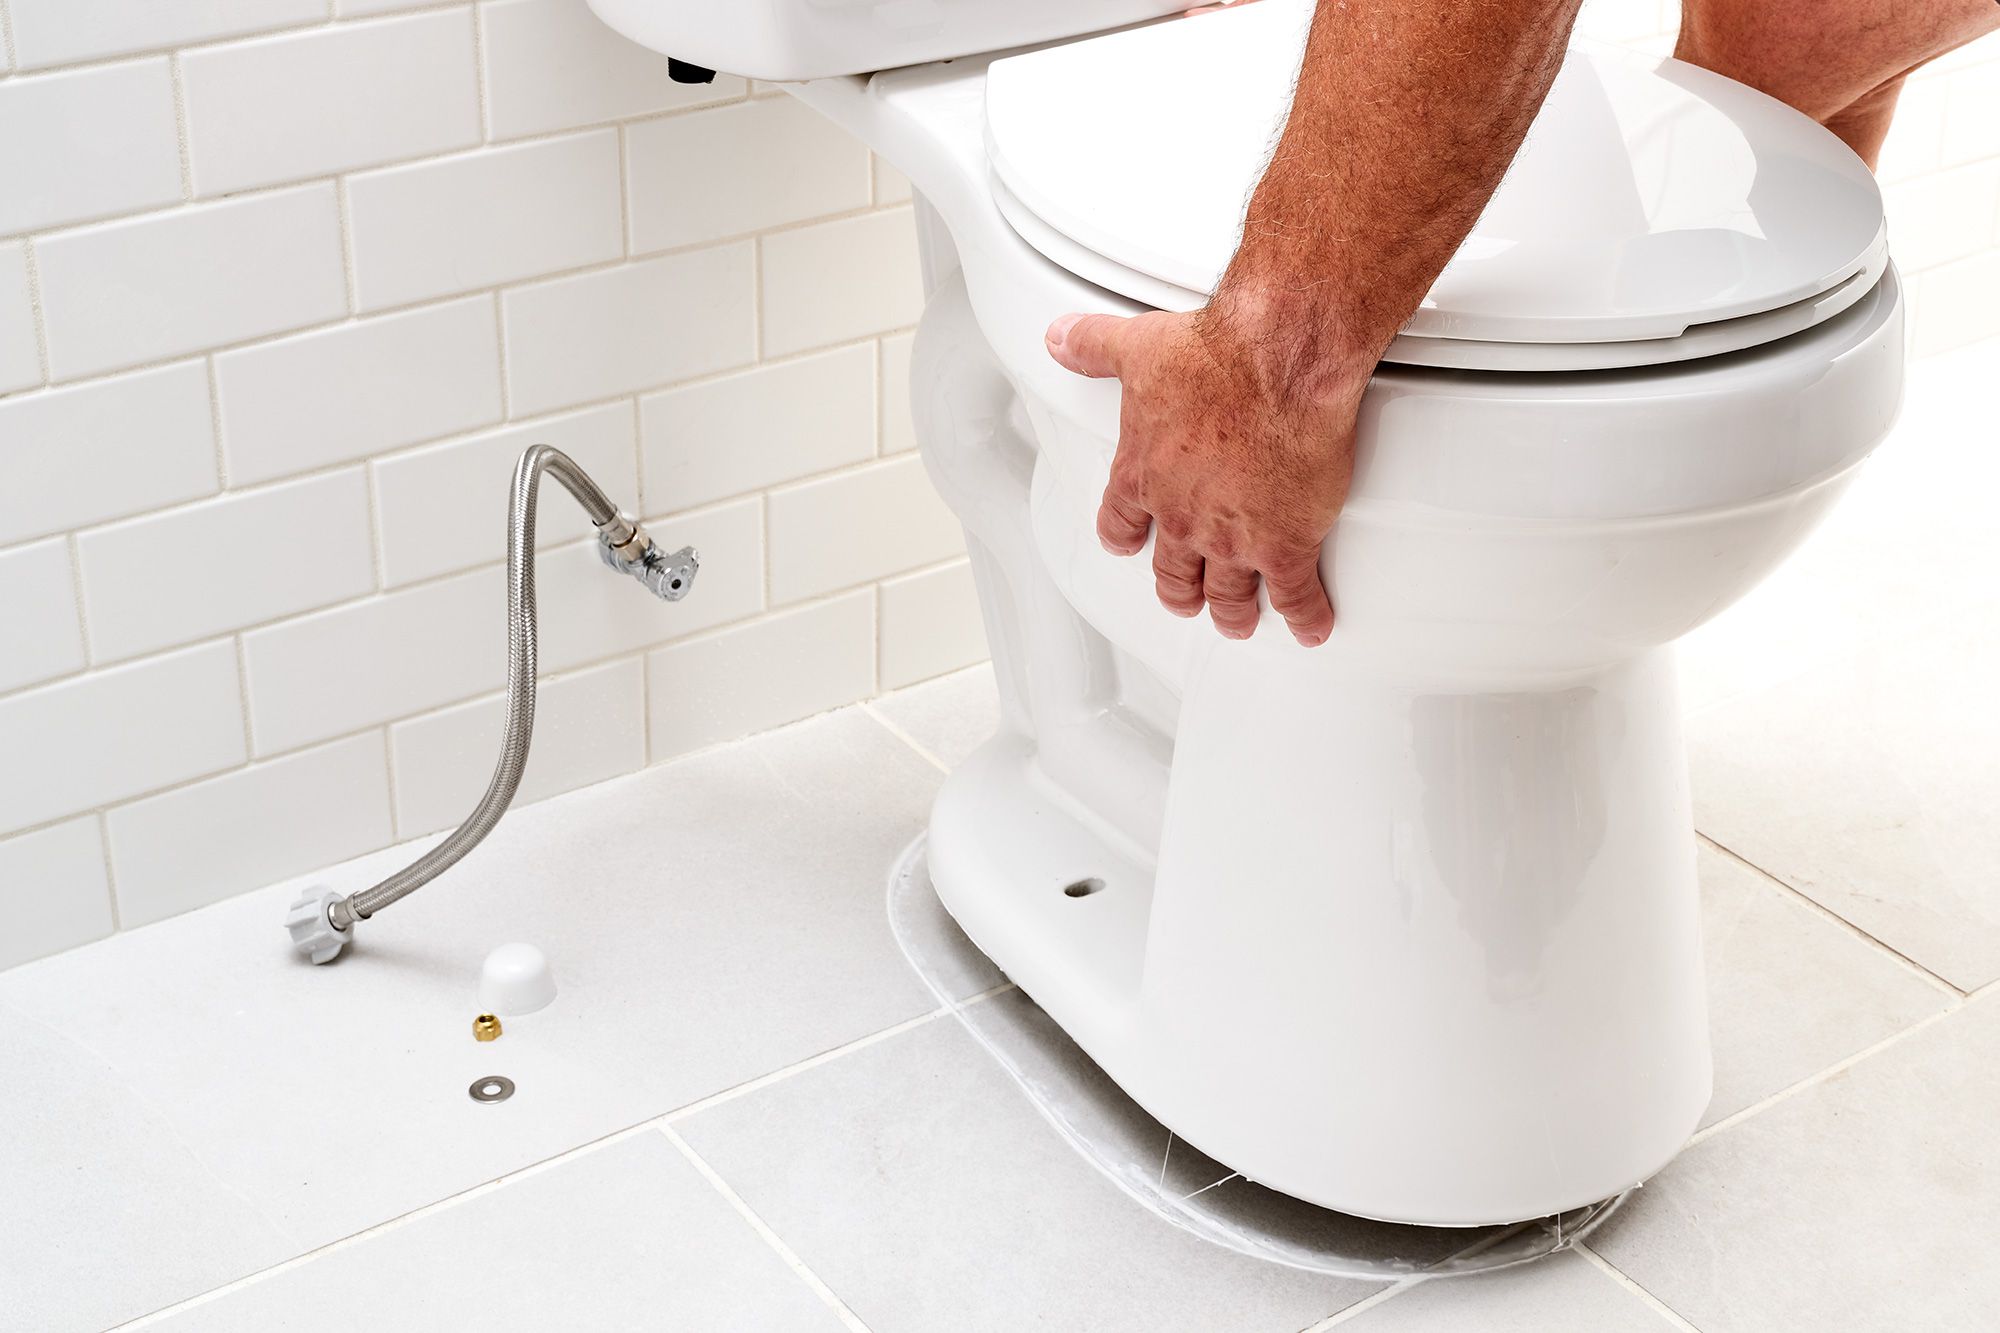
4. Disconnecting the water supply line:
Use an adjustable wrench to loosen the nut connecting the water supply line to the bottom of the toilet tank. Once loose, carefully remove the line from the tank and place it in the bucket to catch any remaining water.
5. Loosening the tank-to-bowl bolts:
Locate the tank-to-bowl bolts underneath the tank. Use the adjustable wrench to loosen them counterclockwise. Be gentle and avoid applying excessive force, as you don’t want to crack or damage the porcelain.
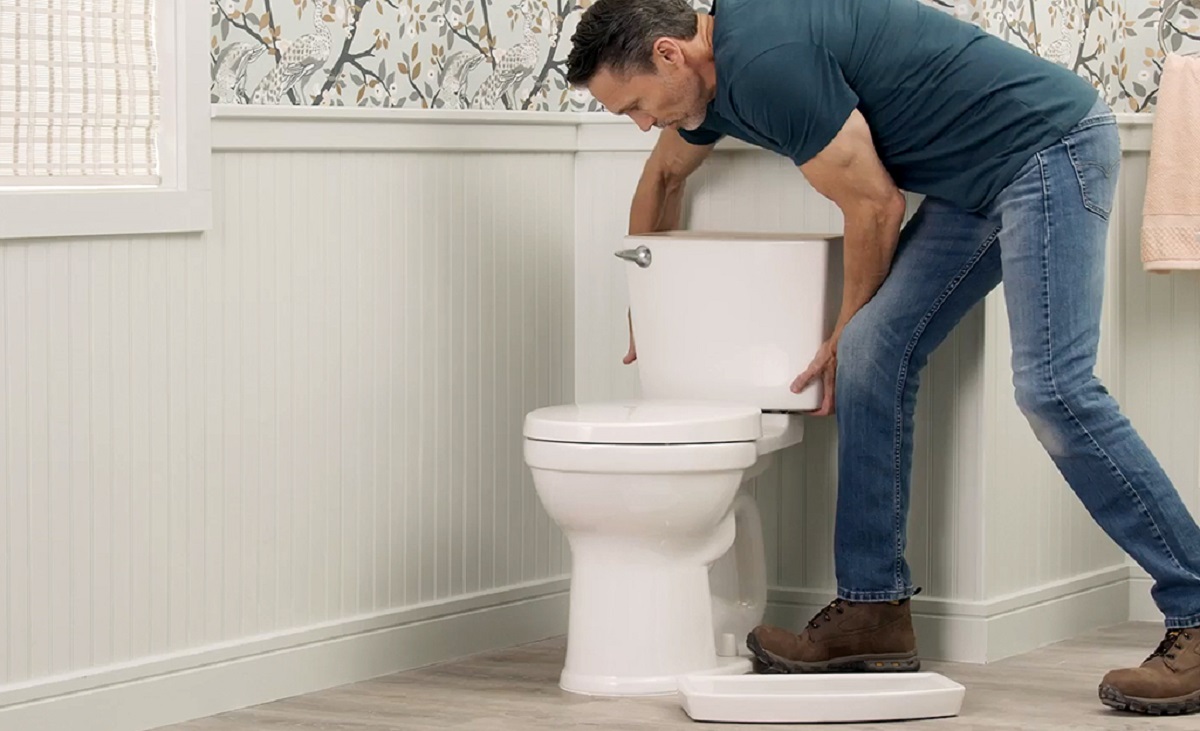
6. Removing the toilet tank from the bowl:
After loosening the tank-to-bowl bolts, lift the toilet tank straight up and away from the bowl. Set it aside in a safe place to avoid any accidental damage.
Continue to the next section to learn about useful tips and troubleshooting during the removal process.
Key Takeaways:
- Safely and efficiently remove a toilet tank by following proper steps, taking safety precautions, and using essential tools. Regular maintenance ensures longevity and proper functioning of the tank, contributing to bathroom hygiene.
- Prioritize safety, follow proper steps, and be prepared for potential challenges when removing a toilet tank. Regular cleaning and maintenance are crucial for preventing leaks and extending the tank’s lifespan.
Read more: How To Replace Toilet Tank Seal
Introduction
When it comes to your bathroom, the toilet tank plays a vital role in flushing waste away and maintaining proper sanitation. However, there are situations where you may need to remove the toilet tank. Whether it’s due to a leak, a broken part that needs replacement, or a bathroom renovation project, knowing how to remove the toilet tank is essential.
Why you may need to remove the toilet tank
There are several reasons why you might need to remove the toilet tank. One common reason is a leak, either from the tank itself or from the connections to the bowl. If you notice water pooling around the base of the toilet or seeping from the tank, it’s a clear sign that something is wrong and needs to be fixed.
Another reason for removing the toilet tank is to replace a broken or malfunctioning part. Over time, components inside the tank, such as the fill valve or flush valve, can wear out or become defective. Removing the tank gives you access to these parts so you can replace them and restore the toilet’s functionality.
Additionally, if you’re planning a bathroom renovation, you may want to remove the toilet tank to facilitate other work, such as painting or installing new flooring. Removing the tank makes it easier to maneuver and work in the limited space of a bathroom.
Importance of following proper steps
When it comes to any DIY project, following the proper steps is crucial. Removing a toilet tank is no exception. By following the correct procedure, you can ensure that you don’t damage any components or disrupt the plumbing system. Additionally, removing the tank correctly will make it easier to reinstall it properly, avoiding any future issues.
Furthermore, following the proper steps ensures your safety throughout the process. When dealing with plumbing fixtures, it’s essential to take precautionary measures to prevent accidents or injuries. The correct removal process minimizes the risk of water damage, potential leaks, or personal harm.
Safety precautions
Before starting the process of removing the toilet tank, there are a few safety precautions to keep in mind. Firstly, locate and shut off the water supply to the toilet. This is typically done by turning the shut-off valve clockwise until it’s fully closed. This step prevents water from flowing into the tank and potentially causing a mess.
It’s also important to wear protective gloves and eyewear when working with plumbing fixtures. This protects you from any potential cuts or exposure to harmful chemicals. Additionally, keep a towel or rag nearby to clean up any spills or drips during the removal process.
By following these safety precautions, you can ensure a safe and successful removal of the toilet tank. Now that you understand why you may need to remove the tank and the importance of following proper steps, let’s move on to the tools and materials needed for the job.
Read more: How To Put Fabuloso In Toilet Tank
Tools and Materials Needed
To successfully remove a toilet tank, you will need a few essential tools and materials. Having these items on hand will make the process much smoother and ensure that you can complete the job without any hiccups. Here is a list of what you’ll need and why each item is essential for the task:
1. Adjustable wrench: An adjustable wrench is a versatile tool that will help you loosen and tighten various nuts and bolts. It is particularly useful for disconnecting the water supply line and removing the tank-to-bowl bolts.
2. Screwdriver (flathead or Phillips): You’ll need a screwdriver to remove the tank lid, as well as potentially detach other components inside the tank. The type of screwdriver required will depend on the type of screws used in your specific toilet model.
3. Towels or rags: Keeping towels or rags nearby is essential to deal with any water spills or drips during the removal process. This will help prevent damage to your bathroom floor and keep the work area clean and dry.
4. Bucket or container: It’s necessary to have a bucket or container on hand to collect any water that remains in the tank. This will prevent water from flowing onto the floor when you disconnect the water supply line.
5. Plumbers tape (Teflon tape): Plumbers tape, also known as Teflon tape, is used to create a watertight seal when reassembling the toilet tank. It wraps around the threaded connections to prevent leaks.
Each of these items serves a specific purpose during the removal process. The adjustable wrench allows you to disconnect the water supply line and remove the tank-to-bowl bolts with ease. The screwdriver enables you to remove the tank lid and potentially detach other components securely. Towels or rags are crucial for maintaining a clean and dry work area. The bucket or container ensures that water is collected and doesn’t cause any damage. Finally, plumbers tape plays a vital role in creating a leak-free connection when reassembling the tank.
Having these tools and materials readily available will save you time and effort during the removal process. Now that you’re equipped with a comprehensive list of what you’ll need let’s move forward and dive into the step-by-step guide on how to remove the toilet tank.
Step-by-Step Guide
Now that you have all the necessary tools and materials, let’s dive into the step-by-step guide on how to remove a toilet tank. By following these instructions carefully, you’ll be able to complete the task efficiently and without any issues.
1. Shutting off the water supply:
Before starting the removal process, locate the shut-off valve near the toilet. Turn the valve clockwise until it’s fully closed. This will shut off the water supply to the toilet and prevent any water from flowing into the tank during the removal process.
2. Draining the toilet tank:
Flush the toilet to remove as much water from the tank as possible. If the tank doesn’t completely drain, use a small container or sponge to soak up the remaining water. This step will prevent any water spills when you disconnect the water supply line.
3. Removing the toilet tank lid:
Carefully lift and remove the lid from the toilet tank. Set it aside in a safe place to avoid any accidental breakage or damage. Be cautious, as older lids may be heavy or fragile.
4. Disconnecting the water supply line:
Use an adjustable wrench to loosen the nut connecting the water supply line to the bottom of the toilet tank. Turn the nut counterclockwise until it’s loose enough to remove. Once loose, carefully detach the water supply line from the tank and place it in a bucket or container to catch any water that may still be in the line.
5. Loosening the tank-to-bowl bolts:
Locate the tank-to-bowl bolts underneath the tank. These bolts secure the tank to the bowl. Use the adjustable wrench to loosen the bolts in a counterclockwise direction. Be gentle and avoid applying excessive force, as you don’t want to crack or damage the porcelain. Loosen the bolts enough to separate the tank from the bowl.
6. Removing the toilet tank from the bowl:
After loosening the tank-to-bowl bolts, lift the toilet tank straight up and away from the bowl. Be careful, as the tank may still be heavy, especially if it’s filled with water. Set the tank aside in a safe area, making sure it’s secure and won’t accidentally tip over or break.
By following these step-by-step instructions, you’ve successfully removed the toilet tank. Now, you can proceed with any necessary repairs, replacements, or renovations. Remember to take your time and exercise caution throughout the process to ensure a smooth and safe removal experience.
Tips and Troubleshooting
During the removal process of a toilet tank, you may encounter various challenges or unexpected situations. To help you navigate through these issues, we have compiled a list of tips and troubleshooting advice. By following these suggestions, you’ll be better equipped to overcome difficulties and ensure a successful removal.
Common issues and potential challenges during the removal process
1. Stuck tank-to-bowl bolts: Over time, tank-to-bowl bolts can become corroded or rusted, making them difficult to loosen. In such cases, you can try applying a penetrating oil or using a hacksaw blade to carefully cut through the bolts.
2. Stubborn water supply line nut: Sometimes, the nut connecting the water supply line to the tank can be challenging to loosen, especially if it hasn’t been detached in a long time. Applying some WD-40 or another lubricant can help loosen the tight connection.
3. Difficulties with lifting the tank: Tanks can be heavy and unwieldy, making them challenging to lift and remove. Consider enlisting the help of a friend or using a strap or lifting tool to make the task easier and avoid straining your back.
Read more: How To Clean A Toilet Tank With Vinegar
Useful tips to overcome difficulties
1. Take precautionary measures: Wear gloves and protective eyewear throughout the removal process to protect yourself from any potential injuries or exposure to harmful substances.
2. Be organized: Keep all removed screws, bolts, and components in a safe place. It’s easy to lose smaller parts during the removal process, so keeping them together will make reassembly much smoother.
3. Label connections: If you suspect you may forget how to reconnect certain parts later, consider labeling the connections. This way, you can easily identify which components go where when it’s time to reassemble the tank.
How to handle unexpected situations
1. Constant water flow: If you encounter a situation where the water doesn’t stop flowing from the shut-off valve, it may be due to a faulty valve. In this case, you will need to shut off the main water supply to your home until the valve can be repaired or replaced.
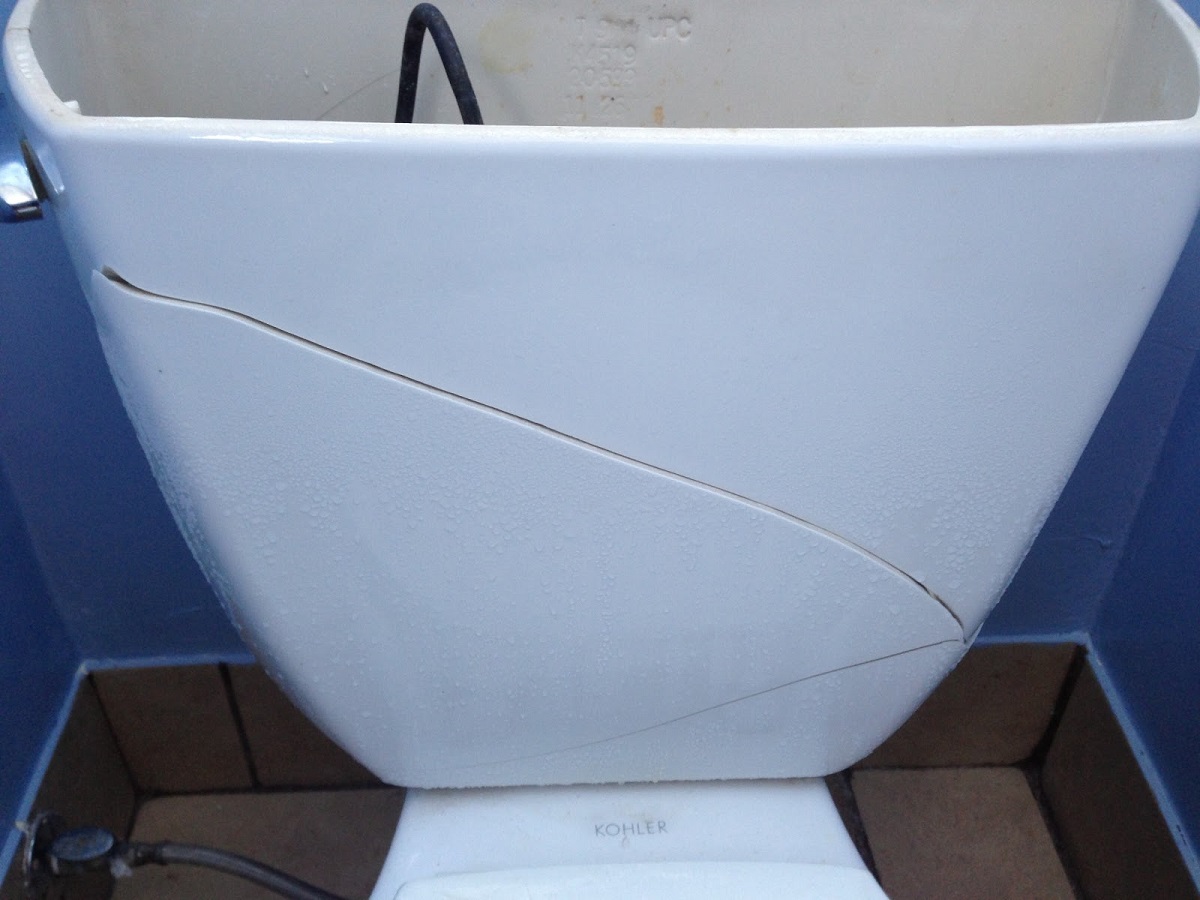
2. Cracked porcelain: Cracking or damaging the toilet tank or bowl is always a possibility. If this occurs, you will need to replace the damaged part. Ensure that you safely dispose of broken porcelain and follow proper disposal regulations.
3. Leaking water: After removing the tank, inspect the rubber gasket between the tank and bowl. If it appears worn or damaged, replace it to prevent future leaks. Additionally, reseal any connections with plumbers tape during the reassembly process to create a watertight seal.
Remember, unexpected situations can arise, and it’s important to approach them calmly and assess the best course of action. If you feel uncertain or are unable to resolve an issue on your own, it’s advisable to consult a professional plumber for further assistance.
By being prepared and following these tips and troubleshooting suggestions, you’ll be better equipped to handle any difficulties that may arise during the removal process of a toilet tank.
Cleaning and Maintenance
Once you have successfully removed the toilet tank, it’s essential to take the opportunity to clean and inspect it for any damages. Performing regular maintenance on your toilet tank will help ensure its longevity and keep it functioning properly. Here are the steps to follow for cleaning and maintaining your toilet tank:
Cleaning the tank and removing any debris
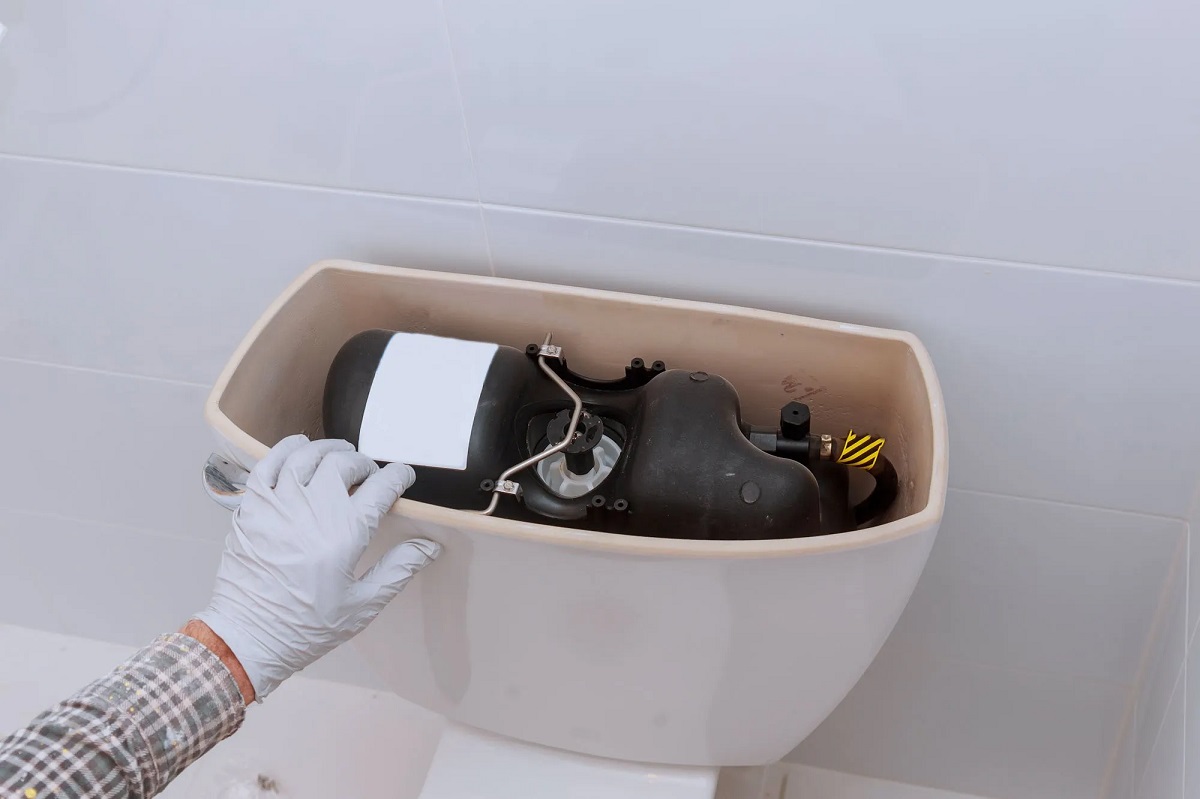
1. Empty the tank: If there is still water in the tank, carefully pour it out into a bucket or container. Be cautious not to spill the water.
2. Scrub the tank interior: Use a scrub brush or sponge and a mild cleaning solution to clean the interior of the tank. Pay attention to areas that may have accumulated mineral deposits or mold. Thoroughly clean these areas using a gentle scrubbing motion.
3. Remove any debris: Check for any debris, such as sediment or small objects, that may have accumulated in the tank. Carefully remove any debris using a pair of long-handled tweezers or a plastic spoon. Be careful not to scratch the surface of the tank.
4. Rinse the tank: Once you have scrubbed and removed any debris, thoroughly rinse the tank with clean water. This will ensure that all cleaning solution and loosened debris are washed away.
5. Dry the tank: Use a clean towel or cloth to wipe down the interior of the tank. Make sure it is completely dry before proceeding.
Read more: How To Attach Tank To Toilet Bowl
Inspecting and repairing any damages
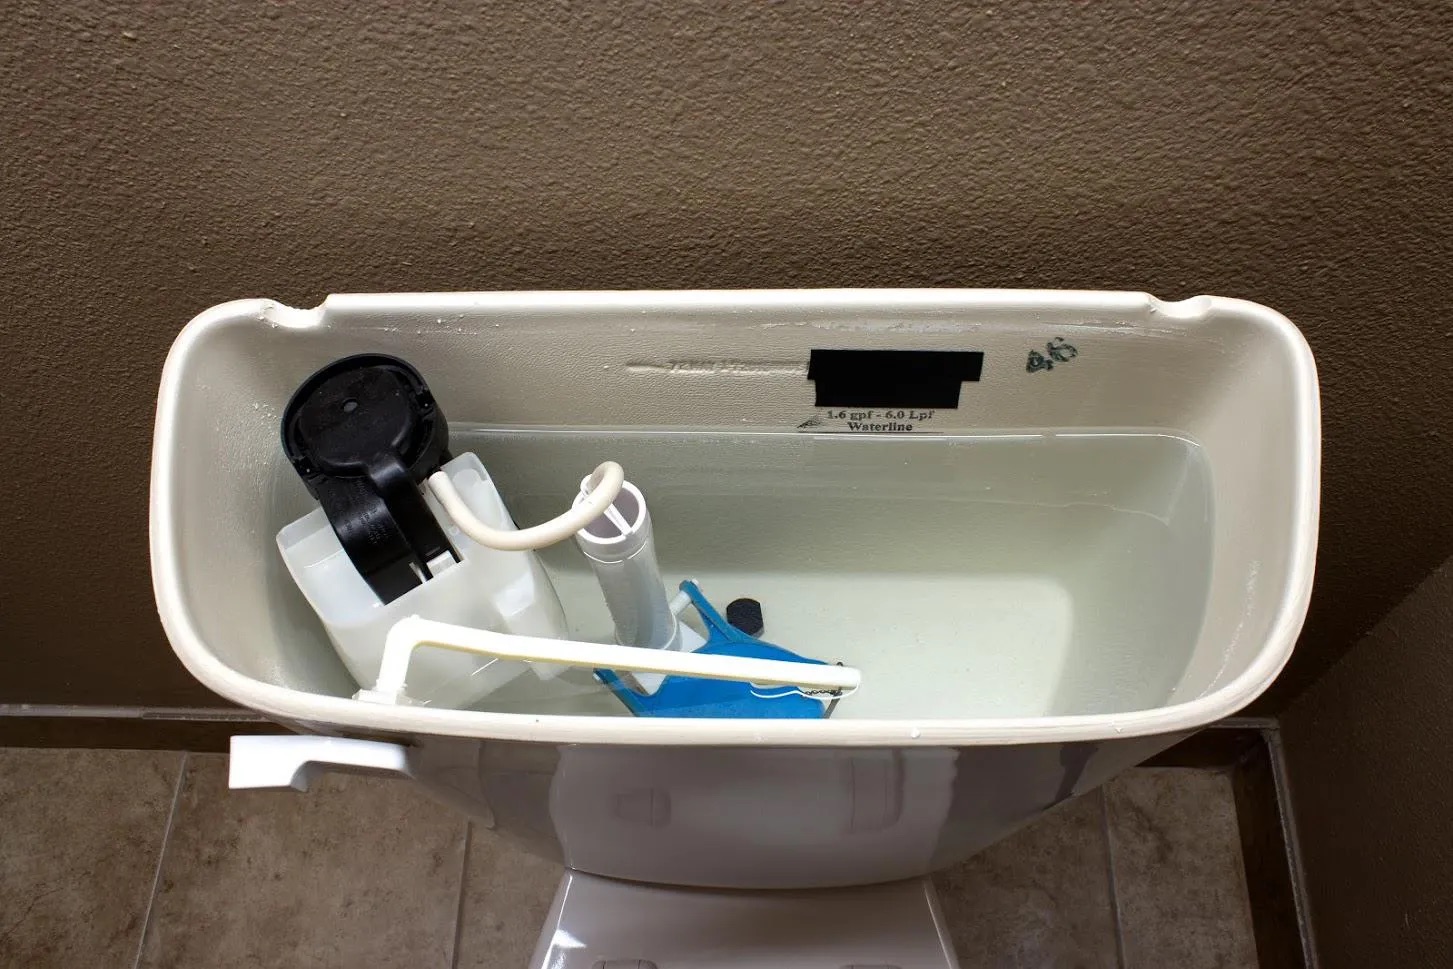
1. Check for cracks or leaks: Carefully inspect the tank for any visible cracks or leaks. Pay close attention to areas around the tank-to-bowl gasket, fill valve, and flush valve. If you notice any damages, such as cracks or signs of water leakage, it’s crucial to address them promptly.
2. Repair or replace damaged parts: If you identify any damages, it’s essential to repair or replace the affected parts. Consult the manufacturer’s instructions or seek professional assistance for proper repair or replacement procedures.
Regular maintenance to prolong the lifespan of the toilet tank
1. Check and adjust water level: Verify that the water level in the tank is set to the appropriate level. Adjust the fill valve as needed to ensure proper water fill and prevent excessive water usage.
2. Inspect and clean the flush valve: Regularly inspect the flush valve for any debris or mineral buildup. Clean the flush valve using a mild cleaning solution and a brush to ensure optimal flushing performance.
3. Check tank-to-bowl gasket: Inspect the tank-to-bowl gasket for wear or damage. If necessary, replace the gasket to prevent leaks between the tank and bowl.
4. Check and tighten connections: Periodically check all connections within the tank, including the fill valve and flush valve. Tighten any loose connections to prevent leaks.
5. Avoid using harsh chemicals: When cleaning the toilet tank or bowl, avoid using harsh chemicals that can damage the tank’s components. Stick to mild cleaning solutions and non-abrasive cleaning methods.
Regular cleaning and maintenance will prolong the lifespan of your toilet tank, prevent water leaks, and maintain its proper functioning. By following these steps and addressing any issues promptly, you can ensure that your toilet tank remains in excellent condition for years to come.
Conclusion
In conclusion, removing a toilet tank may seem like a daunting task, but by following the proper steps and taking necessary precautions, you can successfully complete the process. Here is a recap of the steps involved in removing a toilet tank:
1. Shut off the water supply.
2. Drain the toilet tank.
3. Remove the toilet tank lid.
4. Disconnect the water supply line.
5. Loosen the tank-to-bowl bolts.
6. Remove the toilet tank from the bowl.
It is crucial to approach this task with caution and prioritize safety. Remember to wear protective gloves and eyewear throughout the process. Take the time to shut off the water supply and drain the tank before starting any removal steps. Handling the tank with care to avoid damage or injury is essential.
By following the appropriate steps, you can remove the toilet tank efficiently and without complications. It is also crucial to be prepared for potential challenges that may arise during the removal process. Use the tips provided to troubleshoot issues such as stuck bolts or stubborn connections.
Regular cleaning and maintenance of the toilet tank are key to ensuring its longevity and proper functioning. Removing any debris, inspecting for damages, and addressing them promptly will help prevent leaks and extend the lifespan of the tank.
In conclusion, while removing a toilet tank may seem like a daunting task, it is manageable with the right tools, knowledge, and approach. By following the steps outlined in this guide and prioritizing caution and safety, you can successfully remove the toilet tank and address any necessary repairs or replacements.
Remember, if you feel unsure or encounter significant challenges during the process, it is always advisable to seek professional assistance. Taking care of your toilet tank will contribute to the overall functionality and hygiene of your bathroom. With regular maintenance and care, your toilet tank will continue to serve you efficiently for years to come.
Once you've mastered removing a toilet tank, why stop there? Dive into our handy guide on toilet repair to tackle even more fixes with ease before 2024. Planning a bigger project? Get insights on bathroom renovation duration to efficiently plan and execute your next big transformation. Keep your home in top shape with these practical tips and tricks!
Frequently Asked Questions about How To Remove Toilet Tank
Was this page helpful?
At Storables.com, we guarantee accurate and reliable information. Our content, validated by Expert Board Contributors, is crafted following stringent Editorial Policies. We're committed to providing you with well-researched, expert-backed insights for all your informational needs.


0 thoughts on “How To Remove Toilet Tank”