Articles
How To Replace Toilet Tank Seal
Modified: August 17, 2024
Learn how to replace a toilet tank seal with this informative article. Find step-by-step instructions and tips to fix leaks and keep your bathroom in top shape.
(Many of the links in this article redirect to a specific reviewed product. Your purchase of these products through affiliate links helps to generate commission for Storables.com, at no extra cost. Learn more)
Introduction
Replacing a toilet tank seal is a common maintenance task that homeowners often face. Over time, the seal can deteriorate, causing leaks and potential water damage. It is important to address this issue promptly to prevent further complications.
In this article, you will learn step-by-step instructions on how to replace a toilet tank seal. We will guide you through the process, highlighting the necessary tools and supplies, as well as providing helpful tips to ensure a successful repair.
By following these instructions, you can save yourself the cost and hassle of hiring a professional plumber. So let’s get started and restore the proper functioning of your toilet!
Note: Before beginning any plumbing tasks, it’s always a good idea to shut off the water supply. Locate the shut-off valve near the base of the toilet and turn it clockwise until it stops. This will prevent any water flow while you work.
Now, let’s move on to the first step: gathering the necessary tools and supplies.
Key Takeaways:
- Replacing a toilet tank seal is a manageable DIY task that can save you time and money. By following the step-by-step instructions and gathering the necessary tools, you can effectively restore your toilet’s proper functioning.
- Prioritize safety and thoroughness when replacing a toilet tank seal. By shutting off the water supply, cleaning the area, and checking for leaks, you can ensure a successful seal replacement and prevent potential water damage.
Read more: How To Remove Toilet Tank
Step 1: Gather the necessary tools and supplies
To successfully replace the toilet tank seal, you will need the following tools and supplies:
1. Adjustable wrench: This tool will help you loosen and tighten various nuts and bolts throughout the process.
2. Screwdriver: You may need a screwdriver to remove any screws or fasteners holding the toilet tank in place.
3. Putty knife: A putty knife will come in handy for scraping off any old sealant or debris from the surfaces.
4. New toilet tank seal: Ensure that you have a replacement seal that matches the size and shape of the old one. These are readily available at hardware stores.
5. Rag or towel: Having a rag or towel nearby will help you clean up any spills or excess water.
Before proceeding, make sure you have all these items readily available. It is essential to gather everything beforehand to streamline the repair process and minimize any disruptions.
Now that you have everything you need, let’s move on to the second step: shutting off the water supply.
Step 2: Shut off the water supply
Before working on the toilet tank, it is crucial to shut off the water supply to avoid any water leakage or accidents. Follow these steps to shut off the water supply:
1. Locate the shut-off valve: Look for a small handle or lever near the base of the toilet. This is the shut-off valve for the water supply to the toilet tank. It is typically located on the wall or floor behind the toilet.
2. Turn the valve clockwise: Using your hand or an adjustable wrench, turn the valve clockwise until it stops. This will shut off the water flow to the toilet tank.
3. Test the shutdown: To ensure that the water supply is fully shut off, flush the toilet and check if water continues to flow. If the water stops, you have successfully shut off the supply. If water continues to flow, double-check that the valve is fully closed.
By shutting off the water supply, you prevent any accidental flooding or water damage during the repair process. It’s always recommended to take this precautionary step before working on any plumbing-related tasks.
With the water supply shut off, you can proceed to the next step: emptying the toilet tank.
Step 3: Empty the toilet tank
Before you can replace the toilet tank seal, you need to empty the tank of any water. Follow these steps to empty the toilet tank:
1. Remove the tank lid: Lift the lid of the toilet tank and set it aside in a safe place. Be careful as the lid may be heavy and fragile.
2. Flush the toilet: Press down on the toilet handle to initiate the flushing process. This will empty most of the water from the tank into the toilet bowl.
3. Remove remaining water: To completely empty the tank, locate the flapper valve at the bottom of the tank. Lift the flapper valve up to release any remaining water. You may need to hold the valve up until all the water has drained.
4. Soak up excess water: Use a sponge, towel, or bucket to soak up any residual water that may be in the tank. Make sure the tank is completely dry before proceeding.
By emptying the toilet tank, you create a clean and dry environment to work in. This allows for easy access to the toilet tank components and minimizes the risk of water spills during the seal replacement process.
Once the toilet tank is empty, you are ready to move on to the next step: removing the old toilet tank seal.
Step 4: Remove the old toilet tank seal
Now that the toilet tank is empty, it’s time to remove the old seal. Follow these steps to effectively remove the old toilet tank seal:
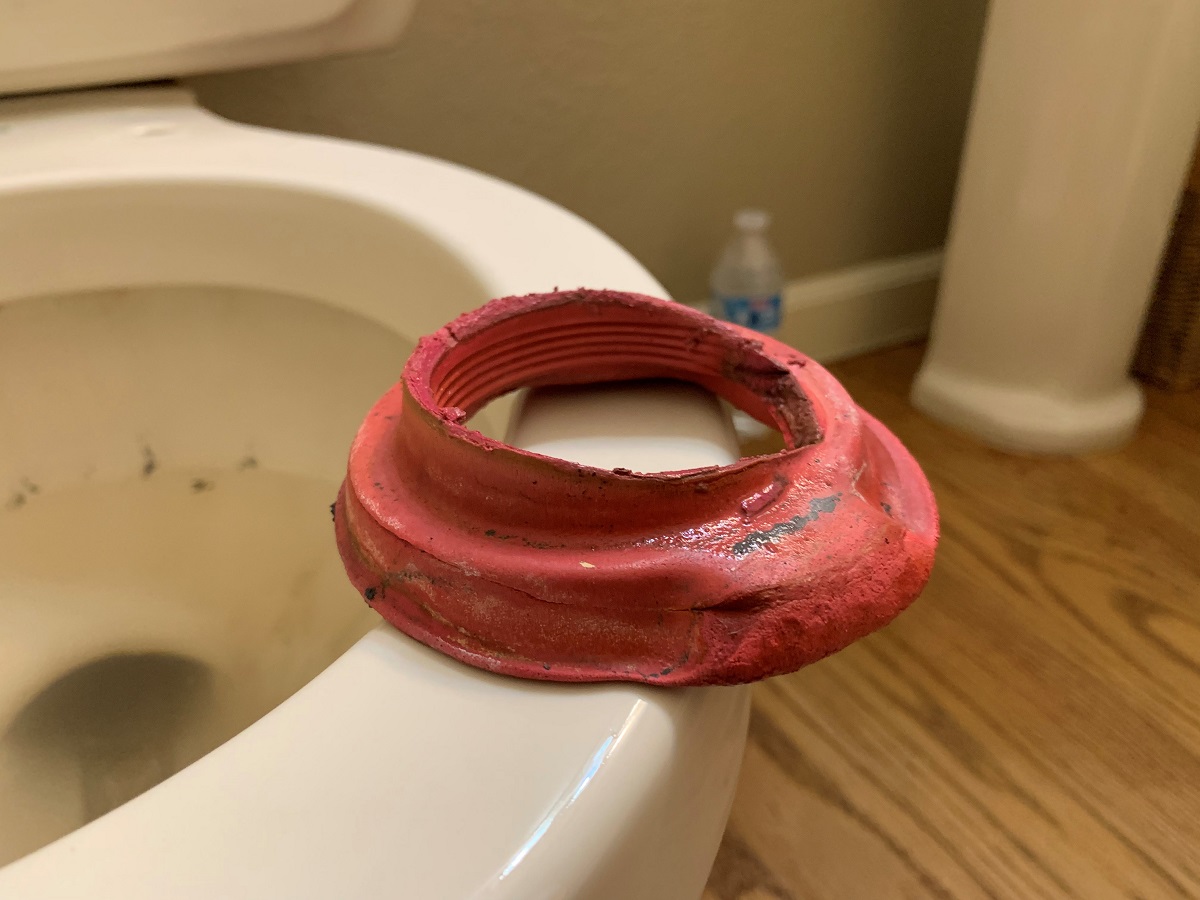
1. Inspect the seal: Take a close look at the seal around the base of the flush valve. Look for any cracks, damage, or signs of wear. This will help you determine if the seal is indeed the cause of any leaks or issues.
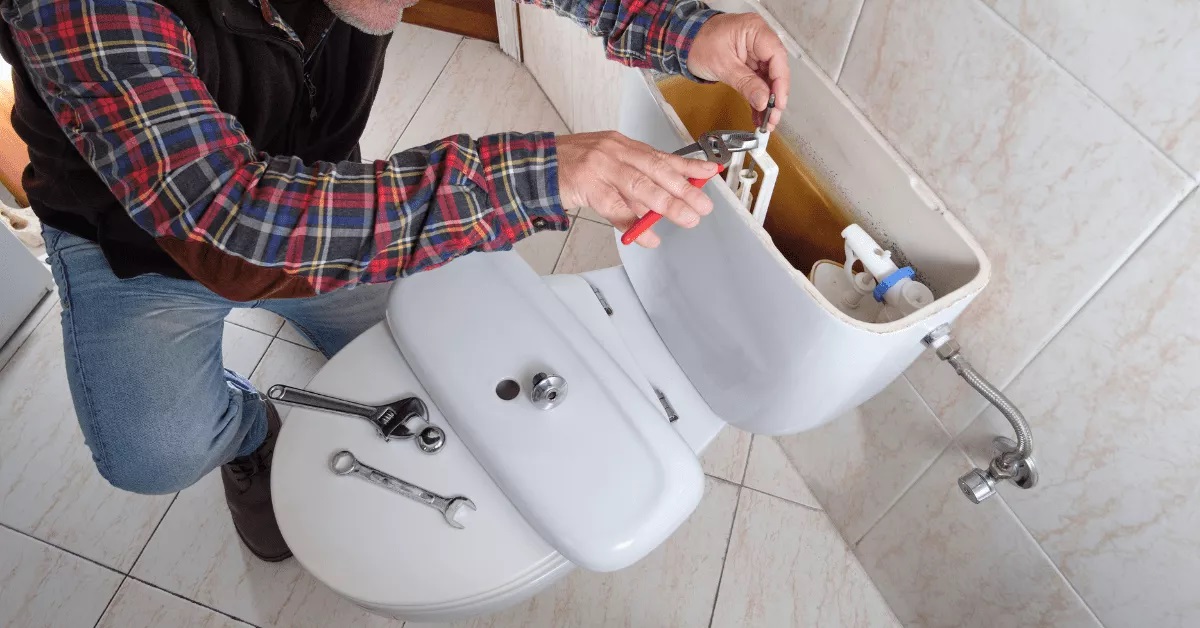
2. Loosen the tank bolts: Locate the tank bolts that secure the toilet tank to the bowl. You may need to use a wrench or a pair of pliers to loosen the bolts. It’s important to be gentle and avoid applying excessive force to prevent damaging the tank or the bowl.
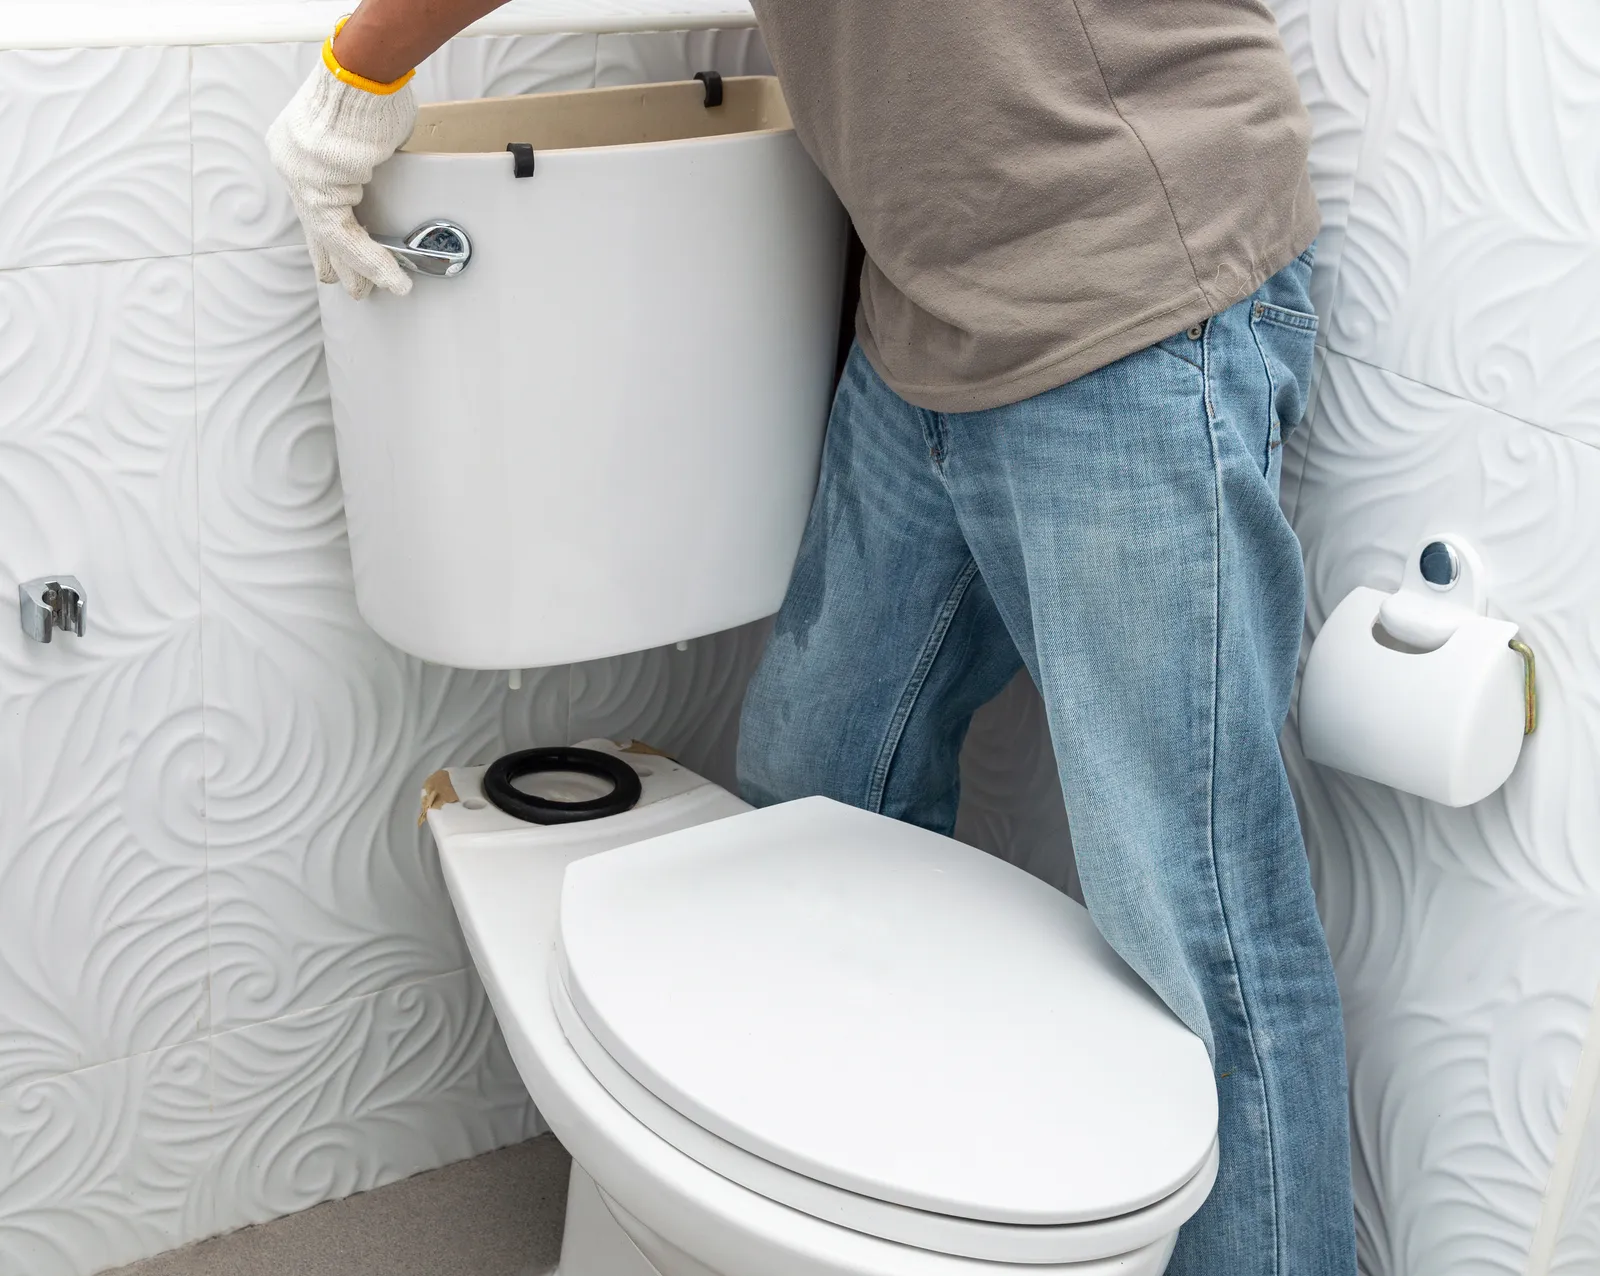
3. Lift the tank off the bowl: Once the bolts are loosened, carefully lift the toilet tank off the bowl. You may need some assistance as toilet tanks can be heavy. Set the tank aside on a soft surface, like a towel or a blanket, to protect it from scratches.
4. Remove the old seal: Inspect the bottom of the toilet tank and the top of the bowl for the old seal. It may be adhered with sealant or a rubber gasket. Use a putty knife or your fingers to carefully peel off the old seal. Ensure that all remnants of the old seal are removed.
5. Clean the surfaces: Once the old seal is removed, use a rag or towel to clean both the bottom of the toilet tank and the top of the bowl. Remove any debris, old sealant, or residue to ensure a clean and smooth surface for the new seal.
By removing the old toilet tank seal, you eliminate any potential leaks or issues caused by a worn-out seal. This step prepares the surfaces for the installation of the new seal, which we will cover in the next step.
Now, let’s move on to step 5: cleaning the area around the seal.
Read more: How To Clean Inside Toilet Tank
Step 5: Clean the area around the seal
Before installing the new toilet tank seal, it’s essential to clean the area around the seal thoroughly. This will ensure optimal adhesion and prevent any debris from interfering with the seal’s effectiveness. Follow these steps to clean the area:
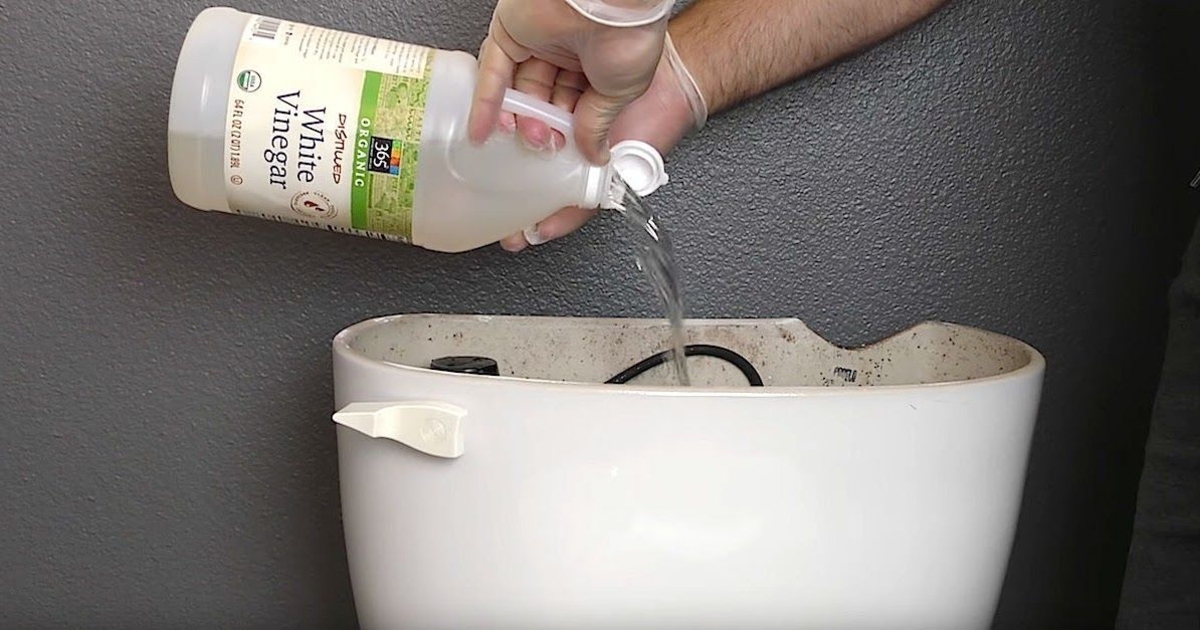
1. Scrub the surfaces: Use a soft brush or a sponge to scrub the bottom of the toilet tank and the top of the bowl around the seal area. Remove any dirt, grime, or residue that may have accumulated.
2. Remove stubborn residue: For any stubborn residue or old sealant, you can use a putty knife to gently scrape it off. Be cautious not to scratch or damage the surfaces.
3. Wipe with a damp cloth: After scrubbing, dampen a clean cloth with water and wipe down the surfaces to remove any remaining dirt or residue. Ensure that the area is dry before proceeding to the next step.
By cleaning the area around the seal, you create a clean and smooth surface for the new seal to adhere to. This step ensures a proper seal and prevents any leakage or issues in the future.
Now that the area is clean, we can move on to step 6: installing the new toilet tank seal.
When replacing the toilet tank seal, be sure to thoroughly clean the area around the seal and the tank to ensure a proper seal. Any debris or old sealant left behind can cause leaks.
Step 6: Install the new toilet tank seal
Now that the surfaces are clean and prepped, it’s time to install the new toilet tank seal. Follow these steps to effectively install the new seal:
1. Inspect the new seal: Take a close look at the new seal to ensure it is the correct size and shape for your toilet. Verify that it is in good condition, without any cracks or deformities.
2. Position the new seal: Carefully place the new seal onto the flush valve opening at the bottom of the toilet tank. Ensure that it is centered and aligned properly.
3. Press down firmly: Apply even pressure and press down firmly on the new seal to secure it in place. Make sure it is seated properly and snugly against the flush valve opening.
4. Check for proper placement: Double-check that the seal is flush against the toilet tank and sits evenly on top of the bowl. Any misalignment can cause leaks or issues.
By installing the new toilet tank seal correctly, you create a watertight seal between the tank and the bowl. This prevents any water leakage and ensures efficient and effective flushing.
With the new seal in place, we can move on to step 7: reattaching the toilet tank to the bowl.
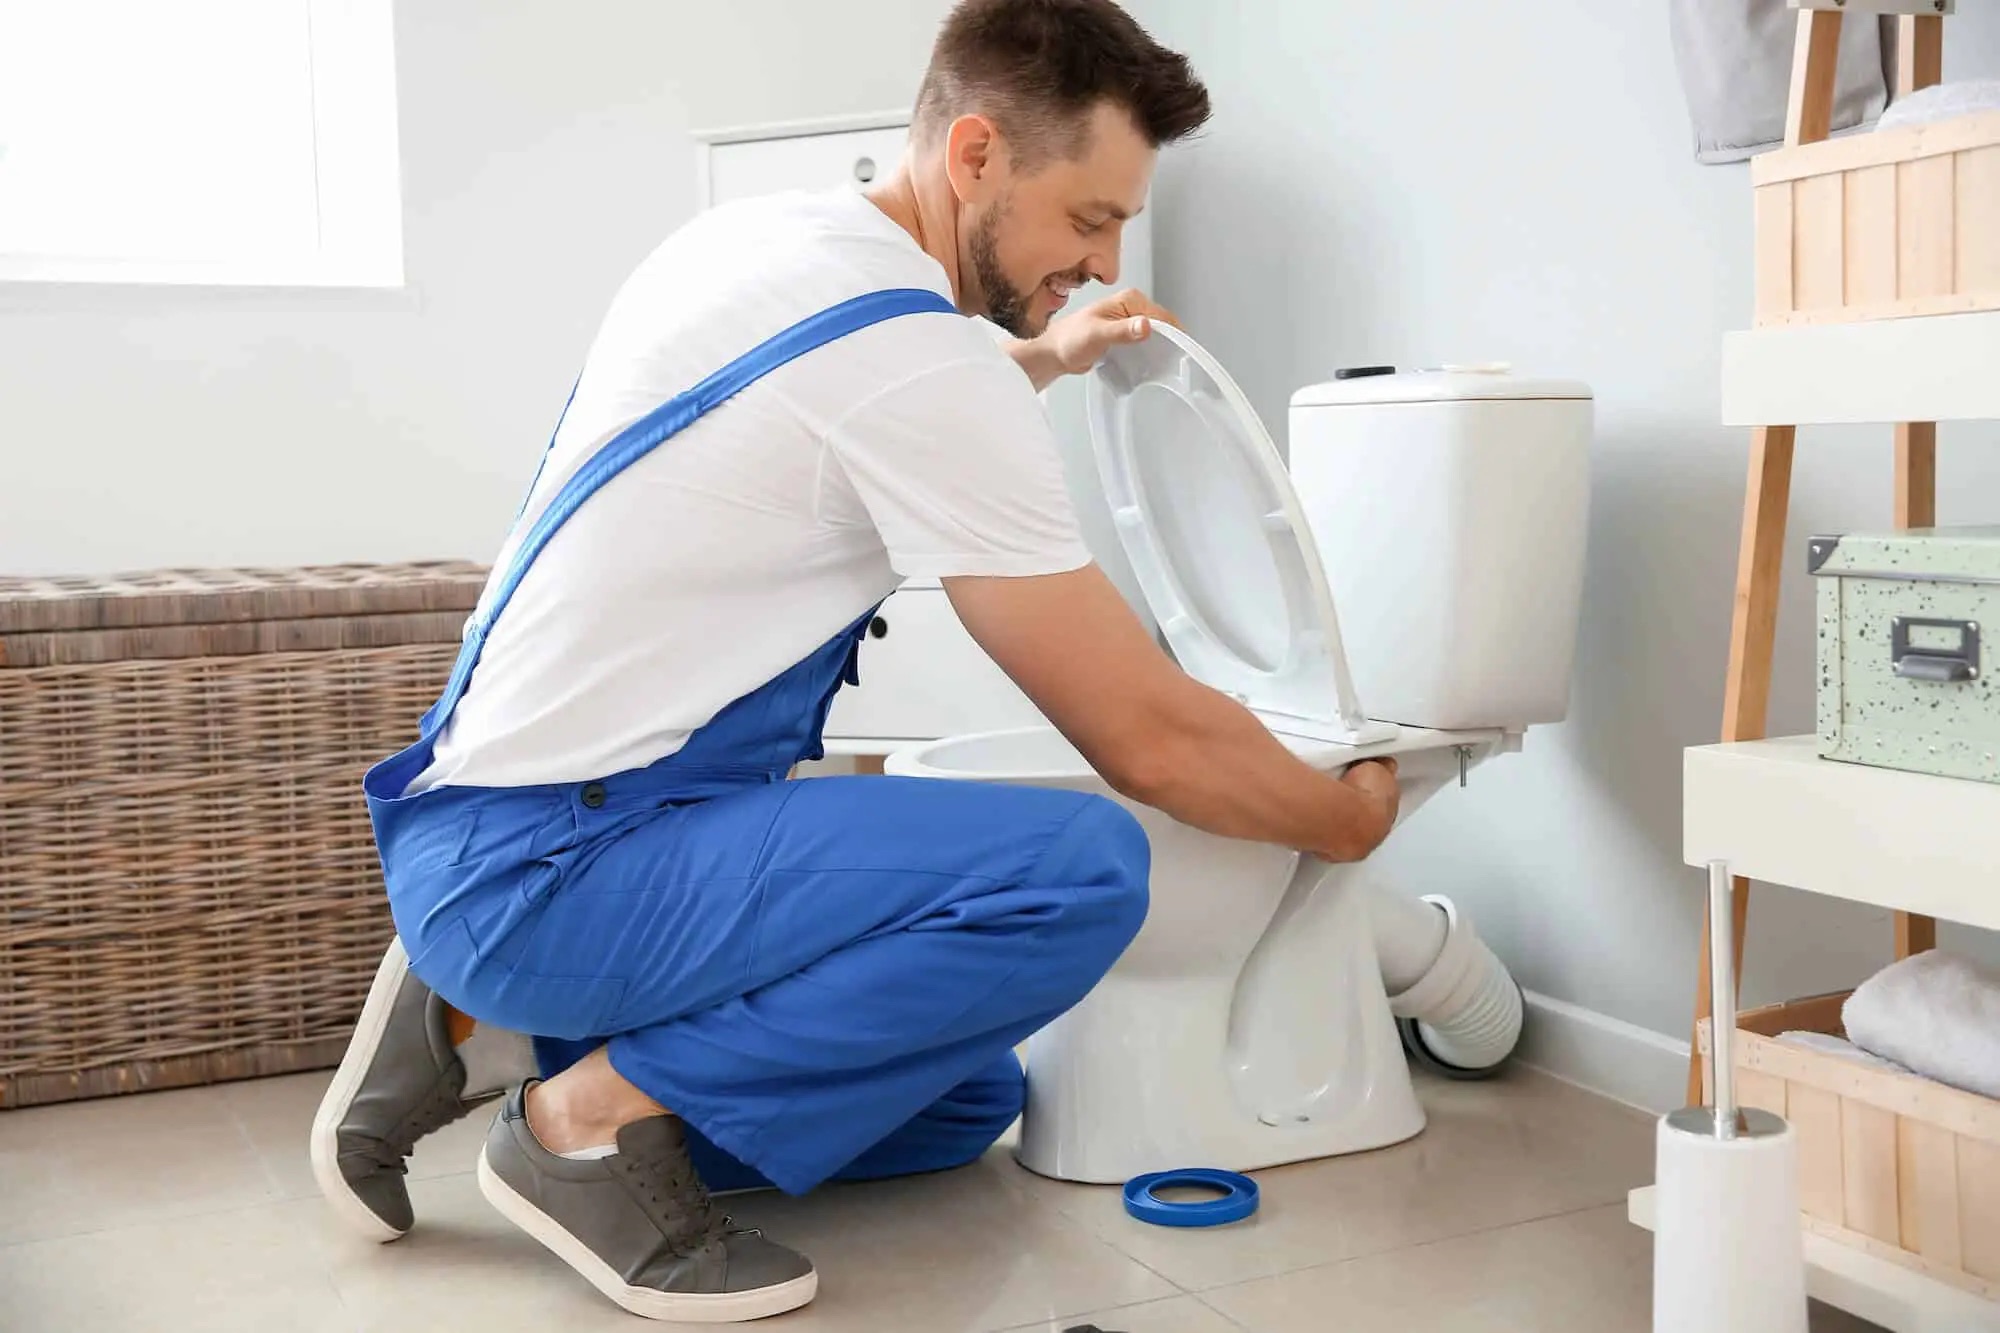
Step 7: Reattach the toilet tank
Now that the new seal is in place, it’s time to reattach the toilet tank to the bowl. Follow these steps to ensure a secure and proper reattachment:
1. Align the tank and bowl: Carefully position the toilet tank above the bowl, ensuring that the bolt holes on the bottom of the tank align with the corresponding holes on the bowl.
2. Insert the tank bolts: Insert the tank bolts through the bolt holes on the bottom of the tank and through the corresponding holes on the bowl. Align the bolts to ensure they are straight and properly inserted.
3. Tighten the nuts: Underneath the bowl, secure the tank bolts with the nuts provided. Use an adjustable wrench or pliers to tighten the nuts, but be careful not to overtighten as it can crack the porcelain.
4. Check for stability: Gently wiggle the toilet tank to ensure it is securely attached to the bowl. If there is any wobbling or instability, further tighten the nuts until the tank is stable.
By reattaching the toilet tank to the bowl, you ensure a proper and secure connection. This step is crucial to prevent any leaks or issues during regular use.
With the toilet tank reattached, we can move on to step 8: turning on the water supply and testing for any leaks.
Step 8: Turn on the water supply
After the toilet tank is securely reattached, it’s time to turn on the water supply and restore the flow of water. Follow these steps to turn on the water supply:
1. Locate the shut-off valve: Identify the shut-off valve that you previously closed in step 2. It is typically located near the base of the toilet, either on the wall or the floor.
2. Turn on the valve: Using your hand or an adjustable wrench, turn the shut-off valve counterclockwise to open it. This will allow water to flow into the toilet tank.
3. Monitor for leaks: As the water flow is resumed, closely monitor the areas around the seal and the tank bolts for any signs of leaks. Keep an eye on the water level in the tank as well.
4. Adjust as needed: If you notice any leaks, try tightening the tank bolts slightly or adjusting the seal to ensure a proper seal. If the leaks persist, you may need to replace the seal or seek professional assistance.
By turning on the water supply, you allow the toilet tank to fill up and prepare for regular use. It is important to be vigilant during this step to identify and address any potential leaks or issues.
With the water supply turned on, we can move on to step 9: checking for any leaks and ensuring the proper functioning of the toilet.
Read more: How To Put Fabuloso In Toilet Tank
Step 9: Check for any leaks
After turning on the water supply, it’s important to check for any leaks and ensure the proper functioning of the toilet. Follow these steps to check for leaks:
1. Observe the seal: Carefully inspect the area around the new toilet tank seal for any signs of water leakage. Look for any dripping or pooling water. If you notice any leaks, it may indicate an issue with the seal.
2. Check the tank bolts: Examine the area where the tank bolts are secured. Look for any water seepage or drips around the bolts. Tighten the nuts if necessary to ensure a watertight connection.
3. Inspect the tank-to-bowl connection: Check for any water leakage between the toilet tank and the bowl. Look for any moisture or signs of water around the connection points. Tighten the tank bolts further if needed.
4. Test the flushing function: Flush the toilet several times and observe the water flow. Ensure that the water flows properly into the bowl and that there are no unusual sounds or signs of water leaking from the tank.
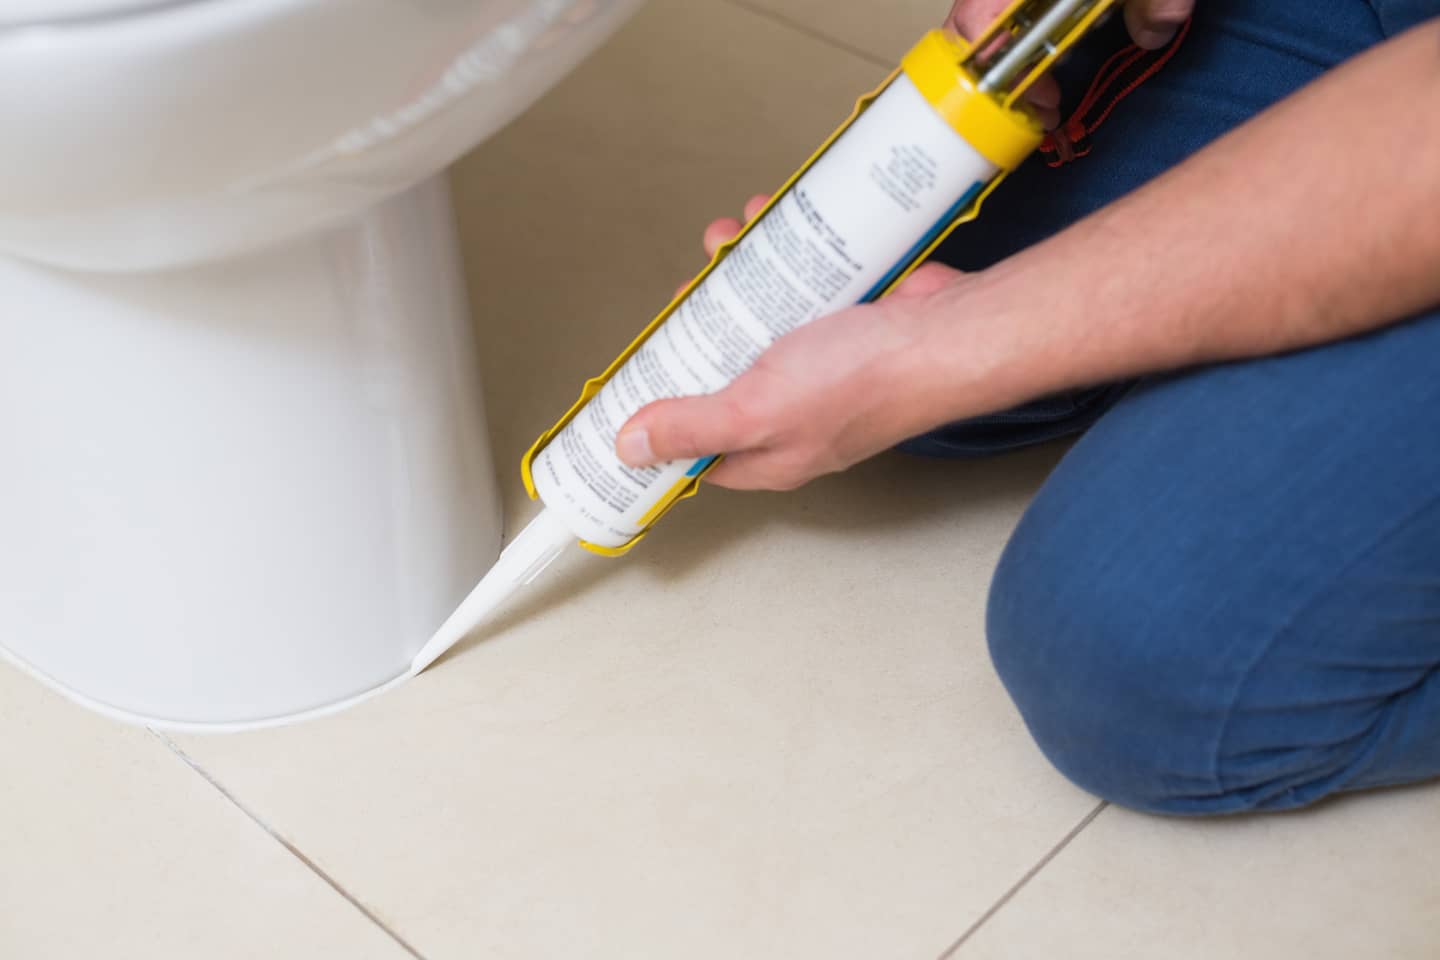
5. Monitor for any continued leaks: Keep an eye on the area around the toilet for any continued leaks or dripping water. Pay attention to the base of the toilet, the floor surrounding it, and the walls nearby.
If you notice any leaks during the testing phase, take immediate action to address the issue. This may involve tightening the nuts, adjusting the seal, or seeking professional assistance if the problem persists.
By thoroughly checking for leaks, you can ensure that the toilet tank seal replacement was successful and prevent any water damage or further issues.
With step 9 complete, you have successfully replaced the toilet tank seal. Congratulations! You have saved time and money by completing this maintenance task yourself.
Feel free to reach out if you have any further questions or concerns. Happy plumbing!
Conclusion
Replacing a toilet tank seal is a straightforward maintenance task that can be easily accomplished with the right tools and instructions. By following the step-by-step guide provided in this article, you can successfully replace a worn-out or damaged seal, preventing leaks and ensuring the proper functioning of your toilet.
Throughout the process, we highlighted the importance of gathering the necessary tools, shutting off the water supply, emptying the toilet tank, removing the old seal, cleaning the area, installing the new seal, reattaching the toilet tank, turning on the water supply, and checking for leaks. Each step plays a crucial role in ensuring a successful seal replacement.
Remember to take your time and proceed with caution during each step. Familiarize yourself with the layout and components of your toilet to confidently navigate the process. If you encounter any difficulties or persistent leaks, don’t hesitate to seek professional assistance.
By successfully replacing the toilet tank seal, you have restored the integrity of the tank-to-bowl connection, preventing water leakage and potential damage to your bathroom. Regular maintenance tasks like this can save you money on costly repairs and contribute to the overall efficiency of your plumbing system.
Throughout the process, prioritize safety by wearing protective gloves and taking necessary precautions. Remember to clean up any spills and dispose of old materials properly.
We hope this article has provided you with the guidance you need to confidently replace a toilet tank seal. By following these steps, you can ensure the long-term functionality and reliability of your toilet.
Now that you've mastered replacing a toilet tank seal, why stop there? Dive deeper into bathroom maintenance with our next article, which covers a wide range of toilet repair techniques set to be all the rage in 2024. From simple fixes to more complex issues, this guide ensures your toilet stays in perfect working condition. Don’t miss out on these invaluable insights!
Frequently Asked Questions about How To Replace Toilet Tank Seal
Was this page helpful?
At Storables.com, we guarantee accurate and reliable information. Our content, validated by Expert Board Contributors, is crafted following stringent Editorial Policies. We're committed to providing you with well-researched, expert-backed insights for all your informational needs.

0 thoughts on “How To Replace Toilet Tank Seal”