Articles
How To Clean Inside Toilet Tank
Modified: October 19, 2024
Discover effective methods for cleaning the inside of your toilet tank with our informative articles. Achieve a spotless, hygienic bathroom effortlessly.
(Many of the links in this article redirect to a specific reviewed product. Your purchase of these products through affiliate links helps to generate commission for Storables.com, at no extra cost. Learn more)
Introduction
The toilet is one of the most used fixtures in any household, but often, we forget to clean the inside of the toilet tank. While the bowl and seat are regularly cleaned, the tank tends to be overlooked, leading to the buildup of dirt, mold, and mineral deposits.
Regular cleaning of the inside of the toilet tank is not only essential for hygiene but also for maintaining the functionality and lifespan of your toilet. By removing debris and mineral deposits, you can prevent clogs, reduce the risk of damage to the flush components, and ensure the water in the tank remains clean and fresh.
In this article, we will guide you through the process of cleaning the inside of a toilet tank. From understanding its components to the step-by-step cleaning process, we will provide you with all the necessary information to effectively tackle this task. We will also share some extra tips to help maintain a clean toilet tank in the long run.
Key Takeaways:
- Regularly cleaning the inside of your toilet tank is essential for hygiene and functionality. Follow safety precautions, empty the tank, scrub, remove deposits, and maintain it for a fresh and long-lasting toilet system.
- Understanding the components, safety precautions, and step-by-step cleaning process will help you effectively clean the inside of your toilet tank. Regular maintenance and natural cleaning agents can ensure a clean and functional toilet system.
Read more: How To Clean A Toilet Tank With Vinegar
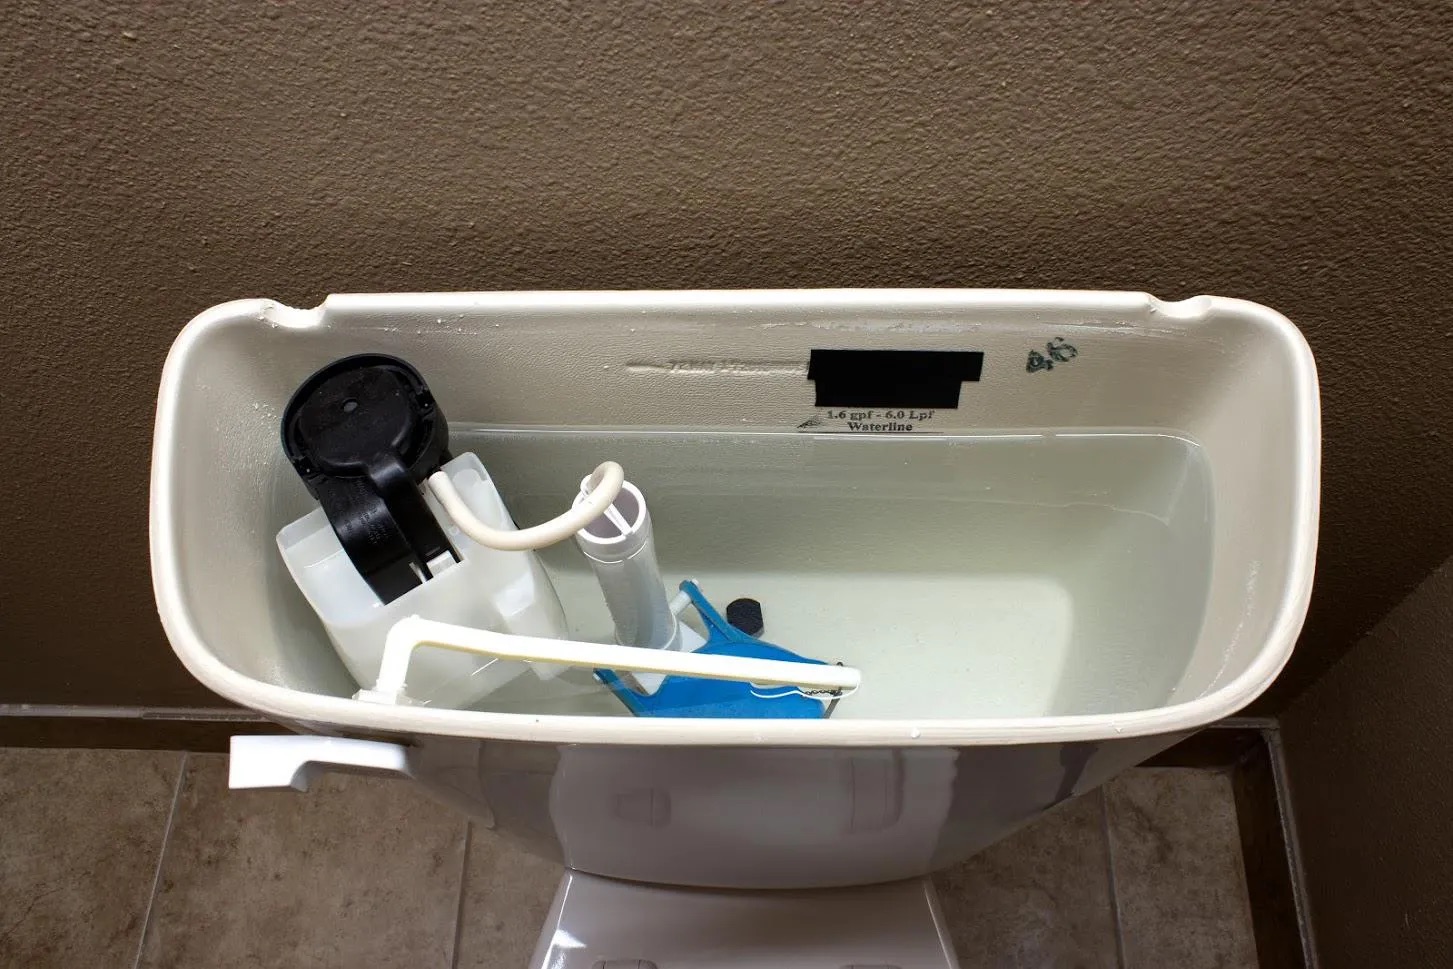
Understanding the Inside of a Toilet Tank
Before you begin cleaning the inside of a toilet tank, it’s important to have a basic understanding of its components. A toilet tank is where the water is stored for flushing purposes. It consists of several parts that work together to ensure the toilet functions properly.
The main components inside a toilet tank include:
- Fill Valve: This valve controls the water flow into the tank after a flush. When the water level drops, the fill valve opens to refill the tank.
- Flush Valve: Also known as the flapper valve, it is responsible for releasing water from the tank into the bowl when you flush.
- Overflow Tube: This tube prevents the tank from overflowing by directing excess water into the toilet bowl.
- Float Ball or Fill Valve Float: As the tank fills with water, the float ball or fill valve float rises. Once it reaches a certain level, it signals the fill valve to stop filling the tank.
- Flush Handle: This lever, located outside the tank, is used to initiate a flush. When you press down on the handle, it lifts the flush valve, allowing water to enter the bowl.
- Flapper Chain: It connects the flush handle to the flush valve. When you press the flush handle, the chain lifts the flapper valve, initiating the flush.
Understanding these components will help you navigate the cleaning process more effectively and avoid any accidental damage while cleaning.
Now that you have a clear understanding of the inside of a toilet tank, let’s move on to the next section and unravel the necessary safety precautions before you begin.
Safety Precautions
When it comes to cleaning the inside of a toilet tank, it’s important to prioritize your safety. Here are some essential safety precautions to keep in mind before you begin:
- Wear Protective Gloves: Cleaning the inside of a toilet tank involves coming into contact with potentially harmful bacteria, mold, and cleaning solutions. Always wear a pair of rubber or latex gloves to protect your hands from any potential hazards.
- Use Eye Protection: To prevent any splashes or accidental contact with cleaning agents, wear safety goggles or glasses to protect your eyes.
- Turn Off the Water Supply: Before starting any cleaning process, it’s crucial to shut off the water supply to the toilet. Locate the water shut-off valve, which is usually located below or behind the tank. Turn it clockwise to stop the water flow.
- Avoid Mixing Cleaning Solutions: Never mix different cleaning agents, as they can produce harmful fumes or hazardous chemical reactions. Stick to one cleaner or use a mixture of vinegar and water for a natural and safe cleaning solution.
- Follow Manufacturer’s Instructions: If you’re using a specific cleaning product, make sure to read and follow the instructions provided by the manufacturer. This will ensure you use the product correctly and safely.
- Keep the Area Well-Ventilated: Open windows or doors to encourage proper airflow while cleaning. This will help dissipate any odors or fumes from cleaning agents.
- Dispose of Cleaning Solutions Properly: After completing the cleaning process, make sure to dispose of any leftover cleaning solutions according to the instructions on the product label. Avoid pouring chemicals directly into the toilet or down the drain, as they can harm the environment.
By following these safety precautions, you can minimize the risk of accidents or exposure to harmful substances while cleaning the inside of your toilet tank. Now that you’re aware of the necessary safety measures, let’s move on to the step-by-step process of cleaning the inside of the tank.
Step 1: Shut Off the Water Supply
Before you begin cleaning the inside of the toilet tank, you need to shut off the water supply. This is important to prevent any water flow or accidental flushing during the cleaning process.
- Locate the water shut-off valve, which is typically located near the base of the toilet or on the wall behind the toilet.
- Turn the valve clockwise to shut off the water supply. You may need to use a wrench or pliers if the valve is stiff.
- Flush the toilet once or twice to remove any excess water from the tank.
By shutting off the water supply, you ensure that there is no water entering the tank while you clean, making the process easier and more efficient.
Now that you have successfully turned off the water supply, let’s move on to the next step: emptying the tank.
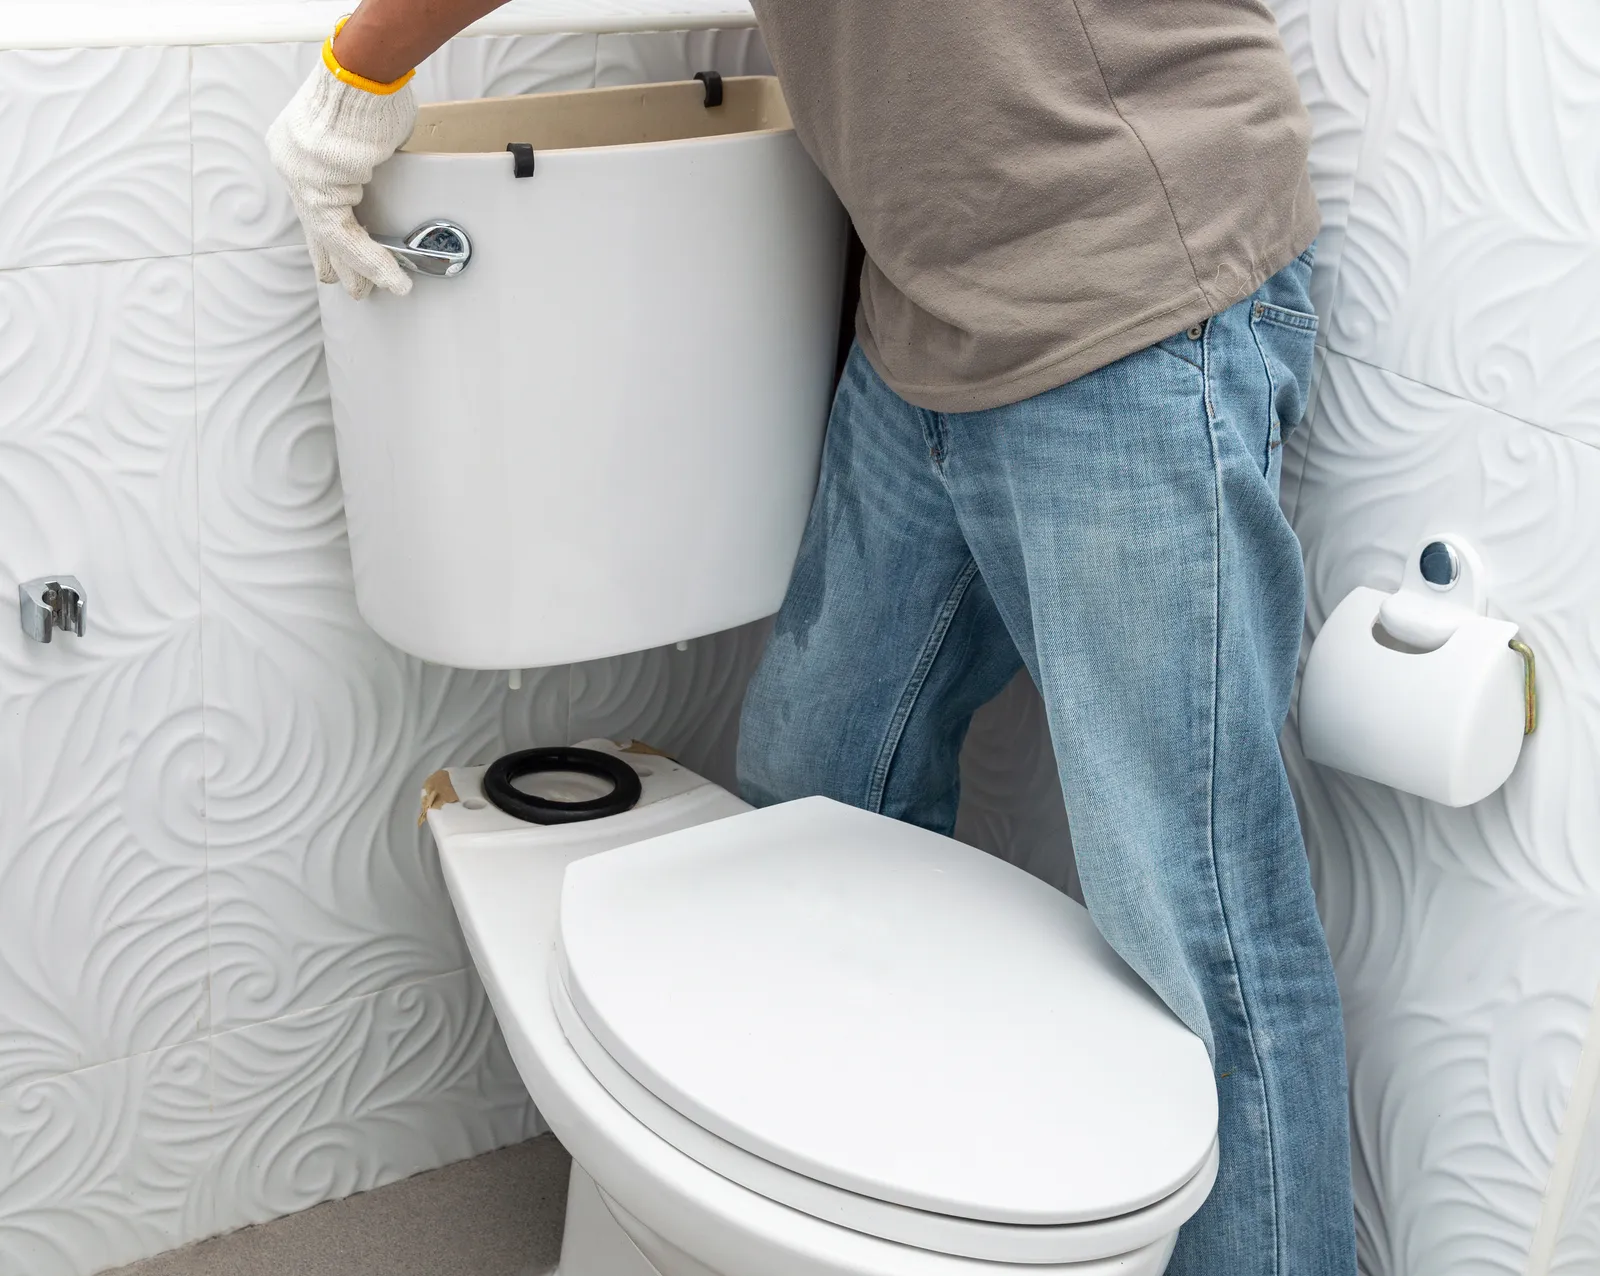
Step 2: Empty the Tank
With the water supply shut off, it’s time to empty the tank of any remaining water. This will make it easier to clean the inside of the tank and prevent any accidental spills.
- Remove the tank lid. Place it in a safe location where it won’t get damaged.
- Flush the toilet one more time to remove as much water as possible from the tank. Hold down the flush handle until the tank is completely empty.
- If there is still some water remaining in the bottom of the tank, use a sponge or towel to soak it up and wring it out into a bucket or sink.
- Ensure that the tank is completely dry before moving on to the next step.
Emptying the tank is an important step as it allows you to have a clear workspace to effectively clean the inside of the tank. By removing the water, you can easily access all areas of the tank and eliminate any potential mess during the cleaning process.
Now that the tank is empty, let’s move on to the next step: scrubbing the inside of the tank.
To clean inside the toilet tank, start by turning off the water supply and flushing to empty the tank. Then, use a scrub brush and a mixture of vinegar and water to scrub away any buildup. Finally, turn the water supply back on and flush to rinse.
Read more: How To Replace The Inside Of A Toilet
Step 3: Scrub the Inside of the Tank
Now that the tank is empty, it’s time to scrub the inside to remove any dirt, stains, or bacteria. Here’s how you can effectively clean the inside of the toilet tank:
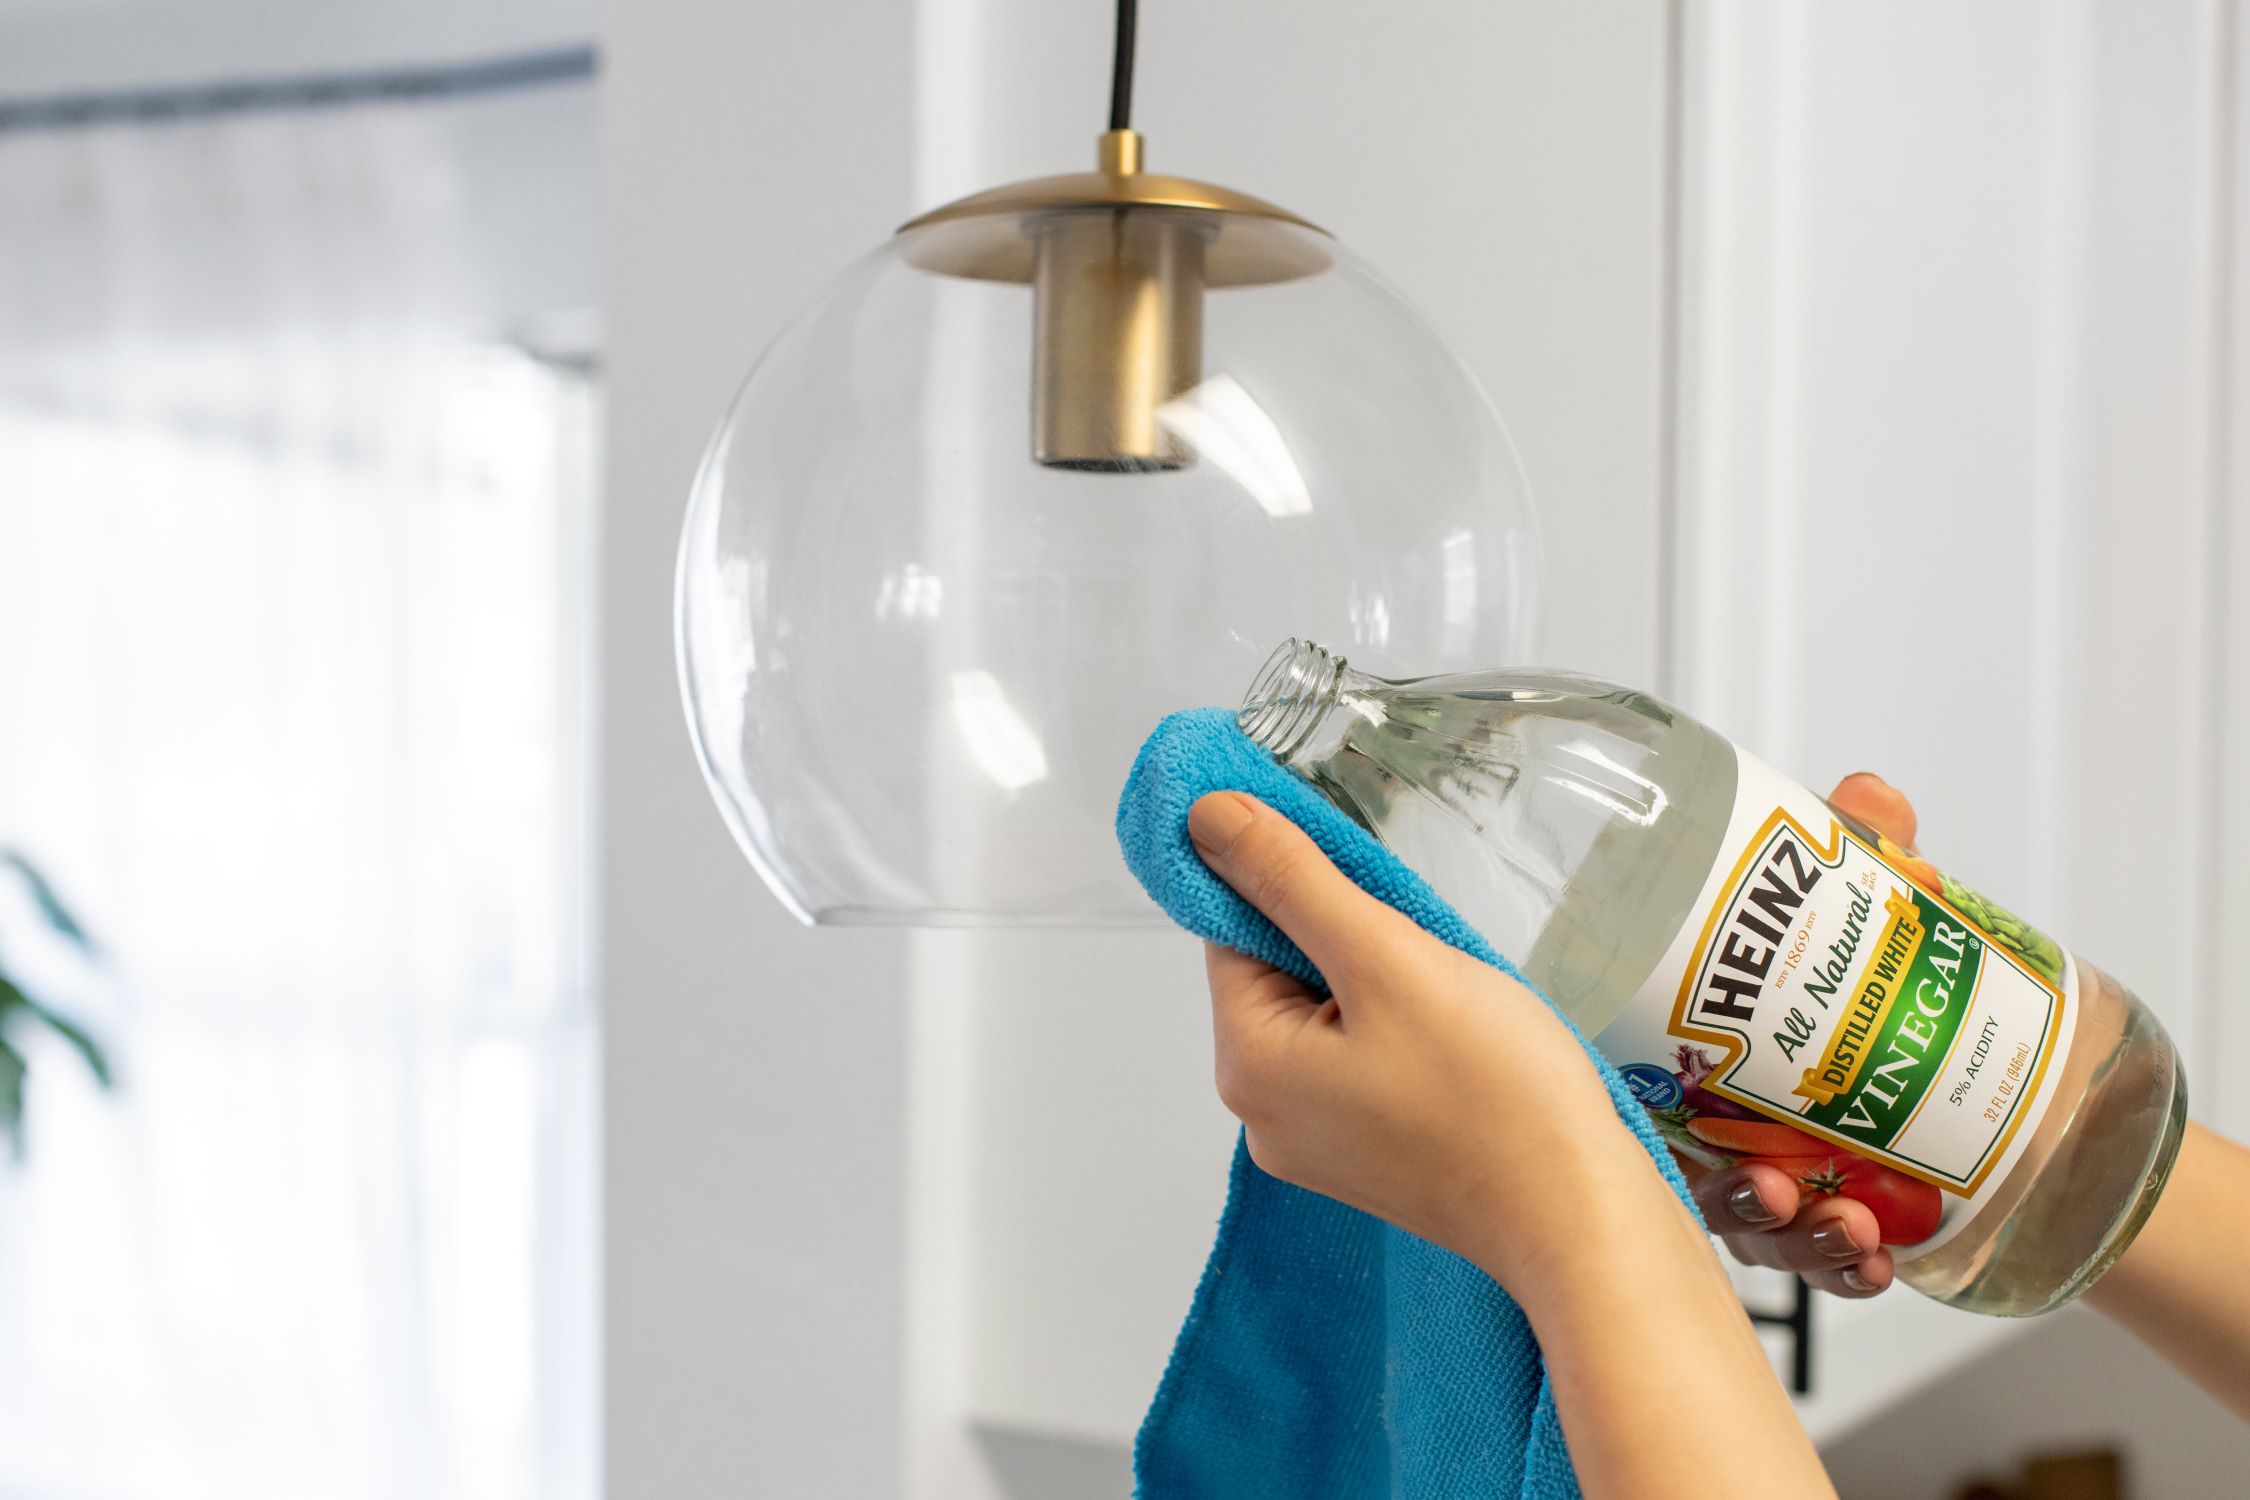
- Start by preparing a cleaning solution. You can either use a commercial toilet cleaner or create a natural cleaner by mixing equal parts of white vinegar and water.
- Dip a clean sponge or cloth into the cleaning solution and thoroughly scrub the inside walls of the toilet tank. Pay extra attention to areas that are prone to buildup, such as the sides and corners.
- For stubborn stains or mineral deposits, you can use a mixture of baking soda and water. Apply the paste to the stains and let it sit for a few minutes before scrubbing it off.
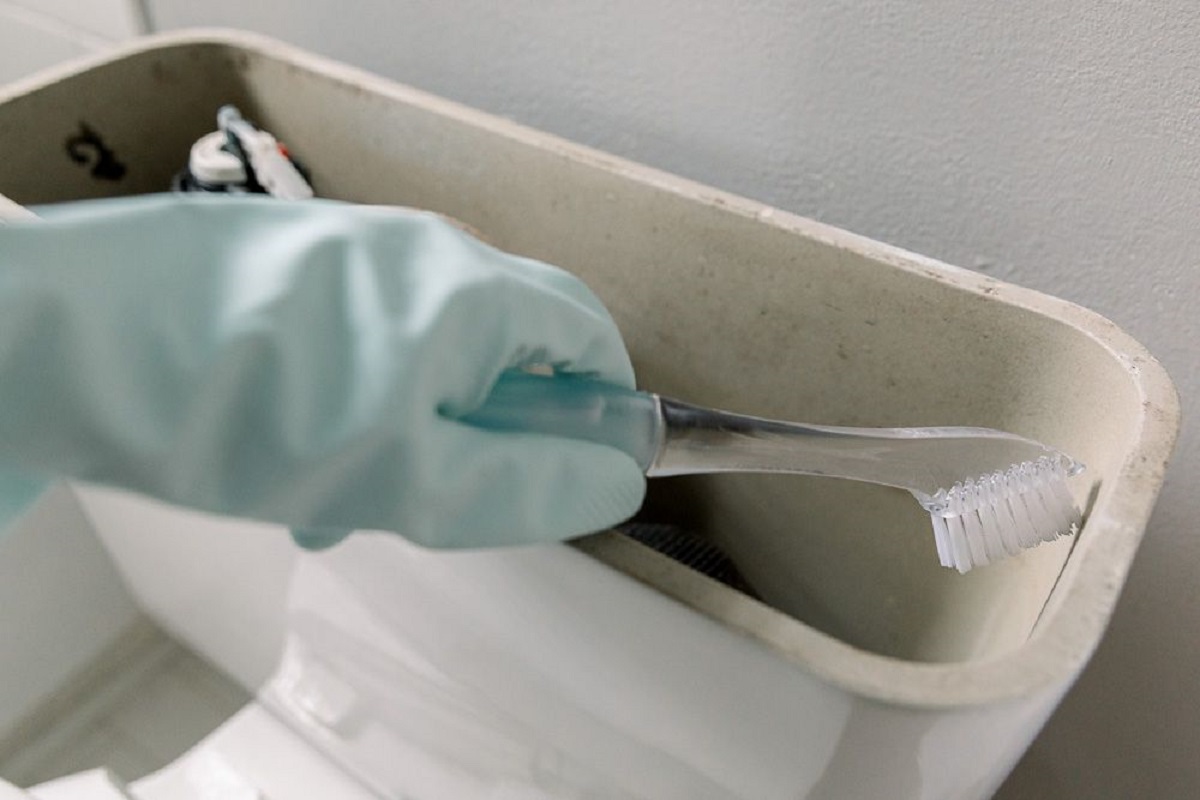
- Don’t forget to clean the different components inside the tank, such as the fill valve, flush valve, and overflow tube. Use a soft-bristle brush or an old toothbrush to gently scrub these areas.
- Rinse the sponge or cloth frequently and continue to scrub until the inside of the tank looks clean.
During the scrubbing process, be careful not to apply excessive force or damage any of the components inside the tank. Gently scrubbing will effectively remove dirt and stains without causing any harm.
Once you have thoroughly cleaned the inside of the tank, move on to the next step: removing mineral deposits and stains.
Step 4: Remove Mineral Deposits and Stains
Over time, mineral deposits and stubborn stains can accumulate inside the toilet tank. These can be unsightly and affect the overall cleanliness of your toilet. Here’s how you can effectively remove mineral deposits and stains:
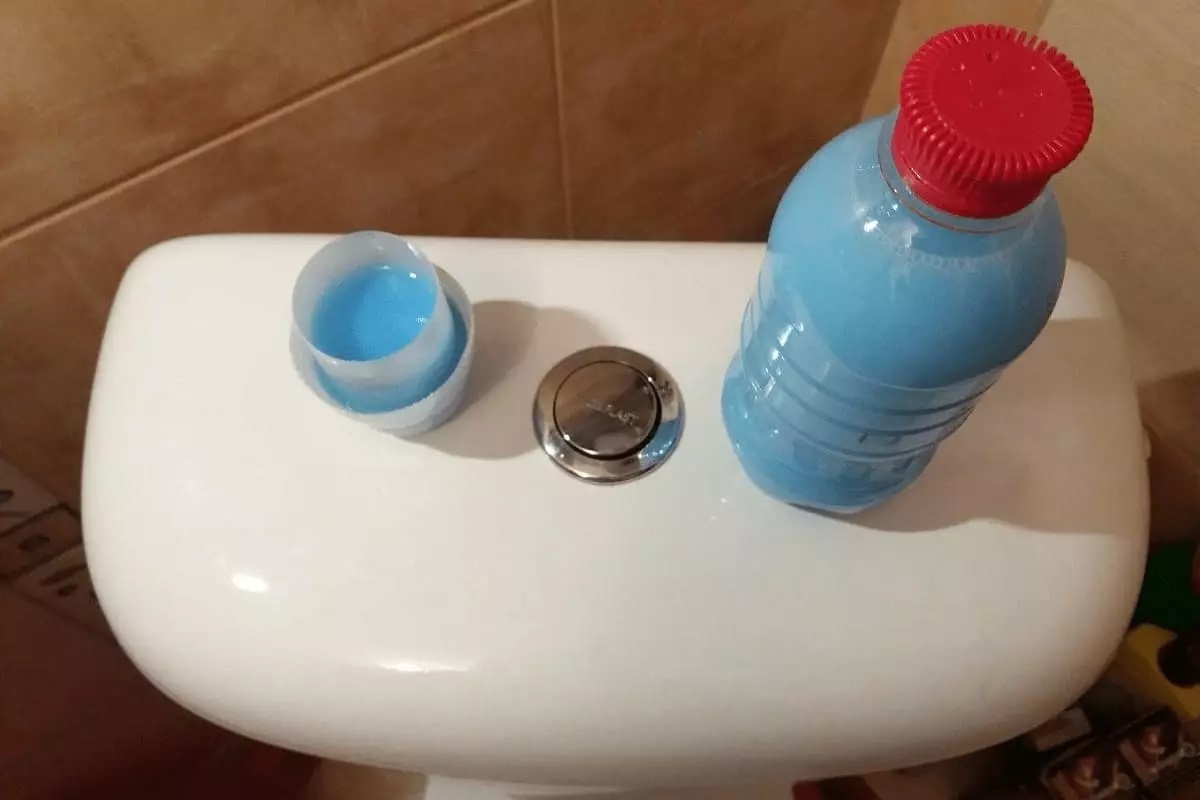
- To remove mineral deposits, fill a container with white vinegar.
- Submerge any components, such as the fill valve or flush valve, that have visible mineral deposits in the vinegar. Let them soak for a few hours to dissolve the deposits.
- Use a soft brush or toothbrush to scrub away any remaining mineral deposits. Rinse the components thoroughly with clean water before placing them back into the tank.
- For stubborn stains, you can create a paste using baking soda and water. Apply the paste directly to the stains and let it sit for a few minutes to loosen the stains.
- Gently scrub the stains using a soft brush or sponge. Rinse thoroughly with clean water.
Remember to avoid using abrasive materials or harsh chemicals that can damage the components of the toilet tank. Gentle scrubbing and natural cleaning agents are usually sufficient to remove most mineral deposits and stains.
Once you have successfully removed mineral deposits and stains, it’s time to move on to the final step: replacing the tank lid and turning the water supply back on.
Step 5: Replace the Tank Lid and Turn the Water Supply Back On
After completing the cleaning and removing mineral deposits, it’s time to put everything back together and restore the functionality of your toilet. Here’s how to replace the tank lid and turn the water supply back on:
- Take the tank lid that you set aside earlier and position it correctly on top of the tank. Make sure it fits securely and aligns with any openings or attachments.
- Gently lower the lid onto the tank, being cautious not to place it forcefully.
- Once the lid is in place, locate the water shut-off valve and turn it counterclockwise to reopen the water supply. The valve position should be rotated back to its original position.
- Allow the tank to fill with water. You may hear the sound of water flowing into the tank.
- Check for any leaks around the base of the toilet or from the connections inside the tank. If you notice any leaks, tighten the connections or seek professional assistance if needed.
- Flush the toilet to ensure everything is working properly. The water should flow from the tank into the bowl without any issues.
By replacing the tank lid and turning the water supply back on, you have successfully completed the cleaning process and restored your toilet to full functionality.
Now that your toilet tank is clean and in proper working condition, let’s discuss some extra tips for maintaining a clean toilet tank in the future.
Extra Tips for Maintaining a Clean Toilet Tank
Maintaining a clean toilet tank is essential for the overall cleanliness and longevity of your toilet. Here are some additional tips to help you keep your toilet tank clean:
- Regular Cleaning: Make it a habit to clean the inside of your toilet tank at least once every few months. This will prevent the buildup of dirt, bacteria, and mineral deposits.
- Use Natural Cleaning Agents: Consider using natural cleaning agents, such as vinegar or baking soda, to clean the inside of the tank. These are effective and environmentally friendly alternatives to harsh chemicals.
- Keep the Toilet Bowl Clean: A dirty toilet bowl can contribute to the buildup of stains and mineral deposits inside the tank. Regularly clean the toilet bowl using a toilet cleaner to minimize the transfer of dirt and grime to the tank.
- Inspect and Replace Components when Necessary: Over time, the components inside the toilet tank may wear out or become damaged. Regularly inspect them and replace any faulty or worn-out parts to maintain the proper functioning of the toilet.
- Monitor Water Quality: If you have hard water, it’s important to monitor the mineral content and consider using a water softener. This can help reduce the formation of mineral deposits inside the tank.
- Avoid Putting Harsh Chemicals in the Tank: Avoid using bleach tablets or other harsh chemicals inside the tank, as they can damage the components and affect the functionality of the toilet.
- Consider Installing a Water Filtration System: If you have concerns about the water quality in your area, consider installing a water filtration system. This can help reduce the presence of minerals and contaminants that contribute to tank buildup.
By following these extra tips, you can maintain a clean toilet tank and ensure the overall cleanliness and functionality of your toilet system.
Finally, we have reached the end of our comprehensive guide on cleaning the inside of a toilet tank. By implementing these steps and tips, you can enjoy a fresh and hygienic toilet while also prolonging the lifespan of your toilet system.
Read more: How To Remove Toilet Tank
Conclusion
Regularly cleaning the inside of a toilet tank is crucial for maintaining a clean and hygienic toilet. By following the step-by-step process outlined in this guide, you can effectively remove dirt, stains, and mineral deposits that can accumulate inside the tank over time.
Remember to prioritize your safety by wearing protective gloves and eye protection, as well as following all safety precautions. Shut off the water supply before beginning the cleaning process and empty the tank to create a clear workspace.
Scrub the inside of the tank using a cleaning solution or a mixture of vinegar and water, paying attention to all the components inside. If necessary, remove mineral deposits and stains by soaking them in vinegar or using a baking soda paste. Finally, replace the tank lid and turn the water supply back on.
To maintain a clean toilet tank in the long run, make it a habit to clean the inside of the tank regularly and use natural cleaning agents. Keep the toilet bowl clean, inspect and replace components as needed, and monitor the water quality to prevent the buildup of mineral deposits.
By following these tips and maintaining a regular cleaning routine, you can ensure your toilet tank remains clean, functional, and free from issues like clogs and damage to the flush components.
With a clean and hygienic toilet tank, you can enjoy a fresh and comfortable bathroom experience. So, go ahead, put these steps into action, and keep your toilet tank sparkling clean.
Frequently Asked Questions about How To Clean Inside Toilet Tank
Was this page helpful?
At Storables.com, we guarantee accurate and reliable information. Our content, validated by Expert Board Contributors, is crafted following stringent Editorial Policies. We're committed to providing you with well-researched, expert-backed insights for all your informational needs.


0 thoughts on “How To Clean Inside Toilet Tank”