Articles
How To Repair A Chipped Porcelain Sink
Modified: May 6, 2024
Learn how to repair a chipped porcelain sink with these informative articles.
(Many of the links in this article redirect to a specific reviewed product. Your purchase of these products through affiliate links helps to generate commission for Storables.com, at no extra cost. Learn more)
Introduction
Having a chipped porcelain sink not only affects its appearance but can also lead to further damage if left untreated. Repairing a chipped porcelain sink is a cost-effective solution that can restore its look and functionality, saving you from the expense of replacing the entire sink.
In this article, we will guide you through the process of repairing a chipped porcelain sink, step by step. We will explore the tools and materials you will need, how to assess the damage, and the techniques involved in successfully repairing the sink. By following these instructions, you can restore the beauty and usability of your sink with minimal effort.
Before we dive into the repair process, it is important to note that while you can repair small chips and cracks in porcelain sinks, larger or more extensive damage may require professional assistance or even sink replacement. It is always best to assess the severity of the damage before deciding on the appropriate course of action.
Now, let’s gather the necessary tools and materials to get started on repairing your chipped porcelain sink.
Key Takeaways:
- Save money and restore your sink’s beauty by repairing chipped porcelain sinks at home. Follow the step-by-step process and enjoy a professional-looking repair with minimal effort.
- Prioritize safety, patience, and attention to detail when repairing chipped porcelain sinks. Achieve a seamless finish and extend the life of your sink with the right tools and techniques.
Read more: How To Repair A Chip In A Porcelain Bathtub
Tools and Materials Needed
Before you begin repairing your chipped porcelain sink, gather the following tools and materials:
- Safety goggles
- Gloves
- Mask or respirator
- Acetone or paint thinner
- Clean cloth or paper towels
- Mild cleanser or soap
- 400-grit sandpaper
- Porcelain repair compound or epoxy filler
- Disposable mixing container
- Plastic putty knife or spatula
- Fine-grit sandpaper (800-1000 grit)
- Water
- Wet/dry sandpaper (1200-2000 grit)
- Polishing compound
- Soft cloth or sponge
These tools and materials will allow you to effectively clean, prepare, and repair your chipped porcelain sink. Safety goggles, gloves, and a mask or respirator are essential for protecting yourself from any chemical fumes or particles during the repair process.
Acetone or paint thinner will be used to clean the chipped area and remove any residue or contaminants that may interfere with the repair. Make sure to work in a well-ventilated area and follow the manufacturer’s instructions for safe use.
A mild cleanser or soap and a clean cloth or paper towels will be used to clean the entire sink surface. This step is crucial to ensure proper adhesion of the repair compound.
400-grit sandpaper will be used to lightly sand the chipped area and surrounding surface, creating a rough surface for better adhesion of the repair compound. Be careful not to sand too aggressively, as it may further damage the sink.
Porcelain repair compound or epoxy filler is the main material used to repair the chip. Make sure to choose a high-quality product specifically designed for porcelain repairs. This compound or epoxy will fill in the chip and create a smooth, durable surface.
A disposable mixing container and a plastic putty knife or spatula are needed to mix and apply the repair compound. These tools allow for precise application and easy cleanup.
Fine-grit sandpaper (800-1000 grit), water, and wet/dry sandpaper (1200-2000 grit) will be used to smooth and polish the repaired area. This step ensures a seamless finish that matches the rest of the sink’s surface.
Lastly, a polishing compound and a soft cloth or sponge are used to bring back the shine and luster of the sink. The polishing compound helps remove any scratches or imperfections, leaving the repaired area looking brand new.
With these tools and materials on hand, you are ready to assess the damage and begin repairing your chipped porcelain sink.
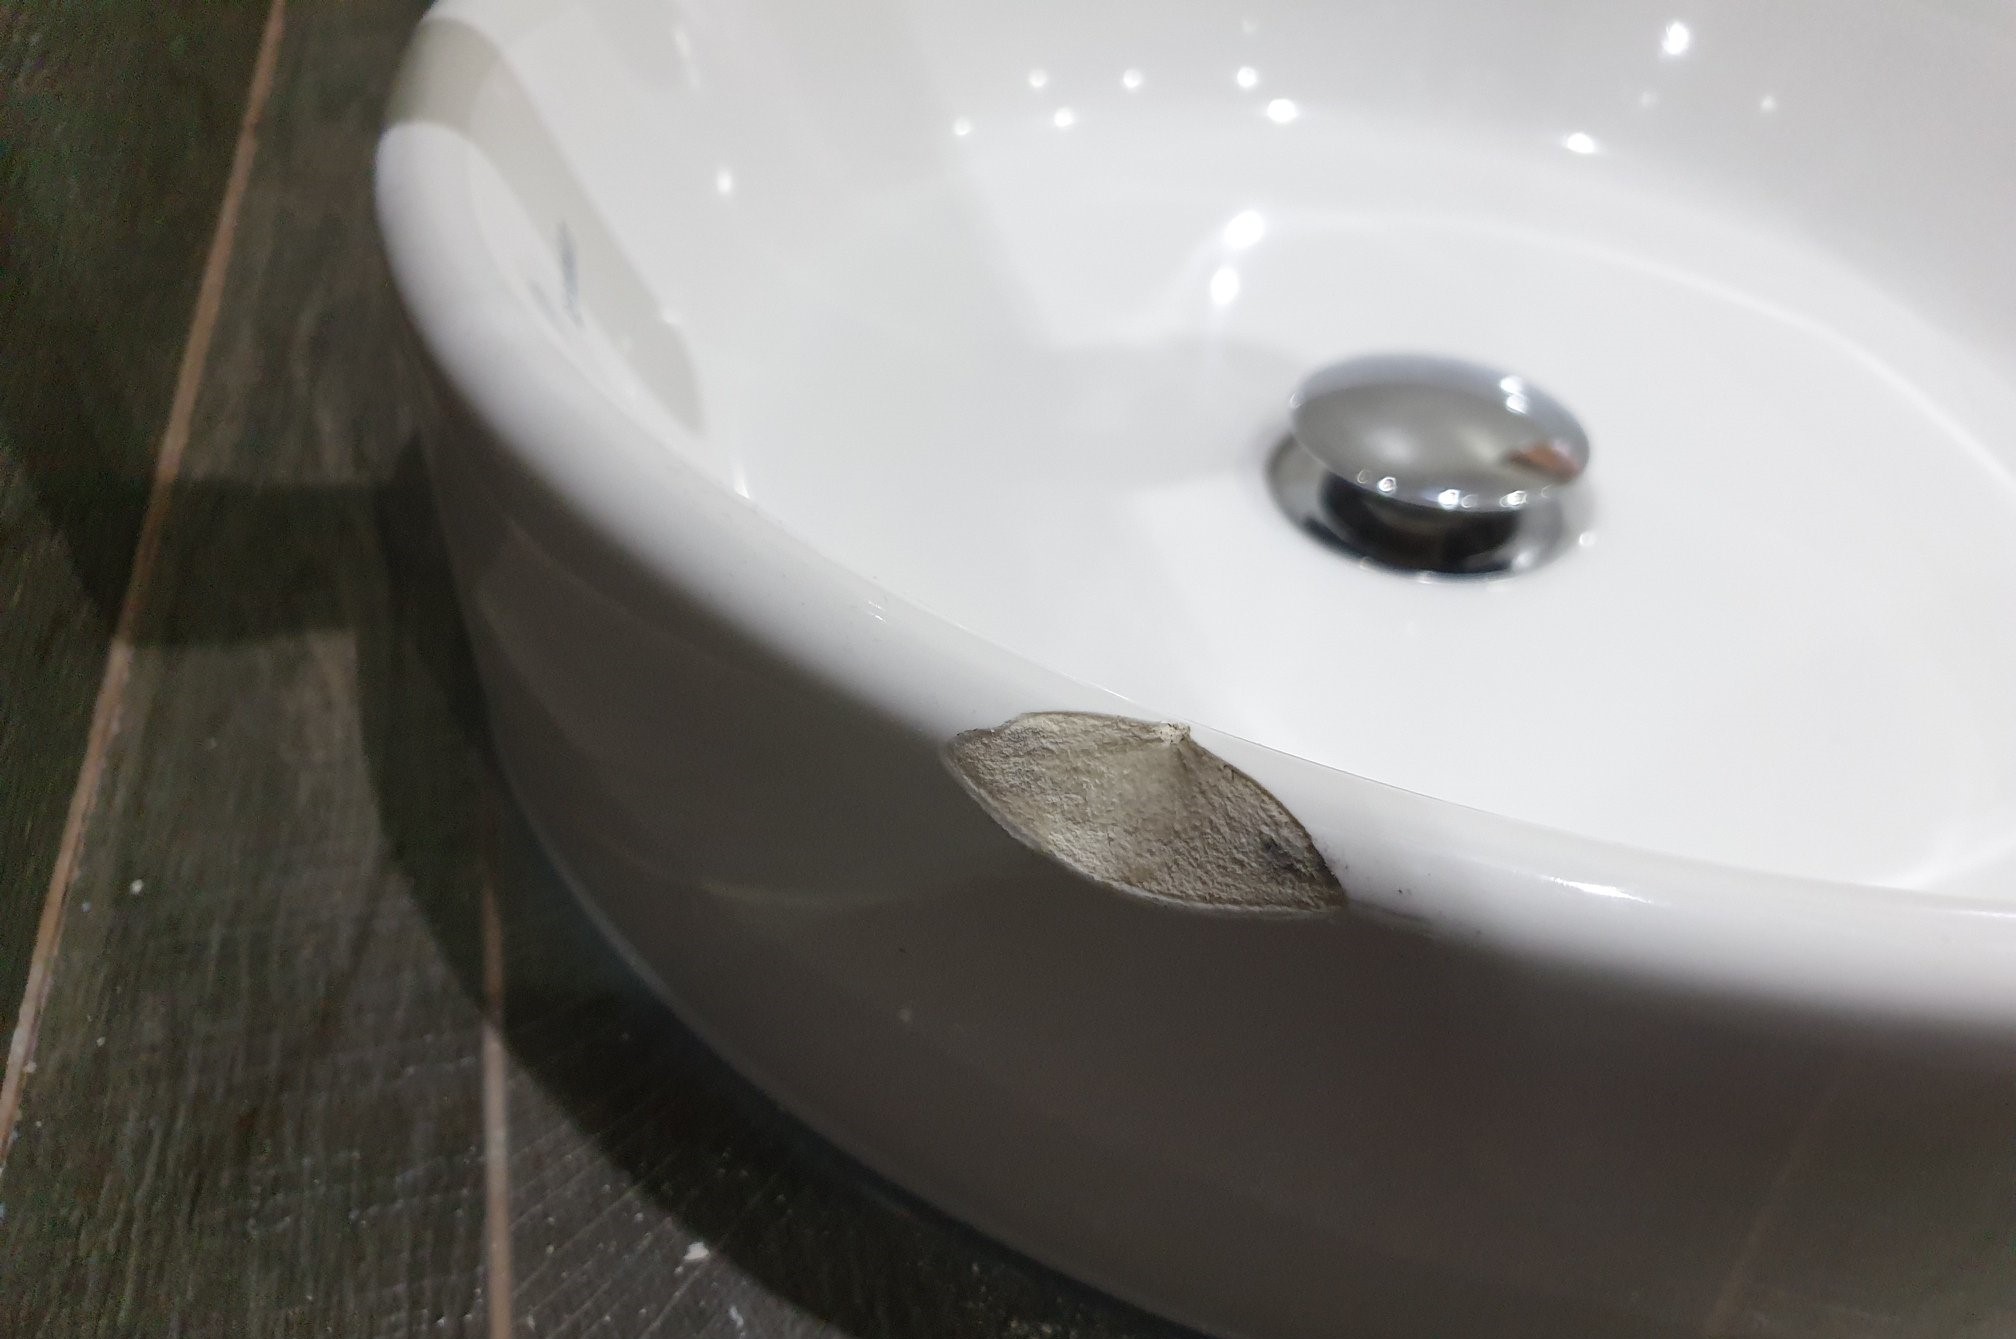
Assessing the Damage
Before you start repairing your chipped porcelain sink, it is vital to assess the extent of the damage. This step will help you determine if the chip can be repaired using DIY methods or if professional help is needed.
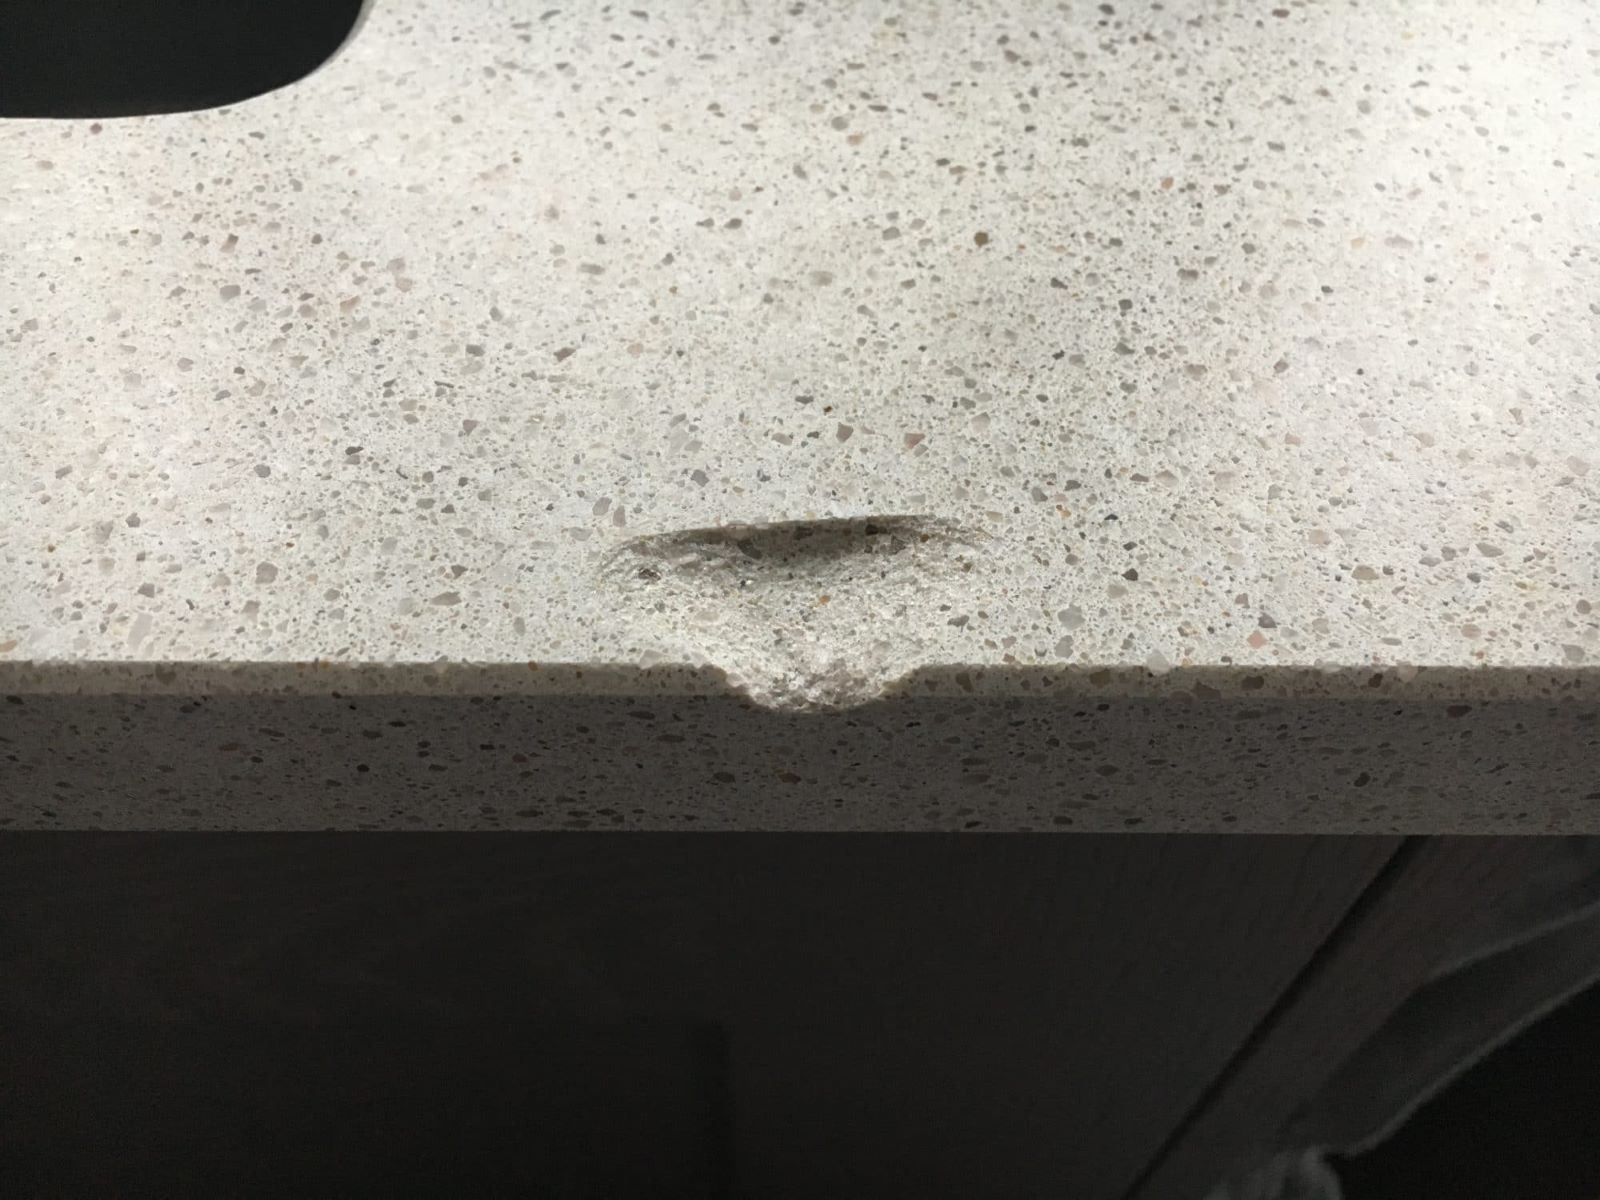
Begin by examining the chip closely to determine its size and depth. Small chips, usually less than an inch in diameter, can often be repaired at home. However, if the chip is large, extends into multiple layers of the porcelain, or is accompanied by cracks or structural damage, it may be best to seek professional assistance or consider replacing the sink altogether.
Next, inspect the surrounding area for any signs of further damage or deterioration. Look for any additional chips, cracks, or discoloration that may affect the overall integrity and appearance of the sink. These issues may require separate repairs or professional attention.
It is important to note that repairing the chip in the sink may slightly alter its appearance. The repaired area may be smoother or shinier than the rest of the sink. While efforts can be made to blend the repaired area with the surrounding surface, it is essential to set realistic expectations for the final outcome.
If you are unsure about the severity of the damage or feel uncomfortable with repairing the chip yourself, it is recommended to consult a professional. They can provide expert advice and assistance in assessing the damage and determining the best course of action.
Now that you have assessed the damage and determined that it can be repaired at home, let’s move on to preparing the sink for the repair process.
Preparing the Sink
Before you can begin repairing the chipped porcelain sink, it is crucial to properly prepare the surface. This preparation ensures that the repair compound adheres securely and creates a seamless finish.
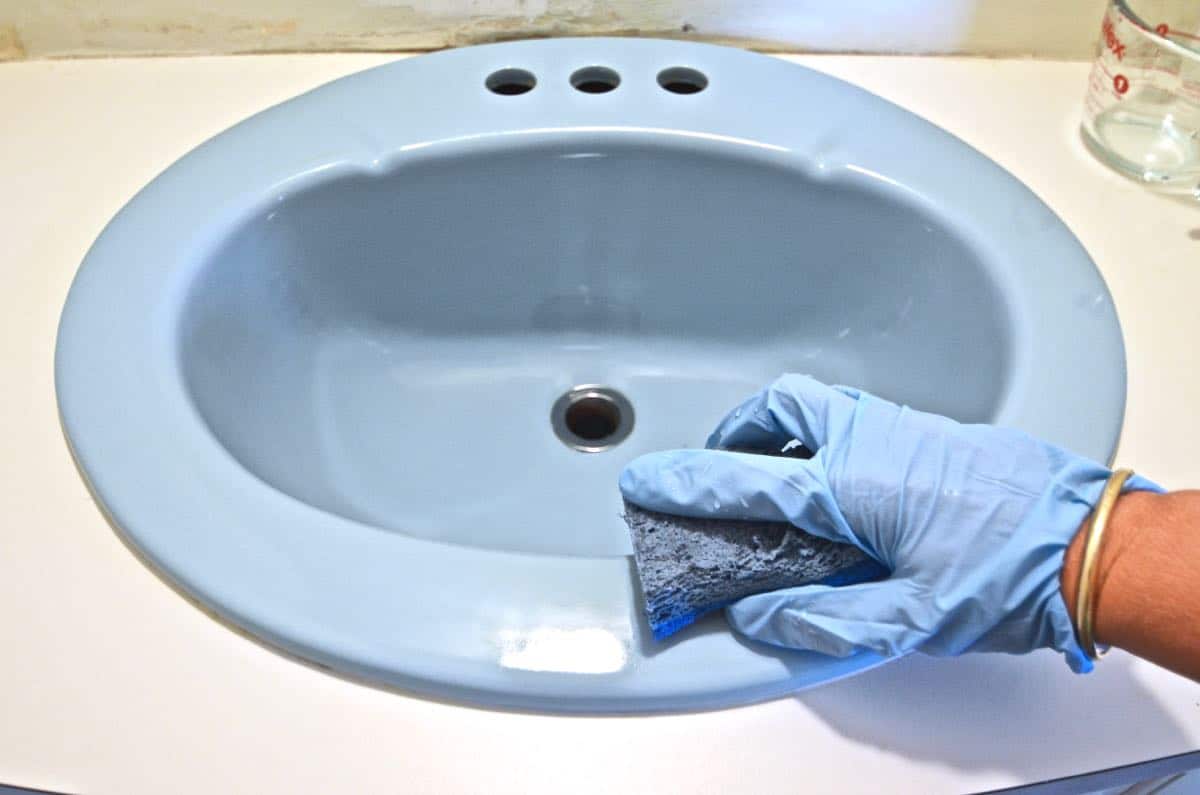
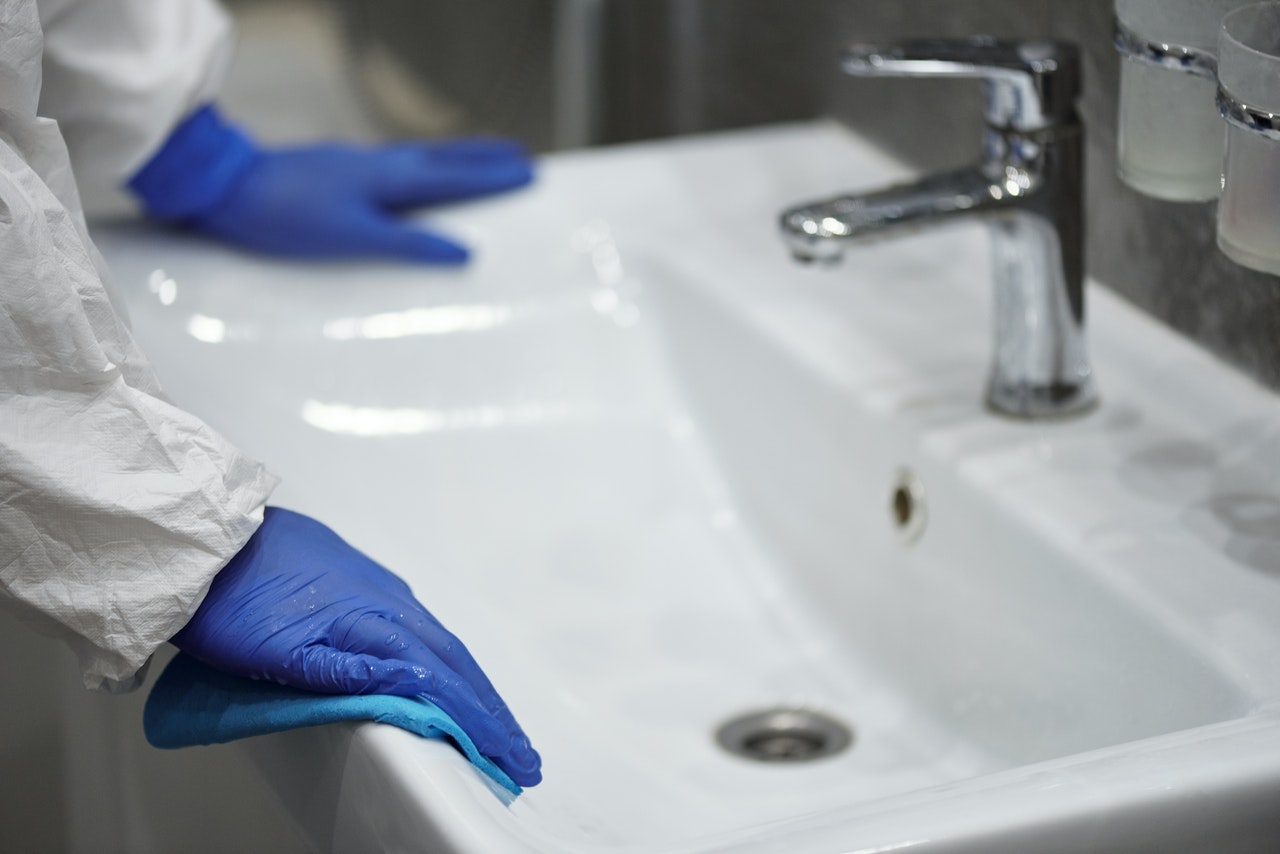
Start by wearing safety goggles, gloves, and a mask or respirator to protect yourself from any chemicals or particles. Safety should always be a top priority during any home improvement project.
Clean the entire sink surface using a mild cleanser or soap and a clean cloth or paper towels. Make sure to remove any dirt, grease, or soap residue that may hinder the adhesion of the repair compound. Rinse the sink thoroughly and dry it completely before proceeding.
Next, focus on the chipped area specifically. If there is any loose or flaking porcelain around the chip, use a gentle touch to remove it. Be cautious not to worsen the damage or create a larger hole.
Once the loose porcelain is removed, lightly sand the chipped area and the immediate surrounding surface using 400-grit sandpaper. This step helps create a rough surface that promotes better adhesion of the repair compound. Be careful not to sand too aggressively, as it may further damage the sink.
After sanding, clean the chipped area again with a cloth dampened with acetone or paint thinner. This step removes any remaining debris and ensures a clean surface for the repair compound. Allow the area to dry completely before moving on.
Now that the sink is properly cleaned and prepared, it is time to apply the repair compound and begin the repair process. In the next section, we will guide you through the steps of applying the repair compound to the chipped area.
Applying the Repair Compound
Now that the chipped porcelain sink is properly prepared, it’s time to apply the repair compound. This compound will fill in the chip, creating a seamless and durable finish.
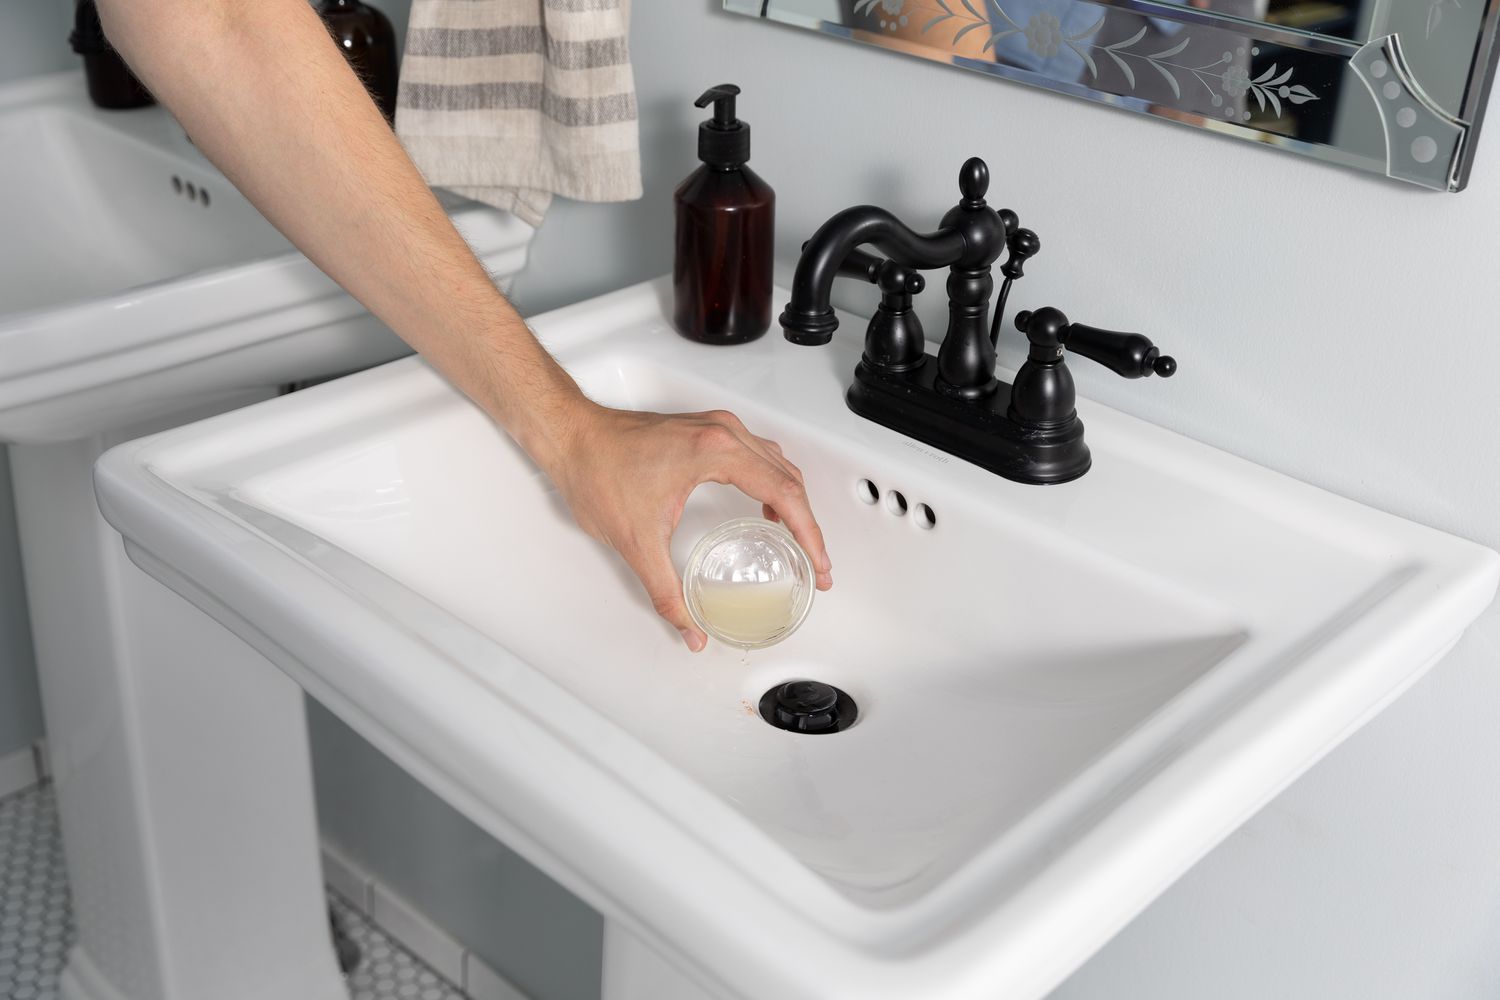
Begin by reading and following the manufacturer’s instructions on the repair compound packaging. Different products may have specific guidelines for mixing and application.
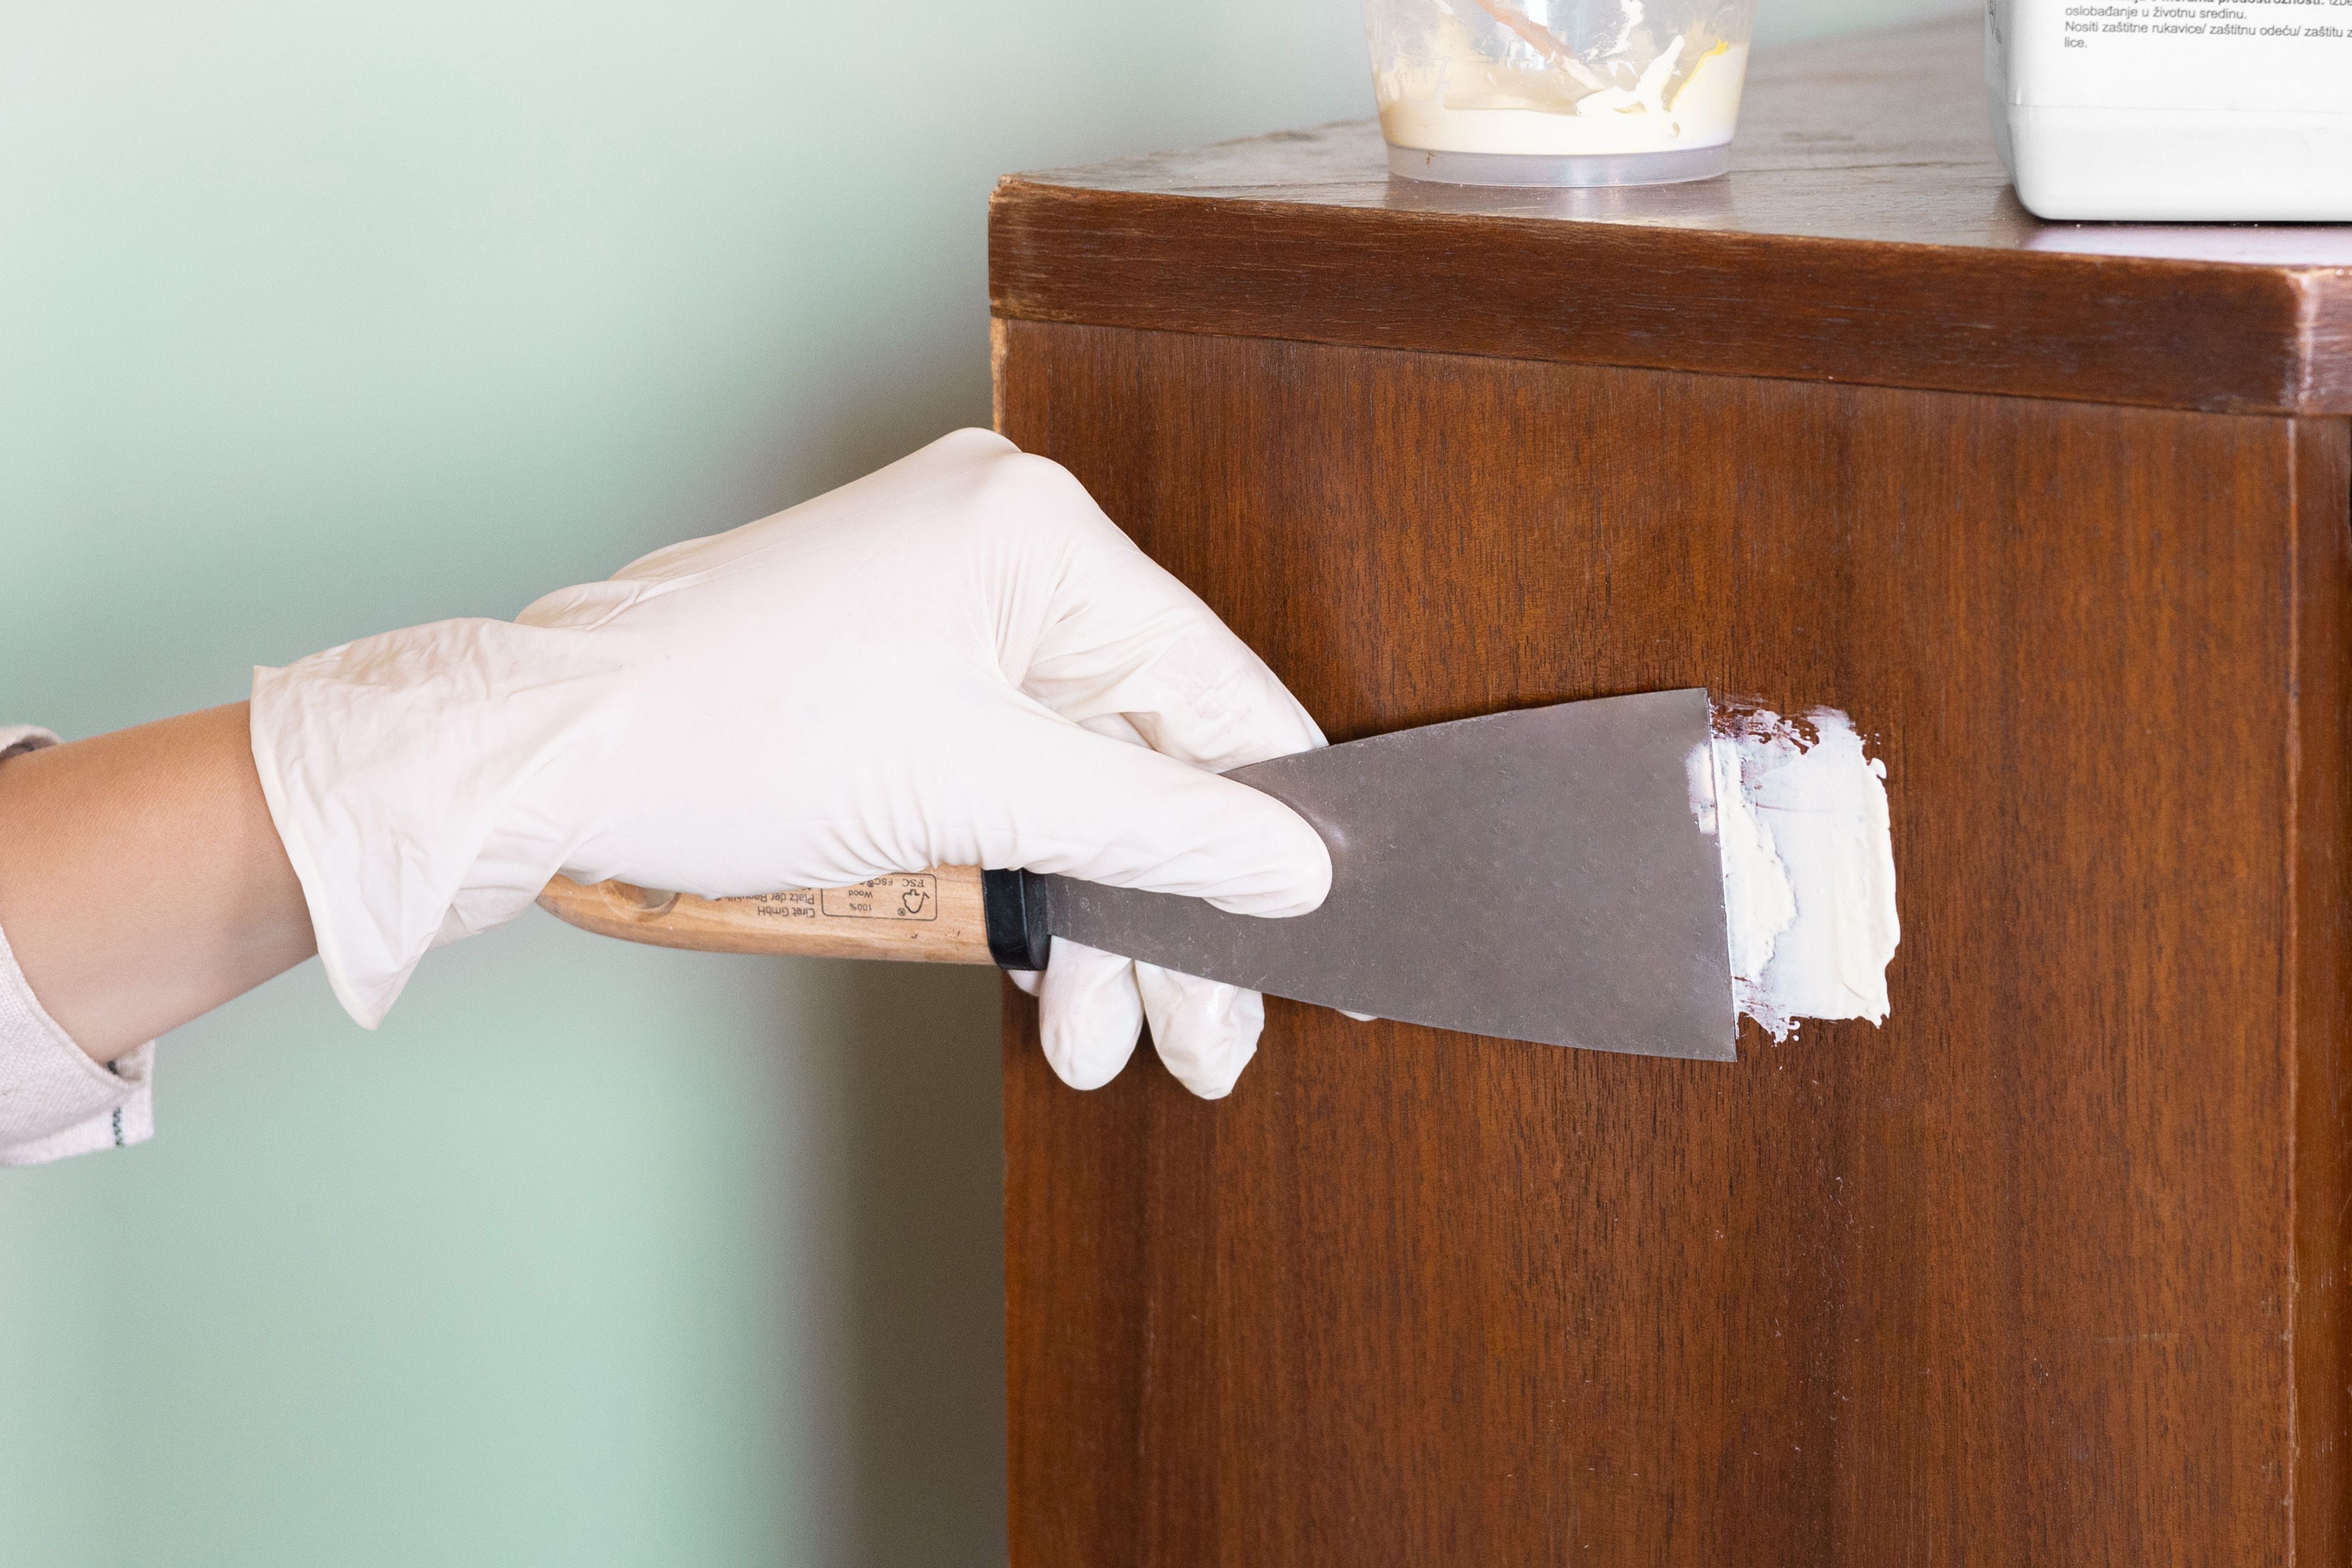
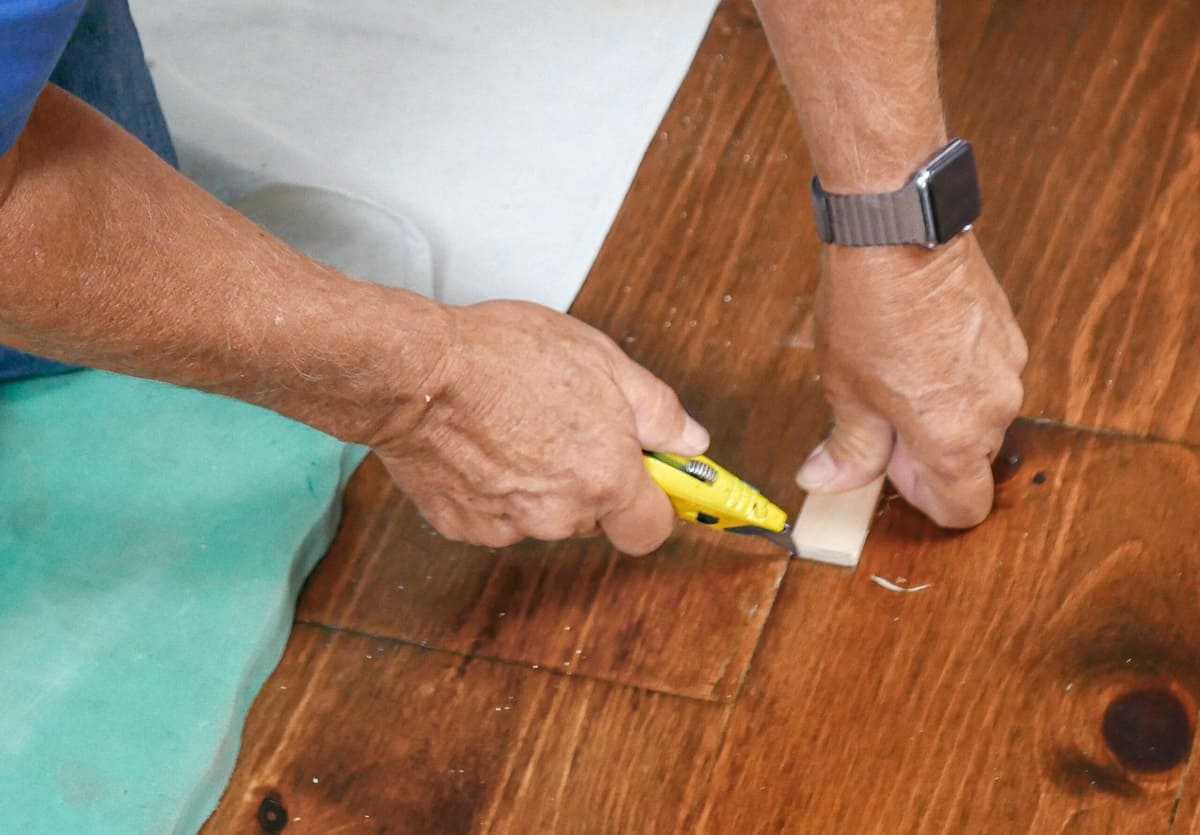
Prepare a disposable mixing container and pour the desired amount of repair compound into it. Use a plastic putty knife or spatula to mix the compound thoroughly, following the manufacturer’s instructions for the proper ratio of hardener to filler.
Apply the repair compound to the chipped area using the putty knife or spatula. Make sure to fill in the chip without overfilling it, as excess compound can be difficult to remove and may affect the final appearance of the repair. Smooth the compound with the edge of the putty knife or spatula, ensuring it is level with the surrounding surface.
Allow the repair compound to set for the recommended time according to the manufacturer’s instructions. This curing time may vary depending on the specific product used. Avoid using the sink or placing any heavy objects on the repaired area during this time to prevent any damage or shifting of the compound.
After the repair compound has cured, lightly sand the surface of the repaired area using fine-grit sandpaper, around 800-1000 grit. This step helps to smooth and level the repaired area with the rest of the sink. Be gentle and use a circular motion to avoid creating any new scratches.
Once the repaired area is sanded, clean it thoroughly to remove any dust or debris. You can use a damp cloth or sponge and mild cleanser to wipe the surface clean. Rinse the area and dry it completely.
With the repair compound applied and sanded, and the surface clean, it’s time to move on to the next step: smoothing and shaping the repair to achieve a seamless finish.
Use a porcelain repair kit to fill in the chipped area, following the instructions carefully. Sand down the repaired area for a smooth finish.
Read more: How To Refinish A Porcelain Sink
Smoothing and Shaping the Repair
After applying the repair compound to the chipped porcelain sink and allowing it to cure, the next step is to smooth and shape the repair. This process ensures that the repaired area blends seamlessly with the rest of the sink’s surface.
Start by examining the repaired area to identify any unevenness or roughness. This can be done by running your fingers gently over the surface. If there are any imperfections, such as bumps or ridges, they will need to be addressed.
Begin by wetting a piece of wet/dry sandpaper with water. Use a sandpaper grit between 1200-2000, which is finer and less abrasive than the initial sanding. The water helps to create a smoother surface and prevent any scratches.
Using gentle circular motions, sand the repaired area to smooth out any rough spots or ridges. Be careful not to apply excessive pressure, as this can cause damage or create new imperfections. Keep the sandpaper wet throughout the process to prevent clogging and ensure a more effective sanding action.
Continue sanding until the repaired area feels smooth and blends seamlessly with the surrounding surface. Take breaks periodically to wipe away any residue and assess your progress. It may take several rounds of sanding to achieve the desired result.
Once you are satisfied with the smoothness and shape of the repair, rinse the area with water and wipe it clean with a soft cloth or sponge. This step ensures that all debris and sanding residue are completely removed from the surface.
Now that the repair is smoothly shaped and the surface is clean, it’s time to move on to the next step: allowing the repair compound to cure fully.
Note: The specific techniques and products used for smoothing and shaping the repair may vary depending on the type of repair compound or epoxy filler you are using. Always refer to the manufacturer’s instructions for the most accurate guidance.
Allowing the Compound to Cure
Once the repair compound has been applied and the surface has been smoothed and shaped to your satisfaction, it is crucial to allow the compound to cure fully. Curing ensures that the repair becomes strong, durable, and ready for the final touches.
The curing time for the repair compound will vary depending on the specific product used. It is important to follow the manufacturer’s instructions for the recommended curing time, as well as any additional instructions for optimal results.
During the curing process, it is essential to avoid using the sink or placing any heavy objects on the repaired area. Any pressure or movement during this time can disrupt the curing process and compromise the integrity of the repair.
Be mindful of the environmental conditions while the compound is curing. Maintain a consistent temperature and humidity level in the area to ensure proper curing. Extreme temperatures or high humidity can affect the curing time and the quality of the repair.
Keep in mind that the curing time may range from a few hours to several days, depending on the type of repair compound used. It is always best to be patient and allow the compound ample time to fully cure, even if it seems dry to the touch.
Once the recommended curing time has passed, perform a gentle touch test to ensure that the repair is firm and solid. Press lightly on the repaired area with a finger. If it feels stable and does not give or leave any marks, the compound has successfully cured.
With the repair compound fully cured, it’s time to move on to the final touches: applying a finishing polish to the repaired area.
Note: The specific curing time may vary depending on the repair compound or epoxy filler used. Always refer to the manufacturer’s instructions for the most accurate information.
Finishing Touches
Now that the chipped porcelain sink has been repaired and the compound has fully cured, it’s time to give it the finishing touches to ensure a polished and seamless finish.
Start by wetting a soft cloth or sponge and applying a small amount of polishing compound to it. Gently rub the repaired area in circular motions. This process helps to buff and polish the repair, removing any fine scratches and further blending it with the surrounding surface.
Continue polishing until the repaired area matches the shine and smoothness of the rest of the sink. Take breaks periodically to wipe away any excess polishing compound and assess your progress. It may take a few rounds of polishing to achieve the desired result.
Once you are satisfied with the appearance and finish of the repaired area, thoroughly rinse the sink with water to remove any remaining residue from the polishing compound. Wipe the surface dry with a clean cloth to reveal the final result.
Step back and admire your work. The chipped porcelain sink should now look as good as new, with the repaired area seamlessly blending in with the rest of the surface.
Remember to exercise caution when using the sink in the future. While the repair compound is durable, excessive force or impact can still cause damage. Treat your repaired sink with care to maintain its beauty and extend its lifespan.
In the event of any future chips or damage, be sure to address them promptly to prevent further deterioration. Early intervention and repair can help maintain the integrity and appearance of your sink for years to come.
With the finishing touches complete, you have successfully repaired your chipped porcelain sink. Congratulations! You have saved yourself the expense of replacing the entire sink while restoring its functionality and aesthetic appeal.
By following these steps, using the right tools and materials, and taking your time to ensure proper preparation and curing, you have achieved a professional-looking repair that will stand the test of time.
Remember, if you are ever unsure or uncomfortable with repairing the sink yourself, it is always best to consult a professional. They can provide expert advice and assistance specific to your sink’s needs.
With your repaired sink now ready to use, enjoy the satisfaction of a job well done and the beauty of a pristine porcelain sink once again.
Conclusion
Repairing a chipped porcelain sink is not only a cost-effective solution but also a rewarding DIY project that can restore the beauty and functionality of your sink. By following the step-by-step process outlined in this article, you can achieve professional-looking results with minimal effort.
We started by assessing the damage and determining if the chip can be repaired at home. Properly preparing the sink by cleaning and sanding the chipped area allows for better adhesion of the repair compound. Applying the repair compound and allowing it to cure fully creates a seamless repair that blends with the rest of the sink.
From there, we moved on to smoothing and shaping the repair, ensuring that the surface is even and matches the surrounding area. Finally, applying the finishing touches, including polishing the repaired area, enhances the overall appearance and creates a seamless finish.
While repairing a chipped porcelain sink can be a relatively simple process, it’s important to remember that the results may vary depending on the severity of the damage, the quality of the repair compound used, and your own attention to detail. Setting realistic expectations and following instructions carefully will yield the best outcome.
Remember to always prioritize safety when working with cleaning agents, sanding tools, and repair compounds. Wear appropriate protective gear and work in a well-ventilated area to minimize any risks.
If you ever feel unsure or uncomfortable with repairing the sink yourself, it’s best to consult a professional. They can offer guidance and expertise specific to your sink’s needs, ensuring a successful repair process.
By taking the time to repair your chipped porcelain sink, you not only save money but also contribute to a more sustainable lifestyle by extending the life of your existing fixtures and minimizing waste.
So, what are you waiting for? Gather your tools, follow the steps outlined in this article, and embark on the journey of restoring your chipped porcelain sink. Enjoy the satisfaction of a job well done and the beauty of a sink that looks as good as new.
Now that you've mastered repairing a chipped porcelain sink, why not broaden your home skills further? If crafting and improving spaces spark your interest, our guide on DIY home improvement offers practical steps to enhance your living area. For those contemplating larger projects, understanding the duration of bathroom renovations provides crucial planning insights. And don't forget, regular upkeep is key; our home repair manual offers essential tips to keep your house in top shape. Each guide is filled with helpful advice to keep you confidently improving every corner of your home.
Frequently Asked Questions about How To Repair A Chipped Porcelain Sink
Was this page helpful?
At Storables.com, we guarantee accurate and reliable information. Our content, validated by Expert Board Contributors, is crafted following stringent Editorial Policies. We're committed to providing you with well-researched, expert-backed insights for all your informational needs.


0 thoughts on “How To Repair A Chipped Porcelain Sink”