Articles
How To Install Utility Sink In Basement
Modified: August 28, 2024
Learn step-by-step instructions on installing a utility sink in your basement with our informative articles. Create a functional and organized space easily.
(Many of the links in this article redirect to a specific reviewed product. Your purchase of these products through affiliate links helps to generate commission for Storables.com, at no extra cost. Learn more)
Introduction
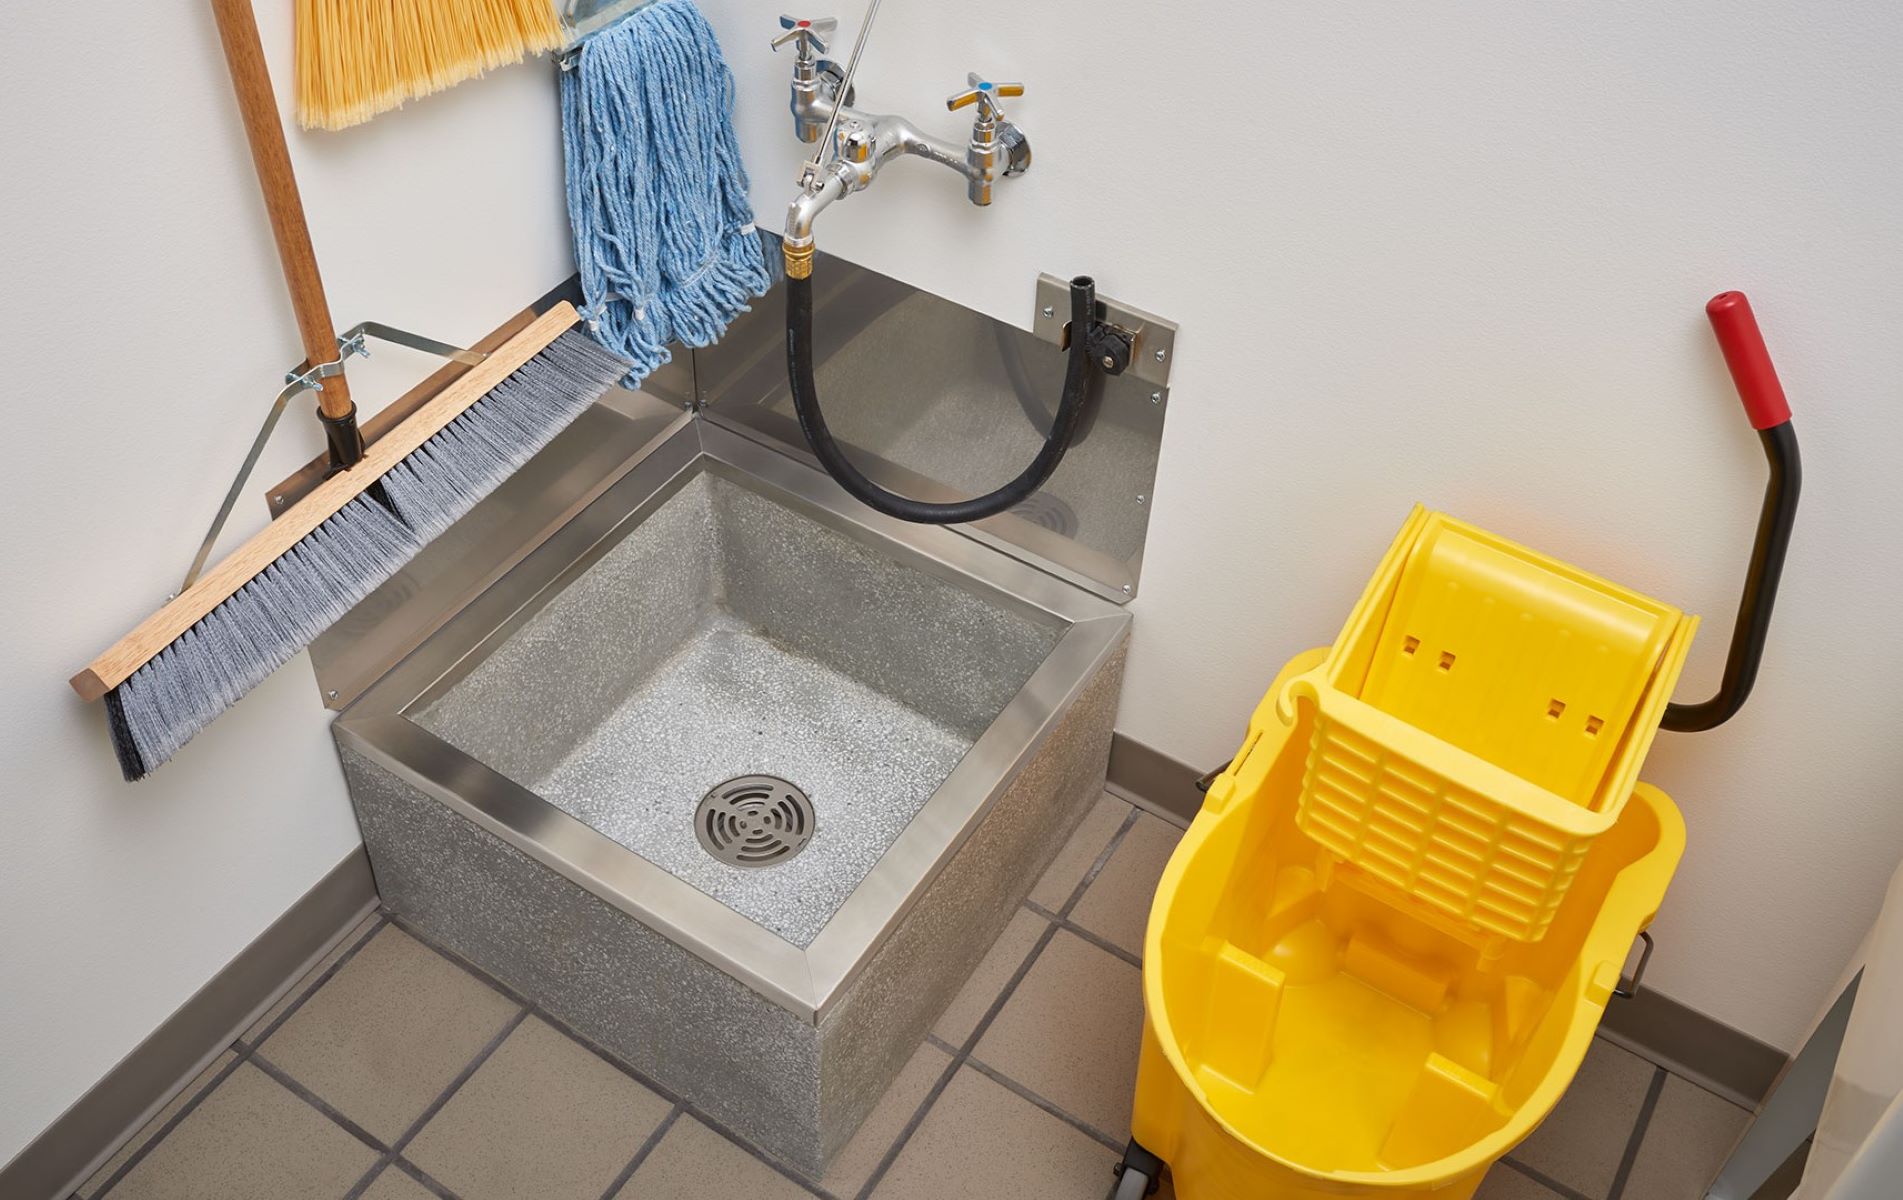
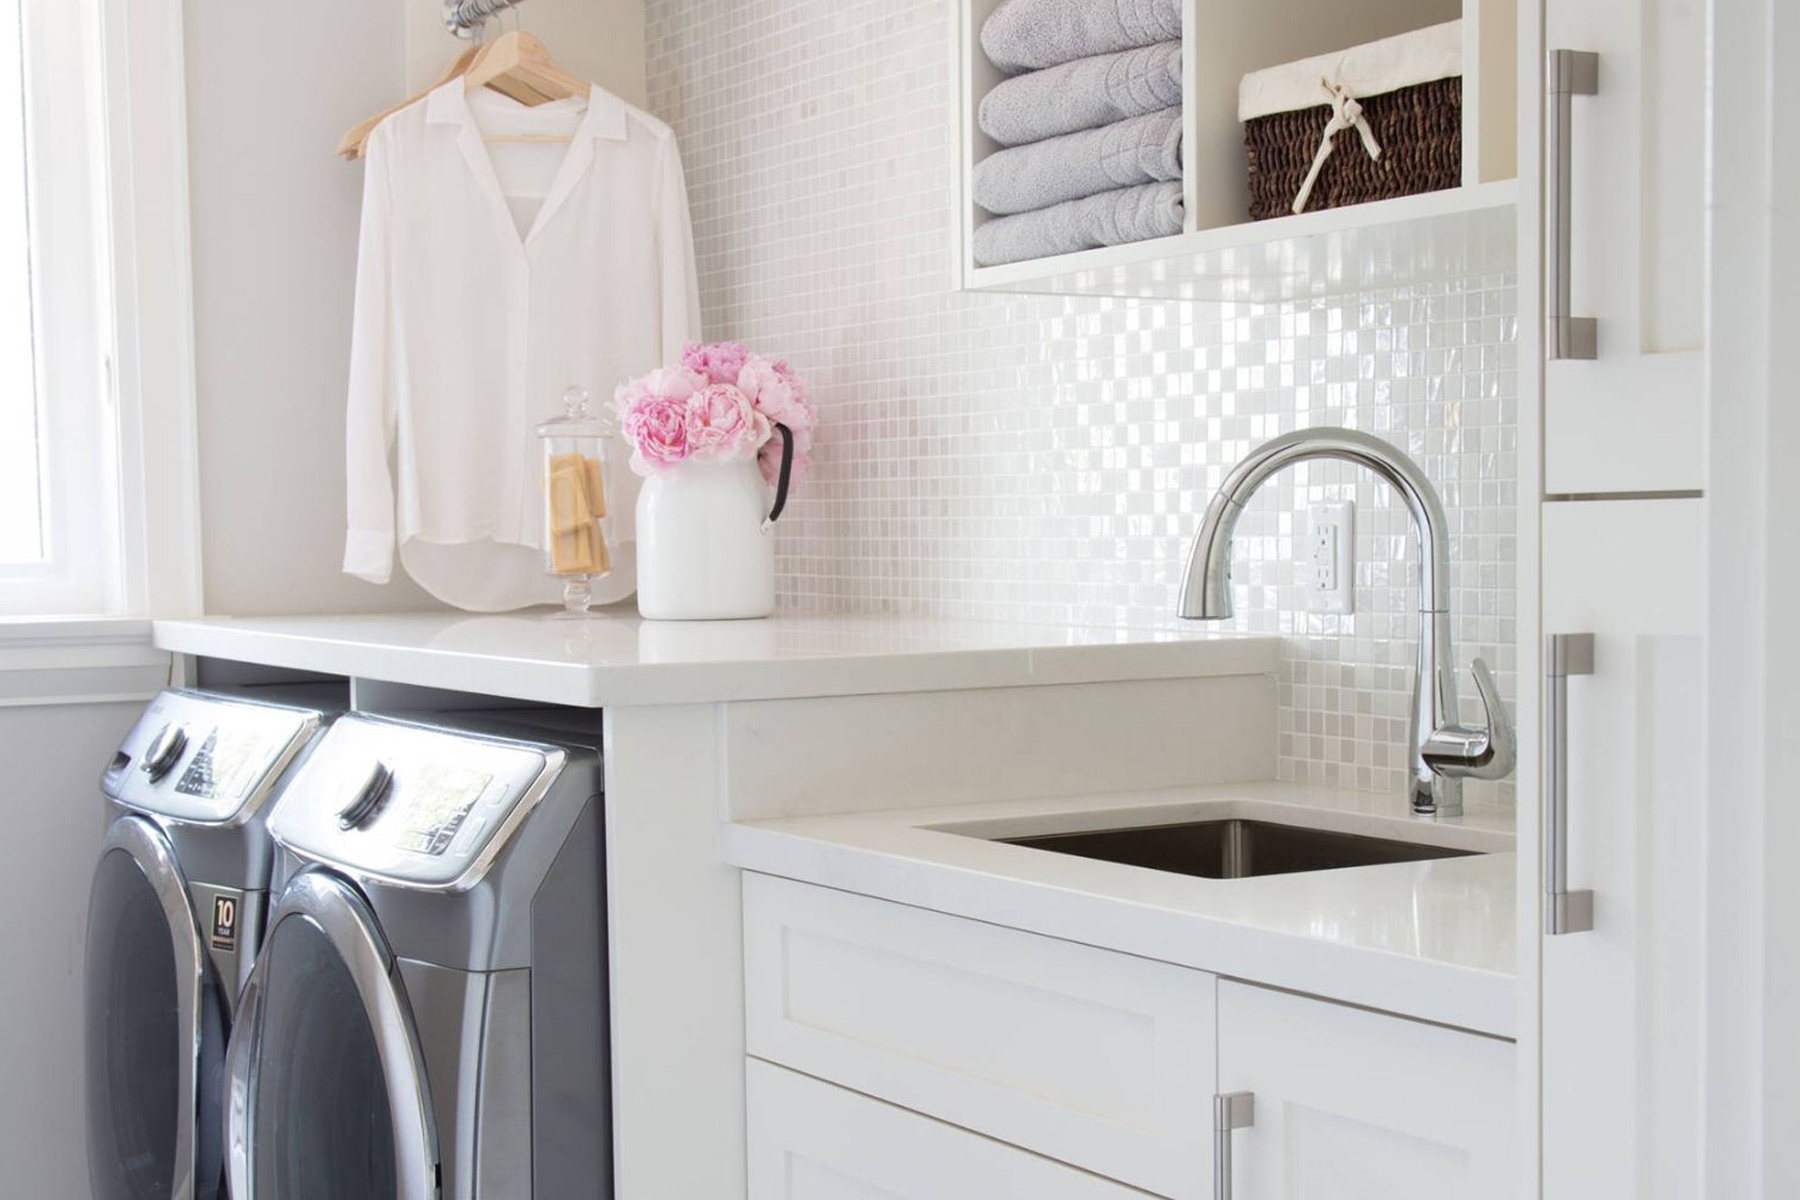
Welcome to our comprehensive guide on how to install a utility sink in your basement. A utility sink is a versatile addition to any basement, providing a convenient space to clean dirty items and perform various household tasks. Whether you need a sink for your laundry room, workshop, or any other area, installing a utility sink can greatly enhance the functionality and efficiency of your basement.
While the installation process may seem daunting at first, with the right tools, materials, and step-by-step instructions, you can successfully tackle this project yourself. In this article, we will walk you through the entire process, from gathering the necessary tools and materials to finalizing the installation.
Installing a utility sink requires some basic plumbing knowledge, but it can be accomplished by homeowners with intermediate DIY skills. Following these steps will help ensure a successful installation and provide you with a functional and durable utility sink for years to come.
Before we dive into the specific steps, let’s take a moment to cover the tools and materials you will need for this project. Having everything prepared beforehand will save you time and frustration as you work through the installation process.
Key Takeaways:
- Installing a utility sink in your basement can greatly enhance the functionality and convenience of the space, providing a dedicated area for laundry, cleaning, and household tasks. With the right tools and step-by-step instructions, homeowners with intermediate DIY skills can successfully tackle this project.
- Proper planning, preparation, and attention to detail are essential for a successful utility sink installation. From choosing the optimal location to testing and finalizing the installation, each step contributes to achieving a professional and durable result.
Read more: How To Install Sink In Basement
Step 1: Gather the Necessary Tools and Materials
Before you begin the installation process, it’s important to gather all the required tools and materials. Having everything on hand will make the installation smoother and more efficient. Here is a list of the essential tools and materials you will need:
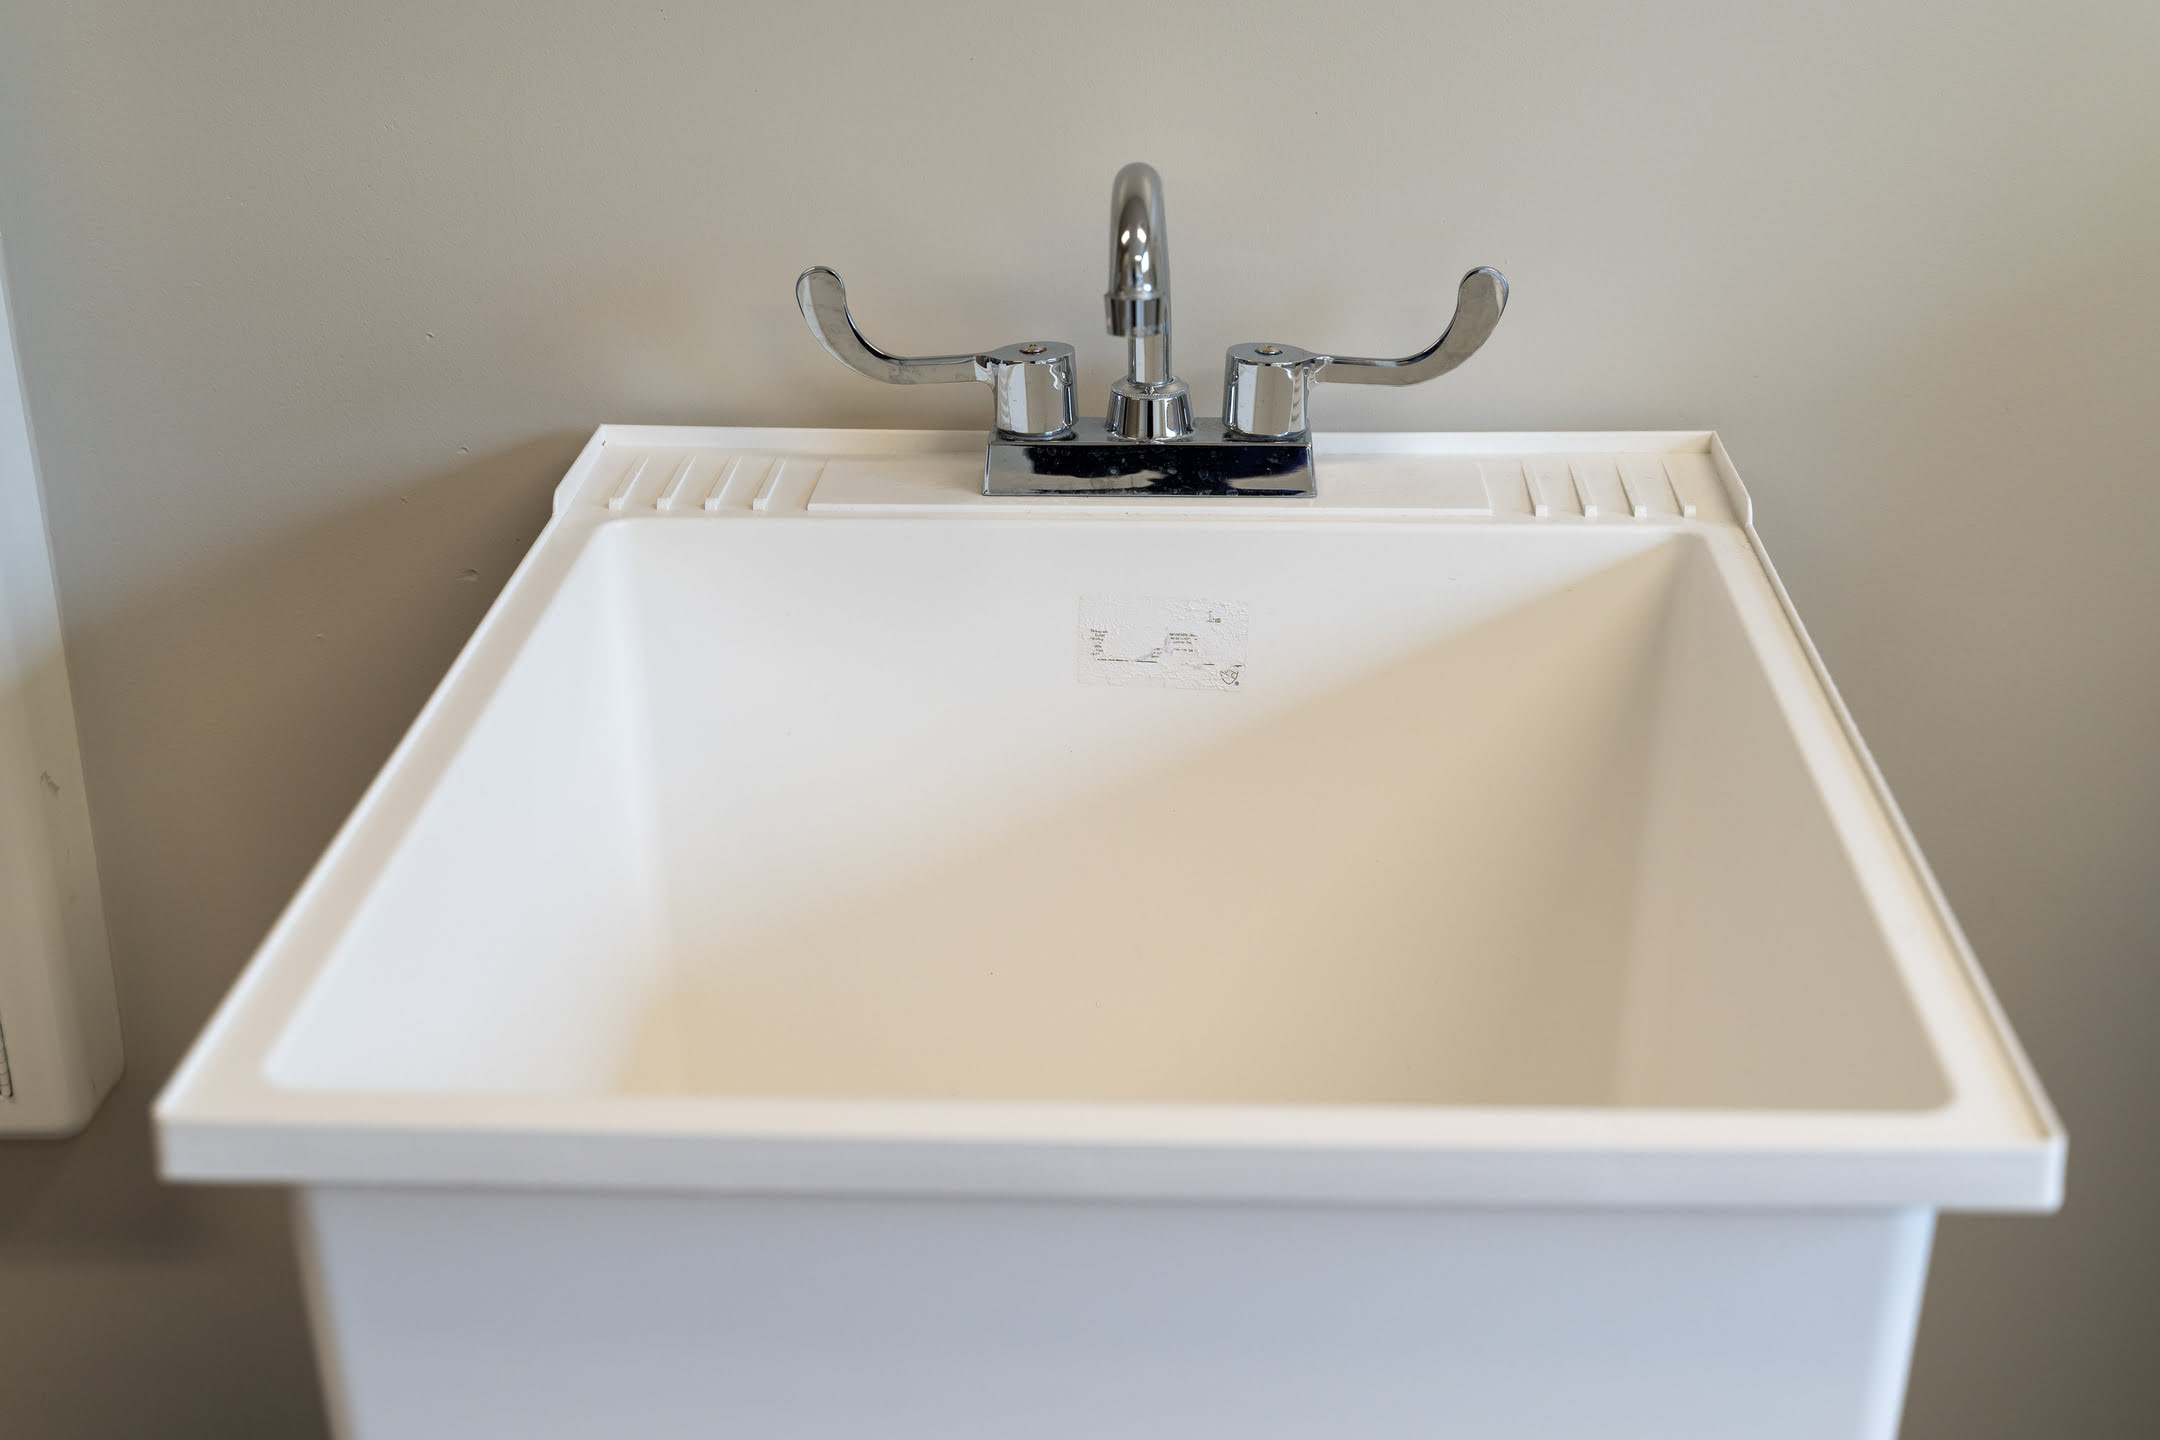
- Utility sink kit: This includes the sink, faucet, drain, and any necessary mounting hardware.
- Adjustable wrench
- Pipe wrench
- Hacksaw or reciprocating saw: This will be used for cutting pipes if needed.
- Teflon tape: This is used to create a watertight seal between pipe fittings.
- Screwdriver
- Plumber’s putty or silicone caulk: This is used to create a watertight seal around the faucet and sink.
- Plumbing tape: This is used to secure pipes and prevent leaks.
- PVC pipe and fittings: Additional pipes and fittings may be necessary depending on your specific installation needs.
- Measuring tape
- Pencil
- Safety goggles and gloves: These will protect you during the installation process.
Once you have gathered all the necessary tools and materials, you are ready to move on to the next step: choosing the location for your utility sink. Proper placement is essential for functionality and efficiency.
Step 2: Choose the Location for the Utility Sink
The next step in installing a utility sink in your basement is to choose the optimal location for it. Consider the following factors when selecting the placement:
- Accessibility: Choose a location that is easily accessible and convenient for your needs. It should be relatively close to the areas where you’ll be using the sink, such as the laundry area or workshop.
- Plumbing and electrical connections: Ensure that the location you choose has access to the necessary plumbing and electrical connections. If the area doesn’t have existing connections, you may need to hire a professional to install them.
- Drainage: The sink will require proper drainage, so consider the location’s proximity to existing drain lines. It’s best to place the sink near an existing drain to minimize the need for additional plumbing work.
- Water supply: Similarly, consider the accessibility of water supply lines. Locate the sink close to existing water lines to simplify the installation process.
- Space requirements: Determine the size of the sink you want and ensure that the chosen location can accommodate it without overwhelming the available space. It’s important to strike a balance between functionality and not overcrowding the basement.
Once you have considered these factors, mark the chosen location with a pencil. Measure the dimensions of the sink and mark the outline on the floor or wall to visualize the placement. This will help you ensure that the chosen location is suitable and that there is enough space to install the sink properly.
With the location decided, it’s time to move on to the next step: preparing the area for installation.
Step 3: Prepare the Area for Installation
Now that you have chosen the location for your utility sink, it’s time to prepare the area for installation. The preparation process involves several essential steps to ensure a smooth and successful installation:
- Clear the area: Remove any obstacles, clutter, or existing items that may interfere with the installation process. Clear the workspace to provide ample room for maneuvering and working comfortably.
- Shut off water supply: Locate the main water shut-off valve for your basement and turn it off. This will prevent any water from flowing while you work on the installation.
- Drain the pipes: Open a faucet in the basement to drain any remaining water from the pipes. This step will help minimize water leakage during the installation.
- Disconnect existing plumbing: If there are any existing plumbing fixtures or pipes in the chosen location, carefully disconnect and remove them. This may involve using a wrench or pipe cutter to loosen and detach the connections.
- Prepare the floor/wall: Ensure that the floor or wall where the sink will be installed is clean and level. If necessary, use a level and shims to adjust and stabilize the surface. This will provide a solid foundation for the sink.
- Create an access hole: If you’re installing a wall-mounted sink, you’ll need to create an access hole in the wall for the plumbing connections. Measure and mark the appropriate location for the hole, and use a reciprocating saw or drill to create it.
By completing these steps, you will have a clear and prepared space for installing your utility sink. In the next step, we will guide you through installing the drainage system for the sink.
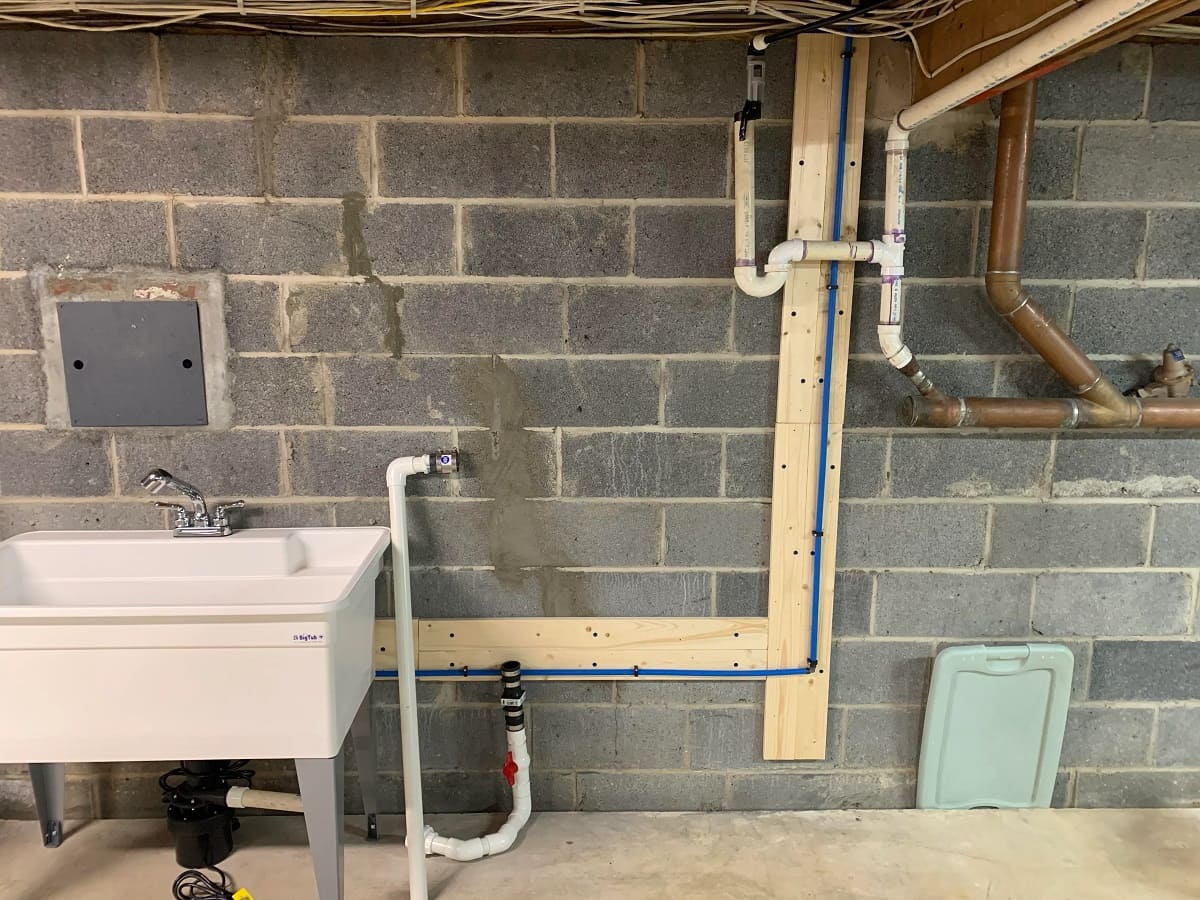
Step 4: Install the Drainage System
With the area prepared, it’s time to move on to installing the drainage system for your utility sink. Proper drainage is crucial to ensure that water flows out efficiently and prevents any potential plumbing issues. Follow these steps to install the drainage system:
- Measure and cut the drainpipe: Measure the distance from the sink drain to the main drain line. Using a hacksaw or reciprocating saw, cut a section of the drainpipe to the appropriate length. Make sure to account for any fittings or bends in the pipe.
- Attach the P-trap: Connect one end of the cut drainpipe to the P-trap, which is a curved section of pipe that prevents sewer gases from entering your basement. Use PVC primer and cement to secure the connection. Ensure that the P-trap is properly aligned and level.
- Connect the drainpipe to the main drain line: If there is an existing drain line in the vicinity, connect the other end of the drainpipe to it. If not, you may need to create a new drain line. Use PVC fittings and a coupling to make the connection. Again, use PVC primer and cement to secure the joints.
- Test for leaks: Once the drainage system is installed, turn on the main water supply and let water flow into the sink. Check for any leaks in the drainpipe or connections. If necessary, tighten any loose connections or apply additional sealant to eliminate leaks.
By following these steps, you will have successfully installed the drainage system for your utility sink. The next step is to connect the water supply lines, which will allow you to have running water in the sink.
When installing a utility sink in the basement, make sure to properly secure the sink to the wall or floor to prevent any movement or instability. This will ensure the sink remains functional and safe to use.
Read more: What Is A Utility Sink
Step 5: Connect the Water Supply Lines
Now that the drainage system is in place, it’s time to connect the water supply lines for your utility sink. This step will enable you to have running water and make the sink fully functional. Follow these steps to connect the water supply lines:
- Measure and cut the water supply pipes: Measure the distance from the sink faucet to the existing water supply lines. Using a pipe cutter, cut a section of the supply pipes to the appropriate length. Make sure to leave enough room for fittings and connectors.
- Attach shutoff valves: Install shutoff valves near the cut ends of the supply pipes. These valves will allow you to easily control the water flow to the sink. Attach the valves using wrenches and ensure they are tight and secure.
- Connect the supply lines to the faucet: Using the appropriate fittings and connectors, attach one end of the supply lines to the faucet. Ensure that the connections are tight and leak-free.
- Connect the supply lines to the shutoff valves: Attach the other end of the supply lines to the shutoff valves. Use wrenches to tighten the connections and ensure they are secure.
- Turn on the water supply: Open the main water supply valve and check for any leaks in the supply lines or connections. If you notice any leaks, tighten the connections or apply plumber’s tape to create a watertight seal.
By following these steps, you will have successfully connected the water supply lines for your utility sink. The next step is to secure the sink in place, ensuring stability and preventing any movement or damage.
Step 6: Secure the Utility Sink in Place
Securing the utility sink in place is an important step to ensure its stability and prevent any movement or damage during use. Follow these steps to securely install and anchor the sink:
- Place the sink in position: Carefully place the utility sink in the designated location. Ensure that it is level and align it with the markings you made earlier.
- Attach the sink brackets: Depending on the type of sink you have, there will be specific brackets or mounting hardware provided. Follow the manufacturer’s instructions to attach the brackets to the wall or underside of the sink. This will provide additional support and stability.
- Secure the sink to the wall: Use screws or bolts to secure the sink brackets to the wall, ensuring a firm hold. Make sure to use appropriate anchors if the sink is being mounted on a drywall or other non-structural surface.
- Tighten the mounting hardware: Check the sink for any wobbling or movement and tighten the mounting hardware as needed. Ensure that the sink is securely fastened and stable.
By following these steps, you will have successfully secured the utility sink in place. The final step is to test and finalize the installation, ensuring that everything is functioning properly.
Step 7: Test and Finalize the Installation
Now that you have completed the installation of your utility sink, it’s time to test everything and make any necessary final adjustments. Follow these steps to ensure that your sink is fully functional and ready for use:
- Turn on the water supply: Open the shutoff valves to allow water to flow into the sink. Check for any leaks in the supply lines, faucet, or connections. If you notice any leaks, tighten the connections or apply plumber’s tape to create a watertight seal.
- Test the drainage system: Fill the sink with water and let it drain completely. Observe the flow of water and check for any blockages or slow drainage. If there are any issues, make adjustments to the drainpipe or P-trap to ensure smooth and efficient drainage.
- Check the stability of the sink: Give the sink a gentle shake to ensure it is securely anchored and stable. If you notice any movement, tighten the mounting hardware or make adjustments as needed to enhance stability.
- Inspect for any remaining adjustments: Take a close look at the entire installation to ensure that all components are properly connected and aligned. Make any necessary adjustments or final touches.
Once you have tested and finalized the installation, you can now enjoy the convenience and functionality of your utility sink. Remember to regularly maintain and clean the sink to keep it in optimal condition and address any issues promptly.
Congratulations! You have successfully installed a utility sink in your basement, providing a valuable addition to your home’s functionality. Whether you use it for laundry, household tasks, or other purposes, the utility sink will make your life easier and more efficient.
Thank you for following along with our step-by-step guide. We hope this article has been helpful in guiding you through the installation process. If you have any questions or need further assistance, don’t hesitate to consult a professional or reach out to us for support.
Happy sink installation!
Conclusion
Installing a utility sink in your basement is a great way to enhance the functionality and convenience of the space. Whether you use it for laundry, cleaning dirty items, or other household tasks, a utility sink provides a dedicated area for these activities. By following the steps outlined in this guide, you can successfully install a utility sink yourself and enjoy its benefits.
Throughout the installation process, it’s important to gather the necessary tools and materials, choose the optimal location, prepare the area, install the drainage system, connect the water supply lines, secure the sink in place, and test and finalize the installation. Each step contributes to achieving a successful and efficient installation.
Remember to take the time to measure, plan, and double-check your work to ensure a professional and durable installation. If you encounter any difficulties or are unsure about any steps, it’s always a good idea to consult a professional plumber or seek guidance from experts.
With your utility sink installed, you can enjoy the convenience of having a dedicated space in your basement for various tasks. From doing laundry to cleaning gardening tools, the utility sink will make your life easier and more organized.
We hope this comprehensive guide has provided you with the necessary knowledge and guidance to install a utility sink in your basement. By following these steps, you can successfully complete the installation and enjoy the benefits of a functional utility sink for years to come.
Thank you for reading, and we wish you the best of luck with your utility sink installation!
Now that you've mastered installing a utility sink, why not tackle more projects to enhance your living space? Wondering how much time you'll need for a complete overhaul? Our guide on Basement Renovation breaks it down, simplifying your planning process. For regular upkeep, check out our practical advice on Home Maintenance to keep your home in top shape year-round. Both articles offer valuable insights and easy-to-follow tips that will surely make your DIY adventures successful and satisfying.
Frequently Asked Questions about How To Install Utility Sink In Basement
Was this page helpful?
At Storables.com, we guarantee accurate and reliable information. Our content, validated by Expert Board Contributors, is crafted following stringent Editorial Policies. We're committed to providing you with well-researched, expert-backed insights for all your informational needs.


0 thoughts on “How To Install Utility Sink In Basement”