Home>Articles>How To Repair Radiators And Keep An Old Heating System In Tip-Top Shape
Articles
How To Repair Radiators And Keep An Old Heating System In Tip-Top Shape
Modified: August 19, 2024
Learn the best tips and tricks to repair radiators and maintain your old heating system. Read our informative articles to keep your heating system in tip-top shape.
(Many of the links in this article redirect to a specific reviewed product. Your purchase of these products through affiliate links helps to generate commission for Storables.com, at no extra cost. Learn more)
Introduction
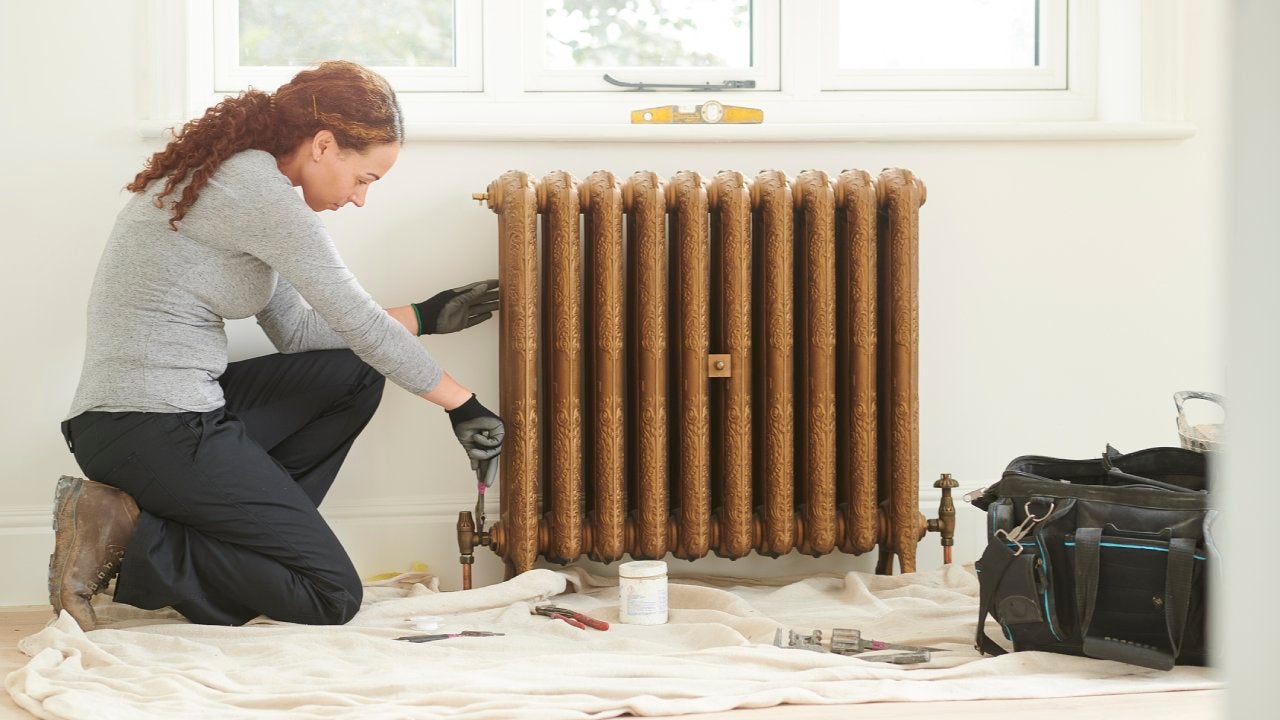
Welcome to our comprehensive guide on how to repair radiators and keep an old heating system in tip-top shape. If you have an older home with a traditional radiator system, you may encounter various issues such as leaks, uneven heating, or malfunctioning thermostats. Fortunately, with a few simple tools and some know-how, you can address these problems and ensure that your heating system operates efficiently throughout the year.
Before diving into the repair process, it’s essential to understand the common problems that can arise with radiators. By identifying the issue, you can accurately diagnose and resolve the problem, saving time and money in the long run.
Key Takeaways:
- Regular maintenance of radiators, including bleeding, flushing, and valve checks, is crucial for efficient heating. Addressing leaks promptly and upgrading insulation can extend the lifespan of an old heating system.
- By following step-by-step repair instructions and scheduling annual boiler servicing, homeowners can ensure optimal heat distribution and comfort. Prioritize safety and seek professional assistance for complex maintenance tasks.
Read more: Central Heating Radiators: How They Work
Common Problems with Radiators
Radiators, like any other mechanical system, can face several issues over time. Here are some of the most common problems you might encounter:
- Leaking Radiators: Leaks can occur due to corrosion, rust, or faulty valves. This can result in reduced heat output and an inefficient heating system.
- Uneven Heating: Sometimes, certain radiators in your home might not heat up as much as others. This can be caused by trapped air, sludge buildup, or issues with valves and pipes.
- Noisy Radiators: If you hear banging or clanging noises coming from your radiators, it could be due to air pockets or trapped debris in the system.
- Malfunctioning Thermostats: If your radiator fails to turn on or off at the desired temperature, there may be an issue with the thermostat. This can result in wasted energy and discomfort.
- Corroded or Clogged Pipes: Over time, pipes in the radiator system can become corroded or clogged with debris, affecting the overall performance of the heating system.
Now that you’re familiar with the common problems, let’s take a look at the essential tools and materials you’ll need to repair and maintain your radiators.
Key Takeaways:
- Regular maintenance of radiators, including bleeding, flushing, and valve checks, is crucial for efficient heating. Addressing leaks promptly and upgrading insulation can extend the lifespan of an old heating system.
- By following step-by-step repair instructions and scheduling annual boiler servicing, homeowners can ensure optimal heat distribution and comfort. Prioritize safety and seek professional assistance for complex maintenance tasks.
Read more: Central Heating Radiators: How They Work
Common Problems with Radiators
Radiators play a vital role in keeping our homes warm and comfortable during the colder months. However, they can sometimes develop issues that require attention and repair. Understanding these common problems will help you identify and address any issues that may arise with your radiators.
1. Leaking Radiators: One of the most common problems with radiators is leaks. Leaks can occur due to corrosion, rust, or faulty valves. When a radiator leaks, it not only reduces the heat output but can also cause damage to your floors and walls. If you notice any signs of leaks, such as damp patches or pooling water around the radiator, it’s crucial to address the issue promptly. Depending on the severity of the leak, you may need to replace the faulty valve or, in some cases, the entire radiator.
2. Uneven Heating: Another common problem is uneven heating throughout the house. You may notice that some rooms are significantly warmer than others or that certain radiators don’t heat up properly. This can be caused by several factors, including trapped air in the system, sludge buildup in the pipes, or issues with valves and thermostatic radiator valves (TRVs). To resolve this problem, you’ll need to bleed the radiators to remove any trapped air and flush the system to clear any debris or sludge that may be obstructing the flow of hot water.
3. Noisy Radiators: If you hear unusual noises coming from your radiators, such as banging or clanging sounds, it’s a clear indication that there is a problem. These noises are often caused by air pockets or trapped debris in the system. To eliminate the noise, you’ll need to bleed the radiators to release any trapped air. If the problem persists, it may be necessary to power flush the system to remove any debris or sludge that may be causing the noise.
4. Malfunctioning Thermostats: The thermostat plays a crucial role in regulating the temperature of your radiators. If your radiator fails to turn on or off at the desired temperature, it may indicate a problem with the thermostat. This can result in wasted energy and discomfort in your home. Checking and replacing thermostatic radiator valves (TRVs) can help resolve this issue and ensure that your radiators are functioning efficiently.
5. Corroded or Clogged Pipes: Over time, the pipes in your radiator system can become corroded or clogged with debris, affecting the overall performance of your heating system. This can cause reduced heat output, inefficient operation, and potential breakdowns. Flushing the radiator system regularly can help remove any built-up sludge and debris, allowing the hot water to flow freely and efficiently.
Now that you’re aware of the common problems that can occur with radiators, you’ll be better equipped to troubleshoot and address these issues. In the next section, we’ll discuss the essential tools and materials you’ll need to repair and maintain your radiators effectively.
Tools and Materials Needed
Repairing and maintaining radiators requires a few essential tools and materials. Having these items on hand will make the process smoother and more efficient. Here’s a list of what you’ll need:
- Radiator Key: A radiator key is a small, T-shaped tool used to bleed radiators. It allows you to release trapped air and maintain proper water flow in the system. Make sure to have a radiator key that fits the bleed valve on your radiators.
- Adjustable Wrench: An adjustable wrench is a versatile tool that will come in handy for various tasks, such as removing and replacing radiator valves or other components.
- Plumber’s Tape: Plumber’s tape, also known as Teflon tape, is used for sealing pipe threads to prevent leaks. It’s important to have plumber’s tape on hand when replacing valves or connectors.
- Pipe Cutter: A pipe cutter is a handy tool for cutting copper pipes. You may need to use a pipe cutter when replacing sections of pipe or installing new valves.
- Wire Brush: A wire brush is useful for cleaning corrosion or sludge buildup on radiator valves or pipes. It helps ensure a clean and secure connection when replacing components.
- Plunger: A plunger is a simple but effective tool for clearing clogged pipes. It can be used to dislodge blockages and restore proper water flow in the system.
- Neutralizing Agent: If you plan to flush your radiator system, a neutralizing agent is necessary to help remove any acidic or corrosive residue left behind by the flushing process. This is an important step to protect the longevity of your heating system.
- Bucket and Towels: Having a bucket and towels nearby is essential for catching any water or debris that may be released during the repair or maintenance process. This helps prevent mess and water damage.
- Replacement Parts: Depending on the specific issue you’re addressing, you may need to have replacement parts on hand. This can include radiator valves, thermostatic radiator valves (TRVs), or other components that may need to be replaced.
- Protective Gear: Lastly, it’s important to prioritize safety when working with radiators and heating systems. Wear protective gear such as gloves and safety glasses to protect yourself from sharp edges, hot surfaces, and any potential debris or chemicals.
By having these tools and materials ready, you’ll be well-prepared to tackle any radiator repairs or maintenance tasks. In the following sections, we’ll guide you through step-by-step instructions on how to repair common radiator problems, such as bleeding the radiator, flushing the system, and replacing thermostatic radiator valves.
Step-by-Step Guide to Repairing Radiators
Repairing radiators may seem daunting, but with the right knowledge and steps, you can successfully address common issues and bring your heating system back to optimal functionality. Follow this step-by-step guide to repair your radiators:
- Bleeding the Radiator: Start by bleeding the radiator to release trapped air. Locate the bleed valve, typically found at the top of the radiator. Attach a radiator key to the valve and turn it counterclockwise to release the air. Be prepared with a bucket and towel to catch any water that may also come out. Once all the air is released, tighten the valve and check for any leaks.
- Flushing the Radiator System: Flushing the radiator system helps remove sludge and debris, allowing for better heat circulation. Begin by turning off the heating system and letting the radiators cool down. Next, close the valves on each radiator, except for the one closest to the boiler. Connect a hose to the drain valve on the radiator and direct the other end to a drain or bucket. Open the drain valve to release the water and debris. Repeat this process for each radiator in the system, starting from the one closest to the boiler and working your way outward. Once all the radiators have been flushed, close the drain valves and refill the system with fresh water.
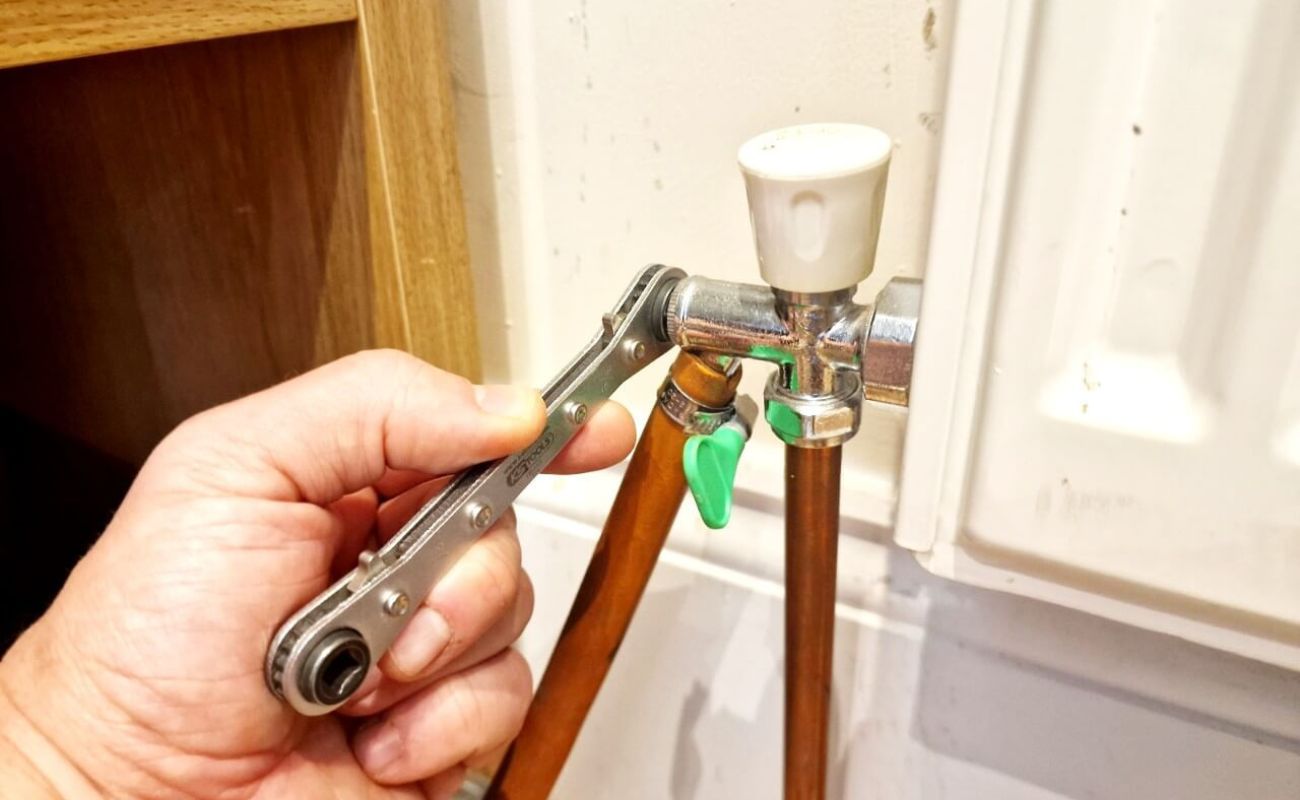
- Checking and Replacing Thermostatic Radiator Valves: Inspect the thermostatic radiator valves (TRVs) on each radiator to ensure they are functioning correctly. Check if the TRVs are opening and closing as they should when the temperature is adjusted. If a valve is faulty or not working properly, it may need to be replaced. To replace a TRV, turn off the heating system and drain the radiator. Disconnect the old valve using an adjustable wrench and plumber’s tape. Install the new valve by connecting it tightly and securely. Remember to use plumber’s tape on the threads to prevent leaks.
- Repairing Leaks in Radiators: If you discover a leak in a radiator, it’s important to address it promptly to prevent further damage. First, turn off the heating system and allow the radiator to cool down completely. Use a wire brush to clean the area around the leak to ensure a good seal. Apply plumber’s tape to the threads of the new valve if you are replacing it or to the existing valve if it’s still in good condition. Tighten the valve securely, being careful not to overtighten. Once the valve is replaced or tightened, turn on the heating system and check for any leaks.
By following these step-by-step instructions, you’ll be able to resolve common radiator issues and keep your heating system in excellent condition. Remember to take necessary safety precautions and have all the required tools and materials on hand. In the next section, we’ll discuss the process of bleeding the radiator in more detail and its importance in maintaining an efficient heating system.
Bleeding the Radiator
Bleeding a radiator is a simple yet essential maintenance task that helps remove trapped air from the system. When air accumulates in a radiator, it can prevent hot water from flowing properly, resulting in reduced heat output and inefficient operation. Bleeding the radiator involves releasing the trapped air, allowing the radiator to function optimally. Follow these steps to bleed a radiator:
- Prepare: Before starting the bleeding process, ensure that your heating system is switched off. This will prevent any hot water from flowing through the radiators while you work. You may also want to place a bucket and some towels nearby to catch any water that might come out during the bleeding process.
- Locate the Bleed Valve: Find the bleed valve on the radiator. It’s typically located at the top of the radiator, on one of the ends. The bleed valve is usually a small square-shaped or hexagonal nut-like fitting.
- Attach the Radiator Key: Take a radiator key that fits the bleed valve, and insert it into the slot on the valve. If you don’t have a radiator key, you can often use a flat-blade screwdriver or pliers instead, taking care not to damage or strip the valve.
- Turn the Valve: Hold the radiator key or the tool you’re using in one hand, and use the other hand to hold a cloth or towel around the key to catch any water that might spray out. Turn the key counterclockwise by about a quarter turn. As you do this, you should hear a hissing sound as the trapped air is released. This is the air escaping from the radiator.
- Release the Air: Keep the valve open until you see a steady stream of water coming out. This indicates that all the air has been released, and you can now close the valve. Do not overtighten the valve; just turn it clockwise until it is snug but not overly tight.
- Check for Leaks: After bleeding the radiator, check the surrounding area for any water leaks. Ensure that the valve is tightened securely to prevent any water from escaping.
- Repeat for Other Radiators: If you have multiple radiators in your home, repeat the process for each one, working from the lowest floor to the highest. This will help release any trapped air in the entire system.
- Turn on the Heating System: Once you have bled all the radiators, turn on your heating system and allow it to run normally. Monitor the radiators to ensure they are heating evenly and efficiently. If you notice any ongoing issues, such as cold spots or reduced heat output, you may need to repeat the bleeding process or seek professional assistance.
Bleeding the radiator is a simple and effective way to ensure proper heat distribution in your home. It should be done regularly, especially at the beginning of the heating season, and whenever you notice any issues with individual radiators. By maintaining a well-bleed heating system, you’ll enjoy a cozy and comfortable home environment.
Regularly bleed your radiators to release any trapped air, which can improve their efficiency and keep your heating system running smoothly.
Flushing the Radiator System
Flushing the radiator system is an important maintenance task that helps remove accumulated sludge, debris, and sediment from the pipes and radiators. Over time, these impurities can obstruct the flow of hot water, reduce heating efficiency, and potentially damage your heating system. Flushing the radiator system involves cleaning out the pipes and radiators, improving overall performance and prolonging the lifespan of your heating system. Follow these steps to flush your radiator system:
- Turn off the Heating System: Begin by switching off the heating system and allowing the radiators to cool down. This step is crucial for your safety and to prevent any accidental burns.
- Prepare the System: Locate the valves on each radiator and close them tightly. You only want to flush one radiator at a time, so it’s essential to close all the other valves to direct the flow of water to the radiator you’re flushing.
- Connect the Hose: Next, connect a hose to the drain valve of the radiator you’re flushing. Ensure that the other end of the hose is directed towards a drain or a bucket to collect the dirty water that will be released.
- Open the Drain Valve: Open the drain valve slowly to allow the dirty water and sludge to flow out through the hose. Be prepared for the initial rush of water, which may contain loose debris and sediment.
- Flush the System: Once the initial rush of dirty water subsides, turn on the cold water supply to the heating system. This will help push any remaining debris out of the radiator and through the hose. Let the cold water run through the system for a few minutes until the water coming out is clear and free of debris.
- Close the Drain Valve: Once the water runs clear, close the drain valve on the radiator you’re flushing. Make sure it is tightly closed to prevent any leaks or drips.
- Repeat the Process: Move on to the next radiator and repeat the flushing process, working your way through each radiator in the system. Start with the radiator nearest to the boiler and progress towards the ones farthest away. This ensures that any debris or sludge is effectively flushed out of the system.
- Refill the System: Once you have flushed all the radiators, close the drain valve on the last radiator and turn on the heating system. Allow the system to refill with clean water and check for any leaks or issues with individual radiators.
Flushing the radiator system is a crucial maintenance task that should be performed periodically to keep your heating system operating efficiently. The frequency of flushing depends on several factors, such as the age of your system and the water quality in your area. Consulting a professional or following the manufacturer’s recommendations can help you determine the ideal flushing schedule for your specific system.
By regularly flushing your radiator system, you’ll remove accumulated sludge and debris, allowing for better heat circulation and extending the lifespan of your heating system. It’s a proactive approach to maintaining a well-functioning and efficient heating system for your home.
Checking and Replacing Thermostatic Radiator Valves
Thermostatic Radiator Valves (TRVs) play a crucial role in regulating the temperature of individual radiators in your home. They allow you to control the heat output of each radiator, ensuring comfort and energy efficiency. Over time, however, TRVs may become faulty or lose their effectiveness, resulting in inconsistent heating or inaccurate temperature control. Checking and replacing faulty TRVs is essential for maintaining an efficient heating system. Follow these steps to check and replace thermostatic radiator valves:
- Turn off the Heating System: Before beginning any work, turn off the heating system and allow the radiators to cool down completely. This ensures your safety and prevents any accidental burns.
- Identify the TRVs: Locate the thermostatic radiator valves on each radiator. They are usually located on either the right or left side, near the top of the radiator. TRVs are typically cylindrical in shape and have temperature settings ranging from 1 to 5 or from Low to High.
- Check the Functionality: Start by adjusting the temperature setting on each TRV to see if it responds. Turn the setting to the lowest temperature and listen for a click or a change in resistance as you rotate the knob. If the TRV is functioning properly, you should feel the resistance and hear a click indicating the valve opening or closing.
- Observe the Radiator: While testing the TRV, pay close attention to the radiator. Ensure that it heats up when the TRV is set to a higher temperature and cools down when set to a lower temperature. If the radiator does not respond or heats up regardless of the temperature setting, there may be an issue with the TRV.
- Replacing Faulty TRVs: If you determine that a thermostatic radiator valve is faulty, it will need to be replaced. Start by turning off the heating system and draining the radiator. Use an adjustable wrench to disconnect the old TRV from the radiator. Apply plumber’s tape to the threads of the new TRV to ensure a tight and secure seal. Connect the new TRV to the radiator and tighten it with the wrench. Take care not to overtighten, as this can cause damage. Once the new TRV is installed, turn on the heating system and check for any leaks or issues.
- Testing the New TRV: Adjust the temperature setting on the newly installed TRV and monitor the radiator’s performance. Ensure that the radiator heats up and cools down as expected based on the temperature setting. This will verify that the new TRV is functioning correctly.
Checking and replacing faulty thermostatic radiator valves is crucial to maintain efficient temperature control in your home. By ensuring that each TRV is working properly, you can optimize the heat output of individual radiators, saving energy and enhancing comfort. If you’re unsure about the process or encounter any complications, it’s advisable to seek assistance from a professional heating engineer.
Remember to take necessary safety precautions and follow manufacturer guidelines when working with thermostatic radiator valves. Regularly checking and maintaining TRVs will help extend the lifespan of your heating system and keep your home cozy and comfortable throughout the year.
Repairing Leaks in Radiators
Discovering a leak in a radiator can be a cause for concern, as it not only reduces the efficiency of your heating system but can also cause damage to your home. Repairing leaks in radiators is a crucial maintenance task that should be addressed promptly to prevent further issues. Follow these steps to repair leaks in radiators:
- Turn off the Heating System: Begin by switching off the heating system and allowing the radiator to cool down completely. This is essential to ensure your safety and prevent any accidental burns.
- Locate the Leak: Identify the specific location of the leak on the radiator. Look for any signs of water stains, dampness, or pooling water around the radiator. Remember that the leak may not always be visible, so pay close attention to any signs of moisture or discoloration.
- Clean the Area: Before making any repairs, clean the area around the leak using a wire brush. This helps remove any corrosion or debris that may prevent proper sealing. Ensure that the area is dry before proceeding.
- Apply Plumber’s Tape: If the leak is coming from a valve or joint, applying plumber’s tape can help create a watertight seal. Wrap the plumber’s tape around the threads of the valve or joint in a clockwise direction. This ensures a secure seal when the components are tightened.
- Tighten the Valve or Joint: Using an adjustable wrench, tighten the valve or joint that is causing the leak. Be cautious not to overtighten, as this can cause damage or further leaks. Once tightened, check for any signs of leakage. If the leak persists, additional repairs may be necessary.
- Replace Faulty Components: If tightening the valve or joint does not resolve the leak, it may be necessary to replace the faulty component. Turn off the heating system and allow the radiator to cool down. Disconnect the old valve or joint using an adjustable wrench. Apply plumber’s tape to the threads of the new component and connect it securely. Take care not to overtighten and check for any signs of leakage after installation.
- Turn on the Heating System: Once the repairs are complete, turn on the heating system and monitor the radiator for any signs of leakage. Ensure that the radiator heats up evenly and that there are no new leaks. If any issues persist, consult a professional heating engineer for further assistance.
Repairing leaks in radiators is a critical task to maintain the efficiency of your heating system and prevent water damage to your home. If you’re uncertain about making the repairs yourself or encounter any complications, it’s advisable to seek help from a qualified heating engineer or plumber.
Regular inspection and maintenance of your radiators can help identify and address leaks early on, minimizing potential damage and ensuring the longevity of your heating system. By following these steps and taking prompt action, you can resolve leaks in radiators and enjoy a well-functioning and leak-free heating system.
Read more: How To Replace Plumbing In Old House
Maintaining an Old Heating System
If you have an old heating system, it’s important to give it proper maintenance to keep it running efficiently and extend its lifespan. While older systems may require more attention than newer ones, with regular maintenance, you can ensure that your heating system operates effectively and provides reliable warmth during the colder months. Here are some essential maintenance tips for maintaining an old heating system:
- Clean and Inspect Regularly: Dust and debris can accumulate inside the heating system over time, affecting its efficiency. Regularly clean the exterior of the system, including radiators, pipes, and vents. Inspect these components for any signs of damage or leaks, and address them promptly.
- Service the Boiler: Schedule annual servicing for your boiler with a qualified heating engineer. During the servicing, the engineer will clean and inspect the boiler, check for any potential issues, and ensure that it’s operating at its optimal efficiency. This regular maintenance will help prevent breakdowns and improve the overall performance of your heating system.
- Bleed the Radiators: As mentioned earlier, bleeding the radiators is an essential maintenance task for both old and new heating systems. It helps release trapped air, improving the heat output and efficiency of the radiators. Bleed your radiators regularly and monitor their performance to ensure they are heating evenly.
- Monitor for Uneven Heating: If you notice that certain rooms are consistently colder than others, the heating system may not be distributing heat evenly. Check for any blockages or airlocks in the radiators or pipes. Consider balancing the system by adjusting the radiator valves to redirect more heat to colder areas of your home.
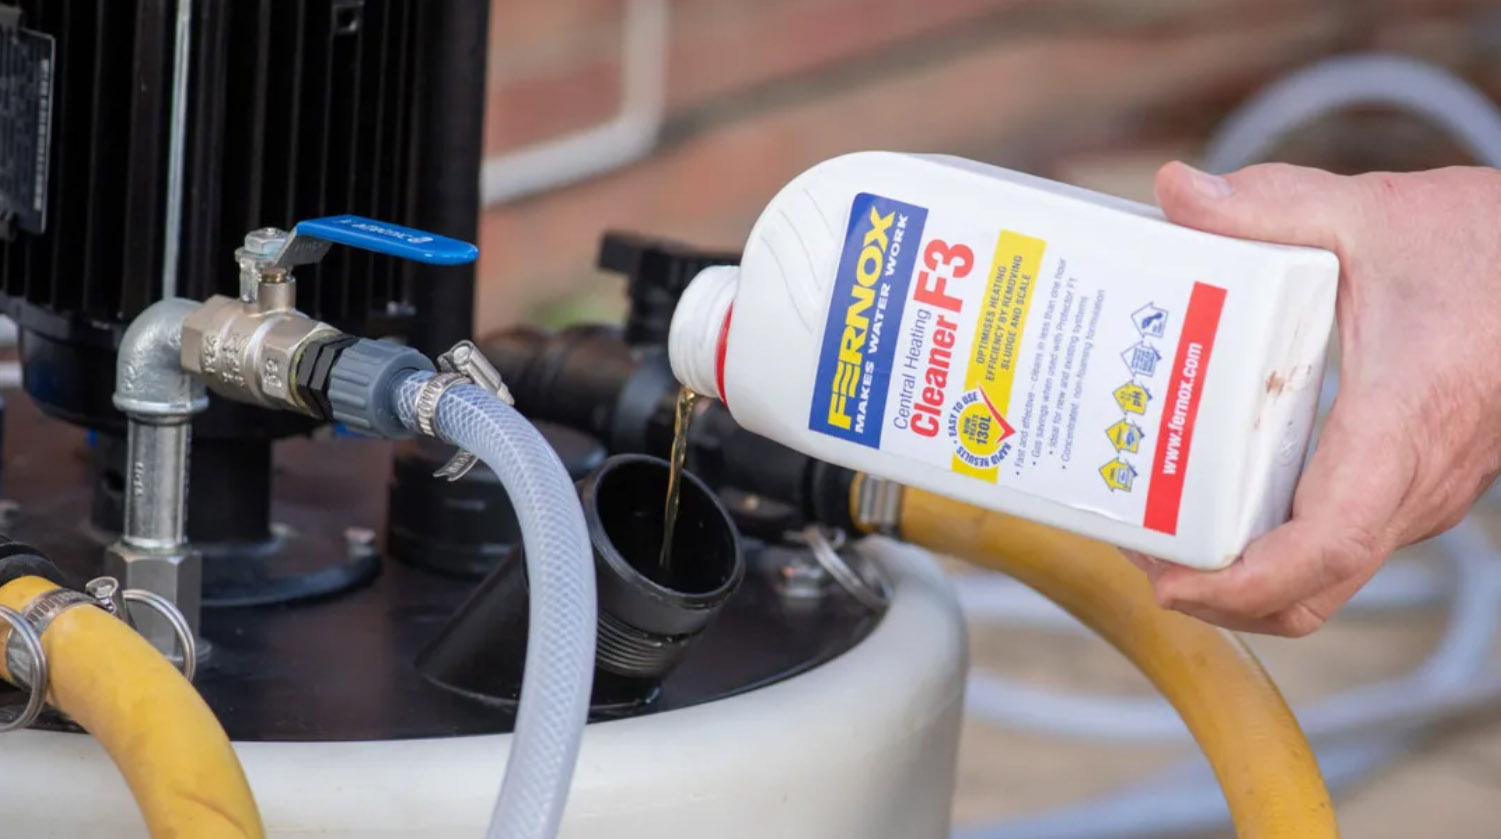
- Consider Power Flushing: Over time, sludge and debris can build up in the heating system, leading to reduced efficiency and potential breakdowns. If you have an old heating system, consider power flushing to remove these impurities. Power flushing involves using specialized equipment to clean the pipes and radiators thoroughly, improving heat circulation and system performance. Consult a professional heating engineer to determine if power flushing is suitable for your system.
- Inspect and Replace Faulty Components: Regularly inspect the components of your heating system, such as thermostats, valves, and pumps. Replace any faulty or malfunctioning parts promptly to avoid further issues. It’s advisable to consult a professional for complex component replacements or repairs.
- Upgrade Insulation: Older homes often have insufficient insulation, leading to heat loss and reduced energy efficiency. Consider upgrading the insulation in your home, including walls, ceilings, and windows, to retain heat and reduce energy consumption. This will enhance the effectiveness of your heating system.
- Follow Manufacturer’s Guidelines: Refer to the manufacturer’s guidelines and recommendations for maintaining your specific heating system. These guidelines provide valuable information on maintenance schedules, optimal settings, and any specific requirements for your particular system.
By following these maintenance tips, you can ensure that your old heating system operates effectively and efficiently. Regular cleaning, inspection, and servicing will help identify and address any issues before they escalate and lead to costly repairs. Consult a professional heating engineer for expert advice and assistance when needed, especially for complex maintenance tasks or component replacements.
Maintaining an old heating system requires a proactive approach, but with proper care, you can enjoy a cozy and comfortable home environment throughout the heating season.
Conclusion
Maintaining and repairing radiators is essential for keeping an old heating system in tip-top shape. By addressing common problems such as leaks, uneven heating, and malfunctioning thermostats, you can ensure that your heating system operates efficiently and provides optimal warmth and comfort in your home.
In this comprehensive guide, we have discussed various maintenance tasks, including bleeding the radiators to release trapped air, flushing the radiator system to remove sludge and debris, checking and replacing thermostatic radiator valves (TRVs) for accurate temperature control, and repairing leaks to prevent water damage.
Regular maintenance of your radiators and heating system is vital to extend its lifespan and improve its performance. By following the step-by-step instructions provided, you can confidently address common issues and make necessary repairs to ensure optimal heat distribution throughout your home.
Additionally, we have highlighted the importance of maintaining an old heating system by cleaning and inspecting regularly, scheduling annual boiler servicing, balancing the heat distribution, and considering power flushing to remove accumulated debris. Upgrading insulation and following manufacturer’s guidelines are also essential to maximize the efficiency and longevity of your old heating system.
Remember to prioritize safety during maintenance tasks, use the appropriate tools and materials, and consult professionals when necessary. Regular care and attention to your radiators and heating system will provide you with a reliable source of warmth and comfort for years to come.
Take the time to maintain your radiators and heating system, and you’ll enjoy a cozy and inviting home environment even during the coldest of months. Stay proactive, stay warm!
Frequently Asked Questions about How To Repair Radiators And Keep An Old Heating System In Tip-Top Shape
Was this page helpful?
At Storables.com, we guarantee accurate and reliable information. Our content, validated by Expert Board Contributors, is crafted following stringent Editorial Policies. We're committed to providing you with well-researched, expert-backed insights for all your informational needs.


0 thoughts on “How To Repair Radiators And Keep An Old Heating System In Tip-Top Shape”