Articles
How To Replace A Roof
Modified: February 25, 2024
Find helpful articles on how to replace a roof, including step-by-step guides and expert tips.
(Many of the links in this article redirect to a specific reviewed product. Your purchase of these products through affiliate links helps to generate commission for Storables.com, at no extra cost. Learn more)
Introduction
Replacing a roof is a significant undertaking that can greatly impact the safety, functionality, and appearance of your home. Whether you’re dealing with old, worn-out shingles, a leaky roof, or extensive damage from a storm, knowing how to replace a roof is essential. With careful planning, the right tools, and a little bit of knowledge, you can tackle this project and ensure a successful outcome.
Before you begin, it’s crucial to prioritize safety. Working at heights can be dangerous, so be sure to follow all necessary precautions. Wear protective gear, use proper ladder techniques, and work with a partner whenever possible. Additionally, it’s essential to consult local building codes and regulations to ensure compliance and avoid unnecessary setbacks.
To replace a roof, you’ll need a variety of tools and materials. These can include a hammer, utility knife, pry bar, roofing nails, shingles, underlayment, flashing, and more. Gathering all the necessary supplies beforehand will save you time and ensure a smooth workflow.
Throughout the process, it’s important to assess the roof damage accurately. Conduct a thorough inspection to identify any areas that require repair or replacement. This will help you determine the extent of the project and plan accordingly.
Once you’ve assessed the damage, you can begin removing the old roofing materials. This step often involves removing the existing shingles, underlayment, and any damaged sections of the roof deck. It’s crucial to exercise caution during this process and dispose of the old materials properly.
If the roof deck requires repair or replacement, take the time to address this before installing new roofing materials. A sturdy and sound roof deck is essential for the longevity of the roof and ensures proper installation.
Once the roof deck is in good condition, you can proceed with installing the new roofing materials. This may include laying down a new underlayment, applying flashing around protrusions, and carefully placing the shingles in the desired pattern. Take care to follow manufacturer instructions and best practices for optimal results.
Securing the roofing materials is crucial to ensure they withstand weather conditions and remain in place. This typically involves nailing or stapling the shingles, securing flashing with roofing cement or nails, and properly sealing any exposed areas.
After completing the installation, it’s essential to seal and waterproof the roof to protect against water damage. Apply a waterproofing substance or sealant to ensure the roof remains watertight and can withstand the elements.
Finally, as you complete the project, take the time to clean up and inspect the finished roof. Remove any debris from the worksite, inspect for any loose or missing shingles, and ensure all the components are properly installed and functioning.
Replacing a roof is a complex task that requires careful planning and execution. By following these steps and prioritizing safety, you can replace your roof effectively, ensuring the long-term integrity and protection of your home.
Key Takeaways:
- Prioritize safety, gather the right tools, and assess roof damage accurately before replacing a roof. Carefully remove old materials, repair the roof deck, and install new roofing materials with precision to ensure a successful and long-lasting outcome.
- Secure the roofing materials, seal and waterproof the roof, and conduct a thorough cleanup and inspection to complete the roof replacement project. Following these steps will ensure a durable, weatherproof, and visually appealing roof for years to come.
Read more: How To Replace A Roof Vent
Safety Precautions
When it comes to replacing a roof, safety should be your top priority. Working at heights can be dangerous, so it’s essential to take the necessary precautions to protect yourself and others involved in the project. Here are some important safety measures to keep in mind:
- Wear appropriate safety gear: Always wear protective gear, such as a hard hat, safety glasses, gloves, and sturdy work boots. This will help protect you from potential hazards and reduce the risk of injury.
- Use a stable ladder: Ensure you have a sturdy ladder that is in good condition. Follow proper ladder safety techniques, such as setting it up on level ground and securing it correctly.
- Work with a partner: Whenever possible, have a partner assist you with the project. This not only makes the job easier but also provides an extra set of eyes and hands to help ensure your safety.
- Check the weather forecast: Avoid working on the roof during inclement weather, such as rain, strong winds, or extreme temperatures. Slippery conditions can increase the risk of accidents and make it more challenging to work safely.
- Secure the work area: Use caution tape or other barriers to mark off the work area and prevent unauthorized access. This will protect both you and others from potential accidents or injuries.
- Be mindful of electrical hazards: Roofing materials may come into contact with electrical wires, so be cautious when working near power lines or other electrical components. If necessary, consult a professional to ensure proper safety measures are followed.
- Proper lifting techniques: Lift heavy materials correctly to avoid strains or injuries. Bend your knees, keep your back straight, and use your legs to lift rather than your back.
- Stay hydrated and take breaks: Roofing work can be physically demanding, so remember to stay hydrated and take regular breaks to rest and recharge.
- Follow local building codes and regulations: Familiarize yourself with the building codes and regulations in your area. Adhering to these guidelines will help ensure the safety and legality of your roofing project.
- If in doubt, consult a professional: If you are unsure about any aspect of the roof replacement process or feel uncomfortable with certain tasks, it is always better to seek the help of a professional roofing contractor.
Remember, safety is paramount when replacing a roof. By taking the necessary precautions and being mindful of potential risks, you can complete your project with confidence and minimize the chances of accidents or injuries.
Tools and Materials NeededBefore you start replacing a roof, it’s important to gather all the necessary tools and materials. Having everything on hand will save you time and ensure a smoother workflow. Here is a list of the essential tools and materials you’ll need:
Tools:
- Hammer: Used for removing old nails and securing new roofing materials.
- Utility knife: Used for cutting shingles, underlayment, and other roofing materials.
- Pry bar: Used for removing old shingles and other roofing components.
- Nail puller: Used for extracting nails from the roof deck.
- Roofing nails: Used to secure shingles, flashing, and other roofing elements.
- Tape measure: Essential for accurately measuring and cutting roofing materials.
- Ladders: Ensure you have a stable ladder that can reach the roof safely.
- Safety harness: Recommended for added safety when working at heights.
- Caulking gun: Used to apply roofing sealant or other adhesives.
- Safety glasses, gloves, and other protective gear: Essential for personal safety during the project.
Materials:
- Shingles: The primary roofing material that provides protection from the elements.
- Underlayment: A layer of moisture-resistant material that goes beneath the shingles and provides an additional barrier against water damage.
- Roofing felt: Another type of underlayment that offers added protection and helps with water and moisture management.
- Flashing: Metal or other waterproof material used to seal joints and transitions on the roof, such as around chimneys, vents, and skylights.
- Drip edge: A metal strip installed along the edges of the roof to direct water away from the fascia and prevent water damage.
- Ridge vents: Ventilation components installed at the peaks of the roof to promote airflow and reduce heat buildup in the attic.
- Roofing cement: A sealant used to secure flashing, fill gaps, and provide additional waterproofing.
- Roofing adhesive: Used to bond roofing materials together, particularly in areas where nails cannot be used, such as in valleys or on low-slope roofs.
- Ice and water shield: A self-adhesive membrane used in areas prone to ice dams or heavy snow loads.
It’s important to note that the specific tools and materials you need may vary depending on the type of roofing system and the extent of the project. Consider consulting with a professional roofer or doing additional research to ensure you have everything you need for your particular roof replacement job.
By having the right tools and materials on hand, you’ll be well-equipped to tackle the roof replacement project and achieve successful results.
Read more: How To Replace A Porch Roof
Step 1: Assessing the Roof Damage
Before you can proceed with replacing a roof, it’s crucial to assess the extent of the damage. This step will help you determine the scope of the project and plan accordingly. Follow these steps to assess the roof damage effectively:
1. Inspect the interior:
Start by checking the interior of your home for any signs of water damage or leaks. Look for water stains on the ceiling, mold or mildew growth, and any dampness or discoloration around windows or skylights. This will give you an indication of potential roof issues that need to be addressed.
2. Examine the exterior:
Next, carefully examine the roof from the outside. Look for missing, cracked, or damaged shingles, as well as any visible signs of wear and tear. Check for any sagging areas or spots where the roof appears to be compromised. Pay attention to areas around chimneys, vents, skylights, and other roof penetrations.
3. Check for leaks:
If you’ve noticed water stains or leaks inside your home, trace them back to the source. This will help you pinpoint the specific areas on the roof that require attention. Remember that water can travel along rafters or other structures, so the source may not always be directly above the visible leak.
Read more: How To Replace A Shed Roof
4. Evaluate the roof deck:
Assess the condition of the roof deck, which is the solid surface beneath the roofing materials. Look for any signs of rot, decay, or structural damage. Pay special attention to areas where the decking may be compromised by water intrusion or long-term exposure to the elements.
5. Take photos:
To document the damage and assist in the planning process, take clear photos of any areas that require repair or replacement. These photos will serve as a reference for you and any professionals you may consult throughout the project.
6. Determine the extent of the damage:
Based on your assessment, determine the extent of the roof damage. Decide whether a complete roof replacement is necessary or if repairs to specific sections will suffice. Consider factors such as the age of the roof, the overall condition, and your long-term goals for the property.
Remember, if you’re unsure about the extent of the damage or how to proceed, it’s always a good idea to consult with a professional roofing contractor. They have the expertise to help you make informed decisions and ensure that the necessary repairs or replacements are carried out effectively.
By carefully assessing the roof damage in the initial stages, you’ll have a clearer understanding of the project requirements and be better prepared for the subsequent steps of replacing a roof.
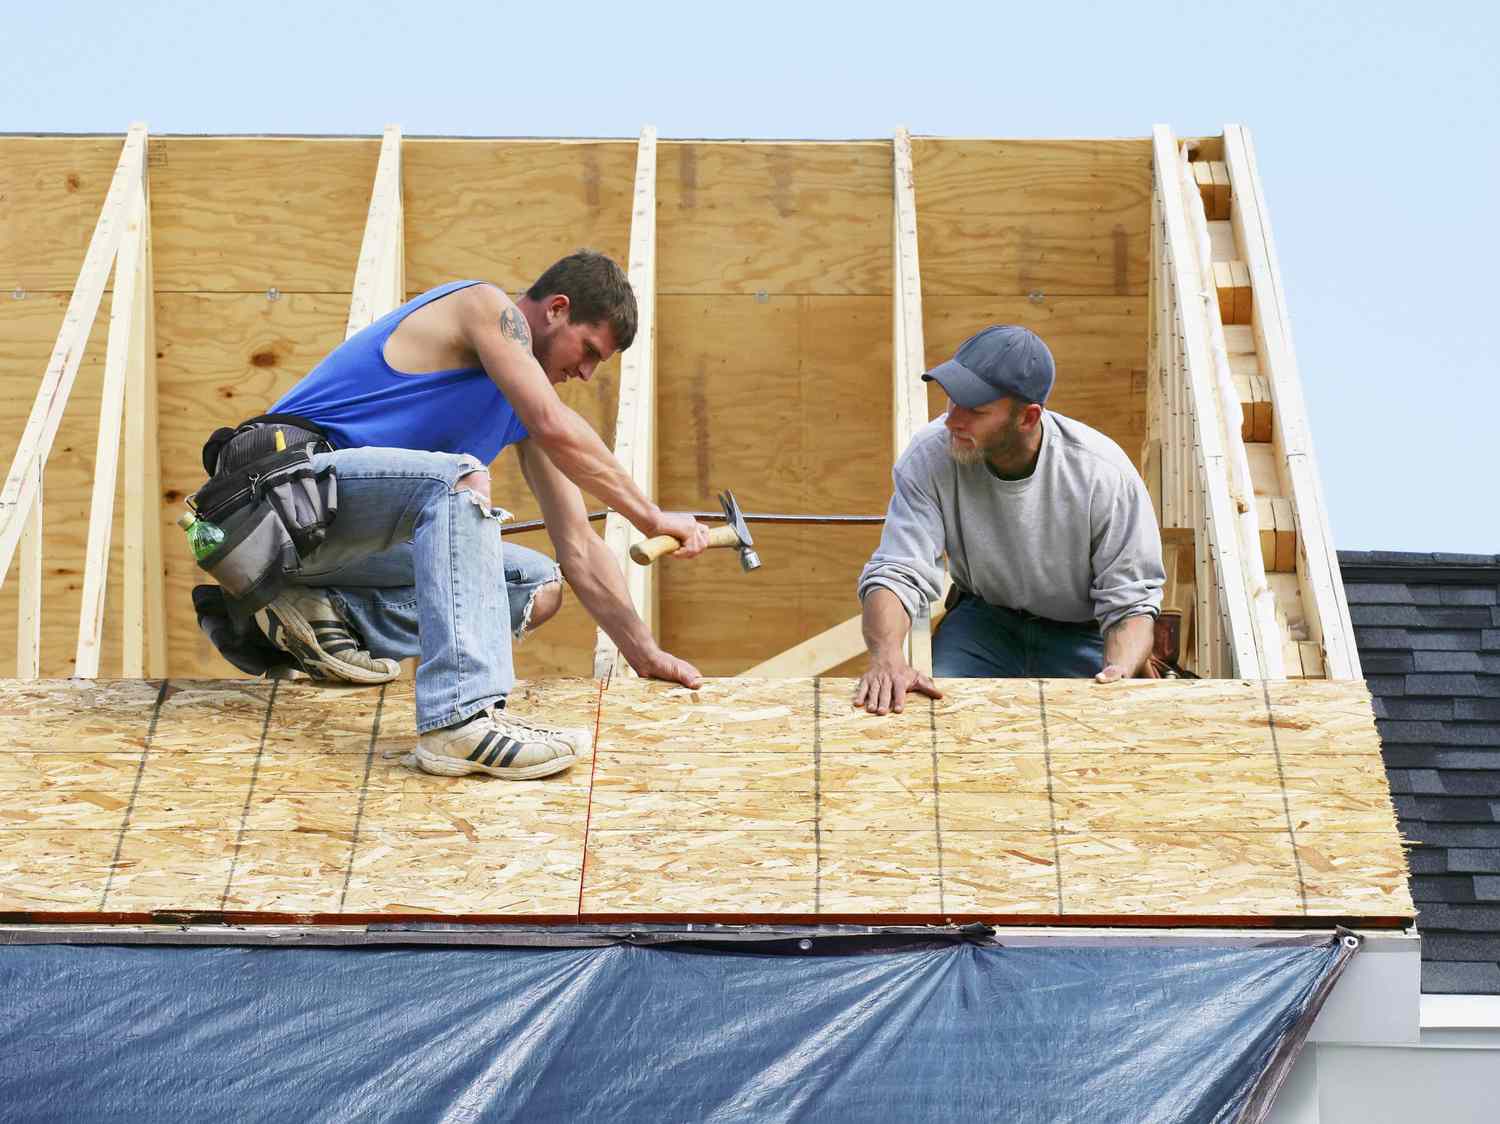
Step 2: Removing the Old Roofing Materials
Once you have assessed the damage and determined that a roof replacement is necessary, the next step is to remove the old roofing materials. Properly removing the old materials is essential to ensure a clean and sound foundation for the new roof. Follow these steps to safely and efficiently remove the old roofing materials:
Read more: How Much Is A Roof Replacement
1. Prepare the work area:
Set up a safe and organized work area by clearing any debris or clutter from the surrounding area. Remove any loose objects or obstacles that could pose a tripping hazard during the removal process.
2. Put on safety gear:
Prioritize safety by wearing protective gear, including gloves, safety glasses, and a dust mask. This will protect you from potential injuries and keep you safe from dust and debris.
3. Start at the top of the roof:
Begin removing the old roofing materials from the highest point on the roof, such as the ridge or the topmost section. This will allow you to work your way down without damaging the sections below.
4. Remove the shingles:
Use a pry bar and a hammer to carefully lift and remove the old shingles. Start at the edge of a shingle and gently pry it up, being cautious not to damage the underlying roof deck. Work your way across the roof, removing one row of shingles at a time.
Read more: How To Replace A Flat Roof
5. Dispose of the old materials:
As you remove the old shingles, have a designated area to collect and dispose of them properly. Consider renting a dumpster or contacting a local waste management service for proper disposal options.
6. Inspect the roof deck:
As you remove the shingles, periodically check the roof deck for any signs of damage or deterioration. If you come across any rotten or compromised sections, mark them for repair or replacement in the next step.
7. Remove other roofing components:
In addition to shingles, you may need to remove other roofing components, such as flashing, underlayment, and sealants. Use a utility knife and pry bar to carefully remove these materials, taking care not to cause any further damage to the roof deck.
8. Clean up the work area:
Once all the old roofing materials have been removed, take the time to clean up the work area. Remove any remaining debris and sweep the roof to ensure a clean surface for installing the new materials.
Removing the old roofing materials is an important step in the roof replacement process. By following these steps and practicing safety precautions, you’ll be well on your way to creating a clean slate for installing the new roof.
Read more: How Much To Replace A Roof On A House
Step 3: Repairing or Replacing the Roof Deck
After removing the old roofing materials, it’s essential to assess the condition of the roof deck. The roof deck serves as the foundation for the new roof, and any damage or deterioration should be addressed before proceeding with the installation. Follow these steps to properly repair or replace the roof deck:
1. Inspect the roof deck:
Closely examine the roof deck for signs of damage, rot, or decay. Look for soft or spongy spots, water stains, or areas where the deck has weakened. Pay attention to areas around vents, skylights, and chimneys, as they are common areas for damage.
2. Mark the damaged sections:
If you find any damaged sections, mark them with tape or a marker to clearly identify the areas that require repair or replacement. It’s crucial to address these issues before installing the new roofing materials.
3. Repairing small areas:
If the damage is limited to small areas, you may be able to repair the roof deck rather than replace it entirely. Use a pry bar to remove any rotten or compromised wood, and replace it with new plywood or OSB (oriented strand board). Secure the new section with roofing nails or screws.
Read more: When To Replace Roof Decking
4. Replacing larger sections:
If the damage is extensive or the roof deck is beyond repair, it may be necessary to replace larger sections of the deck. Remove the damaged sections of the deck, cutting along the marked lines with a circular saw or reciprocating saw. Install new plywood or OSB, ensuring a tight fit and proper support. Secure the new sections to the roof joists with nails or screws.
5. Install additional support:
In some cases, you may need to add additional support to reinforce the roof deck. This could involve installing new joists or sistering existing ones to improve structural integrity. Consult with a professional if you’re unsure about the need for additional support or the best method for installation.
6. Ensure a level surface:
Before proceeding with the installation of the new roofing materials, ensure that the roof deck is level and free of any bumps or uneven surfaces. This will ensure a proper and secure installation of the new roof.
7. Perform any necessary repairs:
In addition to addressing the roof deck damage, take this opportunity to perform any other necessary repairs, such as fixing damaged flashing, replacing rotted fascia boards, or sealing gaps and cracks. This will help ensure a robust and watertight roofing system.
By thoroughly inspecting and repairing or replacing the roof deck, you’ll create a solid foundation for the new roof. This step is crucial for the long-term durability and performance of your roofing system.
Read more: How Much To Replace Roof Decking
Step 4: Installing New Roofing Materials
With the roof deck repaired or replaced, it’s time to proceed with installing the new roofing materials. This step involves carefully placing and securing the shingles, underlayment, flashing, and other components to create a sturdy and watertight roof. Follow these steps for a successful installation of the new roofing materials:
1. Lay down the underlayment:
Start by rolling out the underlayment across the entire roof surface. Ensure that the underlayment overlaps each row by the recommended amount, typically around 6 inches. Secure the underlayment in place using staples or roofing nails, following the manufacturer’s guidelines.
2. Install drip edge:
Position the drip edge along the eaves of the roof, allowing it to hang over the edge slightly. Nail it in place, ensuring that it is secure and tightly fitted.
3. Apply flashing:
Install flashing around any roof penetrations, such as chimneys, vents, skylights, or dormers. Cut the flashing to the appropriate size and shape, ensuring a snug fit. Secure the flashing with roofing nails or screws, and use roofing cement to seal any gaps or edges.
Read more: How Long Does A Roof Replacement Take
4. Start shingling:
Begin shingling at the bottom edge of the roof, working your way up. Position the first shingle with the bottom edge overhanging the drip edge. Secure it in place with roofing nails, following the pattern recommended by the manufacturer.
5. Maintain the proper offset and overlap:
As you continue shingling, make sure to maintain the recommended offset and overlap between rows. This will ensure proper water drainage and maximum weather protection. Use a chalk line or other guide to help you maintain straight and even rows.
6. Trim shingles as necessary:
Trim shingles as needed to fit around roof penetrations, vents, chimneys, or valleys. Use a utility knife or roofing shears to make precise cuts, ensuring a clean and professional appearance.
7. Install ridge vents and cap shingles:
If your roof requires ventilation, install ridge vents along the ridges of the roof. Secure them in place according to the manufacturer’s recommendations. Additionally, apply cap shingles at the ridges to cover and protect the exposed edges of the shingles.
Read more: How Often Do You Replace Roof
8. Verify proper installation:
Ensure that all shingles and roofing components are properly secured and aligned. Double-check for any loose nails or shingles that require additional fastening. Take the time to inspect the roof’s overall appearance and make any necessary adjustments for a neat and professional finish.
Proper installation of the new roofing materials is crucial for the longevity and performance of your roof. By following these steps and adhering to manufacturer guidelines, you will create a durable and attractive roofing system for your home.
Step 5: Securing the Roofing Materials
Once the new roofing materials are installed, it’s crucial to secure them properly to ensure they withstand wind, rain, and other weather elements. This step involves securely fastening the shingles, flashing, and other components to create a durable and weather-resistant roof. Follow these steps to effectively secure the roofing materials:
1. Nail the shingles:
Using a roofing nail gun or a hammer, secure the shingles in place by driving nails through the designated nail tabs. Place the nails near the top of each shingle, but be careful not to overdrive or underdrive them. Refer to the manufacturer’s guidelines for the recommended nail size and placement.
2. Check for proper nail placement:
After nailing each shingle, ensure that the nails are flush with the surface and do not pierce through the shingle. If any nails are not properly positioned, use a pry bar to carefully remove and reposition them.
3. Secure flashing:
To secure flashing, use roofing nails or screws and roofing cement to attach it firmly to the roof. Pay attention to corners and edges, making sure the flashing is properly sealed and securely fastened. Apply roofing cement generously to seal any gaps or edges.
4. Install ridge cap shingles:
When it comes to ridge cap shingles, use roofing nails to secure them at both ends, ensuring they overlap each other. Apply generous amounts of roofing cement to enhance their adhesion and create a watertight seal.
5. Check for loose or raised shingles:
As you secure the roofing materials, periodically check for any loose or raised shingles. Gently press them down and secure them with additional nails or roofing cement if needed. It’s essential to maintain a flat and uniform surface for optimal performance.
6. Review wind resistance:
Ensure that the roofing materials are installed to withstand strong winds. Check that the shingles are properly interlocked and that all flashing and other components are securely fastened. This will help prevent wind damage and ensure the longevity of the roof.
7. Inspect for any missed or damaged spots:
Take the time to thoroughly inspect the roof for any missed or damaged areas. Look for any loose nails, gaps, or irregularities in the shingles or flashing. Address any issues promptly to ensure the integrity and efficiency of the roofing system.
By securely fastening the roofing materials, you’ll create a strong and dependable roof. Proper installation and fastening techniques are essential for ensuring the long-term performance and protection of your home.
Step 6: Sealing and Waterproofing
Sealing and waterproofing the roof is a crucial step to protect your home from water damage and ensure the longevity of the roofing system. Proper sealing prevents water infiltration and strengthens the overall waterproof barrier. Follow these steps to effectively seal and waterproof your newly installed roof:
1. Inspect the roof for gaps and openings:
Thoroughly inspect the roof’s surface for any gaps, openings, or areas that could potentially allow water to penetrate. Common areas to check include the edges, flashing, roof penetrations (such as chimneys and vents), and any seams or joints in the roofing materials.
2. Apply roofing sealant or caulk:
Using a caulk gun or appropriate applicator, apply roofing sealant or caulk to fill any gaps or areas of concern. Focus on areas where different materials meet, such as where flashing meets the roof or around vent pipes. This will create a watertight seal and prevent water from seeping in.
3. Pay attention to flashing:
Ensure that all flashing is properly sealed and secured. Apply roofing sealant or cement around the edges and connections of the flashing to create a waterproof barrier. This is particularly important around chimneys, skylights, and other roof penetrations.
4. Seal roof vents and ridge caps:
Inspect and seal any gaps or openings around roof vents and ridge caps. Use roofing cement or sealant to create a tight seal, preventing water from entering these vulnerable areas.
5. Check for loose or raised shingles:
Ensure that all shingles are properly secured and lying flat. Gently press down on any raised or loose shingles and secure them with additional roofing nails or use roofing cement to adhere them to the roof. This will help prevent water from seeping underneath the shingles.
6. Apply a protective coating or sealant:
Consider applying a protective coating or sealant to the roof for added waterproofing. This can provide an extra layer of protection against moisture, UV rays, and the elements. Follow the manufacturer’s instructions for the specific coating or sealant you choose.
7. Conduct a thorough inspection:
After sealing and waterproofing the roof, conduct a comprehensive inspection. Check for any missed areas or gaps that still need to be addressed. Ensure that the entire roof is properly sealed and waterproofed before finishing the project.
Sealing and waterproofing the roof is essential to keep your home protected from water damage. By following these steps and taking the time to seal vulnerable areas, you’ll establish a strong and impenetrable barrier against water infiltration.
Step 7: Cleaning Up and Inspecting the Finished Roof
As you near the completion of your roof replacement project, it’s crucial to thoroughly clean up the work area and inspect the finished roof. Cleaning up ensures a safe and tidy environment while inspecting the roof allows you to ensure that everything is in place and functioning as intended. Follow these steps for a proper cleanup and final inspection:
1. Remove debris:
Start by clearing the work area of any debris, old roofing materials, and tools. Dispose of these materials properly, following local regulations for waste disposal. This will create a safe and clean environment for the final inspection.
2. Sweep the roof surface:
Using a broom or brush, sweep the entire roof surface to remove any loose dirt, dust, or debris. Pay special attention to valleys, ridges, and other hard-to-reach areas. This will provide a clear view of the finished roof and help identify any potential issues that may need attention.
3. Inspect for loose or missing shingles:
Closely inspect the roof surface for any loose or missing shingles. Check the areas around edges, ridges, and valleys. Secure any loose shingles with roofing nails or adhesive and replace any missing shingles as needed. This ensures a complete and properly functioning roofing system.
4. Check flashing and sealants:
Inspect all flashing and sealants to ensure they are properly secured and in good condition. Look for any signs of cracks, gaps, or deterioration. Repair or replace any damaged or compromised flashing and sealants to maintain a watertight roof.
5. Verify proper water drainage:
Check that the gutters and downspouts are clear of debris and functioning properly. Ensure that water flows freely and drains away from the roof, protecting it from potential water damage. Clean the gutters if necessary and make any adjustments to improve water drainage.
6. Check for proper ventilation:
Verify that the roof’s ventilation system is operating effectively. Ensure that any ridge vents or other ventilation components are clear of debris and properly installed. Adequate ventilation helps regulate temperature and moisture levels, maximizing the longevity of the roof.
Read more: How To Roof A Flat Roof Shed
7. Conduct a final visual inspection:
Take a step back and conduct a comprehensive visual inspection of the entire roof. Look for any signs of unevenness, misalignment, or other aesthetic issues. Address any concerns or inconsistencies to achieve a polished and well-finished appearance.
8. Document the finished roof:
Take photos or make notes of the completed roof for your records. These documents can serve as a reference for future maintenance and can also be helpful when communicating with professionals or insurance providers.
By thoroughly cleaning up the work area and conducting a detailed inspection, you can be confident that the roof replacement project is complete. Address any outstanding issues promptly to ensure a durable, weatherproof, and visually appealing roof for years to come.
Conclusion
Replacing a roof is a significant project that requires careful planning, attention to detail, and a commitment to maintaining the integrity and functionality of your home. By following the steps outlined in this guide, you can successfully replace your roof and ensure the long-term protection and beauty of your property.
Throughout the process, it’s crucial to prioritize safety. Take the necessary precautions, use the appropriate safety gear, and work with a partner whenever possible. Following local building codes and regulations is also essential to ensure compliance and avoid unnecessary setbacks.
Gathering the right tools and materials is vital before starting the project. From hammers and utility knives to shingles and underlayment, having everything you need readily available will save you time and streamline the process.
Assessing the roof damage accurately before starting is vital for proper planning. Inspect both the interior and exterior for signs of water damage, leaks, and overall condition. Identifying any areas that require repair or replacement will help you determine the scope of the project.
Removing the old roofing materials with care and disposing of them properly is the next crucial step. Take your time and use the right tools to ensure a clean and undamaged roof deck.
Repairing or replacing the roof deck, if necessary, provides a solid foundation for the new roof. Identify and address any areas of damage, rot, or decay before proceeding with the installation of the new materials.
Installing the new roofing materials with precision and attention to detail is essential for a successful roof replacement. Follow manufacturer guidelines for proper installation techniques and pay attention to the recommended overlap, offset, and securing methods.
Securing the roofing materials properly ensures their durability and resistance against weather elements. Nail the shingles securely, fasten the flashing, and maintain a level surface for optimal performance.
Sealing and waterproofing the roof is a critical step in protecting your home from moisture damage. Fill gaps, seal flashing, and apply a protective coating or sealant to enhance the roof’s water resistance.
Once the roof is complete, take the time to clean up the work area and conduct a thorough inspection. Remove debris, sweep the roof surface, and address any loose shingles or damaged areas. This final walkthrough ensures that the roof is in excellent condition and ready to withstand the elements.
Replacing a roof is a complex project, but by following the steps outlined in this guide, you can successfully complete the job. Remember to prioritize safety, take your time, and consult with professionals when needed. A well-executed roof replacement will provide you with peace of mind, improved aesthetics, and long-lasting protection for your home.
Frequently Asked Questions about How To Replace A Roof
Was this page helpful?
At Storables.com, we guarantee accurate and reliable information. Our content, validated by Expert Board Contributors, is crafted following stringent Editorial Policies. We're committed to providing you with well-researched, expert-backed insights for all your informational needs.
0 thoughts on “How To Replace A Roof”