
Articles
How Much Does It Cost To ReplACe AC CapACitor
Modified: March 2, 2024
Discover the average cost of replacing an AC capacitor with our informative articles. Learn more about AC capacitor replacement costs and make an informed decision for your home.
(Many of the links in this article redirect to a specific reviewed product. Your purchase of these products through affiliate links helps to generate commission for Storables.com, at no extra cost. Learn more)
Introduction
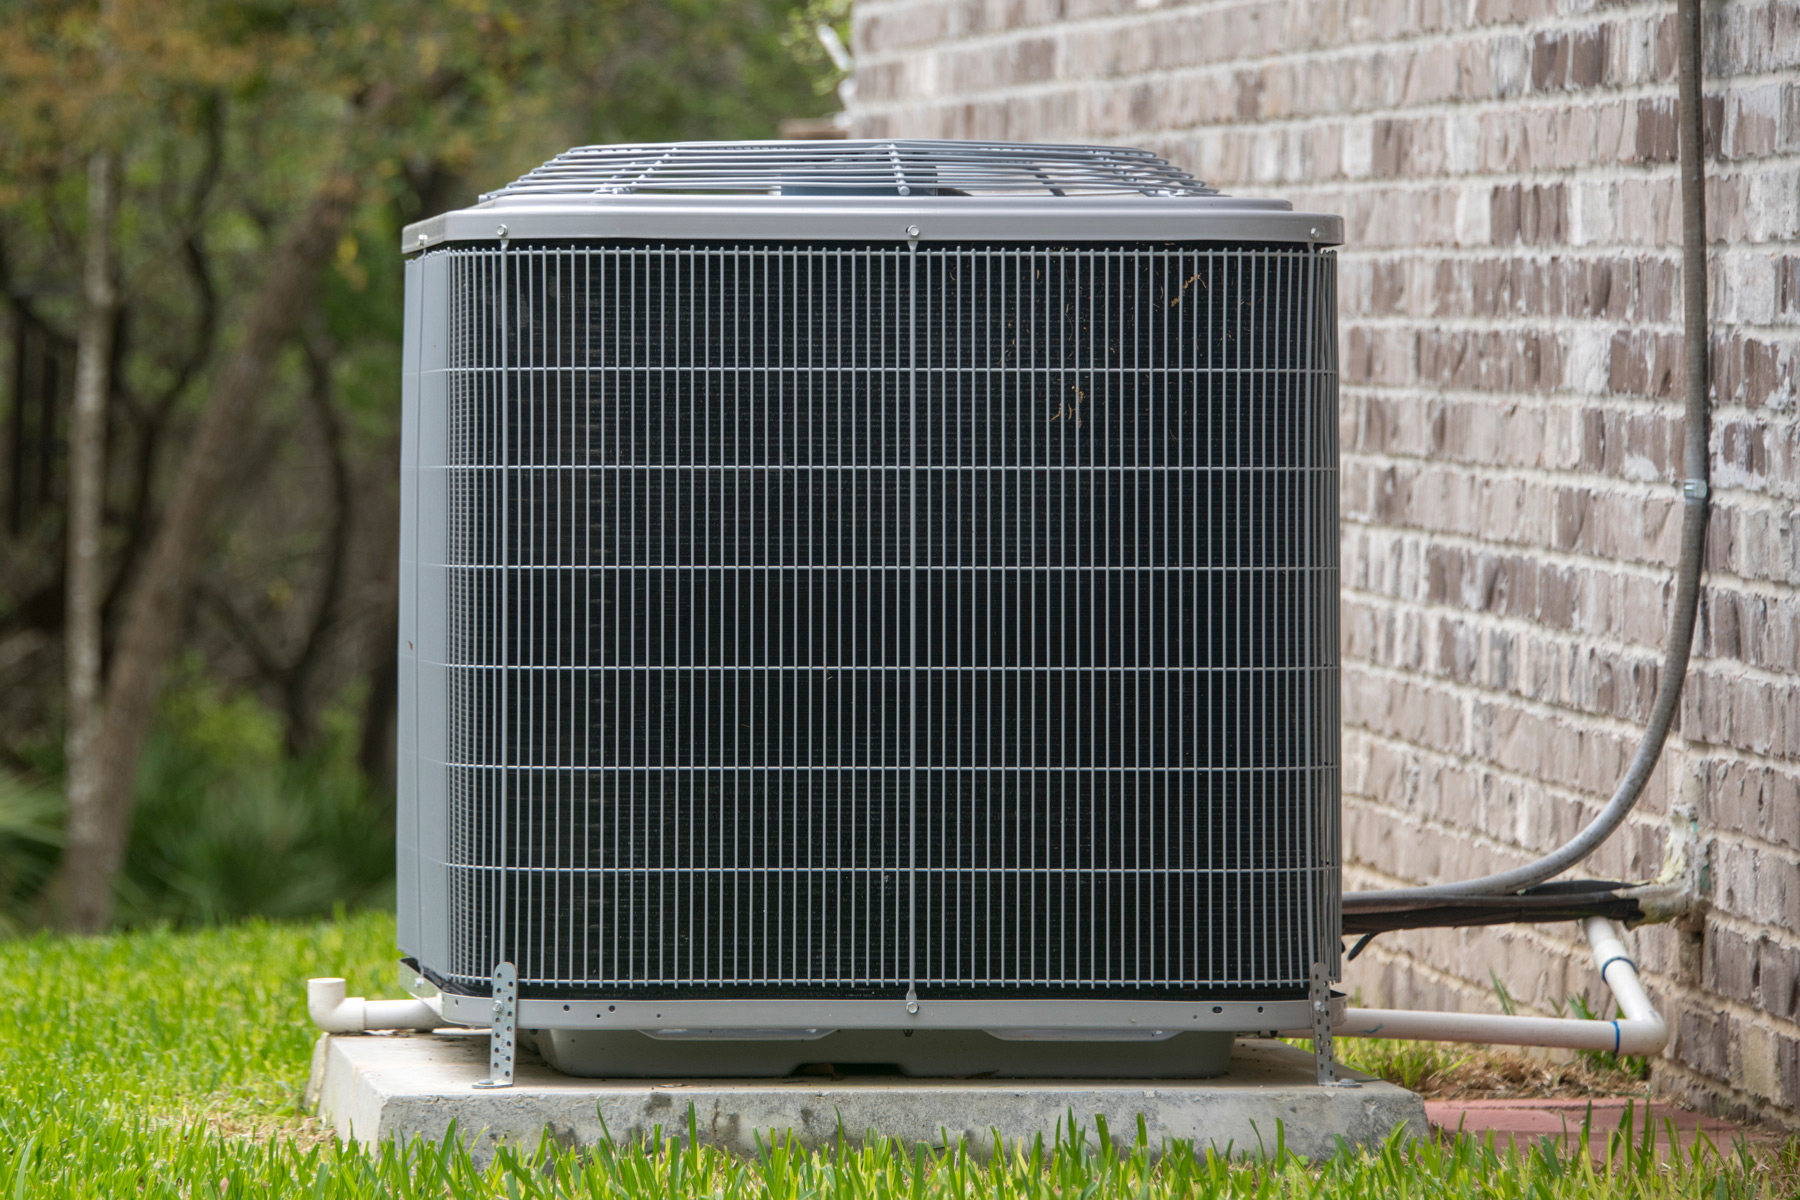
Welcome to the world of air conditioning! As we all know, air conditioning plays a crucial role in providing comfort during the scorching summer months. However, just like any other mechanical system, an air conditioner requires regular maintenance and occasional repairs to keep it running efficiently.
One of the common issues that homeowners may encounter with their air conditioners is a faulty capacitor. The capacitor is an essential component of the AC system, responsible for storing and releasing electrical energy to start the compressor and fans. Without a functioning capacitor, the air conditioner may fail to turn on or may not work properly.
In this article, we will explore the signs of a faulty AC capacitor, the importance of replacing it, factors that can affect the cost of replacement, and whether it’s a job you can tackle yourself or if you should hire a professional.
So, if you’re curious about how much it may cost to replace an AC capacitor and want to ensure your air conditioner keeps you cool all summer long, read on!
Key Takeaways:
- Promptly replacing a faulty AC capacitor is crucial to restore proper functioning, increase energy efficiency, and prevent further damage to your air conditioning system, ensuring reliable cooling and peace of mind.
- While DIY replacement may offer cost savings, hiring a professional for AC capacitor replacement ensures expertise, warranty protection, and time-saving convenience, prioritizing safety and proper functioning.
What is an AC capacitor?
Before we delve into the details of replacing an AC capacitor, let’s first understand what it is and how it functions.
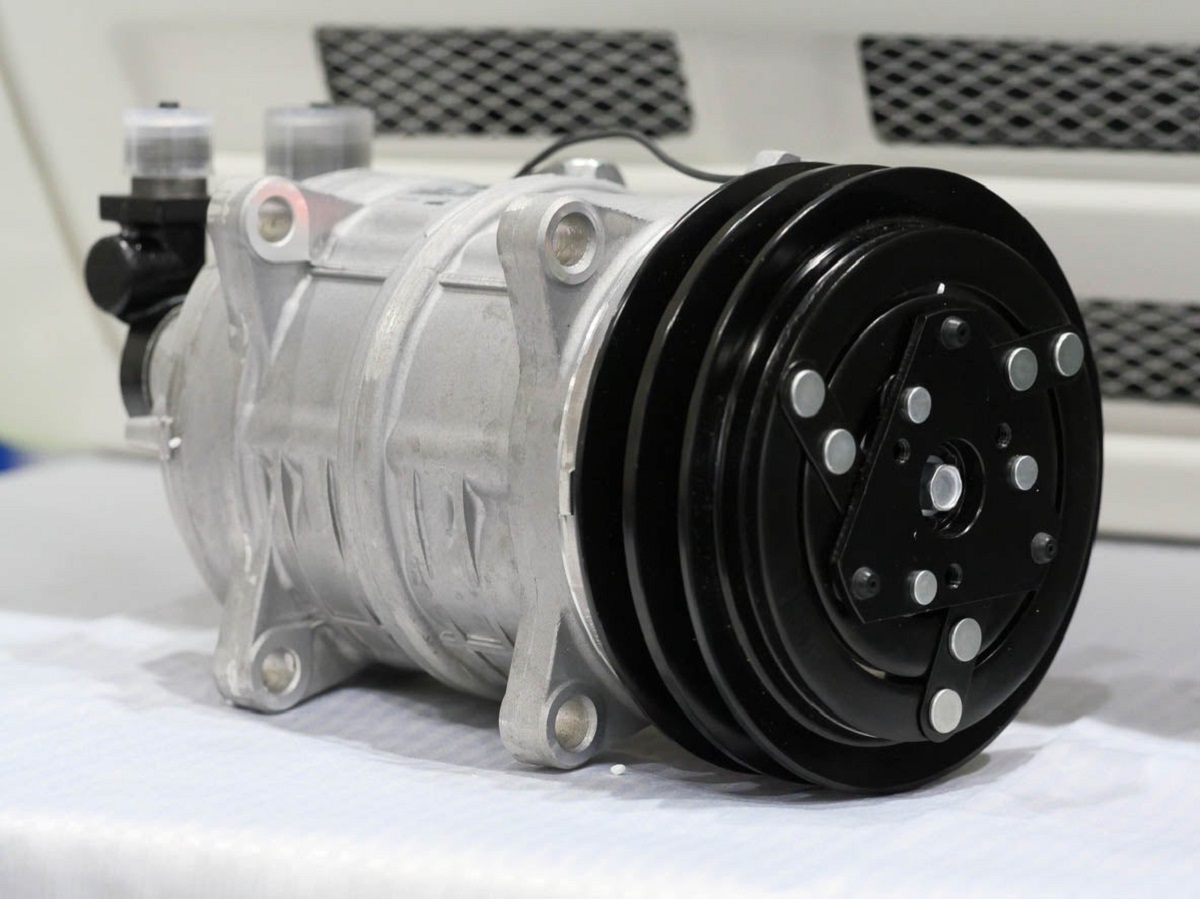
An AC capacitor is a vital component of an air conditioning system that stores and releases electrical energy when needed. It acts as a temporary power source, supplying the necessary jolt to start the compressor and fans. Without a functional capacitor, your AC unit may struggle to turn on or may not operate at all.
AC capacitors are typically made up of two metal plates separated by an insulating material. When an electrical charge is applied, the capacitor stores energy in the form of an electrostatic field. When the compressor or fan needs an extra boost to kickstart its operation, the capacitor discharges that stored energy, helping the components to start running smoothly.
The two main types of AC capacitors are the start capacitor and the run capacitor. The start capacitor provides the initial boost to start the compressor, while the run capacitor helps to maintain a steady flow of electricity to keep the motor and fan running efficiently.
Over time, constant usage, exposure to extreme temperature variations, and other factors can cause the capacitor to weaken or fail. When this happens, the air conditioner may exhibit various signs of a faulty capacitor, indicating the need for replacement.
Now that you have a better understanding of what an AC capacitor is and how it functions, let’s explore the common signs that can help you identify if your capacitor is no longer functioning properly.
Signs of a faulty AC capacitor
A faulty AC capacitor can lead to a myriad of problems with your air conditioning system. It’s important to be aware of the signs that may indicate a failing capacitor so that you can take prompt action and prevent further damage to your unit. Let’s take a look at some common signs to watch out for:
- AC unit not turning on: If you notice that your air conditioner is not turning on or is having difficulty starting, then a faulty capacitor could be the culprit. The capacitor provides the necessary electrical boost to kickstart the compressor and fans, so when it fails, the AC unit may refuse to power up.
- Intermittent cooling: Another sign of a faulty capacitor is when your air conditioner works intermittently. You may experience cold air for a while, followed by warm air or no air at all. This inconsistency in cooling performance can be attributed to a capacitor that is unable to provide a consistent supply of electrical energy to the motor.
- Frequent system cycling: Does your AC unit frequently turn on and off? This rapid cycling can indicate a faulty capacitor. When the capacitor weakens, it may cause the motor to start and stop frequently, leading to inefficient cooling and unnecessary strain on the system.
- Strange noises: A failing capacitor can manifest as unusual sounds coming from your air conditioner. You may hear buzzing, humming, or clicking noises, indicating that the capacitor is struggling to send the necessary electrical charge to the motor. These noises should not be ignored as they can signal imminent failure.
- Bulging or leaking capacitor: Physical damage to the capacitor, such as bulging or leaking, is a clear indication that it needs to be replaced. Bulging is often caused by excess heat, while leaking can result from capacitor failure or age. If you notice any visible signs of damage, it’s essential to address them promptly.
If you observe any of these signs, it’s advisable to seek professional assistance to diagnose and replace the faulty capacitor. Ignoring these warning signs can lead to further damage to your air conditioning system and potentially result in costly repairs.
Now that we’ve explored the signs of a failing capacitor, let’s discuss why it’s crucial to replace it as soon as possible.
The importance of replacing a faulty AC capacitor
When your air conditioning system is experiencing issues due to a faulty capacitor, it’s vital to prioritize its replacement. Ignoring or delaying the replacement can lead to various negative consequences that can affect both the performance of your AC unit and your overall comfort. Here are some reasons why replacing a faulty AC capacitor is important:
1. Restore proper functioning: A faulty capacitor can significantly impact the performance of your air conditioner. By replacing it, you can restore the proper functioning of your AC unit, ensuring that it cools your home effectively and efficiently.
2. Increase the lifespan of your AC unit: The capacitor plays a crucial role in the overall lifespan of your air conditioner. A failing or faulty capacitor can put extra strain on other components of the system, such as the compressor and motor. By promptly replacing the faulty capacitor, you can prevent further damage and extend the lifespan of your AC unit.
3. Improve energy efficiency: A malfunctioning capacitor can cause your air conditioner to consume more energy than necessary and potentially lead to higher energy bills. By replacing the faulty capacitor, you can restore energy efficiency to your AC unit, helping you save on monthly utility costs.
4. Prevent further damage: Neglecting to replace a faulty capacitor can result in more severe damage to your air conditioning system. As the capacitor weakens or fails, other components may be forced to compensate, leading to increased wear and tear. This can ultimately lead to more expensive repairs or even the need for a complete system replacement.
5. Ensure reliable cooling: A properly functioning capacitor ensures consistent and reliable cooling in your home. By replacing the faulty capacitor, you can enjoy a comfortable indoor environment, especially during the hot summer months.
6. Peace of mind: Knowing that your AC unit is operating with a new and reliable capacitor provides peace of mind. You can be confident that your air conditioner will work efficiently and effectively to keep your home cool, without the worry of unexpected breakdowns or system malfunctions.
Now that we understand the importance of replacing a faulty AC capacitor, let’s explore the factors that can affect the cost of AC capacitor replacement.
When replacing an AC capacitor, the cost can vary depending on the size and type of the capacitor needed for your specific AC unit. It’s best to consult with a professional HVAC technician to get an accurate cost estimate for the replacement.
Factors affecting the cost of AC capacitor replacement
When it comes to replacing a faulty AC capacitor, the cost can vary depending on several factors. It’s essential to understand these factors so that you can better estimate the overall cost and budget accordingly. Here are some key factors that can affect the cost of AC capacitor replacement:
1. Type of capacitor: The cost can vary based on the type of capacitor needed for your air conditioning system. Start capacitors and run capacitors have different specifications and price points. The type required will depend on the make and model of your AC unit.
2. Capacitor size and rating: Capacitors come in various sizes and ratings. The size and rating needed for your system will influence the cost. Larger capacitors or those with higher voltage ratings may cost more than smaller ones.
3. Brand and quality: The brand and quality of the capacitor can impact the cost. Well-known and reputable brands often come with a higher price tag. However, opting for a higher quality capacitor can provide better durability and longevity, which may be worth the investment in the long run.
4. Accessibility and labor: The accessibility of the capacitor in your system can affect the labor cost of replacement. If the capacitor is in a hard-to-reach location or requires additional disassembly of components, it may increase the overall cost of the replacement.
5. Contractor fees: The fees charged by HVAC contractors for AC capacitor replacement can vary. Different contractors may have different pricing structures, so it’s always a good idea to obtain multiple quotes to ensure you’re getting a fair price.
6. Additional repairs or parts: In some cases, a faulty capacitor may cause other components to malfunction or damage other parts of the system. If additional repairs or replacement of other parts are required, it will increase the overall cost of the service.
7. Warranty: If your air conditioner is still under warranty, the cost of the capacitor replacement may be covered. Check the terms and conditions of your warranty to see if the replacement falls within its coverage.
8. DIY vs. professional: Lastly, the decision to replace the AC capacitor yourself or hire a professional can also impact the cost. DIY replacement may save you on labor costs, but it’s crucial to have the necessary knowledge and skills to ensure a successful and safe replacement.
Considering these factors will give you a better understanding of the potential expenses involved in AC capacitor replacement. However, it’s important to remember that the cost can vary significantly, so it’s best to consult with a professional for an accurate estimate tailored to your specific situation.
Now that we have a better understanding of the factors that can affect the cost of AC capacitor replacement, let’s explore the average cost you can expect to pay.
Read more: How Much Does An AC Cost To Run
Average cost of AC capacitor replacement
The cost of AC capacitor replacement can vary depending on the factors we discussed earlier. On average, homeowners can expect to pay around $150 to $400 for AC capacitor replacement. However, it’s important to note that this is just an estimate, and the actual cost can be higher or lower depending on the specific circumstances.
The cost of the capacitor itself typically ranges from $50 to $200, depending on factors such as the type, size, and brand. Labor charges can vary as well, depending on the contractor and the complexity of the replacement. On average, labor costs for AC capacitor replacement can range from $100 to $300.
It’s important to remember that these costs are subject to regional variations, as labor rates and material prices can differ from one area to another. Additionally, if your HVAC system requires additional repairs or if there are any complications during the replacement process, it could increase the overall cost.
When considering the cost of AC capacitor replacement, it’s crucial to weigh the potential benefits. Investing in the proper functioning of your air conditioning system can help improve energy efficiency, extend the lifespan of your unit, and ensure reliable cooling performance.
While it may be tempting to opt for the cheapest option available, it’s important to prioritize quality and reliability. Choosing a reputable contractor and reliable brand for the replacement capacitor can help ensure a longer-lasting and more efficient solution.
Lastly, it’s worth noting that some HVAC manufacturers offer warranty coverage for certain parts, including capacitors. If your air conditioner is still under warranty, it’s advisable to check if the cost of capacitor replacement is covered. This can potentially save you from incurring any out-of-pocket expenses.
Now that we have discussed the average cost of AC capacitor replacement, let’s delve into the decision of whether to attempt a DIY replacement or hire a professional.
DIY vs professional replacement
When it comes to AC capacitor replacement, you may be wondering whether it’s a job you can tackle yourself or if it’s better to hire a professional. Let’s explore the pros and cons of DIY replacement versus hiring a professional:
DIY Replacement:
- Cost savings: One of the primary reasons homeowners consider DIY replacement is to save money on labor costs. By purchasing the capacitor and replacing it yourself, you can potentially save a significant amount of money.
- Knowledge and skills: DIY replacement requires basic knowledge of electrical systems and experience working with AC units. If you have the necessary skills and are comfortable working with electrical components, you may be able to successfully replace the capacitor.
- Convenience: DIY replacement gives you flexibility in terms of timing and scheduling. You can work on the replacement at your own pace, without having to coordinate with a professional contractor.
However, it’s important to consider the potential drawbacks of DIY replacement:
- Risk of injury: Working with electrical components can be dangerous if proper precautions are not taken. Safety should always be a top priority, and if you are not confident in your abilities or lack experience, it’s best to leave it to the professionals.
- Lack of warranty: DIY replacement may void the warranty on your air conditioner. If something goes wrong during or after the replacement, you may not have any coverage or recourse.
- Potential for mistakes: Incorrect installation or handling of the capacitor could lead to more significant damage to your AC unit or pose a safety risk. Professionals have the expertise and experience to ensure proper installation and minimize the risk of mistakes.
Professional Replacement:
- Expertise and experience: HVAC professionals have the knowledge and experience to perform AC capacitor replacement correctly. They are familiar with the intricacies of various systems and can quickly and efficiently get the job done.
- Warranty protection: Hiring a professional ensures that the replacement work is covered by their warranty or guarantee. If any issues arise after the replacement, you can rely on their expertise and support to resolve them.
- Time and convenience: By hiring a professional, you don’t have to worry about sourcing the correct capacitor or spending time and effort on the replacement. They will handle everything from diagnosing the problem to purchasing the right capacitor and completing the replacement.
It’s important to weigh these factors and assess your own skills and comfort level before deciding to attempt a DIY replacement. If you are uncertain or inexperienced with electrical work, it is highly recommended to hire a professional to perform the AC capacitor replacement. They can ensure that the replacement is done correctly and safely, giving you peace of mind and a properly functioning air conditioning system.
Now that we have explored the DIY vs. professional replacement options, let’s conclude our article.
Conclusion
Replacing a faulty AC capacitor is a critical maintenance task to ensure the proper functioning of your air conditioning system. Paying attention to the signs of a failing capacitor and taking prompt action can help prevent further damage to your unit and maintain a comfortable indoor environment.
In this article, we discussed what an AC capacitor is and how it functions, as well as the common signs of a faulty capacitor. We also highlighted the importance of replacing a faulty capacitor, including restoring proper functioning, increasing the lifespan of your AC unit, improving energy efficiency, and ensuring reliable cooling.
We explored the factors that can affect the cost of AC capacitor replacement, including the type of capacitor, its size and rating, brand and quality, accessibility, labor, and additional repairs or parts. While the average cost can vary, it is essential to prioritize quality and reliability when considering replacement options.
We also considered the decision of DIY replacement versus hiring a professional. While DIY replacement can offer cost savings and convenience for those with the necessary knowledge and skills, it also carries the risk of injury, lack of warranty coverage, and potential mistakes. Hiring a professional ensures expertise, warranty protection, and time-saving convenience.
Ultimately, the choice between DIY and professional replacement depends on your comfort level and experience with electrical work. It is crucial to prioritize your safety and the proper functioning of your air conditioning system.
By being proactive in identifying and addressing issues with your AC capacitor, you can ensure the longevity and efficient performance of your air conditioning system. Remember to consult with a reputable HVAC professional for accurate estimates and guidance tailored to your specific situation.
Thank you for reading our article on the cost of AC capacitor replacement. Stay cool and comfortable!
Frequently Asked Questions about How Much Does It Cost To ReplACe AC CapACitor
Was this page helpful?
At Storables.com, we guarantee accurate and reliable information. Our content, validated by Expert Board Contributors, is crafted following stringent Editorial Policies. We're committed to providing you with well-researched, expert-backed insights for all your informational needs.


0 thoughts on “How Much Does It Cost To ReplACe AC CapACitor”