Articles
How To Replace Glass Stove Top
Modified: February 7, 2024
Looking for articles on how to replace a glass stove top? Find step-by-step guides and expert advice to help you successfully replace your broken stove top.
(Many of the links in this article redirect to a specific reviewed product. Your purchase of these products through affiliate links helps to generate commission for Storables.com, at no extra cost. Learn more)
Introduction
The glass stove top is a stylish and functional feature of modern kitchens. Its sleek design and ease of cleaning make it a popular choice among homeowners. However, accidents happen, and sometimes the glass stove top can get cracked or damaged. When that happens, it’s important to know how to replace it properly to ensure both safety and functionality.
In this article, we will guide you through the step-by-step process of replacing a glass stove top. We will provide you with all the necessary information, safety precautions, and tools you need, so you can confidently tackle this DIY project and have your stove looking as good as new.
Before we dive into the actual replacement process, it’s crucial to underscore the importance of safety. Dealing with electrical appliances and fragile glass elements requires caution and precision. Always remember to disconnect the power supply before performing any work on your stove, and if you ever feel unsure or uncomfortable, don’t hesitate to call a professional for assistance.
Now, let’s gather our tools and materials and get ready to replace that glass stove top!
Key Takeaways:
- Prioritize safety by disconnecting power, handling glass with care, and following manufacturer instructions when replacing a glass stove top. With the right tools and precautions, you can tackle this DIY project confidently.
- From disconnecting power to reattaching burners, the step-by-step process ensures a successful glass stove top replacement. Remember, safety first, and enjoy cooking with your stylish new stove top!
Read more: How To Fix Samsung Glass Top Stove Burners
Safety Precautions
Before beginning the process of replacing a glass stove top, it is essential to prioritize your safety. Here are some important safety precautions to keep in mind:
- Turn off the power: Before starting any work, ensure that the power supply to the stove is completely turned off. This can typically be done by unplugging the stove or flipping the appropriate circuit breaker in your electrical panel.
- Protect yourself: Wear appropriate safety gear, such as gloves and safety glasses, to prevent any accidents or injuries during the replacement process.
- Allow the stove to cool down: Make sure that the stove has been turned off and has had sufficient time to cool down before attempting to replace the glass top. A hot stove can cause burns or damage the new glass top.
- Secure your work area: Clear the area around the stove and ensure that it is clean and free from any obstructions. This will provide you with ample space to work and reduce the risk of accidents.
- Handle the glass with care: Glass stove tops are fragile, so be cautious when handling and moving them. Use both hands and avoid placing unnecessary pressure on the glass surface.
- Be mindful of electrical components: Take note of any wires or electrical connections attached to the old glass top. Handle them carefully and ensure they are properly disconnected before removing the old glass top.
- Follow manufacturer instructions: Every stove may have slight variations in the process of replacing the glass top. Refer to the manufacturer’s instructions or the user manual for specific guidelines and precautions.
By following these safety precautions, you can minimize the risk of accidents and injuries while replacing your glass stove top. Remember, safety should always be your top priority when working with electrical appliances and fragile materials.
Tools and Materials Needed
Before you start replacing the glass stove top, it’s essential to gather all the necessary tools and materials. Having everything prepared beforehand will streamline the process and ensure you have everything you need. Here’s a list of the tools and materials you’ll need:
Tools:
- Screwdriver (typically Phillips or flathead, depending on your specific stove model)
- Needle-nose pliers
- Wrench (if required for removing control knobs)
- Electrical tape
- Multi-meter (for checking the wires, if needed)
- Soft cloth or microfiber towel
Materials:
- Replacement glass stove top
- New burner gaskets (recommended, if not already included with the replacement glass top)
- Cleaners specially formulated for glass stove tops
- Protective gloves
- Safety glasses
- Cleaning sponge or non-abrasive scrub brush
- Bucket of soapy water
- Lint-free cloth
- Scraper tool (optional, for removing stubborn stains)
Make sure to assess your specific stove model and consult the manufacturer’s instructions or user manual to confirm any additional tools or materials that might be required. It’s better to be fully prepared before starting the replacement process.
By having all the necessary tools and materials at hand, you can work efficiently and ensure a smooth glass stove top replacement experience.
Step 1: Disconnecting the Power
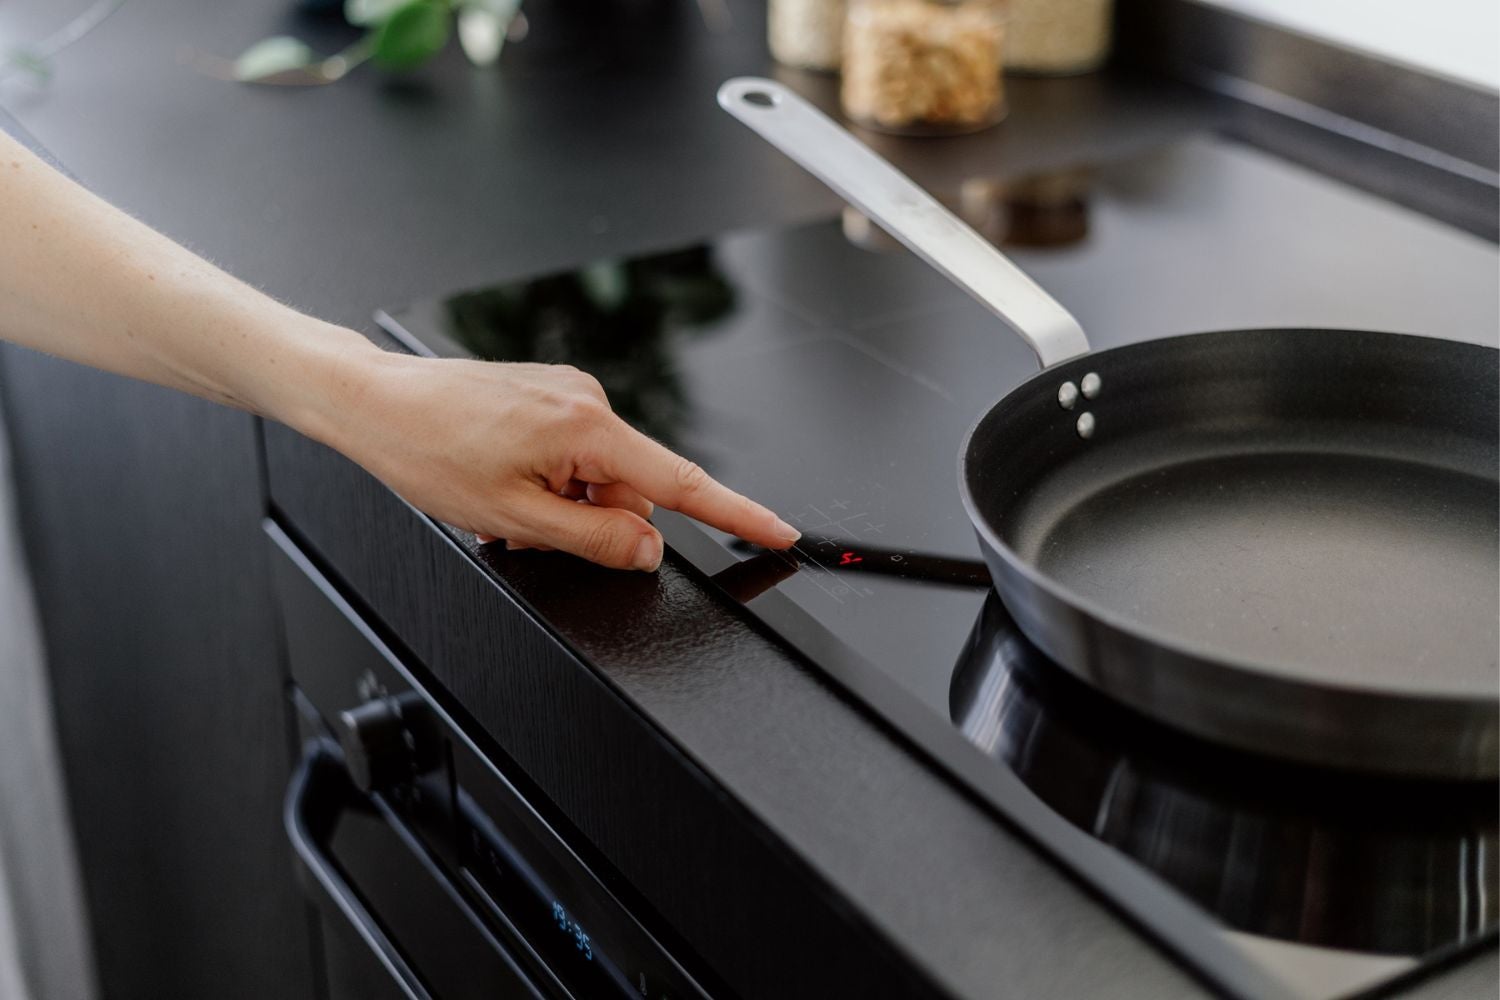
Before you begin any work on your glass stove top, it’s crucial to disconnect the power to ensure your safety. Follow these steps:
- Turn off the stove: Make sure all burners and the oven are turned off and no cooking operations are in progress.
- Unplug the stove: Locate the power cord at the back of the stove and unplug it from the electrical outlet. If your stove is hardwired, locate the circuit breaker responsible for powering the stove and switch it off.
- Confirm power disconnection: Test the stove by turning the knobs or pushing the buttons to verify that there is no power supply. If the stove does not respond, you have successfully disconnected the power.
It is essential to take this precautionary step to prevent electric shocks or accidents during the replacement process. Always double-check that the power is truly disconnected before proceeding to the next steps.
Now that the power is safely disconnected, you can move forward with confidence to remove the burners and control knobs in the next step.
Step 2: Removing the Burners and Control Knobs
In this step, we will guide you through the process of removing the burners and control knobs from your glass stove top. Follow these steps:
- Remove the burners: Start by lifting the burner grates or covers off the glass stove top. Depending on your stove model, the burners may be secured with screws or clips. If there are screws, use a screwdriver to remove them. If there are clips, gently detach them by pulling them upwards.
- Disconnect the wires: Underneath the burners, you will find electrical wires connected to each burner. Using needle-nose pliers, carefully disconnect the wires from the terminals. Take note of the position or take a picture to ensure proper reconnection later.
- Remove the control knobs: Next, take off the control knobs on the front panel of the stove. Some knobs may have a retaining screw securing them in place. If so, use a screwdriver to loosen and remove the screws. Once the screws are removed, the knobs should easily slide off.
By removing the burners and control knobs, you will have clear access to the glass stove top and be ready to move forward with the next steps. Remember to handle the burners, control knobs, and any wires with care to avoid any damage or misplacement.
In the next step, we will guide you through the process of unscrewing the glass stove top.
Read more: How To Set Clock On GE Glass Top Stove
Step 3: Unscrewing the Glass Stove Top
At this stage, we will walk you through the process of unscrewing the glass stove top so that it can be safely removed. Follow these steps:
- Locate the screws: Carefully inspect the edges of the glass stove top to locate the screws that secure it to the frame. These screws may be hidden by trim pieces or caps, so take your time to find and identify them.
- Remove the screws: Using an appropriate screwdriver, carefully unscrew each screw, ensuring not to overtighten or strip them. Set the screws aside in a safe place to avoid misplacing them.
- Release the glass top: Once all the screws are removed, gently lift the glass stove top from the frame. Be cautious as the glass top may still be connected to the control panel or other components.
If you encounter any difficulty during the unscrewing process, refer to your stove’s user manual or manufacturer instructions for specific guidance. Some models may have additional steps or mechanisms to ensure proper removal of the glass stove top.
With the glass stove top unscrewed and ready for removal, we can now proceed to the next step: disconnecting any wires connected to the glass top.
Step 4: Disconnecting the Wires
In this step, we will guide you through the process of disconnecting any wires that are attached to the glass stove top. Follow these steps:
- Identify the wires: Take a close look at the underside of the glass stove top. You should see wires connected to various terminals or connectors. These wires are responsible for powering the burners and controls.
- Check for connectors or terminals: Each wire may be connected to the glass top via a connector or terminal block. Identify the type of connector or terminal block used in your stove model.
- Disconnect the wires: Using the appropriate tool, gently detach the wires from their corresponding connectors or terminals. Some connectors may require you to press or release a tab or latch to release the wire. Take note of the wire positions or take a photo for reference.
It’s important to handle the wires with care to avoid any damage or accidental disconnection. If you encounter any difficulty disconnecting the wires, refer to your stove’s user manual or manufacturer instructions for specific guidance.
Once all the wires are disconnected, you can proceed to the next step: removing the old glass stove top from the stove.
When replacing a glass stove top, make sure to disconnect the power supply and remove any screws or brackets holding the old top in place. Carefully lift and remove the old top, then place the new top in position and secure it according to the manufacturer’s instructions.
Step 5: Removing the Old Glass Stove Top
Now that the wires are safely disconnected, we can move on to removing the old glass stove top from the appliance. Follow these steps:
- Clear the area: Ensure the surrounding area is free of any objects or debris that may obstruct the removal process. This will provide you with ample space to work.
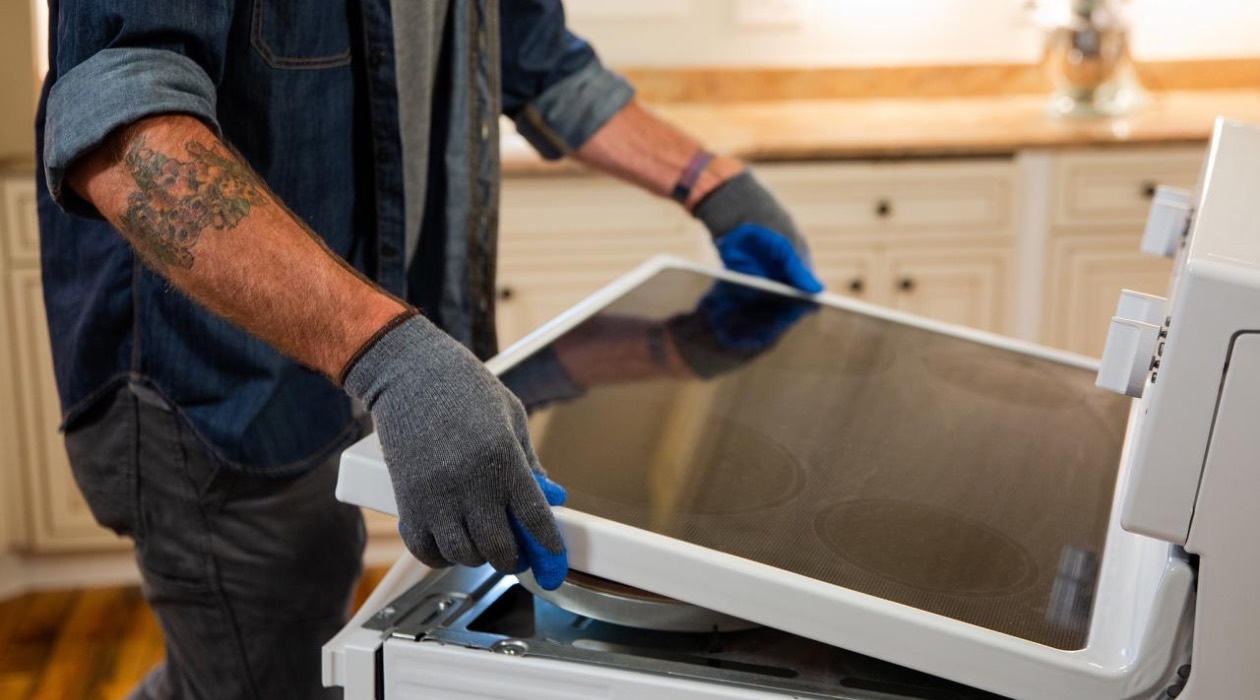
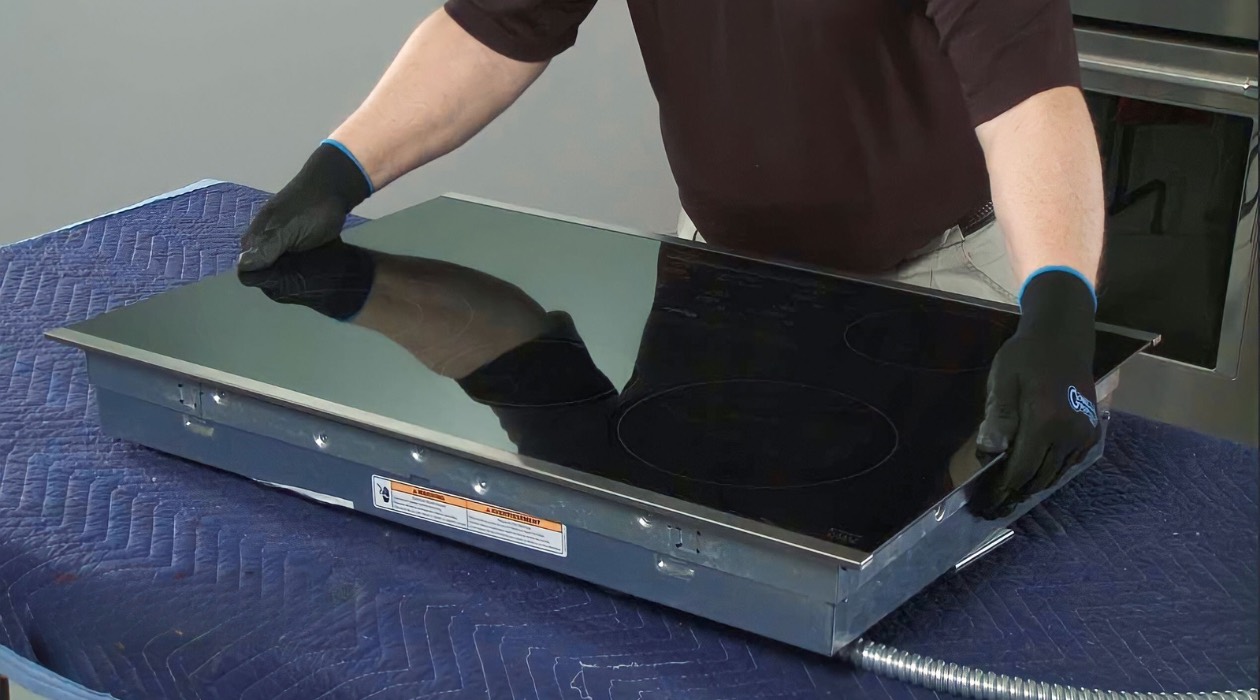
- Gently lift the glass top: Carefully lift the old glass stove top from the stove, ensuring that you have a firm grip on it. It is important to handle the glass top with care to prevent any damage or injury.
- Place the old glass top in a safe location: Once you have successfully removed the old glass stove top, set it aside in a secure place where it won’t be accidentally bumped or shattered. If the glass is broken or cracked, take extra precautions to prevent any injuries.
It is essential to be cautious during this step, as the glass stove top can be heavy and fragile. Take your time and avoid putting unnecessary pressure on the glass surface.
With the old glass top safely removed, you are now ready to install the new glass stove top. Proceed to the next step for detailed instructions on how to do so.
Step 6: Installing the New Glass Stove Top
In this step, we will guide you through the process of installing the new glass stove top onto your appliance. Follow these steps:
- Clean the frame: Before placing the new glass stove top, ensure that the frame and surrounding area are clean and free from any debris or residue. Use a soft cloth or microfiber towel to wipe down the frame.
- Position the new glass top: Carefully place the new glass stove top onto the frame, aligning it properly with the openings for the burners and control knobs. Take your time to ensure it is centered and positioned correctly.
- Secure the glass top: Once the glass top is in place, refer to your stove’s user manual or manufacturer instructions to determine the appropriate method of securing it. This may involve tightening screws in the designated areas or using specific clips or brackets.
It is crucial to follow the manufacturer’s instructions carefully to ensure proper installation of the new glass stove top. Using incorrect methods or failing to secure it properly can lead to stability issues or damage in the future.
With the new glass stove top securely installed, you can move on to the next step: reconnecting the wires.
Read more: What Are Glass Top Stove Burners Made Of
Step 7: Reconnecting the Wires
Now that the new glass stove top is in place, it’s time to reconnect the wires that power the burners and controls. Follow these steps:
- Refer to your notes or photos: If you took notes or photos during the disconnection process, now is the time to refer to them. This will help ensure that you reconnect the wires to their correct terminals or connectors.
- Connect the wires: Using the appropriate tool, carefully connect each wire to its corresponding terminal or connector. Make sure the connections are secure and the wires are properly inserted.
It’s important to take your time during this step, as a wrong connection or loose wire can affect the functionality of the burners and controls. Double-check each connection to ensure they are secure and properly seated.
Now that the wires are reconnected, we can move on to the next step: screwing in the new glass stove top.
Step 8: Screw in the New Glass Stove Top
In this step, we will guide you through the process of securely screwing in the new glass stove top. Follow these steps:
- Locate the screw holes: Carefully inspect the edges of the new glass stove top to locate the screw holes. These holes should align with the screw holes in the frame of the stove.
- Insert the screws: Using the appropriate screwdriver, insert the screws into the designated screw holes. Start by loosely screwing in each screw to ensure easy alignment of the remaining screws.
- Tighten the screws: Once all the screws are inserted, use the screwdriver to carefully tighten each screw. Be cautious not to overtighten, as this can potentially damage the glass or the frame.
It’s crucial to exert even pressure when tightening the screws, treating each screw with the same level of tightness. This will help ensure that the new glass stove top is securely fastened and stable.
With the new glass stove top securely screwed in place, we can proceed to the next step: reattaching the burners and control knobs.
Step 9: Reattach Burners and Control Knobs
In this step, we will guide you through the process of reattaching the burners and control knobs to the new glass stove top. Follow these steps:
- Place the burners: Start by placing each burner back into its designated spot on the new glass stove top. Ensure that the burners are aligned with the burner openings and are sitting securely in place.
- Secure the burners: If the burners were originally secured with screws, reinsert the screws and use a screwdriver to tighten them. If they were held in place with clips, carefully reattach the clips by pressing them down until they click into place.
- Slide on the control knobs: Line up the control knobs with their corresponding shafts on the control panel. Gently slide each knob onto its shaft, ensuring a snug fit.
- Secure the control knobs: If the control knobs were originally secured with retaining screws, use a screwdriver to tighten the screws. This will help ensure that the knobs are firmly held in place.
Throughout this process, be aware of the placement and orientation of each burner and control knob. Double-check that they are correctly positioned before finalizing the attachments.
With the burners and control knobs securely reattached, we can move on to the final step in this process: reconnecting the power.
Step 10: Reconnecting the Power
In the final step of replacing the glass stove top, we will guide you through the process of reconnecting the power supply. Follow these steps:
- Verify all connections: Before reconnecting the power, double-check that all wires, screws, burners, and control knobs are properly installed and secure.
- Plug in the stove: If your stove has a power cord, plug it back into the electrical outlet. Ensure that the plug is fully inserted and seated correctly. If your stove is hardwired, locate the circuit breaker responsible for powering the stove and switch it back on.
- Test the power supply: Turn on the stove and test the burner controls and oven to ensure that the power supply has been successfully reconnected. If everything is functioning properly, you have successfully reconnected the power.
It’s important to be cautious and observant as you restore the power supply. Look out for any unusual sounds, smells, or malfunctions. If you notice anything out of the ordinary, disconnect the power immediately and consult a professional for assistance.
Congratulations! You have successfully replaced the glass stove top and restored power to your appliance.
Remember, safety should always be a priority. If you ever feel unsure or uncomfortable during any step of the process, don’t hesitate to seek professional help.
With your newly installed glass stove top, you can enjoy cooking with confidence and style!
Conclusion
Replacing a glass stove top may seem like a daunting task, but with the right knowledge and steps, it can be accomplished successfully. By following the comprehensive guide outlined in this article, you have learned how to replace a glass stove top safely and effectively.
We started by emphasizing the importance of safety precautions and gathering the necessary tools and materials. Throughout the step-by-step process, we highlighted the need to disconnect the power, remove the burners and control knobs, unscrew the old glass stove top, disconnect the wires, remove the old glass top, install the new glass top, reconnect the wires, screw in the new glass top, reattach the burners and control knobs, and finally, reconnect the power.
Each step was designed to help you navigate the replacement process smoothly, ensuring your safety and the proper functioning of your stove. It’s important to consult your stove’s user manual or manufacturer instructions for specific guidance tailored to your stove model.
Remember, if at any point during the process you feel unsure or uncomfortable, it is always advisable to seek assistance from a professional. Your safety is paramount.
With your new glass stove top properly installed, you can once again enjoy cooking with ease and in style. And by following the maintenance tips provided by the manufacturer, you can keep your glass stove top looking clean and sleek for years to come.
Thank you for taking the time to learn about the process of replacing a glass stove top. We hope this guide has been helpful and enabled you to successfully complete the task.
Happy cooking!
Frequently Asked Questions about How To Replace Glass Stove Top
Was this page helpful?
At Storables.com, we guarantee accurate and reliable information. Our content, validated by Expert Board Contributors, is crafted following stringent Editorial Policies. We're committed to providing you with well-researched, expert-backed insights for all your informational needs.


0 thoughts on “How To Replace Glass Stove Top”