Articles
How To Fix Stove Top
Modified: March 1, 2024
Learn how to fix stove top issues with our informative and in-depth articles. Get expert advice and step-by-step instructions to troubleshoot and resolve common problems.
(Many of the links in this article redirect to a specific reviewed product. Your purchase of these products through affiliate links helps to generate commission for Storables.com, at no extra cost. Learn more)
Introduction
A stove top is an essential appliance in every kitchen, used for cooking a variety of meals. However, like any other household appliance, stove tops can encounter issues over time. From uneven heating to broken control knobs, these problems can be frustrating for any homeowner. The good news is that many stove top issues can be fixed without the need for professional assistance.
In this article, we will guide you through the process of fixing common stove top problems. Whether you’re dealing with dirty burner grates, malfunctioning control knobs, or electrical connection issues, we’ve got you covered. With a few simple tools and some basic knowledge, you’ll be able to troubleshoot and repair your stove top, saving you time and money.
Please note that safety is a top priority when working with any electrical appliance. Before attempting any repairs, make sure to unplug your stove to avoid the risk of electric shock. Additionally, if you’re not comfortable handling electrical components or if your stove top issue is more complex, it’s always best to consult a professional technician.
Now, let’s dive into the most common stove top issues and how to fix them.
Key Takeaways:
- Regular maintenance and simple repairs can resolve common stove top issues, such as uneven heating and broken control knobs, saving time and money while extending the appliance’s lifespan.
- Prioritizing safety and following manufacturer’s instructions are crucial when troubleshooting and fixing stove top problems. Seeking professional help for complex issues ensures optimal functionality.
Read more: How To Fix Samsung Glass Top Stove Burners
Common Stove Top Issues
Stove tops can experience a range of problems that can hinder their performance and functionality. Here are some of the most common stove top issues:
- Dirty Burner Grates and Drip Pans: Over time, burner grates and drip pans can accumulate grease, food residue, and stubborn stains. This can affect the heat distribution and make your stove top appear dirty. Regular cleaning can help restore proper functionality and improve the aesthetics of your stove top.
- Uneven Heating: If you notice that your stove top is not heating evenly, with some burners getting too hot while others remain cold, it could be a sign of a malfunctioning burner element or an issue with the control switch. This can affect the quality of your cooking and make meal preparation a challenge.
- Faulty Burner Elements: Burner elements can wear out over time, resulting in uneven heating or complete failure. If you’re experiencing issues with a specific burner, it might be time to replace the element.
- Broken Control Knobs: Control knobs are used to adjust the heat settings on your stove top. If a control knob becomes loose, sticks, or breaks, it can be difficult to properly regulate the temperature. This can be a frustrating issue when trying to cook your favorite meals.
- Stuck or Loose Control Switch: The control switch is responsible for turning the burners on and off. A stuck or loose control switch can prevent the burner from functioning or make it difficult to adjust the heat level.
- Electrical Connection Issues: If your stove top is not receiving power or the burners are not heating properly, it could be due to electrical connection problems. This typically requires checking the wiring and ensuring a secure connection.
Now that we’ve identified the common stove top issues, let’s move on to the tools and materials you’ll need to perform the necessary repairs.
Tools and Materials Needed
Before you begin fixing your stove top, it’s important to gather the necessary tools and materials to ensure a smooth and efficient repair process. Here’s a list of items you’ll likely need:
- Screwdriver: A screwdriver is essential for removing screws and accessing different parts of the stove top. Make sure to have both a flathead and a Phillips head screwdriver on hand.
- Scrub Brush or Sponge: To clean dirty burner grates and drip pans, you’ll need a scrub brush or sponge. Look for one with firm bristles or a rough surface to effectively remove stubborn stains.
- Mild Dish Soap: Use mild dish soap mixed with warm water to clean the burner grates and drip pans. Avoid using harsh chemicals or abrasive cleaners, as they can damage the enamel or coating on these components.
- Multimeter: A multimeter is an electrical testing device that can help you diagnose issues with electrical connections and components. It measures voltage, current, and resistance.
- Replacement Burner Element: If you determine that a faulty burner element is causing your stove top problem, you’ll need to purchase a replacement. Make sure to check the model number of your stove top to ensure compatibility.
- Replacement Control Knobs: If your control knobs are broken or malfunctioning, you’ll need to purchase new ones. Again, verify the model number of your stove top to ensure a proper fit.
- Electrical Tape: Electrical tape is useful for securing and insulating electrical connections.
- Wire Strippers: If you’re dealing with electrical connection issues, wire strippers will come in handy for removing the insulation from wires.
- Replacement Control Switch: If you discover that a broken or stuck control switch is causing your stove top problem, you may need to purchase a new control switch. Refer to your stove top’s model number for compatibility.
By having these tools and materials prepared, you’ll be equipped to tackle a wide range of common stove top issues. Now that you’re ready, let’s move on to the safety precautions you should consider before starting any repairs.
Safety Precautions
Working with electrical appliances, such as a stove top, requires taking necessary precautions to ensure your safety. Before you begin any repairs, make sure to follow these safety guidelines:
- Turn Off the Power: Before handling any components or performing any repairs, always unplug your stove top or turn off the circuit breaker that supplies power to it. This will help prevent the risk of electrical shock or injury.
- Allow the Stove Top to Cool: Stove tops can get extremely hot during use, so it’s crucial to allow them to cool down completely before attempting any repairs. Touching hot surfaces can result in burns.
- Use Protective Gear: Wear protective gloves to safeguard your hands and prevent any injury while handling sharp or hot parts of the stove top. Additionally, consider wearing safety goggles to protect your eyes from any debris or cleaning products.
- Work in a Well-Ventilated Area: When cleaning or using any chemicals, make sure you’re in a well-ventilated area to avoid inhaling fumes. Open windows, turn on fans, or work near an exhaust hood if possible.
- Follow Manufacturer’s Instructions: Always refer to the manufacturer’s instructions when performing repairs or maintenance on your stove top. Different models may have specific guidelines that need to be followed to ensure safety and proper functionality.
- Avoid Overexertion: When removing or reinstalling parts, be mindful of your physical capabilities. If a component is too heavy or requires excessive force to remove, seek assistance to avoid strain or injury.
- Keep Children and Pets Away: During the repair process, it’s important to keep children and pets away from the workspace. This will prevent accidents and ensure their safety.
- Consult a Professional: If you’re unsure about any aspect of the repair process or encounter a complex issue, it’s best to consult a professional technician. Your safety should never be compromised.
By adhering to these safety precautions, you can minimize the risks associated with repairing your stove top. Now that you’ve taken safety into consideration, we can proceed to the step-by-step guide to fix common stove top issues.
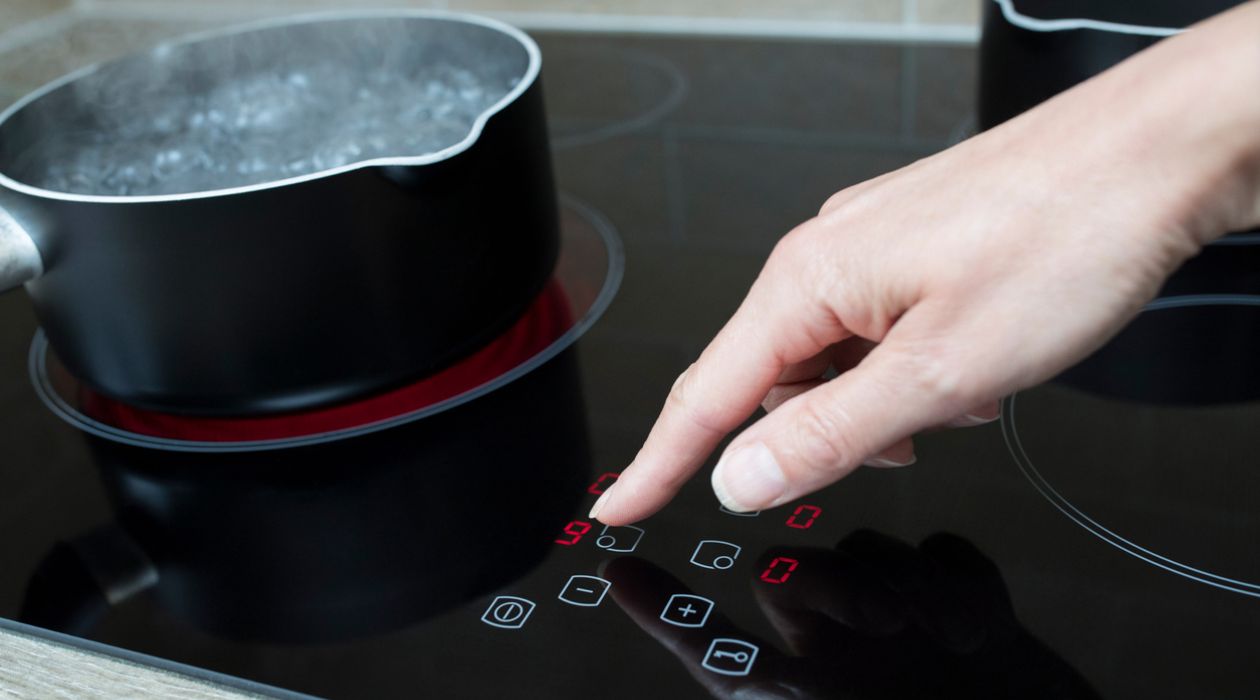
Step 1: Unplugging the Stove
Before starting any repairs or maintenance on your stove top, it’s crucial to ensure that it is safely disconnected from the power source. This will help prevent electric shock or injury. Follow these steps to unplug your stove:
- Locate the Power Source: Identify the power cord connected to your stove top. It is typically located behind the appliance or underneath the kitchen counter.
- Switch Off the Power: Make sure the stove top is turned off. If there are control knobs, turn them all the way to the “off” position.
- Unplug the Power Cord: Carefully pull the power cord out of the electrical outlet. Gently tug on the plug, ensuring a firm grip, to avoid damaging the cord.
- Store the Power Cord Safely: To prevent tripping hazards or damage to the power cord, store it in a safe and easily accessible place.
Remember, even when the stove top is unplugged, some parts may still retain heat. Allow the stove top to cool completely before proceeding with any repairs or maintenance.
By effectively unplugging your stove top, you’ve taken the necessary precaution to ensure your safety throughout the repair process. Now, let’s move on to the next step: removing the burner grates and drip pans.
Read more: How To Make A Stove Top Distiller
Step 2: Removing the Burner Grates and Drip Pans
Before you can clean or replace the burner grates and drip pans, you’ll need to remove them from your stove top. Here’s a step-by-step guide:
- Ensure the Stove Top is Cool: Make sure the stove top has cooled down completely before attempting to remove the burner grates and drip pans. This will prevent burns or other injuries.
- Lift the Burner Grates: Carefully lift each burner grate from the stove top surface. Depending on your stove model, they may be individual grates or one large grate that covers multiple burners.
- Inspect and Clean the Grates: Once removed, inspect the burner grates for any food residue, grease, or stains. Use a scrub brush or sponge and mild dish soap mixed with warm water to clean them thoroughly. Rinse off any soap residue and let them air dry before reattaching.
- Remove the Drip Pans: Underneath the burner grates, you’ll find the drip pans or bowls that catch any spills or drips during cooking. Slide each drip pan out from its housing and carefully empty the contents into the sink.
- Clean the Drip Pans: Similar to the burner grates, clean the drip pans with warm soapy water. For stubborn stains or grease buildup, you may need to use a scrub brush or a non-abrasive cleaner. Rinse thoroughly and let them dry completely before reinserting.
- Inspect the Burner Openings: While the burner grates and drip pans are removed, take a moment to inspect the burner openings for any obstructions or debris. Use a soft, dry cloth to gently clean the openings.
Once you’ve removed the burner grates and drip pans, cleaned them, and checked the burner openings, you’re ready to move on to the next steps of troubleshooting and fixing your stove top. But before we do that, remember to follow safety precautions and ensure the stove is still unplugged. Now, let’s proceed to Step 3: Cleaning the Burner Elements.
Step 3: Cleaning the Burner Grates and Drip Pans
Keeping your burner grates and drip pans clean is essential for proper stove top maintenance and functionality. Over time, they can accumulate grease, food residue, and stubborn stains. Follow these steps to effectively clean your burner grates and drip pans:
- Prepare a Cleaning Solution: Fill a sink or large basin with warm water and add a few drops of mild dish soap. Mix the soap gently to create a soapy solution.
- Submerge the Grates and Drip Pans: Place the burner grates and drip pans into the soapy water, ensuring they are fully submerged. Let them soak for a few minutes to loosen any food debris or stains.
- Scrub the Grates and Drip Pans: Using a scrub brush or sponge, scrub the burner grates and drip pans to remove any built-up grease or stains. Pay attention to corners and hard-to-reach areas. For stubborn stains, you may need to apply a gentle abrasive cleaner.
- Rinse Thoroughly: Once you’ve scrubbed the grates and drip pans, rinse them well under running water to remove any remaining soap or residue. Check for any missed spots and repeat the cleaning process if necessary.
- Dry Completely: After rinsing, use a clean towel or allow the burner grates and drip pans to air dry completely before reassembling them on the stove top. This will prevent any moisture from causing rust or other damage.
Regular maintenance and cleaning of the burner grates and drip pans will not only improve the appearance of your stove top but also ensure optimal heat distribution during cooking. Once you have completed this step, you can move on to Step 4: Checking and Cleaning the Burner Elements.
Step 4: Checking and Cleaning the Burner Elements
The burner elements are responsible for generating heat on your stove top. Over time, these elements can become dirty or damaged, leading to uneven heating or complete malfunction. Here’s how you can check and clean the burner elements:
- Ensure the Stove Top is Cool: Before working on the burner elements, make sure the stove top is completely cool to prevent any burns or injuries.
- Inspect the Burner Elements: Carefully lift and inspect each burner element. Look for any signs of damage, such as visible cracks, burns, or discoloration. If you notice any significant issues, it may be necessary to replace the burner element.
- Disconnect the Burner Elements: Depending on your stove top model, the burner elements may be secured with screws or simply slide into place. Follow the manufacturer’s instructions to disconnect the elements from the stove top.
- Clean the Burner Elements: Use a soft cloth or a toothbrush to gently clean the burner elements. You can also use a mild abrasive cleaner or a baking soda paste for stubborn stains. Avoid using water on the elements, as they are electrical components and should not be submerged.
- Remove Debris: Carefully remove any food debris or buildup from the burner element holes. This can be done using a soft brush or a toothpick. Be gentle to avoid bending or damaging the elements.
- Reconnect the Burner Elements: Once the burner elements are clean, carefully slide them back into position or secure them with screws, following the manufacturer’s instructions.
Regularly checking and cleaning the burner elements can help ensure even heat distribution and prevent potential issues with your stove top. Now that you’ve cleaned the burner elements, it’s time to move on to Step 5: Troubleshooting and Fixing Uneven Heating.
To fix a stove top, start by checking the power source and ensuring it’s plugged in. If it’s an electric stove, check the circuit breaker. For gas stoves, make sure the gas supply is connected. If the issue persists, consult a professional technician.
Step 5: Troubleshooting and Fixing Uneven Heating
If you’re experiencing uneven heating on your stove top, where some burners are too hot while others are not heating properly, there are a few troubleshooting steps you can take before considering more extensive repairs or replacements:
- Clean the Burner Openings: Check if the burner openings are clear of any debris or obstructions. Use a soft, dry cloth to gently clean the openings, ensuring there are no blockages that may affect the heat distribution.
- Adjust the Burner Caps: Some stove tops have burner caps that sit on top of the burner elements. Ensure these caps are correctly positioned and flat to ensure proper heat distribution.
- Swap Burner Grates and Drip Pans: If possible, try swapping the burner grates and drip pans from one burner to another. This will help identify if the issue lies with a specific component or if it is related to the burner itself.
- Inspect the Control Knobs: Check the control knobs for any damage or wear. Sometimes, loose or broken control knobs can cause uneven heating. If necessary, replace any faulty control knobs following the manufacturer’s instructions.
- Check the Control Switch: The control switch is responsible for turning the burners on and off. If you suspect a control switch issue, consult the manufacturer’s instructions or a professional technician for guidance on troubleshooting and potentially replacing the control switch.
- Consult a Professional: If none of the above steps resolve the issue, or if you are uncomfortable performing further troubleshooting, it is best to consult a professional technician. They can accurately diagnose the problem and provide expert guidance on how to fix the uneven heating in your stove top.
Remember to always prioritize safety when troubleshooting and fixing stove top issues. If at any point you feel unsure or uncomfortable, it is advisable to seek professional help to avoid accidents or further damage to your appliance.
Now that you have tried troubleshooting and fixing uneven heating, let’s move on to Step 6: Replacing a Faulty Burner Element, if necessary.
Read more: How To Bake On The Stove Top
Step 6: Replacing a Faulty Burner Element
If you have determined that a specific burner element is the cause of the heating issue on your stove top, it may be necessary to replace the faulty element. Follow these steps to replace a burner element:
- Ensure the Stove Top is Cool and Unplugged: Before replacing the burner element, make sure the stove top has completely cooled down and is unplugged to ensure your safety.
- Identify the Faulty Element: If you haven’t already done so, identify the burner element that is not heating properly by testing each burner individually.
- Find a Compatible Replacement: Refer to your stove top’s model number or consult the manufacturer’s instructions to find a compatible replacement burner element. You can usually find these at appliance stores, online retailers, or directly from the manufacturer.
- Disconnect the Faulty Element: Carefully disconnect the faulty burner element from the stove top. Depending on your stove model, this may involve unscrewing it or detaching it from wiring connectors. Follow the manufacturer’s instructions or consult a professional technician if you’re unsure.
- Install the New Burner Element: Position the new burner element in the correct location on the stove top. Ensure it is aligned properly and secure it following the manufacturer’s instructions.
- Restore Power and Test: Plug the stove top back in or turn on the circuit breaker to restore power. Test the new burner element to ensure it heats evenly and functions correctly.
Replacing a faulty burner element can resolve heating issues and restore proper functionality to your stove top. Ensure you follow the manufacturer’s instructions and exercise caution throughout the replacement process.
If you are unsure about any aspect of replacing the burner element or if the issue persists after replacement, it is advisable to seek the assistance of a professional technician.
Now that you’ve replaced the faulty burner element, let’s move on to Step 7: Repairing or Replacing a Broken Control Knob, if needed.
Step 7: Repairing or Replacing a Broken Control Knob
If you are dealing with a broken or malfunctioning control knob on your stove top, you may need to repair or replace it. Follow these steps to repair or replace a broken control knob:
- Ensure the Stove Top is Cool and Unplugged: Before working on the control knob, make sure the stove top is completely cool and unplugged to avoid any potential injuries.
- Inspect the Control Knob: Examine the control knob to identify the issue. If the knob is loose, it may simply require tightening. If it is cracked or broken, replacing it may be necessary.
- Tighten a Loose Control Knob: If the control knob is loose, use a screwdriver to tighten the screw holding it in place. This should secure the control knob and improve its functionality.
- Replace a Broken Control Knob: If the control knob is cracked, broken, or cannot be tightened, it will need to be replaced. Refer to the manufacturer’s instructions or consult a professional to identify the correct replacement knob for your stove top model.
- Remove the Broken Control Knob: Disconnect the broken control knob from its shaft or stem. This can usually be done by pulling or gently twisting the knob off. Be careful not to force it or damage any surrounding components.
- Install the New Control Knob: Align the replacement control knob with the shaft or stem and firmly push or twist it into place. Ensure it is secured properly.
- Test the Control Knob: After installing the new control knob, restore power to the stove top and test the knob’s functionality. Turn it on and off, adjusting the heat settings to ensure it operates smoothly.
Repairing or replacing a broken control knob can restore proper temperature control and usability to your stove top. Remember to follow the manufacturer’s instructions and exercise caution when working with electrical components.
If you encounter any difficulties during the repair process or if the issue persists after attempting these steps, it is recommended to consult a professional technician for further assistance.
Now that you’ve repaired or replaced the control knob, let’s move on to Step 8: Fixing a Stuck or Loose Control Switch, if necessary.
Step 8: Fixing a Stuck or Loose Control Switch
If you’re experiencing issues with a stuck or loose control switch on your stove top, it can impact your ability to turn the burners on or adjust the heat levels. Follow these steps to fix a stuck or loose control switch:
- Ensure the Stove Top is Cool and Unplugged: Before attempting any repairs on the control switch, make sure the stove top is cool and unplugged to avoid any potential risks.
- Locate the Control Switch: Identify the control switch that is stuck or loose. This is typically located near the front of the stove top.
- Inspect the Control Switch: Examine the control switch for any visible damage, such as loose or broken parts, bent connectors, or signs of wear. Additionally, check for any obstructions or debris that may be causing it to stick.
- Tighten Loose Connections: If the control switch is loose, use a screwdriver or the appropriate tool to tighten any loose connections or screws that secure it in place. This should help improve its stability.
- Free a Stuck Control Switch: If the control switch is stuck, gently press or wiggle it to see if it becomes unstuck. If this doesn’t work, you may need to remove the control switch for further inspection and cleaning.
- Clean the Control Switch: If the control switch is dirty or obstructed, use a soft cloth dampened with a mild cleaning solution to carefully clean around the switch. Be mindful not to get any liquid inside the switch itself, as this could cause damage.
- Reinstall the Control Switch: Once the control switch is cleaned and functioning properly, carefully reinsert it back into its original position. Make sure it is securely fastened.
With a stuck or loose control switch properly addressed, you should now be able to operate your stove top with ease. However, if the issue persists or if you’re unsure about any part of the process, it is recommended to consult a professional technician for further assistance.
Now that you’ve fixed the control switch, let’s move on to Step 9: Addressing Electrical Connection Issues, if necessary.
Step 9: Addressing Electrical Connection Issues
If your stove top is not receiving power or you’re experiencing issues with the burners not heating properly, it might be due to electrical connection problems. Here are the steps to address electrical connection issues:
- Ensure the Stove Top is Cool and Unplugged: Before working on any electrical connections, make sure the stove top is completely cool to avoid any potential accidents, and ensure it is unplugged to prevent any risk of electric shock.
- Locate the Power Source: Identify the power cord connected to your stove top. This is usually located behind the appliance or underneath the kitchen counter.
- Check the Power Cord: Inspect the power cord for any visible signs of damage, such as frayed or exposed wires. If any damage is found, the power cord may need to be replaced.
- Inspect the Outlet: Check the electrical outlet where the stove top is plugged in. Look for any loose connections, burns, or discoloration. If you suspect any issues with the outlet, it is advisable to consult a professional electrician to resolve the problem.
- Examine the Wiring Connections: Carefully remove the back panel or access panel of the stove top to access the wiring connections. Inspect the wiring for loose connections, damaged wires, or signs of burning or melting.
- Secure Loose Connections: If you find any loose wiring connections, use a screwdriver or the appropriate tool to tighten them. Ensure the connections are snug but not overly tightened to avoid further damage.
- Repair or Replace Damaged Wiring: If you identify any damaged or frayed wires, they may need to be repaired or replaced. Consult a professional technician or an electrician to properly address wiring issues.
- Restore Power and Test: Once you have addressed any electrical connection issues, plug the stove top back in and restore power. Test the burners to ensure they are heating properly and that the electrical connection issues have been resolved.
Working with electrical connections can be potentially dangerous, so if you’re not comfortable or experienced in working with electrical components, it’s best to consult a professional technician or an electrician for assistance.
Now that you have addressed any electrical connection issues, let’s move on to Step 10: Testing the Stove Top After Repairs.
Read more: How To Clean A Smooth Top Range Or Cooktop
Step 10: Testing the Stove Top After Repairs
After completing the necessary repairs and maintenance on your stove top, it’s important to test its functionality to ensure that the issues have been resolved. Follow these steps to effectively test your stove top after repairs:
- Ensure the Stove Top is Assembled: Make sure that all components, such as burner grates, drip pans, control knobs, and control switches, are properly reinstalled on the stove top.
- Double-Check Power Connection: Ensure that the stove top is plugged in securely or that the circuit breaker supplying power is turned on.
- Turn On the Burners: Turn on each burner individually and adjust the heat settings to test if they heat up evenly and maintain the desired temperature. Observe the flame or heat to ensure it is consistent across all burners.
- Test Control Knobs and Switches: Check each control knob and control switch to ensure that they are functioning properly. Turn them on and off, adjusting the heat levels, and verify that they operate smoothly without any issues.
- Monitor for Any Abnormalities: Keep an eye out for any unusual smells, sparks, or other signs of malfunction. If you detect any abnormalities or the stove top doesn’t function as expected, turn off the power immediately and reassess the repairs or seek professional assistance.
- Perform a Test Cook: Once you’ve thoroughly tested the burners and control mechanisms, consider cooking something simple on each burner to validate that the stove top is fully functional. This will allow you to confirm that your repairs have resolved the initial issues.
By testing the stove top after repairs, you can ensure that it is working correctly and that the initial issues have been effectively addressed. Properly functioning burners, control knobs, and switches will make your cooking experience easier and more enjoyable.
If you encounter any persisting problems or if the stove top continues to malfunction, it is advisable to consult a professional technician for further assistance. They can provide expert advice and assistance in resolving any complex issues that may require professional expertise.
Congratulations! You have successfully completed the necessary steps to troubleshoot and fix common stove top issues. Regular maintenance and prompt repairs can help prolong the life of your stove top and ensure its optimal performance.
Remember to always prioritize safety and follow the manufacturer’s instructions and recommendations for your specific stove top model. With a well-functioning stove top, you can continue cooking delicious meals for years to come!
This concludes our guide on how to fix stove top issues. If you have any further questions or need additional assistance, do not hesitate to seek professional help or contact the manufacturer for support.
Conclusion
A well-functioning stove top is crucial for any kitchen, allowing you to cook meals efficiently and effectively. However, encountering common stove top issues such as dirty burner grates, uneven heating, broken control knobs, or electrical connection problems can be frustrating. The good news is that many of these issues can be resolved through simple troubleshooting and repairs.
In this comprehensive guide, we have walked through the step-by-step process of fixing common stove top issues, including unplugging the stove, removing burner grates and drip pans, cleaning burner elements, troubleshooting uneven heating, replacing faulty components like burner elements and control knobs, fixing stuck or loose control switches, and addressing electrical connection issues. Each step was accompanied by safety precautions and tips to help you navigate the repairs safely and effectively.
Remember to always prioritize safety throughout the repair process, ensuring the stove top is cool and unplugged, and taking precautions to avoid any potential injuries or electrical hazards. If you’re unsure about any aspect of the repairs or encounter complex issues, it’s wise to consult a professional technician who can provide expert guidance and assistance.
By regularly maintaining and addressing any stove top issues promptly, you can extend the lifespan of your appliance and maintain optimal performance. This will not only enhance your cooking experience but also save you time and money in the long run.
We hope that this guide has equipped you with the knowledge and confidence to tackle common stove top issues. Remember to always refer to the manufacturer’s instructions and recommendations specific to your stove top model for the most accurate and relevant information.
Thank you for taking the time to read this guide. We hope it has been helpful, and we wish you success in troubleshooting and repairing your stove top!
Frequently Asked Questions about How To Fix Stove Top
Was this page helpful?
At Storables.com, we guarantee accurate and reliable information. Our content, validated by Expert Board Contributors, is crafted following stringent Editorial Policies. We're committed to providing you with well-researched, expert-backed insights for all your informational needs.


0 thoughts on “How To Fix Stove Top”