Articles
How To Repair Uneven Concrete Driveway
Modified: October 20, 2024
Learn effective techniques and tips in our latest articles on repairing uneven concrete driveways. Improve your driveway's appearance and safety with our expert advice.
(Many of the links in this article redirect to a specific reviewed product. Your purchase of these products through affiliate links helps to generate commission for Storables.com, at no extra cost. Learn more)
Introduction
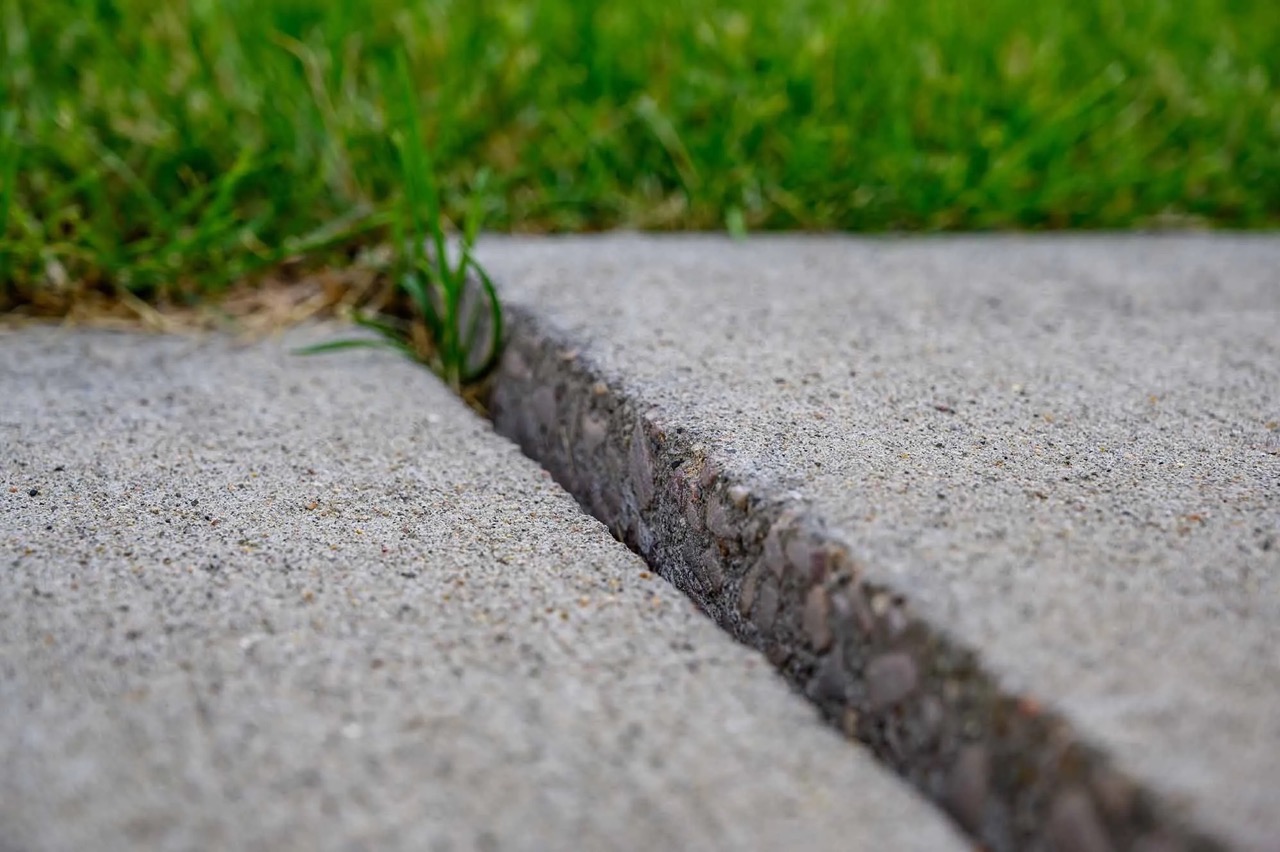
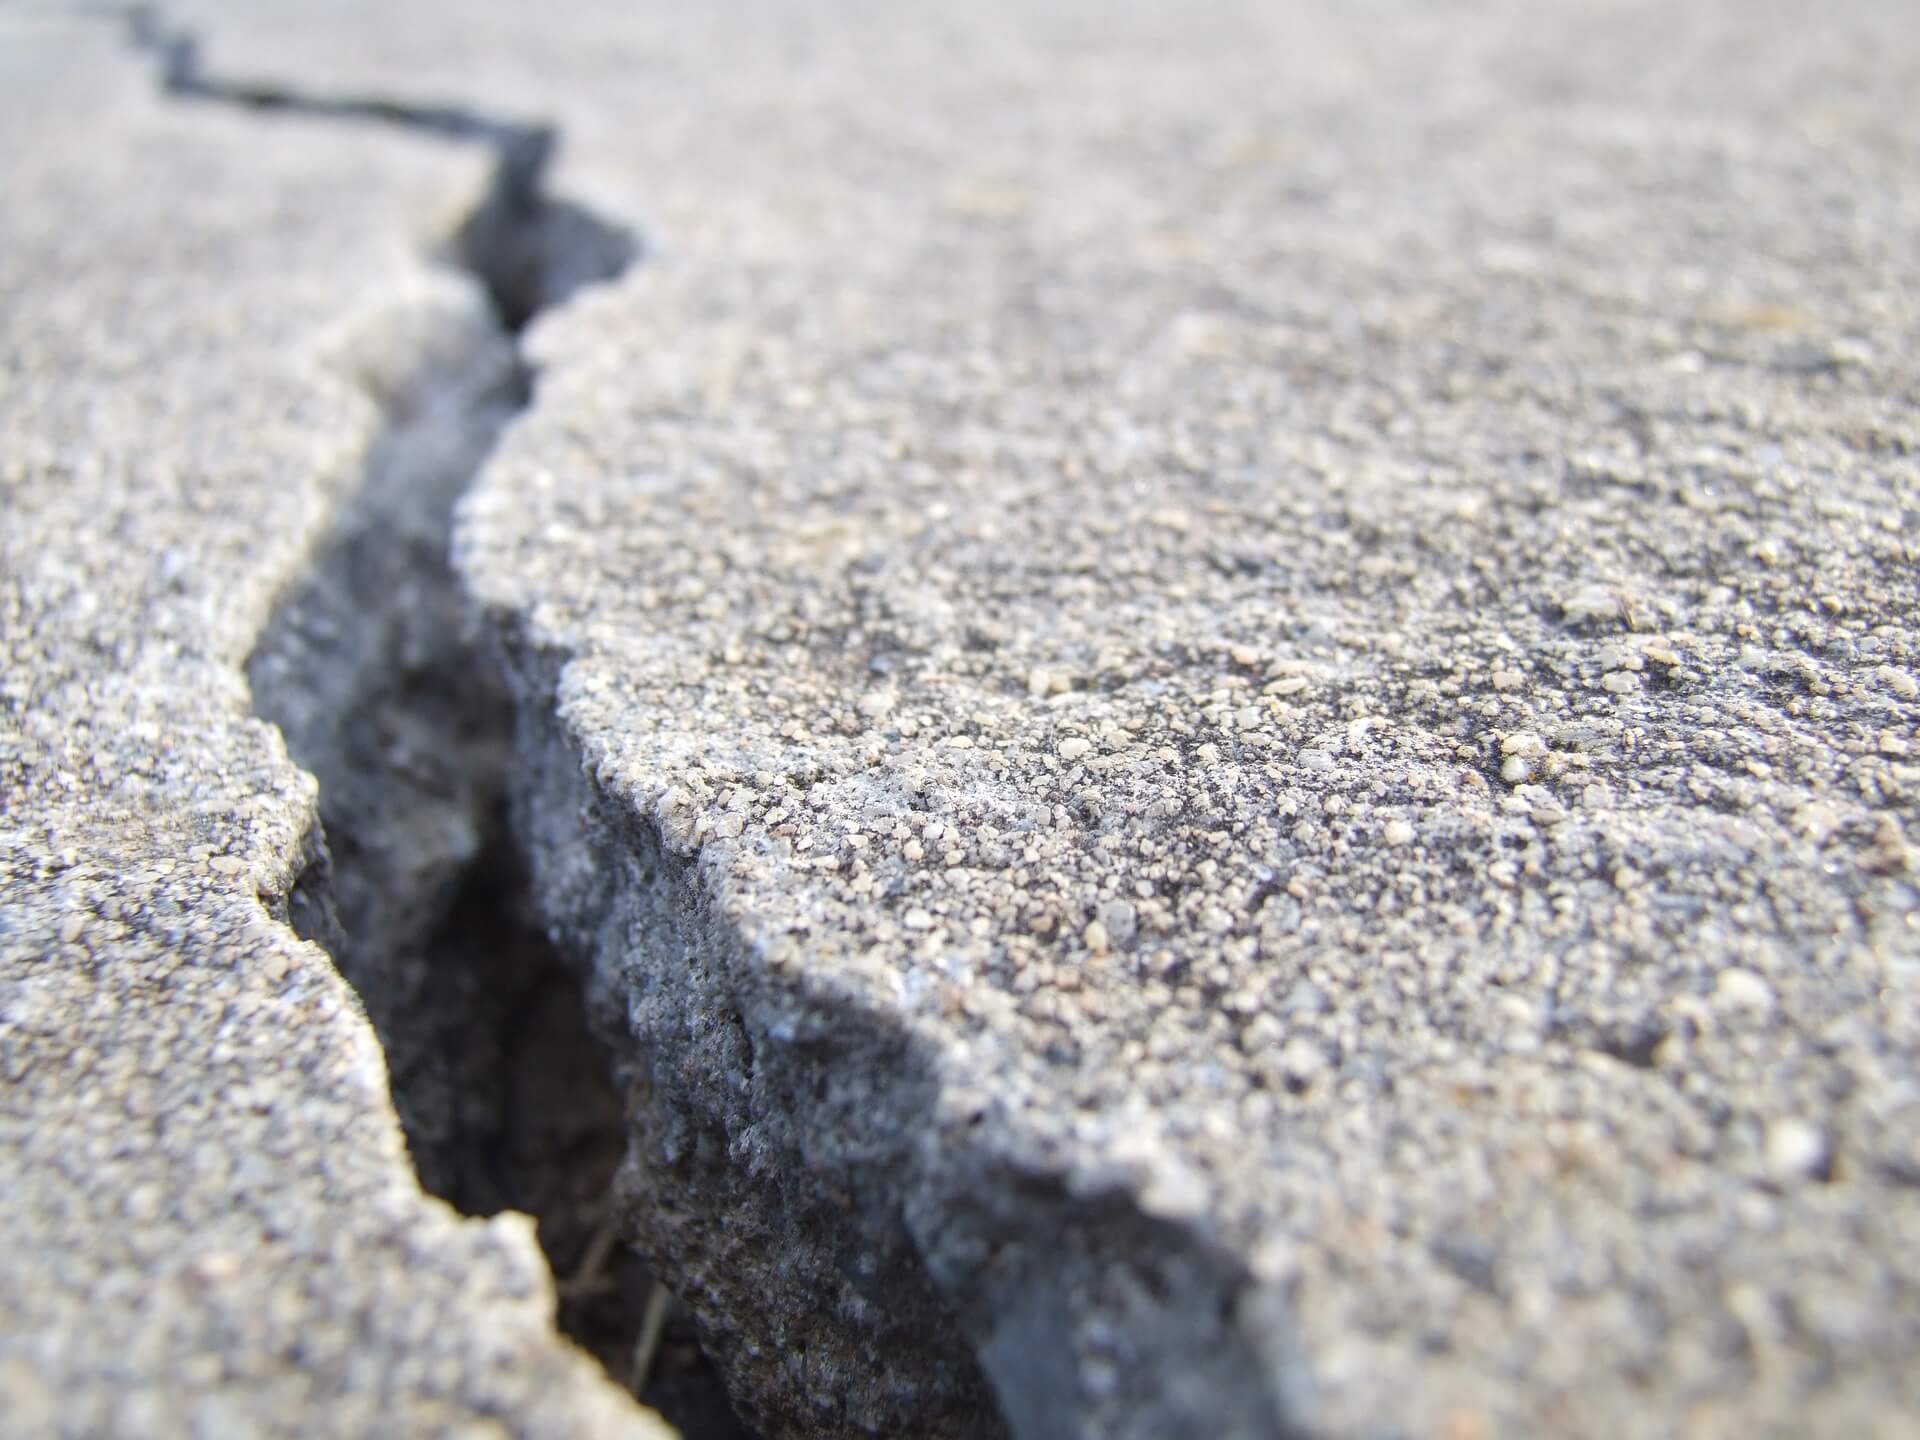
Having an uneven concrete driveway can be not only unsightly but also hazardous. It can cause tripping hazards, puddling of water, and can even damage vehicles that drive over it. If you’re experiencing this issue, don’t worry. Repairing an uneven concrete driveway is a task that you can tackle yourself with the right tools and materials.
In this article, we will guide you through the step-by-step process of repairing an uneven concrete driveway. Whether you’re dealing with minor cracks or major sinking, this comprehensive guide will help you restore your driveway to its original condition.
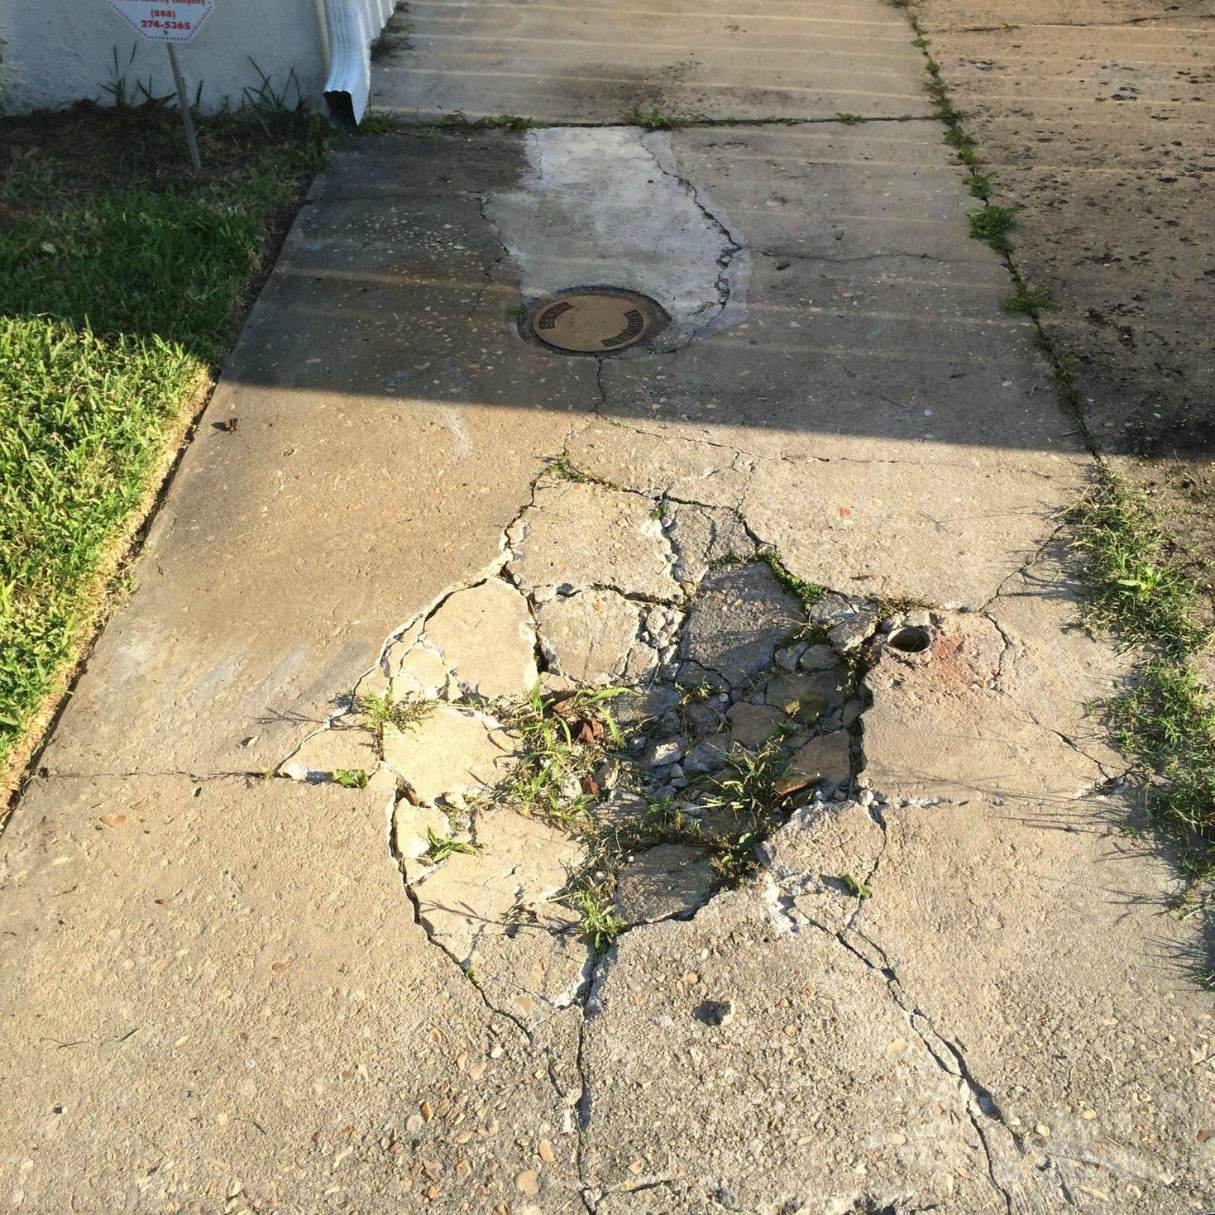
Before we dive into the repair process, it’s important to identify the causes of an uneven concrete driveway. Understanding the underlying reasons will not only help you fix the issue but also prevent it from recurring in the future.
Key Takeaways:
- Identifying the underlying causes of an uneven concrete driveway is crucial for effective repair. Proper preparation, leveling, and careful pouring of new concrete are essential steps to ensure a durable and visually appealing result.
- Sealing and protecting the repaired driveway not only enhances its appearance but also provides added durability and longevity. Regular maintenance and resealing will help preserve the repaired driveway for years to come.
Read more: How To Fix An Uneven Concrete Floor
Causes of Uneven Concrete Driveway
There are several factors that can contribute to an uneven concrete driveway. Identifying the root cause is crucial in order to implement an effective repair solution. Here are some common causes:
- Settling: Over time, the ground beneath the driveway can settle due to various reasons such as soil erosion, poor compaction, or even underground utilities. This can cause sections of the driveway to sink, creating an uneven surface.
- Freeze and Thaw Cycles: If you live in an area with freezing temperatures, the repeated expansion and contraction of water within the concrete can lead to cracking and heaving, resulting in an uneven driveway.
- Tree Roots: Trees near the driveway can extend their roots beneath the surface, causing the concrete to lift and crack as the roots grow. This is a common issue, particularly with older driveways.
- Improper Installation: In some cases, an uneven driveway can be attributed to poor installation practices. If the base was not properly compacted or the concrete was not poured to the correct thickness, it can lead to an unstable and uneven surface.
Identifying the specific cause of your uneven concrete driveway will help you determine the most appropriate repair method. Addressing the underlying issue is crucial to ensure a long-lasting and durable repair.
Tools and Materials Needed
Before you begin repairing your uneven concrete driveway, make sure you have the necessary tools and materials. Having everything ready beforehand will save you time and ensure a smooth repair process. Here’s a list of what you’ll need:
Tools:
- Shovel or excavator
- Wheelbarrow
- Concrete mixer (if needed)
- Masonry chisel
- Hammer
- Trowel
- Float
- Level
- Gloves
- Safety goggles
- Knee pads
Materials:
- Concrete mix
- Gravel or crushed stone
- Sand
- Wire mesh or rebar
- Bonding agent or concrete adhesive
- Concrete sealer or waterproofing agent
Depending on the extent of the repair, you may also need additional materials such as expansion joint strips or joint filler. These are used to prevent future cracking and movement of the concrete.
It’s important to note that the exact tools and materials required may vary based on the specific repair method you choose and the condition of your driveway. It’s a good idea to assess the extent of the damage and consult with a professional if necessary.
Read more: How To Fix Uneven Concrete Walkway
Step 1: Inspecting the Driveway
Before you start repairing an uneven concrete driveway, it’s essential to thoroughly inspect the entire area. Identifying the extent of the damage will help you determine the appropriate repair method and give you a better understanding of what needs to be done.
Here are the key aspects to consider during the inspection:
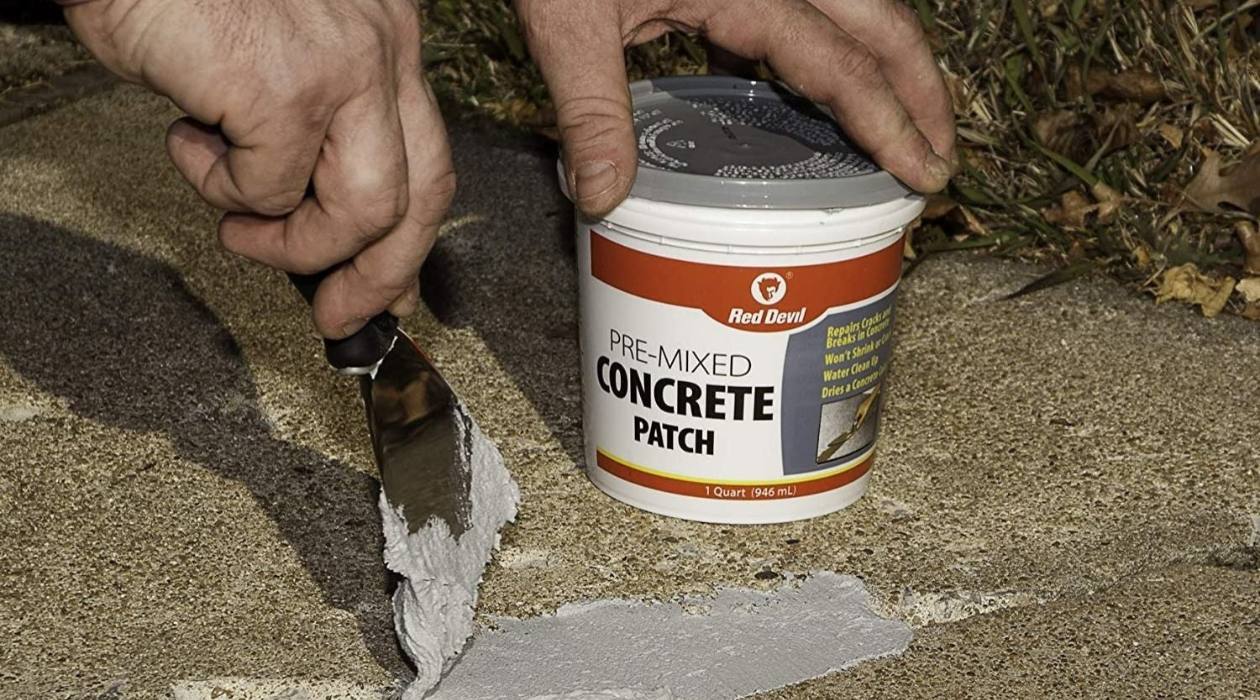
- Cracks: Look for any cracks on the surface of the driveway. Note their width, length, and depth. Small cracks can usually be fixed with simple patching methods, while larger cracks may require more extensive repairs.
- Sinking or Uneven Areas: Walk along the driveway to identify any areas that have sunk or are noticeably uneven. Mark these areas to ensure you address them during the repair process.
- Drainage Issues: Check for any signs of poor drainage. Puddles or standing water on the driveway can indicate improper slope or low spots that may need to be addressed to prevent further damage.
- Underlying Issues: Try to identify the underlying causes of the unevenness. Is it due to settling, freeze and thaw cycles, or tree roots? Understanding the root cause will help you implement the right solution to prevent future issues.
It’s helpful to document the findings of your inspection, either by taking photos or jotting down notes. This will serve as a reference throughout the repair process and help you communicate effectively if you decide to seek professional assistance.
Once you have completed a thorough inspection, you can move on to preparing the work area for the repair process.
Step 2: Preparing the Work Area
In order to ensure a successful repair of your uneven concrete driveway, it’s crucial to properly prepare the work area. Taking the time to do this step correctly will help set the foundation for a long-lasting and durable repair.
Follow these steps to prepare the work area:
- Clean the Driveway: Start by removing any debris, loose gravel, or vegetation from the surface of the driveway. Use a broom, pressure washer, or stiff brush to thoroughly clean the area. This will allow for better adhesion of the repair materials.
- Protect Adjacent Surfaces: If there are any adjacent surfaces, such as walkways or landscaping, that you want to protect from damage during the repair process, cover them with plastic sheeting or tarps. This will prevent any spilled materials from staining or damaging these surfaces.
- Secure the Edges: Inspect the edges of the driveway and look for any areas where the concrete is loose or crumbling. Use a masonry chisel and hammer to remove any unstable concrete and create clean edges. This will provide a solid foundation for the repair.
- Apply Bonding Agent: If you are using a bonding agent or concrete adhesive, apply it according to the manufacturer’s instructions. This will help the new concrete bond securely to the existing surface, ensuring a strong and seamless repair.
- Provide Expansion Joints: If your repair involves pouring new concrete, it’s essential to install expansion joints. These joints allow the concrete to expand and contract with temperature changes, reducing the chances of future cracking. Place strips of foam or other appropriate material to create the expansion joints at regular intervals.
By properly preparing the work area, you’ll create a clean and stable foundation for the repair process. This will help ensure that the new concrete adheres well and the repaired area integrates seamlessly with the existing driveway. With the work area prepared, you’re now ready to move on to the next step: removing the old concrete.
Step 3: Removing Old Concrete
Before you can start leveling and repairing an uneven concrete driveway, it’s important to remove any damaged or deteriorated sections of the existing concrete. This will create a clean slate for the repair and ensure a smooth and even surface.
Follow these steps to remove the old concrete:
- Mark the Area: Use a marking spray or chalk to clearly outline the section of the driveway that needs to be removed. Take into account any cracks or uneven areas that extend beyond the immediate vicinity to ensure a thorough removal.
- Break the Concrete: Use a jackhammer or hammer and masonry chisel to break the old concrete into manageable pieces. Start by creating a series of holes along the marked area, then use the jackhammer or chisel to break the concrete between the holes. Be cautious and wear safety gear such as gloves and goggles during this process.
- Remove the Debris: Once the concrete is broken into smaller pieces, use a shovel or excavator to remove the debris. Ensure that the area is clear and free from any loose concrete or rubble.
- Check the Base: Inspect the base of the area where the concrete was removed. Make sure it is solid and compacted. If necessary, add gravel or crushed stone to the base and compact it using a tamper to create a stable foundation for the new concrete.
Removing the old concrete is a critical step in the repair process as it allows you to address the underlying issues causing the unevenness. It also ensures that the new concrete will adhere properly and provide a level and stable surface. Once the old concrete is removed and the base is prepared, you can move on to the next step: leveling the ground.
Step 4: Leveling the Ground
Now that the old concrete has been removed, it’s time to focus on leveling the ground to create a smooth and even surface for the new concrete. This step is crucial in ensuring a durable and long-lasting repair for your uneven concrete driveway.
Follow these steps to level the ground:
- Compact the Base: Use a tamper or plate compactor to compact the base material, such as gravel or crushed stone, that you added during the previous step. This will help create a solid and stable foundation for the new concrete.
- Add Subbase Material (if needed): If the original base was not sufficient or if you need to adjust the grade of the driveway, you may need to add additional subbase material. This can be gravel, crushed stone, or sand. Spread the material evenly and use a level to ensure that the surface is flat and matches the desired slope of the driveway.
- Pour and Level Sand: If you’re using sand as a leveling material, spread it evenly over the prepared base and use a straight board or a screed to smooth it out. Move the board back and forth in a sawing motion to distribute the sand and create a level surface.
- Confirm Proper Slope: Use a level to check the slope of the leveled ground. The driveway should have a slight slope to allow for proper drainage. Typically, a slope of 1/4 inch per foot is recommended. Adjust the sand or subbase material as needed to achieve the desired slope.
By taking the time to properly level the ground, you not only ensure a smoother and more visually appealing driveway, but also prevent future issues such as water pooling and cracking. Once the ground is leveled, you’re ready to move on to the exciting part: pouring the new concrete.
Consider using a self-leveling concrete resurfacer to repair an uneven driveway. This product can be easily applied and will help to create a smooth and level surface.
Read more: How To Raise A Concrete Driveway
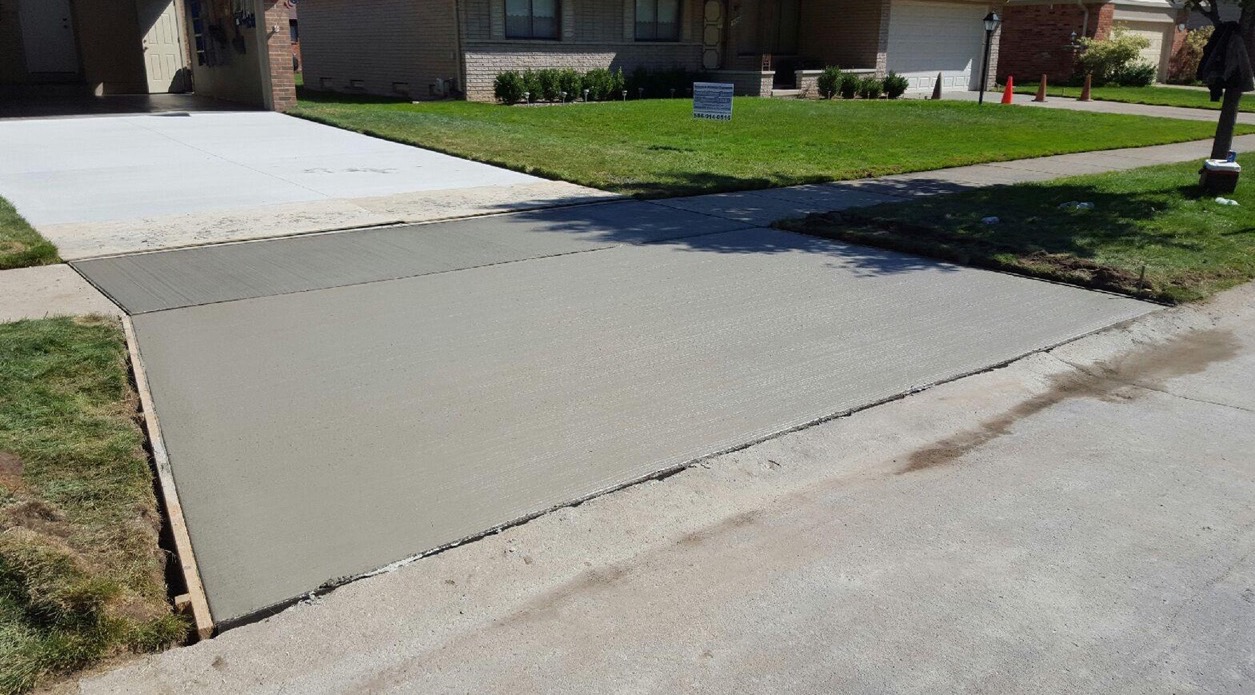
Step 5: Pouring New Concrete
With the ground leveled and prepared, it’s time to pour the new concrete to repair your uneven driveway. This step requires careful planning and execution to ensure a quality result that will improve both the appearance and functionality of your driveway.
Follow these steps to pour new concrete:
- Prepare the Concrete Mix: Mix the concrete according to the manufacturer’s instructions. Use a concrete mixer or follow the recommended hand-mixing process. Make sure to achieve the right consistency, which is typically similar to a thick pancake batter.
- Pour Concrete in Sections: Divide your driveway into manageable sections. Working with smaller sections will allow you to pour and finish the concrete before it starts to set. Pour the concrete onto the prepared and leveled ground within the marked section of the driveway.
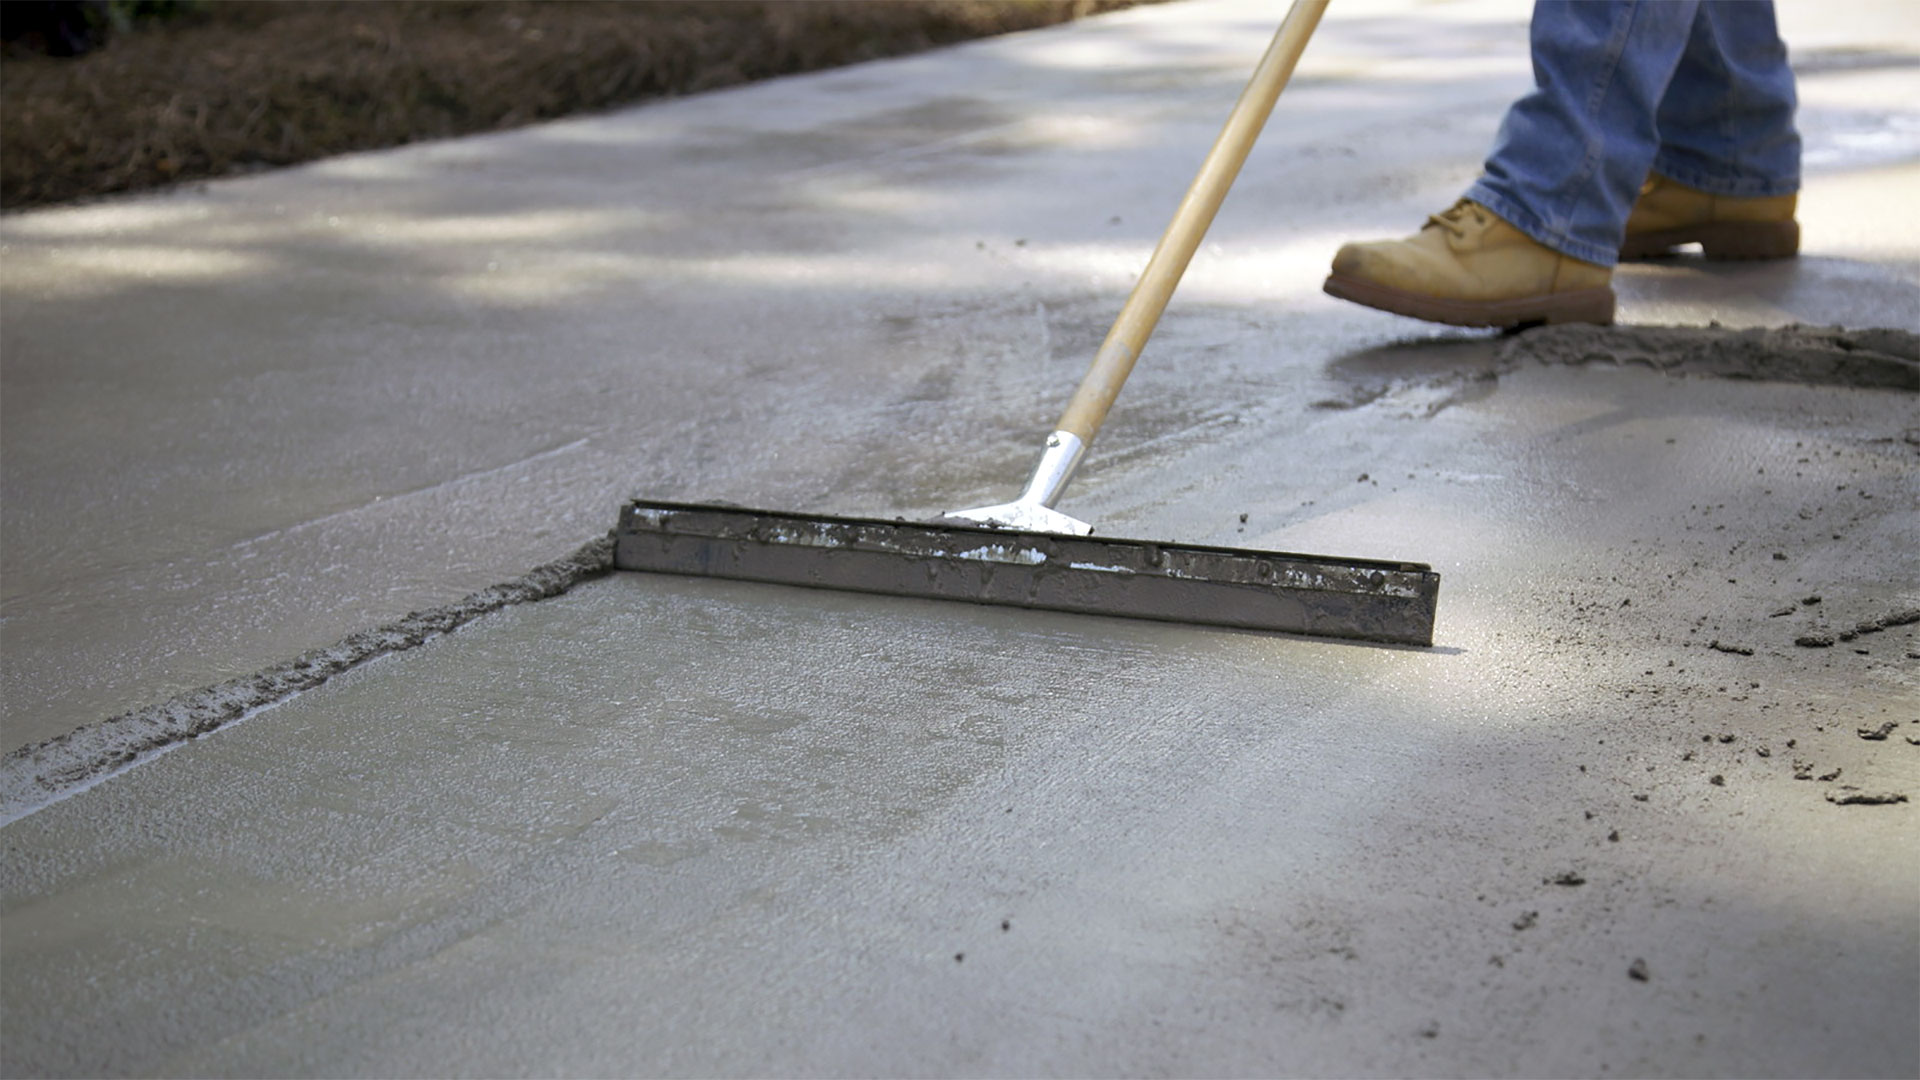
- Distribute and Level the Concrete: Use a shovel, rake, or concrete float to distribute the concrete evenly within the section. Make sure it fills all the corners and edges. Then, use a screed or leveling board to smooth the surface and achieve an even height. Move the screed back and forth in a sawing motion, using the edges of the formwork as guides.
- Finish the Surface: Use a trowel or float to further smooth and level the surface of the concrete. Work in a circular or figure-eight motion to eliminate any air pockets and create a professional finish. Take care to fill any low spots and ensure a consistent thickness across the entire section.
Repeat these steps for each section of the driveway until the entire area is filled with fresh concrete. Ensure that the poured concrete is level with the existing driveway and there are no visible inconsistencies.
After pouring the concrete, allow it to cure for the recommended amount of time, typically 24 to 48 hours or as specified by the concrete manufacturer. Curing prevents cracking and enhances the strength of the newly poured concrete.
Once the concrete has cured, you can proceed to the next step: finishing and curing the concrete.
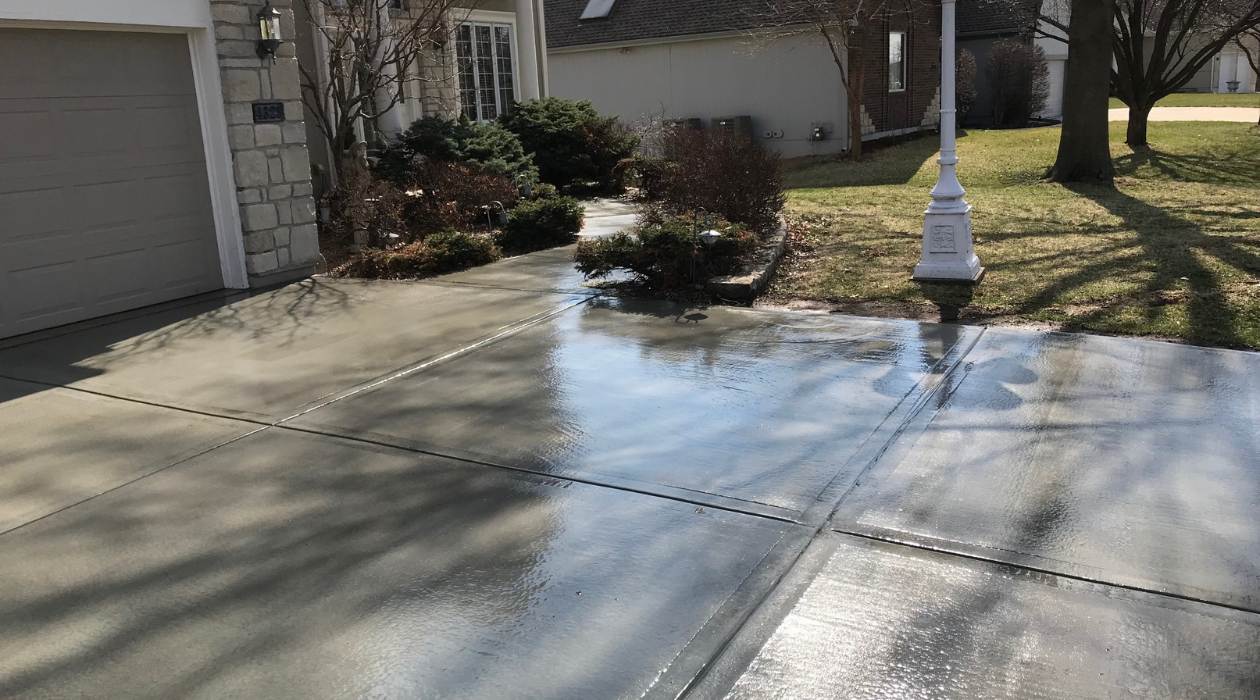
Step 6: Finishing and Curing the Concrete
After pouring the new concrete, the next step in repairing your uneven driveway is to finish and cure the concrete. This step is crucial for achieving a smooth and durable surface that will withstand the test of time.
Follow these steps to finish and cure the concrete:
- Smooth the Surface: Use a concrete float or trowel to further smooth the surface of the newly poured concrete. Start at one end of the driveway and work your way to the other, overlapping each pass slightly. This process will help remove any imperfections and create a consistent texture.
- Add Texture (if desired): If you prefer a textured surface for better traction or aesthetic reasons, consider using a broom or specialized concrete texture tool to create the desired pattern. Drag the broom or texture tool across the surface in long strokes, applying even pressure to achieve the desired texture.
- Protect the Concrete from Drying Too Quickly: Cover the newly poured concrete with plastic sheeting or wet burlap to prevent it from drying too quickly. This will help in the curing process and ensure a stronger and more resilient driveway. Keep the covering in place for at least 48 hours or follow the specific instructions provided by the concrete manufacturer.
- Keep the Concrete Moist: During the curing process, it’s crucial to keep the concrete moist for optimal strength and durability. Mist the concrete with water periodically or use a curing compound recommended by the manufacturer. This will help prevent cracking and ensure a successful repair.
- Avoid Heavy Traffic: While the concrete is curing, avoid driving or placing heavy objects on the repaired area. It’s important to allow the concrete to fully cure and reach its maximum strength before subjecting it to significant weight or stress.
By applying proper finishing techniques and taking the time to cure the concrete, you’ll ensure a high-quality repair that can withstand the rigors of everyday use. Once the concrete has fully cured, you can proceed to the final step: sealing and protecting the driveway.
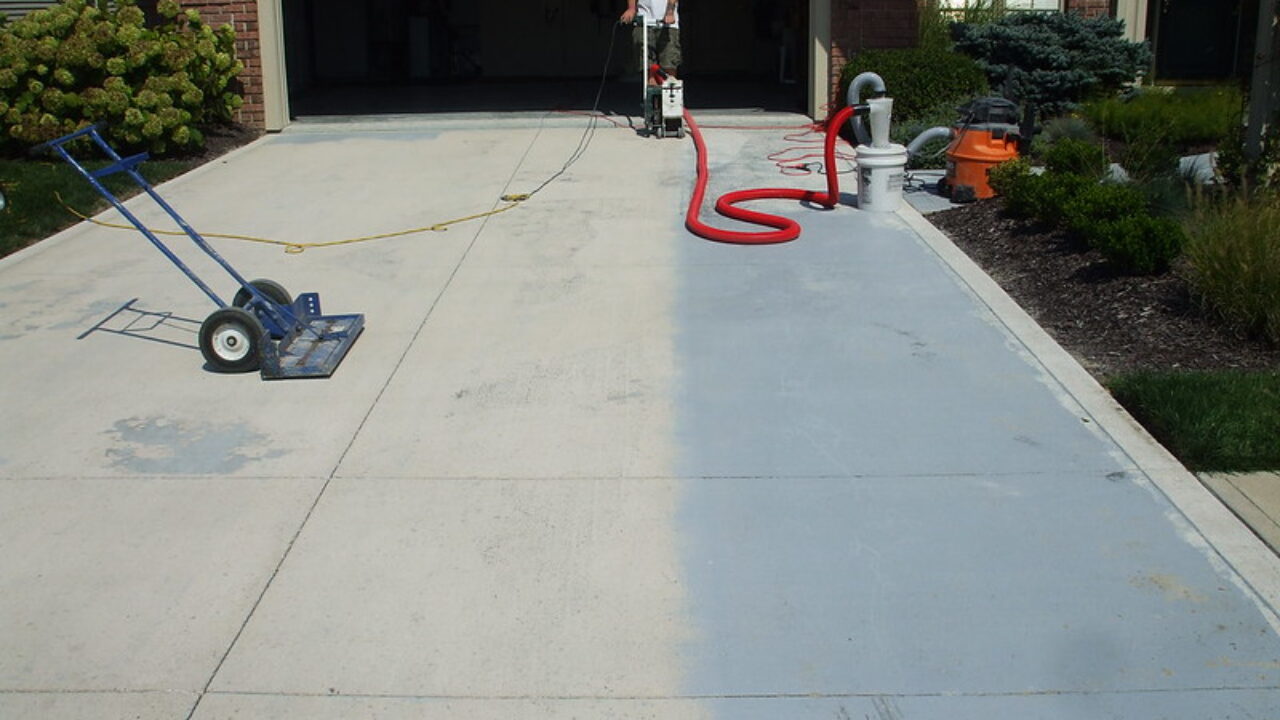
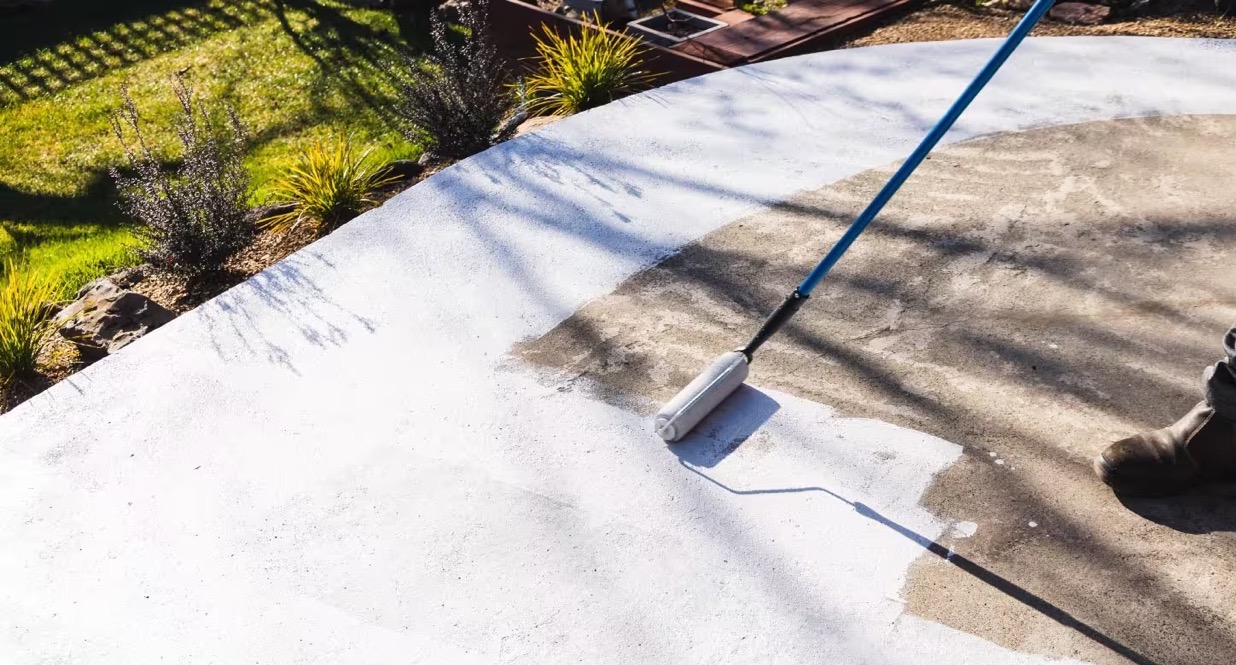
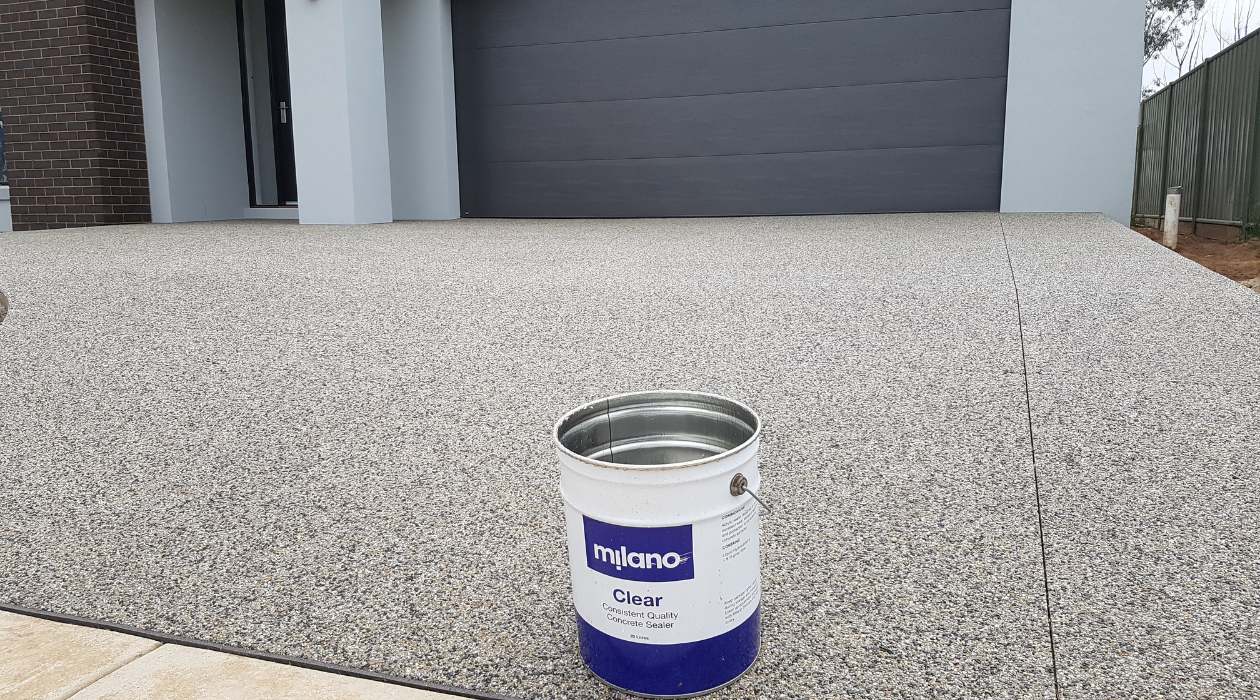
Step 7: Sealing and Protecting the Driveway
The final step in repairing an uneven concrete driveway is sealing and protecting the surface. Applying a sealer not only enhances the appearance of the driveway but also provides protection against elements such as water, UV rays, and chemicals, extending the lifespan of your repair.
Follow these steps to seal and protect your driveway:
- Clean the Surface: Before applying the sealer, make sure the driveway is clean and free from any debris. Use a broom or pressure washer to remove dirt, dust, or stains. Allow the surface to dry completely before moving on to the next step.
- Choose the Right Sealer: Select a concrete sealer based on the specific needs of your driveway. There are various types available, including penetrating sealers and film-forming sealers. Consider factors such as durability, slip resistance, and ease of application when making your choice.
- Apply the Sealer: Follow the manufacturer’s instructions for applying the sealer. Use a roller or sprayer to evenly distribute the sealer over the entire surface of the driveway. Work in small sections to ensure thorough coverage. Avoid over-application, as this can lead to a sticky or uneven surface.
- Allow Proper Drying Time: After applying the sealer, allow it to dry according to the manufacturer’s instructions. Typically, it takes 24 to 48 hours for the sealer to fully cure. During this time, avoid foot or vehicle traffic on the driveway to prevent damage to the sealing layer.
Sealing your repaired driveway provides a protective barrier that helps prevent water penetration, staining, and the accumulation of dirt and grime. Regularly maintaining and resealing your driveway will ensure its longevity and keep it looking its best for years to come.
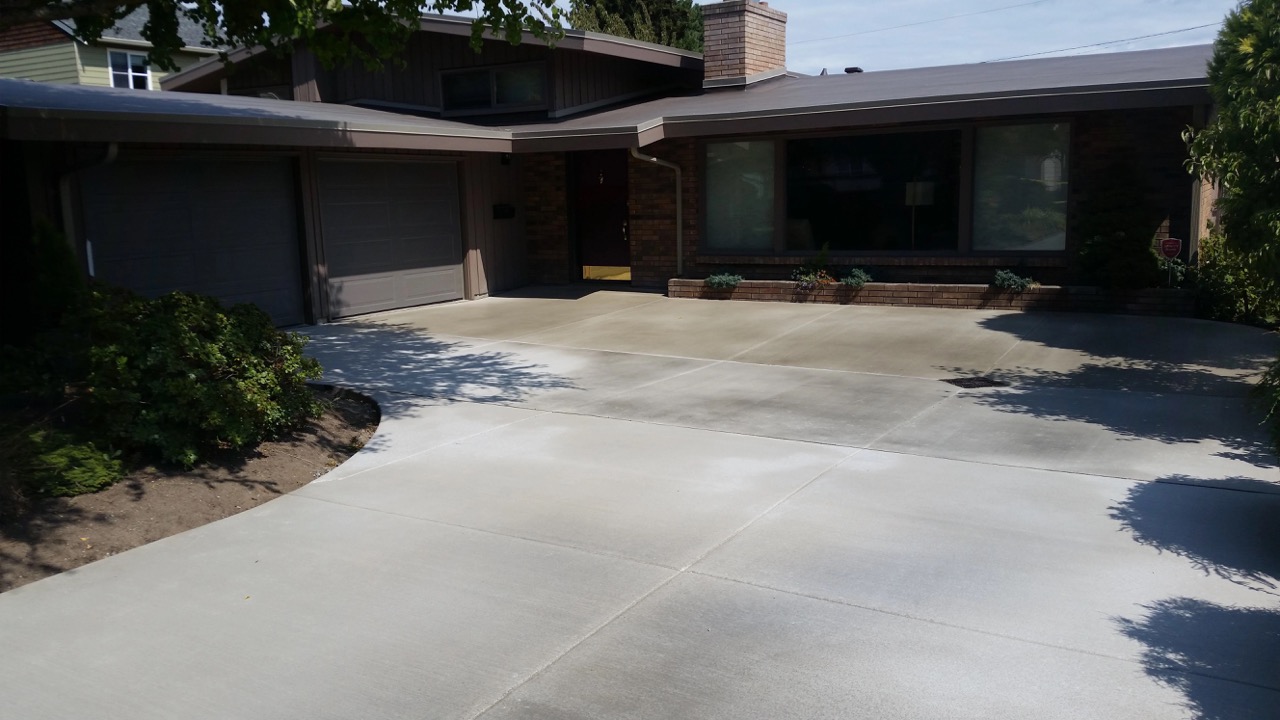
By following these steps, you can successfully repair a previously uneven concrete driveway, restoring its functionality and enhancing its appearance. Remember to consult professional assistance if needed and always prioritize safety throughout the repair process.
With your repaired and protected driveway, you can now enjoy a smooth and even surface that adds value to your property and provides a safe and attractive entrance to your home.
Conclusion
Repairing an uneven concrete driveway may seem like a daunting task, but with the right knowledge and guidance, it can be a manageable DIY project. By addressing the underlying causes of the unevenness and following the step-by-step process outlined in this article, you can restore your driveway to its original condition and ensure its longevity.
During the repair process, it’s crucial to conduct a thorough inspection to identify the reasons behind the unevenness. This will help you choose the most appropriate repair method and prevent future issues from arising. By properly preparing the work area, removing the old concrete, and leveling the ground, you set the foundation for a successful repair.
Pouring new concrete requires careful planning and execution. Taking the time to mix the concrete correctly, pour it in sections, and level the surface will result in a smooth and visually appealing driveway. Finishing the concrete and allowing it to cure properly are essential steps for achieving a durable and long-lasting repair.
Sealing and protecting the driveway is the final step that not only enhances its appearance but also provides added durability and longevity. Regular maintenance and resealing will help preserve the repaired driveway and keep it looking its best for years to come.
Remember, safety is paramount throughout the repair process. Wear appropriate protective gear, follow safety guidelines, and consult professional assistance if needed, especially for complex repairs or if you’re unsure about any aspect of the repair process.
By following the steps outlined in this article and approaching the repair with patience and attention to detail, you can successfully restore your uneven concrete driveway. With a level and functional driveway, you’ll not only improve the curb appeal of your property but also create a safer and more enjoyable space for you and your family.
Take pride in your DIY repair accomplishment and enjoy the benefits of a smooth and even concrete driveway for years to come!
Frequently Asked Questions about How To Repair Uneven Concrete Driveway
Was this page helpful?
At Storables.com, we guarantee accurate and reliable information. Our content, validated by Expert Board Contributors, is crafted following stringent Editorial Policies. We're committed to providing you with well-researched, expert-backed insights for all your informational needs.


0 thoughts on “How To Repair Uneven Concrete Driveway”