Articles
How To Paint A Concrete Driveway
Modified: September 1, 2024
Learn how to transform your concrete driveway with these step-by-step articles on painting techniques. Enhance the curb appeal of your home with these expert tips and tricks.
(Many of the links in this article redirect to a specific reviewed product. Your purchase of these products through affiliate links helps to generate commission for Storables.com, at no extra cost. Learn more)
Introduction
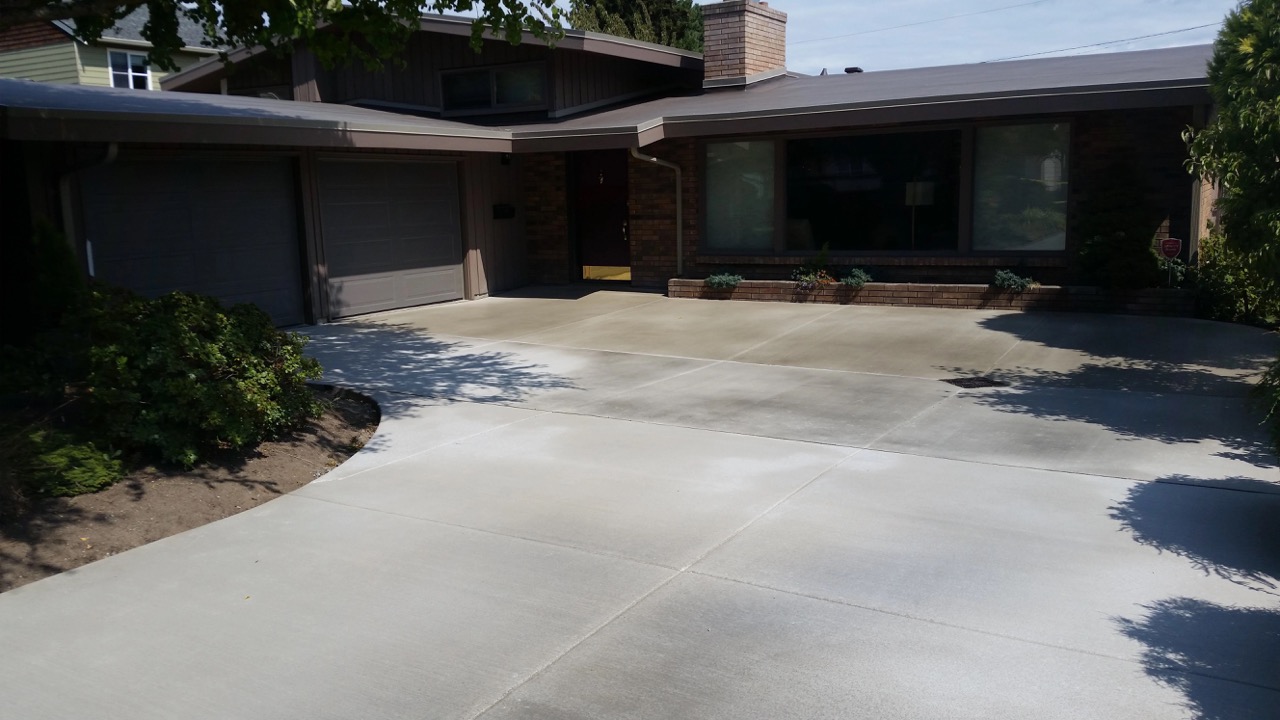
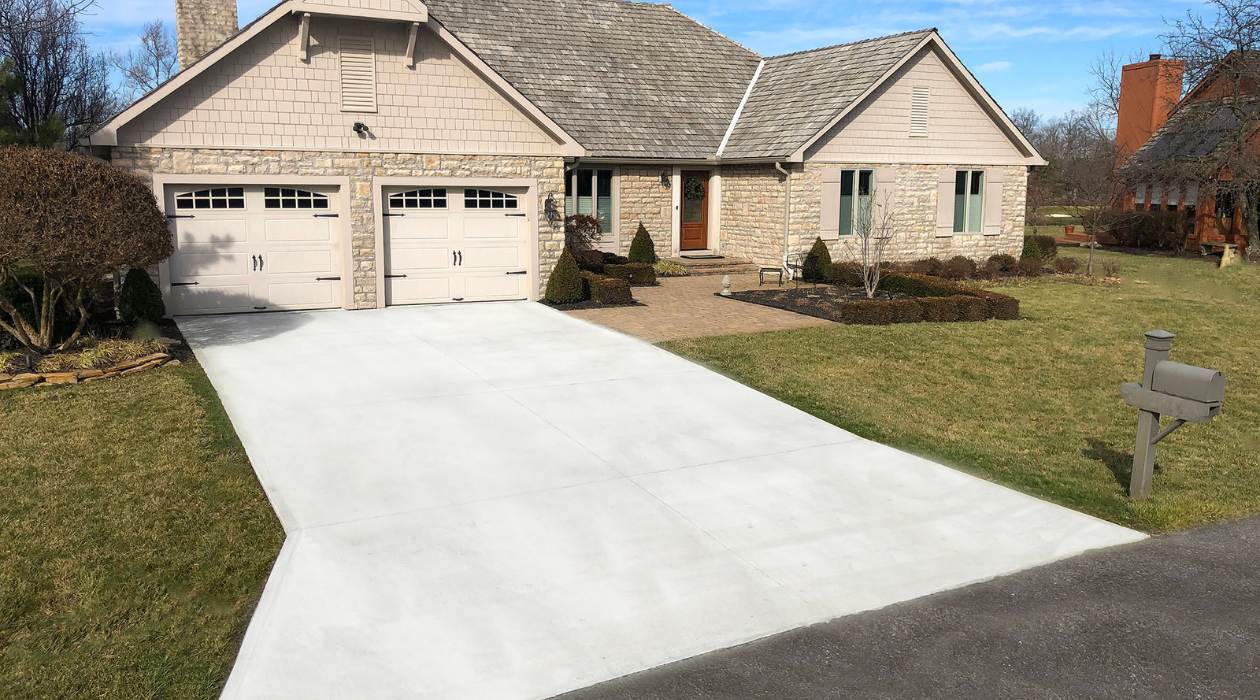
Painting a concrete driveway is an excellent way to give it new life and enhance the overall curb appeal of your home. Whether you’re looking to freshen up the existing paint or completely transform the appearance of your concrete driveway, a fresh coat of paint can make a dramatic difference.
Not only does painting a concrete driveway improve its aesthetics, but it also provides a protective layer that helps prevent damage from weather elements, such as sunlight, rain, and snow. Additionally, it can hide imperfections, stains, and cracks, giving your driveway a clean and polished look.
While the process of painting a concrete driveway may seem daunting, with the right materials, preparation, and techniques, it can be a relatively straightforward and rewarding project to undertake. In this article, we will guide you through the step-by-step process of painting a concrete driveway, from preparation to maintenance.
Before you begin, it’s important to gather all the necessary tools and materials. This includes a pressure washer or hose, a concrete cleaner, a patching compound, sandpaper, a primer specifically designed for concrete, the chosen paint, a paint roller or brush, a paint tray, and a concrete sealer. Additionally, make sure to wear protective clothing, such as gloves, safety glasses, and a mask, to ensure your safety throughout the process.
So, let’s dive into the steps involved in painting a concrete driveway and transform your outdoor space into a stunning and inviting area.
Key Takeaways:
- Proper preparation is essential for painting a concrete driveway. From clearing the surface and repairing cracks to choosing the right primer and paint, attention to detail ensures a durable and professional finish.
- Regular maintenance, including cleaning, addressing spills, and inspecting for damage, is crucial for preserving the appearance and longevity of a painted concrete driveway. Periodic touch-ups and resealing further enhance its beauty and durability.
Read more: How To Raise A Concrete Driveway
Step 1: Preparation
The key to a successful concrete driveway painting project lies in thorough preparation. Before you start painting, you’ll need to prepare the surface to ensure proper adhesion and longevity of the paint. Here’s what you need to do:
- Clear the driveway: Begin by removing any objects, debris, or vehicles from the driveway. This will provide you with a clean and unobstructed space to work on.
- Clean the surface: Next, clean the entire surface of the concrete driveway. Start by using a broom or leaf blower to remove loose dirt, leaves, and debris. Then, thoroughly rinse the driveway with a pressure washer or hose to remove any stubborn dirt, stains, or grime. You can also use a specialized concrete cleaner to get rid of tough stains or oil spots.
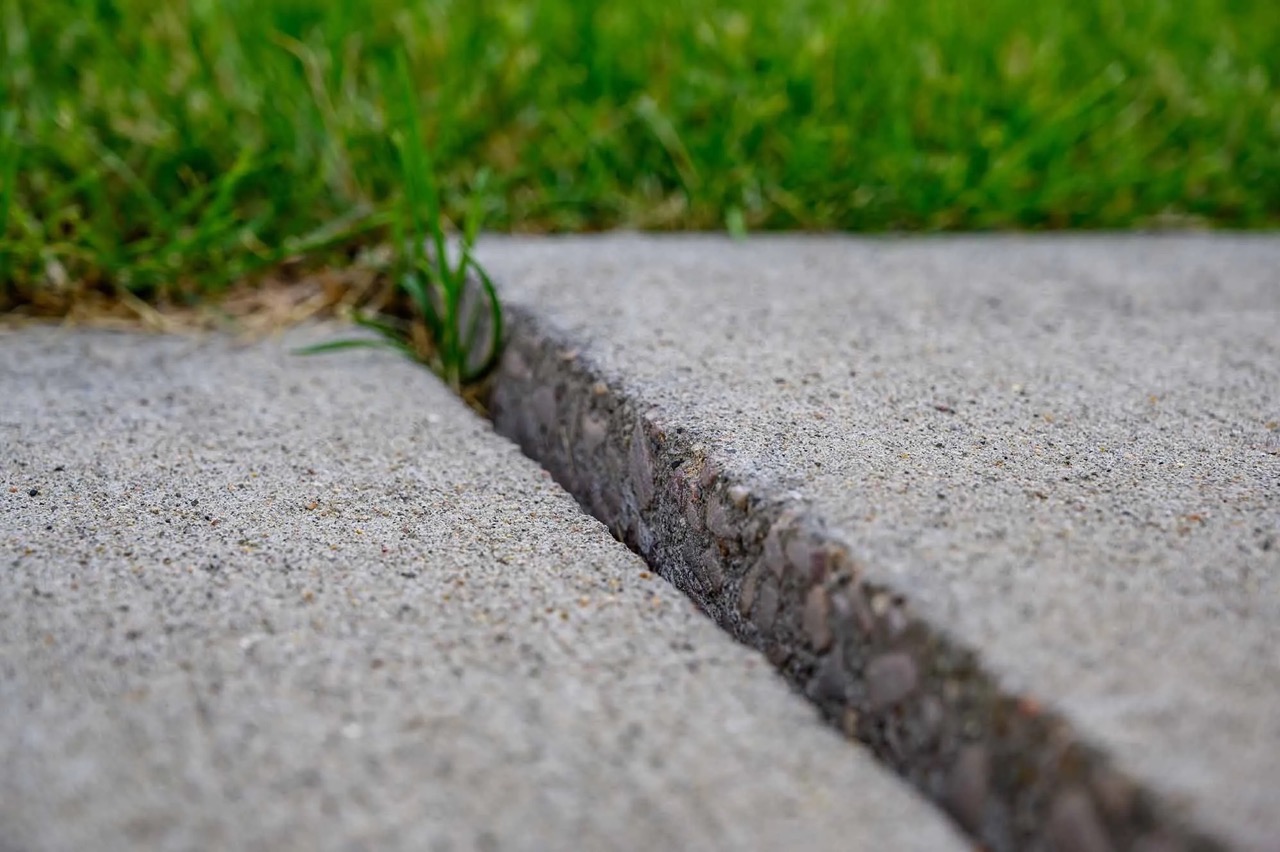
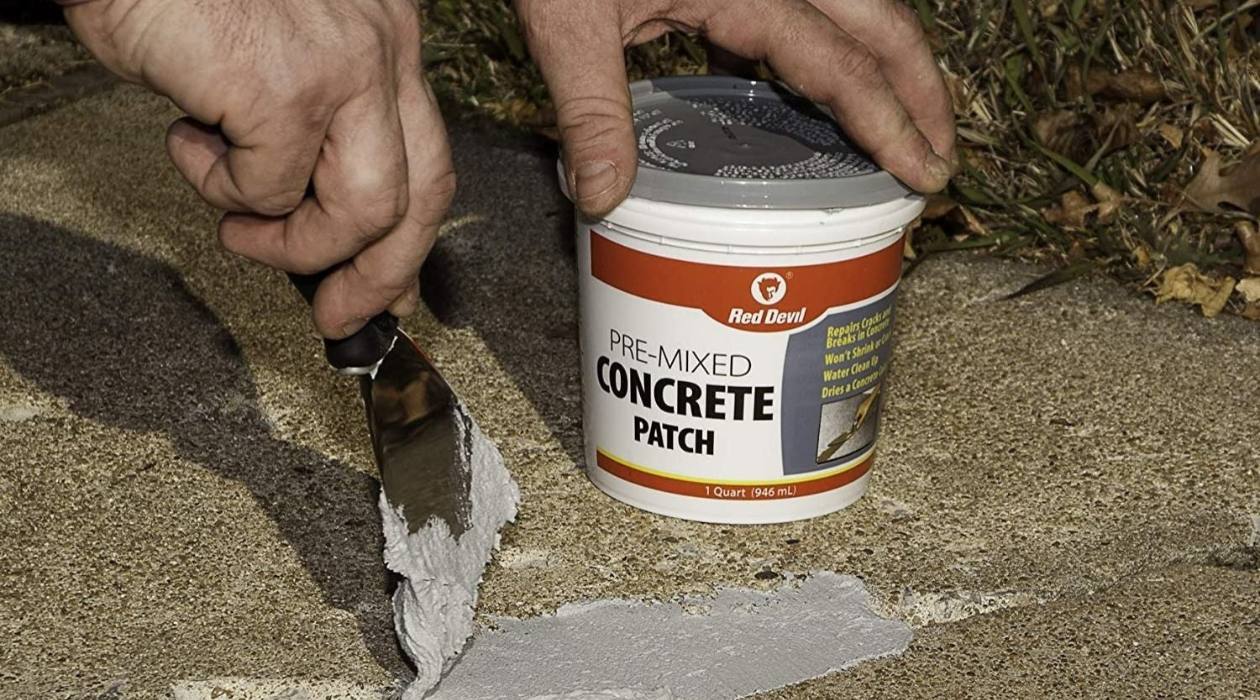
- Repair any cracks: Inspect the driveway for any cracks or damage. If you spot any cracks or holes, it’s important to repair them before proceeding with the painting process. Use a patching compound specifically designed for concrete repairs to fill in any cracks or gaps in the surface. Smooth out the patching compound with a trowel and allow it to dry according to the manufacturer’s instructions.
- Sand the surface: Once the patched areas are dry, use sandpaper to smooth out any rough spots or high points on the surface of the driveway. This will help create an even and smooth base for the paint to adhere to.
- Mask off surrounding areas: If there are any adjacent surfaces or areas that you don’t want to paint, such as garage doors, sidewalks, or landscaping, make sure to mask them off with tape and plastic sheets to protect them from paint splatters.
By taking the time to properly prepare the concrete driveway, you’ll ensure a clean and smooth surface that allows for optimal paint adhesion and a professional-looking finish. Once you’ve completed the preparation steps, you’re ready to move on to the next stage of the painting process.
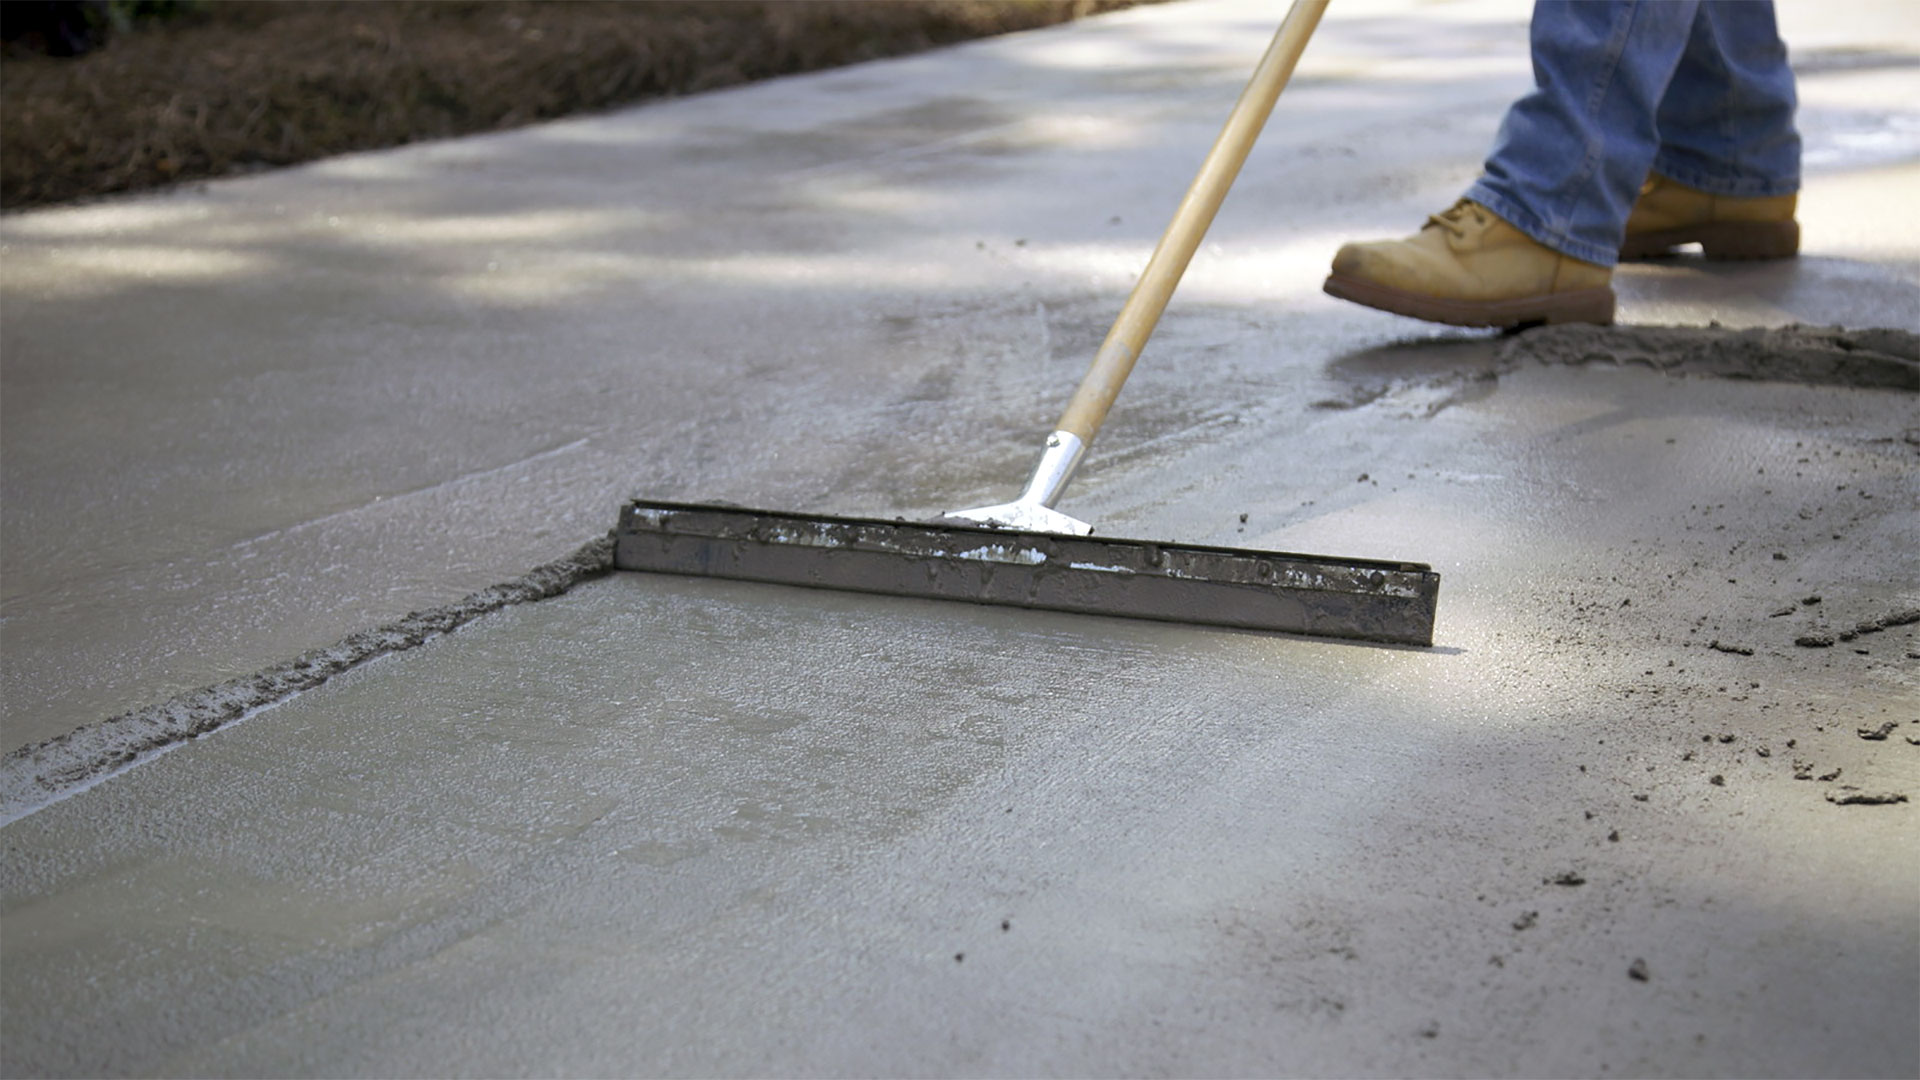
Step 2: Cleaning the Concrete Surface
After completing the preparation steps, the next crucial step in painting a concrete driveway is thoroughly cleaning the surface. Proper cleaning ensures the removal of any remaining dirt, grime, or contaminants that could hinder paint adhesion. Here’s how you can clean the concrete surface effectively:
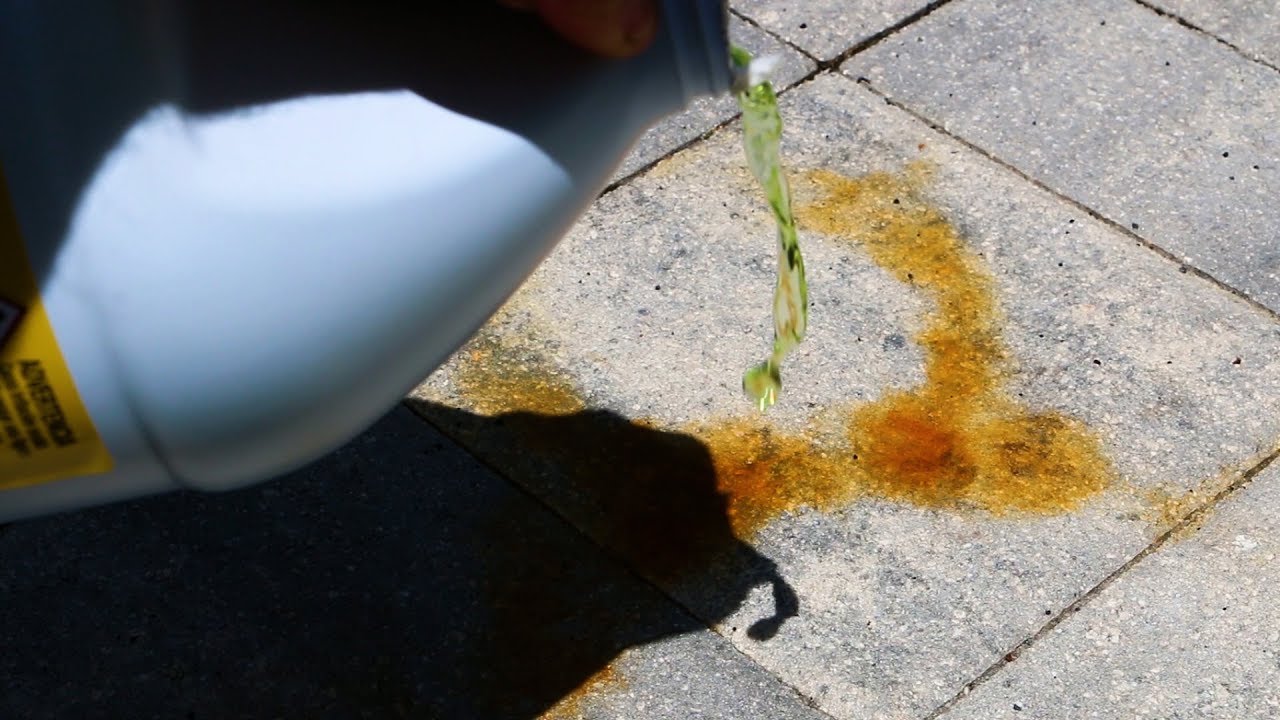
- Use a degreaser: If there are any oil stains or grease spots on the driveway, it’s essential to remove them before painting. Apply a degreaser specifically formulated for concrete surfaces, following the manufacturer’s instructions. Use a scrub brush or broom to agitate the degreaser and loosen the stains. Rinse off the degreaser thoroughly with clean water.
- Utilize a concrete cleaner: In addition to removing oil stains, a concrete cleaner will effectively eliminate other dirt, grime, and mold that may be present on the surface. Dilute the concrete cleaner as instructed on the packaging and apply it generously to the entire driveway. Use a stiff brush or a pressure washer with a low-pressure setting to scrub the surface and dislodge any embedded dirt. Rinse the driveway thoroughly with a hose or pressure washer to remove the cleaner.
- Consider using a pressure washer: For stubborn stains or heavily soiled areas, a pressure washer can be an excellent tool. Adjust the pressure to a moderate level to avoid damaging the concrete. Start from one end of the driveway and work your way across, ensuring that you cover the entire surface evenly.
Once you’ve completed the cleaning process, allow the driveway to dry completely before moving on to the next step. This typically takes around 24 to 48 hours, depending on the weather conditions. It’s crucial to ensure that the surface is thoroughly dry to achieve optimal paint adhesion and prevent any moisture-related issues in the future.
Cleaning the concrete surface is a vital step in achieving a successful and long-lasting paint finish. By removing stains, dirt, and contaminants, you’ll create an ideal canvas for the paint and ensure a professional-looking result.
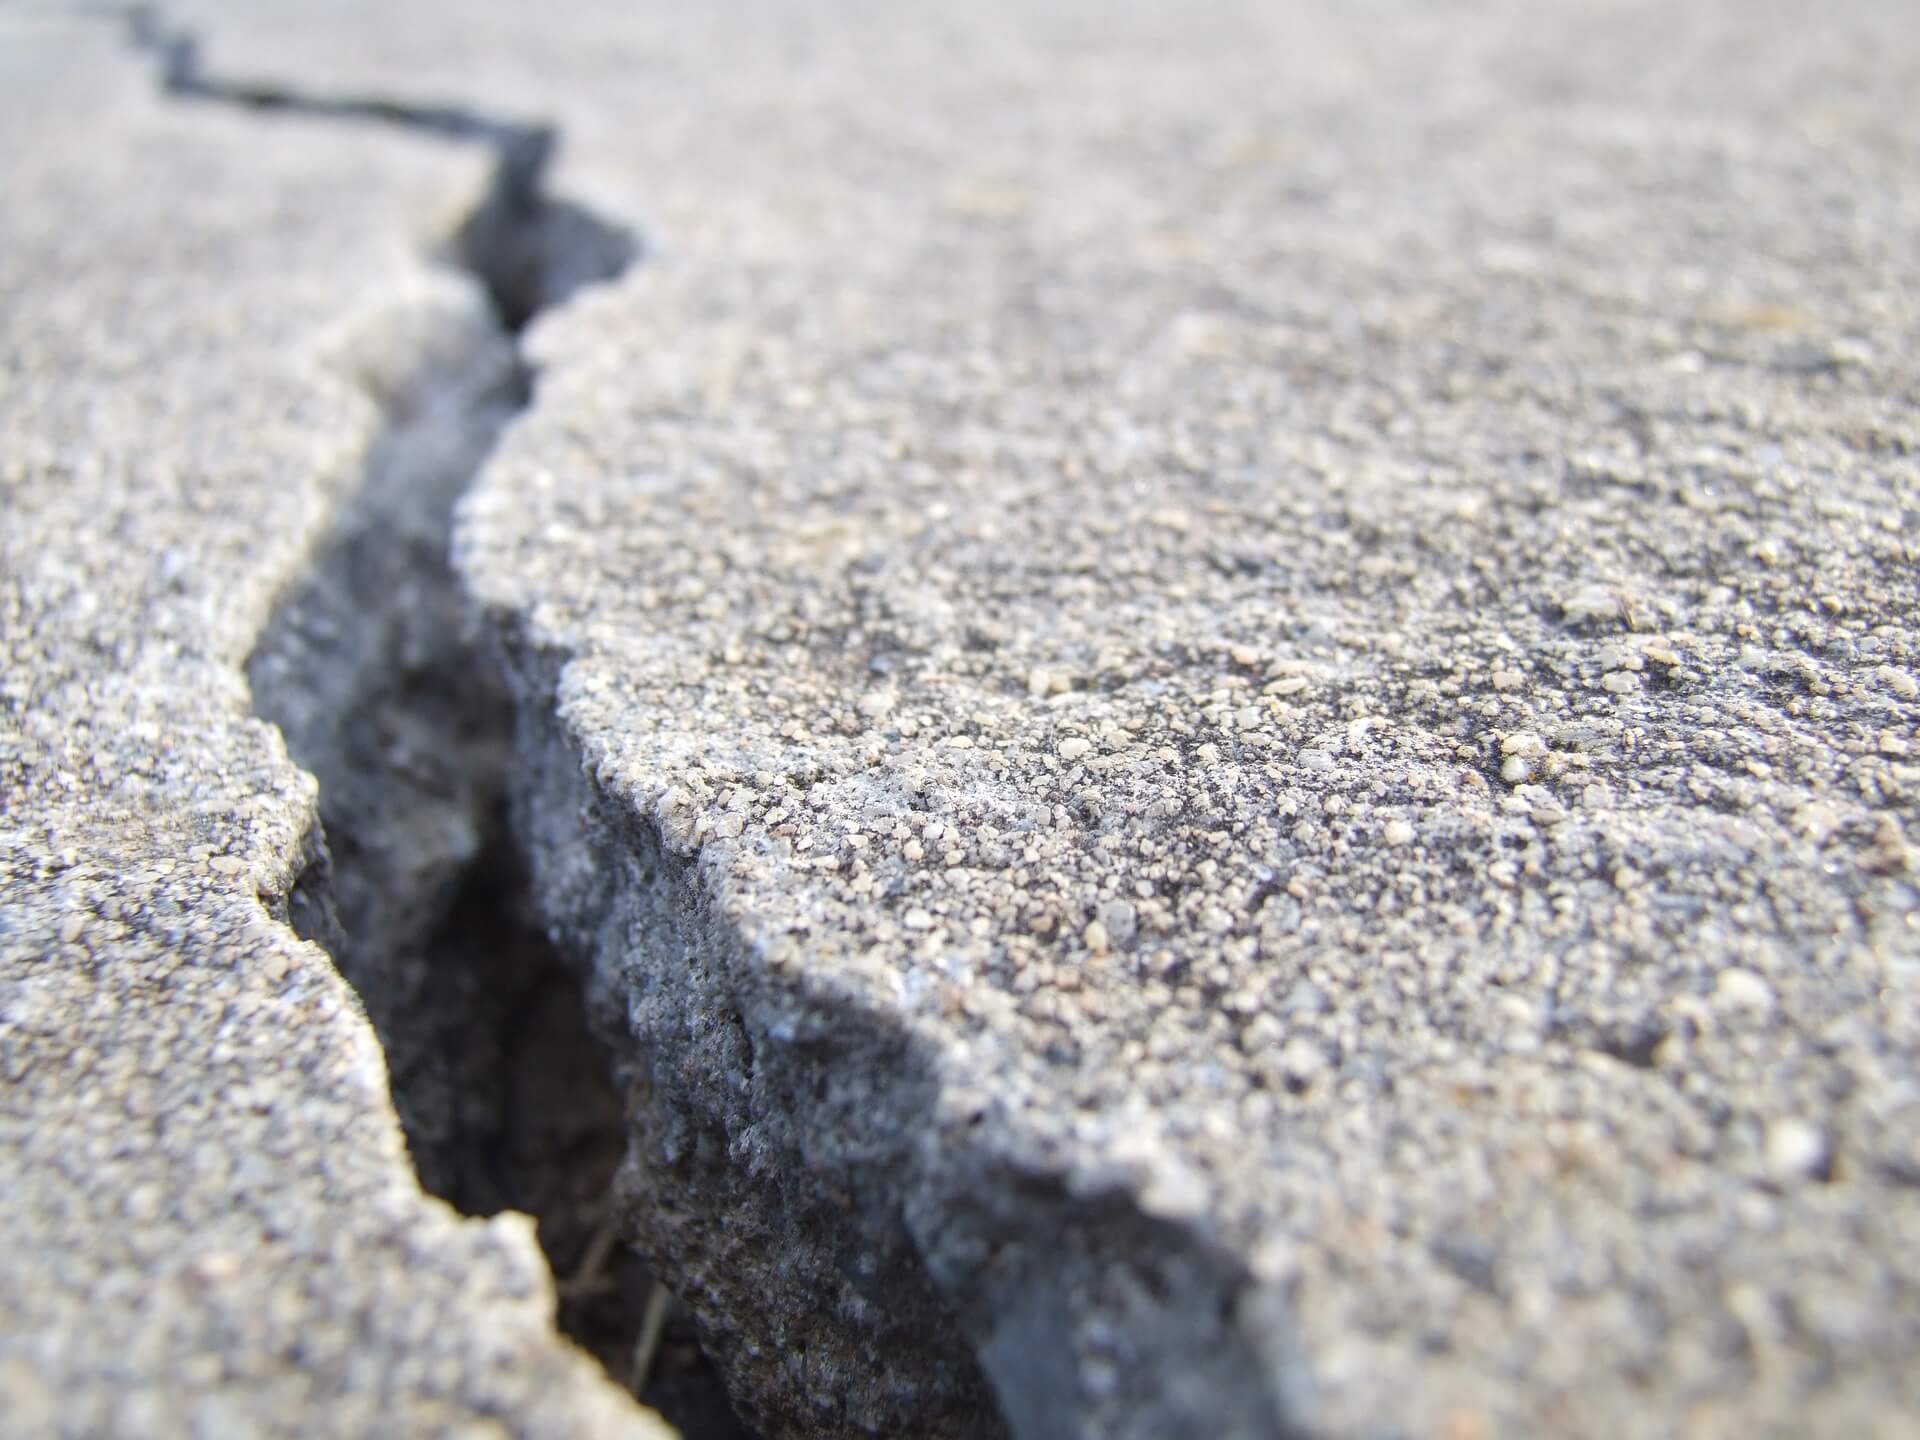
Step 3: Patching and Repairing any Cracks
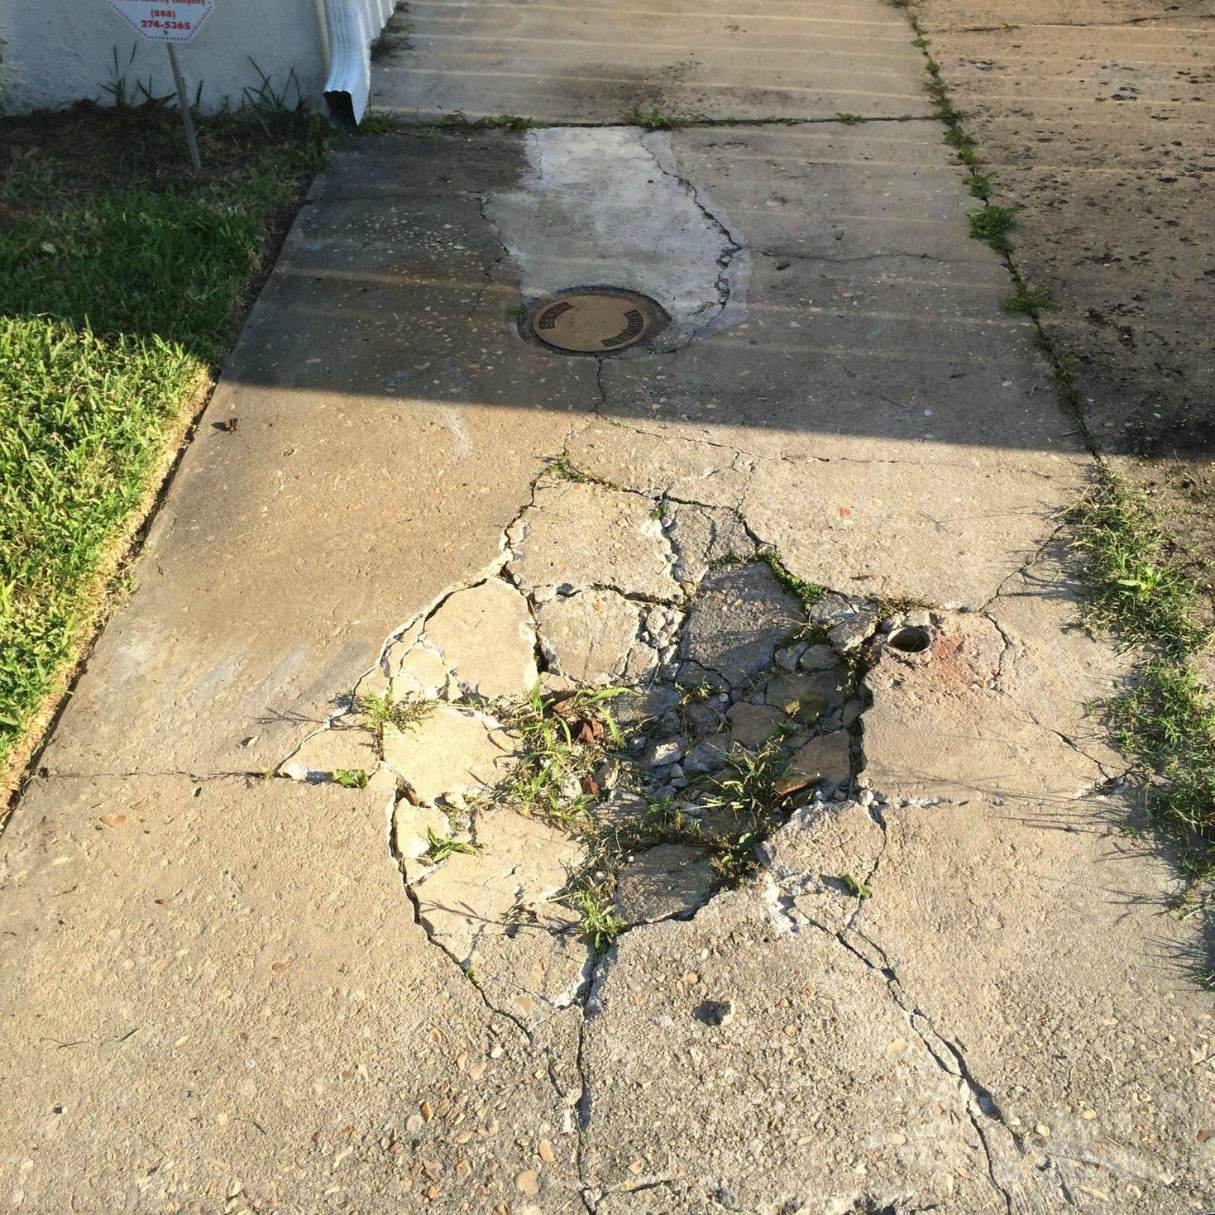
Before you can proceed with painting your concrete driveway, it’s essential to address any cracks or damaged areas. Repairing these imperfections will not only improve the overall appearance of the surface but also prevent further damage from occurring. Here’s how you can patch and repair cracks in your driveway:
- Inspect the driveway: Begin by thoroughly examining the concrete surface for any cracks, holes, or areas of damage. Pay close attention to both small and large cracks, as well as any areas where the concrete may be crumbling or deteriorating.
- Clean the cracks: To ensure proper adhesion of the repair material, clean the cracks using a wire brush or a high-pressure stream of water to remove any loose debris, dirt, or old paint. It’s important to create a clean and smooth surface for the patching compound to adhere to.
- Apply the patching compound: Choose a high-quality concrete patching compound that is specifically designed for repairing cracks and holes in concrete. Follow the manufacturer’s instructions for mixing the compound thoroughly. Use a trowel to fill the cracks with the patching compound, ensuring that it is firmly packed into the cracks and leveled with the surrounding surface.
- Smooth and feather the edges: Once the patching compound is in place, use the edge of the trowel to smooth and feather the edges of the repair. This will help blend the patching compound seamlessly with the surrounding concrete, creating a more aesthetically pleasing finish.
- Allow the compound to dry: Give the patching compound ample time to dry and cure, following the manufacturer’s instructions. This typically takes 24 to 48 hours. Avoid walking or driving on the repaired areas during this time to prevent any damage to the repair.
- Sand the repaired areas: Once the patching compound is fully cured, use sandpaper to smooth out any rough or uneven spots. This step will help create a more uniform surface for the paint to adhere to.
By patching and repairing any cracks or damaged areas in your concrete driveway, you’ll ensure a smooth and even surface for the paint application. Taking the time to address these issues will not only enhance the overall appearance of your driveway but also prolong its lifespan by preventing further damage.
Step 4: Applying a Concrete Primer
Once you have cleaned and repaired the cracks in your concrete driveway, the next step is to apply a concrete primer. A primer acts as a bonding agent between the concrete surface and the paint, improving adhesion and ensuring a longer-lasting finish. Follow these steps to apply the concrete primer:
- Choose the right primer: Select a concrete primer that is specifically formulated for exterior use and is compatible with the type of paint you plan to apply. Make sure to read the product label and follow the manufacturer’s instructions.
- Preparation: Before applying the primer, ensure that the driveway is clean and dry. Remove any dust or debris with a broom or a leaf blower. If necessary, spot clean any remaining stains or dirt with a mild detergent and rinse thoroughly.
- Mix the primer: If the primer requires mixing, follow the manufacturer’s instructions for combining the components. Use a stir stick or a paint mixer attachment on a drill to ensure the primer is thoroughly mixed.
- Apply the primer: Pour the primer into a paint tray and use a roller or a brush to apply a thin and even coat of primer to the entire surface of the driveway. Work in small sections, starting from one end and moving towards the other. Make sure to cover the entire surface, including the repaired areas.
- Allow the primer to dry: Check the product label for the recommended drying time. Typically, it takes around 4 to 8 hours for the primer to dry. Avoid walking or driving on the primed surface until it is fully dry.
- Inspect and sand: After the primer has dried, inspect the surface for any uneven or rough areas. Lightly sand any imperfections with fine-grit sandpaper to create a smooth surface for the paint.
Applying a concrete primer is an essential step in ensuring proper paint adhesion and durability. The primer creates a strong bond between the concrete and the paint, resulting in a longer-lasting and more vibrant finish for your driveway.
Read more: How To Resurface A Concrete Driveway
Step 5: Choosing the Right Concrete Paint
Choosing the right concrete paint is crucial for achieving a beautiful and long-lasting finish on your driveway. There are several factors to consider when selecting a concrete paint that suits your needs. Follow these guidelines to choose the right paint for your project:
- Type of paint: Concrete paints come in various types, including acrylic, epoxy, and latex. Acrylic paint is popular for its durability and weather resistance, while epoxy paint offers excellent durability and resistance to chemicals and stains. Latex paint is more budget-friendly and easier to apply, making it a popular choice among DIYers. Consider the specific requirements of your driveway to determine the most suitable type of paint.
- Color and finish: Decide on the color and finish that you want for your driveway. Concrete paints come in a wide range of colors, allowing you to choose one that complements your home’s exterior. Consider the style and aesthetic you want to achieve. Additionally, choose between a matte, satin, or glossy finish, keeping in mind that a glossy finish may require more maintenance to keep it looking pristine.
- Durability and weather resistance: Since your driveway is exposed to the elements, it’s essential to choose a paint with excellent durability and weather resistance. Look for paints that are specifically formulated for exterior use and are resistant to UV rays, fading, cracking, and peeling. This will ensure that your driveway paint holds up well over time.
- Application method: Consider the application method that suits your skills and preferences. Concrete paints can be applied using a roller or a brush. Rollers are generally more efficient for larger areas, while brushes offer more control for detailed or smaller sections of the driveway.
- Read product reviews and recommendations: Before making a final decision, read product reviews and recommendations from reputable sources or customers who have used the paint. This can give you insights into the paint’s performance, coverage, and overall satisfaction.
By considering these factors, you can select a concrete paint that not only enhances the appearance of your driveway but also withstands the demands of daily use and the elements. Take the time to choose the right paint, and you’ll be rewarded with a beautiful and long-lasting finish.
Before painting a concrete driveway, make sure to thoroughly clean and etch the surface to ensure proper adhesion of the paint. Use a pressure washer and concrete etcher for best results.
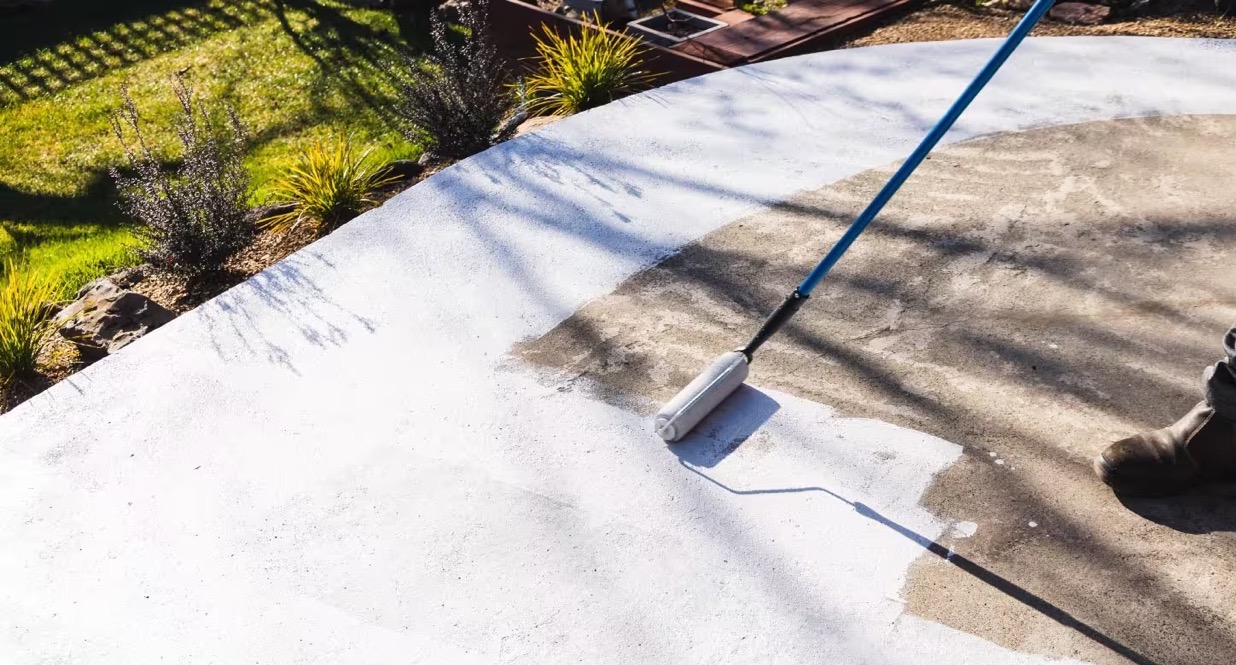
Step 6: Applying the Concrete Paint
Now that you’ve prepared the surface and chosen the right concrete paint, it’s time to apply the paint to your driveway. Follow these steps to ensure a smooth and professional-looking application:
- Mix the paint: If your concrete paint requires mixing, thoroughly stir it according to the manufacturer’s instructions. This will ensure consistent color and a uniform finish.
- Start from the furthest point: Begin painting from the furthest point of your driveway, away from any entrances or exits. This will prevent you from accidentally stepping on the freshly painted surface.
- Use a roller or brush: Determine whether a roller or brush is more suitable for your project and the size of your driveway. Rollers are typically faster for larger surface areas, while brushes provide more control for edges and tight corners.
- Apply a thin and even coat: Dip your roller or brush into the paint and remove any excess to prevent drips. Start applying the paint in smooth, even strokes, working in small sections to maintain consistency. Avoid spreading the paint too thinly, as this may result in an uneven finish.
- Blend wet edges: As you paint, ensure to blend wet edges with the newly applied paint to create seamless transitions between sections. This will prevent any visible overlap marks or lines.
- Work in manageable sections: Paint your driveway in manageable sections, moving methodically to ensure even coverage. Be mindful of the drying time of the paint and work accordingly to avoid painting over partially dried areas.
- Allow for proper drying: Follow the recommended drying time provided by the paint manufacturer. It’s essential to allow the paint to dry thoroughly before applying a second coat or allowing foot traffic or vehicles on the surface.
Take your time during the painting process and ensure consistent coverage and a smooth finish. Remember to follow any specific instructions provided by the paint manufacturer to achieve the best results. Once you’ve completed the application, step back and admire the transformation of your concrete driveway.
Step 7: Adding a Second Coat (optional)
Adding a second coat of paint to your painted concrete driveway can provide additional durability, coverage, and a more vibrant finish. While it’s not always necessary, applying a second coat can help ensure a longer-lasting and more professional-looking result. Follow these steps to add a second coat:
- Assess the coverage: Before applying a second coat, evaluate the coverage of the first coat. If there are any areas that appear thin or show through, a second coat will help provide a more uniform and consistent appearance.
- Allow proper drying time: Check the drying time specified by the paint manufacturer. It’s important to allow the first coat to dry completely before applying a second coat. This typically ranges from 4 to 8 hours, but it may vary depending on the paint product and environmental conditions.
- Inspect the surface: Once the first coat is dry, inspect the surface for any imperfections or areas that need touch-ups. Use a fine-grit sandpaper to smooth out any rough spots or drips that may have occurred during the first coat application.
- Apply the second coat: Dip your roller or brush into the paint and apply a second thin and even coat, following the same techniques used during the first coat. Work in small sections and overlap the edges of the first coat slightly to ensure seamless blending.
- Allow for proper drying: After applying the second coat, allow the paint to fully dry according to the manufacturer’s instructions. Avoid any foot traffic or vehicle use on the driveway until the paint is completely dry.
Adding a second coat can enhance the durability and appearance of your painted concrete driveway. It ensures better coverage and helps to address any areas that may have been missed during the first coat application. By taking the time to apply a second coat, you’ll achieve a more professional and long-lasting finish.
Step 8: Allowing Time for Drying and Curing
After applying the final coat of paint to your concrete driveway, it’s crucial to allow sufficient time for drying and curing. Proper drying and curing are essential for achieving a durable and long-lasting finish. Follow these guidelines to ensure the paint has adequate time to dry and cure:
- Read the manufacturer’s instructions: Refer to the paint manufacturer’s instructions for the recommended drying and curing times. These times can vary depending on the type of paint used, environmental conditions, and humidity levels.
- Avoid foot traffic and vehicle use: To prevent any damage to the freshly painted surface, avoid stepping or driving on the driveway until the paint is fully dry. Even if the paint feels dry to the touch, it may still be curing beneath the surface.
- Provide proper ventilation: Ensure the area around the painted driveway has adequate ventilation. Good airflow aids in the drying process and helps the paint cure effectively. Open windows or doors, or use fans to promote air circulation.
- Protect from the elements: During the drying and curing period, it’s crucial to protect the painted driveway from rain, direct sunlight, and extreme temperatures. Consider using temporary covers or tarps to shield the surface from weather conditions that may negatively impact the drying process.
- Allow ample time for curing: While the paint may feel dry within a few hours, curing is a more extended process. Curing allows the paint to fully harden and reach its maximum durability. Typically, the curing time can range from a few days to a couple of weeks, depending on the specific paint product.
By allowing the necessary time for drying and curing, you’ll ensure that your painted concrete driveway maintains its appearance and withstands everyday use. Rushing this step can lead to premature wear and a less durable finish. Patience is key when it comes to drying and curing to achieve the best possible outcome.
Read more: How To Lay A Concrete Driveway
Step 9: Sealing the Painted Concrete Driveway
Sealing your painted concrete driveway is an essential step to protect the paint and enhance its longevity. A sealer acts as a barrier, shielding the paint from UV rays, moisture, stains, and daily wear and tear. Follow these steps to properly seal your painted concrete driveway:
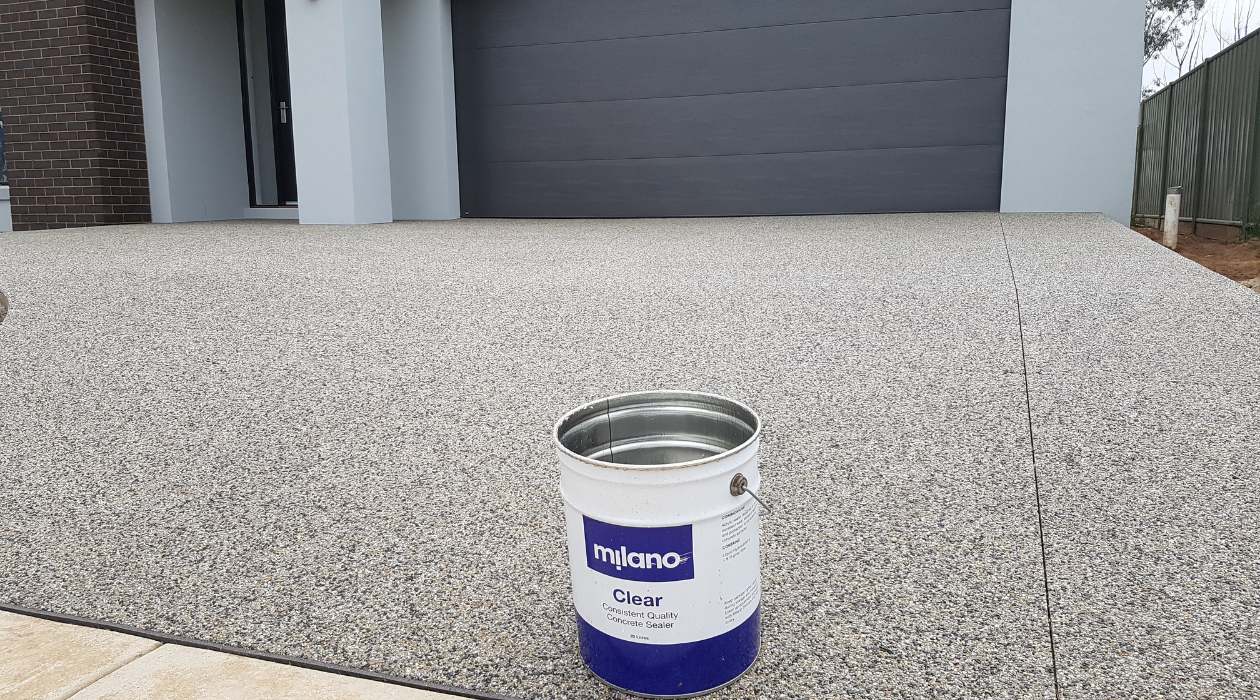
- Choose the right sealer: Select a sealer that is specifically designed for exterior use and compatible with the type of paint you have applied. There are different types of sealers available, such as acrylic sealers or penetrating sealers. Consider the level of protection and the desired finish when choosing the sealer.
- Prepare the driveway: Ensure that the painted surface of the driveway is clean and dry before applying the sealer. Remove any dust or debris with a broom or leaf blower. If needed, spot clean any stains with a mild detergent and rinse thoroughly. Allow the driveway ample time to dry completely.
- Apply the sealer: Follow the manufacturer’s instructions for applying the sealer. Generally, you can either use a paint roller or a brush to evenly apply the sealer onto the driveway surface. Work in small sections, starting from one end and working your way across to ensure thorough coverage.
- Allow the sealer to dry and cure: The drying time for the sealer can vary depending on the product and environmental conditions. Typically, it takes around 24 to 48 hours for the sealer to dry. Be cautious and avoid walking or driving on the driveway until the sealer is fully dry. Keep in mind that the full curing process may take several days to a few weeks.
- Apply a second coat (if necessary): Depending on the sealer and the desired level of protection, you may need to apply a second coat. Refer to the manufacturer’s instructions to determine if a second coat is recommended. Apply the second coat following the same method as the first coat.
Sealing your painted concrete driveway provides an additional layer of protection and helps prolong the lifespan of the paint. It safeguards the surface from damage caused by UV rays, moisture, and everyday use. By properly sealing your driveway, you’ll ensure that your painted surface stays vibrant and in good condition for years to come.
Step 10: Maintaining and Updating the Painted Surface
Once you have successfully painted and sealed your concrete driveway, it’s important to perform regular maintenance and updates to preserve its appearance and protect the paint. Here are some tips to help you maintain and update the painted surface:
- Clean regularly: Regularly clean the painted driveway with a mild detergent and water to remove dirt, debris, and stains. Avoid using harsh chemicals or abrasive cleaners that can damage the paint. Rinse the surface thoroughly after cleaning to prevent any residue buildup.
- Address spills and stains promptly: Accidental spills, oil stains, or other substances can occur on your driveway. Promptly clean up any spills to prevent the paint from staining or being damaged. For stubborn stains, use a specialized concrete cleaner and a soft brush to gently scrub the affected area.
- Inspect for damage: Regularly inspect the painted surface for any signs of damage, such as chips, cracks, or peeling paint. Address these issues promptly by repairing and repainting the damaged areas to maintain the overall appearance and protection of the driveway.
- Consider touch-ups or repainting: Over time, the paint on your driveway may fade or show signs of wear. Consider doing regular touch-ups or repainting the entire surface to keep it looking fresh and vibrant. Follow the same painting process as previously described, ensuring proper preparation and application.
- Protect from heavy objects: Avoid dragging or placing heavy objects directly on the painted surface, as this can cause scratches or damage the paint. Use furniture glides or mats to protect the driveway when moving heavy items.
- Reapply sealer: Depending on the type of sealer used and the amount of traffic on your driveway, it may be necessary to reapply the sealer every few years. Follow the manufacturer’s instructions and recommendations for the appropriate time frame to reseal your painted driveway.
By following these maintenance tips and periodically updating the painted surface, you can prolong the lifespan of your driveway’s paint and keep it looking fresh and well-maintained. With proper care, your painted concrete driveway will continue to be a beautiful and functional feature of your home’s exterior.
Conclusion
Painting a concrete driveway is a rewarding and transformative project that can enhance the curb appeal of your home. By following the step-by-step process outlined in this guide, you can achieve a beautiful and durable finish that will make your driveway stand out.
Preparation is key to a successful painting project. Take the time to clean the concrete surface, repair any cracks or damages, and apply a suitable primer to ensure proper adhesion and longevity of the paint. Choose a high-quality concrete paint that suits your style and provides the desired durability and weather resistance.
When applying the paint, work in manageable sections and strive for a thin and even coat. Consider adding a second coat for better coverage and a more professional finish. Allow sufficient drying and curing time before sealing the painted surface to protect it from UV rays, moisture, and daily wear.
Maintaining your painted concrete driveway is essential to keep it looking its best. Regular cleaning, addressing spills promptly, and inspecting for damage are some of the maintenance tasks you should undertake. Consider touch-ups or repainting if the paint fades or shows signs of wear.
By following these steps and maintaining your painted concrete driveway, you’ll be able to enjoy its enhanced beauty and durability for years to come. Remember, a well-maintained and visually appealing driveway not only adds value to your property but also creates a welcoming entrance that leaves a lasting impression.
So, grab your supplies, put on your painting gear, and get ready to transform your concrete driveway into a stunning focal point that complements the overall aesthetics of your home.
Frequently Asked Questions about How To Paint A Concrete Driveway
Was this page helpful?
At Storables.com, we guarantee accurate and reliable information. Our content, validated by Expert Board Contributors, is crafted following stringent Editorial Policies. We're committed to providing you with well-researched, expert-backed insights for all your informational needs.


0 thoughts on “How To Paint A Concrete Driveway”