Articles
How To Repair Cracks In Concrete Driveway
Modified: December 7, 2023
Learn how to repair cracks in your concrete driveway with these helpful articles. Find step-by-step instructions and expert tips to restore your driveway's durability.
(Many of the links in this article redirect to a specific reviewed product. Your purchase of these products through affiliate links helps to generate commission for Storables.com, at no extra cost. Learn more)
Introduction
Welcome to our comprehensive guide on how to repair cracks in your concrete driveway. Over time, concrete driveways can develop cracks due to various factors such as weather changes, heavy vehicle traffic, or underlying soil movement. These cracks not only detract from the overall appearance of your driveway but can also lead to further damage if left unaddressed.
Repairing cracks in your concrete driveway not only improves its aesthetic appeal but also ensures its longevity and usability. By following the steps outlined in this guide, you will be able to effectively repair cracks of different sizes and restore the integrity of your driveway.
Before we dive into the specific repair techniques, it’s important to understand the different types of cracks that can occur in concrete driveways. This knowledge will help you determine the appropriate course of action for repairing the specific cracks you encounter.
So let’s begin by exploring the common types of concrete cracks and how they can affect the condition of your driveway.
Key Takeaways:
- Understanding the different types of concrete cracks and evaluating their severity is crucial for effective repair. From shrinkage cracks to structural cracks, each requires a specific approach to ensure a successful restoration of your driveway.
- Proper preparation, including cleaning, widening the crack if necessary, and applying a bonding agent, is essential for durable and long-lasting repairs. By following the outlined steps and techniques, you can confidently maintain the integrity and appearance of your concrete driveway.
Read more: How To Fix A Crack In Concrete Floor
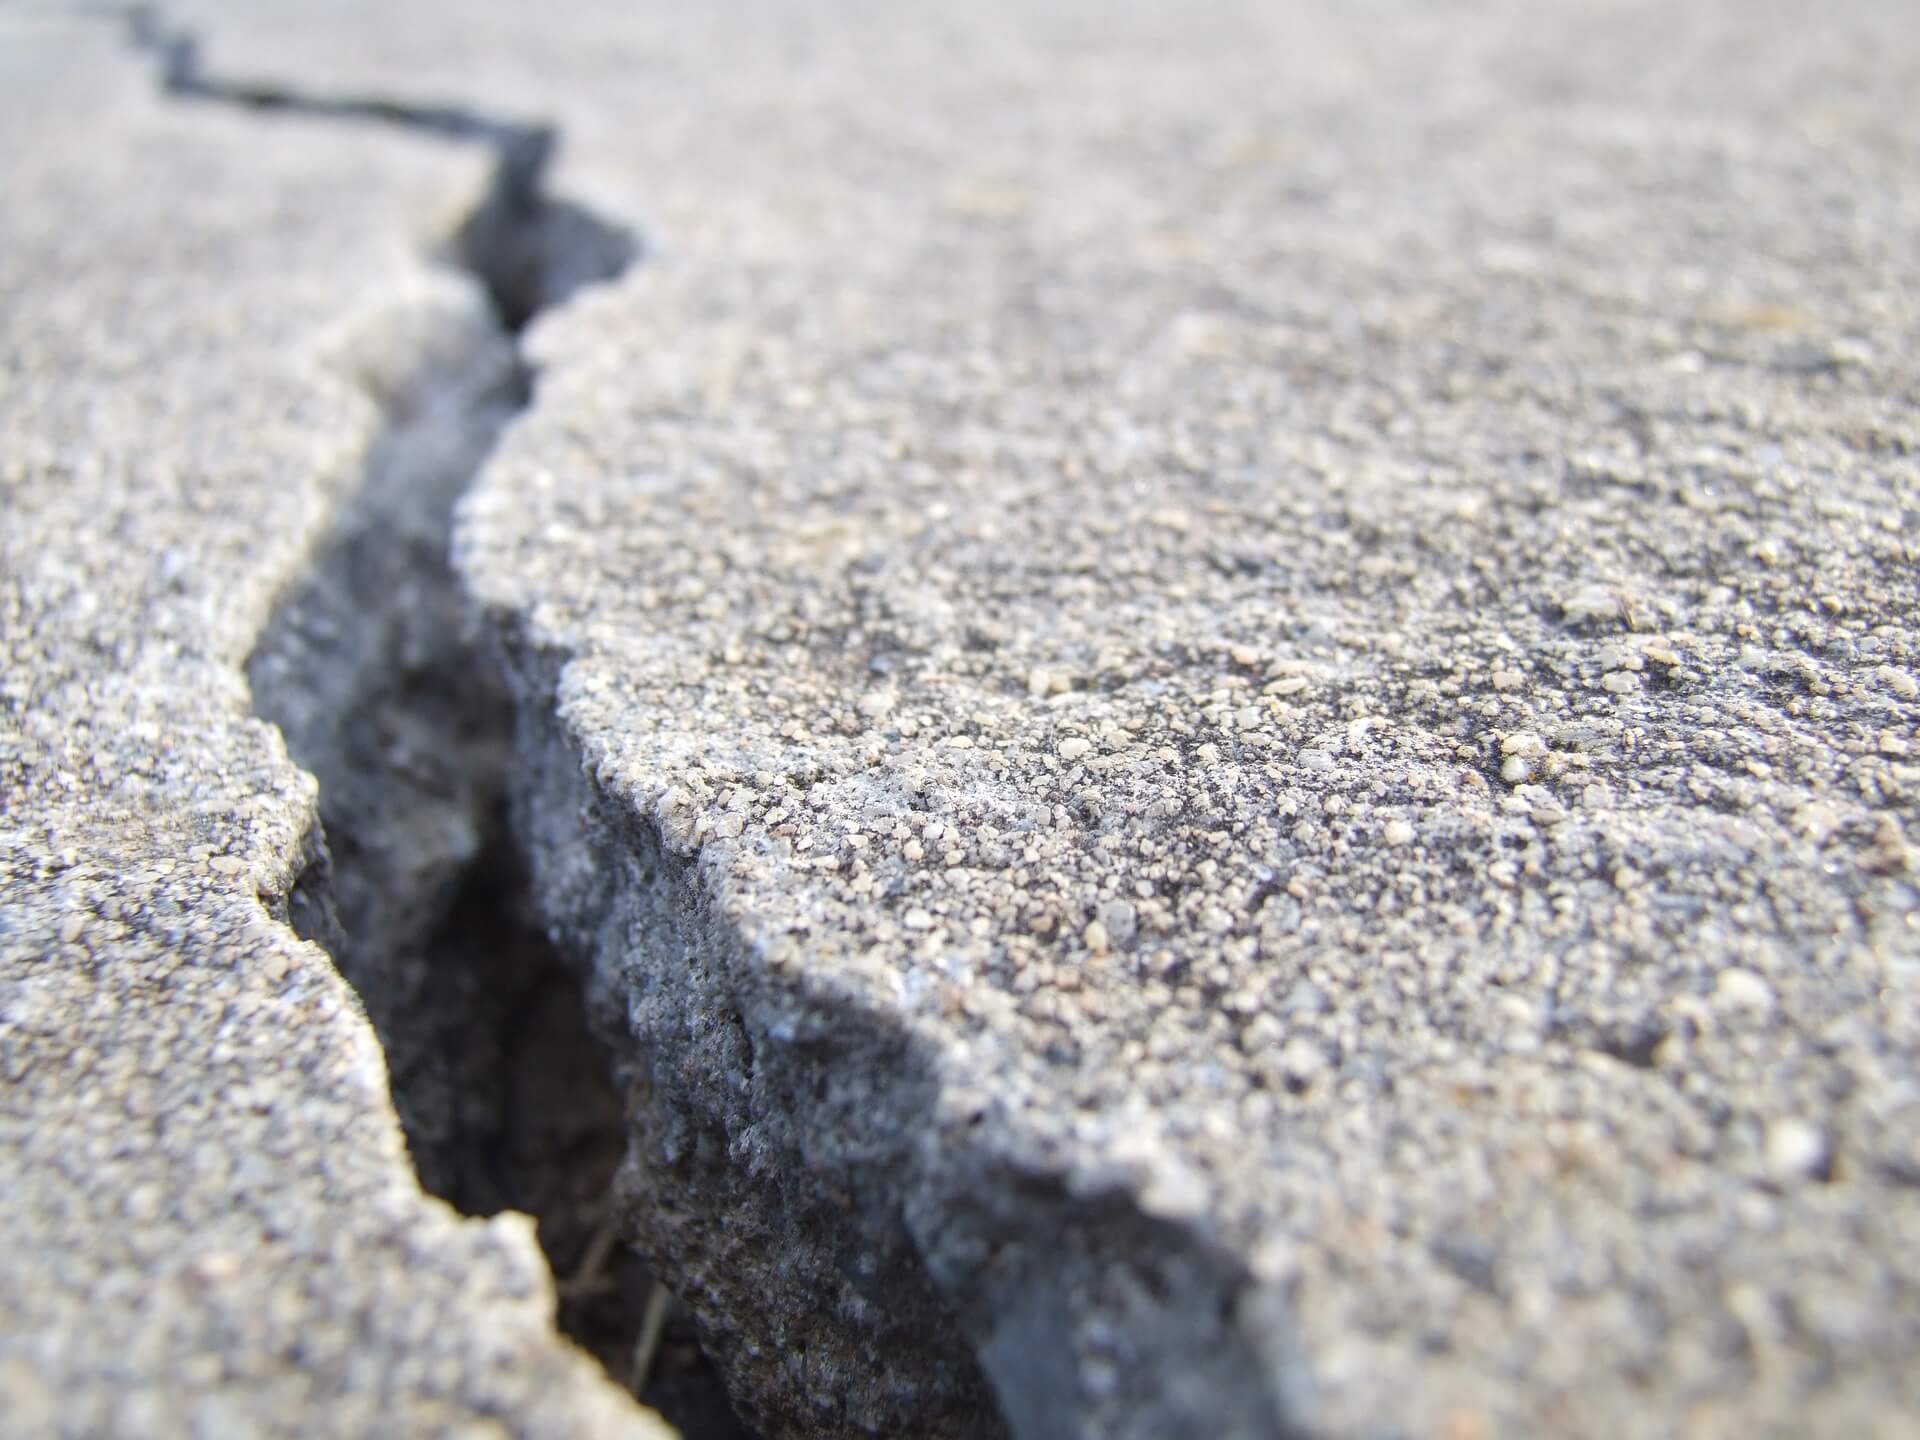
Understanding Concrete Cracks
Concrete cracks can occur for a variety of reasons, and understanding the cause behind them is crucial in determining the best repair approach. Here are some common types of concrete cracks:
- Shrinkage Cracks: These cracks are the most common and occur as the concrete cures and shrinks. They typically run in a straight line and may appear shortly after the concrete has been poured and finished. Shrinkage cracks are usually small and can be easily repaired.
- Settlement Cracks: When the ground beneath the concrete driveway shifts, it can cause cracks known as settlement cracks. These cracks are usually wider at one end and can indicate an underlying issue with the soil or the driveway’s foundation. Repairing settlement cracks may involve addressing the cause of the shifting and reinforcing the affected area.
- Expansion Cracks: As concrete expands and contracts with temperature changes, expansion cracks can form. These cracks are typically wider and filled with flexible materials to allow for movement without further damage. Expansion joints are often installed to prevent these cracks from occurring.
- Structural Cracks: Structural cracks are more severe and can indicate significant damage to the integrity of the driveway. They may be caused by heavy vehicle load, improper construction, or long-term neglect. Repairing structural cracks may require more extensive measures, such as reinforcing the affected area or even replacing a portion of the driveway.
By identifying the type of crack in your concrete driveway, you can better assess the severity of the issue and choose the appropriate repair method. Small and superficial cracks can often be repaired with simple techniques, while larger and more serious cracks may require professional intervention.
Now that we have a better understanding of the different types of concrete cracks, let’s move on to the essential tools and materials you’ll need for the repair process.
Tools and Materials Needed
Before you begin repairing the cracks in your concrete driveway, it’s important to gather the necessary tools and materials. Here is a list of items you will need:
- Safety Gear: Start by ensuring you have the appropriate safety gear, including safety goggles, work gloves, and a dust mask. These items will protect you from any potential hazards during the repair process.
- Crack Filler: Depending on the size and depth of the cracks, you will need a suitable crack filler. There are various types available, including epoxy fillers, concrete patching compounds, or specialized crack repair products. Choose a filler that is appropriate for your specific needs.
- Trowel or Putty Knife: A trowel or putty knife will be essential for applying the crack filler and smoothing it out to create an even surface. Make sure you have a tool with a comfortable grip that allows for precise application.
- Wire Brush: Before applying the crack filler, it’s essential to clean out any debris or loose material from the cracks. A wire brush or stiff bristle brush will help you remove dirt, dust, and loose concrete particles, ensuring proper adhesion of the filler.
- Chisel or Concrete Saw: If you are dealing with larger cracks, a chisel or concrete saw may be necessary to widen and clean the cracks. This will create a better surface for the crack filler to adhere to and ensure a more permanent repair.
- Water and Bucket: Having a water source nearby is crucial for cleaning tools and keeping the surface moist during the repair process. Fill a bucket with water for easy access.
- Sealer: Once the cracks are repaired, it’s important to seal the driveway to protect it from future damage. Choose a high-quality concrete sealer that is compatible with the crack filler you used.
Make sure to have all these tools and materials ready before you begin the repair process. Having everything on hand will help streamline the process and ensure a successful outcome.
Now that you have everything you need, let’s move on to evaluating the cracks in your concrete driveway before starting the repair.
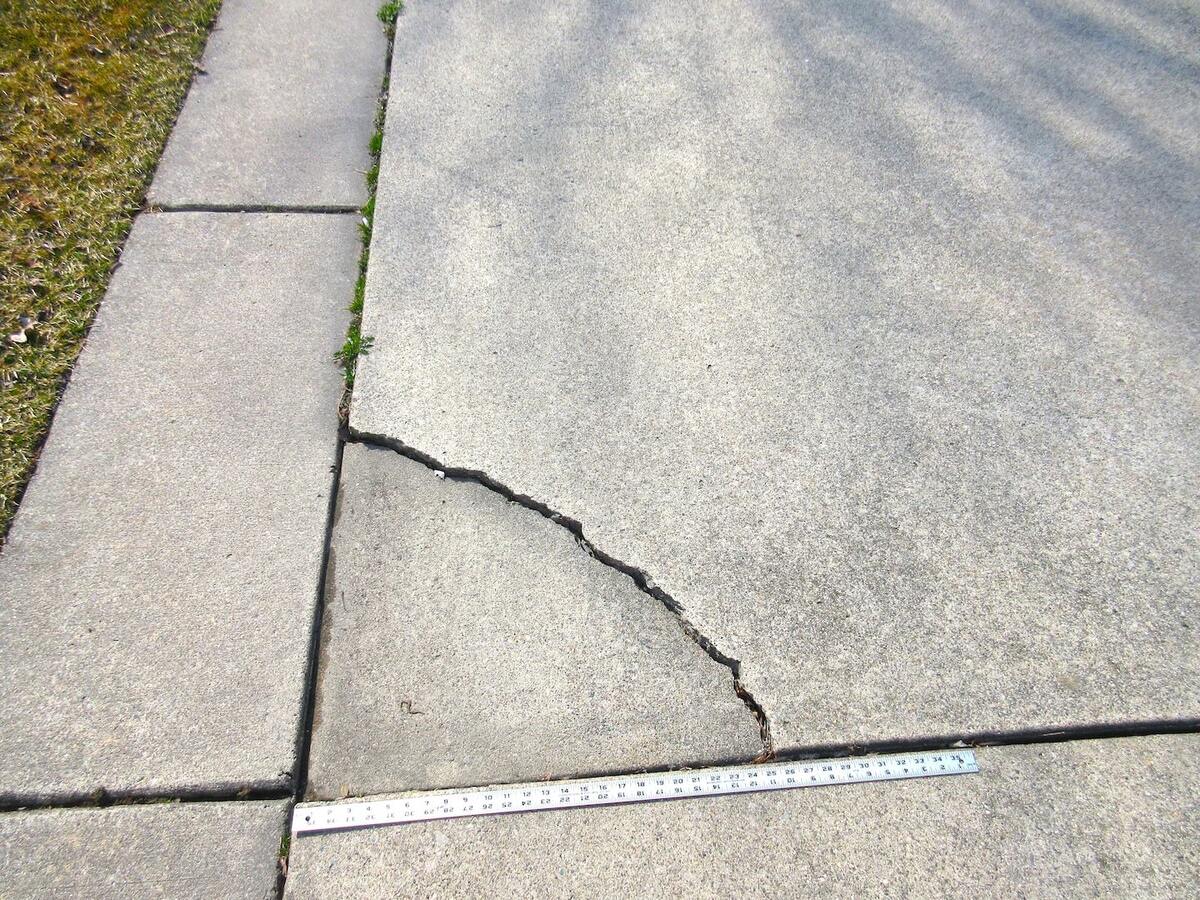
Evaluating the Crack
Before diving into the repair process, it’s important to evaluate the cracks in your concrete driveway. This evaluation will help you determine the appropriate repair method and ensure that the repair will be effective.
Here are some factors to consider when evaluating the cracks:
- Size and Length: Measure the width and depth of the crack using a ruler or tape measure. Small cracks, less than 1/4 inch wide, are generally considered hairline cracks and can be repaired with a basic crack filler. Larger cracks may require more extensive repair techniques.
- Location: Take note of the crack’s location on your driveway. Cracks on the surface or in non-structural areas are typically easier to repair. However, if the crack extends into the foundation or affects the structural integrity of the driveway, professional help may be needed.
- Movement: Observe whether the crack is static or if it shows signs of movement. Dynamic cracks that are still expanding may indicate underlying issues and might require additional measures, such as reinforcing the area or addressing soil instability.
- Severity: Assess the severity of the crack and any potential damage it may have caused to the surrounding concrete. Superficial and hairline cracks are often cosmetic issues and can be easily repaired. However, deeper and wider cracks may require more complex repair techniques to restore the structural integrity of the driveway.
By evaluating these factors, you will be able to determine the appropriate repair method for the specific crack in your driveway. It’s important to note that severe or structural cracks might require professional assistance to ensure a safe and effective repair.
Now that you have evaluated the crack, it’s time to prepare the crack and the surrounding area for the repair process. We’ll cover all the necessary steps in the next section.
Preparation before Repair
Before you begin repairing the cracks in your concrete driveway, proper preparation is essential to ensure a successful and long-lasting repair. Follow these steps to prepare the crack and the surrounding area:
- Clean the Crack: Use a wire brush or stiff bristle brush to remove any loose debris, dirt, or loose concrete particles from the crack. This will help the crack filler adhere better and create a stronger bond.
- Widen the Crack (If Necessary): If you are dealing with larger cracks, you might need to widen them with a chisel or concrete saw. This step allows for better penetration of the crack filler and ensures a more effective repair. Be cautious and wear safety goggles and gloves when widening the cracks.
- Remove Any Moisture: Make sure the crack and the surrounding area are dry before proceeding with the repair. If there is any water or moisture present, use a fan or wait for the area to dry naturally. Applying crack filler to a damp surface can compromise the bond and effectiveness of the repair.
- Protect the Surrounding Area: Cover any adjacent areas, such as the undamaged sections of the driveway or nearby landscaping, with plastic sheeting or painter’s tape. This will prevent any accidental spillage or damage during the repair process.
- Read the Instructions: Before starting the repair, carefully read and follow the instructions provided with the crack filler or concrete repair product. Different products may have specific application instructions or cure times, so it’s important to be familiar with the guidelines.
By thoroughly preparing the crack and the surrounding area, you increase the chances of a successful repair and ensure that the crack filler bonds effectively with the existing concrete. Taking the time to properly prepare the surface will result in a more durable and long-lasting repair.
Now that you have prepared the crack, it’s time to move on to the actual repair process. We’ll cover the steps for repairing small cracks in the next section.
Read more: How To Patch Cracks In A Driveway
Repairing Small Cracks
If you’re dealing with small cracks in your concrete driveway, you can easily repair them using simple techniques. Follow these steps to repair small cracks:
- Clean the Crack: Use a wire brush or stiff bristle brush to remove any debris or loose material from the crack. This will help the crack filler adhere better to the surface.
- Moisten the Crack: Lightly moisten the crack with water using a sponge or spray bottle. This will prevent the concrete from absorbing moisture from the crack filler too quickly and ensure proper adhesion.
- Apply the Crack Filler: Using a trowel or putty knife, apply the crack filler into the crack. Fill the crack completely, slightly overfilling it to compensate for shrinkage as the filler dries. Smooth the surface of the crack filler with the trowel or putty knife, ensuring it is level with the surrounding concrete.
- Allow the Filler to Cure: Follow the manufacturer’s instructions for the specific crack filler you are using. Allow the filler to cure completely before subjecting it to heavy traffic or other stresses. This typically takes a few hours to several days, depending on the product and environmental conditions.
- Sand and Seal: Once the crack filler is fully cured, you can sand any excess filler to create a smooth finish. Use a fine-grit sandpaper or sanding block to gently sand down any rough edges. Then, apply a concrete sealer to protect the repaired crack and the surrounding area.
Keep in mind that small cracks, though repaired, may reappear over time due to natural shifting and settling of the concrete. Regular maintenance and prompt repair of any new cracks that occur will help prolong the life and appearance of your driveway.
Now that you know how to repair small cracks, let’s move on to addressing larger cracks and exploring how to fill them effectively.
Clean out the crack with a wire brush and then fill it with a concrete repair caulk. Smooth the surface with a putty knife and let it dry before sealing the driveway.
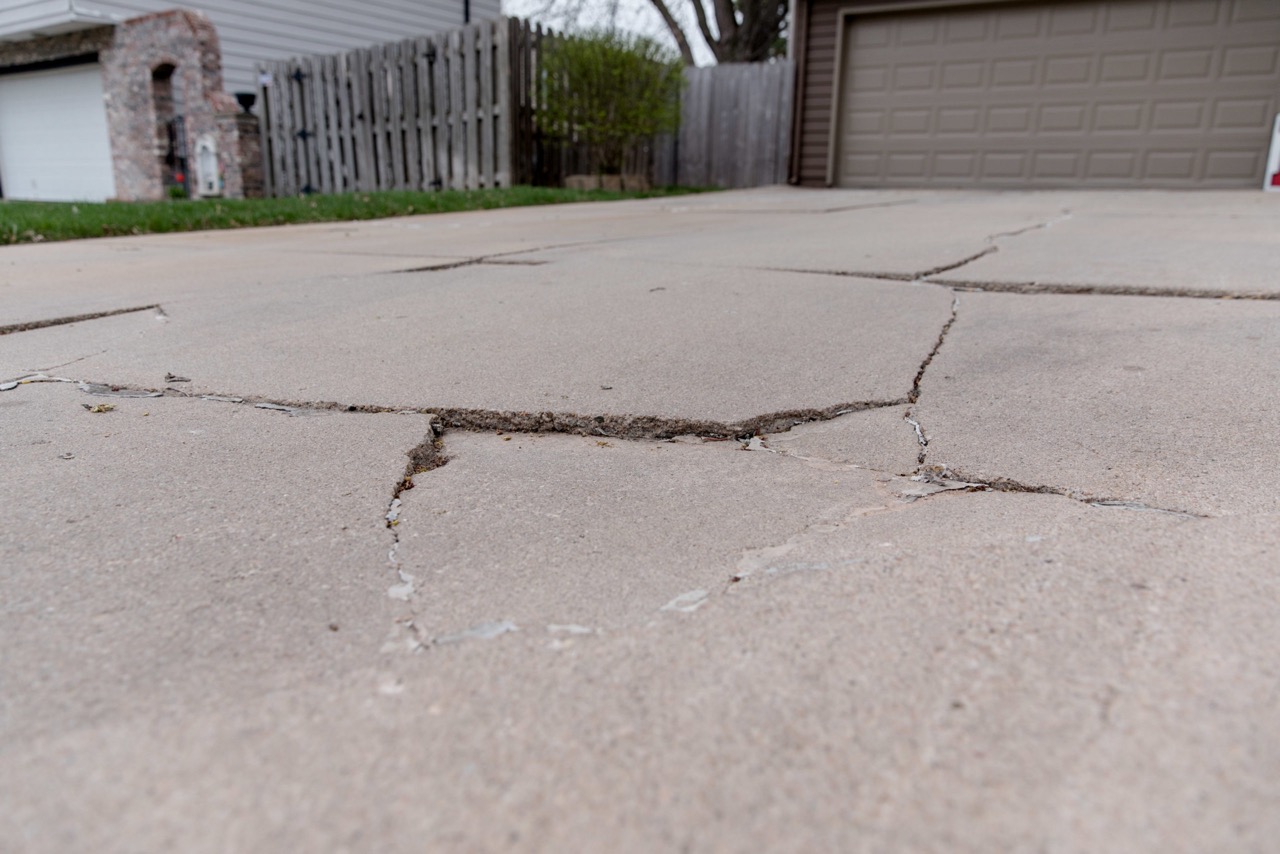
Filling Large Cracks
If you have larger cracks in your concrete driveway, it’s important to use a different approach to ensure a proper and long-lasting repair. Follow these steps to fill large cracks in your driveway:
- Clean and Prepare the Crack: Use a wire brush or a concrete saw to clean and widen the crack, creating a deeper and wider groove. This will allow the crack filler to penetrate and adhere better to the surrounding concrete. Remove any debris or loose material from the crack.
- Moisten the Crack: Lightly moisten the crack with water using a sponge or spray bottle. This will prevent the concrete from absorbing moisture from the crack filler too quickly and ensure proper adhesion.
- Apply a Bonding Agent: Before filling the crack, apply a bonding agent or primer to enhance the adhesion of the crack filler. Follow the manufacturer’s instructions for the specific product you are using, applying it to the cleaned and moistened crack surface.
- Fill the Crack: Using a trowel or putty knife, fill the crack with a suitable crack filler. Epoxy fillers or concrete patching compounds are often recommended for large cracks. Fill the crack completely, slightly overfilling it to compensate for shrinkage. Ensure that the filler is level with the surrounding concrete surface.
- Smooth and Shape the Filler: Use the trowel or putty knife to smooth and shape the filler, blending it seamlessly with the surrounding concrete. Feather the edges to create a smooth transition and ensure a professional finish.
- Allow the Filler to Cure: Follow the manufacturer’s instructions for the specific crack filler you are using. Allow the filler to cure fully before subjecting it to heavy traffic or other stresses. This can take several hours or even days, depending on the product and environmental conditions.
- Sand and Seal: Once the filler is fully cured, you can sand down any excess filler to create a smooth finish. Use a fine-grit sandpaper or sanding block to gently sand any rough edges. Finally, apply a concrete sealer to protect the repaired crack and the surrounding area.
It’s worth noting that filling large cracks may offer a temporary solution, and the cracks might reappear over time due to the natural movement and settling of the concrete. If the cracks persist or continue to widen, it may be necessary to consult a professional to address any underlying foundation or structural issues.
Now that you know how to fill large cracks in your concrete driveway, let’s move on to the next step: resurfacing the driveway for a complete restoration.
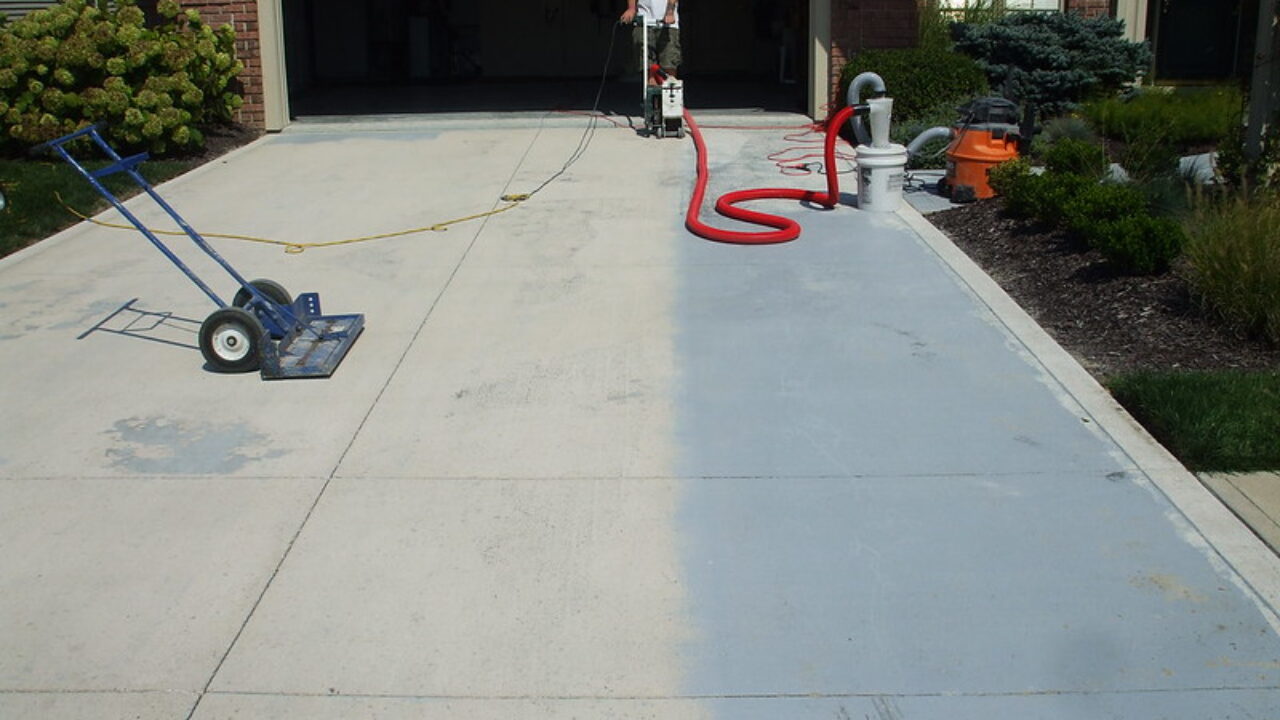
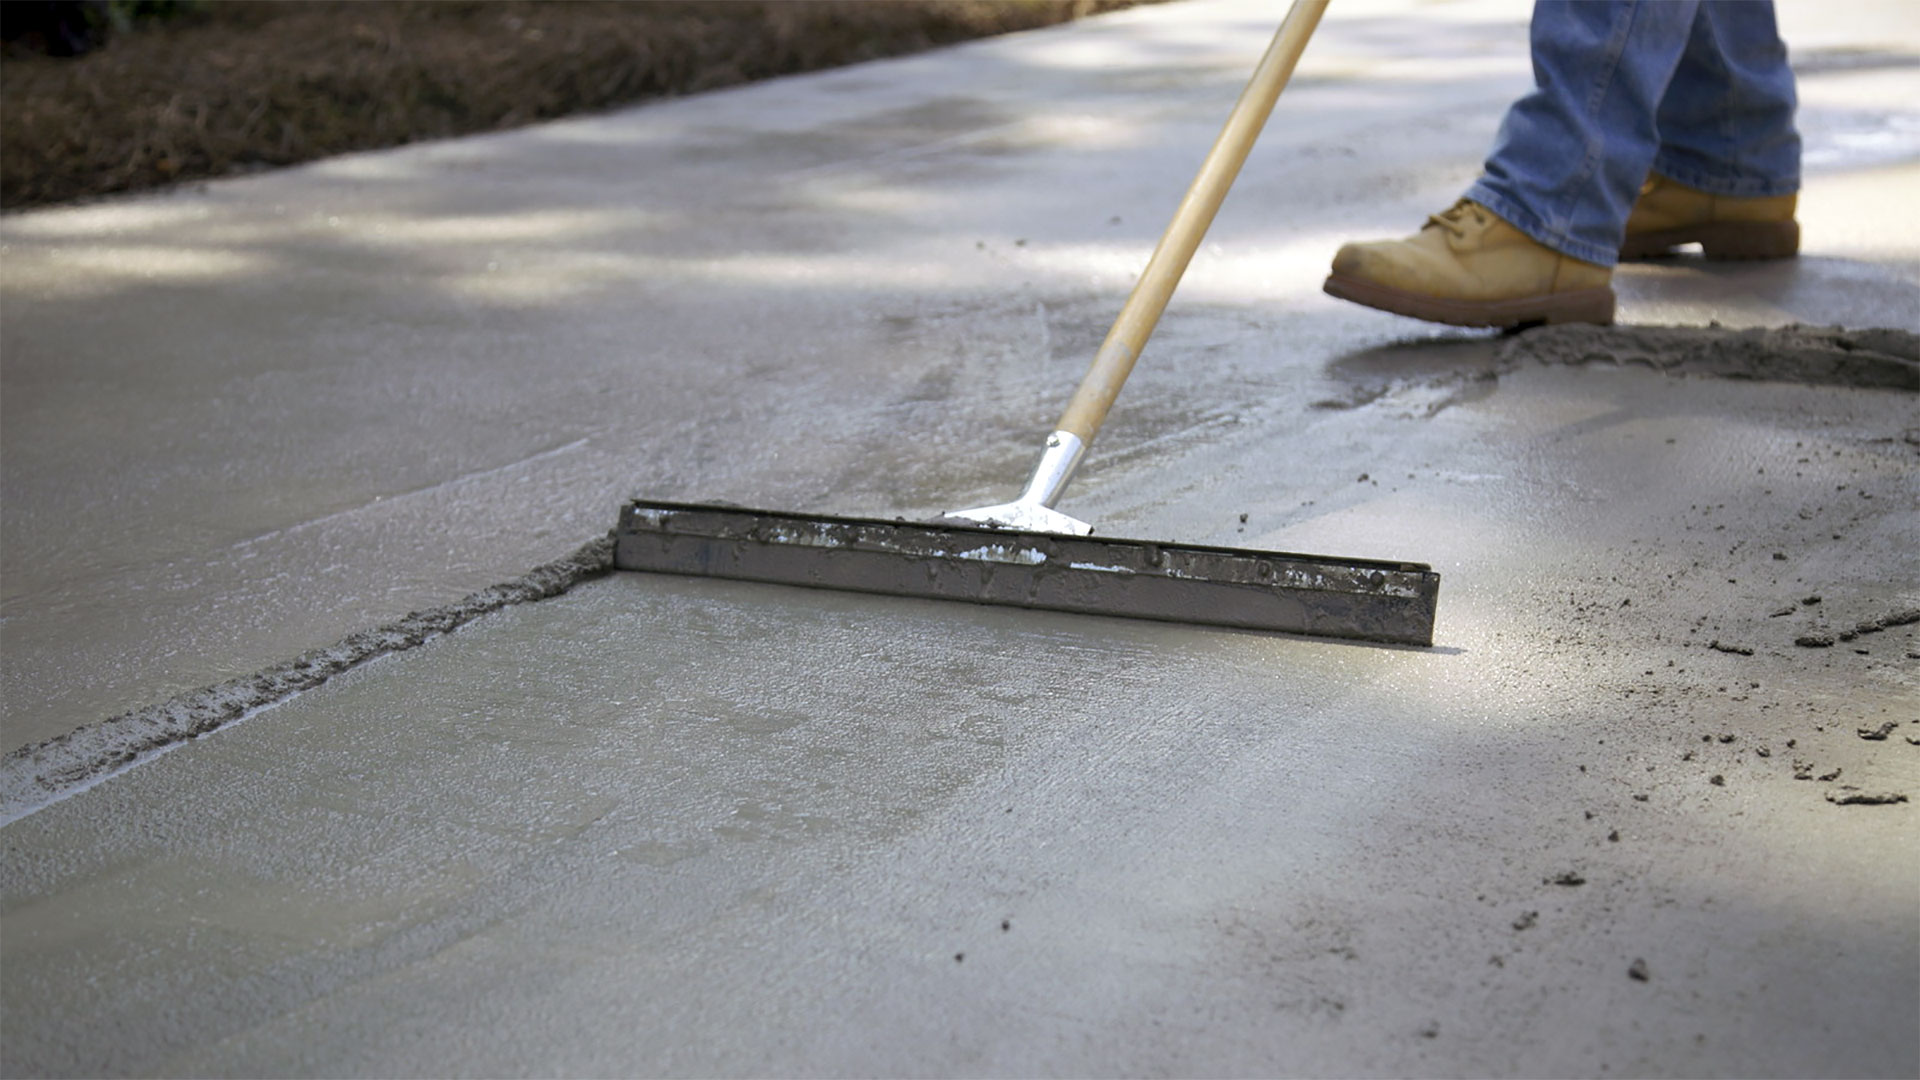
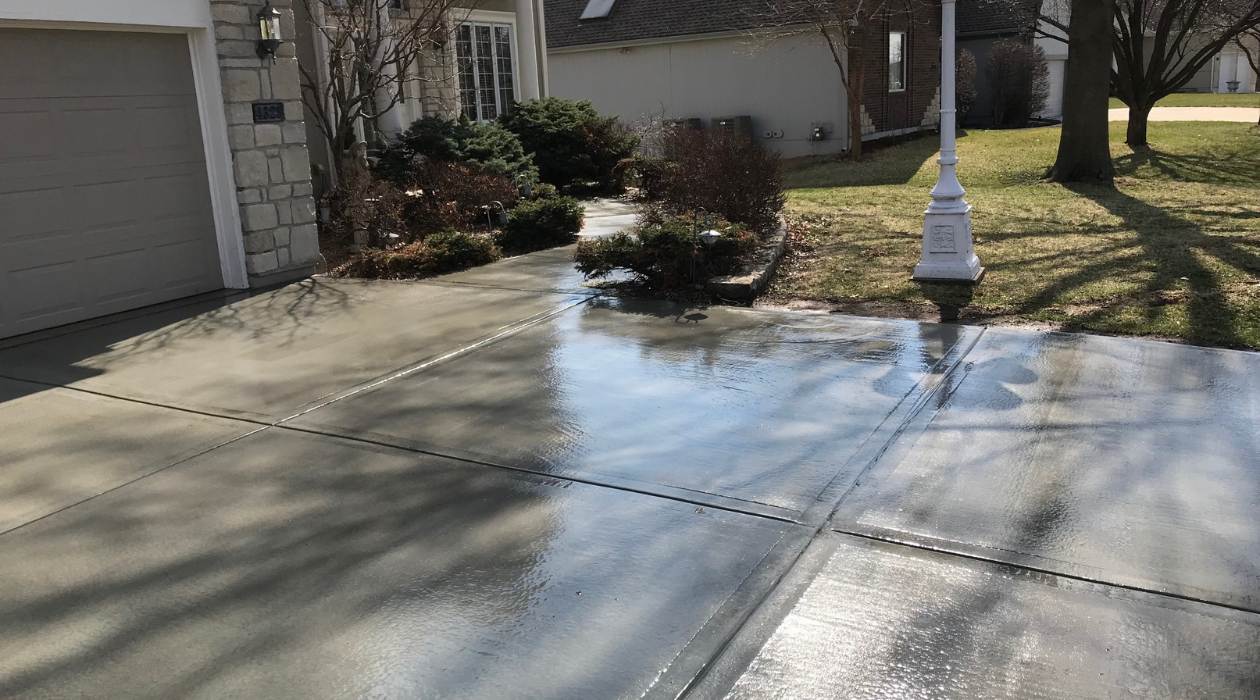
Resurfacing the Driveway
Resurfacing your concrete driveway is an effective way to restore its appearance and address multiple cracks and worn-out areas. This process involves applying a new layer of concrete or a concrete overlay to create a fresh, smooth surface. Follow these steps to resurface your driveway:
- Clean the Driveway: Begin by thoroughly cleaning the entire driveway. Remove any loose debris, dirt, or vegetation using a broom, pressure washer, or a combination of both. If there are stubborn stains or oil spots, use a degreaser or a concrete cleaning solution to remove them.
- Repair Any Major Damage: Before applying the resurfacing material, address any major cracks, holes, or damage in the existing concrete. Use appropriate repair methods as mentioned earlier to ensure a solid foundation for the resurfacing layer.
- Prepare the Surface: Roughen the surface of the driveway using a concrete grinder or shot blaster to create a better bond for the new layer. This step also removes any loose or deteriorated concrete. Make sure to wear proper protective gear, including safety goggles and a dust mask, during this process.
- Apply the Resurfacing Material: Mix the concrete resurfacer or overlay according to the manufacturer’s instructions. Apply the mixture onto the driveway using a trowel or a long-handled squeegee. Work in small sections, ensuring an even and consistent application. Follow the recommended thickness for the resurfacing material to achieve the desired results.
- Smooth and Level the Surface: Once the resurfacing material has been applied, use a concrete float or a trowel to smooth and level the surface. Feather the edges to achieve a seamless transition with the existing concrete. If desired, you can add decorative finishes or textures to enhance the appearance of the driveway.
- Cure and Protect the Surface: Allow the resurfacing material to cure according to the manufacturer’s instructions. This typically involves keeping the newly resurfaced driveway moist and protected from direct sunlight for a specific period. After the curing process, apply a concrete sealer to protect the surface from stains, UV damage, and water penetration.
Resurfacing your driveway not only repairs cracks and damage but also provides a fresh and rejuvenated look to your property. It is an effective solution for restoring the functionality and aesthetic appeal of your concrete driveway.
Now that you have learned how to resurface your driveway, let’s proceed to the final step: sealing the repaired cracks to prevent future damage.
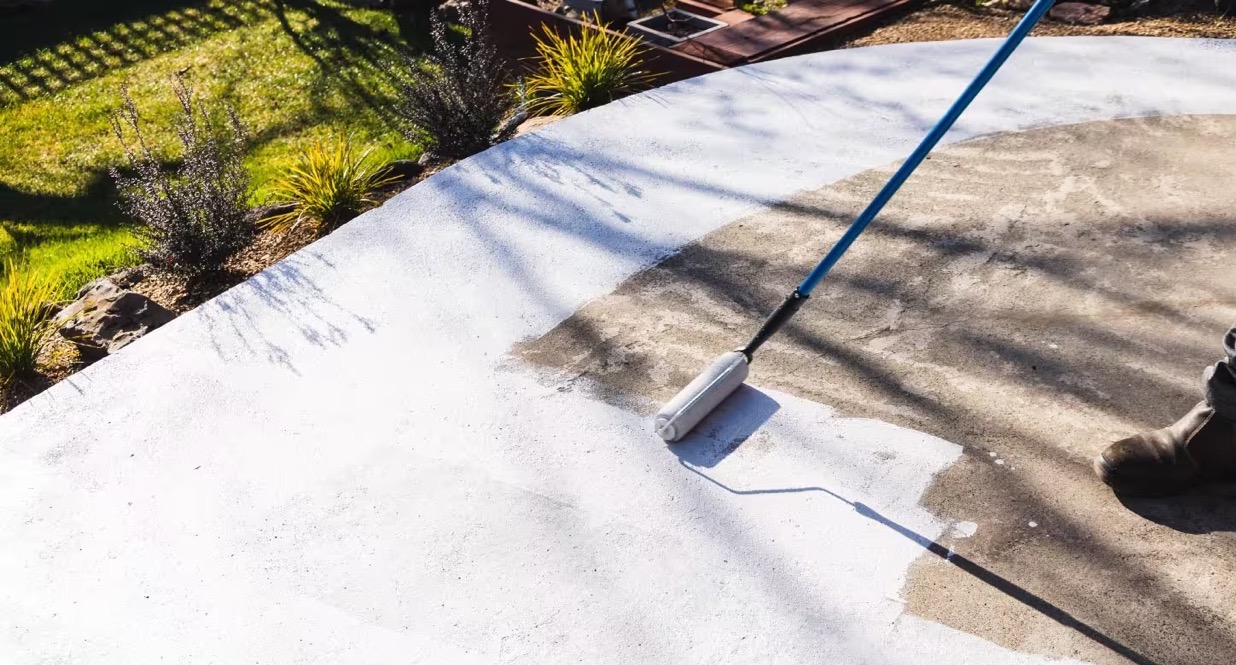
Sealing the Repaired Cracks
After repairing the cracks in your concrete driveway, it’s important to seal them to prevent future damage and maintain the longevity of the repair. Sealing the repaired cracks helps to protect the concrete from water infiltration, freeze-thaw cycles, and other environmental factors. Follow these steps to seal the repaired cracks:
- Clean the Surface: Ensure that the repaired cracks and the surrounding area are free from any dust, debris, or loose particles. Use a broom or a blower to remove any surface contaminants.
- Choose the Right Sealer: Select a high-quality concrete sealer that is specifically designed for use on repaired cracks. There are different types of sealers available, so choose one that suits your needs and the climate in your area.
- Apply the Sealer: Follow the manufacturer’s instructions for the specific sealer you have chosen. Apply the sealer to the repaired cracks using a brush or a roller, ensuring even coverage. Work in small sections to avoid the sealer drying before it is spread evenly.
- Allow the Sealer to Dry: Give the sealer adequate time to dry and cure. This typically takes several hours or even a full day, depending on the sealer and the weather conditions. Avoid stepping or driving on the sealed areas until they are fully dry.
- Reapply if Needed: Depending on the type of sealer you use, it may be necessary to apply multiple coats for optimal protection and longevity. Refer to the manufacturer’s instructions for any recommended reapplication or maintenance schedule.
Sealing the repaired cracks not only protects the concrete but also enhances the overall appearance of your driveway. The sealer acts as a barrier, preventing water, chemicals, and other substances from seeping into the cracks and causing further damage.
Regular maintenance, including periodic inspection and reapplication of the sealer, will help extend the life of your driveway and keep it looking its best for years to come.
Congratulations! You have successfully repaired and sealed the cracks in your concrete driveway. However, to prevent future cracks and ensure the longevity of your driveway, it’s important to take preventive measures. Let’s explore some tips to prevent future cracks in the final section.
Read more: How To Raise A Concrete Driveway
Preventing Future Cracks
While it’s essential to know how to repair and seal cracks in your concrete driveway, preventing them in the first place is even more beneficial. By implementing some preventive measures, you can minimize the occurrence of cracks and prolong the lifespan of your driveway. Here are some tips to help prevent future cracks:
- Proper Installation: Ensure that your driveway is constructed properly from the start. This includes proper compaction of the soil, appropriate thickness of the concrete, and reinforcement where necessary. Hiring a professional and reputable contractor will help ensure the driveway is installed correctly.
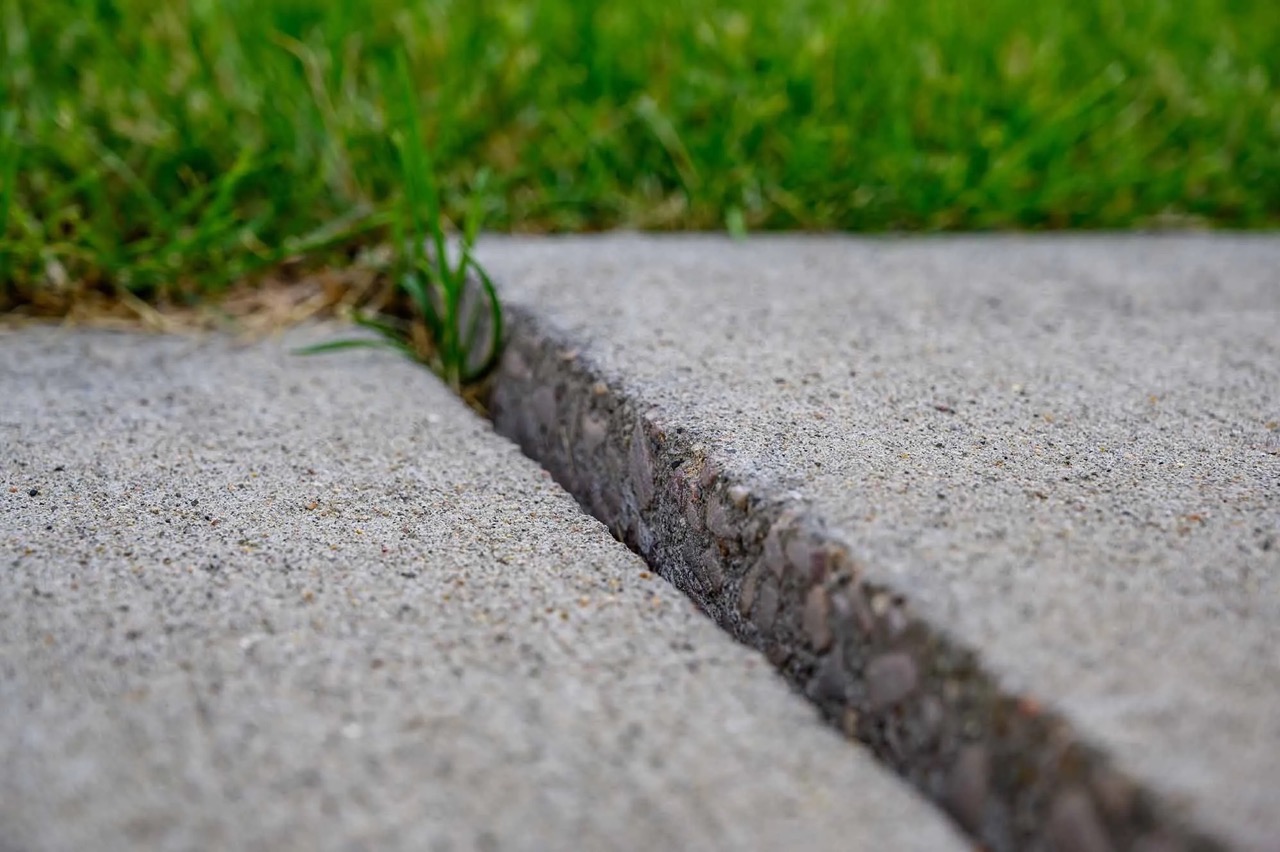
- Control Joint Installation: Install control joints in the concrete during the initial construction phase. These joints are pre-planned cracks that allow the concrete to expand and contract without causing significant damage. Control joints can help prevent random cracking by providing relief points for stress.
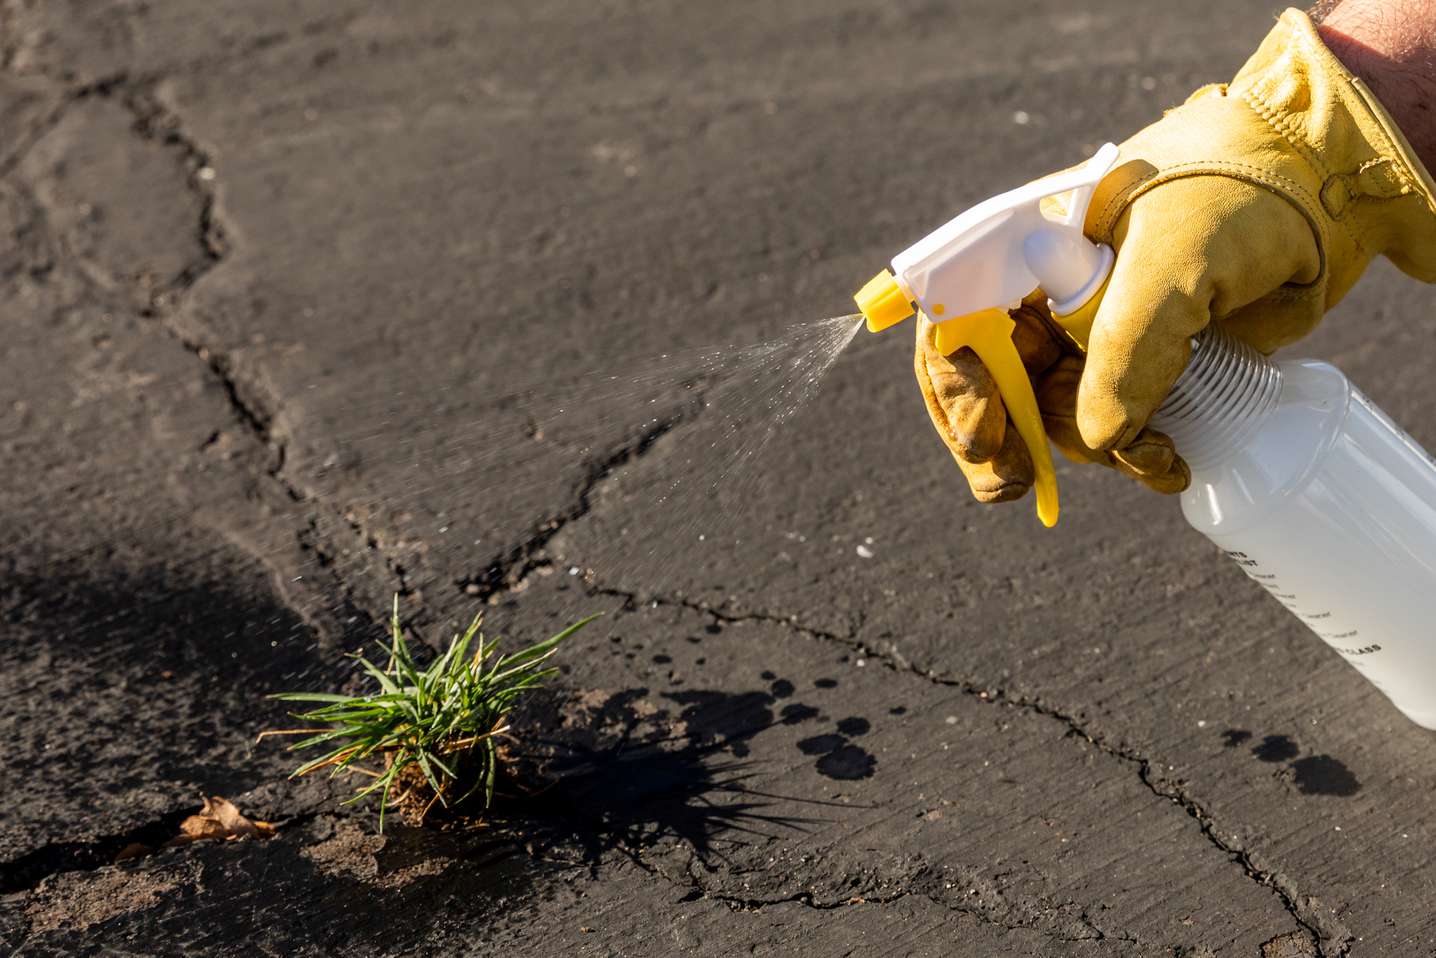
- Regular Maintenance: Regularly inspect your driveway for any signs of cracking or damage. Address any issues promptly to prevent them from worsening. Clear debris, leaves, and snow from the surface to minimize the risk of moisture seeping into the concrete and causing cracks.
- Proper Drainage: Ensure that your driveway has proper drainage to avoid water accumulation. Poor drainage can cause water to pool on the surface, leading to increased pressure and potential cracking. Keep gutters and downspouts clear to direct water away from the driveway.
- Avoid Heavy Loads: Minimize the amount of heavy vehicles or machinery that drive or park on your driveway. Excessive weight can put stress on the concrete and lead to cracking. If heavy loads are unavoidable, consider using plywood or other protective materials to distribute the weight more evenly.
- Temperature Considerations: Be mindful of extreme temperature changes and the impact they can have on the concrete. Limit exposure to extreme heat or cold, as rapid temperature fluctuations can cause the concrete to expand and contract, leading to cracks over time.
By following these preventive measures, you can greatly reduce the risk of future cracks in your concrete driveway. Regular maintenance and proactive care will help ensure its longevity and keep it in optimal condition.
Remember, if you notice any new cracks or significant damage to your driveway, it’s important to address them promptly to prevent further deterioration. Repairing and sealing the cracks as we previously discussed will help maintain the integrity and appearance of your driveway.
With the knowledge and understanding of crack repair, sealing, and preventive measures, you are now equipped to effectively care for and maintain your concrete driveway. Enjoy a functional and beautiful driveway for years to come!
If you have any additional questions or need further assistance, don’t hesitate to seek professional advice or consult with a trusted contractor.
Best of luck with your driveway maintenance endeavors!
Conclusion
Repairing cracks in your concrete driveway is a crucial step in maintaining its appearance, functionality, and longevity. By following the steps and techniques outlined in this guide, you can effectively repair cracks of different sizes and restore the integrity of your driveway.
Understanding the various types of concrete cracks and assessing their severity is essential in determining the appropriate repair approach. From shrinkage cracks to settlement cracks and structural cracks, each requires a specific method to ensure a successful repair.
Before beginning the repair process, gathering the necessary tools and materials is vital. From safety gear to crack fillers, trowels to wire brushes, each item plays a crucial role in achieving a professional and durable repair.
Preparing the crack and the surrounding area is a fundamental step that should not be overlooked. Cleaning the crack, widening if necessary, and removing any moisture or loose debris ensure a strong bond between the crack filler and the existing concrete.
For small cracks, filling them with a suitable crack filler and allowing it to cure is often sufficient. However, larger cracks may require more extensive repair techniques, such as widening the crack and applying a bonding agent before filling it with an appropriate crack filler.
In some cases, resurfacing the entire driveway may be necessary to address multiple cracks and worn-out areas. This process involves applying a new layer of concrete or a concrete overlay to create a fresh and smooth surface.
After repairing the cracks, sealing them is essential to prevent future damage. Using a high-quality concrete sealer protects the repaired cracks from water infiltration, freeze-thaw cycles, and other environmental factors, ensuring the longevity of the repair.
By taking preventive measures, such as proper installation, control joint installation, regular maintenance, proper drainage, avoiding heavy loads, and considering temperature fluctuations, you can minimize the occurrence of cracks and prolong the lifespan of your driveway.
Remember, if you encounter significant cracks or structural issues beyond your capabilities, it’s important to seek professional help to ensure a safe and effective repair.
By following the steps and tips outlined in this guide, you can confidently repair cracks in your concrete driveway, enhance its appearance, and ensure its durability. Enjoy a beautiful and functional driveway for years to come!
If you have any further questions or need additional assistance, don’t hesitate to consult with professionals or experts in the field.
Best of luck with your concrete driveway repair endeavors!
Frequently Asked Questions about How To Repair Cracks In Concrete Driveway
Was this page helpful?
At Storables.com, we guarantee accurate and reliable information. Our content, validated by Expert Board Contributors, is crafted following stringent Editorial Policies. We're committed to providing you with well-researched, expert-backed insights for all your informational needs.


0 thoughts on “How To Repair Cracks In Concrete Driveway”