
Articles
How To Lay A Concrete Driveway
Modified: August 17, 2024
Learn how to lay a concrete driveway with our informative articles. Find step-by-step guides, tips, and expert advice to ensure a successful project.
(Many of the links in this article redirect to a specific reviewed product. Your purchase of these products through affiliate links helps to generate commission for Storables.com, at no extra cost. Learn more)
Introduction
Welcome to our comprehensive guide on how to lay a concrete driveway. A well-constructed concrete driveway not only enhances the aesthetics of your property but also provides a durable and long-lasting surface for vehicles. Whether you’re planning to build a new driveway or replace an existing one, this step-by-step guide will help you navigate the process with ease.
When it comes to laying a concrete driveway, proper planning and preparation are essential. From marking out the area to pouring and finishing the concrete, each stage requires careful attention to detail. By following these tried and tested techniques, you can achieve professional results and ensure the longevity of your driveway.
Before we dive into the specific steps, it’s important to note that this guide assumes you have a basic understanding of working with concrete and have access to the necessary tools and materials. If you’re unfamiliar with concrete work, consulting with a professional may be beneficial.
Now, let’s get started on laying your concrete driveway!
Key Takeaways:
- Proper planning, preparation, and attention to detail are essential for laying a durable concrete driveway. From measuring and marking the area to excavating and leveling the concrete, each step contributes to a successful installation.
- Finishing and curing the driveway is crucial for long-term durability. Creating control joints, proper curing, and regular maintenance are key factors in ensuring the strength and appearance of the concrete surface.
Read more: How To Lay Cobblestone Driveway
Step 1: Planning and Preparation
Before you begin laying a concrete driveway, it’s crucial to plan and prepare the area properly. This will ensure that you have a solid foundation and avoid any potential problems down the line. Here are some key steps to follow:
- Measure and Mark: Start by measuring the area where you want to install the driveway. Use stakes and string lines to mark the boundaries and determine the desired width and length of the driveway. Consider any slope or grade changes that may affect the drainage or accessibility of the driveway.
- Check Permits and Regulations: Depending on your location, you may need to obtain permits or adhere to specific regulations for driveway construction. Contact your local building or planning department to ensure you comply with any requirements.
- Consider Drainage: Proper drainage is essential for a functional driveway. Evaluate the slope and grade of your property, and plan for adequate water runoff. Incorporating a slight slope away from your home or towards a designated drainage area will prevent water pooling on the driveway’s surface.
- Clear the Area: Remove any vegetation, debris, or obstructions from the designated driveway area. This includes rocks, tree roots, and existing pavement or concrete. Use a shovel, rake, or other suitable tools to ensure a clean and level surface.
- Check Utility Lines: Before excavation, contact your local utility companies to identify and mark the location of any underground utility lines. This will help you avoid damaging them during the digging process.
- Consider Sub-base and Soil Compaction: Evaluate the quality of the soil in the driveway area. If the soil is loose or unstable, it may be necessary to remove it and replace it with a suitable sub-base material for better stability. Compact the sub-base thoroughly using a plate compactor or a similar tool to ensure a solid foundation.
- Gather Tools and Materials: Finally, gather all the necessary tools and materials for the project. This may include shovels, wheelbarrows, string lines, stakes, a concrete mixer or mixing tools, reinforcement materials (such as rebar or wire mesh), and appropriate safety equipment.
By taking the time to plan and prepare the area properly, you will lay the foundation for a successful concrete driveway installation. This initial step is crucial for ensuring the stability and longevity of your driveway.
Step 2: Marking Out the Driveway
Once you have completed the planning and preparation phase, the next step in laying a concrete driveway is to mark out the area. Properly marking the driveway will help guide the excavation process and ensure accurate placement of the forms. Here’s how to mark out your driveway:
- Stake the Corners: Begin by driving stakes into the ground at each corner of your planned driveway area. Use a hammer or rubber mallet to securely position the stakes. These will serve as reference points for the width and outline of the driveway.
- Attach String Lines: Connect string lines between each stake to create a clear boundary for the driveway. Ensure that the string lines are straight and level. You can use a line level or a water level to achieve accuracy.
- Measure the Width: Measure and mark the desired width of your driveway at regular intervals along the string lines. This will serve as a guide for the excavation process and the placement of the forms.
- Consider Curves or Edges: If your driveway includes curves or edges, use a flexible material such as a garden hose or landscape edging to mark these areas. This will help you achieve smooth and accurate shapes.
- Double-check Alignment: Once you have marked out the driveway, double-check the alignment and dimensions. Use a measuring tape or laser level to ensure that the width is consistent and that the edges are straight.
- Mark Obstacles or Features: If there are any existing features or obstacles, such as trees, utility boxes, or structures, mark their positions on your driveway plan. This will help you make necessary adjustments during the excavation and construction process.
Properly marking out your driveway will ensure that it is accurately aligned and meets your desired specifications. Take the time to measure and mark carefully, as this will serve as the blueprint for the rest of the construction process.
Step 3: Excavation and Site Preparation
With the driveway area properly marked out, it’s time to move on to the excavation and site preparation phase. This step involves removing the topsoil and creating a proper foundation for the concrete. Follow these steps to excavate and prepare the site:
- Clear Vegetation and Debris: Begin by removing any vegetation, roots, rocks, or debris within the marked driveway area. Use a shovel, rake, or other suitable tools to thoroughly clear the site. Ensure that the area is free from any obstructions that could affect the stability of the driveway.
- Define the Excavation Depth: Determine the desired depth of the driveway excavation. This will depend on various factors, such as the thickness of the concrete slab, the presence of a sub-base material, and local building codes. Typically, a depth of 4-6 inches is recommended for residential driveways.
- Start Excavating: Use a shovel, excavator, or other excavation equipment to remove the topsoil within the marked area. Begin from the edges and work your way towards the center, ensuring a consistent depth throughout.
- Create a Slope: Consider the drainage requirements of your driveway. It’s important to create a slight slope that allows water to flow away from your property. Typically, a slope of 1/4 inch per foot is recommended. Use a level or slope board to ensure the proper slope as you excavate.
- Compact the Subgrade: After excavating, use a plate compactor or a similar compaction tool to compact the subgrade. This will help stabilize the soil and prevent settling or shifting of the driveway. Compact the entire area evenly and check for any low spots or uneven surfaces.
- Add Sub-base Material (if required): If the soil in the excavated area is loose or unstable, consider adding a sub-base material for improved stability. This can consist of crushed stone or gravel, which should be evenly spread and compacted to create a solid base for the driveway.
- Check Excavation Depth: Double-check the depth of the excavation to ensure it meets your desired specifications. Make any necessary adjustments, taking into account the thickness of the concrete slab and any additional layers or sub-base materials.
Excavation and site preparation are vital for creating a stable and durable driveway. By correctly excavating the area and adhering to the necessary depths and slopes, you lay the foundation for a secure and long-lasting concrete surface.
Step 4: Installing Forms and Reinforcement
Once the site is fully excavated and prepared, the next step in laying a concrete driveway is to install the forms and reinforcement. Forms are used to contain and shape the concrete, while reinforcement adds strength and prevents cracking. Here’s how to install forms and reinforcement for your driveway:
- Set Up Forms: Place wooden or metal forms along the edges of the excavated area. These forms will define the shape and dimensions of your driveway. Make sure the forms are securely positioned and aligned with the marked outline of the driveway. Use stakes and screws to hold them in place.
- Consider Expansion Joints: If your driveway is large or spans a significant distance, consider incorporating expansion joints. These joints allow for natural expansion and contraction of the concrete due to temperature changes. Install the expansion joint material along the edges of the forms, following the manufacturer’s guidelines.
- Add Reinforcement: Depending on the size and weight-bearing capacity of your driveway, you may need to add reinforcement. This typically involves installing rebar or wire mesh within the concrete to add strength and minimize cracking. Place the reinforcement material evenly throughout the driveway area, ensuring it is adequately supported by the forms.
- Elevate Reinforcement: To prevent the reinforcement from sitting too close to the subgrade, use mesh supports or other suitable materials to elevate it slightly. This will ensure that the reinforcement is fully encapsulated within the concrete slab and provides optimal support.
- Secure the Reinforcement: Once the reinforcement is in place, use wire ties or zip ties to secure the intersecting points and prevent them from moving or shifting during the concrete pouring process.
- Check Alignment and Levelness: Before proceeding, double-check the alignment and levelness of the forms and reinforcement. Use a level and measuring tape to ensure that everything is properly aligned and meets your desired specifications.
Installing forms and reinforcement is crucial for achieving a structurally sound and durable concrete driveway. By taking the time to carefully set up the forms and add reinforcement, you ensure that your driveway will be able to withstand the weight of vehicles and resist cracking over time.
Before pouring concrete for your driveway, make sure to properly prepare the ground by removing any vegetation, grading the area, and compacting the soil to ensure a stable base for the concrete.
Read more: How To Raise A Concrete Driveway
Step 5: Mixing Concrete
With the forms and reinforcement in place, it’s time to mix the concrete for your driveway. Proper mixing is essential for achieving a strong and uniform concrete mixture. Follow these steps to mix the concrete:
- Gather Materials and Equipment: Before starting the mixing process, gather all the necessary materials and equipment. This includes the concrete mix, water, a concrete mixer (or mixing tools if mixing by hand), a shovel or trowel for blending, and protective gear such as gloves and goggles.
- Read Instructions: Read the instructions provided by the concrete mix manufacturer. These will specify the correct water-to-mix ratio and any additional steps or precautions for achieving optimal results.
- Pour Concrete Mix: Start by pouring the required amount of dry concrete mix into the concrete mixer or a large wheelbarrow. Be sure to work in small batches to ensure proper mixing and avoid overloading the mixer.
- Add Water Gradually: Gradually add water to the dry mix, following the manufacturer’s instructions for the recommended water-to-mix ratio. Start with a small amount of water and gradually increase as needed. Mix the water and concrete using the shovel or mixing tools, ensuring that all dry elements are fully incorporated.
- Achieve Consistency: Continue mixing the concrete until you achieve a uniform and workable consistency. The concrete should be moist but not excessively wet. If the mixture is too dry, add small amounts of water. If it is too wet, add more dry mix as needed.
- Check for Lumps: While mixing, check for any lumps or clumps in the concrete mixture. Break them up and continue blending until the mixture is smooth and free of any inconsistencies.
- Test for Slump: To ensure the concrete’s workability, perform a slump test. Fill a slump cone or similar tool with the mixed concrete, compact it, and then gently lift the cone vertically. Measure the amount of slump or vertical settlement to determine if the concrete has the desired consistency.
Mixing the concrete properly is crucial for achieving a strong and durable driveway. Take your time to follow the manufacturer’s instructions, gradually add water, and achieve the desired consistency. This will ensure that the concrete is easy to work with and will result in a high-quality finished driveway.
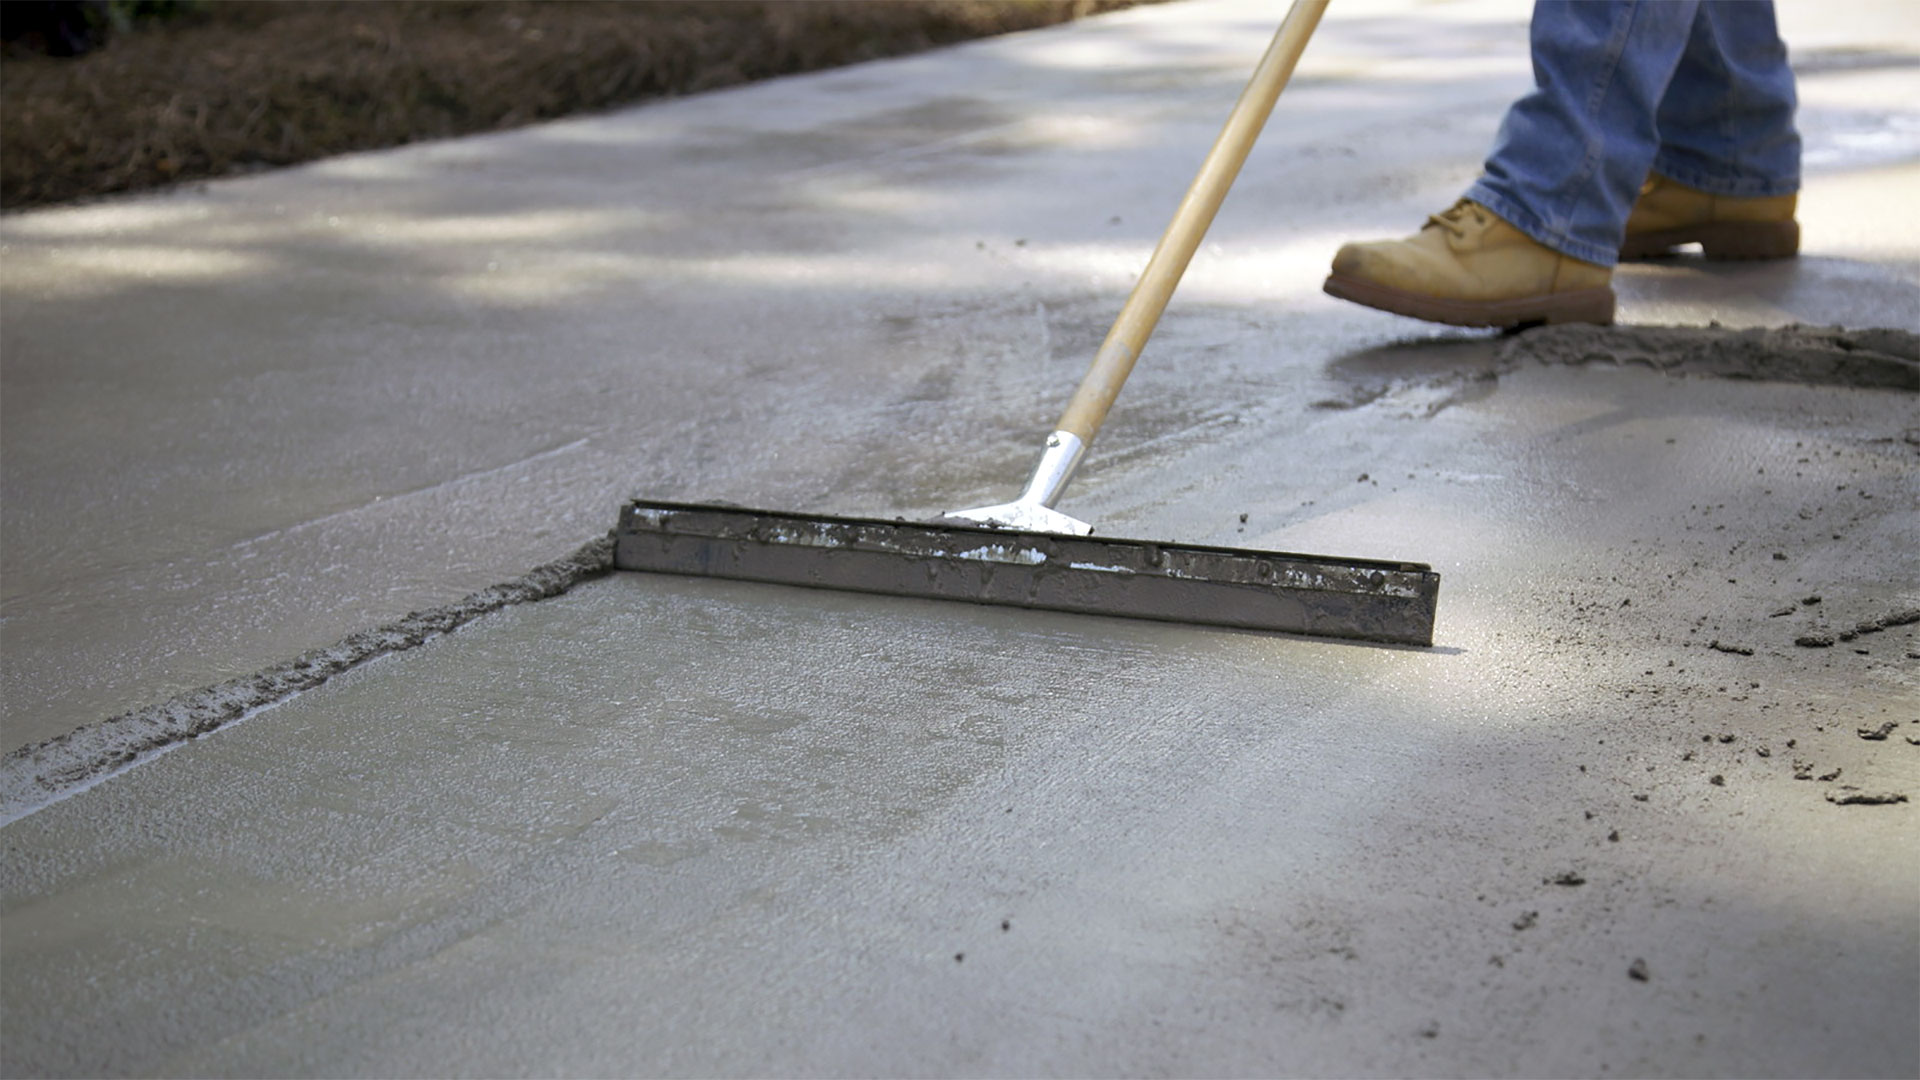
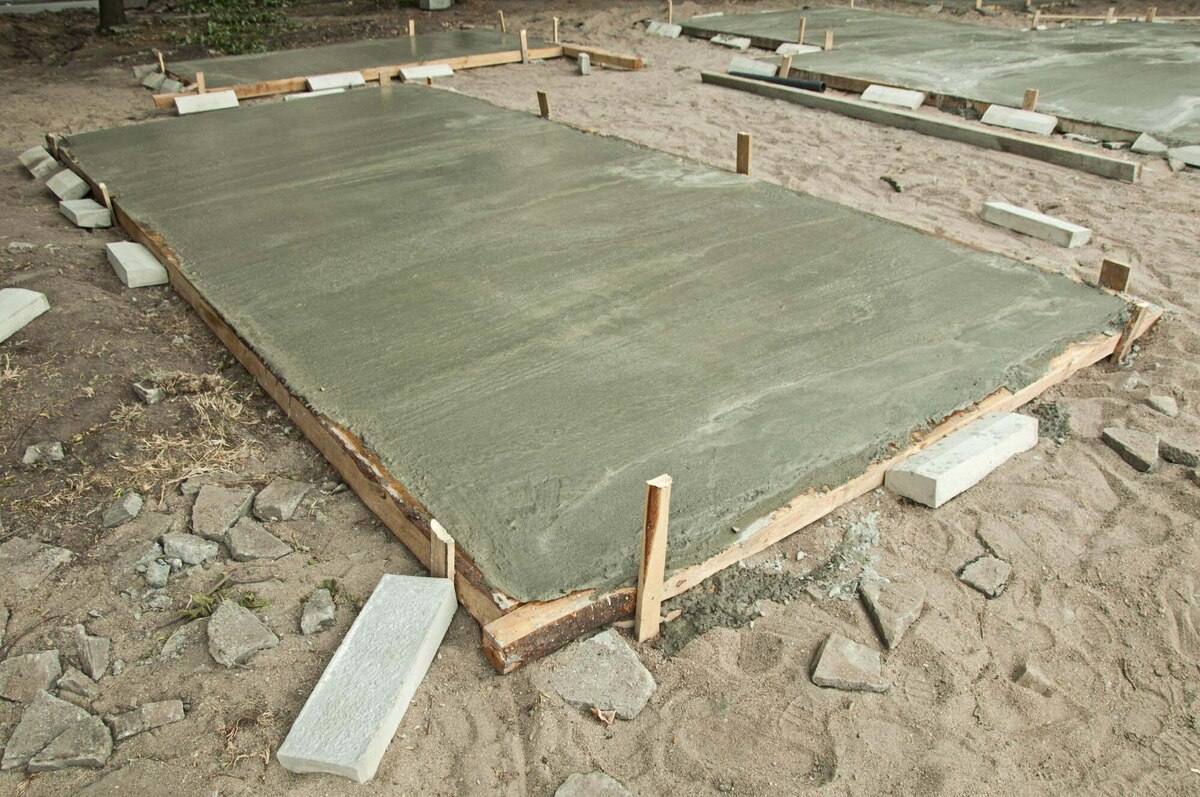
Step 6: Pouring and Leveling the Concrete
After the concrete is properly mixed, it’s time to pour and level it within the prepared forms. This step requires careful attention to detail to ensure a smooth and even surface. Follow these steps to pour and level the concrete for your driveway:
- Prepare for Pouring: Before pouring the concrete, wet the forms and subgrade with water. This will prevent the concrete from drying out too quickly and help with adhesion. Additionally, have a designated area for the concrete delivery, whether using a concrete truck or manually transporting the mixture.
- Pour the Concrete: Begin pouring the concrete into the prepared forms. Work in small sections, starting from one end of the driveway and moving towards the other. Pour the concrete as evenly as possible, using a shovel or rake to distribute it within the forms.
- Distribute and Consolidate: Once the concrete is poured, use a screed or a long board to distribute and level the mixture. Move the screed back and forth in a sawing motion, working towards the opposite end of the driveway. This will help fill any low spots and create a consistent surface.
- Use a Bull Float: After screeding, use a bull float to further level the concrete and remove any excess material. The bull float should be pushed and pulled across the surface in long sweeping motions, smoothing out imperfections and creating a professional finish.
- Check for Proper Thickness: As you pour and level the concrete, ensure that it reaches the desired thickness specified for your driveway. Use measurements or gauges to verify the thickness throughout the entire surface area.
- Fill Low Spots: If you notice any low spots or depressions in the concrete, fill them with additional concrete mix. Use a trowel or float to spread and blend the new material with the existing surface, ensuring a consistent and level driveway.
- Screed and Smooth Edges: As you finish leveling the main surface of the driveway, pay attention to the edges. Use a trowel or edger tool to create smooth, rounded edges along the sides of the driveway. This will enhance the overall appearance and provide a clean finish.
Pouring and leveling the concrete is a critical step in creating a functional and visually appealing driveway. Take your time to distribute and consolidate the concrete properly, ensuring an even thickness and a smooth surface. With careful attention to detail, you’ll achieve a well-executed and professional-looking concrete driveway.
Step 7: Finishing and Curing the Driveway
Once the concrete is poured and leveled, the driveway is almost complete. However, there are a few additional steps that should be taken to ensure proper finishing and curing. These steps are crucial for the long-term durability and appearance of the driveway. Follow these guidelines for finishing and curing your concrete driveway:
- Smooth the Surface: After screeding and leveling the concrete, use a float or trowel to smooth the surface even further. This will help eliminate any trowel marks and create a sleek and uniform finish. Work the float or trowel in a circular motion to achieve a polished appearance.
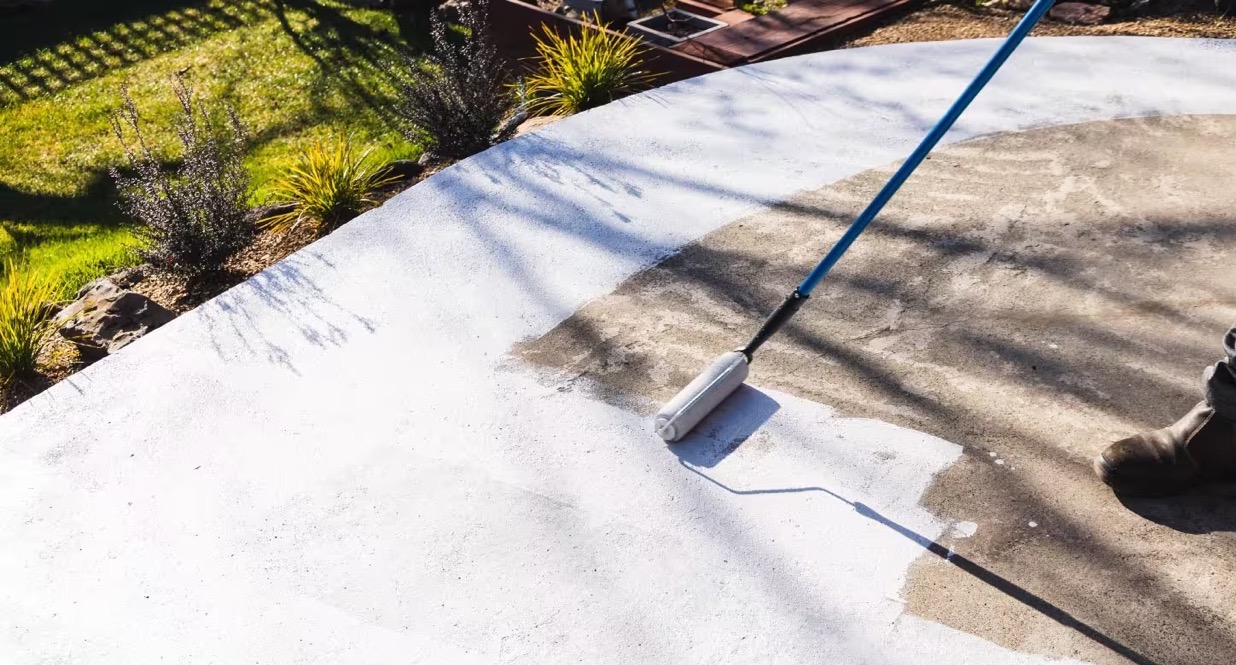
- Add Decorative Elements (if desired): If you want to add decorative elements to your driveway, such as exposed aggregate or stamped patterns, now is the time to do so. Apply the desired technique or material, following the manufacturer’s instructions, before the concrete begins to set.
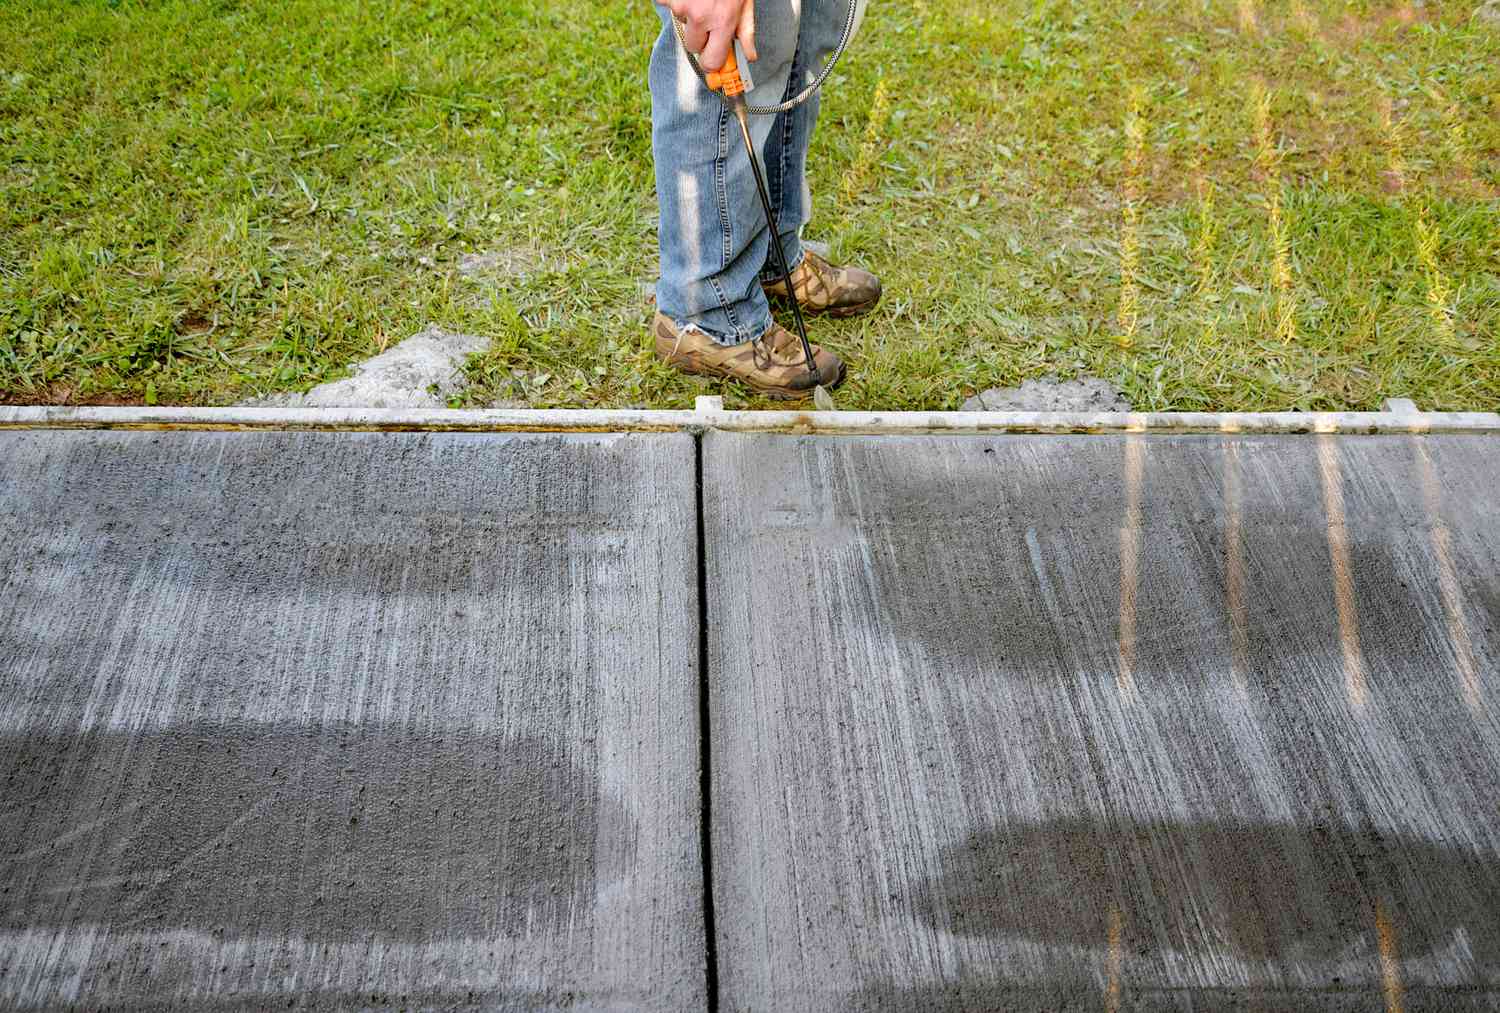
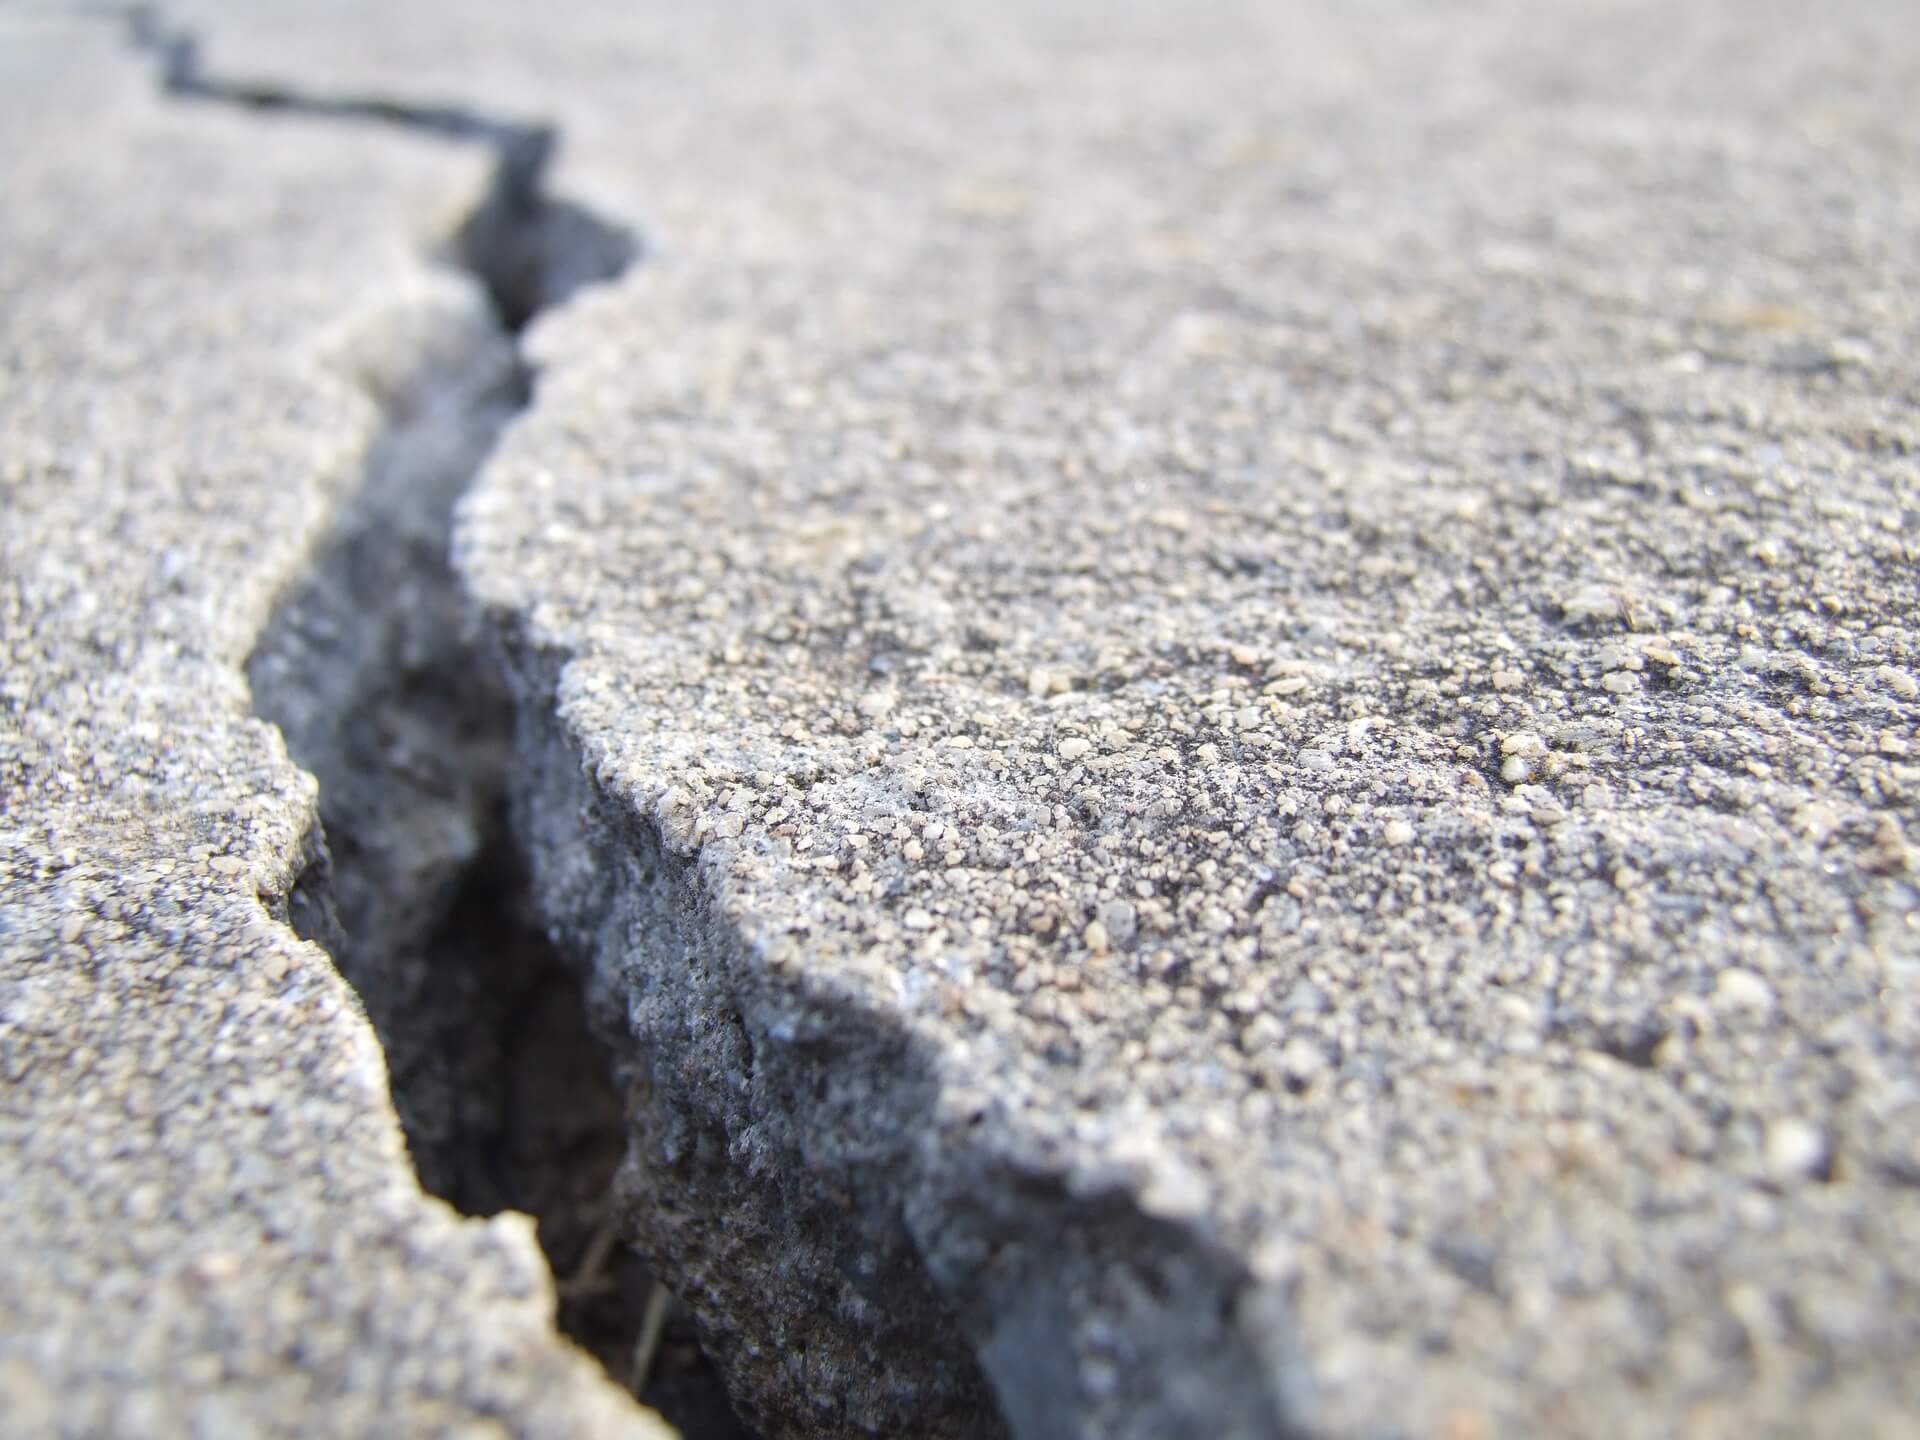
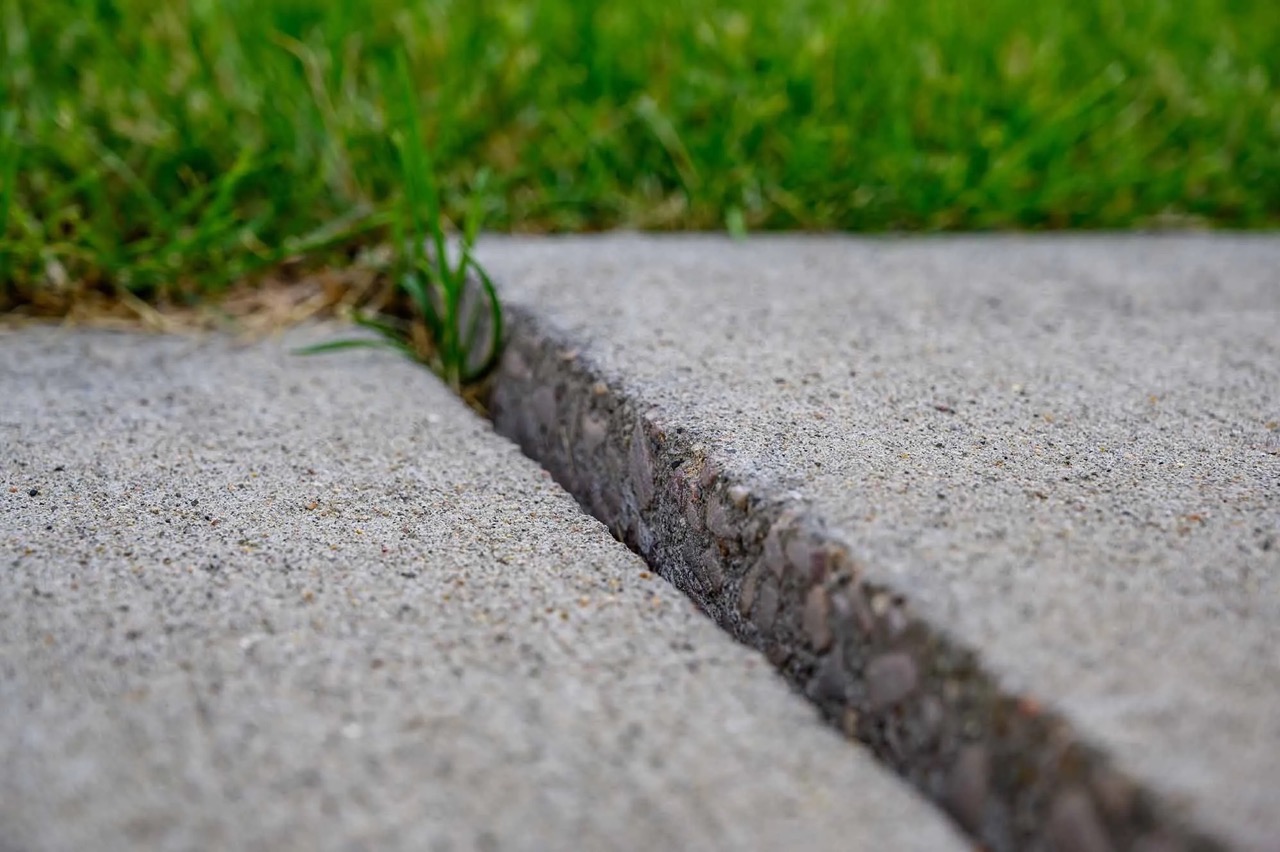
- Create Control Joints: Control joints are essential for allowing the concrete to expand and contract without causing cracks. Use a grooving tool or a concrete saw to create control joints at regular intervals along the width of the driveway. This will help control cracking and improve the overall longevity of the concrete.
- Cure the Concrete: Proper curing is crucial for the strength and durability of the driveway. Cover the freshly poured concrete with a curing compound or plastic sheeting to slow down the evaporation of moisture. This will help prevent premature drying and cracking. Follow the curing compound manufacturer’s instructions for the specific duration and application method.
- Avoid Heavy Traffic: While the curing process is underway, avoid driving or parking vehicles on the driveway for at least a week. This will allow the concrete to properly cure and gain strength. Place warning signs or barriers to prevent accidental damage or premature wear on the fresh concrete surface.
- Maintain Moisture Levels: During the curing period, ensure that the concrete remains moist. Regularly sprinkle water on the surface or use a curing membrane to retain moisture. This will facilitate proper hydration and strengthen the concrete over time.
- Perform Regular Maintenance: Once the concrete has cured, implement a regular maintenance routine for your driveway. This may include sealing the concrete, removing debris, and addressing any potential issues or cracks. Following a maintenance schedule will contribute to the longevity and appearance of your driveway.
Finishing and curing the driveway is the final step in the installation process. By properly smoothing the surface, creating control joints, and observing the curing period, you can ensure the strength and longevity of your concrete driveway. With regular maintenance and care, your driveway will provide a reliable and attractive surface for many years to come.
Conclusion
Congratulations! You’ve now reached the end of our comprehensive guide on how to lay a concrete driveway. By following the steps outlined in this article, you have gained the knowledge and skills necessary to successfully complete your driveway project.
Laying a concrete driveway requires careful planning, preparation, and execution. From marking out the area and excavating the site to pouring and leveling the concrete, each step plays a crucial role in achieving a durable and visually appealing driveway.
Remember to pay attention to details such as proper excavation depth, accurate form placement, and adequate curing time. These factors can greatly influence the structural integrity and longevity of your driveway.
As you embark on your driveway project, keep in mind that safety should always be a priority. Wear protective gear, follow recommended guidelines, and take necessary precautions when working with concrete and construction materials.
Lastly, don’t forget to maintain your concrete driveway regularly. Cleaning debris, sealing the surface, and addressing any issues promptly will help preserve its appearance and extend its lifespan.
Now that you’re equipped with the knowledge and guidance provided in this article, it’s time to put your skills to the test. Whether you’re building a new driveway or replacing an existing one, with proper planning and execution, you can create a beautiful and functional concrete driveway.
Good luck with your project, and enjoy the many benefits that a well-constructed concrete driveway brings!
Frequently Asked Questions about How To Lay A Concrete Driveway
Was this page helpful?
At Storables.com, we guarantee accurate and reliable information. Our content, validated by Expert Board Contributors, is crafted following stringent Editorial Policies. We're committed to providing you with well-researched, expert-backed insights for all your informational needs.


0 thoughts on “How To Lay A Concrete Driveway”