Articles
How To Solder Copper Plumbing
Modified: April 22, 2024
Learn the step-by-step process of soldering copper plumbing with our informative articles. Enhance your DIY skills and ensure a leak-free plumbing system.
(Many of the links in this article redirect to a specific reviewed product. Your purchase of these products through affiliate links helps to generate commission for Storables.com, at no extra cost. Learn more)
Introduction
Soldering copper plumbing is an essential skill for any DIY enthusiast or homeowner. Whether you want to repair a leaking pipe or install new plumbing fixtures, knowing how to solder copper pipes can save you time and money. Soldering creates a secure and long-lasting bond between copper pipes, ensuring reliable water flow and preventing leaks. In this article, we will guide you through the step-by-step process of soldering copper plumbing, from preparation to final inspection.
Before we dive into the details, let’s go over some of the tools and materials you will need for this project. Don’t worry; you don’t need an extensive collection of expensive equipment. With just a few essential tools, you’ll be ready to tackle your soldering project.
Key Takeaways:
- Soldering copper plumbing requires essential tools and materials, proper preparation, and adherence to safety precautions. By following the step-by-step process, DIY enthusiasts can confidently achieve reliable and watertight joints for various plumbing projects.
- Prioritizing safety, mastering proper preparation, and practicing precise soldering techniques are key to successfully soldering copper plumbing. With the right knowledge and skills, DIY enthusiasts can tackle plumbing projects with confidence and efficiency.
Read more: Why Is Copper Used For In Plumbing
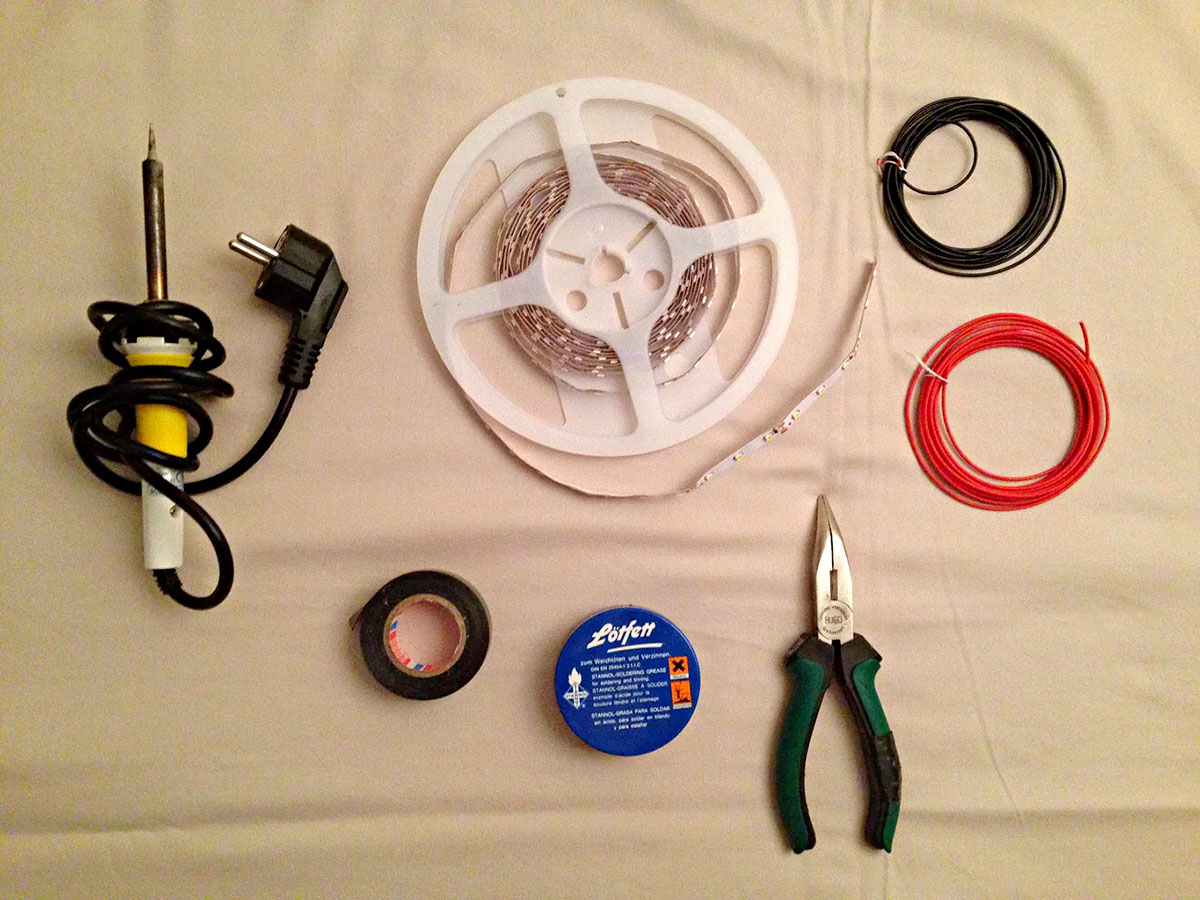
Tools and Materials Needed
Before you begin soldering copper plumbing, make sure you have the following tools and materials on hand:
- Soldering iron or torch: This is the primary tool used to heat the copper pipes and melt the solder.
- Solder: You’ll need a roll of solder specifically designed for plumbing applications. Choose a lead-free solder for safer and more environmentally-friendly results.
- Flux: Flux is a chemical compound that cleans and prepares the copper surfaces for soldering. It also helps the solder flow smoothly and create a strong bond.
- Pipe cutter: Use a pipe cutter to cut the copper pipes to the desired length. Make sure you choose a cutter that is suitable for the size of your copper pipes.
- Emery cloth or sandpaper: This is used to clean the outside of the copper pipes and remove any dirt, debris, or oxidation that may interfere with the soldering process.
- Wire brush: You’ll need a wire brush to clean the inside of the copper fittings. The brush helps remove any dirt or oxidization, ensuring a clean surface for soldering.
- Fire-resistant mat: Place a fire-resistant mat beneath your work area to protect against accidental heat damage or fire.
- Safety goggles: Safety goggles or protective eyewear are essential to safeguard your eyes from the heat and potential splatters of solder or flux.
- Heat-resistant gloves: It’s important to protect your hands from the heat of the soldering process. Use heat-resistant gloves to keep your hands safe.
- Bucket or container of water: Keep a bucket or container of water nearby to quickly extinguish any accidental fires.
Having these tools and materials ready will ensure that you can work efficiently and safely. Now that we have everything we need, let’s move on to some important safety precautions.
Safety Precautions
Before you start soldering copper plumbing, it’s crucial to prioritize your safety. Working with heat and potentially hazardous chemicals requires caution and adherence to proper safety practices. Here are some important safety precautions to follow:
- Wear safety goggles: Protect your eyes from sparks, hot solder, and debris by wearing safety goggles or protective eyewear throughout the soldering process.
- Use heat-resistant gloves: Protect your hands from the heat of the soldering iron or torch by wearing heat-resistant gloves. They will provide a barrier between your skin and the hot surfaces.
- Work in a well-ventilated area: Soldering produces fumes that can be harmful if inhaled. Ensure that you work in a well-ventilated area or use a fume extractor to remove the fumes.
- Use a fire-resistant mat: Place a fire-resistant mat beneath your work area to prevent accidental fires or damage to surfaces from hot tools.
- Keep a fire extinguisher nearby: Have a fire extinguisher nearby in case of any accidental fires. Familiarize yourself with how to use it before starting your project.
- Don’t touch hot surfaces: Avoid touching the soldering iron/torch, heated pipes, or recently soldered joints. They can cause severe burns.
- Be mindful of flammable materials: Make sure to keep flammable materials, such as cloth or paper, away from your work area to prevent accidental fires.
- Handle solder and flux with care: Both solder and flux contain chemicals that can be harmful if ingested or inhaled. Avoid touching your face or mouth while working and wash your hands thoroughly after handling these materials.
- Work at a comfortable height: Ensure that your work area is at a comfortable height to avoid straining your back or causing discomfort during the soldering process.
- Follow manufacturer instructions: Always adhere to the manufacturer’s instructions for the tools and materials you’re using.
By following these safety precautions, you can minimize the risk of accidents or injuries while soldering copper plumbing. Now that we’ve covered the necessary safety measures, let’s move on to the step-by-step process of soldering copper pipes.
Step 1: Preparation
Before you begin soldering copper plumbing, it’s important to properly prepare your work area and gather all the necessary tools and materials. Follow these steps to ensure a smooth and efficient soldering process:
- Clean your work area: Clear your work area of any clutter or flammable materials. Ensure you have enough space to maneuver and work comfortably.
- Gather your tools and materials: Make sure you have all the necessary tools and materials listed earlier, such as the soldering iron or torch, solder, flux, pipe cutter, emery cloth or sandpaper, wire brush, fire-resistant mat, safety goggles, heat-resistant gloves, and a bucket of water.
- Turn off the water supply: Before you begin any work on the plumbing system, shut off the water supply to the area you’ll be working on. This will prevent any accidental leaks or water damage.
- Drain the pipes: Open a faucet or valve lower than the area you’ll be working on to drain any remaining water from the pipes. This will make it easier to solder without water flowing through the system.
- Inspect the pipes: Take a close look at the copper pipes and fittings you’ll be working with. Ensure that there are no signs of damage, corrosion, or blockages. If you notice any issues, repair or replace the affected parts before proceeding.
By preparing your work area and gathering your tools and materials before you begin, you’ll be ready to proceed with confidence and efficiency. Once your preparation is complete, you can move on to cutting the copper pipes.
Step 2: Cutting Copper Pipes
Properly cutting copper pipes is essential for creating clean, precise joints and ensuring a secure fit. Follow these steps to cut your copper pipes accurately:
- Measure and mark: Use a tape measure to determine the desired length of the pipe. Mark the measurement with a pencil or marker.
- Select the appropriate cutter: Choose a pipe cutter that matches the size of the copper pipe you’re working with. Pipe cutters come in various sizes and types, including rotary cutters and ratchet cutters.
- Position the cutter: Place the cutter’s cutting wheel against the marked area on the pipe. Make sure the cutter is aligned parallel to the pipe.
- Adjust the cutter: Tighten or adjust the cutting wheel of the pipe cutter to make sure it is snug against the pipe’s surface.
- Rotate the cutter: Begin rotating the cutter around the pipe, applying firm pressure. Rotate the cutter multiple times until it creates a groove in the pipe’s surface.
- Tighten the cutter: Gradually tighten the cutter with each rotation until the blade cuts through the pipe. Take care not to cut too quickly or forcefully, as this can result in an uneven or jagged edge.
- Deburr the cut end: Use a pipe reaming tool or a piece of emery cloth to remove any burrs or rough edges from the cut end of the pipe. This will ensure a smooth and clean joining surface.
Remember to wear safety goggles and gloves while cutting copper pipes to protect yourself from potential injuries. Once you’ve cut the copper pipes to the appropriate length, proceed to the next step: cleaning the pipes.
Read more: What Temperature Does Plumbing Solder Melt
Step 3: Cleaning the Pipes
Properly cleaning the copper pipes is crucial for achieving a successful solder joint. Cleaning removes any dirt, debris, or oxidation that can hinder the soldering process and compromise the bond between the pipes. Follow these steps to clean the pipes effectively:
- Prepare the cleaning tools: Get your emery cloth or sandpaper for cleaning the outside of the pipes and the wire brush for cleaning the inside of the fittings.
- Clean the outside of the pipes: Use the emery cloth or sandpaper to scrub the outside of the pipes. Rub back and forth in a circular motion, applying moderate pressure. This will remove any dirt, debris, or oxidation from the surface of the pipes.
- Clean the inside of the fittings: Use the wire brush to clean the inside of the fittings. Insert the wire brush into the fitting and twist it back and forth to remove any dirt, debris, or oxidation.
- Rinse the pipes: After cleaning, rinse the pipes and fittings with water to remove any residue from the cleaning process. This will ensure a clean surface for soldering.
- Dry the pipes: Use a clean cloth or towel to thoroughly dry the pipes and fittings. Moisture can interfere with the soldering process, so make sure they’re completely dry before proceeding.
Remember to handle the cleaned pipes and fittings carefully to avoid touching them with dirty hands or contaminating them with debris. Once the pipes are clean and dry, you’re ready to move on to the next step: applying flux.
Clean the copper pipe and fitting thoroughly with a wire brush before soldering to ensure a strong bond.
Step 4: Applying Flux
Flux is a crucial component in the soldering process as it helps create a clean and reliable solder joint. Flux removes oxidation from the surface of the copper pipes, allowing the solder to flow smoothly and bond effectively. Follow these steps to apply flux to the pipes:
- Prepare the flux: Ensure you have the appropriate type of flux for your soldering project. There are different flux formulations available, such as brush-on flux or paste flux. Choose the right flux for your specific soldering application.
- Apply flux to the pipe and fitting: With a small brush or applicator, apply a thin and even layer of flux to the outside of the pipes and the inside of the fittings. Make sure to cover the entire surface area that will be joined.
- Spread the flux: Use a small brush or your finger to spread the flux evenly over the surfaces. Ensure that the flux covers all the areas that will come into contact during the soldering process.
- Remove excess flux: Wipe off any excess flux using a clean cloth or paper towel. You want a thin, even layer of flux that covers the surfaces without excessive buildup.
Remember to work in a well-ventilated area or use a fume extractor as flux can emit fumes during the soldering process. Now that you have applied flux to the copper pipes, you’re ready to move on to the next step: assembling the pipes.
Step 5: Assembling the Pipes
Now that you have prepared the pipes by cutting them to length, cleaning them, and applying flux, it’s time to assemble them. Properly assembling the copper pipes ensures a tight and secure fit for the solder joint. Follow these steps to assemble the pipes:
- Apply flux to the fittings: Just like with the pipes, apply a thin and even layer of flux to the inside of the fittings that will be connected to the pipes. Make sure to cover the entire surface area for a proper solder bond.
- Insert the pipes into fittings: Insert the cleaned and fluxed end of one pipe into the corresponding fitting. Make sure the pipe goes all the way into the fitting until it reaches the bottom. Twist slightly to ensure a snug fit.
- Check alignment: Ensure that both pipes and fittings are properly aligned and straight. This will ensure a secure and leak-free joint.
- Secure the pipes: Use pipe clamps or a vise to hold the pipes and fittings securely in place. This will prevent any movement during the soldering process, ensuring a clean and stable joint.
Double-check the alignment and positioning of the pipes and fittings before proceeding to the next step. Once the pipes are properly assembled, you’re ready to move on to the crucial step of heating the joint.
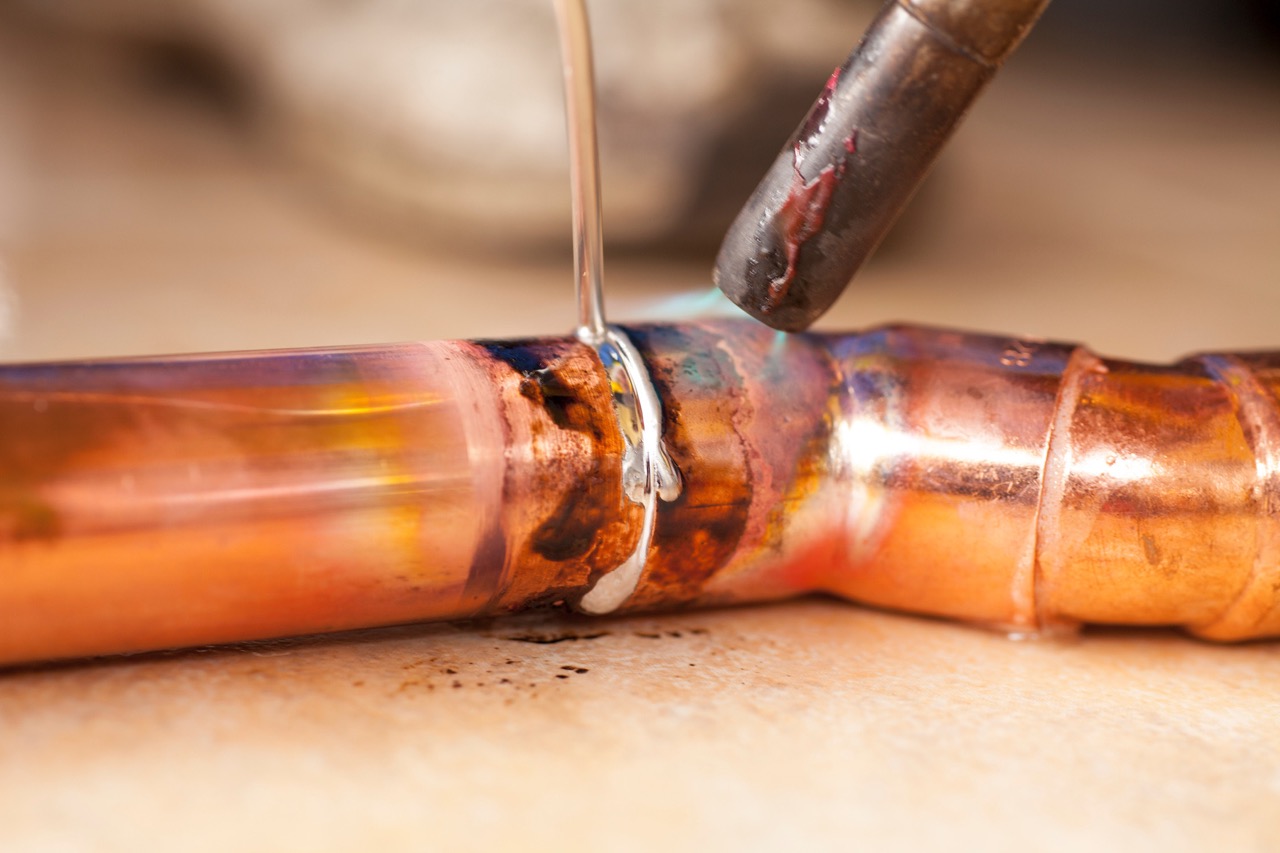
Step 6: Heating the Joint
Heating the joint is a critical step in the soldering process, as it allows the solder to melt and create a strong bond between the pipes and fittings. Follow these steps to heat the joint effectively:
- Hold the soldering iron/torch: Hold the soldering iron or torch in one hand, ensuring a comfortable grip. Position it near the joint but not touching the pipe or fitting.
- Heat up the joint: With the other hand, carefully heat the joint by applying heat directly to the fitting, focusing on the area where the pipe enters the fitting. Move the flame or tip of the soldering iron around the joint to ensure even heating.
- Observe the flux: As you heat the joint, keep an eye on the flux. It will start to bubble and eventually turn into a liquid. This indicates that the joint is reaching the proper temperature for soldering.
- Heat until solder melts: Continue applying heat until the solder around the joint begins to melt. The solder will flow smoothly and evenly into the joint once it reaches its melting point.
Take caution not to overheat the joint or nearby components, as this can lead to damage. Be mindful of the intensity and proximity of the heat source throughout the heating process. Once the solder has melted, you’re ready to move on to the next step: applying solder.
Read more: How Long Does Copper Plumbing Last
Step 7: Applying Solder
Applying solder is the next crucial step in the copper plumbing soldering process. Solder creates a strong and watertight seal between the pipes and fittings. Follow these steps to apply solder properly:
- Hold the solder: Hold the solder wire or soldering rod in one hand. Position it near the joint but not touching the pipe or fitting.
- Touch the heated joint: Touch the heated joint with the solder wire or rod. As the joint is hot, the solder will quickly melt upon contact.
- Allow solder to flow: As the solder melts, allow it to flow into the joint. Aim to cover the entire circumference of the joint with the solder evenly.
- Move along the joint: Move the solder wire or rod along the joint, following the heated area. This will ensure that the solder flows smoothly and creates a consistent bond.
- Apply enough solder: Make sure you apply enough solder to fully fill the joint. A properly soldered joint should have a cone-shaped bead of solder on the outside of the joint.
Take care not to apply excessive solder to the joint, as this can lead to sloppy and weak solder joints. It’s important to achieve a balance between providing enough solder for a strong seal while avoiding excess that can cause harm. Once you have applied solder to the joint, proceed to the next step: cooling and inspecting the joint.
Step 8: Cooling and Inspecting the Joint
After applying solder, it’s important to allow the joint to cool down properly before moving or handling it. Cooling the joint ensures that the solder solidifies and creates a strong and durable bond. Follow these steps to cool and inspect the joint:
- Remove the heat source: Once you have finished applying the solder, remove the heat source, whether it’s the soldering iron or torch. Set it aside in a safe place.
- Allow the joint to cool naturally: It’s crucial to let the joint cool down naturally without any external interference. Avoid blowing on the joint or using any cooling methods that could disrupt the solder bond.
- Inspect the joint: Once the joint has cooled down completely, visually inspect it for any signs of improper soldering or defects. Look for a smooth, cone-shaped bead of solder that completely surrounds the joint.
- Check for leaks: Turn on the water supply to the area where you soldered the pipes. Carefully watch the joint for any signs of leakage. If you notice any leaks, disassemble the joint, clean it thoroughly, and repeat the soldering process.
Make sure to properly dispose of any remaining flux, solder scraps, or other soldering waste in accordance with local regulations. Clean up your work area and safely store your tools and materials for future use. Congratulations! You have successfully soldered copper plumbing. By following these steps and practicing proper soldering techniques, you can confidently handle various soldering projects in the future.
Conclusion
Soldering copper plumbing doesn’t have to be an intimidating task. With the right tools, materials, and knowledge, you can confidently tackle soldering projects and achieve reliable and watertight joints. By following the step-by-step process outlined in this article, you can successfully solder copper pipes for repairs, installations, or DIY plumbing projects.
Remember to prioritize safety throughout the soldering process. Use safety goggles, heat-resistant gloves, and work in a well-ventilated area. Take precautions to prevent accidental fires or injuries, and familiarize yourself with the proper use of fire extinguishers.
Proper preparation is key to successful soldering. Ensure your work area is clean and organized, and gather all the necessary tools, including a soldering iron or torch, solder, flux, pipe cutter, emery cloth or sandpaper, wire brush, and safety equipment.
Follow each step carefully, from cutting the copper pipes to cleaning and applying flux. Pay attention to heating the joint and applying solder evenly and adequately. Allow the joint to cool naturally and inspect it for any defects or leaks before turning on the water supply.
With practice and experience, you’ll become more proficient in soldering copper plumbing. Keep refining your soldering skills and stay updated on new techniques and technologies in the plumbing industry.
By mastering the art of soldering copper plumbing, you can confidently tackle various plumbing projects and enjoy the rewards of a properly functioning plumbing system. Remember to always prioritize safety, adhere to local regulations, and seek professional assistance if needed.
Now, armed with your newfound knowledge, go forth and tackle those copper plumbing projects like a pro!
Frequently Asked Questions about How To Solder Copper Plumbing
Was this page helpful?
At Storables.com, we guarantee accurate and reliable information. Our content, validated by Expert Board Contributors, is crafted following stringent Editorial Policies. We're committed to providing you with well-researched, expert-backed insights for all your informational needs.


0 thoughts on “How To Solder Copper Plumbing”