Home>Garden Essentials>How To Plant Broccoli Seeds Indoors
Garden Essentials
How To Plant Broccoli Seeds Indoors
Modified: August 28, 2024
Learn how to plant broccoli seeds indoors and start your garden with this helpful guide. Grow your own fresh and healthy broccoli right at home.
(Many of the links in this article redirect to a specific reviewed product. Your purchase of these products through affiliate links helps to generate commission for Storables.com, at no extra cost. Learn more)
Introduction
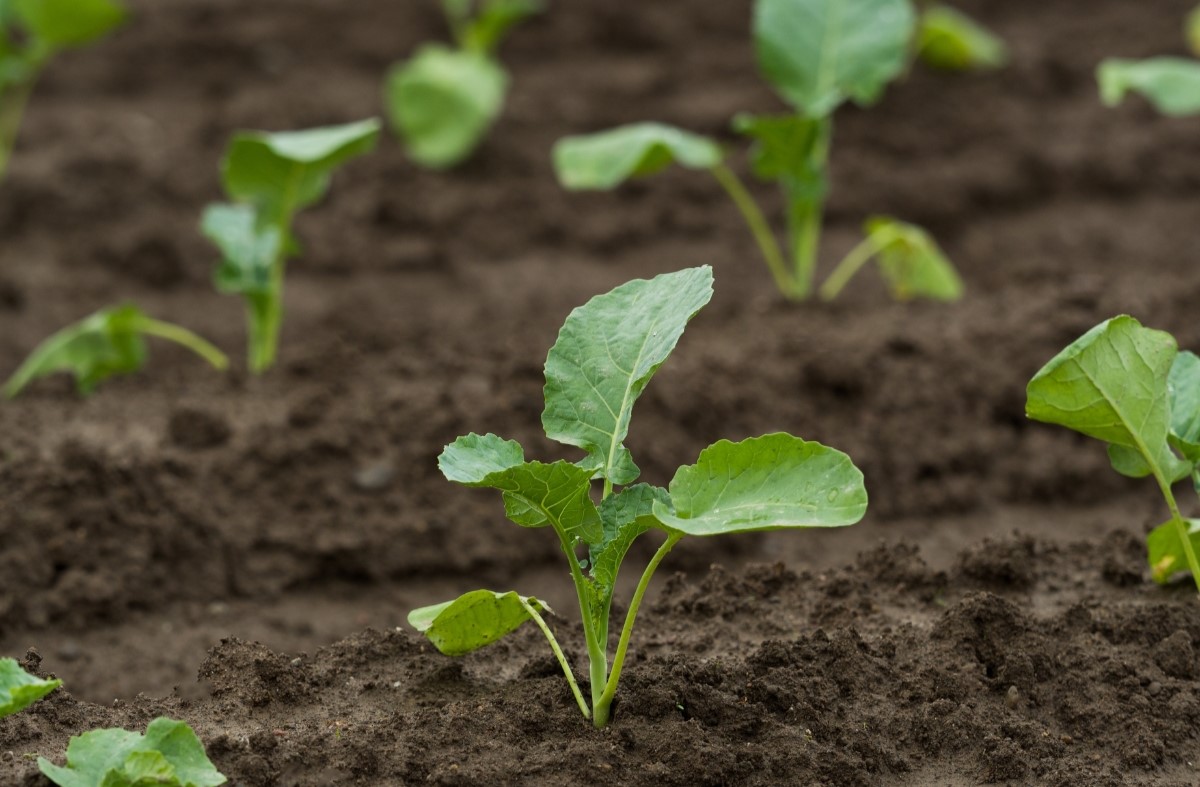
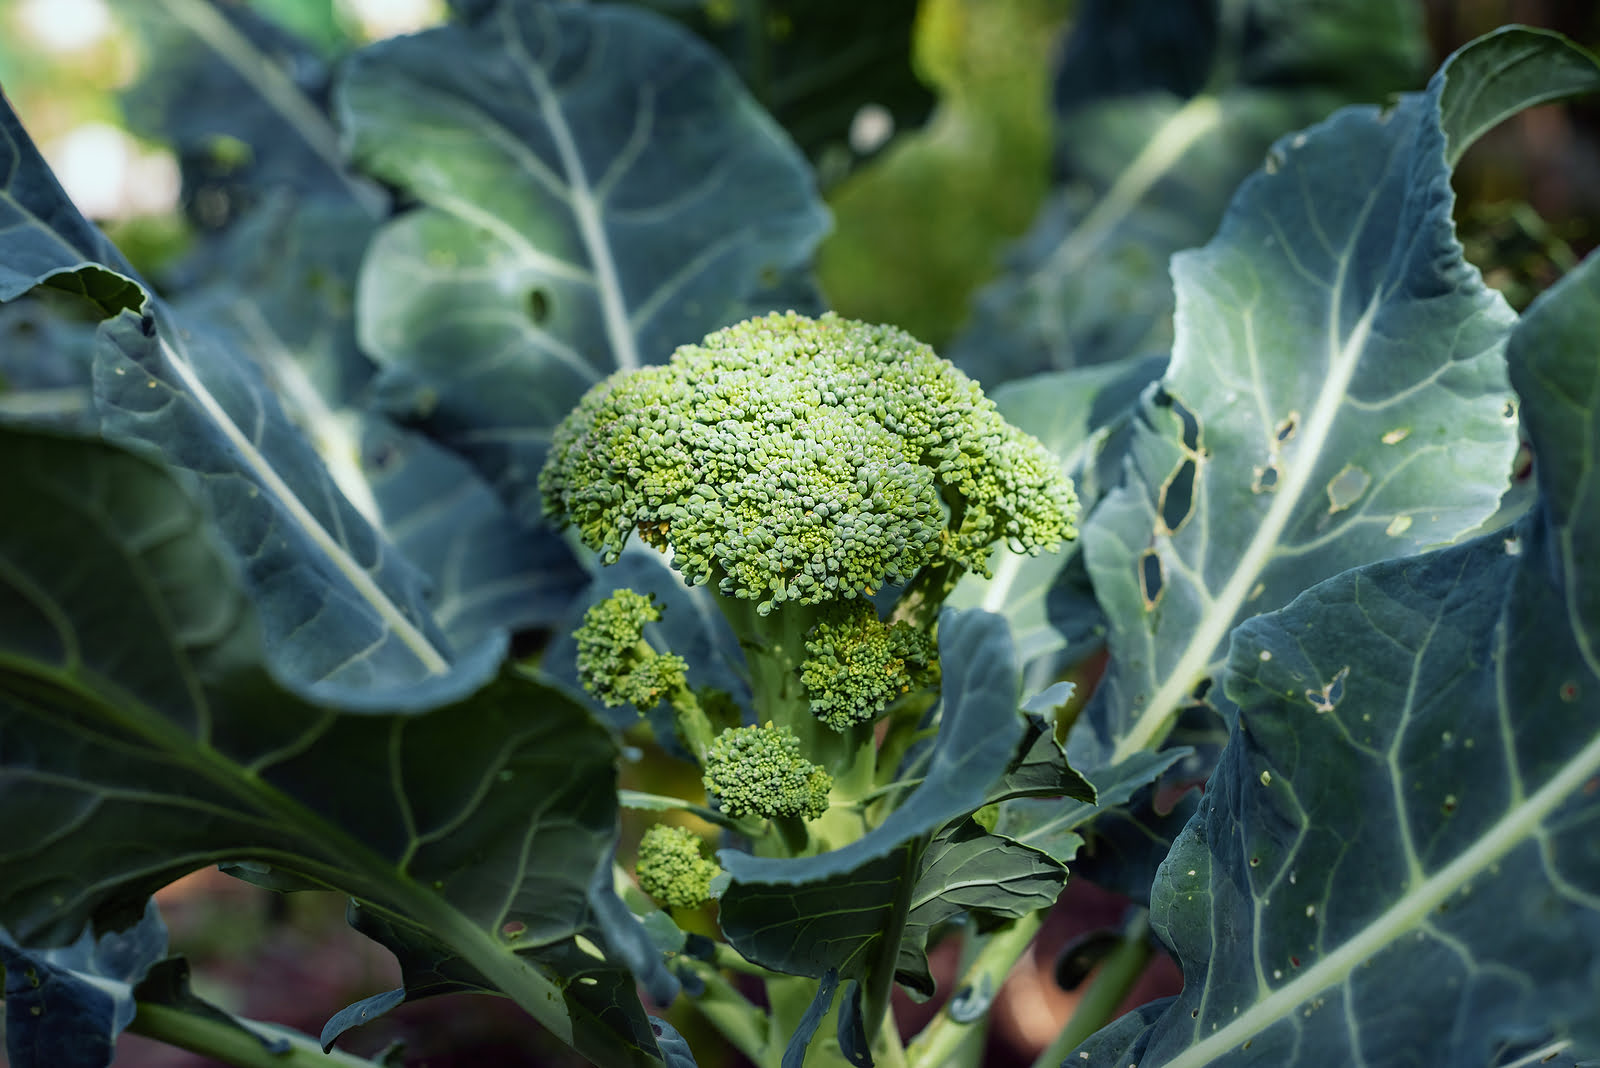
Every garden enthusiast knows that starting plants from seeds can be an exciting and rewarding experience. It gives you the chance to nurture a tiny seedling into a thriving plant, observing every step of its growth. When it comes to vegetables, one popular choice is broccoli. Known for its rich nutritional content and versatility in cooking, broccoli is a favorite among home gardeners.
While many gardeners choose to plant broccoli directly in outdoor garden beds, there are several benefits to starting broccoli seeds indoors. It allows you to have more control over the growing conditions, extends the growing season, and gives the plants a head start before the outdoor environment is suitable for planting. In this article, we will discuss the process of planting broccoli seeds indoors and guide you through each step.
By starting broccoli seeds indoors, you have the opportunity to start your garden early, even before the last frost date. This allows you to enjoy fresh broccoli earlier in the season and potentially have a longer harvest period. Additionally, it gives you the chance to control the temperature and humidity levels, providing optimal growing conditions for your baby broccoli plants.
Starting broccoli seeds indoors also minimizes the risks associated with direct sowing in the garden, such as pests and harsh weather conditions. By keeping the young seedlings inside, you can protect them from the threat of freezing temperatures, heavy rains, or strong winds. This nurturing environment helps the plants to establish strong roots and develop into healthy, robust specimens.
Another advantage of growing broccoli from seeds indoors is that it gives you a wider variety of choices. You can select from a diverse range of broccoli seed varieties available in the market, including traditional and heirloom varieties. This allows you to experiment and find the type of broccoli that suits your taste and gardening preferences.
Additionally, starting broccoli seeds indoors is a great educational activity for children and a chance for them to learn about the plant life cycle. It provides an opportunity for them to observe and participate in the growth process, helping them develop an appreciation for nature and healthy eating habits.
Now that we understand the benefits of starting broccoli seeds indoors, let’s dive into the process of choosing the right containers and potting mix, preparing the seeds, and the steps involved in successfully planting broccoli seeds indoors. With the right knowledge and a little bit of patience, you can soon be harvesting your own delicious homegrown broccoli.
Key Takeaways:
- Starting broccoli seeds indoors offers benefits like extended growing season, control over conditions, and wider seed choices, leading to a rewarding and bountiful harvest.
- Proper care, from seed preparation to outdoor transfer, ensures successful growth and abundant harvest of nutritious and delicious homegrown broccoli.
Read more: How To Plant Seeds Indoors
Benefits of Planting Broccoli Seeds Indoors
Planting broccoli seeds indoors offers several advantages over direct outdoor sowing. Not only does it provide a head start for your plants, but it also allows for better control over the growing conditions. Here are some key benefits of starting broccoli seeds indoors:
1. Extended Growing Season: Starting broccoli seeds indoors allows you to get a jumpstart on the growing season. By starting the seeds indoors, weeks before the last frost date, you can have well-established seedlings ready for transplanting when the weather is suitable. This extends the growing season for your broccoli and gives you an early harvest.
2. Better Control over Growing Conditions: Indoor seed starting enables you to create an ideal environment for your broccoli seeds. You can control factors like temperature, humidity, and light, ensuring optimal conditions for seed germination. This control minimizes the risk of failure and increases the success rate of your seedlings.
3. Protection from Harsh Weather: By starting broccoli seeds indoors, you protect your delicate seedlings from unpredictable weather conditions, such as late frosts or heavy rains. This protection gives your plants a better chance of survival and minimizes the risk of damage or stunted growth.
4. Early Harvest: One of the major advantages of planting broccoli seeds indoors is the opportunity to harvest fresh broccoli earlier in the season. Indoor-grown seedlings have a head start over direct-sown plants, resulting in an early and plentiful harvest of delicious broccoli for your table.
5. Better Quality Seedlings: When you start broccoli seeds indoors, you have more control over the growing conditions, ensuring healthier and stronger seedlings. You can provide them with optimal nutrition, adequate watering, and proper lighting, leading to robust plants with strong root systems. These healthy seedlings are more likely to thrive and yield high-quality broccoli.
6. Varied Seed Choices: Starting broccoli seeds indoors allows you to choose from a wide variety of seed options. You can experiment with different broccoli varieties, including heirlooms and hybrids, to find the ones that best suit your taste and growing conditions. This variety adds excitement and diversity to your garden.
7. Engaging Educational Activity: Planting broccoli seeds indoors is not only a productive gardening practice but also an engaging educational activity for children. It provides an opportunity for kids to learn about plant life cycles, the importance of healthy eating, and the joy of growing their own food. It can spark their curiosity and foster a connection with nature.
By planting broccoli seeds indoors, you can enjoy an early and bountiful harvest, nurture healthy seedlings, and have greater control over the growing conditions. It’s a rewarding and beneficial technique that enables you to grow nutritious broccoli right in your own backyard.
Choosing the Right Indoor Growing Container
When it comes to starting broccoli seeds indoors, choosing the right container is crucial for the healthy development of your seedlings. The container you select should provide adequate space for the roots to grow, good drainage to prevent overwatering, and be made of a material that is suitable for indoor gardening. Here are some factors to consider when choosing the right indoor growing container for your broccoli seeds:
1. Size: The size of the container is an important consideration. It should be spacious enough to accommodate the roots and allow for healthy growth. A container that is at least 2-3 inches deep and wide is generally suitable for starting broccoli seeds. Make sure the container is large enough to prevent overcrowding of the seedlings.
2. Drainage: Proper drainage is essential for preventing waterlogged soil and root rot. Choose a container that has drainage holes at the bottom or comes with a tray to catch excess water. Good drainage ensures that your broccoli seedlings receive the right amount of water without the risk of soggy soil conditions.
3. Material: The material of the container can impact moisture retention and temperature regulation. Clay or ceramic pots provide good moisture control, while plastic containers tend to retain more moisture. Consider the overall climate of your indoor environment and choose a material that balances moisture retention and airflow.
4. Reusable or Biodegradable: You have the option to choose between reusable and biodegradable containers. Reusable containers are made of durable materials like plastic or ceramic and can be used for multiple growing seasons. Biodegradable options, such as peat pots or coconut coir pots, can be directly planted in the soil, preventing root disturbance during transplanting.
5. Spacing: Broccoli seedlings need sufficient space for air circulation and healthy growth. If you plan to start multiple seeds in one container, make sure to leave enough space between each seed to avoid overcrowding. Overcrowding can lead to competition for resources and stunted growth.
6. Appearance: While the functionality of the container is important, you may also consider the aesthetic appeal. Choose a container that complements your indoor space and adds a touch of beauty to your seed starting setup. This can enhance your gardening experience and make it more enjoyable.
7. Availability: Consider the availability of the container. Opt for containers that are easily accessible and affordable. You can find a wide variety of options at local garden centers, online retailers, or even repurpose items you may already have at home, such as disposable cups or egg cartons.
Remember to clean the containers before use to ensure they are free from pathogens that could harm your seedlings. Providing the right container for your broccoli seeds sets the foundation for healthy growth and gives your plants the best chance of thriving throughout their growing journey.
In summary, choosing the right indoor growing container involves considering factors such as size, drainage, material, reusability, spacing, appearance, and availability. By selecting a container that meets these criteria, you can create a nurturing environment for your broccoli seeds and set them on the path to success.
Selecting the Right Potting Mix
Choosing the right potting mix is essential for the successful germination and growth of your broccoli seeds indoors. A high-quality potting mix provides the necessary nutrients, moisture retention, and drainage for healthy seedling development. Here are some key considerations when selecting the right potting mix for your broccoli seeds:
1. Well-Draining: Broccoli seedlings require well-draining soil to prevent the risk of root rot. Look for a potting mix that is formulated to provide good drainage. This allows excess water to flow freely through the soil, preventing waterlogging and ensuring the roots have access to oxygen.
2. Moisture Retention: While good drainage is important, the potting mix should also retain enough moisture to keep the seedlings hydrated. Look for a mix that can hold moisture without becoming excessively soggy. This balance helps to prevent underwatering or overwatering, ensuring optimal conditions for your broccoli seeds.
3. Lightweight: Opt for a lightweight potting mix to enhance airflow and prevent compacting. A mix that is too heavy can lead to poor root development and hinder water and nutrient absorption. Lighter mixes make it easier for young roots to penetrate the soil and promote overall plant health.
4. Nutrient-Rich: Broccoli plants require a steady supply of nutrients to support their growth. Look for a potting mix that is enriched with organic matter, such as compost or well-rotted manure. These organic materials contribute essential nutrients to the soil, providing a healthy start for your seedlings.
5. pH-Balanced: Broccoli plants prefer a slightly acidic soil pH range of 6.0 to 7.0. Check the pH level of your chosen potting mix and ensure it falls within this range. This helps the seedlings absorb nutrients more efficiently and fosters optimal growth and development.
6. Sterile: It is important to select a potting mix that is free from pests, diseases, and weed seeds. This reduces the risk of introducing harmful organisms to your seedlings. Look for mixes that are labeled as sterilized or pasteurized, as they have undergone a process to eliminate potential pathogens.
7. Seed Starting Mix: Consider using a dedicated seed starting mix for your broccoli seeds. These mixes are specifically formulated to provide the ideal balance of nutrients, moisture retention, and aeration for successful seed germination. Seed starting mixes typically have a finer texture, which aids in seedling establishment.
8. Organic Options: If you prefer organic gardening practices, look for potting mixes that are certified organic. These mixes are free from synthetic chemical fertilizers and pesticides, ensuring a more natural and environmentally friendly approach to growing your broccoli seeds.
When selecting a potting mix for your broccoli seeds, it is worth investing in a high-quality product. While it may cost a bit more initially, a good potting mix provides a solid foundation for healthy seedling growth and increases the chances of success in your indoor gardening endeavors.
By considering factors such as drainage, moisture retention, lightweight composition, nutrient content, pH balance, sterility, and organic options, you can select the right potting mix that will support the vibrant growth of your broccoli seeds and set them on the path to becoming strong and productive plants.
Preparing the Broccoli Seeds for Planting
Properly preparing the broccoli seeds before planting is crucial for optimizing germination and ensuring healthy seedling development. Taking the time to prepare the seeds will increase the chances of successful growth and produce robust broccoli plants. Here are the steps to follow when preparing your broccoli seeds for planting:
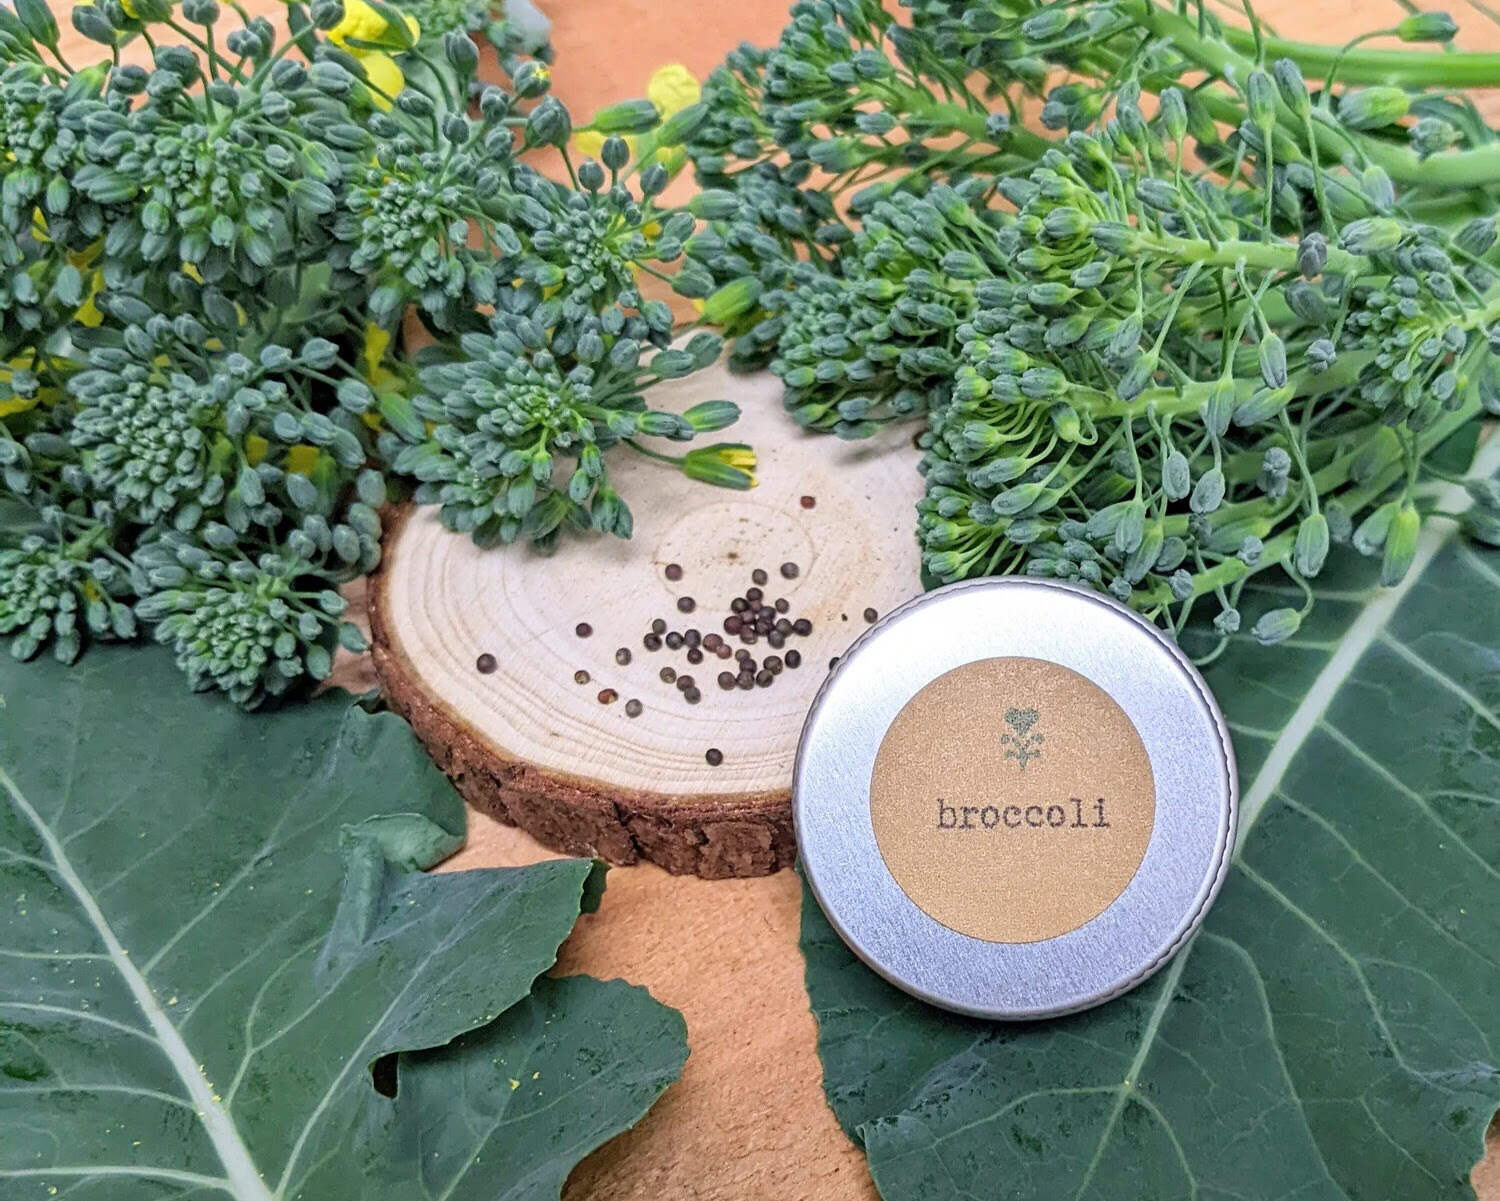
1. Seed Selection: Start by selecting high-quality broccoli seeds. Look for seeds that are well-packaged, from a reputable supplier or seed bank. Choose seeds that are viable and fresh for the best germination rates. Check the seed packet for the recommended planting date and any specific instructions for that particular variety.
2. Seed Treatment: While broccoli seeds typically don’t require any special treatment, some gardeners choose to pre-soak the seeds before planting. Soaking the seeds in water for a few hours or overnight can help soften the seed coat and improve germination rates. However, this step is optional and not necessary for all seed varieties.
3. Seed Storage: If you have leftover broccoli seeds from a previous season, proper storage is important to maintain seed viability. Store the seeds in a cool, dark, and dry place, such as an airtight container in the refrigerator or a cool basement. This helps preserve the seeds’ viability for future plantings.
4. Seed Viability Test: If you are unsure about the viability of older seeds, you can perform a simple germination test. Place a few seeds on a damp paper towel and seal them in a plastic bag. Keep the bag in a warm location and check for germination after a week. This will help you determine the germination rate of your seeds and adjust the planting amount accordingly.
5. Seed Sowing Plan: Before planting your broccoli seeds, it’s a good idea to create a sowing plan. Determine how many seeds you will need based on the size of your containers or garden beds. Proper spacing between seeds ensures enough room for healthy growth and minimizes competition for nutrients and space.
6. Clean and Sterilize: For optimal seedling health, clean and sterilize gardening tools, containers, and trays before handling the seeds. This helps prevent the transfer of pathogens or diseases to the seedlings. Wash tools with warm soapy water and rinse thoroughly, and sanitize containers with a diluted bleach solution or a horticultural disinfectant.
7. Labeling: To avoid confusion, label your containers or trays with the variety and sowing date of the broccoli seeds. This will help you keep track of each seedling’s progress and ensure proper care throughout their growth.
By following these steps and properly preparing your broccoli seeds, you set the stage for successful germination and healthy seedling development. Whether you choose to pre-soak the seeds, conduct a viability test, or simply store them correctly, taking the time to prepare the seeds will greatly increase your chances of a bountiful broccoli harvest.
Read more: How To Plant Sunflower Seeds Indoors
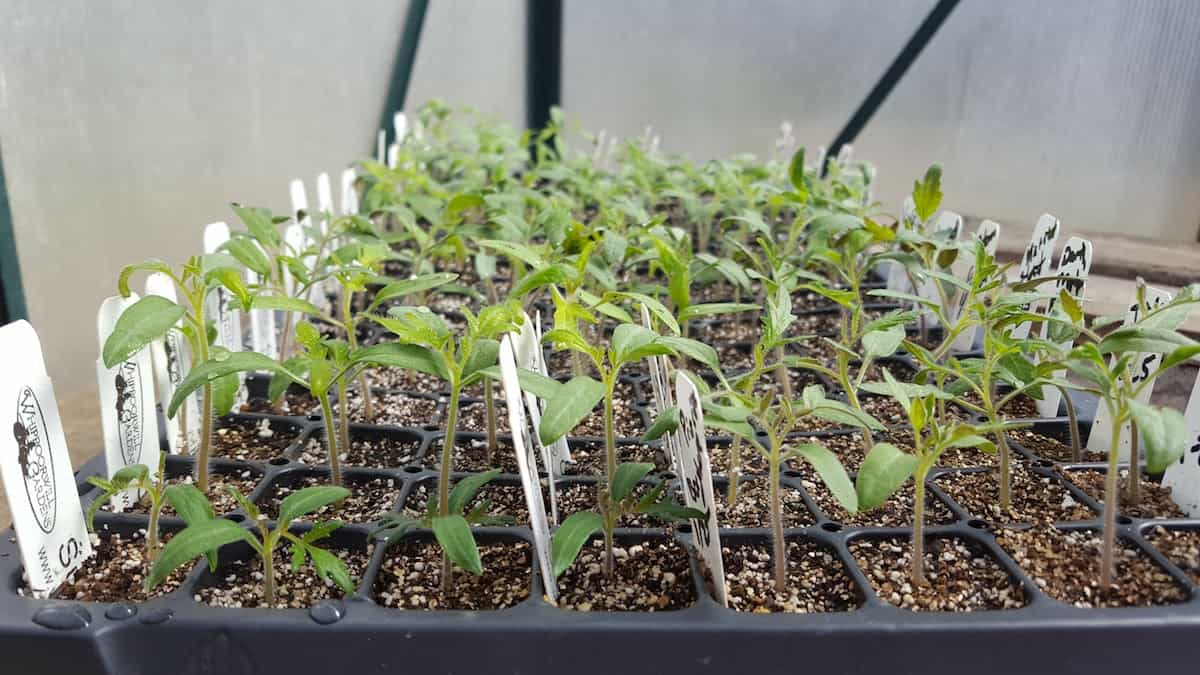
Planting Broccoli Seeds Indoors
Planting broccoli seeds indoors is an exciting and rewarding process that allows you to start your broccoli plants ahead of the outdoor growing season. By following a few simple steps, you can ensure successful seed germination and healthy seedling growth. Here is a step-by-step guide on how to plant broccoli seeds indoors:
1. Select the Right Time: Determine the ideal time to start planting your broccoli seeds indoors. Generally, it is recommended to begin 4-6 weeks before the last expected frost date in your area. This allows the seedlings enough time to grow and be ready for transplanting outdoors.
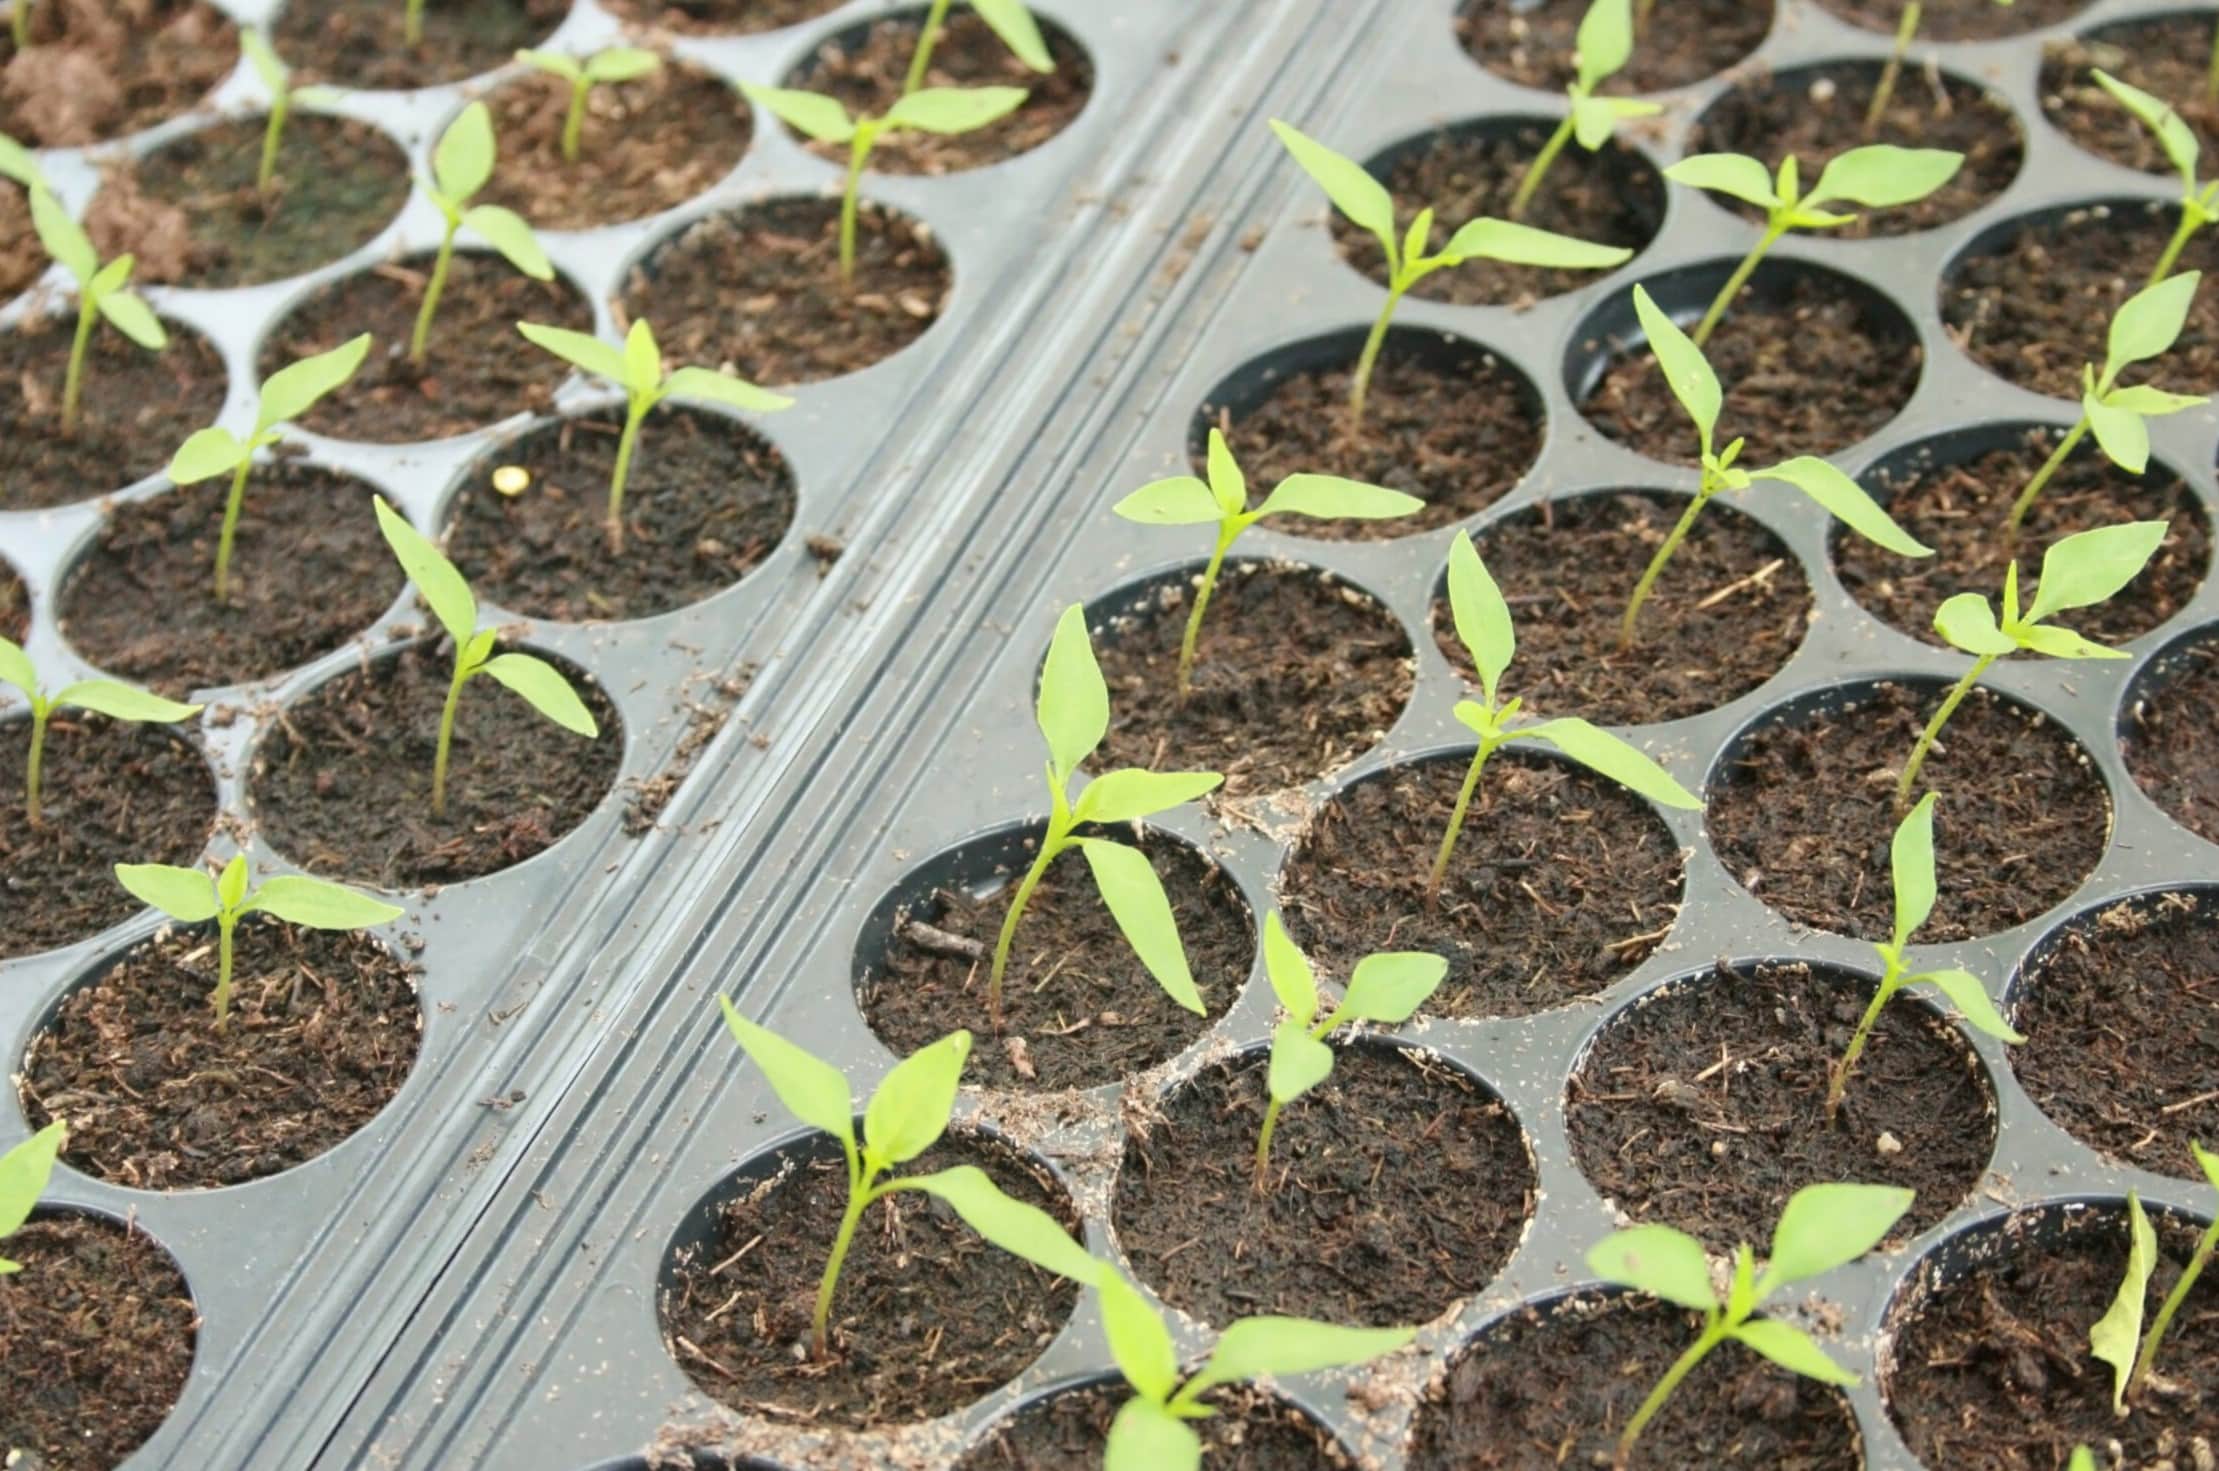
2. Gather Supplies: Gather all the necessary supplies before starting the planting process. You will need seed trays or pots, a high-quality potting mix, a spray bottle or watering can, and of course, your broccoli seeds. Ensure that the containers have proper drainage holes to prevent waterlogging.
3. Fill Containers: Fill the seed trays or pots with the potting mix, leaving a small space at the top for watering. Level the soil surface gently with your fingers or a small trowel. Avoid compressing the soil too tightly as it can hinder root growth.
4. Plant the Seeds: Create small indentations in the soil using your finger or a pencil, about 1/4 to 1/2 inch deep. Space the indentations according to the recommended spacing for the variety you are planting. Place one broccoli seed in each indentation and cover it with a thin layer of the potting mix.
5. Water Gently: After planting, water the seeds gently using a spray bottle or a watering can with a fine nozzle. Ensure that the soil is evenly moist but not soaking wet. Avoid overwatering, as it can lead to fungal diseases or damping off in the seedlings.
6. Provide Proper Lighting: Place the seed trays or pots in a location with ample natural or artificial light. Broccoli seeds require at least 6-8 hours of bright light each day for optimal growth. If natural light is insufficient, consider using fluorescent or LED grow lights positioned 4-6 inches above the seedlings.
7. Maintain Optimal Temperature: Broccoli seeds germinate best within a temperature range of 70-85°F (21-29°C). Keep the seed trays or pots in a warm area of your home or use a heating mat to maintain the ideal temperature for germination. Avoid placing them in drafty or cold locations.
8. Provide Adequate Air Circulation: Good air circulation helps prevent diseases and strengthens the seedlings. Use a small fan set to a low setting nearby to create gentle airflow around the seedlings. Be cautious not to position the fan too close, as excessive airflow may dry out the soil.
9. Monitor and Water Regularly: Check the moisture level of the soil regularly and water as needed. Keep the soil consistently moist but not waterlogged. Mist the soil surface with water from a spray bottle as needed to prevent it from drying out.
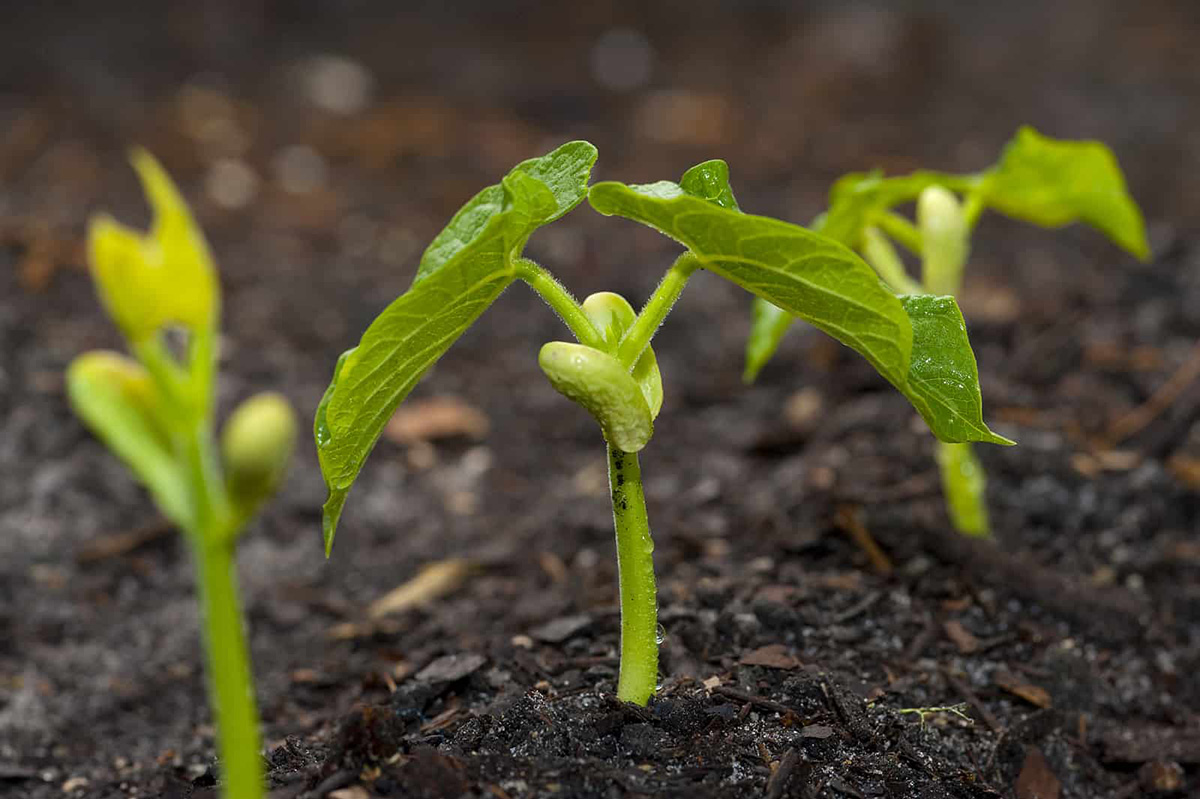
10. Observe Germination and Growth: Within a week or two, the broccoli seeds should start to germinate. Keep track of the germination rate and the growth of the seedlings. As they grow, thin out any overcrowded areas so that each seedling has enough space to develop.
By following these steps and providing the right conditions for your broccoli seeds, you can foster healthy germination and robust seedling growth. Remember to be patient and provide consistent care as you watch your broccoli seedlings flourish. In the next stages of their growth, they will need proper lighting, watering, and eventually be ready for transplanting outdoors to continue their journey to becoming mature broccoli plants.
When planting broccoli seeds indoors, make sure to use a seed starting mix, keep the soil consistently moist, and provide plenty of light to help the seedlings grow strong and healthy.
Providing Adequate Lighting for Germination
Proper lighting is crucial for successful germination of broccoli seeds indoors. As seeds rely on light to trigger germination and promote healthy seedling growth, it is essential to provide adequate lighting. Here is a guide on how to ensure your broccoli seeds receive the right amount and type of light for successful germination:
1. Natural Light: If possible, place your seed trays or pots in a location that receives ample natural light. Choose a south-facing window or a spot where the seedlings can receive at least 6-8 hours of direct sunlight each day. This natural light provides a full spectrum of wavelengths that are beneficial for seed germination.
2. Supplement with Grow Lights: If natural light is limited or unavailable, use artificial grow lights to supplement the lighting requirements. LED (light-emitting diode) grow lights and fluorescent lights are popular choices for indoor gardening. These lights emit the necessary wavelengths of light to promote photosynthesis and stimulate seed germination.
3. Position the Lights: When using artificial grow lights, position them about 4-6 inches above the seed trays or pots. This ensures that the light is delivered directly to the seedlings without causing excessive heat or burning the tender leaves. As the seedlings grow taller, adjust the height of the lights to maintain the appropriate distance.
4. Duration of Lighting: Broccoli seeds require around 12-16 hours of light each day for optimal germination and healthy growth. It is important to provide a consistent light schedule to mimic natural daylight conditions. Consider using a timer to automate the lighting schedule and maintain a consistent duration each day.
5. Light Intensity: The intensity of the light is also a crucial factor for successful germination. The light source should emit enough intensity to reach the seedlings effectively. Measure the light intensity using a light meter or follow the manufacturer’s recommendations for the specific grow lights you are using. Aim for an intensity between 1000-3000 lux for seed germination.
6. Adjusting Light Distance: As the seedlings grow, it is important to adjust the distance of the lights to prevent the seedlings from stretching or becoming leggy. Monitor the growth of the seedlings and ensure they are staying compact and sturdy. If they start to stretch towards the light, move the lights closer to maintain an optimal distance.
7. Even Light Distribution: Make sure that the light is evenly distributed across all the seedlings. Rotate the trays or pots regularly to ensure all sides of the seedlings receive equal light exposure. This helps prevent the seedlings from leaning towards the light source and promotes even growth.
8. Monitor Seedling Response: Observe the seedlings closely to assess their response to the light. Healthy seedlings will display vibrant green color and sturdy growth. If the seedlings appear pale, elongated, or weak, it may indicate insufficient light. In such cases, increase the intensity or duration of the light exposure.
Remember to strike a balance between providing enough light and avoiding excessive heat. Monitor the temperature around the seedlings, ensuring it remains within the optimal range for germination. By following these guidelines and providing adequate lighting, you can ensure successful germination and foster healthy seedling growth for your broccoli plants.
Watering and Caring for Indoor Broccoli Plants
Proper watering and care are essential for the successful growth and development of indoor broccoli plants. By providing consistent moisture, nutrition, and attention to their needs, you can ensure healthy and productive broccoli plants. Here are some guidelines for watering and caring for your indoor broccoli plants:
1. Watering: Water your indoor broccoli plants regularly, keeping the soil consistently moist but not waterlogged. Aim to water the plants when the top inch of the soil feels slightly dry to the touch. Use a watering can or a spray bottle to gently moisten the soil evenly, taking care not to oversaturate it. Be mindful of overwatering, as it can lead to root rot and other fungal diseases.
2. Watering Techniques: To avoid disturbing the fragile seedlings, water the base of the plants rather than directly on the leaves. This helps prevent potential damage and reduces the risk of disease spread. Water the plants slowly and evenly, allowing the water to penetrate the soil deeply. This encourages healthy root development and ensures proper nutrient uptake.
3. Monitoring Moisture Levels: Regularly monitor the moisture level of the soil using your finger or a moisture meter. Adjust your watering schedule based on the specific needs of your broccoli plants and the environmental conditions. If the soil feels excessively dry, increase the frequency of watering, and if it feels too wet, allow it to dry out slightly before watering again.
4. Fertilization: Broccoli plants require regular fertilization to promote healthy growth and abundant yields. Start fertilizing your indoor broccoli plants with a balanced fertilizer once they develop their second set of true leaves. Use a slow-release granular fertilizer or a liquid fertilizer diluted according to the manufacturer’s instructions. Apply the fertilizer every 2-3 weeks throughout the growing season.
5. Proper Nutrient Balance: Ensure your broccoli plants receive a balanced supply of essential nutrients. Broccoli is a heavy feeder, requiring higher levels of nitrogen, phosphorus, and potassium. Choose a fertilizer specifically formulated for vegetables or use organic alternatives like compost or well-rotted manure. Regularly check the foliage for signs of nutrient deficiencies, such as yellowing leaves, and adjust the fertilizer accordingly.
6. Temperature and Humidity: Maintain suitable temperature and humidity levels for your indoor broccoli plants. Broccoli prefers cooler temperatures between 60-70°F (15-21°C) during the day and slightly cooler temperatures at night. Adequate airflow is important to prevent fungal diseases, so ensure proper ventilation while maintaining stable humidity levels. Monitor your indoor environment and make adjustments as needed.
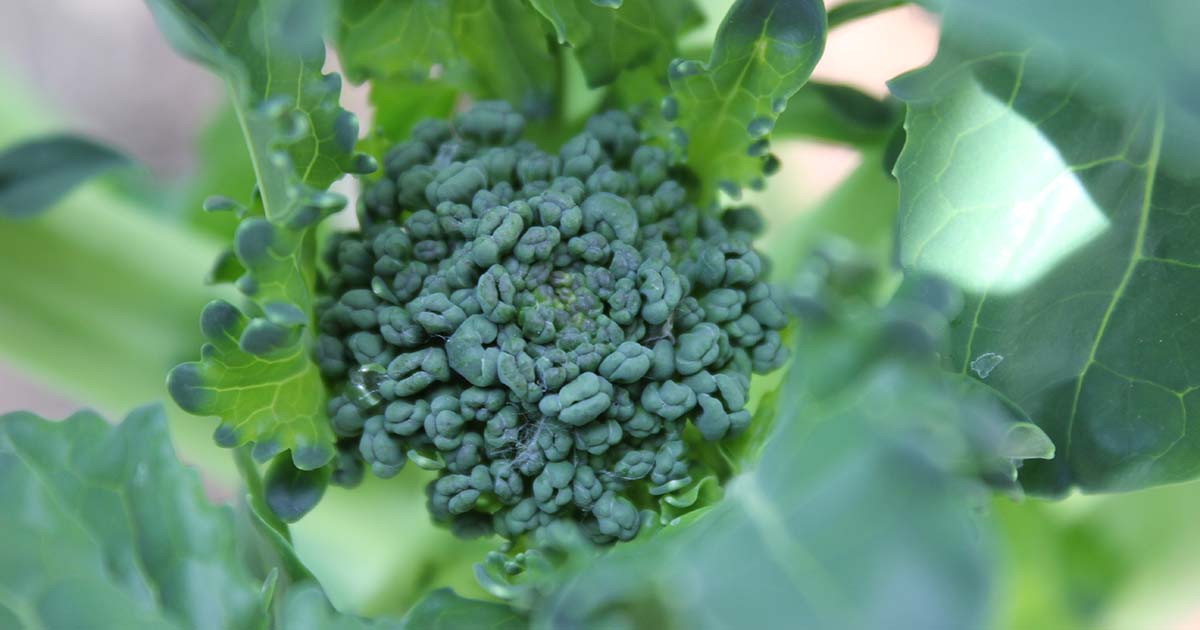
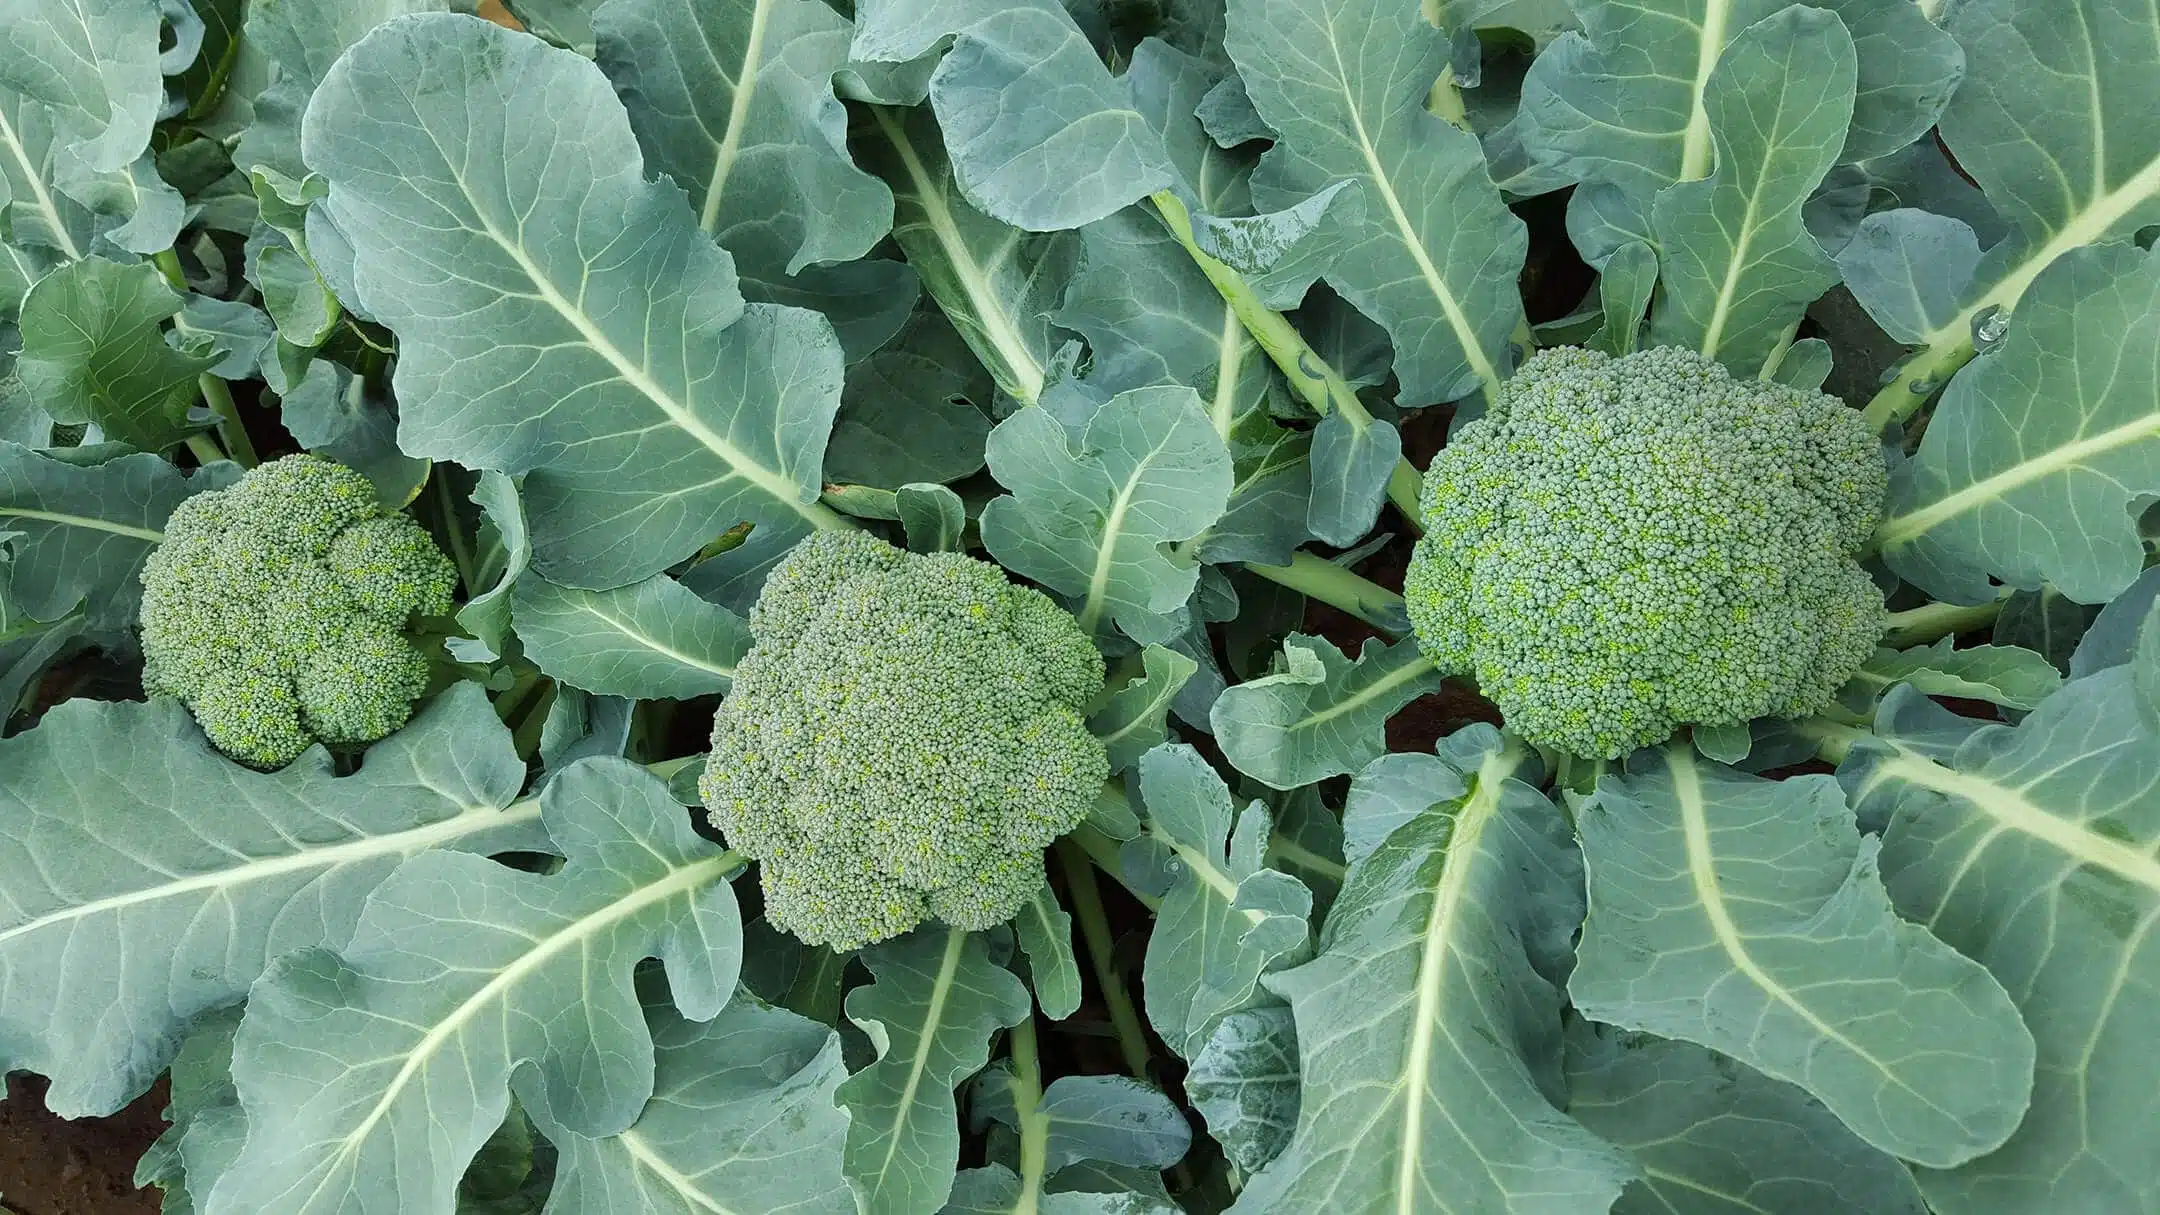
7. Support and Staking: As your indoor broccoli plants grow, they may benefit from support and staking. Broccoli heads can become heavy, causing the plants to tilt or break. Use stakes or cages to provide support for the plants, ensuring the heads remain upright and well-supported. This helps prevent damage and promotes better air circulation.
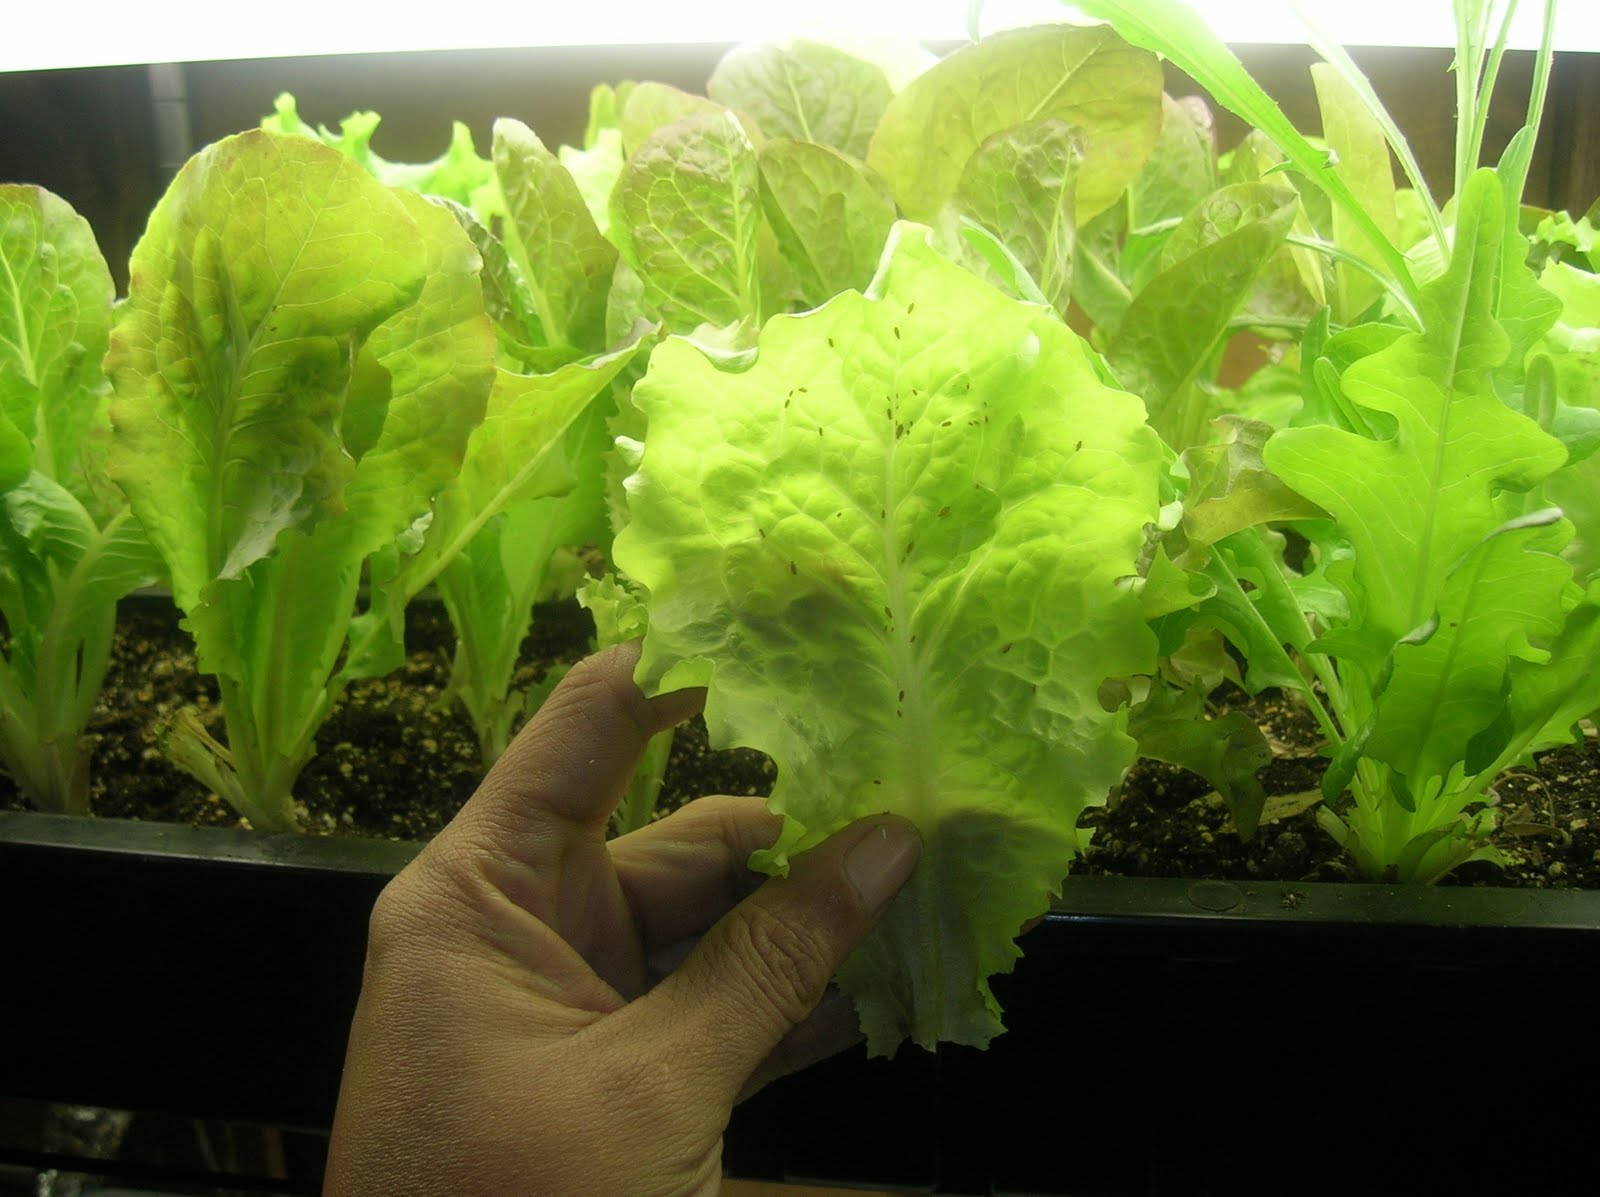
8. Pest and Disease Control: Regularly inspect your indoor broccoli plants for signs of pests or diseases. Common pests that affect broccoli include aphids, cabbage worms, and flea beetles. Consider using organic pest control methods such as handpicking, insecticidal soaps, or natural predators like ladybugs. Proper sanitation and good airflow can help prevent fungal diseases, such as powdery mildew or black rot.
9. Pruning: Monitor your broccoli plants for overcrowding or damaged foliage. Remove any yellowing or diseased leaves promptly to prevent the spread of diseases. Prune out any competing shoots or side sprouts to direct energy towards the main head formation.
10. Observation and Care: Observe your indoor broccoli plants closely, paying attention to their overall growth and appearance. Regularly check for any signs of stress, nutrient deficiencies, or pest issues. Adjust your care routine accordingly to address any issues promptly and provide the necessary attention for healthy plant development.
By following these watering and caring practices, you can provide the optimal conditions for your indoor broccoli plants. With consistent care and attention to their needs, you can expect a rewarding harvest of nutritious and delicious homegrown broccoli.
Transplanting Seedlings to Larger Pots
Transplanting seedlings to larger pots is a crucial step in the growth of indoor broccoli plants. As the seedlings outgrow their initial containers, it is necessary to provide them with more space for root development and continued growth. Transplanting promotes healthier plants and ensures they have enough room to thrive. Here is a step-by-step guide on how to transplant your broccoli seedlings to larger pots:
1. Timing: Choose the appropriate time to transplant your broccoli seedlings. It is generally recommended to wait until the seedlings have developed their first true leaves and are around 3-4 inches tall. This indicates that they have established a healthy root system and are ready to move to larger pots.
2. Prepare the Larger Pots: Select pots that are one size larger than the current containers. Ensure that the new pots have sufficient drainage holes at the bottom. Clean the pots thoroughly and fill them with fresh potting mix, leaving a small space at the top to avoid overflow during watering.
3. Water the Seedlings: Before transplanting, water the seedlings in their current containers. This helps to moisten the soil and makes it easier to remove the seedlings without damaging their delicate roots. Wait for a few minutes to allow excess water to drain away.
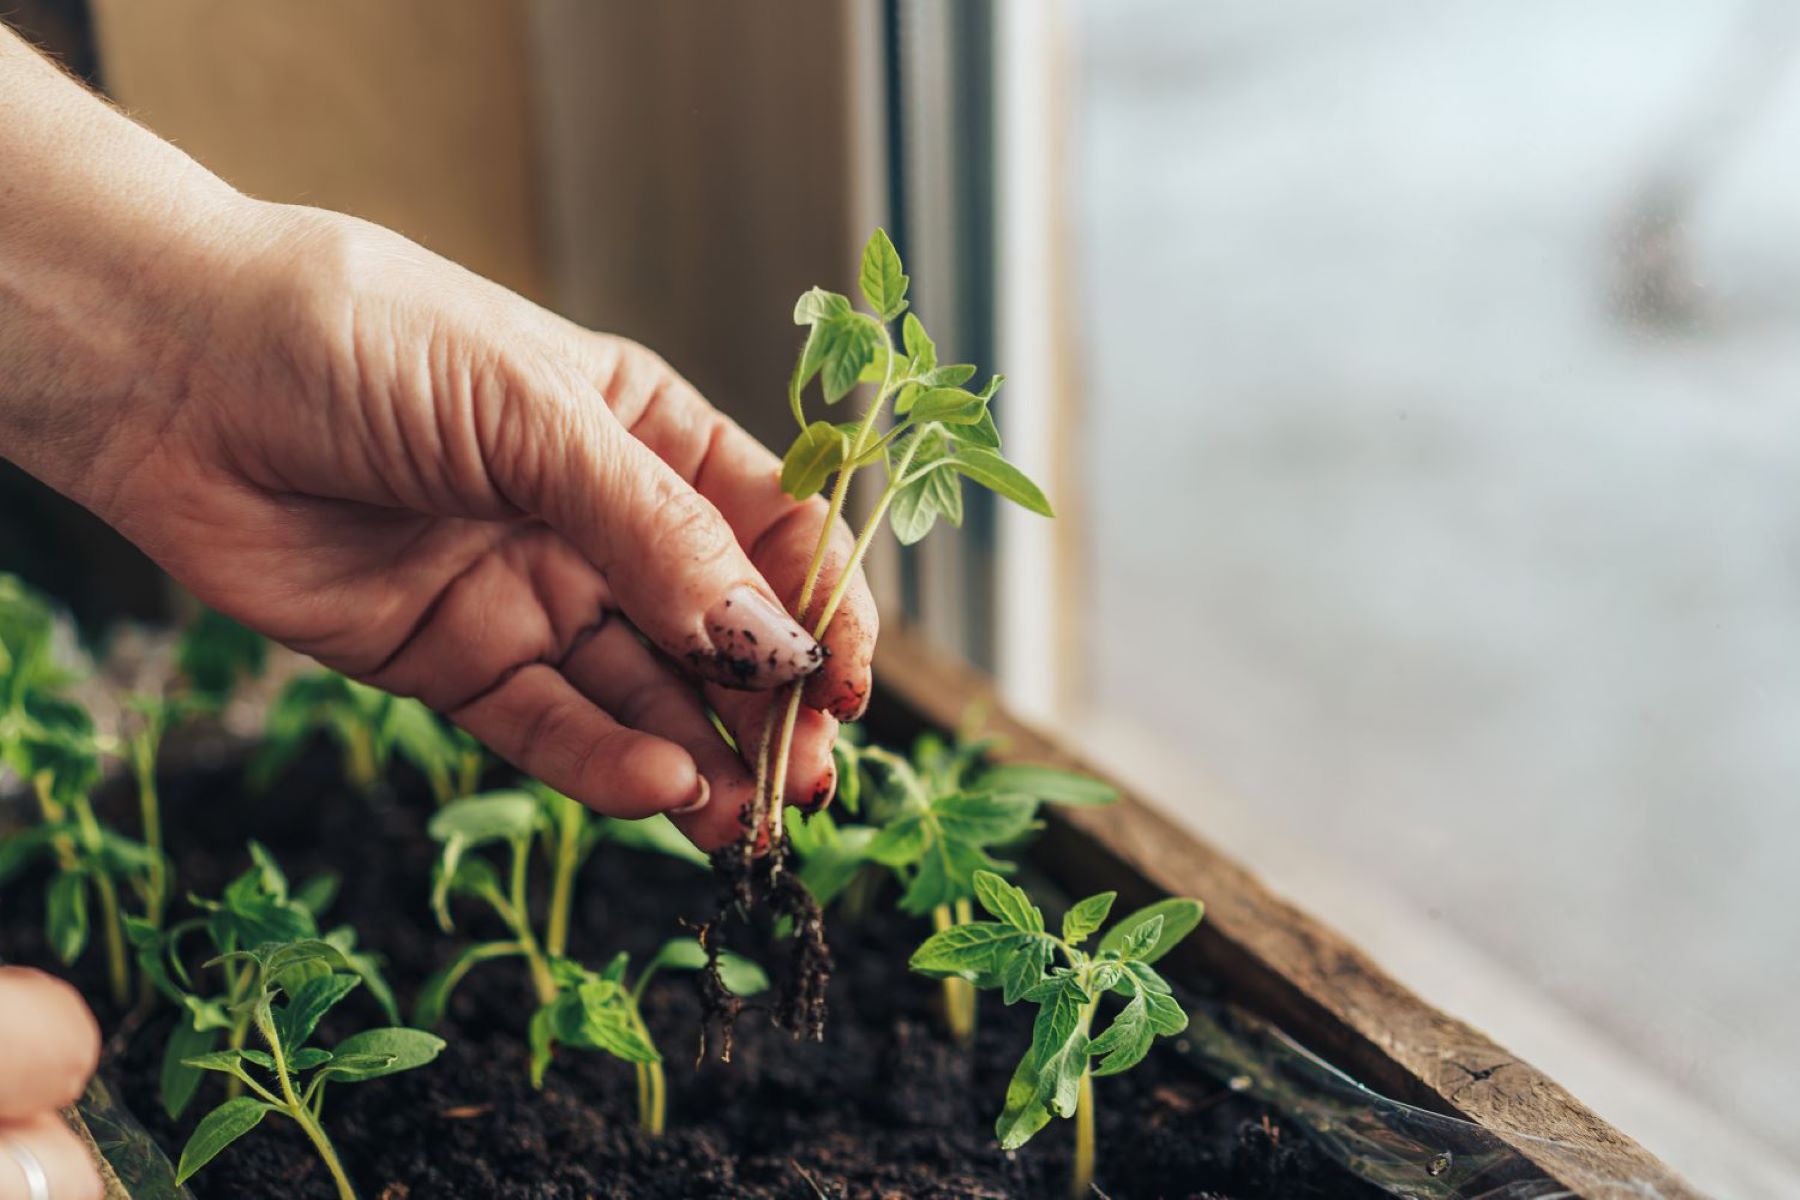
4. Gently Remove Seedlings: Carefully remove the seedlings from their current containers by gently loosening the soil around the base of each plant. Try to minimize root disturbance as much as possible. Hold the seedlings by their leaves or use a small tool, such as a spoon or fork, to gently lift them out.
5. Place Seedlings in New Pots: Make a hole in the center of the prepared larger pots using your finger or a small tool. Insert the seedlings into the holes, ensuring that they are positioned upright and at the same depth as they were in their initial containers. Gently firm the soil around each seedling to provide stability.
6. Water and Settle the Soil: After transplanting, water the new pots thoroughly to help settle the soil around the roots. This helps eliminate air pockets and ensures good root-to-soil contact. Avoid overwatering, but ensure that the soil is evenly moist.
7. Provide Adequate Light: Place the newly transplanted broccoli seedlings in a well-lit area with the appropriate amount of light. If using artificial grow lights, adjust the height and intensity to provide optimal lighting for the plants. Adequate light is vital to support their growth and development.
8. Monitor and Adjust Care: Keep a close eye on the transplanted seedlings and monitor their response to the larger pots. Watch for any signs of stress, such as wilting or yellowing leaves, and adjust their care routine accordingly. Provide ongoing care, including regular watering, appropriate fertilization, and maintenance of proper temperature and humidity levels.
9. Hardening Off: After a week or two of settling into their larger pots, gradually expose the transplanted broccoli seedlings to outdoor conditions. This process, known as hardening off, helps them acclimate to the outdoor environment and prepares them for transplanting into the garden.
10. Plan for Garden Transplanting: As the transplanted seedlings grow stronger and the outdoor conditions become favorable, plan for their final transplant into the garden. Ensure that the soil has warmed up and there is no longer a risk of frost. Follow proper transplanting techniques and provide appropriate care after transplantation to continue supporting their growth.
Transplanting your broccoli seedlings to larger pots allows them to develop robust root systems and provides the necessary space for continued growth. With proper timing, care, and attention, your transplanted seedlings will flourish and ultimately yield abundant and nutritious broccoli heads.
Read more: When To Plant Nasturtium Seeds Indoors
Hardening Off Indoor Broccoli Plants
Hardening off is a crucial step in the transition of indoor-grown broccoli plants to the outdoor garden. It is a gradual process that helps acclimate the seedlings to the external environmental conditions, such as temperature, sunlight, wind, and humidity. Hardening off prepares the plants for the changes they will encounter and reduces the risk of transplant shock. Here is a step-by-step guide on how to effectively harden off your indoor broccoli plants:
1. Timing: Begin the hardening-off process when the weather is consistently mild and there is no longer a risk of frost. Typically, this is around 7-10 days before you plan to transplant the broccoli plants into your garden.
2. Start Slowly: Begin by placing the indoor broccoli plants outside in a sheltered location such as a covered porch, shaded area, or cold frame. Expose them to the outdoor environment for a short period, starting with just a couple of hours per day. Gradually increase the duration each day over the course of a week.
3. Choose the Right Time of Day: Initially, expose the plants to the outdoor environment during the mildest part of the day, typically during late morning or early afternoon. This avoids exposing them to extreme temperatures, such as early morning frost or scorching midday heat.
4. Protect from Wind: During the early stages of hardening off, shield the plants from strong winds. Wind can dry out the tender foliage and damage the delicate stems. Placing the plants in a sheltered location or using windbreaks, such as stakes or garden fabric, can help protect them.
5. Monitor the Plants: Observe the plants closely during the hardening-off period. Watch for any signs of stress, such as wilting or leaf discoloration. If you notice any signs of stress, reduce the duration of outdoor exposure or move the plants to a more protected location.
6. Gradually Increase Sun Exposure: As the plants adjust to outdoor conditions, gradually increase their exposure to direct sunlight. Begin with partial shade and gradually expose them to longer periods of full sun. This helps the plants adjust to the intensity of sunlight and prevents leaf burn.
7. Water the Plants: Pay attention to the moisture needs of the plants during the hardening-off process. The outdoor environment may have different moisture levels than what the plants were accustomed to indoors. Water the plants as needed, ensuring that they remain evenly moist but not waterlogged.
8. Provide Sturdy Support: If your broccoli plants have grown tall or have large heads, provide support such as stakes or cages to prevent them from bending or breaking in windier outdoor conditions. This ensures that the plants remain upright and continue to grow strong.
9. Protect from Pests: During the hardening-off period, be vigilant for pests like aphids, flea beetles, or cabbage worms that may be present outdoors. Take appropriate preventative measures or use natural pest control methods to protect your plants.
10. Transition to Garden: After about a week of gradual acclimatization, your indoor broccoli plants should be ready for transplanting into the garden. Choose a suitable location with well-drained soil and adequate sunlight. Plant them at the appropriate spacing recommended for the variety you are growing.
By following these steps, you can effectively harden off your indoor-grown broccoli plants, preparing them for the outdoor garden. This process reduces the chance of transplant shock and ensures that your plants have a successful transition to their new environment. Your hardened-off broccoli plants will be ready to thrive and produce a bountiful harvest in your garden.
Transferring Broccoli Seedlings to the Outdoor Garden
Transferring your well-hardened indoor broccoli seedlings to the outdoor garden is an exciting step that marks the transition of your plants towards maturity and eventual harvest. By following proper techniques and timing, you can ensure a successful transfer and promote healthy growth in your broccoli plants. Here is a step-by-step guide on how to transfer your broccoli seedlings to the outdoor garden:
1. Choose the Right Timing: Select the appropriate time to transplant your broccoli seedlings. Wait until all risk of frost has passed and the soil has warmed up. Broccoli plants prefer cool weather and thrive when daytime temperatures range between 65-75°F (18-24°C).
2. Prepare the Garden Bed: Prepare the garden bed in advance by removing any weeds, rocks, or debris. Break up the soil, removing any clumps and ensuring it is loose and well-draining. Incorporate organic matter, such as compost or aged manure, to enrich the soil and enhance its moisture retention.
3. Amend the Soil pH: Test the soil pH to ensure it falls within the optimal range of 6.0 to 7.0 for broccoli plants. If necessary, amend the soil with lime to raise the pH or sulfur to lower it. Follow the instructions on the product packaging and adjust the pH accordingly for optimal plant growth.
4. Provide Proper Spacing: Broccoli plants require adequate space for healthy growth and to prevent overcrowding. Space the seedlings according to the specific variety you are growing, typically around 18-24 inches apart. This spacing allows for proper air circulation, reduces disease risks, and provides enough room for the heads to develop.
5. Transplanting Technique: Carefully dig a hole in the garden bed that is slightly larger than the root ball of each seedling. Gently loosen the seedling from its container and place it in the hole, ensuring that it is at the same depth as it was growing indoors. Backfill the hole with soil, gently firming it around the base of the plant.
6. Water Thoroughly: After transplanting, water the seedlings thoroughly to settle the soil around the roots and to provide hydration. Water at the base of the plants, avoiding wetting the foliage as much as possible. Ensure that the soil is evenly moist but not waterlogged.
7. Protect from Harsh Sunlight: Initially, shield the newly transplanted seedlings from prolonged exposure to direct sunlight. Use shade cloth, row covers, or plant them in a location that receives partial shade for a few days. This helps to minimize stress and allow the seedlings to adjust to the outdoor environment.
8. Mulch: Apply a layer of organic mulch, such as straw or wood chips, around the base of the plants. This helps conserve moisture in the soil, suppresses weed growth, and maintains a more consistent soil temperature. Leave a small gap between the mulch and the stem to prevent excess moisture accumulation and the risk of disease.
9. Provide Support: If you are growing broccoli varieties with larger heads, provide support for the plants to prevent them from bending or breaking. Install stakes or cages near the plants, being careful not to damage the roots, and secure the heads as they develop.
10. Monitor and Maintain: Regularly monitor the transplanted seedlings for signs of stress, pests, or disease. Provide adequate watering, ensuring the soil remains evenly moist. Check for any signs of nutrient deficiencies and adjust fertilization as necessary. Pay attention to weather conditions, providing protection from extreme heat, strong winds, or heavy rain.
By following these steps, you can successfully transfer your well-prepared indoor broccoli seedlings to the outdoor garden. With proper spacing, watering, support, and ongoing care, your transplanted broccoli plants will continue to grow and develop, eventually yielding delicious and nutritious heads for you to enjoy in your garden.
Conclusion
Starting broccoli seeds indoors and caring for the seedlings until they are ready for the outdoor garden is a rewarding and fulfilling process for garden enthusiasts. By following the proper techniques and providing the necessary care at each stage, you can ensure the successful growth and development of your broccoli plants. Let’s recap the key points covered in this guide:
– Starting broccoli seeds indoors offers several benefits, including an extended growing season, control over growing conditions, protection from harsh weather, and a wider variety of seed choices.
– Choose the right indoor growing container, ensuring sufficient space, drainage, and a suitable material for indoor gardening.
– Select a high-quality potting mix that provides proper drainage, moisture retention, and nutrition for healthy seedling growth.
– Prepare the broccoli seeds by selecting viable seeds, performing seed treatments if desired, storing them properly, and conducting a seed viability test if necessary.
– Plant the broccoli seeds indoors in a well-prepared potting mix, providing proper spacing and watering them gently.
– Ensure adequate lighting for germination by placing the seed trays or pots in a well-lit area with either natural sunlight or artificial grow lights.
– Water and care for your indoor broccoli plants by providing consistent moisture, proper nutrition through fertilization, maintaining appropriate temperature and humidity levels, and protecting them from pests and diseases.
– Transplant the seedlings to larger pots as they outgrow their initial containers, providing them with ample space for root development.
– Harden off the indoor broccoli plants gradually, exposing them to the outdoor environment over a period of time to acclimate them to the changes in temperature, sunlight, wind, and humidity.
– Transfer the well-hardened broccoli seedlings to the outdoor garden at the appropriate time, ensuring proper spacing, soil preparation, and watering them thoroughly.
By following these guidelines, you can enjoy a successful and abundant harvest of nutritious and delicious broccoli from your very own garden. From sowing the seeds to caring for the seedlings and transplanting them into the garden, each step requires attention and care. Your efforts will be rewarded with the satisfaction of watching your indoor-grown broccoli thrive and provide you with a healthy bounty of homegrown produce. So roll up your sleeves, get your gardening tools ready, and embark on the journey of growing your own indoor broccoli garden. Happy gardening!
Frequently Asked Questions about How To Plant Broccoli Seeds Indoors
Was this page helpful?
At Storables.com, we guarantee accurate and reliable information. Our content, validated by Expert Board Contributors, is crafted following stringent Editorial Policies. We're committed to providing you with well-researched, expert-backed insights for all your informational needs.

0 thoughts on “How To Plant Broccoli Seeds Indoors”