Articles
How To Make Stained Wood Pallet Wall Art
Modified: December 7, 2023
Learn how to create stunning stained wood pallet wall art with our informative articles. Step-by-step instructions and expert tips available.
(Many of the links in this article redirect to a specific reviewed product. Your purchase of these products through affiliate links helps to generate commission for Storables.com, at no extra cost. Learn more)
Introduction
Welcome to the world of DIY home decor! If you’re looking for a creative and personalized way to adorn your walls, stained wood pallet wall art might be just the thing you’ve been searching for. With its rustic charm and unique aesthetic, stained wood pallet wall art can add warmth and character to any space.
Whether you’re an experienced DIY enthusiast or a beginner looking to explore your creative side, this article will guide you through the process of creating your very own stained wood pallet wall art. From gathering the necessary materials to hanging the finished piece, we’ll cover all the steps you need to take to bring this beautiful project to life.
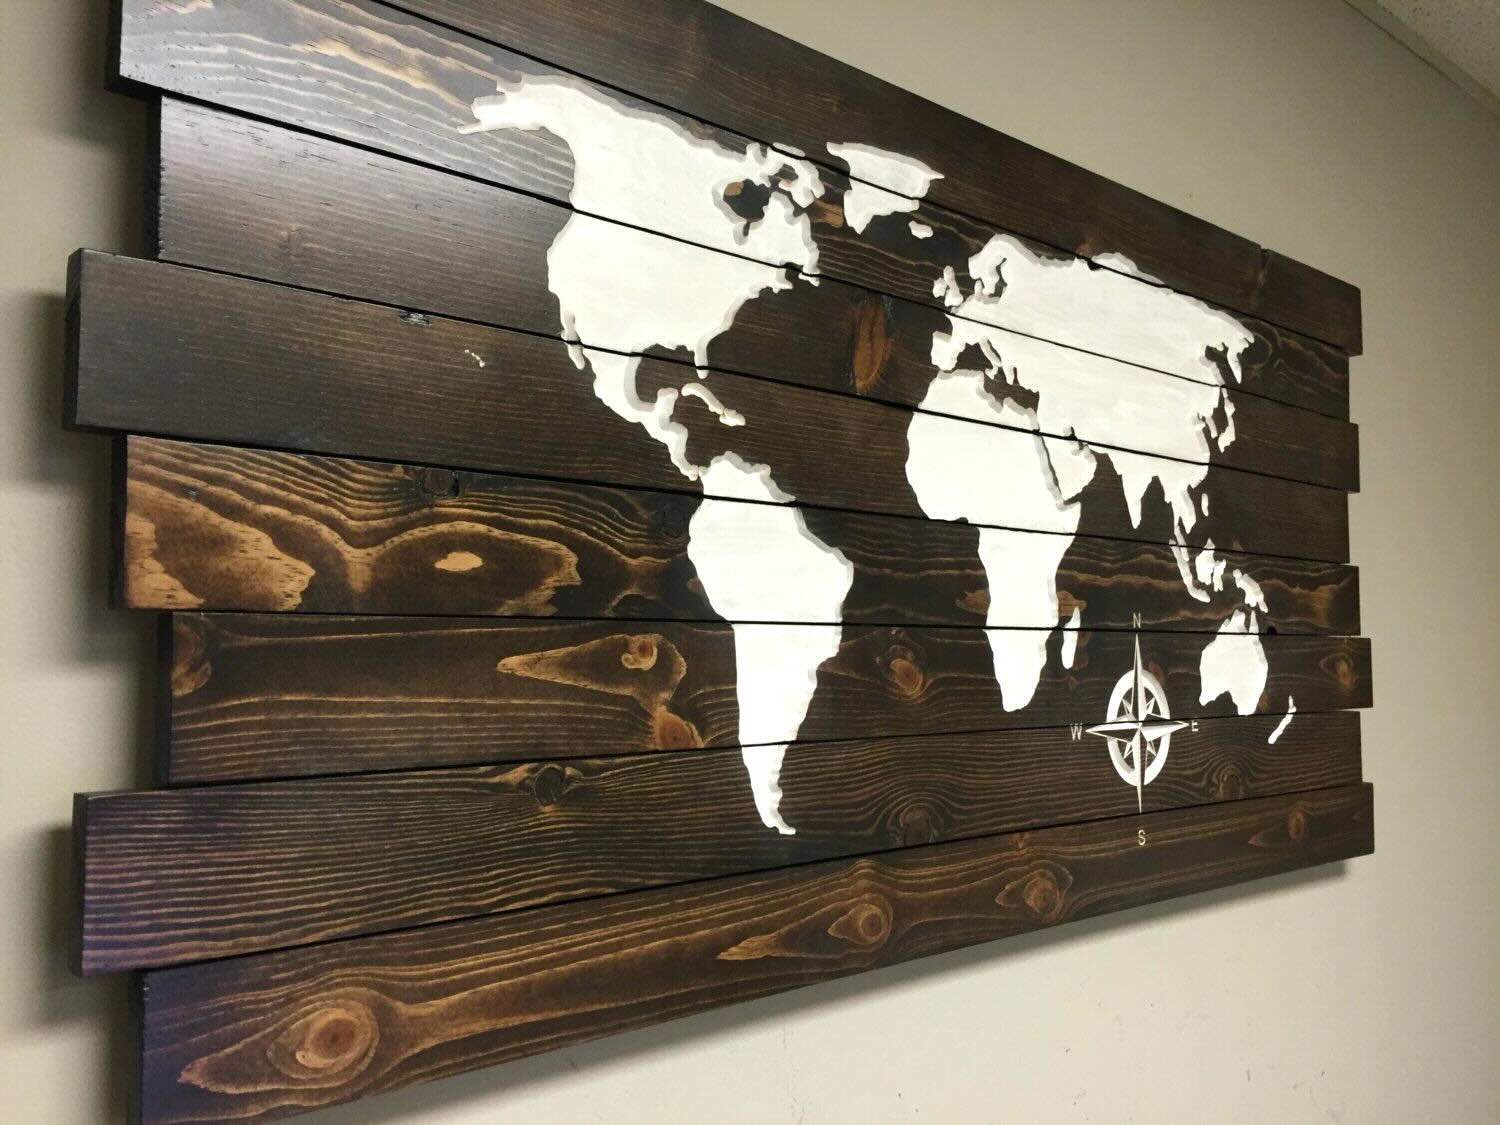
Before we dive in, let’s take a moment to understand the appeal of stained wood pallet wall art. The combination of weathered wood and rich stains creates a stunning visual effect that instantly adds depth and texture to any room. Stained wood also brings out the natural grain and beauty of the material, creating a sense of authenticity and rustic charm.
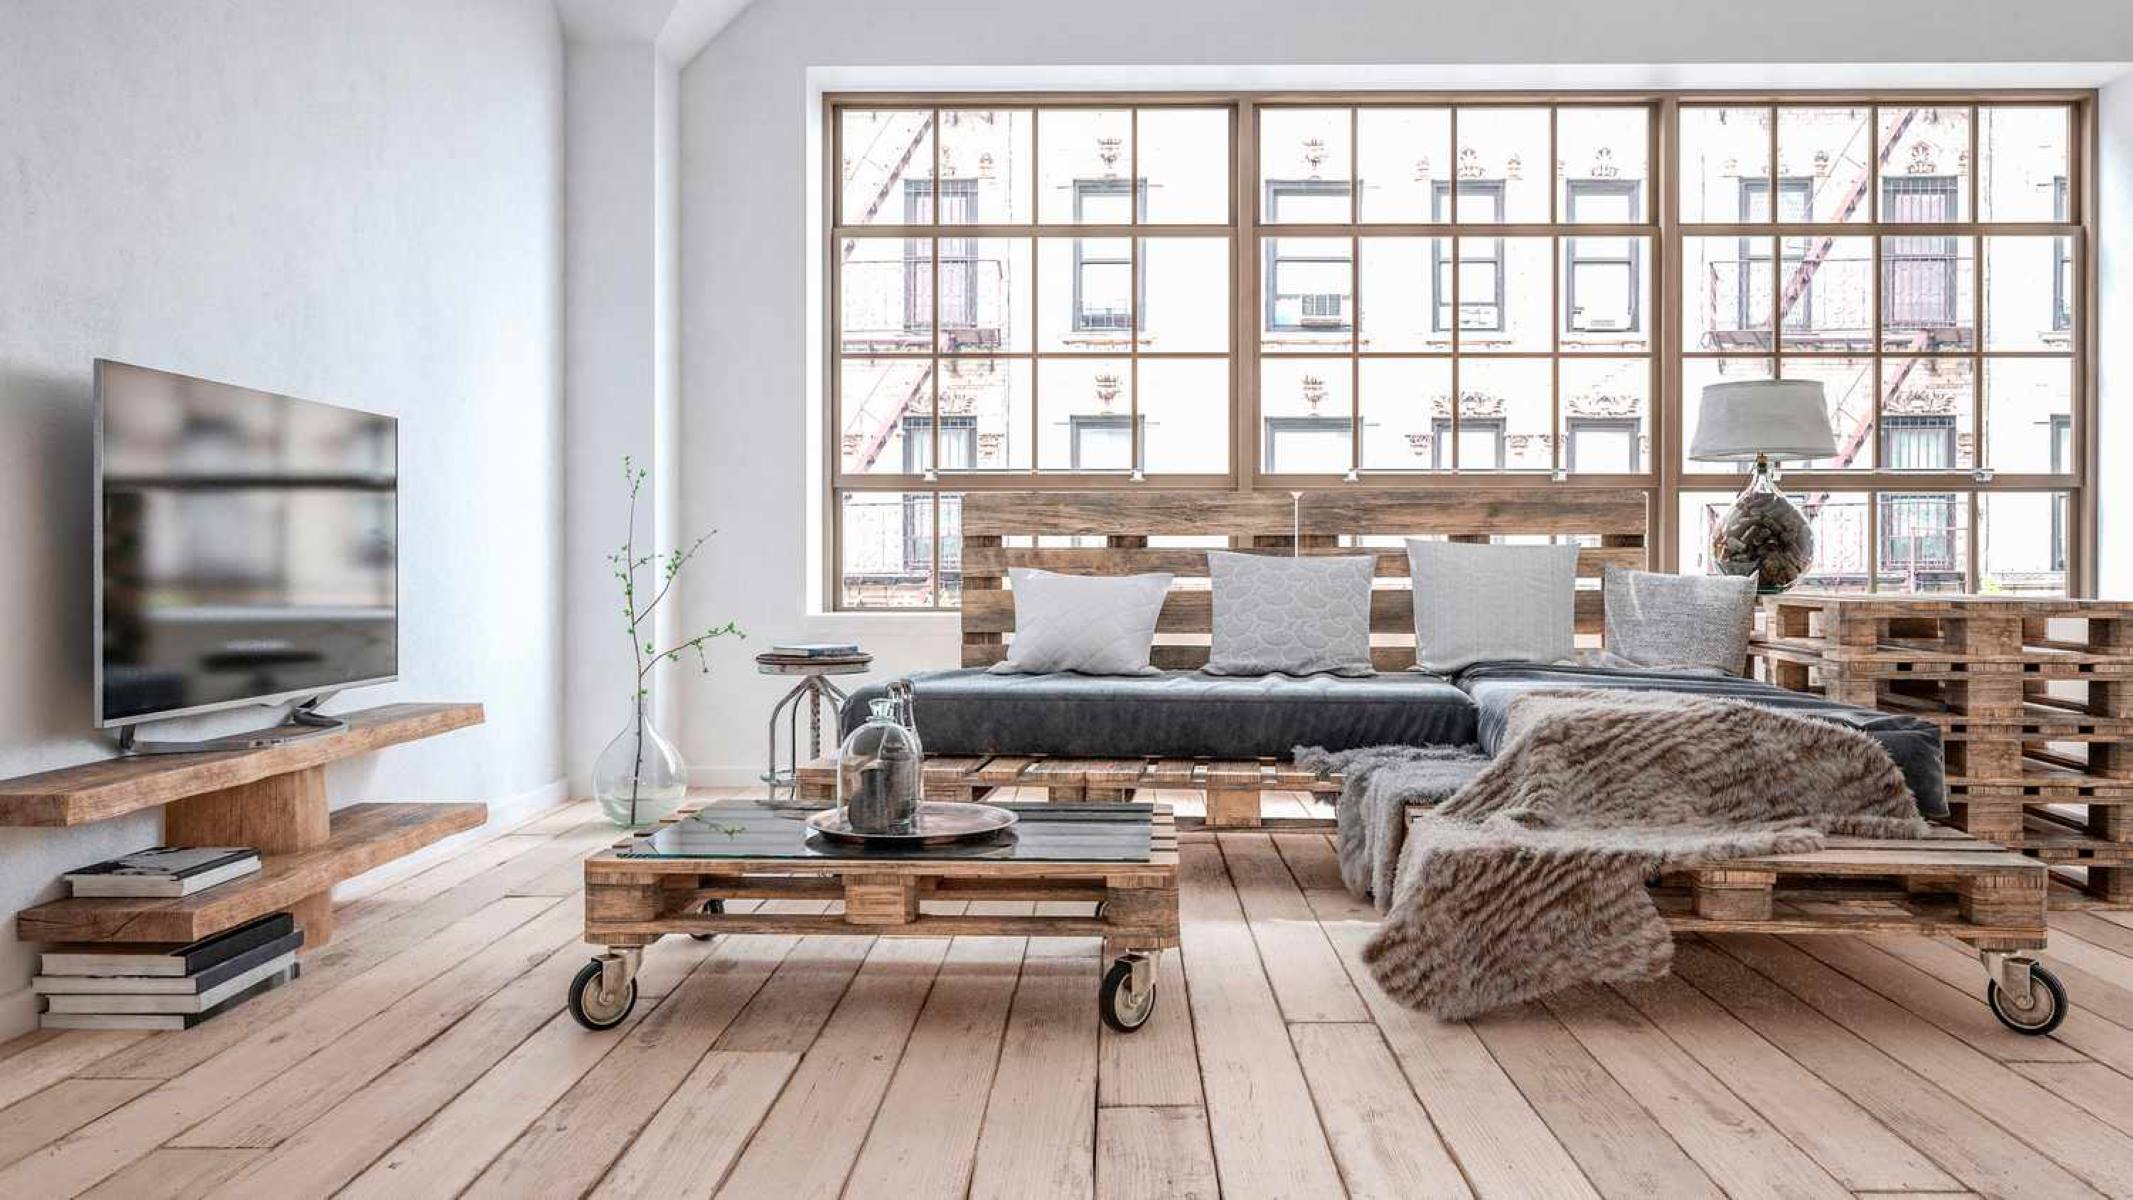
One of the great things about stained wood pallet wall art is its versatility. It can be customized to match any decor style, whether you prefer a farmhouse-inspired look, a modern and sleek aesthetic, or anything in between. Plus, the use of recycled pallet wood makes this project eco-friendly and budget-friendly.
So, if you’re ready to embark on a creative journey and add a touch of charm and personality to your walls, let’s gather our materials and get started on creating your very own stained wood pallet wall art!
Key Takeaways:
- Unleash Your Creativity: Transform a simple wooden pallet into stunning wall art by following these steps. Customize the design, choose your stain, and create a one-of-a-kind piece that reflects your personal style.
- Sustainable DIY Charm: Embrace the eco-friendly and budget-friendly nature of stained wood pallet wall art. Recycle pallets, unleash your creativity, and adorn your walls with rustic elegance.
Read more: How To Make A Wood Pallet Coffee Table
Materials Needed
Before you begin your stained wood pallet wall art project, it’s important to gather all the necessary materials. Here’s a list of what you’ll need:
- Wooden pallet: Look for a pallet in good condition, preferably with slats that are still intact. You can often find pallets for free or at a low cost from local businesses or online platforms.
- Sandpaper: Choose a medium-grit sandpaper (around 120-180 grit) to smooth out the rough surfaces and edges of the pallet wood.
- Wood stain: Pick a stain color that aligns with your desired look and complements your existing decor. There are various shades available, from light natural tones to deeper, richer hues.
- Stain applicator: This can be a brush, sponge, or cloth, depending on your personal preference. Make sure it’s suitable for applying the stain evenly to the wood.
- Protective gloves: Staining wood can be messy, so it’s essential to protect your hands and avoid direct contact with the stain.
- Protective goggles: Safety first! Shield your eyes from any potential debris or splinters while working with the pallet wood.
- Hanging hardware: To securely hang your finished piece on the wall, you’ll need appropriate hardware, such as D-ring hangers or sawtooth hangers.
- Drill or screwdriver: Depending on the type of hanging hardware you choose, you may need a drill or screwdriver to attach it to the pallet wood.
- Paintbrushes or stencils (optional): If you want to add additional design elements or incorporate colors other than the stain, you may need paintbrushes or stencils to achieve the desired effects.
- Drop cloth or plastic sheet: To protect your work area from any potential stains or spills, lay down a drop cloth or plastic sheet.
Once you have gathered all the necessary materials, you’ll be well-prepared to embark on your stained wood pallet wall art journey. Now, let’s move on to the first step of the process: preparing the pallet wood.
Step 1: Gather Supplies
Before you dive into your stained wood pallet wall art project, it’s important to gather all the necessary supplies. Having everything you need on hand will ensure a smooth and efficient workflow. Here’s what you’ll need for this step:
- Wooden pallet: Find a pallet that is in good condition with intact slats. If you don’t have one already, you can often acquire pallets for free or at a low cost from local businesses or online platforms.
- Pry bar or hammer: Use a pry bar or hammer to carefully remove any nails or staples from the pallet. This will make it easier to work with the wood.
- Protective gloves: Since you’ll be handling the pallet and potentially dealing with sharp edges or splinters, it’s important to wear protective gloves to protect your hands.
- Workbench or sturdy surface: Find a workbench or a sturdy surface to place your pallet on. This will make it easier to dismantle and prepare the wood.
- Safety glasses or goggles: Protect your eyes from any flying debris or wood particles by wearing safety glasses or goggles throughout the process.
- Dust mask: To avoid inhaling any dust or particles while working with the pallet wood, wear a dust mask to protect your respiratory system.
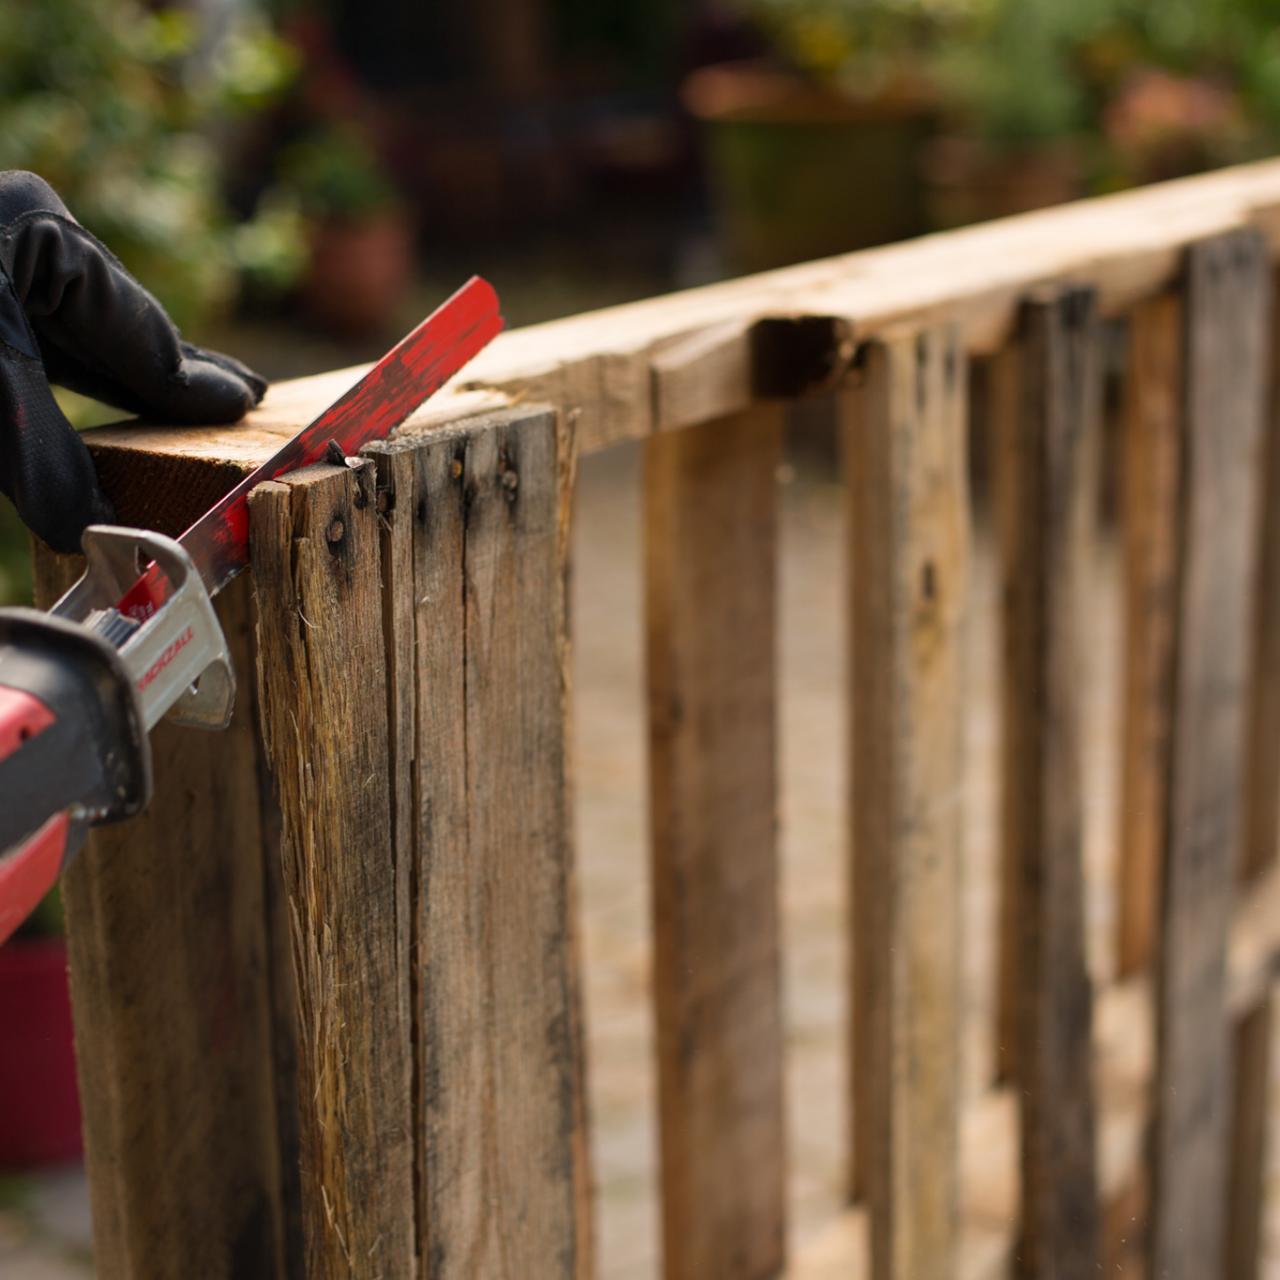
- Reciprocating saw or handsaw (optional): If you want to resize or reshape the pallet, you can use a reciprocating saw or handsaw to make the necessary cuts.
It’s a good idea to double-check and ensure that you have all of these supplies before you move on to the next step. This will save you time and prevent any unnecessary delays or interruptions throughout the project.
Once you have gathered all of your supplies, you are now ready to move on to the next step: preparing the pallet wood for your stained wood pallet wall art.
Step 2: Prepare the Pallet Wood
Now that you’ve gathered all your supplies, it’s time to prepare the pallet wood for your stained wood pallet wall art. Follow these steps to get the wood ready for staining:
- Secure the pallet: Place the pallet on a stable surface, such as a workbench or sawhorses, to ensure stability while you work.
- Remove any nails or staples: Use a pry bar or hammer to carefully remove any nails or staples from the pallet. This step is crucial to prevent accidents or damage during the process.
- Inspect the wood: Examine the wood for any damaged or rotten sections. If you notice any, use a reciprocating saw or handsaw to cut out the problematic areas and ensure you’re left with only sturdy and usable pieces.
- Optional: Sand down rough edges: If the wood has rough edges or splinters, use sandpaper to smooth them out. This will not only make the wood more pleasant to touch but also prevent any injuries during the handling and staining process.
- Wipe down the wood: Use a clean, damp cloth to wipe down the pallet wood, removing any dirt, dust, or debris that may have accumulated during the preparation process.
By properly preparing the pallet wood, you’ll ensure that your stained wood pallet wall art looks polished and professional. Taking the time to remove any nails or staples, inspect and trim the wood, and smooth out rough edges will contribute to the overall quality and longevity of your finished piece.
With the pallet wood now prepared, it’s time to move on to the next step: sanding the wood to create a smooth and even surface.
Step 3: Sand the Wood
Now that you have prepared the pallet wood, it’s time to move on to the next step: sanding. Sanding the wood is essential to create a smooth and even surface, ensuring that the stain adheres properly and the finished piece looks polished. Follow these steps to sand the wood:
- Select the right sandpaper: Choose sandpaper with a medium-grit (around 120-180 grit) to start. You can always switch to a finer grit later for a smoother finish.
- Secure the wood: Place the pallet wood on a stable surface or secure it in a vice to prevent it from moving while you sand.
- Sand the surface: Use the sandpaper to sand the entire surface of the wood, including the top, sides, and edges. Sand in the direction of the wood grain, applying even pressure. This will help remove any roughness, splinters, or imperfections.
- Check for smoothness: After sanding, run your hand over the wood to feel for any remaining rough areas. If needed, lightly sand those areas again until the surface feels smooth to the touch.
- Remove dust: Use a clean, dry cloth or a brush to remove any sanding dust from the wood. It’s essential to remove all dust particles before moving on to the staining process.
Keep in mind that sanding can be a dusty process, so wearing a dust mask and protective goggles is highly recommended. Additionally, if you’re working indoors, consider laying down a drop cloth or working in a well-ventilated area to minimize any mess.
By taking the time to sand the pallet wood, you’ll achieve a more professional-looking result. The smooth surface will allow the stain to penetrate evenly, enhancing the natural beauty of the wood grain.
Now that the wood is sanded, it’s time to move on to the next step: applying the stain to bring out the richness and color of the wood.
Read more: How To Make Plaster Wall Art
Step 4: Stain the Wood
With the pallet wood sanded and smoothed, it’s time to add color and depth to your stained wood pallet wall art by applying the wood stain. Follow these steps to achieve a beautiful stained finish:
- Choose a stain color: Select a wood stain color that complements your desired aesthetic and existing decor. Whether you prefer a light, natural tone or a deeper, richer hue, there are plenty of options available to suit your taste.
- Prepare the stain: Open the can of wood stain and give it a good stir to ensure the color is evenly mixed. Follow the instructions on the can for any specific preparation required for the stain you’ve chosen.
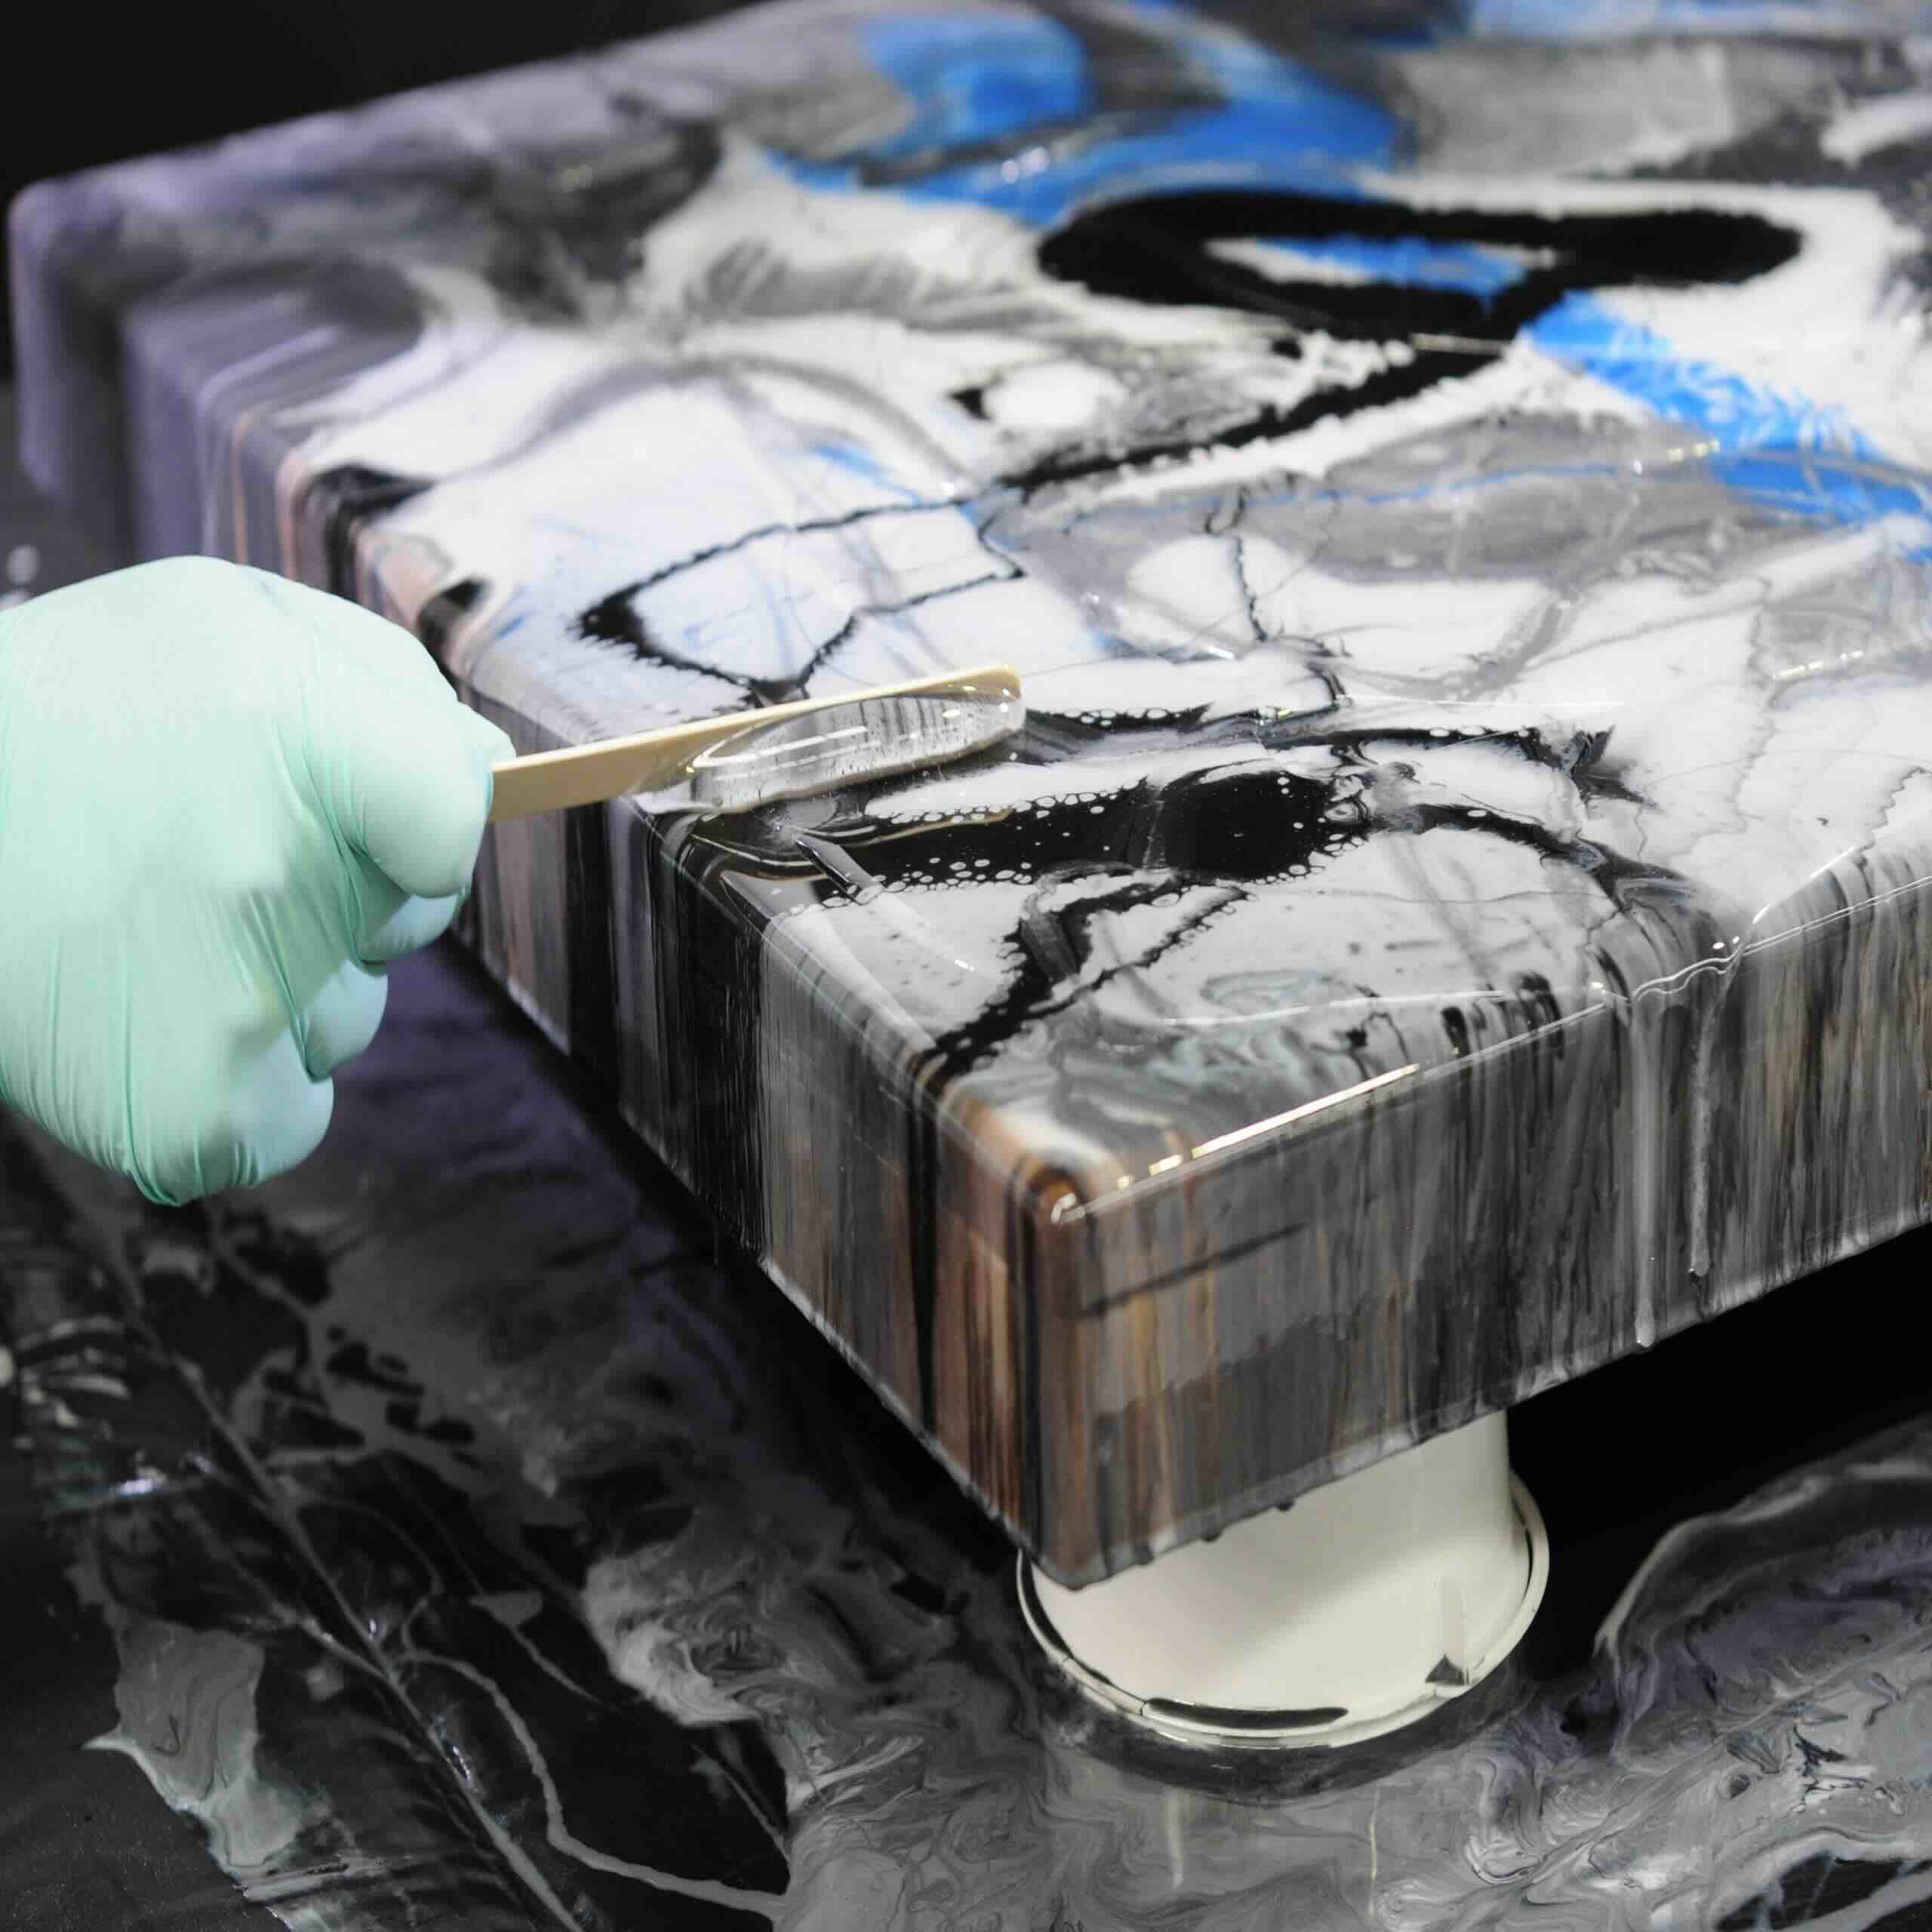
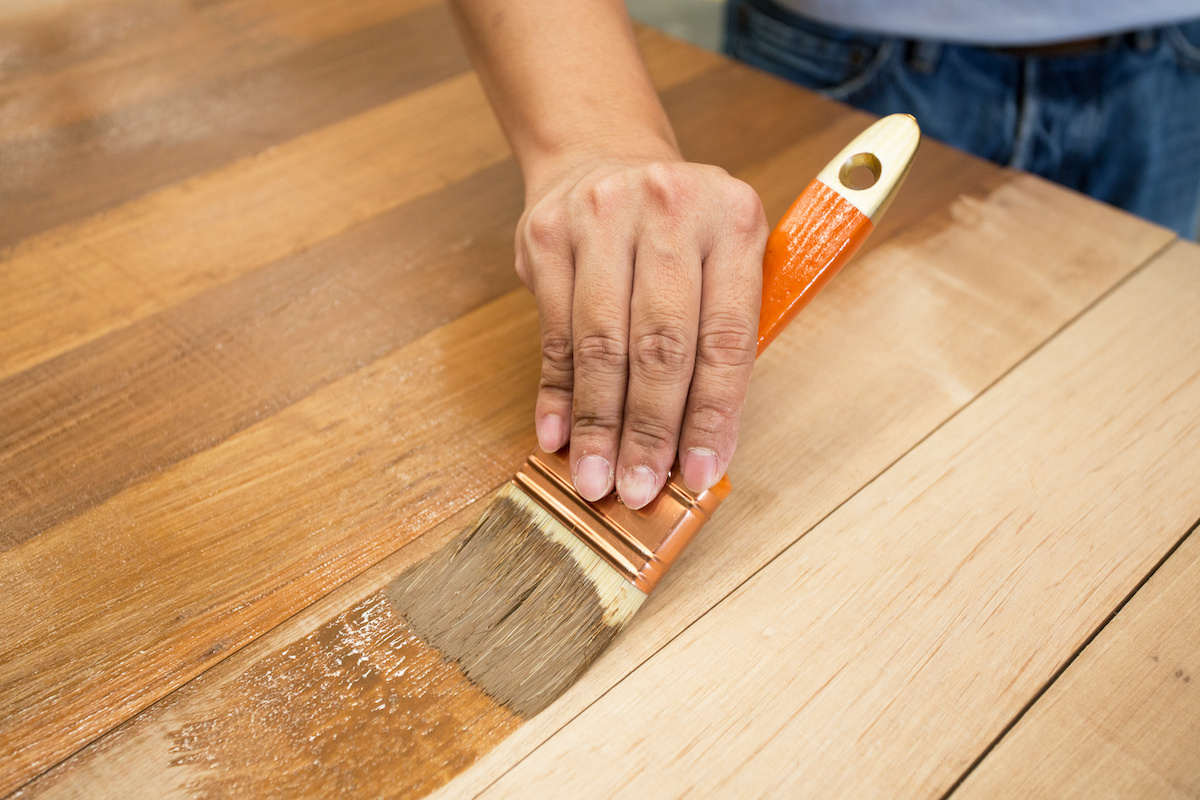
- Apply the stain: Using a stain applicator such as a brush, sponge, or cloth, begin applying the stain to the pallet wood. Start with a small, inconspicuous area to test the color and ensure you’re happy with the result before proceeding to the entire piece.
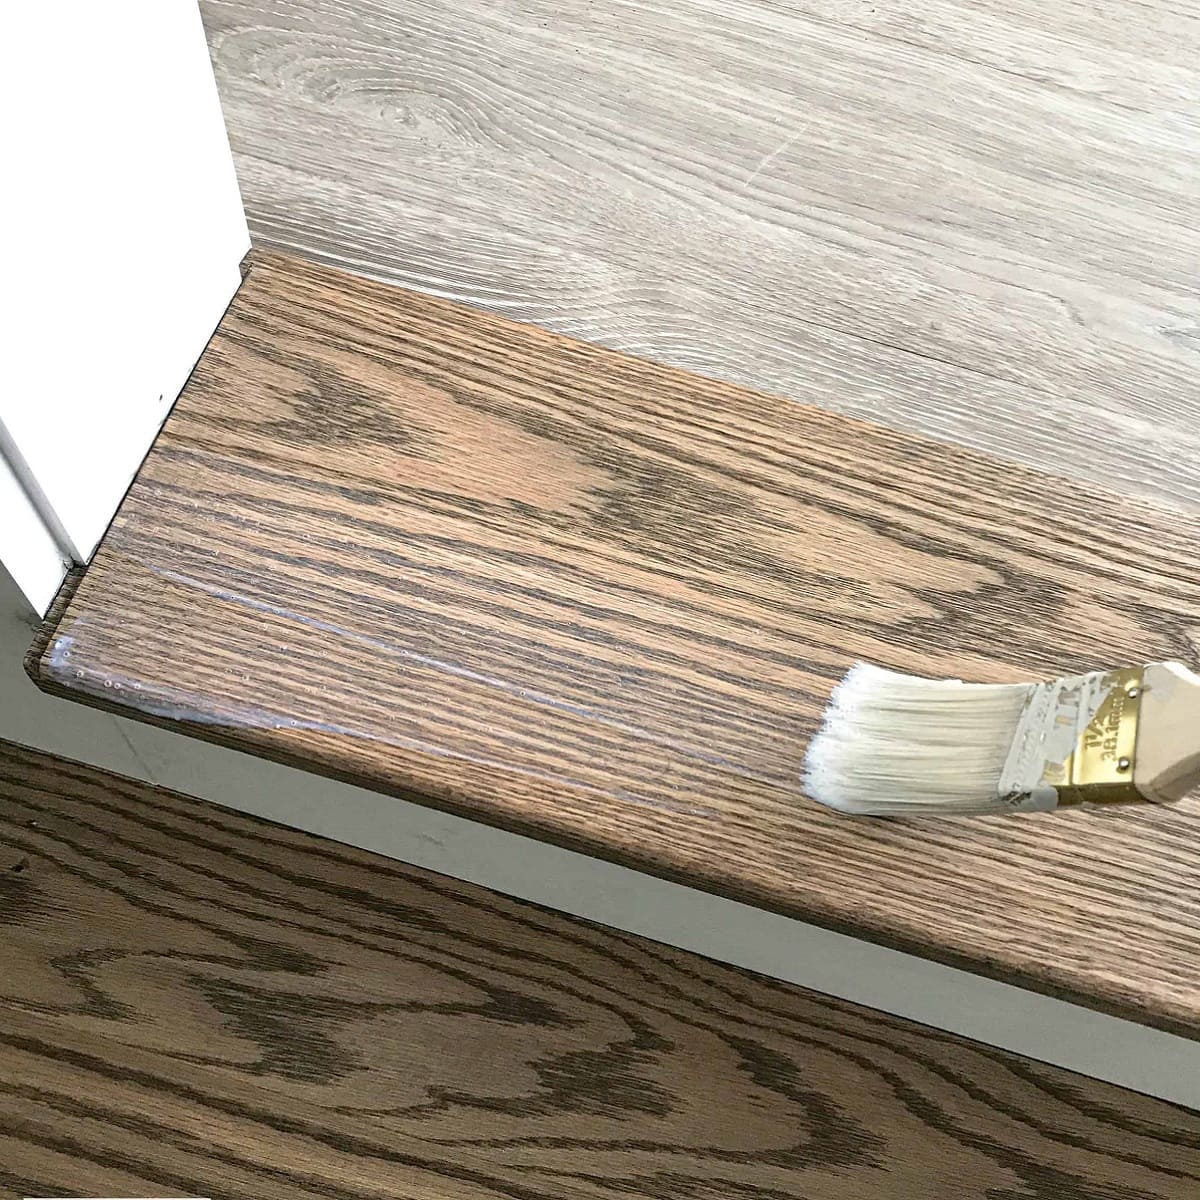
- Work in sections: To achieve an even application, work in small sections at a time, applying the stain liberally in the direction of the wood grain. Allow the stain to penetrate the wood for the recommended amount of time specified on the label.
- Wipe off excess stain: After the recommended time has passed, use a clean cloth to wipe off any excess stain. This step will help achieve a more consistent and even color.
- Drying time: Allow the stained wood to dry completely based on the instructions provided with the stain. This may take several hours or even overnight, depending on the brand and environmental conditions.
- Optional: Apply additional coats: If you desire a deeper or darker color, you can apply additional coats of stain, following the same process of application and drying in between.
Remember to wear protective gloves throughout the staining process to avoid direct contact with the stain. Additionally, ensure good ventilation in your workspace to allow the stain fumes to dissipate.
By staining the wood, you’ll enhance the natural beauty of the pallet and bring out its unique characteristics. The stain will also provide protection and help the wood withstand the test of time.
Now that the wood is stained, it’s time to move on to the next step: designing the wall art by arranging the stained wood in a visually appealing manner.
When making stained wood pallet wall art, be sure to sand the wood thoroughly to ensure a smooth and even surface for the stain to adhere to. This will help to achieve a more professional and polished look for your project.
Step 5: Designing the Wall Art
Now that you have beautifully stained pallet wood, it’s time to unleash your creativity and design your unique wall art piece. Here are some steps to guide you in creating a visually appealing design:
- Plan your layout: Before you start assembling the wood, take some time to plan out your design. Consider the size and shape of your wall space, as well as any patterns or arrangements you want to create with the stained wood.
- Arrange the wood: Lay out the stained wood pieces on a flat surface, experimenting with different arrangements until you find one that you love. Play with the orientation of the wood boards, mixing different sizes, or even creating interesting patterns or shapes.
- Consider proportions: Pay attention to the proportions of your wall art and how it will fit within your space. Make sure the arrangement is balanced and visually appealing, taking into account any other decor or furniture in the room.
- Experiment with angles: Don’t be afraid to tilt or angle some of the wood pieces to add visual interest and dimension to your design. This can create a dynamic and eye-catching effect.
- Play with color variations: If you stained the wood in different shades or mixed colors, consider how to arrange them to create a beautiful contrast or gradient effect.
- Nail or glue the wood pieces: Once you are satisfied with your design, start nailing or gluing the wood pieces together. Use finishing nails or an adhesive suitable for wood to ensure durability and stability.
- Secure the joints: If needed, reinforce the joints or connections between the wood pieces with additional nails or screws to ensure the wall art is sturdy and long-lasting.
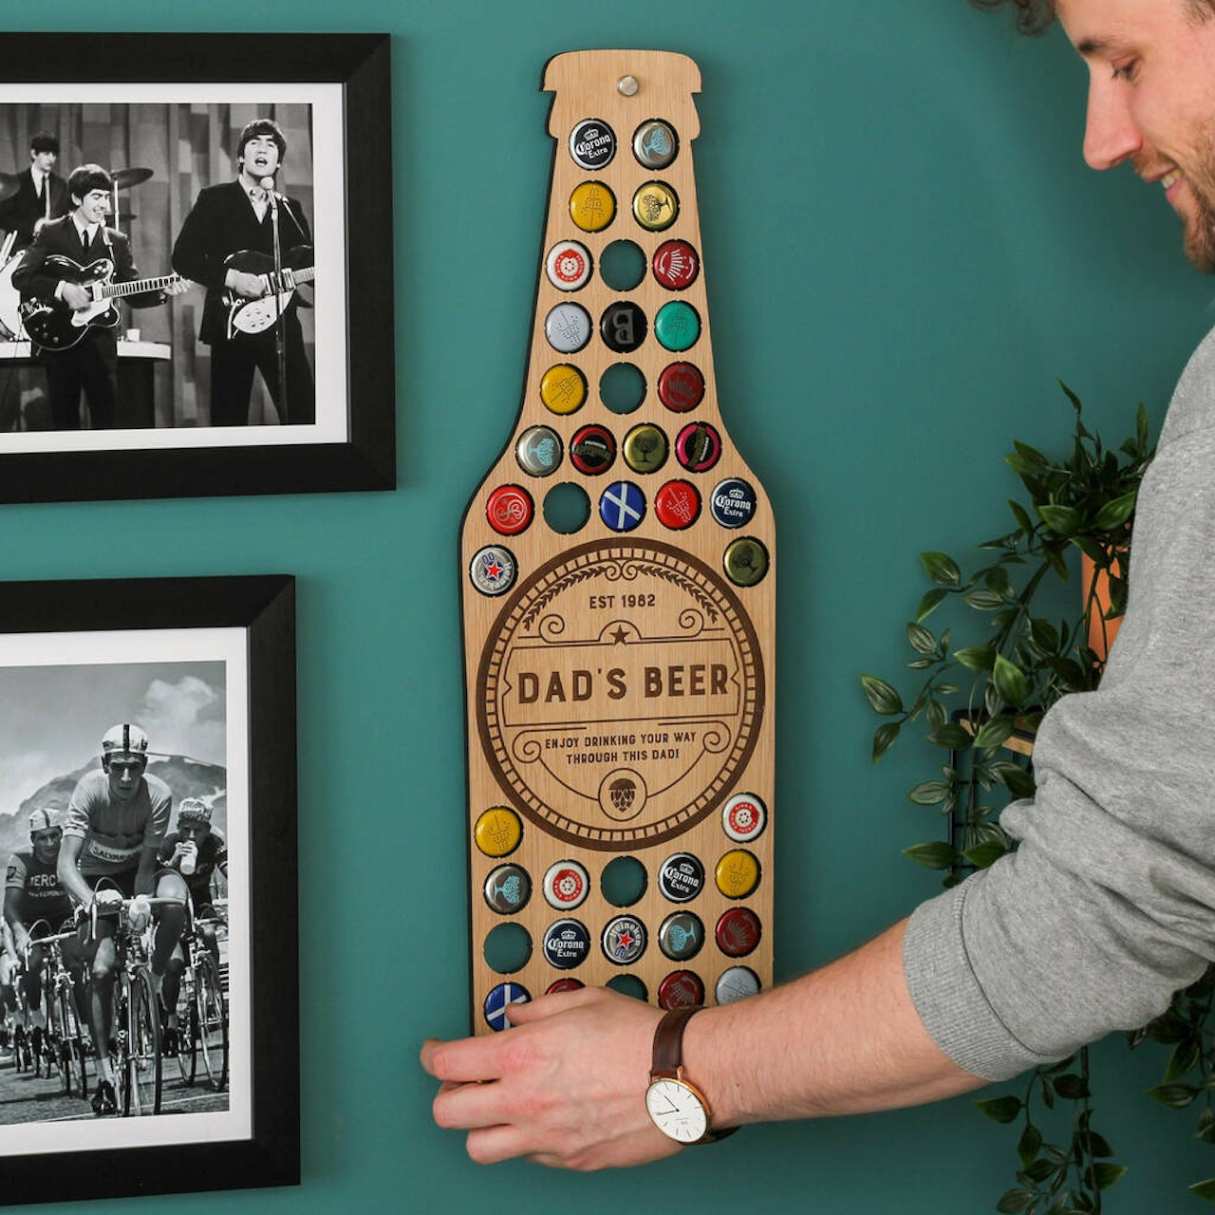
Remember, the design possibilities are endless, so don’t be afraid to get creative and experiment with different arrangements. You can also incorporate other elements such as metal accents, painted details, or even incorporate words or quotes with stencils or decals.
By taking the time to plan and design your stained wood pallet wall art, you’ll create a unique and visually appealing piece that reflects your personal style and enhances the overall aesthetic of your space.
Now that you have designed your wall art, it’s time to move on to the next step: assembling the individual wood pieces to create your finished artwork.
Step 6: Assemble the Art Piece
Now that you have designed your stained wood pallet wall art, it’s time to bring your vision to life by assembling the individual wood pieces into a cohesive artwork. Here’s how to successfully assemble your art piece:
- Gather the designed wood pieces: Collect all the wood pieces that you arranged in your desired design during the previous step.
- Place the wood pieces on a flat surface: Lay out the wood pieces in the same arrangement that you planned, ensuring they are properly aligned and fit together seamlessly.
- Connect the wood pieces: Depending on your design and the thickness of the wood, you can choose to connect the pieces by nailing or screwing them together from the backside. Alternatively, you can use a strong adhesive suitable for wood to create a secure bond.
- Ensure stability and durability: Double-check that all the wood pieces are securely connected and that the art piece feels sturdy. If needed, add additional nails, screws, or adhesive to reinforce any weak spots.
- Smooth out any rough edges: Use sandpaper or a file to smooth out any rough edges or splinters that may have occurred during the assembly process. This step will ensure that your finished art piece looks polished and professional.
It’s important to take your time during the assembly process to ensure that each wood piece is properly aligned and connected. Pay attention to the overall structure and make necessary adjustments to achieve a balanced and visually appealing final art piece.
By carefully assembling your stained wood pallet wall art, you’ll create a beautiful and durable piece that will withstand the test of time and become a focal point in your room.
Now that your art piece is assembled, it’s time to move on to the next step: attaching the hanging hardware so that you can proudly display your creation on the wall.
Step 7: Attach Hanging Hardware
Congratulations! You’re almost done with your stained wood pallet wall art project. The next step is to attach the hanging hardware so that you can easily and securely display your artwork on the wall. Follow these steps to ensure a successful installation:
- Choose the right hanging hardware: Consider the weight and size of your artwork to determine the appropriate hanging hardware. Common options include D-ring hangers, sawtooth hangers, or keyhole brackets.
- Measure and mark the placement: Use a tape measure to determine the ideal placement for your hanging hardware on the backside of the art piece. Ensure that the hardware is evenly spaced for balanced hanging.
- Pre-drill or screw holes: Depending on the type of hanging hardware, you may need to pre-drill holes or screw directly into the wood to attach the hardware securely.
- Attach the hanging hardware: Install the chosen hanging hardware based on the instructions provided. Make sure the hardware is securely fastened to the wood, ensuring proper weight distribution.
- Double-check stability: Once the hanging hardware is in place, carefully lift the art piece and test its stability. Ensure that it hangs level and doesn’t feel loose or wobbly.
Remember to consider the location and type of wall where you’ll be hanging your art piece. Use appropriate wall anchors or hardware if needed to ensure a strong and secure attachment. If you’re unsure about the best method for hanging your artwork, consult with a professional or a knowledgeable staff member at your local hardware store.
By properly attaching the hanging hardware, you can confidently display your stained wood pallet wall art and enjoy its beauty for years to come.
Now that your hanging hardware is securely in place, it’s time for the final step: hang up your artwork and enjoy the fruits of your labor.
Read more: How To Make Metal Wall Art
Step 8: Hang and Enjoy
Congratulations, you’ve reached the final step of your stained wood pallet wall art project! It’s time to hang up your creation and admire the beauty you’ve brought to your space. Follow these steps to hang your artwork securely and enjoy the finished result:
- Choose the perfect location: Select a wall in your home where you want to showcase your stained wood pallet wall art. Consider the size of the artwork and how it will complement the surrounding decor.
- Prepare the wall: Ensure the wall is clean and free from any dust or debris. If needed, use a level to mark the desired placement of your artwork, ensuring it hangs straight.
- Securely hang the artwork: Depending on the type of hanging hardware you’ve installed, carefully place the artwork on the wall and align it with the marked position. Use screws, nails, or other appropriate hardware to securely attach the hanging hardware to the wall.
- Double-check alignment: Step back and carefully inspect the placement of the artwork. Adjust if necessary to ensure it hangs level and looks visually balanced within the space.
- Secure any loose wires: If your artwork includes multiple pieces that are wired together, make sure to secure any loose wires or connections to maintain stability.
It’s exhilarating to see your stained wood pallet wall art finally on display. Take a step back and appreciate the unique beauty and personal touch it brings to your home.
Now that your artwork is securely hung, make it a point to regularly clean and dust it to maintain its appearance. Avoid direct sunlight or excessive moisture that could potentially damage the wood and stain over time.
Invite your friends and family to admire your creation and share the story behind your stained wood pallet wall art. Your hard work and creativity have resulted in a stunning piece that adds charm and personality to your space.
Enjoy the satisfaction and sense of accomplishment that comes with completing a DIY project, and take pride in knowing that you’ve created a one-of-a-kind piece of art for your home.
Congratulations on successfully creating your stained wood pallet wall art! Now, sit back, relax, and bask in the beauty of your handmade masterpiece.
Conclusion
Creating stained wood pallet wall art is a rewarding and fulfilling DIY project that allows you to showcase your creativity and add a touch of rustic elegance to your home decor. By following the steps outlined in this guide, you’ve learned how to transform a simple wooden pallet into a stunning piece of artwork that will become a focal point in any room.
Throughout this process, you’ve learned how to gather the necessary materials, prepare the pallet wood, sand it to perfection, apply the stain, design the layout, assemble the pieces together, attach the hanging hardware, and finally, hang up your artwork to be admired.
Remember, the beauty of stained wood pallet wall art lies in its versatility. You can customize your design, choose different stain colors, and adapt it to perfectly suit your decor style and personal preferences. Whether you prefer a rustic farmhouse look or a modern and sleek aesthetic, the options are endless.
Not only is stained wood pallet wall art visually stunning, but it is also an eco-friendly and budget-friendly project. By recycling pallets and giving them new life as beautiful artwork, you’re contributing to sustainable living and reducing waste.
So, if you’re ready to unleash your creativity and add a touch of charm to your walls, gather your materials, follow the steps outlined in this guide, and create your own stained wood pallet wall art masterpiece. Embrace the process, enjoy the journey, and be proud of the final result.
Now, go forth with confidence and let your creativity shine as you embark on this DIY adventure. Your stained wood pallet wall art will become a source of joy, inspiration, and admiration for years to come.
Frequently Asked Questions about How To Make Stained Wood Pallet Wall Art
Was this page helpful?
At Storables.com, we guarantee accurate and reliable information. Our content, validated by Expert Board Contributors, is crafted following stringent Editorial Policies. We're committed to providing you with well-researched, expert-backed insights for all your informational needs.


0 thoughts on “How To Make Stained Wood Pallet Wall Art”