Articles
How To Start Ryobi Weed Wacker
Modified: August 17, 2024
Learn how to start your Ryobi Weed Wacker with easy step-by-step articles. Get expert tips and tricks for a hassle-free gardening experience.
(Many of the links in this article redirect to a specific reviewed product. Your purchase of these products through affiliate links helps to generate commission for Storables.com, at no extra cost. Learn more)
Introduction
Starting a Ryobi weed wacker can be a daunting task, especially if you are new to using power tools. However, with the right knowledge and guidance, you can quickly learn how to start your Ryobi weed wacker and get your yard looking pristine in no time. In this article, we will provide a step-by-step guide on how to start a Ryobi weed wacker, along with essential tips and tricks to ensure smooth operation and maintenance.
Before we dive into the practical steps, let’s take a moment to understand the importance of using a weed wacker for maintaining your lawn. A weed wacker, also known as a string trimmer or weed eater, is a versatile tool that helps you trim grass and weeds in areas that a lawnmower cannot reach. It is particularly effective for edging around trees, fences, and flower beds, giving your yard a polished and well-maintained look.
Ryobi is a trusted brand that offers a wide range of weed wacker models, each designed to meet specific needs and preferences. Whether you have a small yard or a sprawling landscape, Ryobi has a weed wacker that will suit your requirements.
Now, let’s get started with the step-by-step process of starting your Ryobi weed wacker.
Key Takeaways:
- Starting and maintaining a Ryobi weed wacker is a straightforward process when following the step-by-step guide. Proper preparation, fueling, and handling ensure efficient operation and a well-maintained yard.
- Regular maintenance, troubleshooting common issues, and prioritizing safety are essential for maximizing the performance and lifespan of your Ryobi weed wacker. Following these guidelines ensures a hassle-free trimming experience.
Read more: How To Fix Ryobi Weed Wacker
Step 1: Gather the necessary tools and materials
Before you begin, it’s essential to gather all the necessary tools and materials to ensure a smooth and hassle-free process. Here’s a list of items you’ll need:
- 1. Ryobi weed wacker (specific model)
- 2. Safety goggles or glasses
- 3. Hearing protection (earplugs or earmuffs)
- 4. Work gloves
- 5. Fuel (gasoline or battery for electric models)
- 6. Ryobi weed wacker manual
Having all these items ready before you start will save you time and ensure your safety throughout the process.
Once you have gathered all the necessary tools and materials, find a well-ventilated area to work. It’s also a good idea to lay a tarp or cloth on the ground to catch any debris or spilled fuel.
Now that you are prepared, let’s move on to the next step: familiarizing yourself with the Ryobi weed wacker.
Step 2: Familiarize yourself with the Ryobi weed wacker
Before you start operating the Ryobi weed wacker, it’s important to familiarize yourself with its various components and features. This will help you understand how the tool works and enable you to use it effectively and safely.
Begin by reading the user manual that came with your specific Ryobi weed wacker model. The manual will provide detailed information about the different parts of the tool, their functions, and how to properly handle and maintain the weed wacker.
Next, visually inspect the weed wacker and identify its main components:
- 1. Engine: This is the power source of the weed wacker. It can be either a gas-powered engine or a battery for electric models.
- 2. Shaft: The shaft connects the engine to the cutting head and is responsible for transferring power.
- 3. Handle: The handle is where you grip the weed wacker and control its movements.
- 4. Cutting head: This is the part of the weed wacker that holds the cutting line or blade.
- 5. Safety features: Check for safety features such as a guard or shield to protect you from debris and a throttle trigger lock to prevent accidental startups.
Take your time to understand the purpose and functionality of each component. The more familiar you become with the weed wacker, the more confident you will be in using it.
Once you feel comfortable with the weed wacker and its different parts, you’re ready to move on to the next step: preparing the weed wacker for use.
Step 3: Preparing the weed wacker for use
Before you can start using your Ryobi weed wacker, it’s crucial to prepare it properly. This step ensures that the tool is in good working condition and that you’ll be able to use it efficiently. Follow these steps to prepare your weed wacker:
- Clean the weed wacker: Before each use, inspect the weed wacker for any dirt, debris, or grass clippings. Use a brush or a cloth to clean the tool thoroughly, especially around the cutting head where accumulation can hinder performance.
- Inspect the cutting line: Check the condition of the cutting line to ensure it is not worn, damaged, or tangled. Replace the cutting line if necessary, following the manufacturer’s recommended specifications.
- Check for loose fasteners: Examine all the fasteners and screws on the weed wacker and make sure they are tightened securely. Loose fasteners can cause the tool to vibrate excessively and affect its performance.
- Verify the safety features: Ensure that the guard or shield is properly attached and in good condition. The guard helps protect you from debris while operating the weed wacker.
- Inspect the spark plug (gas-powered models): If you have a gas-powered Ryobi weed wacker, check the spark plug. Make sure it is clean and properly gapped, as a faulty spark plug can lead to starting issues or poor engine performance.
By taking the time to prepare your weed wacker, you are ensuring that it is in optimal condition for use, minimizing potential issues and maximizing its efficiency. Once you have completed these preparations, it’s time to fuel up your weed wacker in the next step.
Step 4: Fueling the weed wacker
Fueling your Ryobi weed wacker is an essential step before you can start it up and begin trimming. The fuel type and process may vary depending on whether you have a gas-powered or battery-powered model.
Gas-powered weed wacker:
- Choose the right fuel: Refer to your Ryobi weed wacker manual to determine the recommended fuel type (usually gasoline) and the correct gasoline-to-oil ratio if applicable.
- Use a clean fuel container: Use a fuel container specifically designated for gasoline. Make sure the container is clean, and free from any dirt or debris that could contaminate the fuel.
- Mix the fuel (if required): If your gas-powered Ryobi weed wacker requires a gasoline-to-oil mixture, use a separate container to mix the correct ratio. Follow the manufacturer’s instructions to ensure the proper ratio is achieved.
- Fuel the weed wacker: Locate the fuel tank on your weed wacker and remove the fuel cap. Carefully pour the fuel into the tank, taking care not to spill any fuel. Ensure the fuel cap is tightly sealed after refueling.
Battery-powered weed wacker:
- Charge the battery: If your Ryobi weed wacker is battery-powered, ensure that the battery is fully charged before use. Follow the charging instructions provided by the manufacturer.
- Insert the battery: Insert the fully charged battery into its designated compartment on the weed wacker. Ensure it is securely in place before proceeding.
It’s important to note that safety should always be a top priority when handling fuel. Ensure that you are in a well-ventilated area while refueling and never perform this step near open flames or sources of ignition.
Once your weed wacker is properly fueled, you’re ready to move on to the next step: starting the Ryobi weed wacker.
Read more: How To Load Ryobi Weed Wacker
Step 5: Starting the Ryobi weed wacker
Starting your Ryobi weed wacker is a crucial step in the process. The starting procedure may differ slightly depending on whether you have a gas-powered or battery-powered model. Let’s explore both scenarios:
Gas-powered weed wacker:
- Prime the engine: Locate the primer bulb on the weed wacker, usually near the fuel tank. Press the primer bulb several times to draw fuel into the carburetor. This step helps facilitate the starting process.
- Set the choke: Check the choke lever or knob position on your weed wacker. If the engine is cold, set the choke to the closed or full position. If the engine is warm, set it to the open or half position.
- Start position: Place your Ryobi weed wacker on a flat and stable surface. Firmly grip the handle and place your foot on the cutting head to secure the tool. Hold the throttle trigger fully depressed, and engage the throttle lock if equipped.
- Pull the starter cord: Slowly pull the starter cord with a steady and smooth motion until you feel resistance. Then, give it a firm pull to start the engine. Repeat this process if necessary until the engine starts.
- Adjust the choke: Once the engine starts, let it run for a few moments to warm up. Gradually open the choke according to the manufacturer’s instructions until it is fully open. This step helps the engine run smoothly.
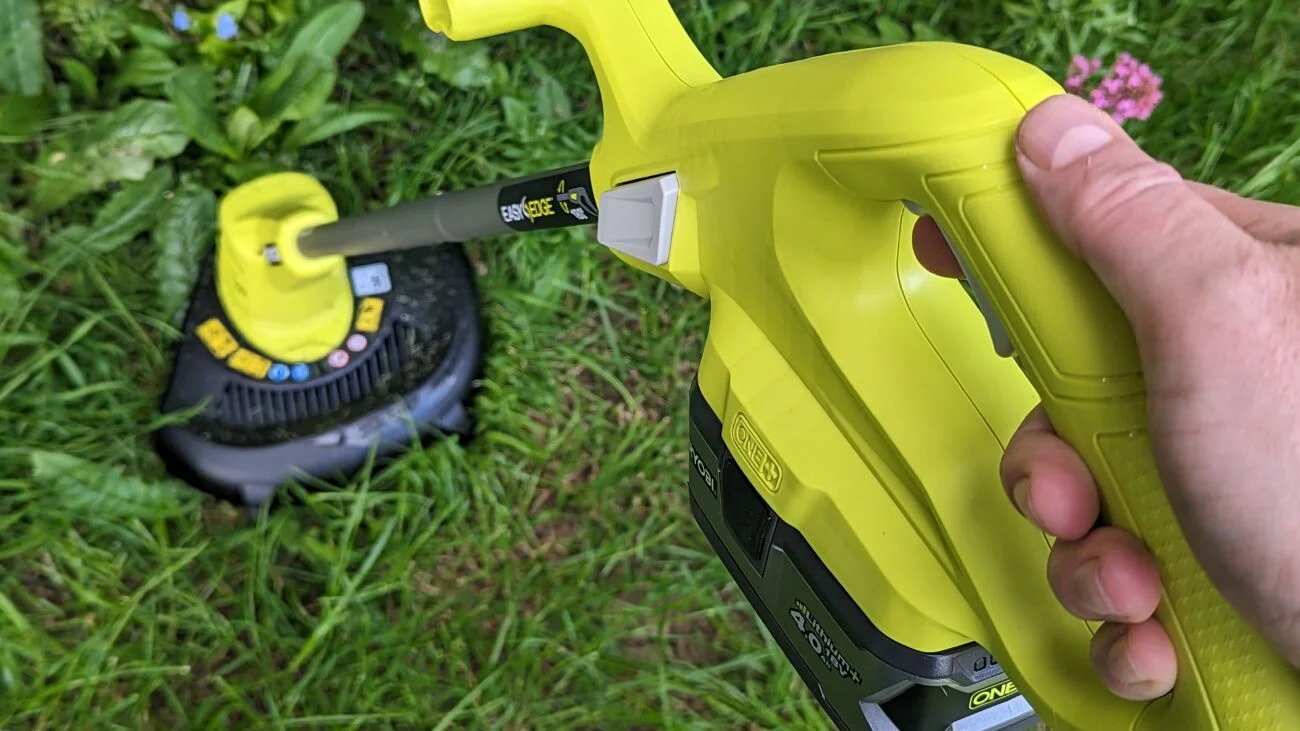
Battery-powered weed wacker:
- Ensure the battery is inserted: Double-check that the battery is properly inserted and securely in place in its compartment.
- Power button: Locate the power button on the weed wacker and turn it on. Some models may have a safety lock or additional buttons to press for activation.
Once you have successfully started your Ryobi weed wacker, it’s time to move on to adjusting the cutting line in the next step.
Before starting your Ryobi weed wacker, make sure to check the fuel level, prime the engine, and set the choke to the “start” position. Pull the starter rope gently to start the engine.
Step 6: Adjusting the cutting line
Properly adjusting the cutting line of your Ryobi weed wacker is essential to ensure efficient and effective trimming. The cutting line or blade is responsible for cutting through grass and weeds, so it’s crucial to have it set at the correct length and position. Follow these steps to adjust the cutting line:
- Inspect the cutting head: Examine the cutting head of your weed wacker. Depending on the model, it may have a single line or dual-line trimmer head.
- Turn off the weed wacker: Before making any adjustments, ensure that the weed wacker is turned off and the engine is completely stopped.
- Release and unwind the line: If the cutting line is too short or worn out, release the line from the spool and unwind it. Clean any grass or debris that may be stuck in the head.
- Measure the correct line length: Refer to your weed wacker’s user manual for the recommended cutting line length. Measure and cut the line accordingly, ensuring that it matches the specifications provided.
- Wind the line back onto the spool: Hold the end of the cutting line and carefully wind it onto the spool in the direction indicated by the arrows or symbols on the trimmer head.
- Secure the line: Once the line is properly wound, secure it in the notches or slots on the spool to prevent it from unraveling.
- Test the line length: Before using the weed wacker, check that the cutting line extends to the appropriate length beyond the protective guard or shield. Trim any excess line if necessary.
It’s important to note that the cutting line may wear down during use. Regularly inspect and adjust the line as needed to maintain optimal cutting performance.
Now that you have adjusted the cutting line, let’s move on to Step 7, where we will discuss proper handling and posture while using the weed wacker.
Step 7: Proper handling and posture while using the weed wacker
Using your Ryobi weed wacker with the correct handling and posture is crucial for both safety and efficient operation. Follow these guidelines to ensure you maintain proper control and minimize strain while using the weed wacker:
- Grip the handle: Hold the weed wacker’s handle firmly with both hands, placing one hand on the main handle and the other on the auxiliary handle. This grip will provide stability and control as you maneuver the tool.
- Stand with a balanced stance: Position yourself with your feet shoulder-width apart, maintaining a balanced and stable stance. This will help you maintain control and reduce fatigue while operating the weed wacker.
- Keep a safe distance: Maintain a safe distance between your body and the cutting area. Avoid leaning over the cutting head to reduce the risk of injury from debris or accidental contact with the cutting line.
- Use a sweeping motion: Move the weed wacker in a steady sweeping motion from side to side, using short, controlled strokes. Avoid excessive force or jerky movements, as this can strain your muscles and hinder the trimming process.
- Pay attention to surroundings: Be aware of your surroundings while operating the weed wacker. Watch out for obstacles like rocks, tree roots, or uneven terrain that may cause tripping or damage to the cutting line.
- Wear protective gear: Always wear the appropriate safety gear, including safety goggles or glasses to protect your eyes from debris, and work gloves to protect your hands from scratches or blisters. Consider wearing hearing protection as well, as some weed wackers can be loud.
- Take breaks and hydrate: Trimming your lawn can be physically demanding, so remember to take periodic breaks to rest and hydrate. Listen to your body and avoid overexertion.
By following these guidelines for proper handling and posture, you can ensure both your safety and the efficiency of your weed wacker operation. Now, let’s move on to Step 8, which covers tips for maintaining your Ryobi weed wacker.
Step 8: Tips for maintaining the Ryobi weed wacker
Maintaining your Ryobi weed wacker properly is essential to prolong its lifespan and ensure optimal performance. By following these maintenance tips, you can keep your weed wacker in excellent condition:
- Clean the weed wacker after each use: Remove any grass clippings, dirt, or debris from the weed wacker’s exterior and cutting head. Use a brush or cloth to wipe away any residue. This prevents buildup and maintains the tool’s efficiency.
- Inspect and replace the cutting line: Periodically check the condition of the cutting line. If it is worn or damaged, replace it according to the manufacturer’s recommendations. A sharp and intact cutting line ensures efficient trimming.
- Check for loose screws and fasteners: Regularly inspect the screws and fasteners on the weed wacker and tighten them if necessary. Loose components can affect the tool’s performance and cause unnecessary vibrations.
- Keep the air vents clean: Ensure that the air vents on the weed wacker’s engine are clear of any obstructions. Clean them regularly with a brush or compressed air to prevent overheating.
- Inspect and clean the spark plug: For gas-powered models, check the spark plug periodically. Remove any dirt or deposits and ensure the spark plug is securely tightened. Replace the spark plug if it is damaged or worn out.
- Store the weed wacker properly: When not in use, store your Ryobi weed wacker in a clean, dry area. If it has a detachable battery, remove it and store it separately in a cool place.
- Follow the maintenance schedule: Refer to your weed wacker’s user manual for the manufacturer’s recommended maintenance schedule. Adhere to the suggested intervals for oil changes, filter replacements, or any other necessary maintenance tasks.
By regularly maintaining your Ryobi weed wacker, you can extend its lifespan and ensure that it performs optimally when you need it. Taking care of your tool will save you time, money, and potential headaches in the long run.
Now that you’re equipped with maintenance tips, let’s move on to Step 9, which will cover troubleshooting common issues that may arise with your Ryobi weed wacker.
Read more: How To Change Spool In Ryobi Weed Wacker
Step 9: Troubleshooting common issues
While Ryobi weed wackers are reliable tools, you may encounter certain issues during their operation. Here are some common problems that you may come across and possible solutions:
- Starting difficulties: If you’re having trouble starting your weed wacker, ensure that the fuel tank is filled with the correct fuel mixture (for gas-powered models) or that the battery is fully charged (for battery-powered models). Check the spark plug for any dirt or damage and clean or replace it if necessary.
- Line feed issues: If the cutting line isn’t advancing or feeding properly, check for any tangles or obstructions in the cutting head. Clean the head and ensure the line is wound correctly. If the issue persists, consult your user manual for specific troubleshooting steps.
- Loss of power: If your weed wacker suddenly loses power or struggles to cut through vegetation, check the cutting line for wear or damage. Replace it if necessary. Additionally, ensure the air vents are clear, and the engine is properly primed and fueled.
- Vibrations and excessive noise: Excessive vibrations and noise can indicate loose components or damaged parts. Check all screws and fasteners and tighten them if needed. If the problem persists, consult a professional for further inspection and repair.
- Battery issues: For battery-powered models, if you experience a short battery life or the battery doesn’t hold a charge, ensure it is properly inserted and fully charged. If the problem persists, the battery may need to be replaced.
- Overheating: If your weed wacker overheats, check that the air vents are clear and the engine is properly fueled. Avoid extended periods of continuous operation, and take breaks to allow the tool to cool down.
If you encounter any other issues with your Ryobi weed wacker that are not mentioned above or if the troubleshooting steps do not resolve the problem, it is recommended to refer to the user manual or contact Ryobi’s customer support for further assistance.
By troubleshooting common issues and addressing them promptly, you can ensure the smooth operation of your Ryobi weed wacker and enjoy a hassle-free trimming experience.
Now that we have covered troubleshooting, we can conclude our guide on how to start and maintain a Ryobi weed wacker. Following these steps and guidelines will allow you to effectively use your Ryobi weed wacker and achieve a well-maintained yard.
Remember, always prioritize safety and wear appropriate protective gear while operating the weed wacker. Regular maintenance and care will ensure the longevity of your tool and keep your lawn looking sharp and well-trimmed.
Happy trimming!
Conclusion
Starting and maintaining a Ryobi weed wacker can be a straightforward and rewarding process if you follow the right steps and guidelines. By gathering the necessary tools, familiarizing yourself with the weed wacker, preparing it for use, fueling it correctly, and adjusting the cutting line, you can ensure a smooth and efficient operation.
Proper handling, posture, and regular maintenance are essential to maximize the performance and lifespan of your Ryobi weed wacker. Take the time to clean the tool, inspect and replace the cutting line when needed, and check for loose fasteners. Additionally, store the weed wacker properly and follow the manufacturer’s recommended maintenance schedule to keep it in top condition.
Should you encounter any issues, refer to the troubleshooting section for possible solutions. If the problem persists, consult the user manual or contact Ryobi’s customer support for assistance.
Remember to prioritize safety while operating the weed wacker. Wear appropriate protective gear such as safety goggles, gloves, and ear protection. Maintain a safe working distance from the cutting area and be mindful of your surroundings.
By following these steps and recommendations, you can confidently start and maintain your Ryobi weed wacker, achieving a well-trimmed and visually appealing yard. Enjoy the process, and happy trimming!
Frequently Asked Questions about How To Start Ryobi Weed Wacker
Was this page helpful?
At Storables.com, we guarantee accurate and reliable information. Our content, validated by Expert Board Contributors, is crafted following stringent Editorial Policies. We're committed to providing you with well-researched, expert-backed insights for all your informational needs.


0 thoughts on “How To Start Ryobi Weed Wacker”