
Articles
How To Store A Trampoline
Modified: October 21, 2024
Learn how to properly store a trampoline with our helpful articles. Protect your investment and keep your trampoline in great condition for years to come.
(Many of the links in this article redirect to a specific reviewed product. Your purchase of these products through affiliate links helps to generate commission for Storables.com, at no extra cost. Learn more)
Introduction
Trampolines are a great way to have fun and get some exercise right in your own backyard. However, during certain times of the year or when not in use for an extended period, you may need to store your trampoline properly to protect it from the elements and ensure its longevity.
Storing a trampoline may seem like a daunting task, but with the right steps and precautions, it can be a fairly straightforward process. In this article, we will provide you with a comprehensive guide on how to store a trampoline effectively.
By following the steps outlined in this guide, you can keep your trampoline in top shape during the off-season, preventing any damage or deterioration. So let’s dive in and learn how to properly store your trampoline!
Key Takeaways:
- Properly storing a trampoline involves selecting a suitable location, disassembling the trampoline, cleaning its components, and securing it with a high-quality cover and anchors. Regular maintenance is key to preserving its condition.
- By following the comprehensive guide, you can confidently store your trampoline, ensuring its longevity and preserving its condition for future use. Proper care and maintenance will make the process of setting it up again much smoother and enjoyable.
Read more: How To Jump On A Trampoline
Step 1: Selecting the Storage Location
The first step in storing a trampoline is to select an appropriate storage location. Ideally, you want to find a place that is dry, cool, and well-ventilated. This will help protect the trampoline from moisture and prevent mold or mildew from forming.
If possible, choose an indoor storage area such as a garage, shed, or basement. This will provide the best protection against the elements. However, if indoor storage is not an option, look for an outdoor location that offers some form of protection, such as under a covered patio or in a storage shed.
When selecting the storage location, also consider the available space. Make sure there is enough room to store the trampoline without it being squeezed or cramped. You want to avoid any unnecessary pressure on the frame or springs, which could lead to damage.
Additionally, make sure the storage location is easily accessible. You don’t want to struggle or navigate obstacles when it’s time to retrieve the trampoline for future use. Easy access will make the process of setting it up again much more convenient.
Lastly, consider any local regulations or guidelines regarding trampoline storage. Some homeowners’ associations or local authorities may have specific rules or recommendations. Adhering to these guidelines will help ensure compliance and prevent any potential issues.
By taking the time to carefully select the storage location, you are setting the foundation for a successful trampoline storage process. Now let’s move on to the next step: disassembling the trampoline.
Step 2: Disassembling the Trampoline
Disassembling the trampoline is a crucial step in the storage process. Taking the time to carefully disassemble the trampoline will not only make it easier to store but also prevent any damage or accidents during the disassembly process.
Start by removing any accessories or attachments from the trampoline, such as safety nets or ladders. Store these separately in a safe place to prevent them from getting lost or damaged.
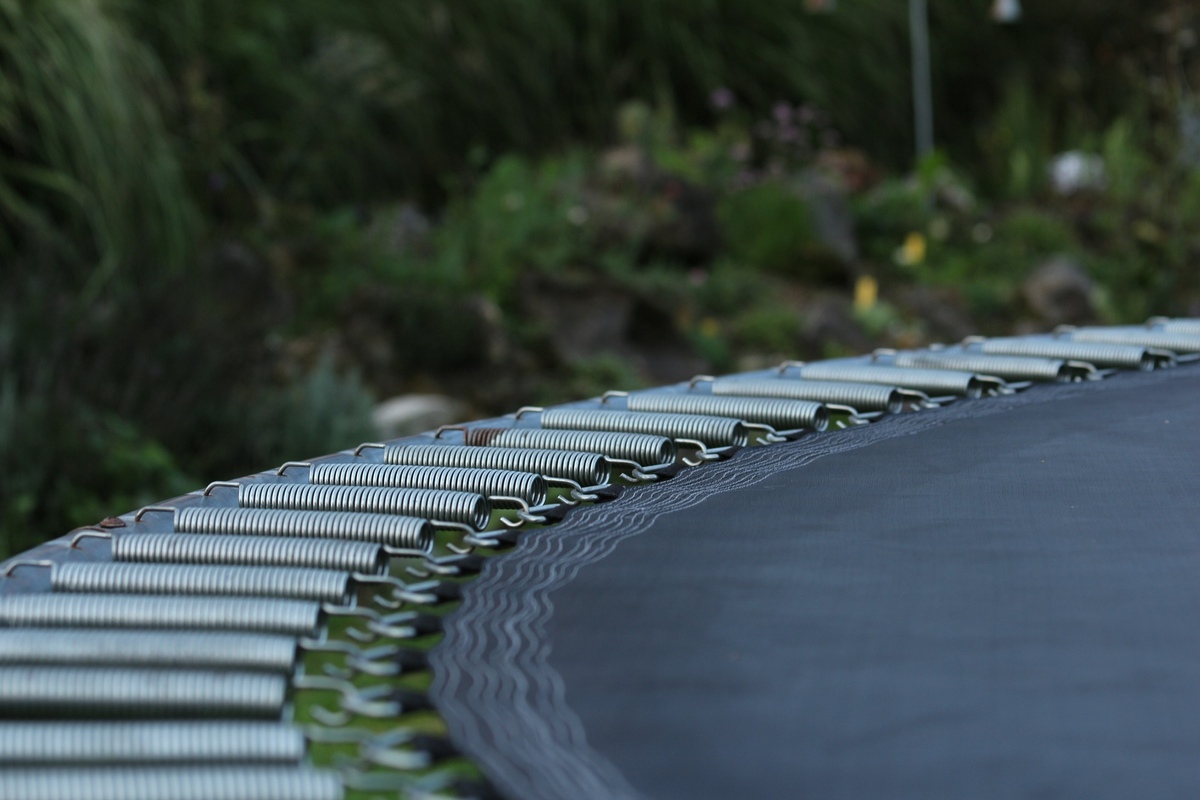
Next, remove the springs from the trampoline. Begin by unhooking one end of the springs from the frame and then work your way around, unhooking the rest of the springs. It’s important to follow the proper technique to prevent any unnecessary strain or injury.
Once the springs are removed, carefully remove the trampoline mat from the frame. You may need an extra pair of hands to help with this step, as the mat can be bulky and heavy. Avoid dragging the mat on the ground, as it can cause tears or damage.
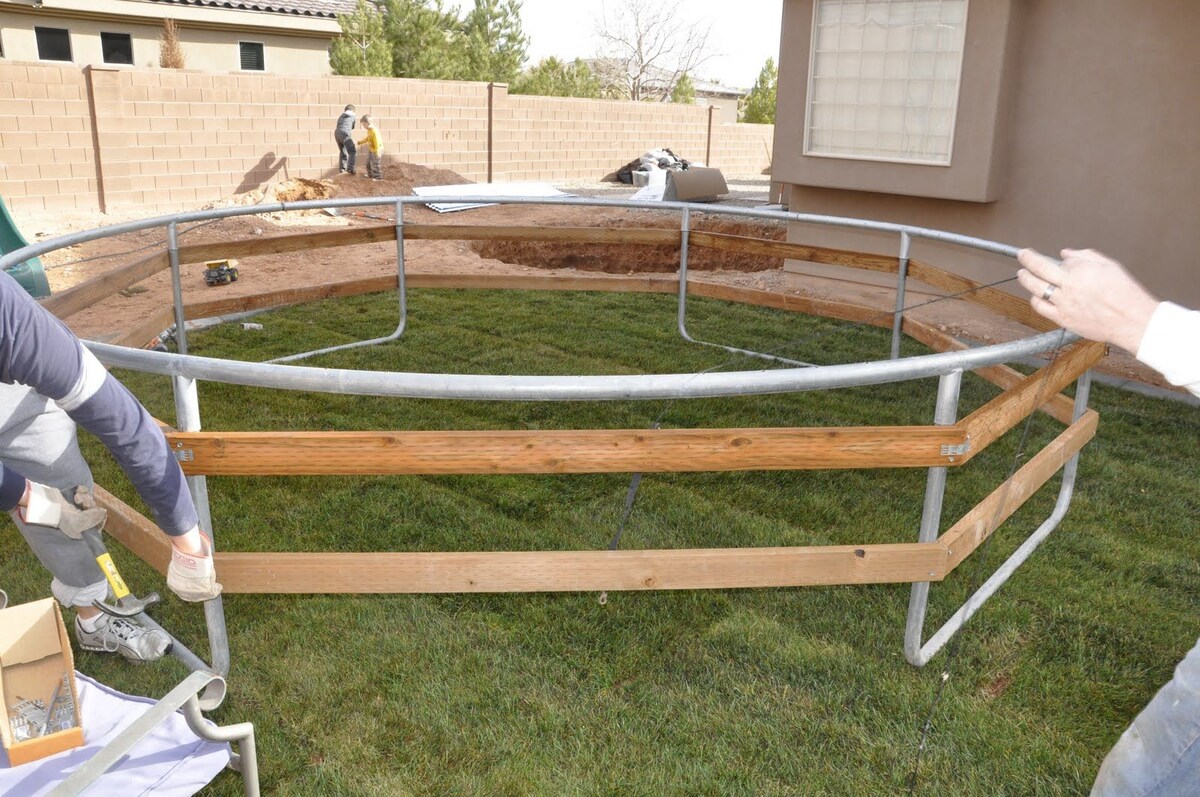
With the mat removed, disassemble the trampoline frame. Depending on the type of trampoline you have, this may involve removing bolts or simply folding the frame. Follow the manufacturer’s instructions for disassembly, if available, to ensure you are doing it correctly.
As you disassemble the trampoline, take note of any parts or components that need to be replaced or repaired. This is a good time to inspect the trampoline for any signs of wear and tear or damage. Addressing these issues before storage will ensure that your trampoline is in optimal condition for future use.
Once the trampoline is fully disassembled, keep all the components together and organized. This will make it easier when it’s time to reassemble the trampoline in the future. Consider using ziplock bags or storage containers to keep small parts and bolts secure.
Now that the trampoline is disassembled, let’s move on to the next step: cleaning the trampoline.
Step 3: Cleaning the Trampoline
Before storing your trampoline, it’s important to give it a thorough cleaning. This will help remove any dirt, debris, or residue that has accumulated while it was in use. Cleaning the trampoline ensures that it’s stored in a clean and hygienic condition, ready for its next use.
Start by using a broom or brush to sweep off any loose dirt or leaves from the trampoline mat. Pay special attention to the seams and corners where debris tends to accumulate. You can also use a leaf blower or a gentle stream of water to remove stubborn dirt.
Once the loose dirt is removed, fill a bucket with warm water and add a mild detergent or trampoline cleaner. Using a soft brush or sponge, gently scrub the trampoline mat, frame, and springs. Pay attention to any stains or marks and try to remove them using gentle circular motions.
Rinse the trampoline thoroughly with clean water to remove any detergent residue. Make sure to rinse under the mat and in between the springs to ensure all the soap is removed. This step is crucial, as detergent residue can cause damage to the trampoline over time.
After rinsing, allow the trampoline to air dry completely. Avoid exposing it to direct sunlight or using a heater or hairdryer to speed up the drying process, as this can damage the materials. It’s best to let the trampoline dry naturally to prevent any warping or shrinking.
While the trampoline is drying, take the opportunity to inspect it for any signs of damage or wear. Look out for tears, holes, or any loose parts that may need to be repaired or replaced. Addressing these issues now will ensure that your trampoline is in proper working condition when you set it up again.
By cleaning your trampoline before storage, you are not only maintaining its aesthetics but also prolonging its lifespan. With a clean trampoline, you can move on to the next step: removing the springs and mat.
Step 4: Removing the Springs and Mat
Now that you have cleaned and dried the trampoline, it’s time to remove the springs and mat. This step will make the storage process more efficient and ensure that these components are properly stored to maintain their integrity.
Start by securing the trampoline frame to prevent it from moving or collapsing while removing the springs. You can use bungee cords or rope to hold the frame securely in place. This will prevent any potential accidents or injuries during the removal process.
Begin by locating the hook of a spring attached to the trampoline frame. Using a spring removal tool or a strong pair of pliers, carefully unhook the spring from the frame. It’s important to work systematically and take precautions to avoid any harm.
Continue removing the springs one by one, working your way around the trampoline. Take your time and make sure to keep track of the springs to prevent any loss or confusion. You may find it helpful to organize the springs by size or color for easy reassembly later.
After removing all the springs, carefully lift and remove the trampoline mat from the frame. It may be helpful to have another person assist you with this step, as the mat can be quite heavy and difficult to handle alone. Avoid dragging the mat on the ground to prevent damage.
Once the mat is removed, take a moment to inspect it for any signs of wear or tear. Check for any holes, tears, or stretching that may compromise its integrity. If you notice any damage, it’s best to repair or replace the mat before storing it.
With the springs and mat removed, keep them together and organized. Coil the springs neatly and secure them with a tie or string to prevent them from tangling. Fold the trampoline mat carefully, making sure not to crease or damage it, and store it in a clean and dry area.
By properly removing the springs and mat, you are ensuring that these components are well-preserved and ready for future use. The next step is to fold and store the trampoline frame.
Read more: What Is A Trampoline
Step 5: Storing the Springs and Mat
Now that you have removed the springs and mat from the trampoline, it’s time to properly store them. Correct storage methods will help preserve the integrity and condition of these components, ensuring that they are ready for use when you set up the trampoline again.
Start by storing the springs. Coil them neatly into loops, making sure they are not tangled or twisted. It’s a good idea to secure the coils with a tie or string to keep them in place. You can also consider using a storage bag or container specifically designed for trampoline springs.
When storing the trampoline mat, make sure it is clean and dry. Fold the mat carefully, avoiding any sharp creases that could lead to permanent damage. It’s best to store the mat in a clean and dry space, such as a storage bag or a plastic bin, to protect it from dust, moisture, and pests.
If your trampoline came with a safety net or enclosure, remove it and store it separately. Make sure it’s clean and dry before storing. Fold the net or enclosure neatly and store it in a secure place, away from any potential damage or interference.
Label the storage containers or bags for easy identification when you need to retrieve the components. This will save you the hassle of searching for specific parts when you want to assemble the trampoline again in the future.
Store the springs, mat, and other components in a cool, dry, and well-ventilated area. Avoid storing them in places where they can be exposed to extreme temperatures or excessive humidity. This will help prevent damage and ensure the components remain in good condition.
By properly storing the springs and mat, you are taking necessary precautions to protect these components and extend their lifespan. With the components safely stored, let’s move on to the next step: folding and storing the trampoline frame.
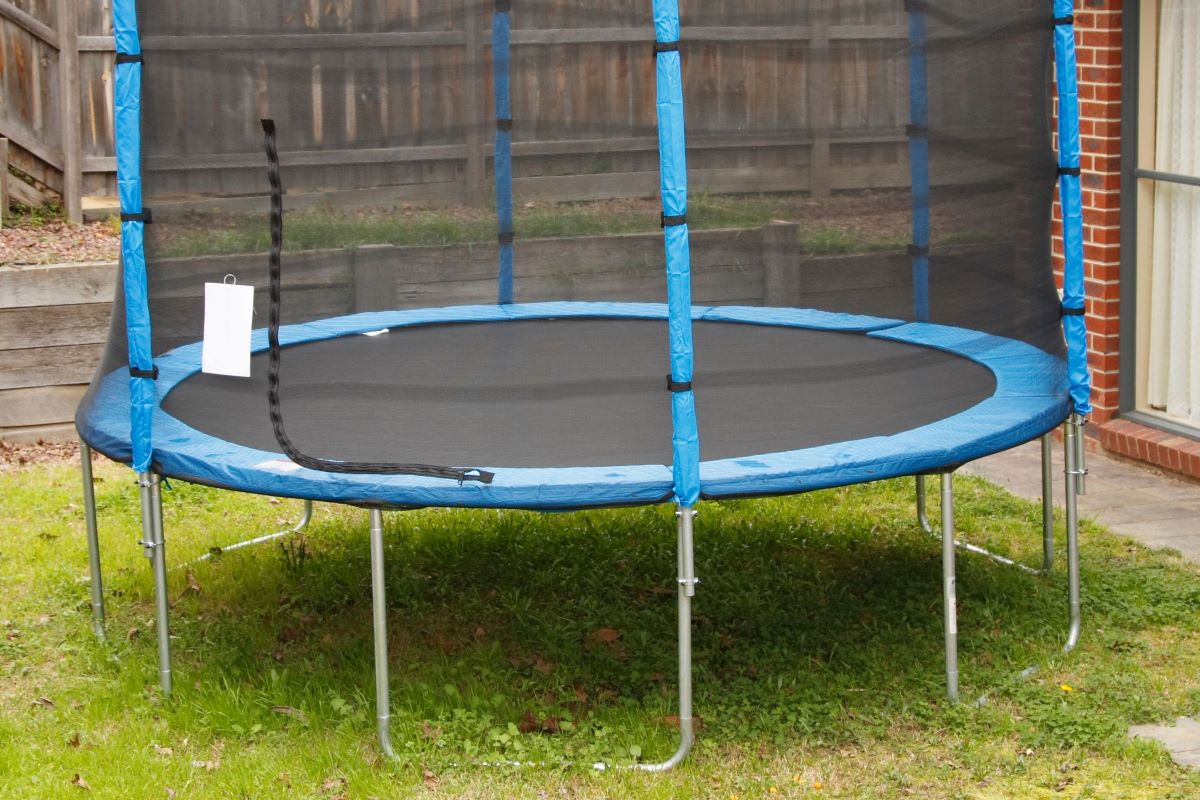
When storing a trampoline, disassemble it if possible to save space. Store the frame and mat in a dry, covered area to protect it from the elements and prolong its lifespan.
Step 6: Folding and Storing the Frame
Now that you have removed and stored the springs and mat, it’s time to focus on folding and storing the trampoline frame. Properly folding and storing the frame will help save space and protect it from damage during the storage period.
Start by ensuring that the frame is clean and dry. Remove any dirt, debris, or moisture from the frame using a soft cloth or brush. This will prevent any corrosion or damage while the trampoline is in storage.
If your trampoline has a foldable frame, follow the manufacturer’s instructions to fold it. Begin by unlocking any hooks or latches that hold the frame in place, ensuring that it is safe to fold. Gently fold the frame, taking care not to force it or cause any unnecessary strain.
For non-foldable frames, you will need to disassemble the frame into manageable parts. Start by removing any bolts or screws that connect the different sections of the frame. Keep track of these fasteners to avoid loss or confusion during reassembly.
Once the frame is folded or disassembled, secure it to prevent any accidental unfolding or movement. You can use straps, bungee cords, or ropes to tie the frame securely. This will keep it compact and prevent any potential damage during storage.
It’s important to store the trampoline frame in a clean and dry area. If storing outdoors, ensure that the frame is covered with a waterproof and UV-resistant cover to protect it from the elements. If storing indoors, keep it in a space where it won’t be subjected to excessive moisture or temperature fluctuations.
Label the storage container or indicate on the cover that it contains the trampoline frame. This will help you identify it easily when it’s time to retrieve and assemble the trampoline again.
By folding and storing the trampoline frame properly, you are ensuring that it remains in good condition and takes up minimal space during the storage period. The next step involves covering and protecting the trampoline.
Step 7: Covering and Protecting the Trampoline
Covering and protecting the trampoline is an essential step in the storage process. This step helps shield the trampoline from dust, debris, UV rays, and other outdoor elements that can cause damage over time. By taking the time to properly cover and protect your trampoline, you can ensure its longevity and keep it in excellent condition.
Start by selecting a high-quality trampoline cover that is specifically designed for your trampoline’s size and shape. These covers are typically made of durable and weather-resistant materials that can withstand various outdoor conditions. The cover should fit snugly over the trampoline, providing complete coverage.
Clean the trampoline thoroughly before covering it to prevent any dirt or debris from getting trapped under the cover. Use a brush or cloth to remove any loose dirt or leaves on the frame and mat. This step ensures that the trampoline stays clean and free from potential contaminants.
Once the trampoline is clean, position the cover over the trampoline, starting from one side and extending it over the entire frame and mat. Make sure the cover is secure and fitted tightly to prevent it from blowing away in windy conditions.
If your trampoline has any accessories, such as a safety net or ladder, consider covering them as well. This will provide additional protection and keep all components of the trampoline in top-notch condition.
Ensure that the cover is properly secured to prevent it from coming loose or getting damaged. Some covers come with built-in straps or buckles, while others may require additional ties or bungee cords to secure them firmly in place. Follow the manufacturer’s instructions for securing the cover properly.
Periodically check the trampoline cover during the storage period to make sure it is still securely in place and undamaged. This will allow you to address any issues promptly and ensure that the trampoline remains protected.
By covering and protecting your trampoline, you are safeguarding it from potential damage caused by weather elements and debris. With the trampoline securely covered, let’s move on to the next step: securing the trampoline.
Step 8: Securing the Trampoline
Securing the trampoline is an important step to ensure its stability and prevent any potential accidents or damage during the storage period. Properly securing the trampoline will give you peace of mind and protect both the trampoline and your surroundings. Follow these steps to secure your trampoline effectively.
Start by choosing an appropriate method to secure the trampoline. There are several options available, depending on your storage location and personal preference. Consider using anchors, stakes, or heavy objects to keep the trampoline in place and prevent it from being moved by strong winds or other external forces.
If your trampoline is located outdoors, use ground anchors or stakes specifically designed for trampolines. These anchors should be inserted into the ground at regular intervals around the trampoline, attaching to the frame or legs. Make sure the anchors are securely in place and tightly connected to the trampoline.
For indoor storage or if using ground anchors is not feasible, you can also use heavy objects such as sandbags or cinder blocks to weigh down the trampoline. Place these objects on the frame or legs of the trampoline to provide stability and prevent any movement.
Ensure that the trampoline is level and stable before securing it. Adjust the positioning or use shims if necessary to eliminate any wobbling or unevenness. This will prevent any unnecessary stress on the trampoline and help maintain its structural integrity.
Check the security of the trampoline regularly, especially after severe weather or heavy winds. Inspect the anchors or weights to make sure they are still in place and securely attached. If any adjustments are needed, address them promptly to maintain the trampoline’s stability.
Remember to follow any specific guidelines or recommendations provided by the trampoline manufacturer for securing the trampoline. They may have additional instructions or product recommendations that are specific to your trampoline model.
By properly securing your trampoline, you are taking proactive measures to ensure its stability and prevent any accidents or damage. With the trampoline securely in place, let’s move on to the next step: regular maintenance tips.
Read more: How To Dig In A Trampoline
Step 9: Regular Maintenance Tips
Maintaining your trampoline regularly is crucial for its longevity and safety. Even when it’s in storage, certain maintenance tasks should be performed to keep the trampoline in good condition. Follow these regular maintenance tips to ensure your trampoline stays in top shape:
1. Inspect the trampoline components: Periodically check the trampoline for any signs of wear, tear, or damage. Look for loose springs, bent frame parts, or any other issues that may need attention. Address these problems promptly to prevent further damage or accidents.
2. Clean the trampoline: Keep the trampoline clean by regularly removing any dirt, leaves, or debris that may accumulate on the frame or mat. Use a soft brush or cloth to gently sweep away these particles. This will prevent any buildup or damage to the trampoline.
3. Check the cover: If your trampoline is covered during storage, inspect the cover for any tears, holes, or degradation. Replace the cover if necessary to provide proper protection for the trampoline. Ensure the cover is securely in place and free from any debris or moisture.
4. Maintain proper tension: If your trampoline has springs, make sure they are properly tensioned. Loose or over-stretched springs can affect the bounce and stability of the trampoline. Adjust the tension as needed by tightening or replacing any loose or worn-out springs.
5. Keep the storage area clean: Whether your trampoline is stored indoors or outdoors, make sure the storage area is clean and free of any potential hazards. Remove any objects that could fall onto the trampoline and cause damage. This will help prevent accidents and maintain the trampoline’s integrity.
6. Regularly inspect the anchors or weights: If you have secured the trampoline with anchors or weights, check them periodically to ensure they are still in place and properly secured. Tighten or adjust them if necessary to maintain the trampoline’s stability during storage.
7. Follow manufacturer’s guidelines: Always refer to the manufacturer’s guidelines and recommendations for proper maintenance. They may have specific instructions or recommendations tailored to your trampoline model. Adhering to these guidelines will help ensure safe and effective maintenance practices.
By performing regular maintenance tasks, you can extend the lifespan of your trampoline and ensure its overall performance and safety. Taking care of your trampoline will make the process of setting it up again in the future much smoother and enjoyable.
With these maintenance tips in mind, you are now equipped with the knowledge to properly care for your trampoline during storage and beyond.
Conclusion
Storing a trampoline properly is essential to protect it from the elements and ensure its longevity. By following the steps outlined in this guide, you can confidently store your trampoline and preserve its condition for future use. Let’s recap the key points discussed:
1. Select a suitable storage location that is dry, cool, and well-ventilated.
2. Disassemble the trampoline carefully, removing accessories, springs, mat, and folding or disassembling the frame.
3. Clean the trampoline thoroughly, removing any dirt or debris.
4. Store the springs and mat properly, coiling and securing them to prevent damage.
5. Fold or disassemble the trampoline frame and store it in a clean and dry area.
6. Cover the trampoline with a high-quality, properly fitting cover to protect it from dust and outdoor elements.
7. Secure the trampoline using anchors, stakes, or heavy objects to ensure stability during storage.
8. Perform regular maintenance tasks, such as inspections, cleaning, and tension adjustments.
9. Follow manufacturer’s guidelines and recommendations for proper trampoline care.
By following these steps and implementing regular maintenance, you can store your trampoline with confidence, knowing that it will remain in top condition. When it’s time to set up the trampoline again, you’ll be ready to enjoy the fun and excitement it brings.
Remember, safety is paramount when it comes to trampoline use. Always follow proper usage guidelines, supervise children, and use safety accessories such as safety nets and padding.
With proper storage and care, your trampoline can provide years of entertainment and enjoyment for you and your family. Happy bouncing!
Frequently Asked Questions about How To Store A Trampoline
Was this page helpful?
At Storables.com, we guarantee accurate and reliable information. Our content, validated by Expert Board Contributors, is crafted following stringent Editorial Policies. We're committed to providing you with well-researched, expert-backed insights for all your informational needs.





0 thoughts on “How To Store A Trampoline”