Articles
How To Store Deer Hide Before Tanning
Modified: December 7, 2023
Learn how to properly store deer hide before tanning in this informative articles. Discover expert tips and techniques to preserve and prepare your hides for the best tanning results.
(Many of the links in this article redirect to a specific reviewed product. Your purchase of these products through affiliate links helps to generate commission for Storables.com, at no extra cost. Learn more)
Introduction
When it comes to tanning deer hides, proper storage is crucial. The process of tanning involves turning raw animal hides into soft, durable leather that can be used in various applications. However, before you can begin the tanning process, it is important to ensure that the deer hide is stored correctly. This step is often overlooked by hunters and enthusiasts, but it plays a significant role in the quality of the finished product.
Storing deer hides properly not only helps preserve their quality but also prevents the growth of bacteria, mold, and unpleasant odors. It ensures that the hides remain in optimal condition until you are ready to start the tanning process. In this article, we will explore the importance of proper deer hide storage and provide step-by-step guidelines on how to store deer hides effectively.
Whether you are a seasoned hunter or a beginner, following these storage techniques will help you maintain the integrity of the hide, increase tanning success, and ensure that you achieve the desired results. So let’s dive in and discover how to store deer hides before tanning!
Key Takeaways:
- Proper storage and preparation of deer hides before tanning is crucial for achieving high-quality leather. Precision in skinning, fleshing, salting, and regular inspections are key to ensuring optimal results.
- Attention to detail and patience throughout the process of storing and preparing deer hides before tanning sets the foundation for a successful and rewarding experience. Following specific guidelines and thorough preparation lead to soft and supple leather for various projects.
Read more: How To Store Deer Jerky
Importance of Proper Deer Hide Storage before Tanning
Proper deer hide storage is essential for several reasons. Firstly, it helps to prevent the growth of bacteria and mold on the hide. When a fresh deer hide is exposed to moisture or heat, it becomes a breeding ground for harmful microorganisms. These organisms can degrade the quality of the hide, leading to discoloration, foul smells, and even deterioration. By storing the hide correctly, you can minimize the risk of bacterial and mold growth, ensuring that the hide remains in the best possible condition.
In addition to preventing the growth of bacteria and mold, proper storage also helps eliminate any unpleasant odors that may develop. Fresh hides can emit strong smells due to the natural oils and fluids present in the skin. Storing the hide in a cool, dry place with proper ventilation allows these odors to dissipate over time, resulting in a cleaner and more pleasant-smelling hide.
Furthermore, proper storage reduces the chances of physical damage to the hide. Deer hides are relatively delicate and can easily be torn or scratched if not handled and stored carefully. By following the correct storage techniques, such as folding the hide properly and protecting it from sharp objects, you can prevent any unnecessary damage and maintain the integrity of the hide.
Another important reason to store deer hides properly is to ensure consistent tanning results. The success of the tanning process relies on a properly preserved hide. If the hide has been exposed to unfavorable conditions or mishandled during storage, it can have an adverse impact on the tanning process. By storing the hide correctly, you are setting yourself up for a more successful and satisfactory tanning experience.
Lastly, maintaining proper deer hide storage is essential for long-term preservation. If you are not ready to tan the hide immediately, storing it correctly allows you to keep it in a usable condition for an extended period. Whether you plan to tan the hide in a few days or a few months, following the proper storage techniques ensures that it remains in prime condition until you are ready to start the tanning process.
Overall, proper deer hide storage is a crucial step in the tanning process. It helps prevent bacteria and mold growth, eliminates unpleasant odors, reduces physical damage, ensures consistent tanning results, and allows for long-term preservation. By taking the time to store your deer hide correctly, you are laying the foundation for a successful and enjoyable tanning experience.
Step 1: Skinning the Deer
The first step in preparing a deer hide for tanning is to properly skin the deer. Skinning a deer requires precision and care to ensure that the hide remains intact and undamaged. Here’s a step-by-step guide on how to skin a deer:
- Prepare your tools: Gather all the necessary tools for the job, including a sharp knife, a bone saw, and a strong rope or chain. Make sure your knife is sharp to make clean, precise cuts.
- Hang the deer: Find a suitable location where you can hang the deer carcass securely. This can be a sturdy tree branch or a strong overhead beam. Use the rope or chain to hoist the deer up, making sure it is at a comfortable height for you to work on.
- Make the initial incision: Begin by making a shallow cut around the hind legs, just above the hooves. Be careful not to puncture the hide as you want to keep it intact.
- Continue the incision: Extend the initial cut from the hind legs up to the chest area, following the natural contours of the deer’s body. Take your time and make precise cuts to avoid damaging the hide.
- Remove the hide: Once you have made the full incision, carefully peel the hide away from the carcass, using your knife to separate any connecting tissues or muscles. Be cautious around areas with thinner hide, such as the neck and belly.
- Cut around the anus and genitals: To fully remove the hide, you will need to make a circular cut around the anus and genitals. Take care to avoid puncturing any organs or contaminating the meat.
- Finish removing the hide: Continue peeling the hide away from the deer’s body, working your way up towards the head. As you approach the head, be particularly careful around the ears and eyes, as these areas are more delicate.
Remember to take your time and work methodically to ensure a clean and undamaged hide. Once you have successfully skinned the deer, you can move on to the next step: fleshing and salting the hide.
Step 2: Fleshing and Salting the Hide
After successfully skinning the deer, the next step in preparing the hide for tanning is to flesh and salt it. Fleshing involves removing any remaining fat, muscle tissue, and excess membrane from the hide, while salting helps to preserve the hide and prepare it for the tanning process. Here’s a detailed guide on how to flesh and salt the deer hide:
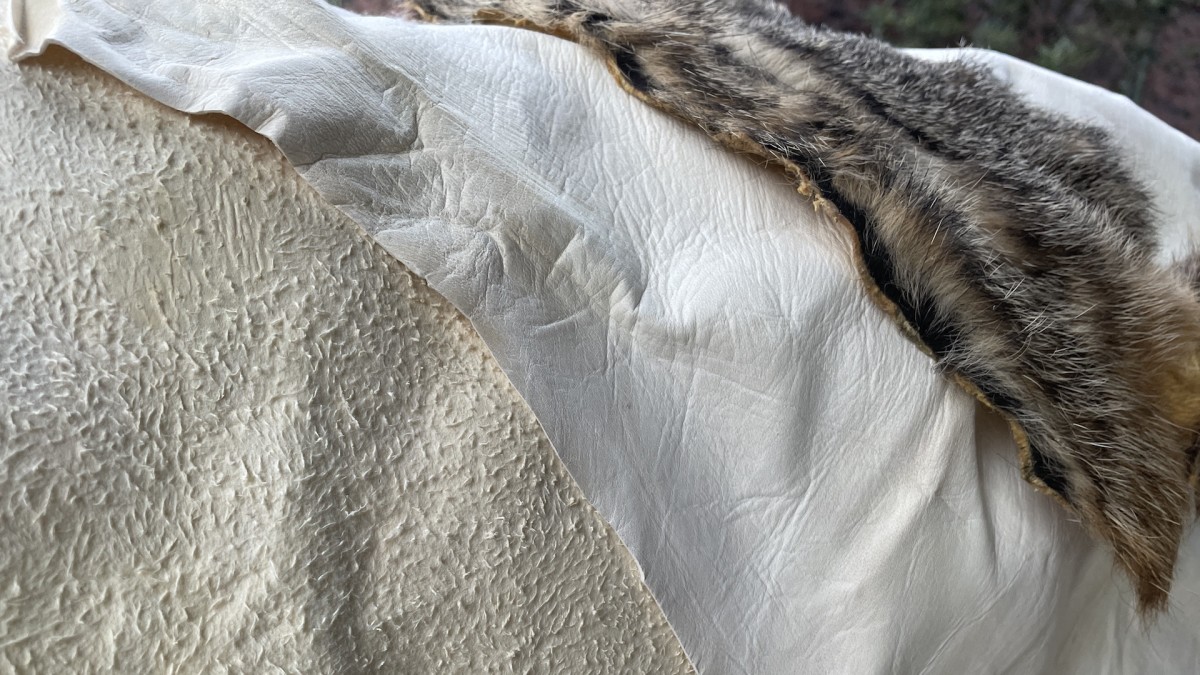
- Fleshing the hide: Begin by laying the hide out on a clean and flat surface, fur side down. Using a fleshing tool or a blunt knife, carefully scrape away any remaining fat or flesh from the underside of the hide. This process helps to thin out the leather and remove any excess tissue that could cause issues during tanning. Continue scraping until the hide feels smooth and pliable.
- Salt the hide: Once the fleshing is complete, it’s time to salt the hide to preserve it. Lay the hide out flat and evenly spread a liberal amount of non-iodized salt over the entire flesh side. Pay extra attention to thick areas of the hide, such as around the neck and shoulders. The salt helps to draw out moisture from the hide, preventing bacterial growth and preserving the skin. Fold the hide in half, flesh side in, to protect it from dust and debris. You can also stack other hides on top of each other but make sure to place a layer of salt between each hide.
- Let it rest: After salting, allow the hide to rest for at least 24 hours. This gives the salt time to absorb moisture and draw it out of the hide. During this time, check the hide periodically to ensure that there is no excess moisture pooling. If necessary, sprinkle more salt on any damp areas and gently massage it into the hide.
- Inspect and re-salt if necessary: After 24 hours, carefully unfold the hide and inspect it for any areas that may still be moist. If you notice any damp areas or signs of moisture, remove any existing salt and reapply a fresh layer. The key is to ensure that the hide is completely dry before proceeding to the next step.
Successfully fleshing and salting the hide sets the stage for a successful tanning process. Properly removing excess fat and tissue helps to prepare the hide for tanning agents, and the salt aids in preserving the hide by preventing spoilage. Once the hide is thoroughly salted and dry, you can move on to the next step: folding and storing the hide.
After skinning the deer, roll up the hide with the hair side in and store it in a cool, dry place. Avoid letting it get wet or allowing bacteria to grow on it before tanning.
Step 3: Folding and Storing the Hide
After fleshing and salting the deer hide, the next step in the process is to fold and store it properly. This step is crucial for maintaining the quality and condition of the hide until you are ready to begin the tanning process. Here’s a step-by-step guide on how to fold and store the deer hide:
- Inspect the hide: Before folding the hide, take a close look at its condition. Ensure that there are no remaining chunks of flesh or excess salt on the surface. If necessary, gently brush off any loose salt or debris using a soft-bristled brush.
- Smooth out any wrinkles: Lay the hide flat on a clean surface, fur side down. Smooth out any wrinkles or creases by gently flattening the hide with your hands. This will help prevent the formation of permanent folds or creases during storage.
- Determine the fold pattern: Decide on the fold pattern that works best for your storage space. One common method is to fold the hide in half lengthwise, with the fur side in. This creates a compact, rectangular shape that is easier to store. Alternatively, you can opt for a more intricate accordion-style fold if you have the space to accommodate it.
- Begin folding: Start folding the hide according to your chosen pattern. Make sure to fold it evenly and avoid overlapping any areas. Take your time and be gentle to avoid causing any damage to the hide.
- Adjust the size: If needed, trim any excess or uneven edges to create a more uniform shape. This will help ensure that the folded hide can be stored efficiently and securely.
- Wrap the folded hide: Once you have achieved the desired fold, wrap the hide in a breathable material such as muslin or burlap. This helps protect the hide from dust and light exposure while allowing it to breathe and prevent moisture buildup. Secure the wrapped hide with twine or tape.
- Label and store: Clearly label the wrapped hide with the date and any relevant information regarding the deer or tanning process. Store the wrapped hide in a cool, dry place away from direct sunlight. Ideally, the temperature and humidity should be consistent to prevent any fluctuation that could affect the hide’s condition.
Properly folding and storing the deer hide is essential for maintaining its quality during the waiting period between salting and tanning. The chosen fold pattern should allow for secure storage while minimizing the risk of creasing or damage. By taking the time to properly fold and store the hide, you are ensuring that it remains in optimal condition until you are ready to proceed with the tanning process.
Read more: How To Store Deer Meat
Step 4: Checking the Hide Regularly
Once you have folded and stored the deer hide, it is important to regularly check on its condition. Regular inspections help ensure that the hide remains in optimal condition during the waiting period before tanning. Here are some guidelines for checking the hide regularly:
- Set a schedule: Establish a regular schedule for checking the hide. It is typically recommended to inspect the hide every week or every two weeks, depending on the climate and storage conditions. This allows you to catch any potential issues early and take appropriate action.
- Unwrap the hide: Carefully unwrap the hide from its protective covering. Take note of any changes in color, texture, or smell. Any unusual odors or discoloration may indicate a problem.
- Look for signs of moisture: Check for any signs of moisture on the hide. Excessive moisture can lead to mold or bacterial growth, which can compromise the quality of the hide. If you notice any dampness, reapply salt to the affected areas and allow them to dry before rewrapping.
- Inspect for pests: Keep an eye out for any signs of pests, such as insects or rodents. They can cause damage to the hide, so it is important to address any infestations promptly. If you notice pests, take appropriate measures to eliminate them and ensure the hide is protected.
- Reapply salt if necessary: If you find areas where the salt has fully dissolved or been absorbed, reapply a thin layer of salt to those areas. This helps maintain the preservation of the hide and prevent any bacterial growth.
- Address any issues promptly: If you notice any issues or concerns during the inspection, take immediate action to address them. This may involve re-salting, adjusting the storage conditions, or seeking professional guidance if necessary.
- Re-wrap and store: After completing the inspection, carefully re-wrap the hide in its protective covering. Ensure it is secured properly to prevent dust or unwanted exposure. Return the hide to its designated storage area.
Regularly checking the hide helps ensure that any potential issues are identified early on, allowing you to take appropriate measures to maintain the hide’s quality. By staying proactive and attentive, you can help ensure that the hide remains in optimal condition until you are ready to proceed with the tanning process.
Step 5: Preparing for Tanning
Once you have properly stored the deer hide and conducted regular inspections, it’s time to prepare for the tanning process. This step involves some final preparations to ensure that the hide is ready to be transformed into soft and supple leather. Here are the steps to prepare for tanning:
- Unwrap the hide: Carefully unwrap the deer hide from its storage covering. Take this opportunity to inspect it one final time, checking for any signs of moisture, pests, or any other issues.
- Remove excess salt: Shake off any excess salt that may still be clinging to the hide. Alternatively, you can lightly brush the hide with a soft brush to remove any remaining salt particles.
- Rinse the hide: Depending on the tanning method you will be using, you may need to rinse the hide to remove some or all of the salt. This step is particularly important if you plan to use a tanning method that requires the hide to be hydrated before the tanning agents are applied. Follow the instructions provided with your chosen tanning method.
- Allow the hide to dry: After rinsing, hang the hide in a well-ventilated area to dry. Avoid direct sunlight as it can cause the hide to become brittle. Allow sufficient time for the hide to completely dry before moving on to the tanning process. This usually takes a few days to a week, depending on the humidity levels and air circulation.
- Prepare tanning agents: Depending on the tanning method you plan to use, prepare the necessary tanning agents according to the instructions provided. Different tanning methods require different combinations of chemicals, so it is important to carefully follow the guidelines.
- Apply the tanning agents: Once the hide is dry and the tanning agents are prepared, apply the tanning solution onto the flesh side of the hide. Most tanning methods involve soaking the hide in the tanning solution or applying it using a brush or sprayer. Again, refer to the specific instructions for your chosen tanning method.
- Follow the tanning process: After applying the tanning agents, follow the required steps for the specific tanning method you have chosen. This may involve allowing the hide to soak in the tanning solution for a specific duration, maintaining a specific temperature, or performing other necessary procedures. Again, carefully follow the guidelines provided by the tanning method you are using.
- Rinse and neutralize: After completing the tanning process according to the instructions, rinse the hide thoroughly to remove any excess tanning agents. Then, neutralize the hide by soaking it in a neutralizing solution. This step helps balance the pH levels and ensures the tanning agents are fully deactivated.
- Stretch and dry: After neutralizing, carefully stretch the hide to its original shape and size. Secure it in this stretched position and allow it to air dry. This ensures that the leather retains its desired shape and prevents any wrinkling or shrinking.
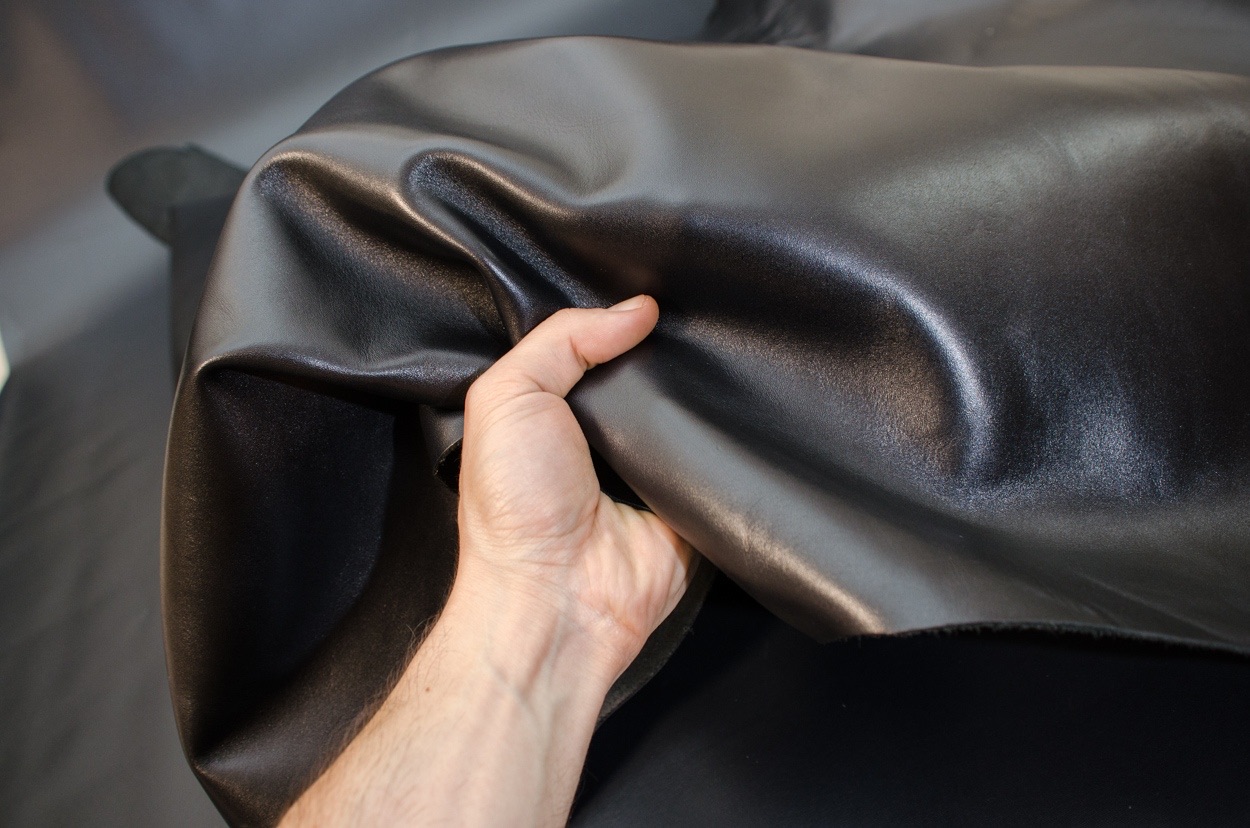
By following these steps and properly preparing your deer hide for tanning, you are setting yourself up for a successful and satisfying tanning experience. The preparations ensure that the hide is clean, hydrated (if required), and ready to undergo the tanning process. With patience and attention to detail, you will soon have a beautiful, soft leather ready for use in various projects.
Conclusion
Properly storing and preparing deer hides before tanning is essential for achieving high-quality results. By following the step-by-step guidelines outlined in this article, you can ensure that your deer hide remains in optimal condition and ready for the tanning process.
Starting with the careful process of skinning the deer, handling the hide with precision is crucial to avoid any unnecessary damage. Fleshing and salting the hide help remove excess fat, muscle tissue, and preserve the hide for later tanning. Folding the hide properly and storing it in a cool, dry place with proper ventilation is important to prevent bacterial growth and maintain its condition.
Regularly checking the hide allows you to catch any issues early on, such as moisture buildup or pest infestation, ensuring that the hide remains in the best possible condition. Finally, when it comes time to tan the hide, thorough preparation and following the specific instructions for your chosen tanning method will result in a soft and supple leather that can be used for various projects.
Remember, patience and attention to detail are key throughout the entire process. Properly storing and preparing your deer hide before tanning sets the foundation for a successful and rewarding experience. With the right techniques and care, you can transform a raw deer hide into a beautiful piece of leather that will be both functional and aesthetically pleasing.
So, take the time to implement these steps and enjoy the journey of transforming your deer hide into a quality leather product that you’ll be proud to show off.
Frequently Asked Questions about How To Store Deer Hide Before Tanning
Was this page helpful?
At Storables.com, we guarantee accurate and reliable information. Our content, validated by Expert Board Contributors, is crafted following stringent Editorial Policies. We're committed to providing you with well-researched, expert-backed insights for all your informational needs.


0 thoughts on “How To Store Deer Hide Before Tanning”