Articles
How To Store Embroidery Projects
Modified: April 22, 2024
Looking for articles on how to store your embroidery projects? Find valuable tips and techniques to keep your creations safe and organized for years to come.
(Many of the links in this article redirect to a specific reviewed product. Your purchase of these products through affiliate links helps to generate commission for Storables.com, at no extra cost. Learn more)
Introduction
Welcome to the world of embroidery, where creativity knows no bounds. Embroidery projects can take hours or even days to complete, depending on their complexity. As a dedicated embroiderer, you put your heart and soul into each piece, cherishing the time and effort you invested.
But what happens when you finish a project and want to store it? Proper storage is crucial to keep your embroidery projects in pristine condition, whether they are small designs or large masterpieces. In this article, we will guide you through the process of storing embroidery projects, ensuring their longevity and protecting your hard work.
Key Takeaways:
- Proper storage is essential for preserving the beauty and longevity of embroidery projects. From choosing the right storage method to maintaining quality, careful attention ensures cherished creations remain vibrant and protected.
- Whether stored in containers, frames, hoops, bags, or pouches, embroidery projects require gentle care and maintenance. Regular checks, controlled humidity, and clean handling help preserve the artistry and value of these cherished creations.
Read more: How To Store Embroidery Floss
Choosing the Right Storage Method
Before diving into the specifics of storing embroidery projects, it’s important to consider the various storage methods available. Depending on the size, shape, and material of your project, different storage options may be more suitable.
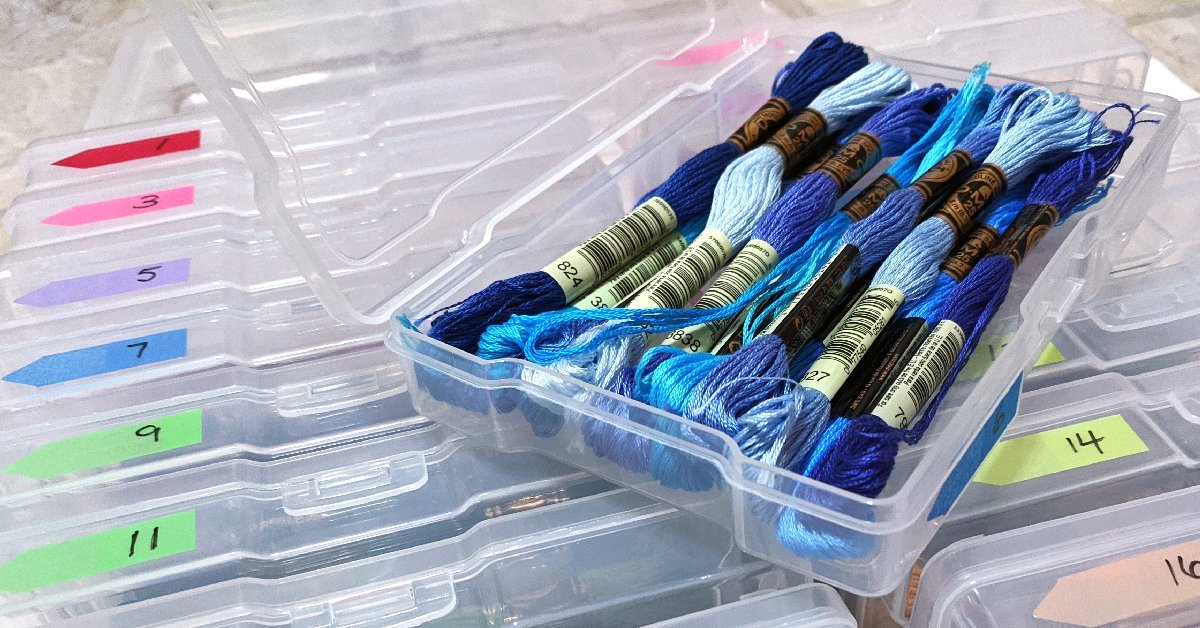
One popular storage method is using a container or box. These can be made of plastic, wood, or even fabric. Containers provide protection against dust, sunlight, and other elements that may cause damage to your embroidery projects. They also offer the advantage of organization, allowing you to categorize and store multiple projects in one place.
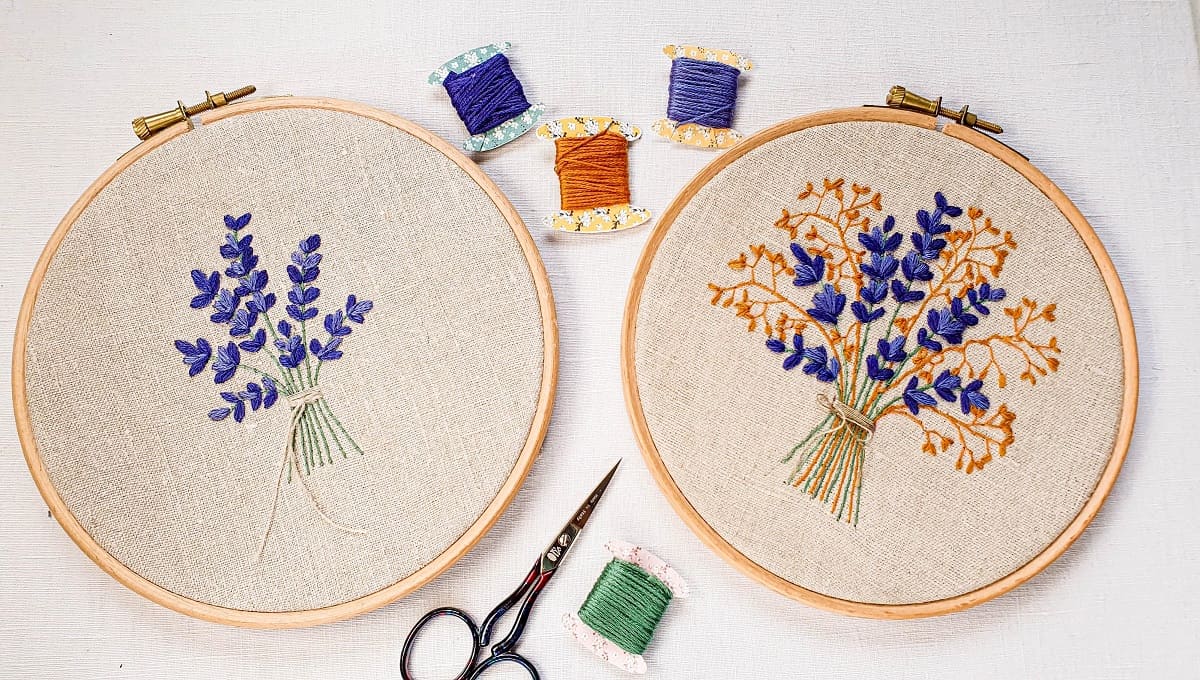
Another option is to store your embroidery projects in a frame or hoop. This is an ideal choice for smaller projects or those that you plan to display on the wall. Frames and hoops keep the fabric taut and prevent wrinkles or creases from forming over time. Not only does this preserve the integrity of your embroidery, but it also allows you to showcase your hard work.
If you prefer a more portable storage solution, consider using a bag or pouch. These are especially useful for embroidery projects on the go. Bags and pouches come in a variety of sizes and materials, providing protection against potential damage while allowing for easy transportation.
Ultimately, the right storage method will depend on the specific needs of your embroidery projects. Consider factors such as size, fragility, and where you plan to store them. Now that you have an understanding of the different options available, let’s explore how to prepare your embroidery projects for storage.
Preparing Your Embroidery Projects for Storage
Before you store your embroidery projects, it’s important to take a few steps to ensure their longevity and protection. By preparing your projects properly, you can prevent damage such as color fading, fabric fraying, and insect infestation.
The first step in preparing your embroidery projects for storage is to gently clean them. Use a soft brush or lint roller to remove any dust, lint, or loose threads. Be careful not to rub too vigorously, as this can damage the delicate stitches. If necessary, you can also spot clean stains using a mild detergent and warm water. Just make sure to thoroughly rinse and air dry the project before storing.
Next, consider adding an extra layer of protection by using acid-free tissue paper. Lay a sheet of tissue paper on top of the embroidery to create a barrier between the fabric and any potential contaminants. This will help prevent discoloration and maintain the vibrancy of your stitches.
If you’re storing your embroidery projects in a container, consider adding silica gel packets to absorb excess moisture. Moisture can lead to mold and mildew growth, which can ruin your projects. Silica gel packets can help eliminate moisture and keep your projects dry.
For framed or hooped embroidery, it’s important to ensure the frame or hoop is clean and secure. Check for any loose screws or nails and tighten them if necessary. This will help maintain the tension in the fabric and prevent it from sagging or warping over time.
Lastly, it’s a good idea to take photographs or make digital copies of your embroidery projects before storing them. This serves as a backup in case anything happens to the physical piece. You can also use these images to share your work with others or create a digital portfolio.
Now that your embroidery projects are clean and protected, it’s time to determine the best storage method based on their size and shape. Let’s explore the different storage options in more detail.
Storing Embroidery Projects in a Container
Using a container or box is one of the most common and practical ways to store embroidery projects. Containers provide a secure and organized space to keep your projects safe from dust, sunlight, and potential damage. Here are a few steps to follow when storing your embroidery projects in a container:
- Select an appropriate container: Choose a container that is large enough to accommodate your embroidery projects without crowding or folding them. It should also have a secure lid or closure to prevent dust and insects from getting inside.
- Line the container: To provide an additional layer of protection, consider lining the bottom of the container with acid-free tissue paper or cotton fabric. This will help prevent any direct contact between the fabric and the container’s surface.
- Arrange the projects: Carefully place your embroidery projects in the container, making sure they are flat and not creased or folded. If you have multiple projects, consider separating them with acid-free tissue paper to avoid any friction or potential damage.
- Add silica gel packets: If you live in a humid climate or if the storage area tends to get damp, it’s a good idea to add silica gel packets to absorb moisture. Simply place a few packets in the container, ensuring they are not in direct contact with the embroidery projects.
- Label and seal: Don’t forget to label the container with the project details, such as the design name, date completed, and any other relevant information. Once labeled, seal the container securely to keep out any dust or pests.
By following these steps, you can ensure that your embroidery projects remain protected and in excellent condition for years to come. However, if you prefer to display your embroidery rather than storing it in a container, there is another storage option to consider: framing or hooping.
Store your embroidery projects in a cool, dry place away from direct sunlight to prevent fading and damage. Use acid-free tissue paper to protect delicate stitches.
Storing Embroidery Projects in a Frame or Hoop
If you want to showcase your embroidery projects while keeping them protected, storing them in a frame or hoop is an excellent option. Not only does this method preserve the integrity of your embroidery, but it also allows you to display your hard work as a beautiful piece of art. Here’s how to properly store your embroidery projects in a frame or hoop:
- Clean the frame or hoop: Before placing your embroidery in a frame or hoop, ensure that it is clean and free from any dust, dirt, or loose threads. Wipe the frame or tighten the hoop as needed to ensure a secure fit.
- Center the embroidery: Gently center your embroidery within the frame or hoop, making sure that the design is aligned properly. Take care to avoid distorting or stretching the fabric during this process.
- Secure the fabric: If using a hoop, tighten the screw or latch to secure the fabric in place. For frames, make sure the fabric is taut and smooth. Adjust as necessary to ensure a proper fit.
- Add a protective layer: To provide an extra layer of protection, consider covering the back of the frame or hoop with acid-free mat board or foam board. This will prevent dust and light from reaching the fabric and potentially causing damage.
- Display or store: Once your embroidery project is securely framed or hooped, you can choose to hang it on the wall or store it in a safe location. If you decide to hang your embroidery, make sure it is displayed away from direct sunlight and in an environment with stable humidity.
Storing your embroidery projects in a frame or hoop not only keeps them protected but also allows you to enjoy and showcase your work. However, if you prefer a more portable storage solution, there is another option to consider: storing your embroidery projects in a bag or pouch.
Read more: How To Store Embroidery Thread
Storing Embroidery Projects in a Bag or Pouch
If you’re an embroidery enthusiast on the go or prefer a more portable storage solution, you may consider storing your projects in a bag or pouch. These options provide convenience and protection, allowing you to easily transport and store your embroidery projects. Here’s how to properly store your embroidery projects in a bag or pouch:
- Choose the right size: Select a bag or pouch that is suitable for the size of your embroidery projects. It should be spacious enough to accommodate your projects without folding or squishing the fabric.
- Opt for fabric or padded protection: Look for bags or pouches that are made from fabric or have padding. This will provide a cushioning effect and protect your embroidery from potential damage or creasing.
- Separate multiple projects: If you plan to store multiple embroidery projects in one bag or pouch, consider using acid-free tissue paper or fabric to separate them. This will prevent any friction or rubbing that could lead to damage.
- Add a moisture-absorbing packet: To combat moisture buildup, especially during long-term storage, include a silica gel packet in the bag or pouch. This will help absorb any excess moisture and prevent mold or mildew from forming.
- Seal the bag or pouch: Ensure that the bag or pouch has a secure closure, such as a zipper or drawstring, to keep out dust, light, and pests. This will help maintain the quality of your embroidery projects.
- Store in a cool, dry place: Find a suitable storage location that is cool, dry, and away from direct sunlight. Extreme temperatures and humidity can damage your embroidery projects, so it’s important to store them in an environment with stable conditions.
Storing your embroidery projects in a bag or pouch provides a convenient and protective solution, whether you’re traveling or simply want an organized storage option. By following these steps, you can ensure that your embroidery stays in excellent condition and is ready for whenever you want to work on or display your projects.
Now that you’ve learned how to store your embroidery projects using different methods, it’s important to understand how to maintain their quality over time. Let’s explore some tips for keeping your stored embroidery projects in pristine condition.
Maintaining the Quality of Stored Embroidery Projects
Once you have stored your embroidery projects using the appropriate method, it’s essential to maintain their quality while they are in storage. By following a few simple tips, you can ensure that your embroidery remains in excellent condition, ready to be admired or worked on in the future:
- Check on your projects regularly: Set a reminder to periodically inspect your stored embroidery projects. This will allow you to identify any potential issues, such as mold, pests, or fabric degradation, before they cause significant damage.
- Keep away from direct sunlight: Exposure to direct sunlight can cause fading and discoloration in your embroidery projects. Therefore, it’s important to store them in a location that is shielded from direct sunlight. Consider using UV-blocking window film or blinds if necessary.
- Control humidity levels: Fluctuating humidity levels can lead to mold, mildew, or fabric damage. Aim to store your embroidery projects in a controlled environment with stable humidity levels, avoiding areas that are excessively damp or humid.
- Avoid storing in basements or attics: Basements and attics are prone to temperature and humidity fluctuations, making them less than ideal for storing delicate embroidery projects. Instead, choose a location on an upper floor or in a climate-controlled area.
- Handle with clean, dry hands: When taking out or putting back your embroidery projects, make sure your hands are clean and dry. Oils, lotions, or moisture on your hands can transfer onto the fabric and potentially cause staining or damage over time.
- Rotate stored projects: If you have multiple embroidery projects in storage, consider rotating them every few months. This helps to evenly distribute any potential wear and tear and prevents one project from being stored for too long.
- Document and label: Keep a detailed inventory of your stored embroidery projects, including project names, dates, materials used, and any other relevant information. This will help you keep track of what you have in storage and allow for easy retrieval when needed.
By following these maintenance tips, you can ensure that your stored embroidery projects remain in excellent condition for years to come. Whether you’re storing them in containers, frames, hoops, bags, or pouches, taking care of your embroidery projects during storage is essential to preserve their beauty and value.
Now that you are equipped with the knowledge and tools to store and maintain your embroidery projects, you can confidently protect and showcase your hard work. So go ahead and explore new embroidery projects, knowing that you can store them with care and enjoy them for a lifetime.
Enjoy your embroidery journey!
Conclusion
Proper storage is crucial for maintaining the quality and longevity of your embroidery projects. Whether you choose to store them in containers, frames, hoops, bags, or pouches, the key is to protect them from dust, sunlight, and potential damage. By taking the time to prepare your projects for storage and following the appropriate storage method, you can ensure that your embroidery remains in excellent condition, ready to be admired or worked on in the future.
Remember to clean your projects gently, use acid-free tissue paper or fabric to provide a protective barrier, and consider adding moisture-absorbing packets if necessary. Depending on the size, shape, and material of your embroidery projects, choose the storage method that best suits your needs.
Whether you choose to display your embroidery projects or store them away, it’s important to periodically check on them, control humidity levels, and keep them away from direct sunlight. Handling your projects with clean, dry hands and rotating them in storage also helps to preserve their quality.
By following these guidelines and maintaining your stored embroidery projects with care, you can ensure that they remain as beautiful and vibrant as the day you completed them. Your hard work and creativity deserve to be protected and cherished for years to come.
So embrace the art of embroidery, store your projects with confidence, and continue to explore new designs and techniques. With proper storage, your embroidery projects will not only bring joy to your own life but can also be treasured heirlooms for future generations to admire and appreciate.
Happy stitching!
Frequently Asked Questions about How To Store Embroidery Projects
Was this page helpful?
At Storables.com, we guarantee accurate and reliable information. Our content, validated by Expert Board Contributors, is crafted following stringent Editorial Policies. We're committed to providing you with well-researched, expert-backed insights for all your informational needs.


0 thoughts on “How To Store Embroidery Projects”