Home>Articles>How To Make A Quilt Label With An Embroidery Machine
Articles
How To Make A Quilt Label With An Embroidery Machine
Modified: October 27, 2024
Learn how to create beautiful quilt labels using an embroidery machine with our informative articles. Enhance your quilting projects with personalized labels.
(Many of the links in this article redirect to a specific reviewed product. Your purchase of these products through affiliate links helps to generate commission for Storables.com, at no extra cost. Learn more)
Introduction
Making a quilt is a labor of love, and what better way to personalize your creation than by adding a custom quilt label? A quilt label serves as a permanent reminder of the time and effort you put into making a beautiful quilt. While there are many ways to create a quilt label, one popular method is to use an embroidery machine.
Embroidery machines allow you to add intricate designs, colorful threadwork, and even personalized text to your quilt labels. Whether you’re a seasoned embroiderer or a beginner looking to explore the world of embroidery, creating a quilt label with an embroidery machine is a fun and rewarding project.
In this article, we will take you through the step-by-step process of making a quilt label with an embroidery machine. We will cover everything from gathering your materials to adding the finishing touches, ensuring that you have all the information you need to create a beautiful and professional-looking quilt label.
So, let’s dive in and learn how to make a quilt label with an embroidery machine. Get ready to unleash your creativity and add a special touch to your quilts!
Key Takeaways:
- Personalize Your Quilts
Adding a quilt label with an embroidery machine allows you to infuse your quilts with a personal touch, showcasing your creativity and leaving a lasting mark on your creations. - Attention to Detail Matters
Proper fabric preparation, stabilizer selection, and meticulous embroidery ensure that your quilt label is beautifully crafted, secure, and able to withstand the test of time.
Read more: How To Make A Label For A Quilt
Step 1: Gathering Your Materials
Before you begin creating your quilt label with an embroidery machine, it’s important to gather all the necessary materials. Having everything ready will make the process smoother and more enjoyable. Here’s a list of materials you’ll need:
1. Fabric: Select a fabric that complements your quilt and is suitable for embroidery. Cotton or cotton-blend fabrics work well as they are easy to handle and provide a smooth surface for embroidery.
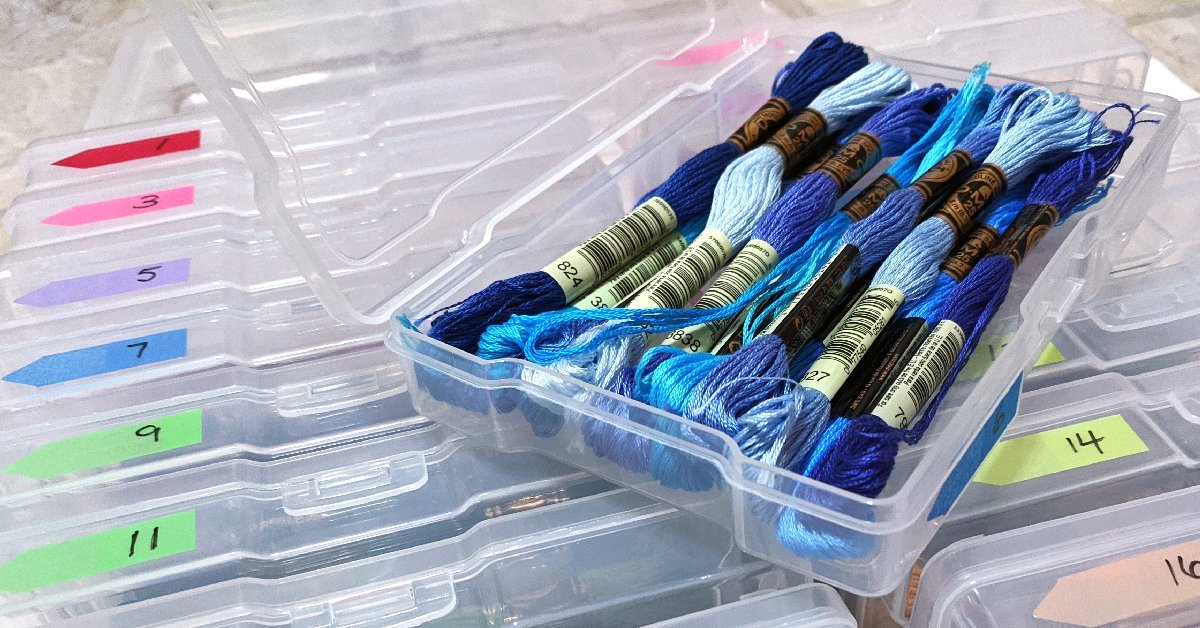
2. Embroidery Thread: Choose high-quality embroidery thread in colors that coordinate with your quilt. Polyester or rayon threads are commonly used for embroidery projects.
3. Embroidery Stabilizer: Stabilizers are essential for keeping the fabric taut and preventing any stretching or puckering during the embroidery process. There are different types of stabilizers available, so choose one that best suits your fabric and embroidery design.
4. Embroidery Machine Needles: It’s important to use the correct needles for your embroidery machine. Check your machine’s manual for the recommended needle type and size.
5. Embroidery Design: Decide on the design you want for your quilt label. You can choose a pre-made design from your embroidery machine’s library or create your own using embroidery software.
6. Scissors: A sharp pair of scissors will come in handy for cutting fabric, threads, and stabilizers.
7. Marking Tools: Depending on your fabric choice, you may need marking tools such as fabric markers or air-soluble pens to mark guidelines for your embroidery design.
8. Iron and Ironing Board: Pressing your fabric before embroidering helps ensure a smooth surface for stitching.
9. Optional: Extra Embellishments: If desired, you can add additional elements to embellish your quilt label, such as buttons, ribbons, or beads.
Once you have gathered all these materials, you’ll be well-prepared to start the process of creating your quilt label with an embroidery machine. Keep them organized and easily accessible for a hassle-free embroidery experience. Now, let’s move on to the next step!
Step 2: Designing Your Quilt Label
Designing your quilt label is an exciting and creative process. This is where you can truly personalize your quilt by adding your own unique touch. Follow these steps to design a quilt label that reflects your style and captures the essence of your quilt:
1. Determine the Size: Decide on the size of your quilt label based on the available space on your quilt and your personal preference. Consider whether you want to place the label on the front or back of the quilt.
2. Choose the Shape: Quilt labels can be any shape you desire, such as squares, rectangles, circles, or even free-form shapes. Consider the overall design of your quilt and choose a shape that complements it.
3. Add Text: Decide what information you want to include on your quilt label. Common details to include are your name, the date the quilt was made, the occasion (if applicable), and a short message or dedication. Choose a font that is easy to read and complements the style of your quilt.
4. Select Embroidery Designs: If your embroidery machine has built-in designs, browse through the collection and choose motifs or borders that enhance your quilt label. You can also import designs from external sources or create your own using embroidery software.
5. Consider Placement: Visualize where you want to place each element on your quilt label. Determine if you want the text to be centered or aligned in a specific way. Experiment with different arrangements until you are satisfied with the overall design.
6. Make a Sample: Before embroidering your design onto the actual fabric, create a sample on a scrap piece of fabric to ensure you are happy with the size, placement, and appearance of the embroidery.
7. Customize with Embellishments: To add extra flair to your quilt label, consider incorporating additional elements such as buttons, ribbons, or beads that complement the theme or colors of your quilt.
Once you have finalized your design, you are ready to transfer it to your embroidery machine and bring your quilt label to life. Stay tuned for the next step, where we will discuss how to transfer the design to your embroidery machine.
Step 3: Transferring the Design to Your Embroidery Machine
Now that you have designed your quilt label, it’s time to transfer the design to your embroidery machine. This step is crucial to ensure that your machine accurately stitches the design onto the fabric. Follow these steps to successfully transfer your design:
1. Save the Design: Save your quilt label design in a file format that is compatible with your embroidery machine. Common formats include .pes, .dst, .exp, and .jef. Refer to your machine’s manual for the specific file formats supported.
2. Connect your Machine: Connect your embroidery machine to your computer using a USB cable or by using a removable storage device such as a USB flash drive or memory card.
3. Transfer the Design: Using the software provided with your embroidery machine, transfer the design file from your computer to the machine. Follow the instructions in the software to ensure a successful transfer.
4. Select the Design: On your embroidery machine, navigate to the design files section and locate the transferred quilt label design. Select it to prepare for embroidery.
5. Customize Settings: Before embroidering, you may need to adjust some settings on your embroidery machine. These settings include thread colors, stitch density, and stitch length. Refer to your machine’s manual for detailed instructions on customizing embroidery settings.
6. Choose the Hoop Size: Select the appropriate hoop size on your machine that matches the dimensions of your quilt label. This ensures that the design will fit within the designated area of your fabric.
7. Load the Fabric: Attach your chosen fabric to the embroidery hoop, making sure it is taut and secure. Position the hoop in your embroidery machine, ensuring the fabric is aligned correctly.
8. Test the Design: Before embroidering on your actual quilt label fabric, it’s a good practice to run a test stitch on a scrap piece of fabric. This allows you to check for any issues or make necessary adjustments before embroidering on your final fabric.
Once you have successfully transferred the design to your embroidery machine and prepared your fabric, you are ready to move on to the next step: preparing your fabric for embroidery.
Step 4: Preparing Your Fabric
Preparing your fabric is an essential step in the quilt label embroidery process. Proper fabric preparation ensures that your embroidery design looks its best and that the fabric remains stable during stitching. Follow these steps to prepare your fabric for embroidery:
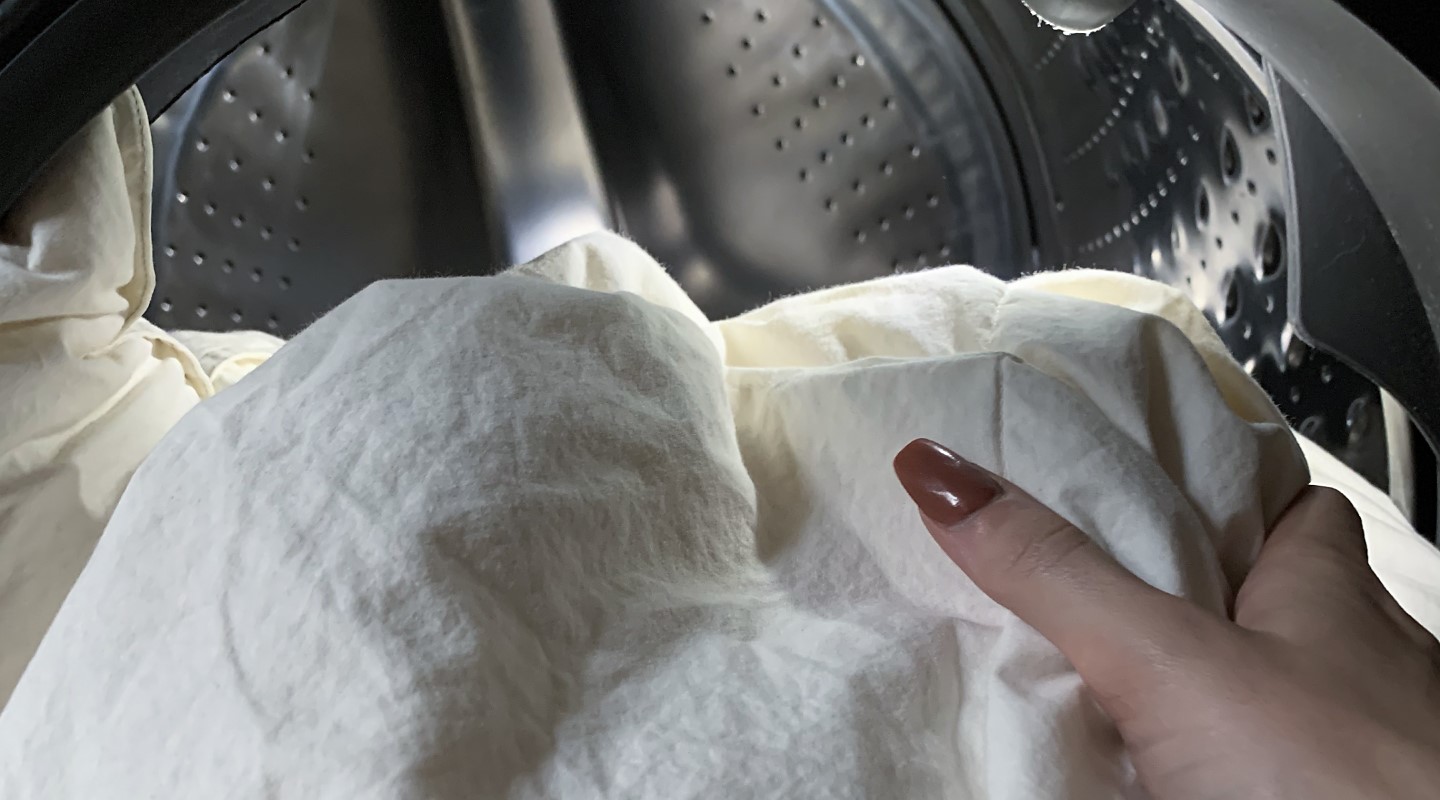
1. Wash and Iron: Before you start embroidering, it’s recommended to wash and iron your fabric. This step helps remove any chemicals, dirt, or wrinkles that may affect the quality of your embroidery. Be sure to follow the fabric’s washing instructions to avoid any damage.
2. Measure and Cut: Measure the size of your quilt label and add a few inches of extra fabric around the edges. This additional fabric provides room for hooping and prevents the embroidery from being too close to the edges. Once measured, cut your fabric accordingly.
3. Mark Guidelines: If needed, use fabric markers or air-soluble pens to mark guidelines for the placement of the embroidery design on your fabric. These guidelines will help you position the design accurately and ensure that it is centered.
4. Secure Fabric in Hoop: Place your fabric on the embroidery hoop, ensuring that it is taut and evenly stretched. Smooth out any wrinkles or creases. Tighten the hoop to secure the fabric in place, making sure it is centered within the hoop.
5. Trim Excess Fabric: Trim any excess fabric beyond the hoop to prevent interference with the embroidery process. Leave a small allowance of fabric for stability.
Properly preparing your fabric sets the stage for a successful embroidery experience. Taking the time to wash, press, and measure your fabric ensures that your quilt label embroidery will be neat, professional-looking, and without any unwanted surprises. With your fabric prepared, it’s time to move on to the next step: stabilizing your fabric to prevent shifting or puckering during embroidery.
When making a quilt label with an embroidery machine, be sure to use stabilizer to prevent the fabric from puckering during the embroidery process. This will ensure a professional-looking label for your quilt.
Read more: How To Quilt With Embroidery Machine
Step 5: Stabilizing Your Fabric
Stabilizing your fabric is an important step in embroidery to prevent shifting, stretching, or puckering during the stitching process. The type of stabilizer you use depends on your fabric and the complexity of your embroidery design. Follow these steps to properly stabilize your fabric:
1. Choose the Right Stabilizer: There are various types of stabilizers available, including cut-away, tear-away, and wash-away stabilizers. Select the one that is most suitable for your fabric and embroidery project.
– Cut-Away Stabilizer: This type of stabilizer is usually used for fabrics with a lot of stretch or those that require extra support. It remains permanently attached to the fabric, even after the excess is trimmed away.
– Tear-Away Stabilizer: Tear-away stabilizers are easy to remove by tearing them away once the embroidery is complete. They are suitable for stable or woven fabrics that do not require extensive support.
– Wash-Away Stabilizer: As the name suggests, wash-away stabilizers dissolve when washed. They are ideal for delicate and sheer fabrics that may be damaged by tearing or cutting.
2. Hoop the Stabilizer: Place the chosen stabilizer in the embroidery hoop, making sure it is taut and smooth. Align the stabilizer with the markings on the hoop if necessary.
3. Secure the Fabric: Position your fabric on top of the stabilizer, aligning it with the guidelines you marked earlier. Smooth it out to remove any wrinkles or air bubbles.
4. Pin or Spray Baste: Use straight pins or a temporary fabric adhesive spray to secure the fabric to the stabilizer. This ensures that the fabric remains flat and does not shift during the embroidery process.
5. Prepare Multiple Layers: For fabrics that require additional stability, consider layering multiple pieces of stabilizer. This can be helpful for heavyweight or textured fabrics that may need extra support.
Remember that the type and weight of your fabric will impact the choice of stabilizer and the number of layers needed. It’s crucial to ensure that the fabric is securely attached to the stabilizer to avoid any distortion or misalignment during the embroidery process.
By properly stabilizing your fabric, you create a stable and supportive base for your embroidery design. With the fabric securely in place, you are now ready to set up your embroidery machine and begin stitching your quilt label. Stay tuned for the next step: setting up your embroidery machine for the best results.
Step 6: Setting Up Your Embroidery Machine
Setting up your embroidery machine correctly is crucial to ensure optimum results and a smooth embroidery process. Follow these steps to properly set up your embroidery machine:
1. Refer to the Manual: Familiarize yourself with your embroidery machine’s manual. It contains important information specific to your machine model, such as threading instructions, setting adjustments, and maintenance guidelines.
2. Thread the Machine: Follow the machine’s manual instructions to thread your embroidery machine correctly. Make sure you use high-quality embroidery thread that matches your design requirements.
3. Insert the Embroidery Hoop: Attach the embroidery hoop to the machine’s embroidery arm. Ensure that it is securely locked in place. Double-check that the hoop size matches the dimensions of your quilt label.
4. Select the Design: Use the machine’s control panel or touchscreen to browse through your saved designs and select the one you will be embroidering. Verify that the design is displayed correctly and aligned as desired.
5. Customize Settings: Adjust the machine settings according to your fabric type, design complexity, and personal preferences. These settings may include thread tension, stitch speed, and needle positioning. Refer to your machine’s manual for detailed instructions on adjusting settings.
6. Test the Machine: Before embroidering on your actual quilt label fabric, run a test stitch on a scrap piece of fabric. This allows you to ensure that the machine is functioning properly and that the design is centered and aligned correctly.
7. Check Bobbin Thread: Verify that the bobbin thread is properly wound and inserted into the bobbin case. Ensure that the tension is correctly adjusted to avoid thread breakage or uneven stitches.
8. Clean and Lubricate: Regularly clean and lubricate your embroidery machine as recommended in the manual. This helps maintain the machine’s performance and prevents any build-up of lint or debris.
Properly setting up your embroidery machine ensures that your quilt label embroidery runs smoothly and produces precise and beautiful results. Taking the time to familiarize yourself with the machine’s functions, adjust the settings, and perform regular maintenance will contribute to a positive embroidery experience. With your machine set up, it’s time to move on to the exciting step of actually embroidering your quilt label. Stay tuned for step 7: embroidering your quilt label.
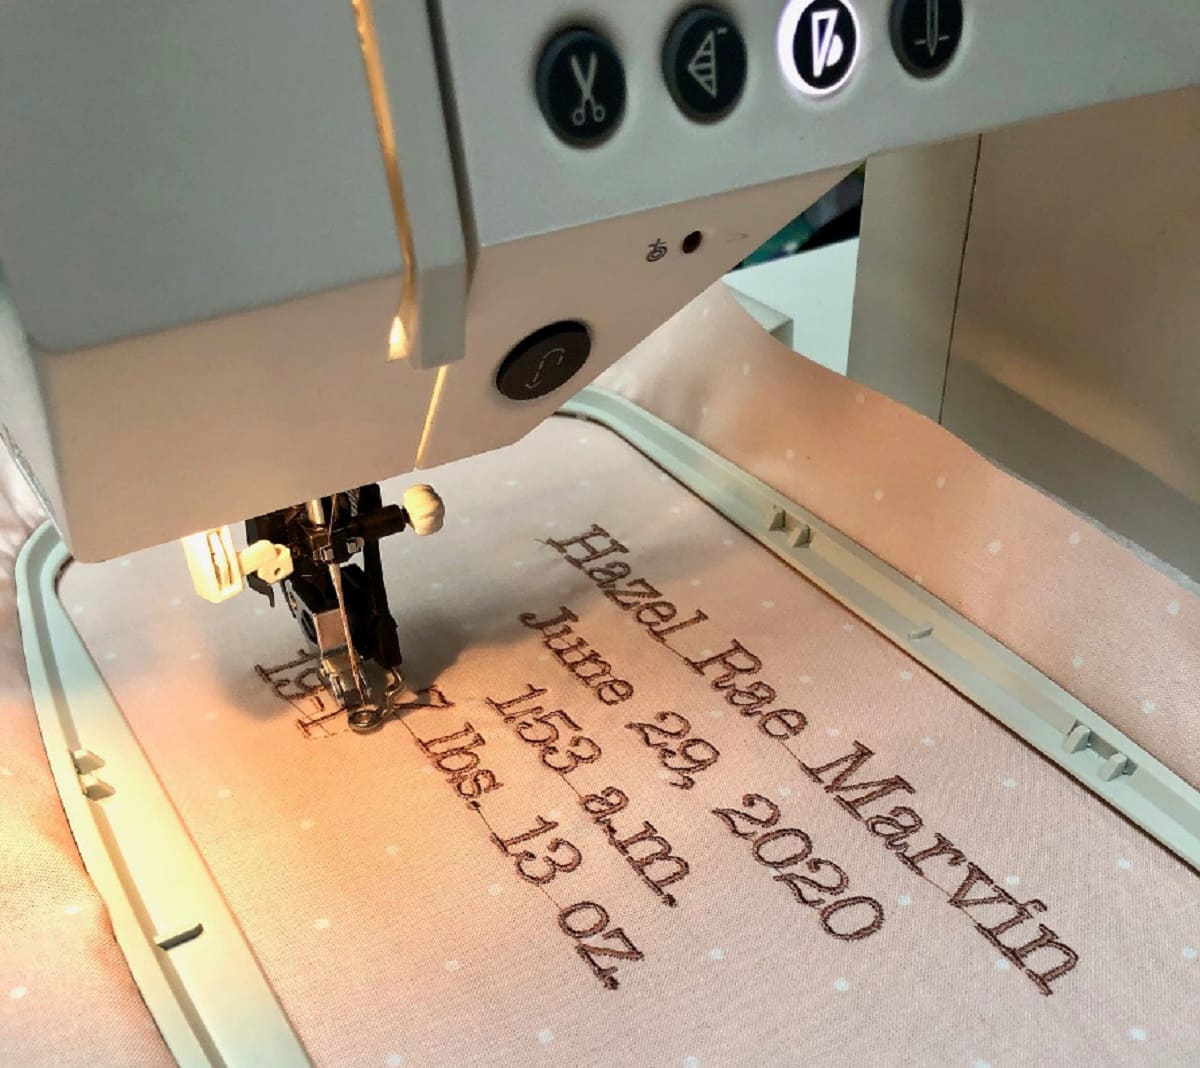
Step 7: Embroidering Your Quilt Label
Now comes the moment you’ve been waiting for – it’s time to embroider your quilt label! Follow these steps to ensure a successful and beautiful embroidery:
1. Position Your Fabric: Carefully place your prepared fabric hooped with the stabilizer onto the embroidery machine. Make sure the fabric is centered and aligned with the embroidery design.
2. Start the Embroidery: Once your fabric is in place, start the embroidery process according to your machine’s instructions. Double-check that the correct design is selected, and adjust any additional settings if needed.
3. Monitor the Progress: Keep an eye on the embroidery process as it progresses. Pay attention to the stitching, thread tension, and any potential issues that may arise. If necessary, make adjustments to ensure a smooth and precise embroidery.
4. Thread Changes: If your design requires multiple thread colors, follow the prompts on your embroidery machine to change the thread color at the appropriate intervals. Trim any excess thread after each color change.
5. Pause and Trim Jump Stitches: Some designs may have jump stitches, which are the stitches that connect different elements within the design. If necessary, pause the embroidery process when a jump stitch appears, trim the excess thread, and resume embroidering.
6. Take Breaks if Needed: Embroidering a quilt label can be time-consuming, so feel free to take breaks if you need them. Just make sure to secure the fabric and stabilize properly when you resume the process.
7. Finishing the Embroidery: Once the embroidery is complete, carefully remove the hoop from the machine. Gently tear away or cut the excess stabilizer from the back of the embroidery. Take care not to tug on the stitches or fabric.
Congratulations! You have successfully embroidered your quilt label. Admire your work and take a moment to appreciate the beautiful design. Now it’s time for the final step: adding the finishing touches to complete your quilt label. Stay tuned for Step 8 to learn how to bring it all together.
Step 8: Finishing Touches
You’re almost there! Step 8 focuses on the final touches to complete your quilt label and ensure it is ready to be attached to your quilt. Follow these steps to add those finishing touches:
1. Trim the Excess Fabric: Using sharp scissors, carefully trim the excess fabric around the embroidered design. Be mindful not to cut into any stitches, but ensure your quilt label has a clean and professional edge.
2. Backing Fabric (Optional): If you prefer, you can add a backing fabric to your quilt label for added stability and a neater finish. Cut a piece of fabric slightly larger than your embroidered design and attach it to the back of the label with hand stitching or fabric glue.
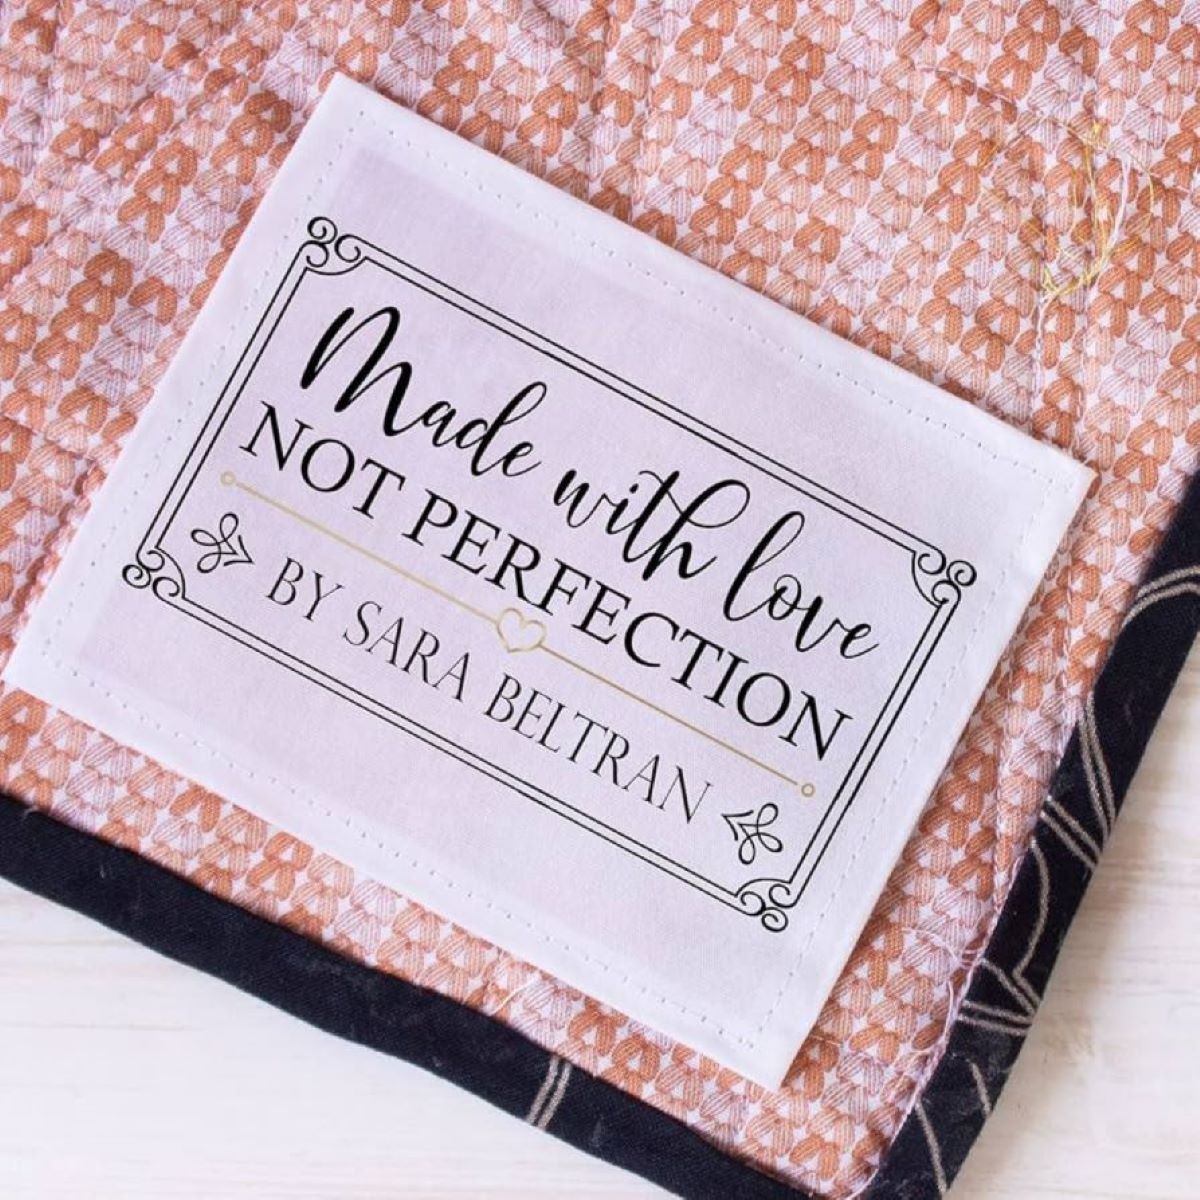
3. Add Information: Use permanent fabric markers or embroidery to add additional details to your quilt label, such as your name, the date, the occasion, or any special message or dedication. Choose a contrasting color that complements your quilt label design.
4. Secure the Label: Decide where you want to place the quilt label on your quilt. Use hand stitching or a sewing machine to attach the label securely to the back of the quilt. You can stitch along the edges or tack it down at the corners.
5. Optional Embellishments: For an extra special touch, consider adding embellishments to your quilt label. This could include small buttons, ribbons, beads, or appliques that accentuate the design or theme of your quilt.
6. Press the Label: Once the quilt label is attached, give it a final press using an iron set to the appropriate temperature for your fabric. This helps smooth out any wrinkles and ensures a polished look.
7. Document the Quilt: Take a moment to document your quilt label. Snap a photo of it and record any important information about the quilt-making process. This will serve as a reference for future memories and valuable information about your quilt.
With the finishing touches completed, your quilt label is now ready to be proudly displayed on your quilt. It adds a personal touch and serves as a testament to your hard work and creativity. Step back and admire your quilt label, knowing that you’ve created something unique and meaningful. Congratulations on successfully completing all the steps to make a quilt label with an embroidery machine!
Read more: What To Write On A Quilt Label
Conclusion
Creating a quilt label with an embroidery machine is a wonderful way to add a personal touch to your quilting projects. By following the step-by-step process outlined in this article, you have learned how to gather your materials, design your quilt label, transfer the design to your embroidery machine, prepare your fabric, stabilize it, set up your embroidery machine correctly, embroider your quilt label, and add the finishing touches.
Embroidering a quilt label allows you to showcase your creativity and leave a lasting mark on your quilts. It provides an opportunity to personalize your creations, conveying important information such as your name, dates, special dedications, or messages for the recipient of the quilt.
Throughout this journey, you have discovered the importance of proper fabric preparation, appropriate stabilizer selection, and meticulous attention to detail. These steps ensure that your quilt label is beautifully embroidered, secure, and withstands the test of time.
Remember to take breaks when needed and enjoy the process of embroidering your quilt label. This is a chance to infuse your own style and creativity into your quilt, making it truly one-of-a-kind.
Now, armed with the knowledge and skills gained from this article, you can confidently embark on future quilt projects, knowing that you have the ability to add a personalized quilt label with an embroidery machine.
So, gather your materials, let your creative juices flow, and breathe life into your quilts with beautifully embroidered quilt labels. Your quilting journey has reached a new level of personalization, and your finished quilts will be cherished heirlooms for generations to come. Happy quilting!
Frequently Asked Questions about How To Make A Quilt Label With An Embroidery Machine
Was this page helpful?
At Storables.com, we guarantee accurate and reliable information. Our content, validated by Expert Board Contributors, is crafted following stringent Editorial Policies. We're committed to providing you with well-researched, expert-backed insights for all your informational needs.


0 thoughts on “How To Make A Quilt Label With An Embroidery Machine”