Articles
How To Store Produce In Mason Jars
Modified: October 20, 2024
Learn how to store produce in mason jars with these helpful articles. Preserve freshness and extend shelf life with our expert tips and techniques.
(Many of the links in this article redirect to a specific reviewed product. Your purchase of these products through affiliate links helps to generate commission for Storables.com, at no extra cost. Learn more)
Introduction
When it comes to storing produce, finding the right method can make a significant difference in maintaining freshness and prolonging shelf life. While traditional methods like plastic bags or containers may be effective to some extent, using mason jars offers a range of benefits that can revolutionize your produce storage game.
Mason jars, with their airtight seal and durable glass construction, are not just for canning and preserving food. They are also an ideal choice for storing a wide variety of fruits, vegetables, herbs, and even homemade dressings and sauces. Whether you’re a gardening enthusiast or simply want to make your groceries last longer, mason jars can provide a practical and eco-friendly solution to keep your produce fresh for longer periods.
In this article, we will explore the benefits of using mason jars for produce storage and guide you through the process of choosing the right jars, preparing them for use, and storing different types of produce. We’ll also share some tips on maximizing the freshness and flavor of your stored produce.
So, if you’re ready to take your produce storage to the next level, let’s dive in and discover the wonderful world of storing produce in mason jars!
Key Takeaways:
- Mason jars offer an eco-friendly, airtight, and durable solution for storing produce, preserving freshness, and extending shelf life. Their transparent visibility and versatile sizing options make them a practical choice for any kitchen.
- Properly preparing and cleaning mason jars is essential for optimal cleanliness and hygiene when storing produce. Choosing the right jar size, mouth type, and quality of seal ensures effective and efficient produce storage.
Read more: How To Store Mason Jars
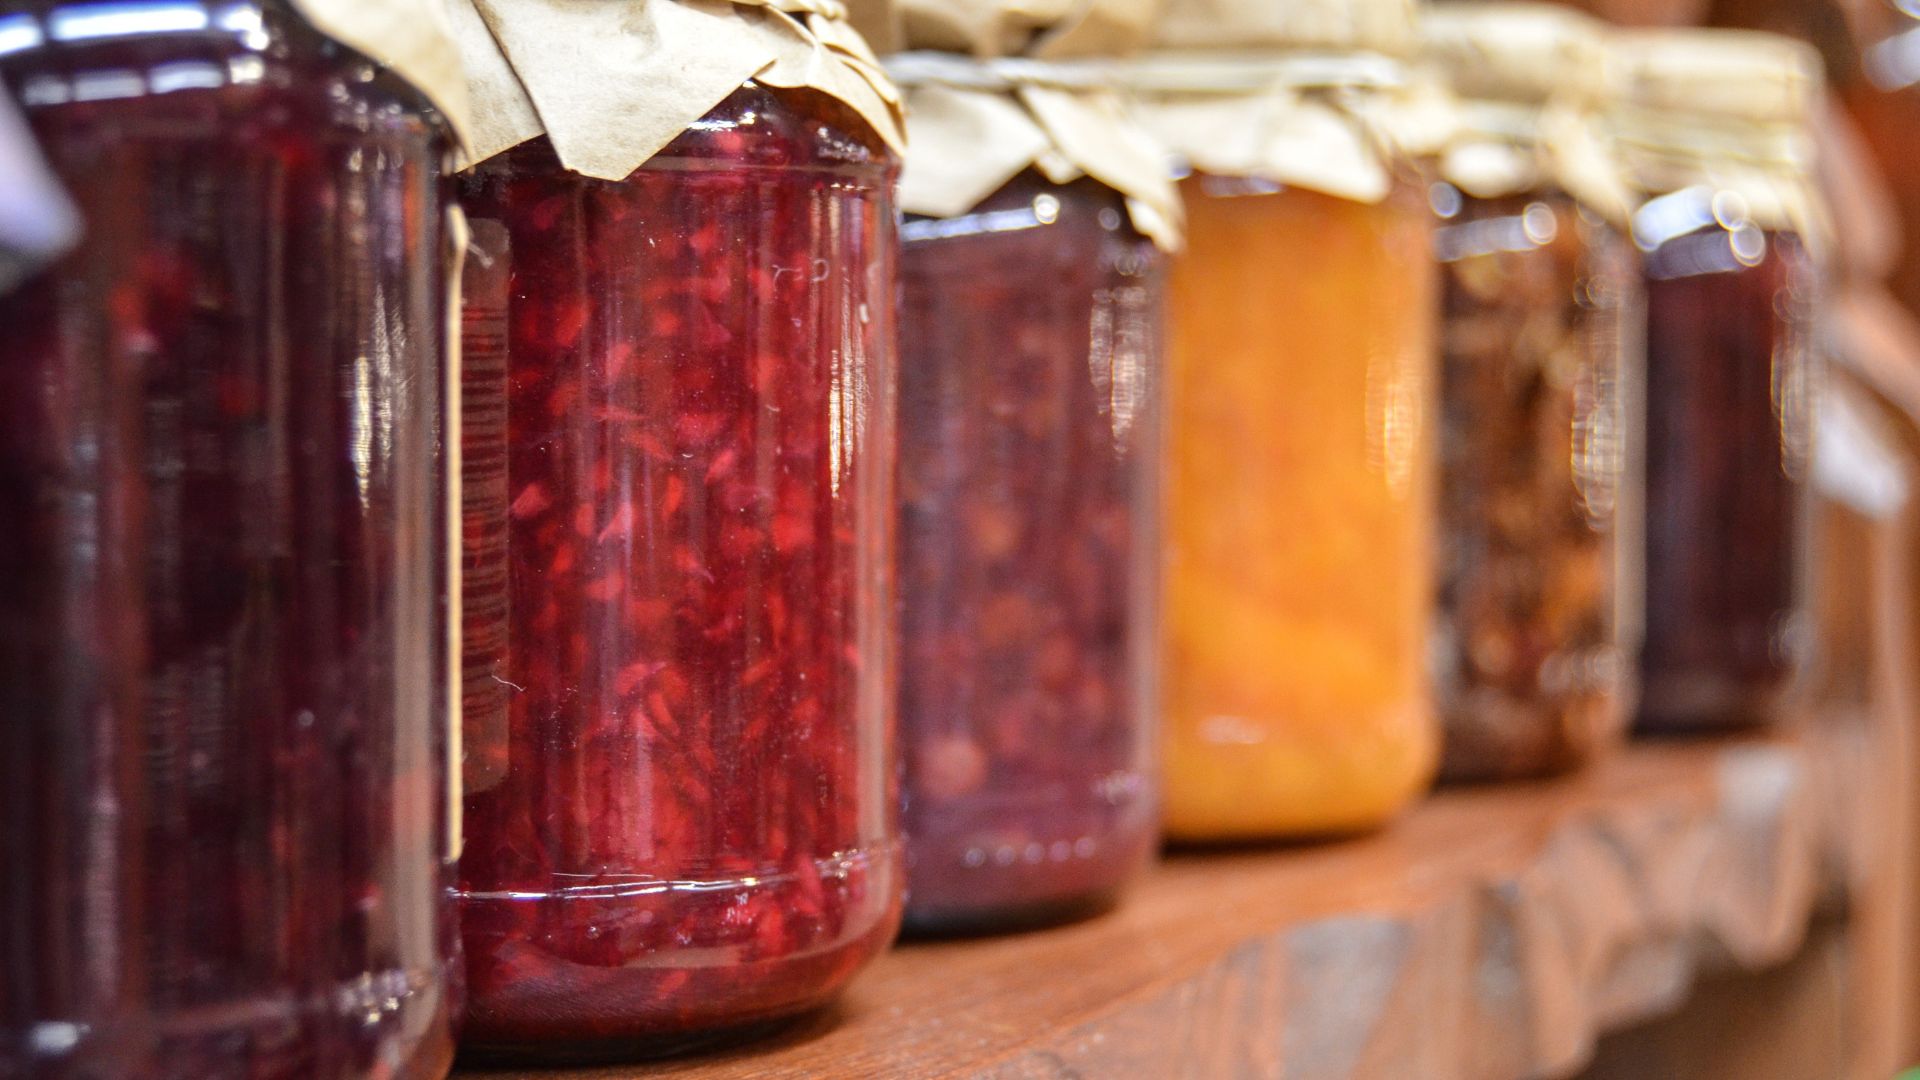
Benefits of using mason jars for produce storage
Using mason jars for produce storage offers a multitude of benefits that can greatly enhance your experience in the kitchen. Here are some key advantages:
- Sealing in freshness: Mason jars are designed with airtight lids, ensuring that moisture and air are kept out. This helps to preserve the freshness and flavor of your produce for longer periods. Unlike other storage methods that can lead to wilting or dehydration, mason jars create an optimal environment to keep your fruits and vegetables crisp and vibrant.
- Durable and reusable: Unlike plastic bags or containers that can degrade over time, mason jars are made of durable glass that can withstand repeated use. They are resistant to stains and odors, making them a hygienic option for storing produce. Additionally, their reusable nature aligns with eco-friendly practices, reducing waste generated by single-use storage options.
- Transparent visibility: One of the advantages of using mason jars is their transparent design. This allows you to easily see the contents inside, helping you quickly identify and locate the produce you need. It also allows for convenient meal planning by providing a visual reminder of the ingredients you have on hand.
- Safe and chemical-free: The use of glass jars eliminates the potential for harmful chemicals leaching into your produce, as can happen with certain plastics. Mason jars provide a safe and non-toxic storage option, ensuring that your fruits, vegetables, and herbs remain free from any unwanted contaminants.
- Versatile sizing options: Mason jars come in various sizes, allowing you to choose the most suitable container for the type and quantity of produce you want to store. Whether you’re storing a single serving of berries or preserving a larger batch of homemade salsa, there is a mason jar size that fits your needs.
- Easy organization: With their uniform size and shape, mason jars are perfect for organizing your pantry or refrigerator. They can be stacked neatly, maximizing storage space and reducing clutter. You can also label your jars for easy identification, ensuring that you always know what you have and when it was stored.
Overall, using mason jars for produce storage offers a range of benefits, from preserving freshness and flavor to providing a safe and eco-friendly storage solution. Now that we understand the advantages, let’s explore how to choose the right mason jars for storing your produce.
Choosing the right mason jars for storing produce
When it comes to choosing mason jars for storing produce, there are a few factors to consider. Here are some guidelines to help you make the right choice:
- Size matters: Consider the size of the produce you typically store. Smaller fruits and vegetables, like berries or cherry tomatoes, are better suited for smaller mason jars, while larger produce, such as cucumbers or apples, may require larger jars. Having a variety of jar sizes can accommodate different types of produce.
- Wide-mouth vs. regular-mouth: Mason jars come in two main types – wide-mouth and regular-mouth. Wide-mouth jars are easier to fill and empty, especially with bulkier produce or when using utensils. Regular-mouth jars, on the other hand, are better suited for liquids, such as dressings or sauces, as they provide more control when pouring.
- Quality of the seal: Check the quality of the sealing mechanism. Look for jars with lids that have a rubber gasket or silicone sealing ring, as these provide a superior airtight seal. Ensure that the lids are in good condition and show no signs of corrosion or damage.
- Clear glass vs. colored glass: Mason jars are available in both clear and colored glass options. Clear glass allows you to easily see the contents inside, which can be helpful for quick identification. Colored glass, particularly amber or blue, can provide some protection against light exposure, which can help preserve the quality of light-sensitive produce like herbs or leafy greens.
- Quantity needed: Consider how much produce you typically store at one time. If you tend to store larger quantities, it may be more convenient to invest in sets of mason jars rather than buying individual jars.
- Brand and quality: Opt for reputable brands known for their quality and durability. While there are many brands available, some popular choices include Ball, Kerr, and Anchor Hocking.
By keeping these factors in mind, you can choose mason jars that are best suited for your produce storage needs. Once you have selected the jars, it’s important to properly prepare and clean them before using them for storing your fruits, vegetables, and other produce.
Preparing and cleaning mason jars for produce storage
Before using mason jars for produce storage, it is important to properly prepare and clean them to ensure optimal cleanliness and hygiene. Follow these steps to prepare your mason jars:
- Inspect the jars: Check the jars for any cracks, chips, or damages. Discard any jars that show signs of damage, as they may compromise the integrity of the seal and affect the freshness of your produce.
- Wash in hot soapy water: Start by washing the jars, lids, and bands in hot, soapy water. Use a gentle dish soap and a sponge or bottle brush to thoroughly clean the jars. Pay extra attention to the inside and rim of the jars, as well as the lids and bands.
- Rinse thoroughly: Once washed, rinse the jars, lids, and bands under warm running water to remove any soap residue. Ensure that all the soap has been rinsed off completely.
- Sterilize the jars: To prevent any bacteria or microorganisms from affecting your produce, it is recommended to sterilize the jars. There are several methods you can use to sterilize mason jars:
- Boiling water method: Place the cleaned jars in a large pot and cover them with water. Bring the water to a boil and let the jars boil for around 10 minutes. Remove the jars from the pot using jar tongs and place them on a clean towel to cool. Be cautious as the jars will be hot.
- Oven method: Preheat your oven to 275°F (135°C). Place the cleaned jars, lids, and bands on a baking sheet. Bake them in the preheated oven for around 20 minutes. Remove them from the oven and let them cool before using.
- Inspect the seals: After sterilizing the jars, check the seals on the lids for any signs of damage or wear. If the seals appear damaged or worn-out, replace them with new ones to ensure a proper seal during storage.
By following these steps, you can ensure that your mason jars are clean, sterilized, and ready to store your produce. In the next sections, we will delve into specific techniques for storing different types of produce in mason jars, including leafy greens, fruits, vegetables, herbs, and even homemade dressings and sauces.
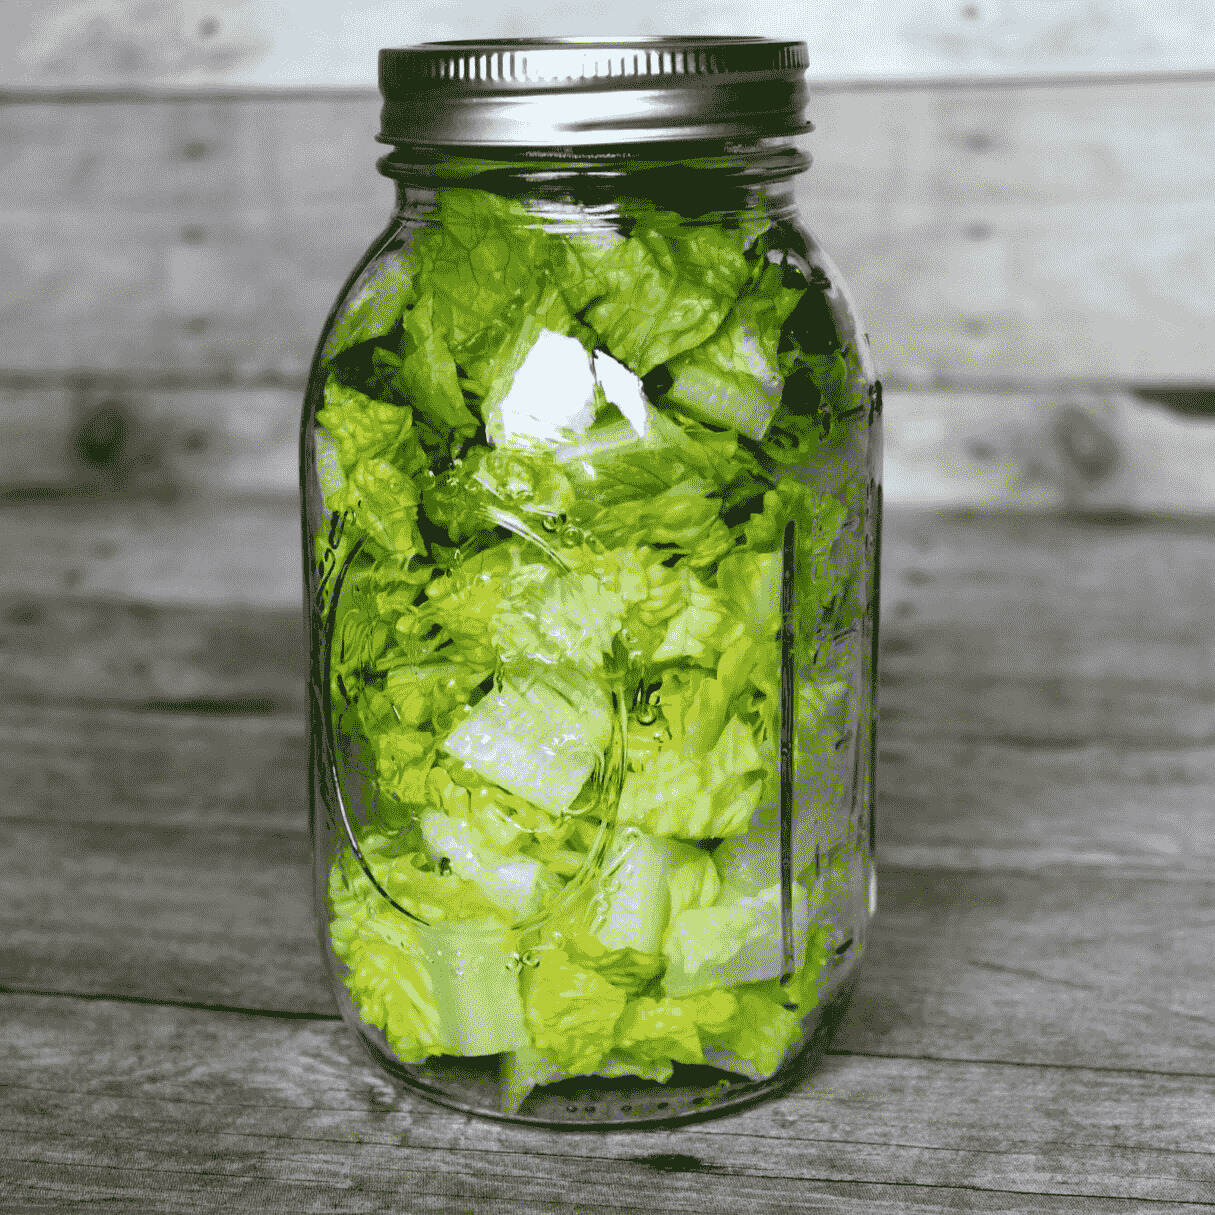
Storing leafy greens in mason jars
Leafy greens like lettuce, spinach, kale, and arugula are prone to wilting and can quickly lose their freshness if not stored properly. Mason jars provide an excellent solution for keeping your leafy greens crisp and ready to use. Here’s how you can store leafy greens in mason jars:
- Wash and dry the greens: Start by washing your leafy greens thoroughly to remove any dirt or contaminants. Gently pat them dry with a clean kitchen towel or use a salad spinner to remove excess moisture. Make sure the leaves are completely dry before storing them in the jars.
- Tear or chop the leaves: Depending on your preference, you can tear the leaves into bite-sized pieces or chop them into smaller, more manageable pieces. This can help fit more greens into the jars and make them easier to handle when it’s time to use them.
- Layer the greens: Begin by placing a layer of the prepared leafy greens at the bottom of the mason jar. Avoid overstuffing the jar to prevent crushing the leaves. Fill the jar about halfway full with the greens.
- Moisture control: To help retain moisture and keep the greens fresh, you can add a paper towel or a piece of clean kitchen towel on top of the first layer of greens. This can absorb any excess moisture and prevent the leaves from becoming soggy.
- Repeat the layering process: Continue layering the prepared greens and adding a moisture-control layer until the jar is filled, leaving a small space at the top. It’s best to avoid packing the jar too tightly to maintain airflow and prevent the greens from wilting.
- Seal and store: Once the jar is filled, securely close the lid to create an airtight seal. Store the jar in the refrigerator, preferably in the crisper drawer, to maintain a cool and consistent temperature. Properly sealed mason jars can keep leafy greens fresh for up to a week.
- Usage tips: When it’s time to use the greens, simply open the jar and remove the desired amount. Reseal the jar and return it to the refrigerator. If you notice any wilting or spoiling leaves, remove them before using the rest of the greens.
Storing leafy greens in mason jars not only helps preserve their freshness but also makes it convenient to grab a healthy serving whenever you need it. Now that you know how to store leafy greens, let’s explore how to store various fruits in mason jars.
Read more: How To Store Blueberries In Mason Jars
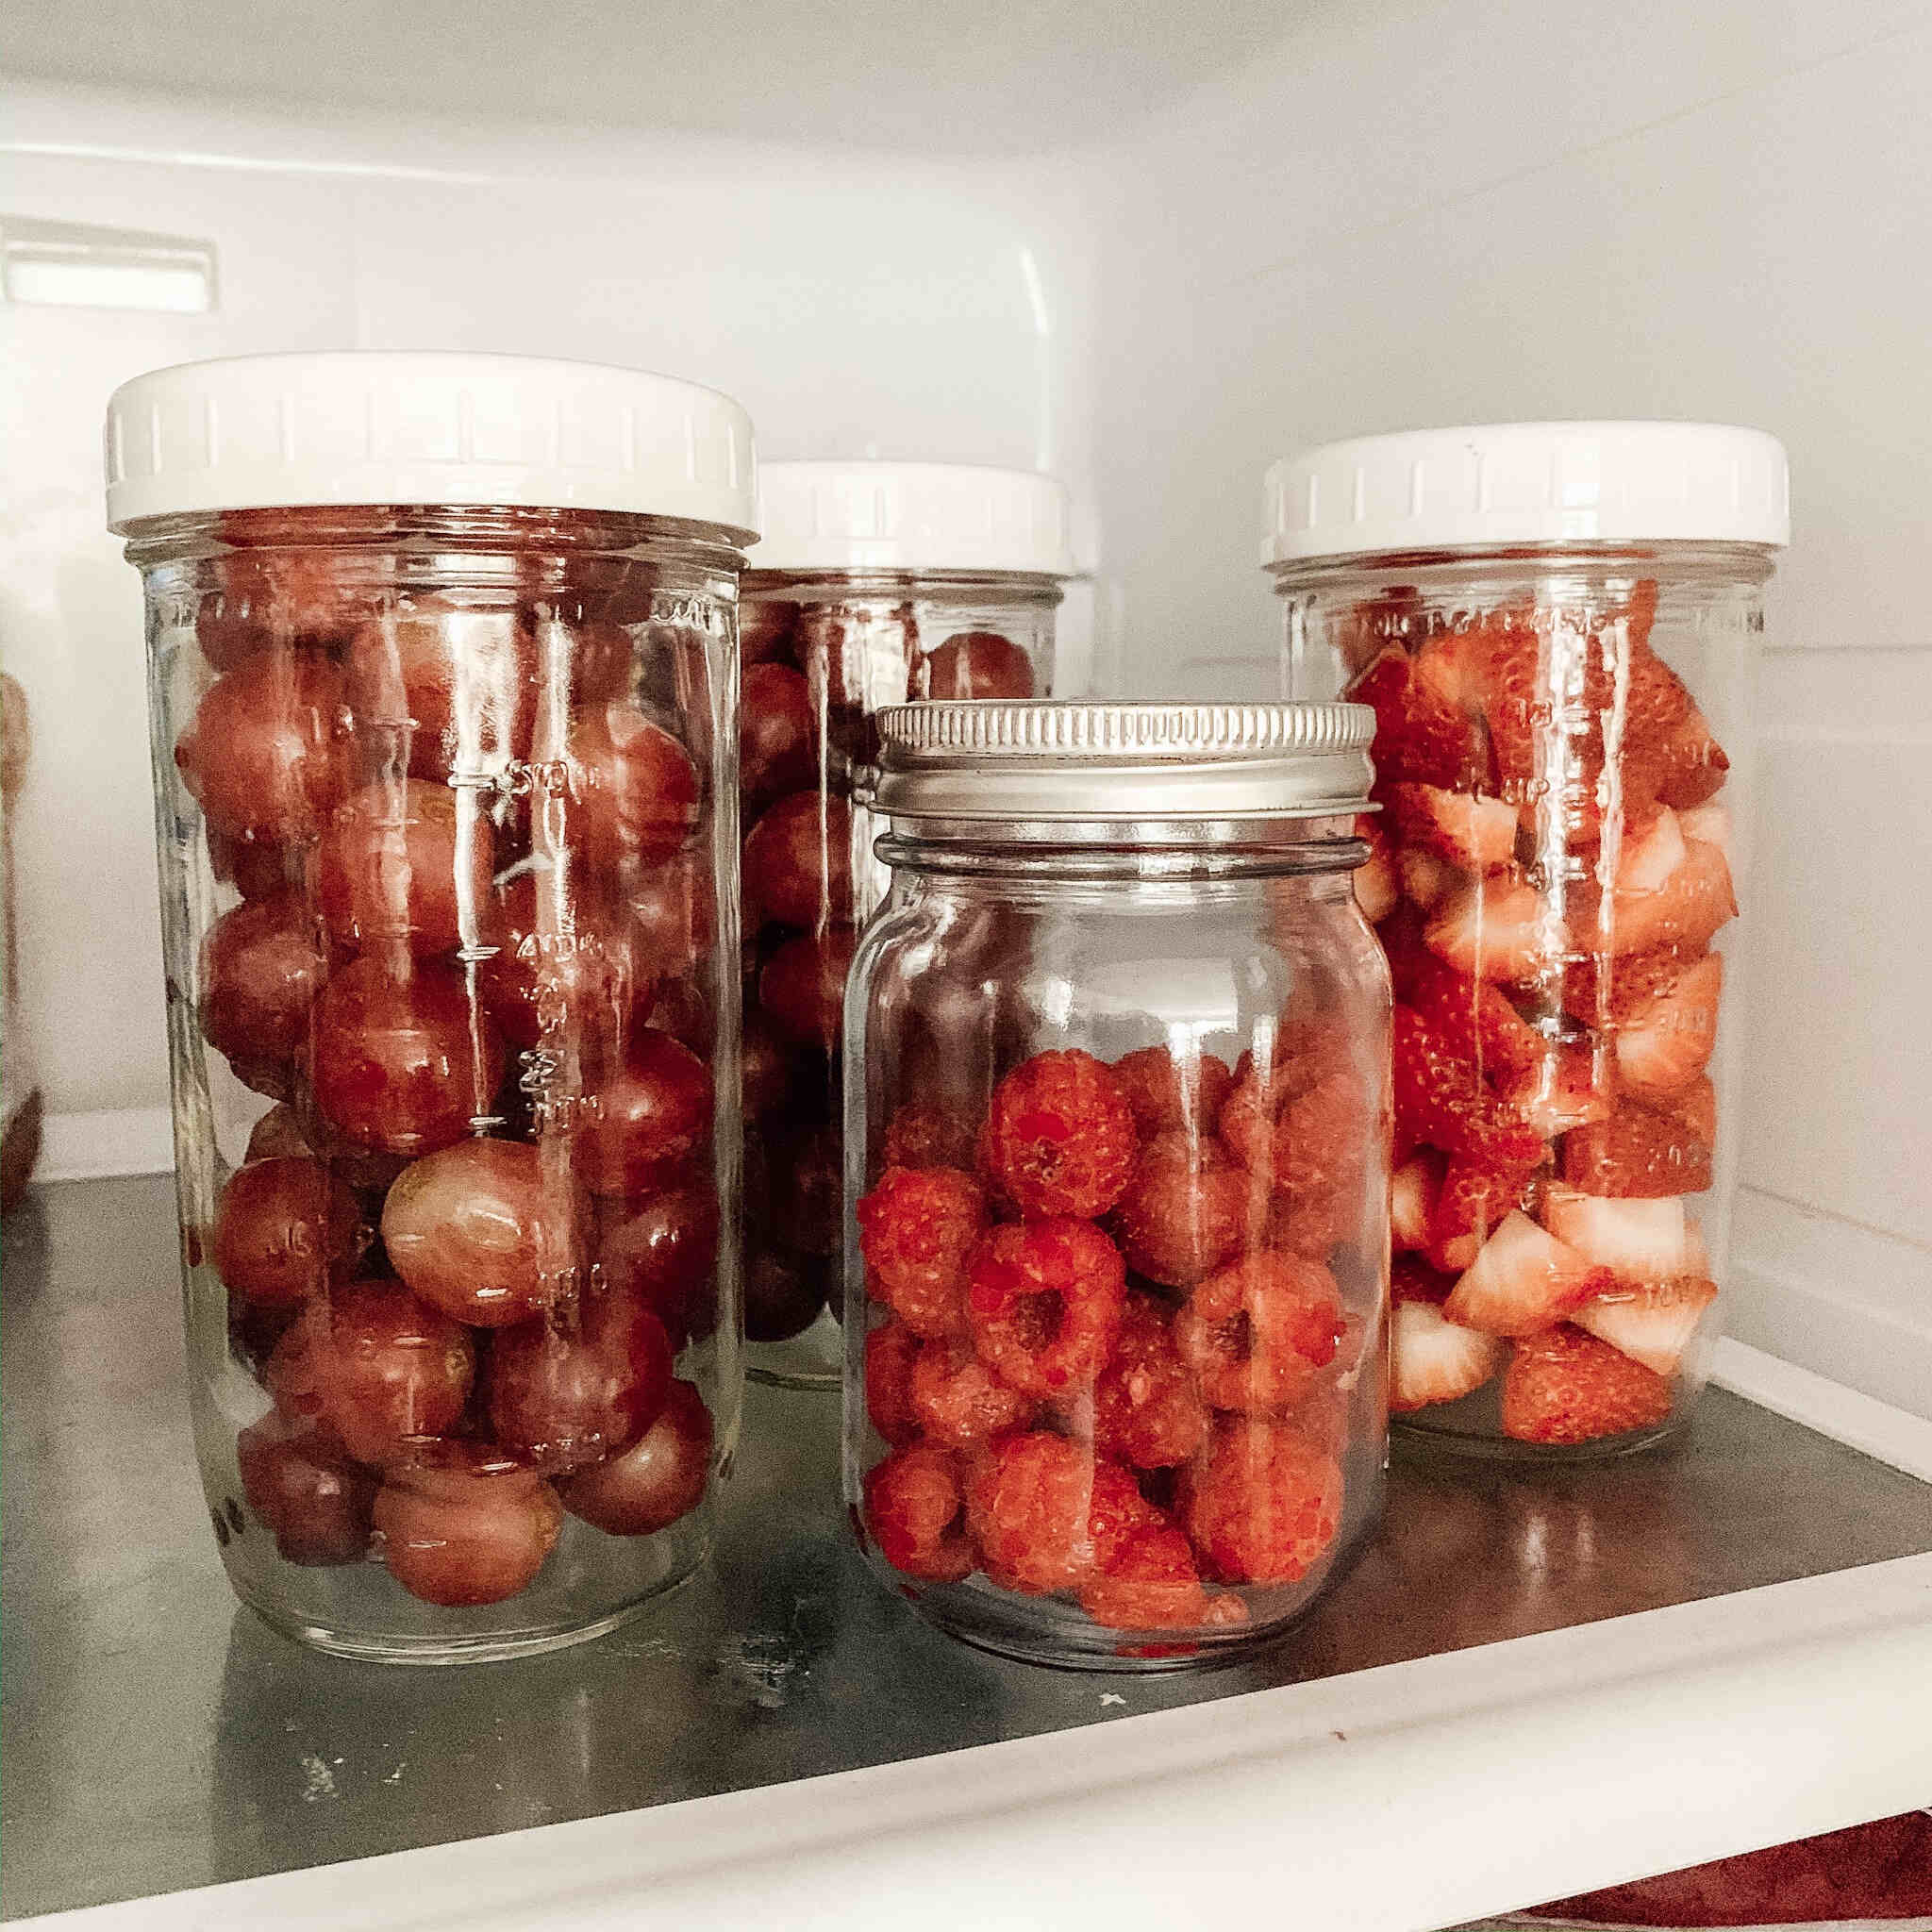
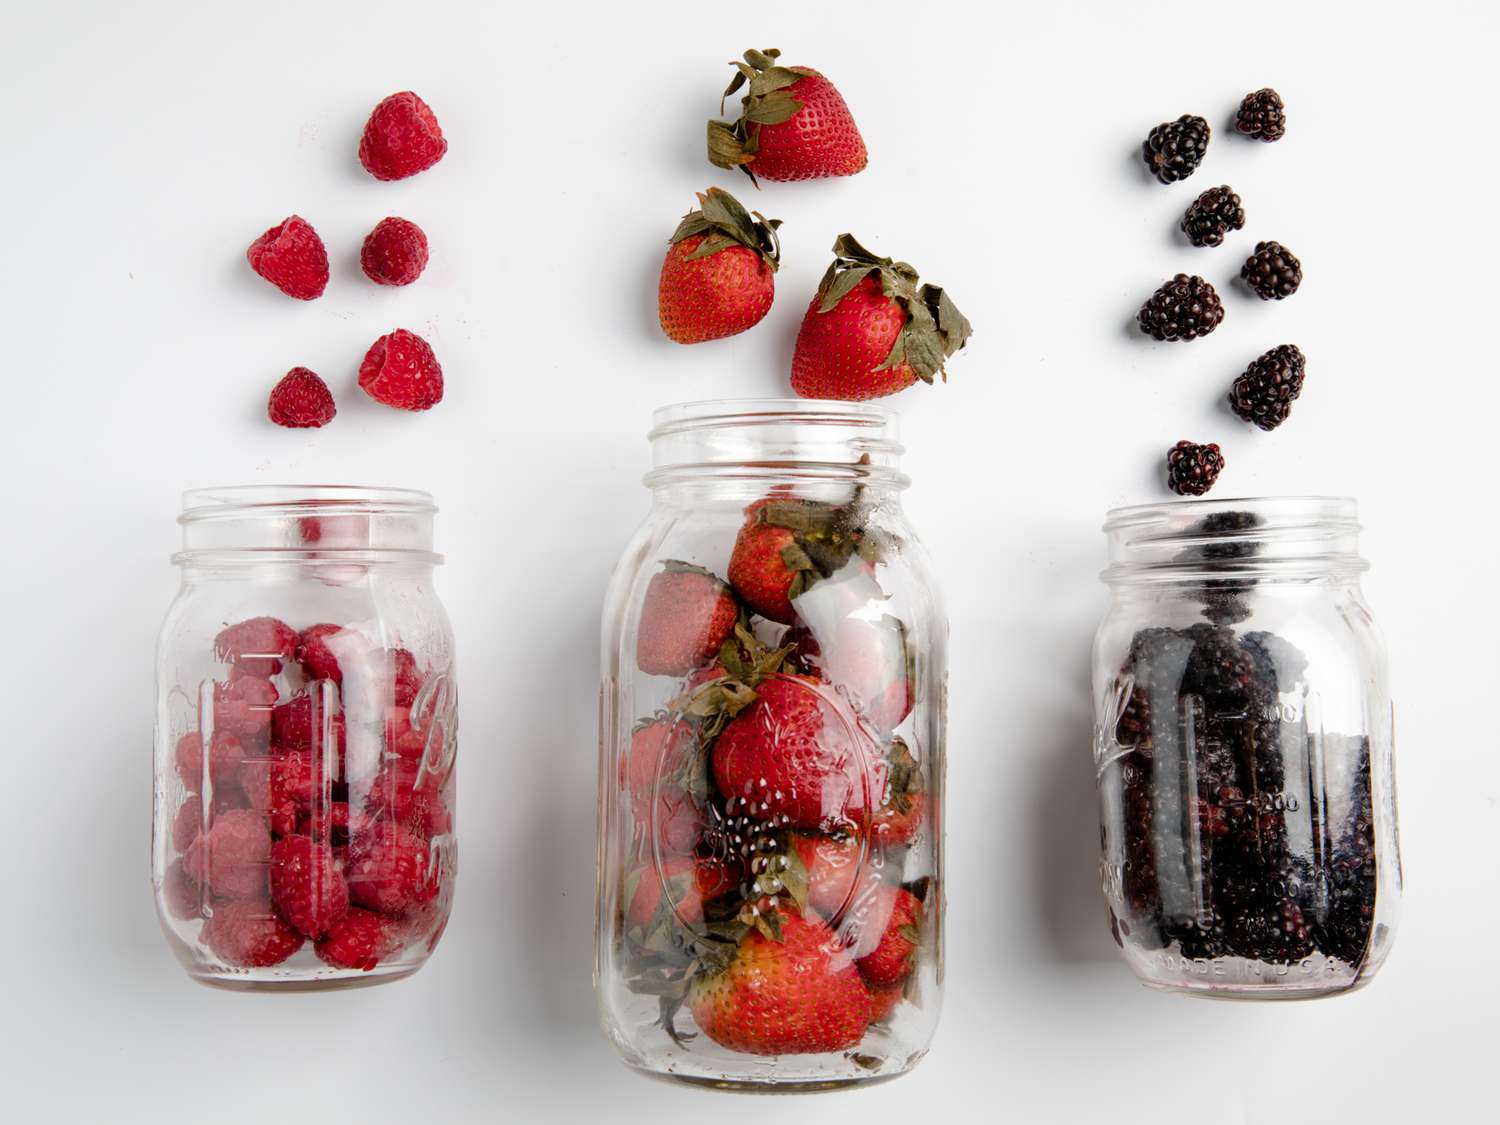
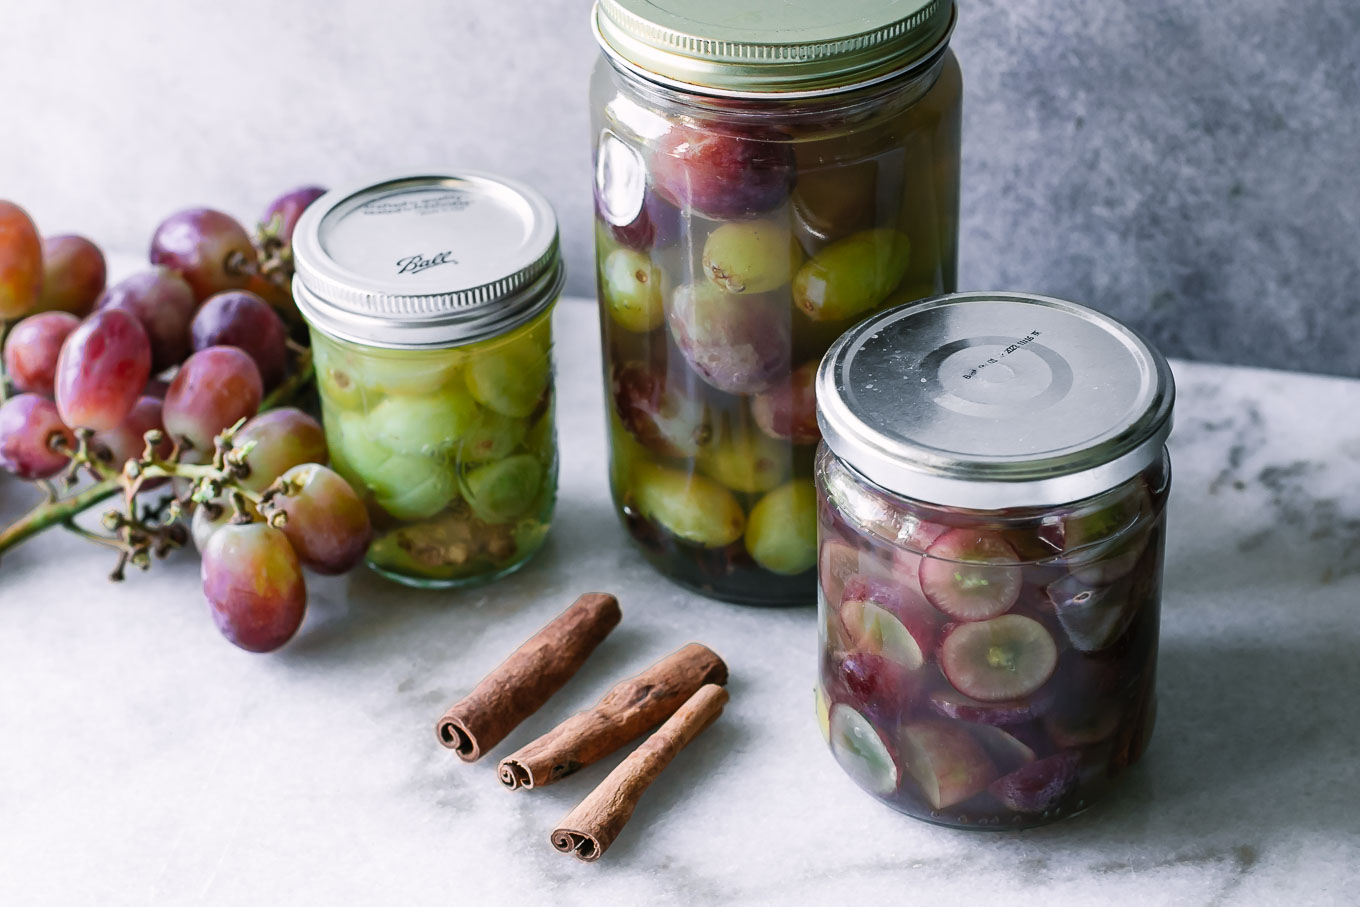
Storing fruits in mason jars
Fruits, with their delicate texture and tendency to ripen quickly, require proper storage to maintain their flavor and extend their shelf life. Mason jars provide an excellent solution for storing a variety of fruits. Here’s how you can store fruits in mason jars:
- Choose ripe yet firm fruits: Select fruits that are ripe but still firm to ensure they retain their texture during storage. Overripe or excessively soft fruits may not hold up well in mason jars.
- Wash and prepare the fruits: Wash the fruits thoroughly to remove any dirt or residue. Peel, slice, or chop the fruits as desired, removing any stems, pits, or seeds. Some fruits, like berries or grapes, can be left whole.
- Layer the fruits: Begin by placing a layer of the prepared fruits at the bottom of the mason jar. Avoid overfilling the jar to prevent crushing the fruits. Fill the jar up to three-fourths full with the fruits.
- Add a sweetener (optional): If desired, you can sprinkle a small amount of sugar or drizzle honey over the fruits to enhance their natural sweetness. Stir gently to ensure the sweetener is evenly distributed.
- Seal and store: Once the jar is filled with the fruits, securely close the lid to create an airtight seal. Store the jar in the refrigerator to help maintain the freshness and extend the shelf life of the fruits. Depending on the type of fruits, they can typically be stored for up to a week.
- Usage tips: When you’re ready to enjoy the fruits, simply open the jar and remove the desired amount. You can consume them as is, add them to yogurt, smoothies, or use them in various recipes. Remember to reseal the jar and place it back in the refrigerator after use.
Storing fruits in mason jars helps preserve their freshness while providing a convenient way to enjoy them. From sliced apples and citrus segments to mixed fruit salad, the possibilities are endless. Now, let’s explore how to store different types of vegetables in mason jars.
To store produce in mason jars, make sure to clean and dry the produce thoroughly before placing it in the jars. This will help extend the shelf life of the produce and prevent mold or spoilage.
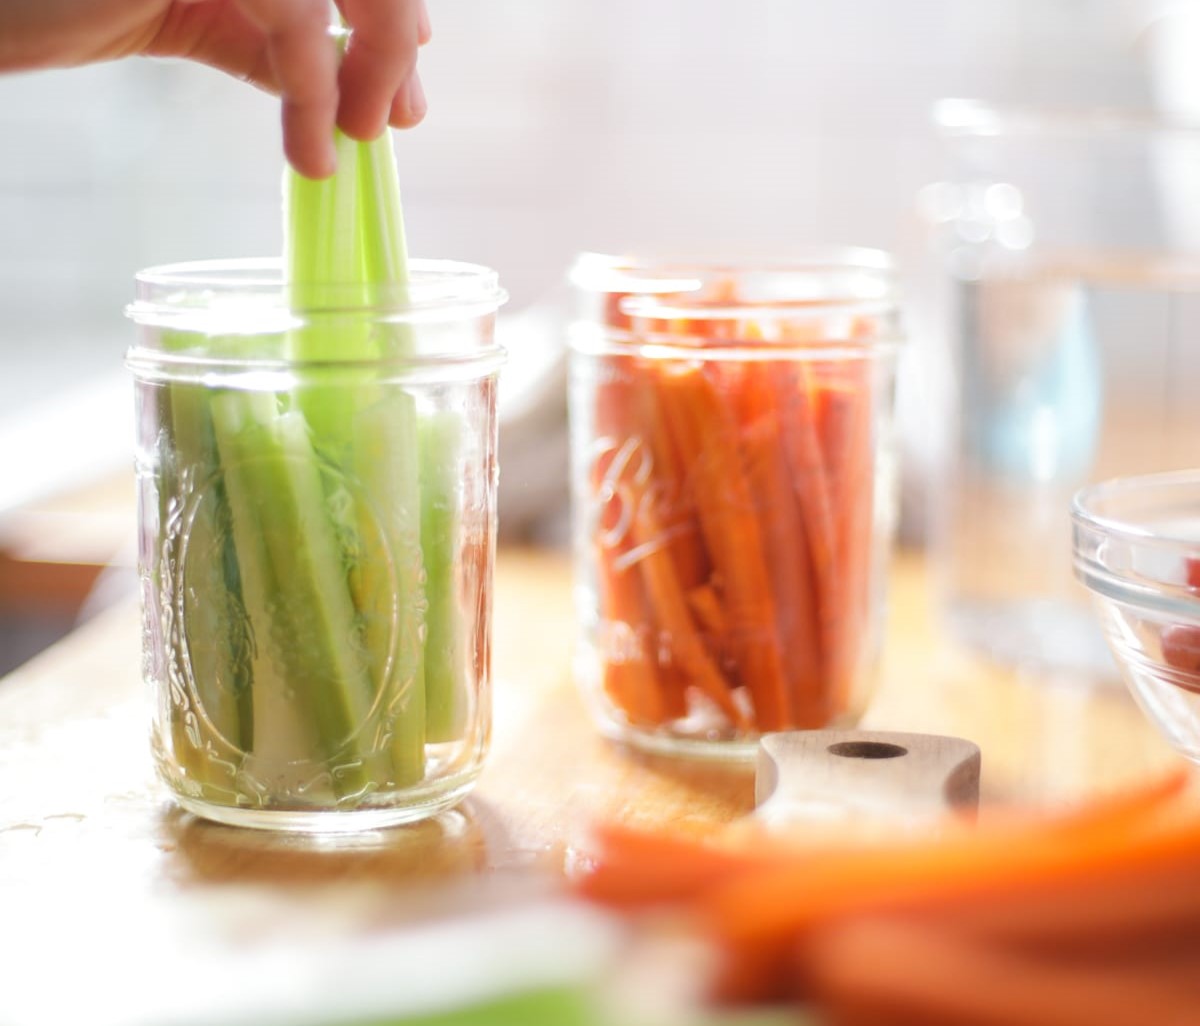
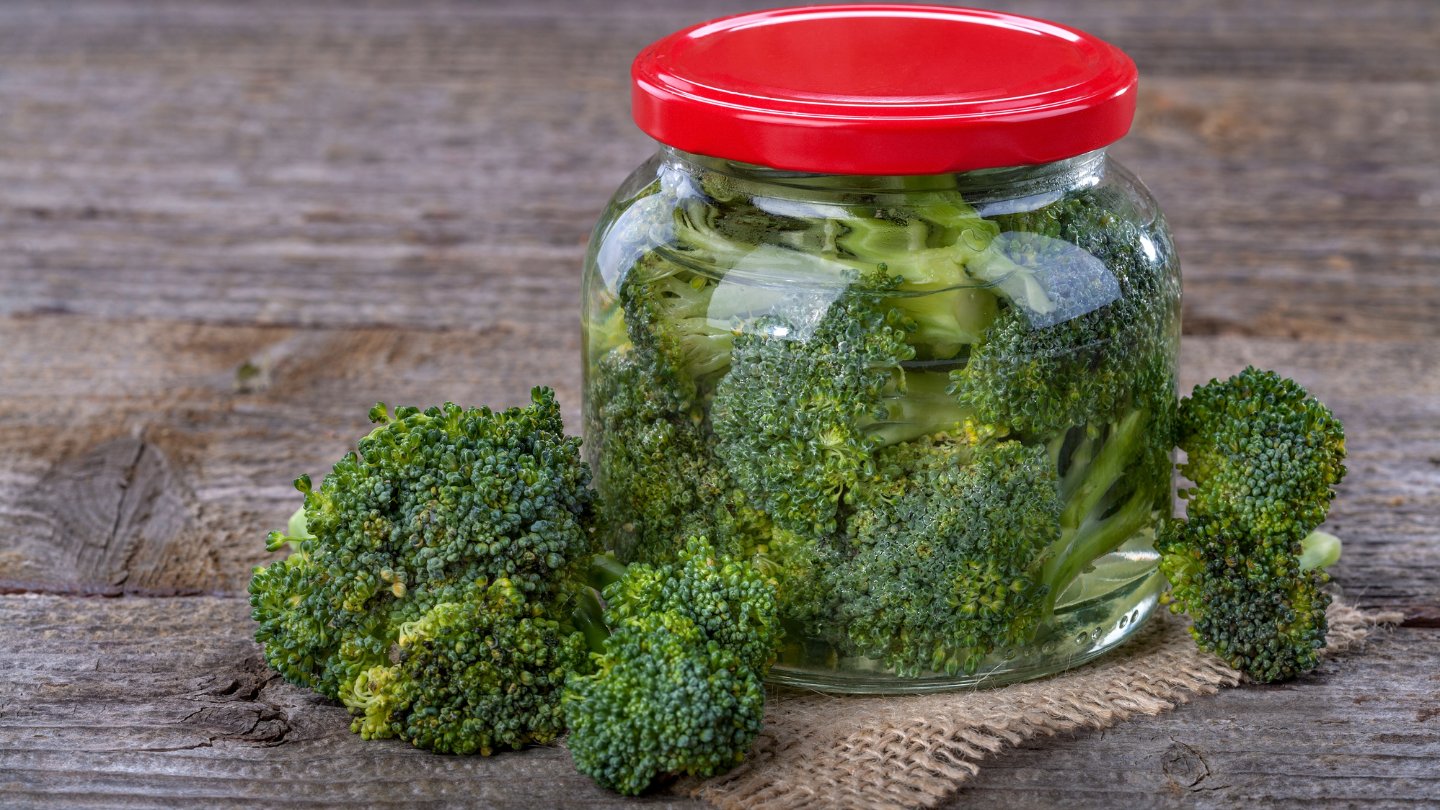
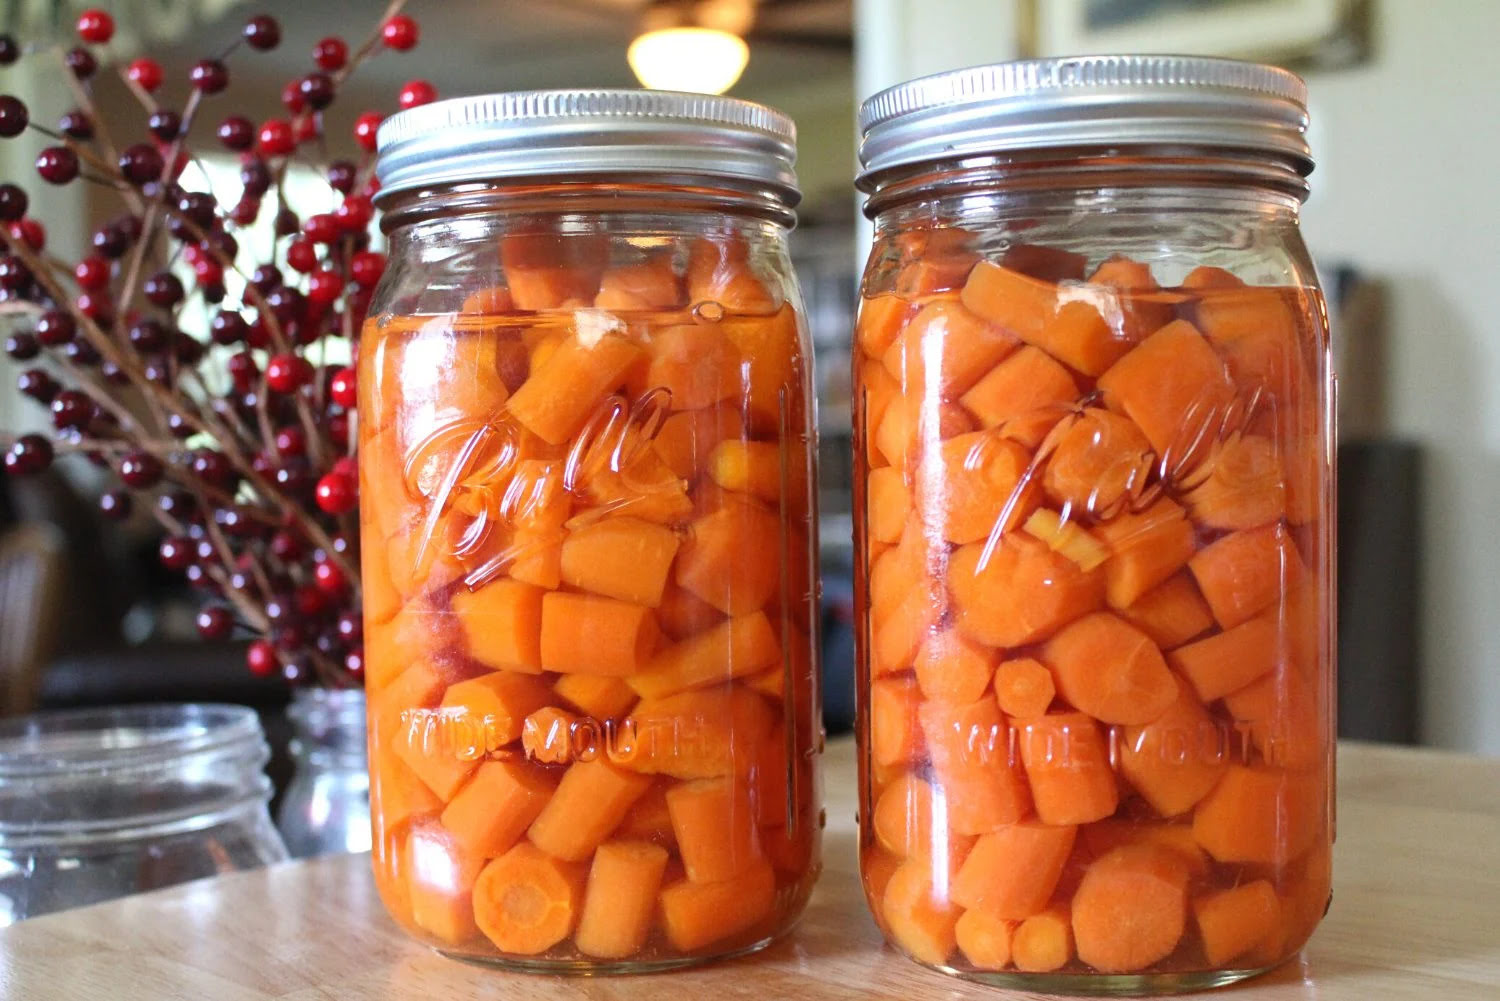
Storing vegetables in mason jars
Vegetables are a staple in many diets, and proper storage can help maintain their freshness and prolong their shelf life. Mason jars offer a practical and efficient way to store a variety of vegetables. Here’s how you can store vegetables in mason jars:
- Wash and prepare the vegetables: Start by washing the vegetables thoroughly to remove any dirt or debris. Trim, peel, and cut the vegetables into appropriate sizes for storage. Some vegetables, like carrots or celery, can be cut into sticks, while others, like cherry tomatoes or baby carrots, can be kept whole.
- Blanch if necessary: Certain vegetables, such as broccoli, cauliflower, or green beans, benefit from blanching before storage. Blanching involves briefly boiling the vegetables and then immediately plunging them into ice water to halt the cooking process. This helps preserve their color, texture, and nutritional value. Drain and pat dry the blanched vegetables before placing them in the jars.
- Layer the vegetables: Begin by placing a layer of the prepared vegetables at the bottom of the mason jar. Fill the jar about halfway full, leaving enough space for air circulation. Avoid packing the jar too tightly, as this can cause the vegetables to become mushy or spoil quickly.
- Moisture control: To prevent excess moisture buildup, which can lead to spoilage, you can add a paper towel or a piece of clean kitchen towel on top of the first layer of vegetables. This helps absorb any excess moisture and keeps the vegetables fresh.
- Repeat the layering process: Continue layering the prepared vegetables and adding a moisture-control layer until the jar is filled, leaving a small space at the top. It’s important to maintain a balance between the amount of vegetables and the space for air circulation.
- Seal and store: Once the jar is filled with the vegetables, securely close the lid to create an airtight seal. Store the jar in the refrigerator for optimal freshness. Different vegetables have varying storage times, but generally, they can be stored in mason jars for up to a week.
- Usage tips: When you want to use the vegetables, simply open the jar and remove the desired amount. You can incorporate them into your favorite recipes, salads, stir-fries, or even enjoy them as healthy snacks. After use, reseal the jar and store it back in the refrigerator.
Storing vegetables in mason jars helps to preserve their crispness, flavor, and nutritional value, making them readily available for your culinary creations. Now, let’s move on to discuss how to store herbs in mason jars.
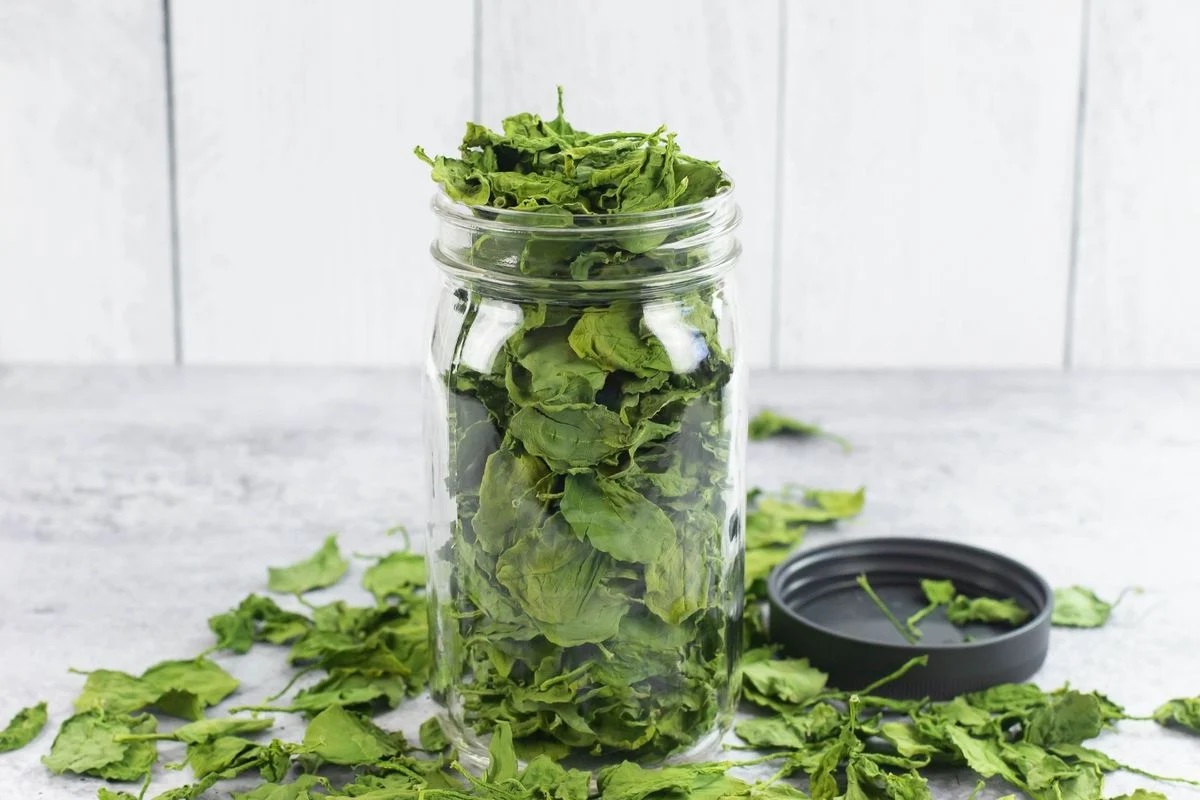
Storing herbs in mason jars
Herbs can add a burst of flavor to your dishes, but they can also wilt and lose their potency if not stored properly. Mason jars provide an excellent solution for storing and preserving herbs. Here’s how you can store herbs in mason jars:
- Wash and dry the herbs: Begin by washing the herbs gently under cool running water to remove any dirt or debris. Shake off any excess water or use a salad spinner to dry them. It’s important to ensure the herbs are completely dry before storing to prevent moisture buildup that can lead to spoilage.
- Remove excess moisture: To further remove any excess moisture, you can gently pat the herbs dry with a kitchen towel or let them air dry for a few minutes.
- Separate the leaves from stems: Carefully remove the leaves from the stems, as the stems can sometimes have a bitter taste. Discard any damaged or discolored leaves.
- Choose a storage method: There are a few different methods you can use to store herbs in mason jars:
- Whole bunches: For hardier herbs like rosemary, thyme, or parsley, you can store them as whole bunches. Place the bunches in mason jars with a small amount of water at the bottom, similar to a bouquet of flowers. Cover the jar with a plastic bag and secure it with a rubber band to create a humid environment. This method helps keep the herbs hydrated and fresh.
- Chopped or minced: If you prefer to chop or mince the herbs, you can do so and pack them into the mason jars. Fill the jars about three-fourths full, leaving some space at the top for air circulation.
- Seal and store: Once the herbs are placed in the mason jars, securely close the lids to create an airtight seal. Store the jars in the refrigerator, preferably in the crisper drawer, to maintain a cool temperature. Properly stored herbs can retain their freshness and flavor for up to a week or longer, depending on the herb.
- Usage tips: When you need to use the herbs, simply open the jar and take out the desired amount. Remember to reseal the jar tightly and return it to the refrigerator promptly. If you notice any wilting or discoloration, remove the affected leaves before using the rest of the herbs.
Storing herbs in mason jars helps preserve their aromatic oils and flavors, ensuring that you have fresh herbs on hand whenever you need them. Now, let’s explore how you can store homemade dressings and sauces in mason jars.
Storing homemade dressings and sauces in mason jars
Homemade dressings and sauces can bring your dishes to life with their fresh flavors and customizable ingredients. Storing them properly is key to maintaining their taste and extending their shelf life. Mason jars are an excellent choice for storing homemade dressings and sauces. Here’s how you can do it:
- Prepare the dressings or sauces: Start by making your favorite homemade dressings or sauces according to your preferred recipe. Ensure that they are well mixed and the flavors are fully developed.
- Cool the dressings or sauces: Allow the dressings or sauces to cool to room temperature before transferring them to mason jars. This helps prevent condensation from forming inside the jars, preserving the quality of the contents.
- Select the appropriate jar size: Choose mason jars that can comfortably accommodate the amount of dressing or sauce you wish to store. It’s useful to have a range of jar sizes on hand to accommodate different quantities.
- Fill the jars: Carefully pour the dressings or sauces into the mason jars, leaving some space at the top and avoiding overfilling. This space allows for expansion if freezing and prevents leaks when shaking or stirring the contents.
- Label the jars: Use labels or markers to clearly mark the jars with the name of the dressing or sauce and the date it was made. This helps you keep track of freshness and avoid confusion if you have multiple jars of different dressings or sauces.
- Seal the jars: Ensure that the jar lids are tightly secured to create an airtight seal. This prevents air from getting into the jar, which can lead to spoilage or flavor deterioration. If you’re using mason jars with metal lids, make sure to check that the seal is intact.
- Storage options:
- Refrigerator storage: If you plan to use the dressings or sauces within a few weeks, store them in the refrigerator. Mason jars provide an airtight seal that helps preserve their freshness for a reasonable period.
- Freezing option: If you want to store the dressings or sauces for a longer duration, consider freezing them. Leave enough headspace in the jars to allow for expansion when freezing. Keep in mind that the texture of some dressings or sauces may change slightly after thawing, so consider this when choosing which ones to freeze.
Storing homemade dressings and sauces in mason jars will keep them fresh and flavorful, allowing you to enjoy them whenever you need a burst of taste in your meals. With these tips, you can confidently prepare and store your dressings and sauces. Next, we’ll share some tips for maximizing the freshness of produce in mason jars.
Read more: How To Store Cucumbers In Mason Jars
Tips for maximizing the freshness of produce in mason jars
Proper storage techniques can help maintain the freshness and quality of produce stored in mason jars. Follow these tips to maximize the freshness of your fruits, vegetables, herbs, and other produce:
- Choose the freshest produce: Start with fresh, high-quality produce. Select fruits and vegetables that are ripe but still firm, and herbs that are vibrant and aromatic.
- Store produce in the right jars: Ensure you choose the appropriate size and type of mason jars for the produce you are storing. Use wide-mouth jars for easy access, and consider using colored glass to protect light-sensitive produce.
- Keep moisture in check: Excess moisture can lead to spoilage or mold growth. Before placing produce in the jars, make sure it is thoroughly dry. Consider adding a moisture-control layer, such as a paper towel or kitchen towel, to absorb any excess moisture.
- Seal jars properly: Ensure that the jars are tightly sealed with an airtight lid. This helps prevent air from entering the jars and compromising the freshness of the produce. Check the seals regularly for any signs of damage or wear.
- Store in the optimal environment: Place the sealed mason jars in the refrigerator or another cool storage area. Certain produce, like leafy greens, may benefit from being stored in the crisper drawer. Maintaining a consistent and cool temperature helps prolong the freshness of the produce.
- Monitor and rotate: Regularly check the stored produce for any signs of spoilage or wilting. Remove any damaged pieces promptly to prevent them from affecting the rest. Consider rotating the jars to ensure even exposure to temperature and prevent any condensation buildup.
- Label and date: Properly labeling the jars with the name and date of storage helps you keep track of freshness and avoid confusion. This is especially useful when storing different types of produce or when storing for extended periods.
- Use produce in a timely manner: Mason jars can help extend the shelf life of produce, but it is still important to use it in a timely manner. Plan your meals and recipes to utilize the stored produce before it begins to deteriorate in quality.
- Experiment with preservation methods: Consider exploring preservation methods like pickling, fermenting, or canning for certain types of produce. These techniques can further enhance the shelf life and flavor of your stored produce.
By following these tips, you can ensure that your produce stays fresh and delicious in mason jars. Now that you’ve learned the key strategies for maximizing freshness, let’s wrap up the article.
Conclusion
Storing produce in mason jars offers a multitude of benefits, revolutionizing the way we preserve and enjoy fresh fruits, vegetables, herbs, and homemade dressings. Mason jars provide an airtight and durable storage solution, keeping produce fresh and extending its shelf life.
Throughout this article, we explored the various benefits of using mason jars for produce storage, from sealing in freshness to their transparent visibility. We discussed the importance of choosing the right mason jars based on size, mouth type, quality of seal, and material. We also learned how to prepare and clean mason jars, ensuring optimal cleanliness and hygiene.
Furthermore, we delved into specific techniques for storing different types of produce. We learned how to store leafy greens, fruits, vegetables, herbs, and homemade dressings and sauces in mason jars, providing practical tips for each category.
To maximize the freshness of produce in mason jars, we shared invaluable tips, such as choosing the freshest produce, keeping moisture in check, sealing jars properly, and storing produce in the optimal environment.
By implementing these techniques and following our tips, you can enjoy the benefits of using mason jars for produce storage, including reduced food waste, better organization, and prolonged freshness.
So, whether you’re a gardening enthusiast looking to store your homegrown produce or simply want to make your groceries last longer, consider incorporating mason jars into your storage routine. With their versatility and effectiveness, mason jars truly offer a practical and eco-friendly solution for preserving and maximizing the freshness of your produce for days to come.
Frequently Asked Questions about How To Store Produce In Mason Jars
Was this page helpful?
At Storables.com, we guarantee accurate and reliable information. Our content, validated by Expert Board Contributors, is crafted following stringent Editorial Policies. We're committed to providing you with well-researched, expert-backed insights for all your informational needs.


0 thoughts on “How To Store Produce In Mason Jars”