Articles
How To Store Fruit In Mason Jars
Modified: August 28, 2024
Learn how to store fruit in mason jars with these helpful articles. Discover tips and tricks for preserving and enjoying your favorite fruits all year round.
(Many of the links in this article redirect to a specific reviewed product. Your purchase of these products through affiliate links helps to generate commission for Storables.com, at no extra cost. Learn more)
Introduction
Fruit is not only delicious but also packed with essential vitamins, minerals, and antioxidants. However, it’s not always easy to keep fresh fruit on hand for extended periods, especially when it’s at the peak of its ripeness and flavor. That’s where mason jars come in. Mason jars offer a convenient and efficient way to store fruit while preserving its freshness and taste.
In this article, we will explore the benefits of storing fruit in mason jars and provide you with expert tips on choosing the right jars, cleaning and sterilizing them, and preparing the fruit for optimal storage. We will also delve into various techniques for storing different types of fruit in mason jars and discuss the importance of maintaining proper storage conditions to prolong the shelf life of your fruits.
So why choose mason jars for fruit storage? There are several reasons that make them an ideal option. First, mason jars are made of high-quality glass that is both durable and non-reactive, ensuring that the flavor and freshness of your fruit remain intact. Moreover, they have a tight-sealing lid that helps keep out air and moisture, which are the main culprits behind fruit spoilage.
Another advantage of using mason jars is their versatility. Whether you’re looking to store whole fruits, sliced fruits, or even fruit jams and compotes, mason jars can accommodate your needs. They come in various sizes and shapes, allowing you to choose the perfect jar for the quantity and type of fruit you wish to store.
Not to mention, mason jars are eco-friendly and reusable, making them a more sustainable option compared to single-use plastic containers. By using mason jars for fruit storage, you’ll be reducing your environmental impact while enjoying the numerous benefits they offer.
So, are you ready to learn all about how to store fruit in mason jars? Let’s dive in!
Key Takeaways:
- Mason jars offer a versatile and eco-friendly solution for preserving fruit, ensuring extended shelf life, and maintaining freshness and flavor without the use of harmful chemicals.
- Proper cleaning, sterilizing, and organizing of mason jars, along with monitoring stored fruit for freshness, are essential for enjoying delicious, preserved fruits at their best.
Read more: How To Store Fresh Fruit In Mason Jars
Benefits of Storing Fruit in Mason Jars
Storing fruit in mason jars offers a range of benefits that can help you enjoy fresh and delicious fruit for longer periods. Here are some advantages of using mason jars for fruit storage:
- Extended Shelf Life: Mason jars provide an airtight seal, preventing exposure to air and moisture that can cause fruits to spoil quickly. This helps extend the shelf life of your fruit, allowing you to enjoy it for a longer time.
- Preservation of Freshness and Flavor: With their excellent sealing properties, mason jars help lock in the freshness and natural flavors of the fruit. This means that when you open the jar days or even weeks later, the fruit will still taste as delicious as when it was first stored.
- No Chemical Leaching: Unlike plastic containers, mason jars are made of glass, which is non-reactive and doesn’t leach any harmful chemicals into your fruit. This ensures that the quality and safety of the fruit remain uncompromised.
- Visual Appeal: Storing fruit in colorful mason jars not only provides a visually pleasing display but also allows you to see the contents easily. This makes it simple to identify different fruits and their condition without having to open each jar.
- Portability: Mason jars are portable and convenient for on-the-go consumption. You can pack them in your lunch bag, picnic basket, or backpack, knowing that the fruit will stay fresh and secure until you’re ready to enjoy it.
- Multiple Storage Options: Whether you’re storing whole fruits, sliced fruits, or even homemade fruit preserves, mason jars offer a versatile storage solution. You can choose different jar sizes to accommodate different quantities and types of fruit.
- Sustainable Choice: By opting for mason jars for fruit storage, you’re making an eco-friendly choice. These jars are reusable and reduce the need for single-use plastic containers, contributing to a more sustainable lifestyle.
Now that you are aware of the benefits of storing fruit in mason jars, let’s explore how to select the right jars for your needs and the necessary steps to prepare them for fruit storage.
Choosing the Right Mason Jars for Storing Fruit
When it comes to choosing mason jars for storing fruit, there are a few factors to consider. Here are some tips to help you select the right jars for your fruit storage needs:
- Jar Size: Consider the quantity of fruit you wish to store. Mason jars come in various sizes, including pint, quart, and half-gallon options. If you’re planning to store smaller amounts or single servings, pint-sized jars will be sufficient. For larger quantities, quart or half-gallon jars may be more suitable.
- Jar Style: Mason jars typically come in two styles: regular mouth and wide mouth. Regular mouth jars have a smaller opening, making them ideal for whole fruits or smaller pieces. Wide mouth jars have a larger opening, which is convenient for storing larger fruits and for easy access during consumption.
- Glass Quality: Opt for high-quality glass jars that are thick and durable. This ensures that the jars can withstand the pressure of storage without breaking or cracking. Look for jars labeled as “picking jars” or “canning jars” as they are specifically designed for food preservation.
- Lid Type: Pay attention to the lids that come with the mason jars. Look for jars with two-piece lids consisting of a metal ring and a flat lid with a rubber ring. These lids provide a secure and airtight seal, minimizing the risk of air and moisture getting into the jars.
- Reusable and BPA-Free: Choose mason jars that are reusable and free from harmful chemicals like Bisphenol A (BPA). BPA is often found in plastic lids and can leach into the food. Ensure that the jars you select are labeled as BPA-free for safe and healthy fruit storage.
- Quantity: Consider how many mason jars you will need to accommodate your fruit storage needs. It’s always a good idea to have a few extra jars on hand for future use or in case you come across an abundance of ripe fruit that you’d like to store.
By taking these factors into account, you can choose the right mason jars that suit your fruit storage requirements. Once you have your jars, the next step is to ensure they are clean and properly sterilized before use. Cleaning and sterilizing the jars is essential for maintaining the quality and safety of your stored fruit, and we will discuss this in the next section.
Cleaning and Sterilizing Mason Jars
Before storing fruit in mason jars, it is essential to thoroughly clean and sterilize the jars to ensure the hygiene and safety of your stored fruit. Follow these steps to clean and sterilize your mason jars:
- Disassemble the Jars: Start by disassembling the jars. Separate the metal rings from the lids and remove any rubber seals or gaskets if present. This will allow you to clean each component thoroughly.
- Wash with Warm, Soapy Water: Fill a sink or basin with warm water and add a mild dish soap. Place the jars, lids, and rings into the soapy water and use a clean cloth or sponge to wash them. Pay close attention to removing any food residues or stains from the jars and lids.
- Rinse Thoroughly: After washing, rinse all the jar components with clean water to remove any soap residues.
- Sterilize the Jars: To sterilize the jars, there are a few methods you can choose from:
- Boiling Method: Place the jars, lids, and rings in a large pot filled with water. Ensure that the jars are fully submerged. Bring the water to a rolling boil and let the jars boil for 10 minutes. Remove them from the water using tongs and place them on a clean towel to cool.
- Oven Method: Preheat your oven to 250°F (121°C). Place the jars, lids, and rings on a baking sheet and put them in the oven for about 20 minutes. Carefully remove them from the oven and let them cool on a heat-resistant surface.
- Dishwasher Method: If your dishwasher has a sterilization cycle, you can place the jars, lids, and rings in the dishwasher and run the cycle according to the manufacturer’s instructions. Make sure that the jars remain upright during the cycle to prevent any water from pooling inside.
- Inspect for Damage: Once the jars have cooled, inspect them for any cracks, chips, or other damage. Discard any jars that appear damaged, as they may not provide a proper seal for storing fruit.
- Store in a Clean, Dry Place: After cleaning and sterilizing, store the jars, lids, and rings in a clean and dry place until you are ready to fill them with fruit.
By following these cleaning and sterilizing techniques, you can ensure that your mason jars are in optimal condition for storing your fruits. In the next section, we will discuss how to prepare the fruit for storage in mason jars.
Preparing the Fruit for Storage
Properly preparing the fruit before storing it in mason jars is crucial for maintaining its quality and freshness. Follow these steps to prepare the fruit for optimal storage:
- Select Ripe, High-Quality Fruit: Choose fruits that are ripe but not overripe. They should be firm and free from any bruises or signs of spoilage. High-quality fruits will yield the best results when stored.
- Wash the Fruit: Rinse the fruits thoroughly under cool running water to remove any dirt or debris. Gently pat them dry with a clean towel or paper towel.
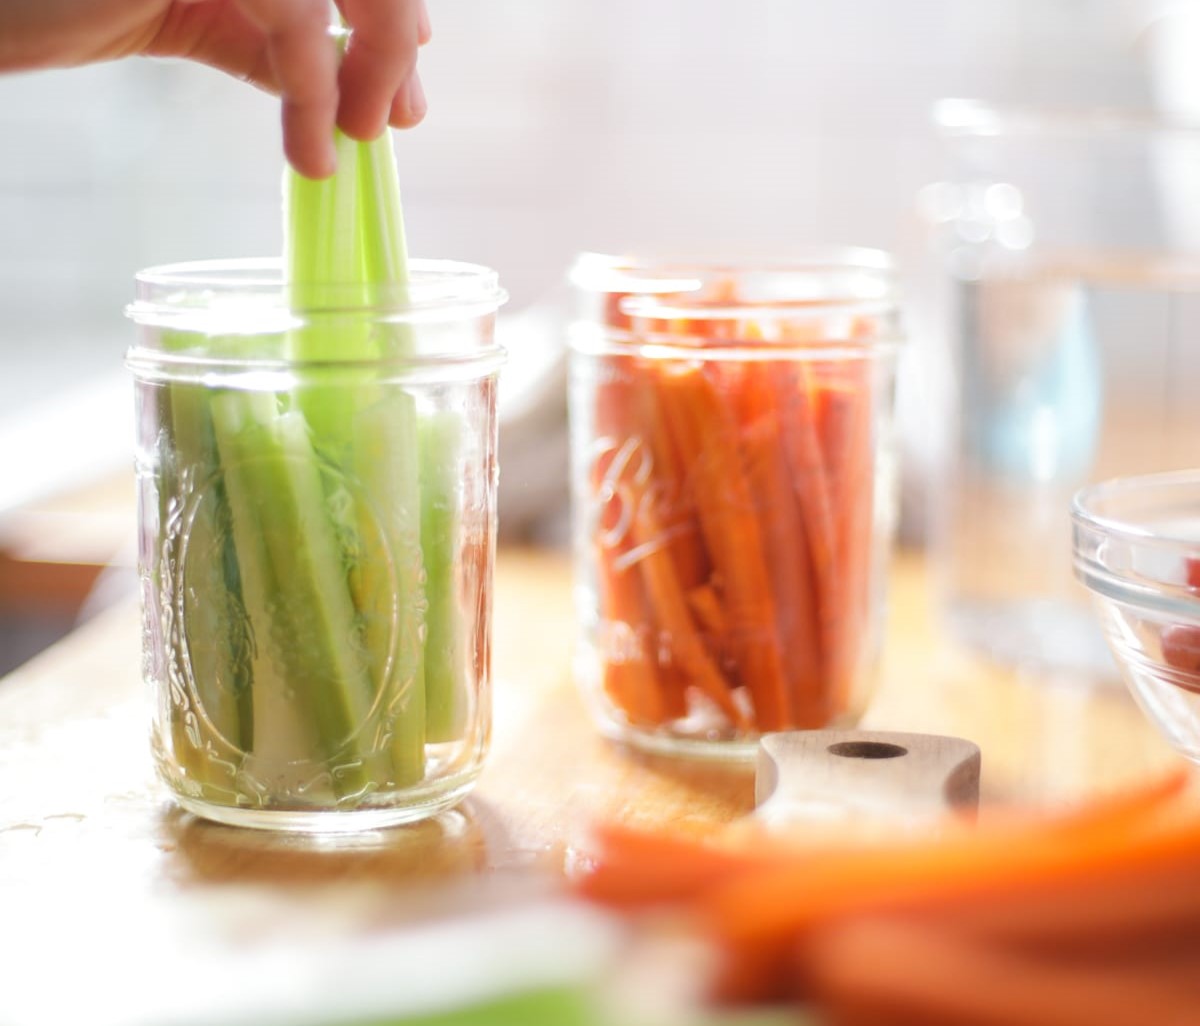
- Remove Inedible Parts: Remove any stems, leaves, pits, seeds, or tough skins from the fruits as necessary. Cut the fruits into slices or pieces if desired, taking into consideration the size of your mason jars.
- Treat with Lemon Juice: Some fruits, like apples, pears, and bananas, tend to darken when exposed to air. To prevent this, you can treat the fruit with lemon juice. Squeeze fresh lemon juice over the fruits and gently toss to coat them. The citric acid in lemon juice helps slow down the oxidation process, keeping the fruits looking fresh.
- Optional: Preparing Syrup or Juice: Depending on your preference, you can choose to store the fruits in a syrup or juice. If desired, prepare a light sugar syrup by dissolving sugar in water over low heat until it becomes a thin syrup. Alternatively, you can use fruit juice or even the fruit’s own juice as a natural sweetener.
- Fill the Jars: Place the prepared fruits into the clean and sterilized mason jars, leaving about ½ inch (1.27 cm) of headspace at the top. This space allows for expansion during freezing or maintaining a proper liquid-to-fruit ratio if using a syrup or juice.
- Add Liquid (if desired): If you choose to store the fruits in a syrup or juice, carefully pour the liquid over the fruits, ensuring they are completely covered. Leave about ½ inch (1.27 cm) of headspace below the jar’s rim.
- Wipe the Jar Rim: Before sealing the jars, wipe the rim of each jar with a clean, damp cloth to remove any fruit residue or liquid. This will ensure a proper seal when closing the jars.
- Secure the Lids: Place the sterilized metal lids on top of the jars, making sure the rubber rings are in contact with the jar rim. Screw the metal rings onto the jars tightly but not excessively.
- Label and Date the Jars: Use a permanent marker or labels to indicate the contents and date of storage on each jar. This will help you identify and track the freshness of the stored fruit.
With the fruit properly prepared, you’re now ready to store them in the mason jars using different techniques based on the type of fruit and your preferred storage method. We will explore these techniques in the next section.
Techniques for Storing Different Types of Fruit in Mason Jars
Storing different types of fruit in mason jars requires different techniques to ensure optimal freshness and flavor. Here are some techniques for storing various fruits:
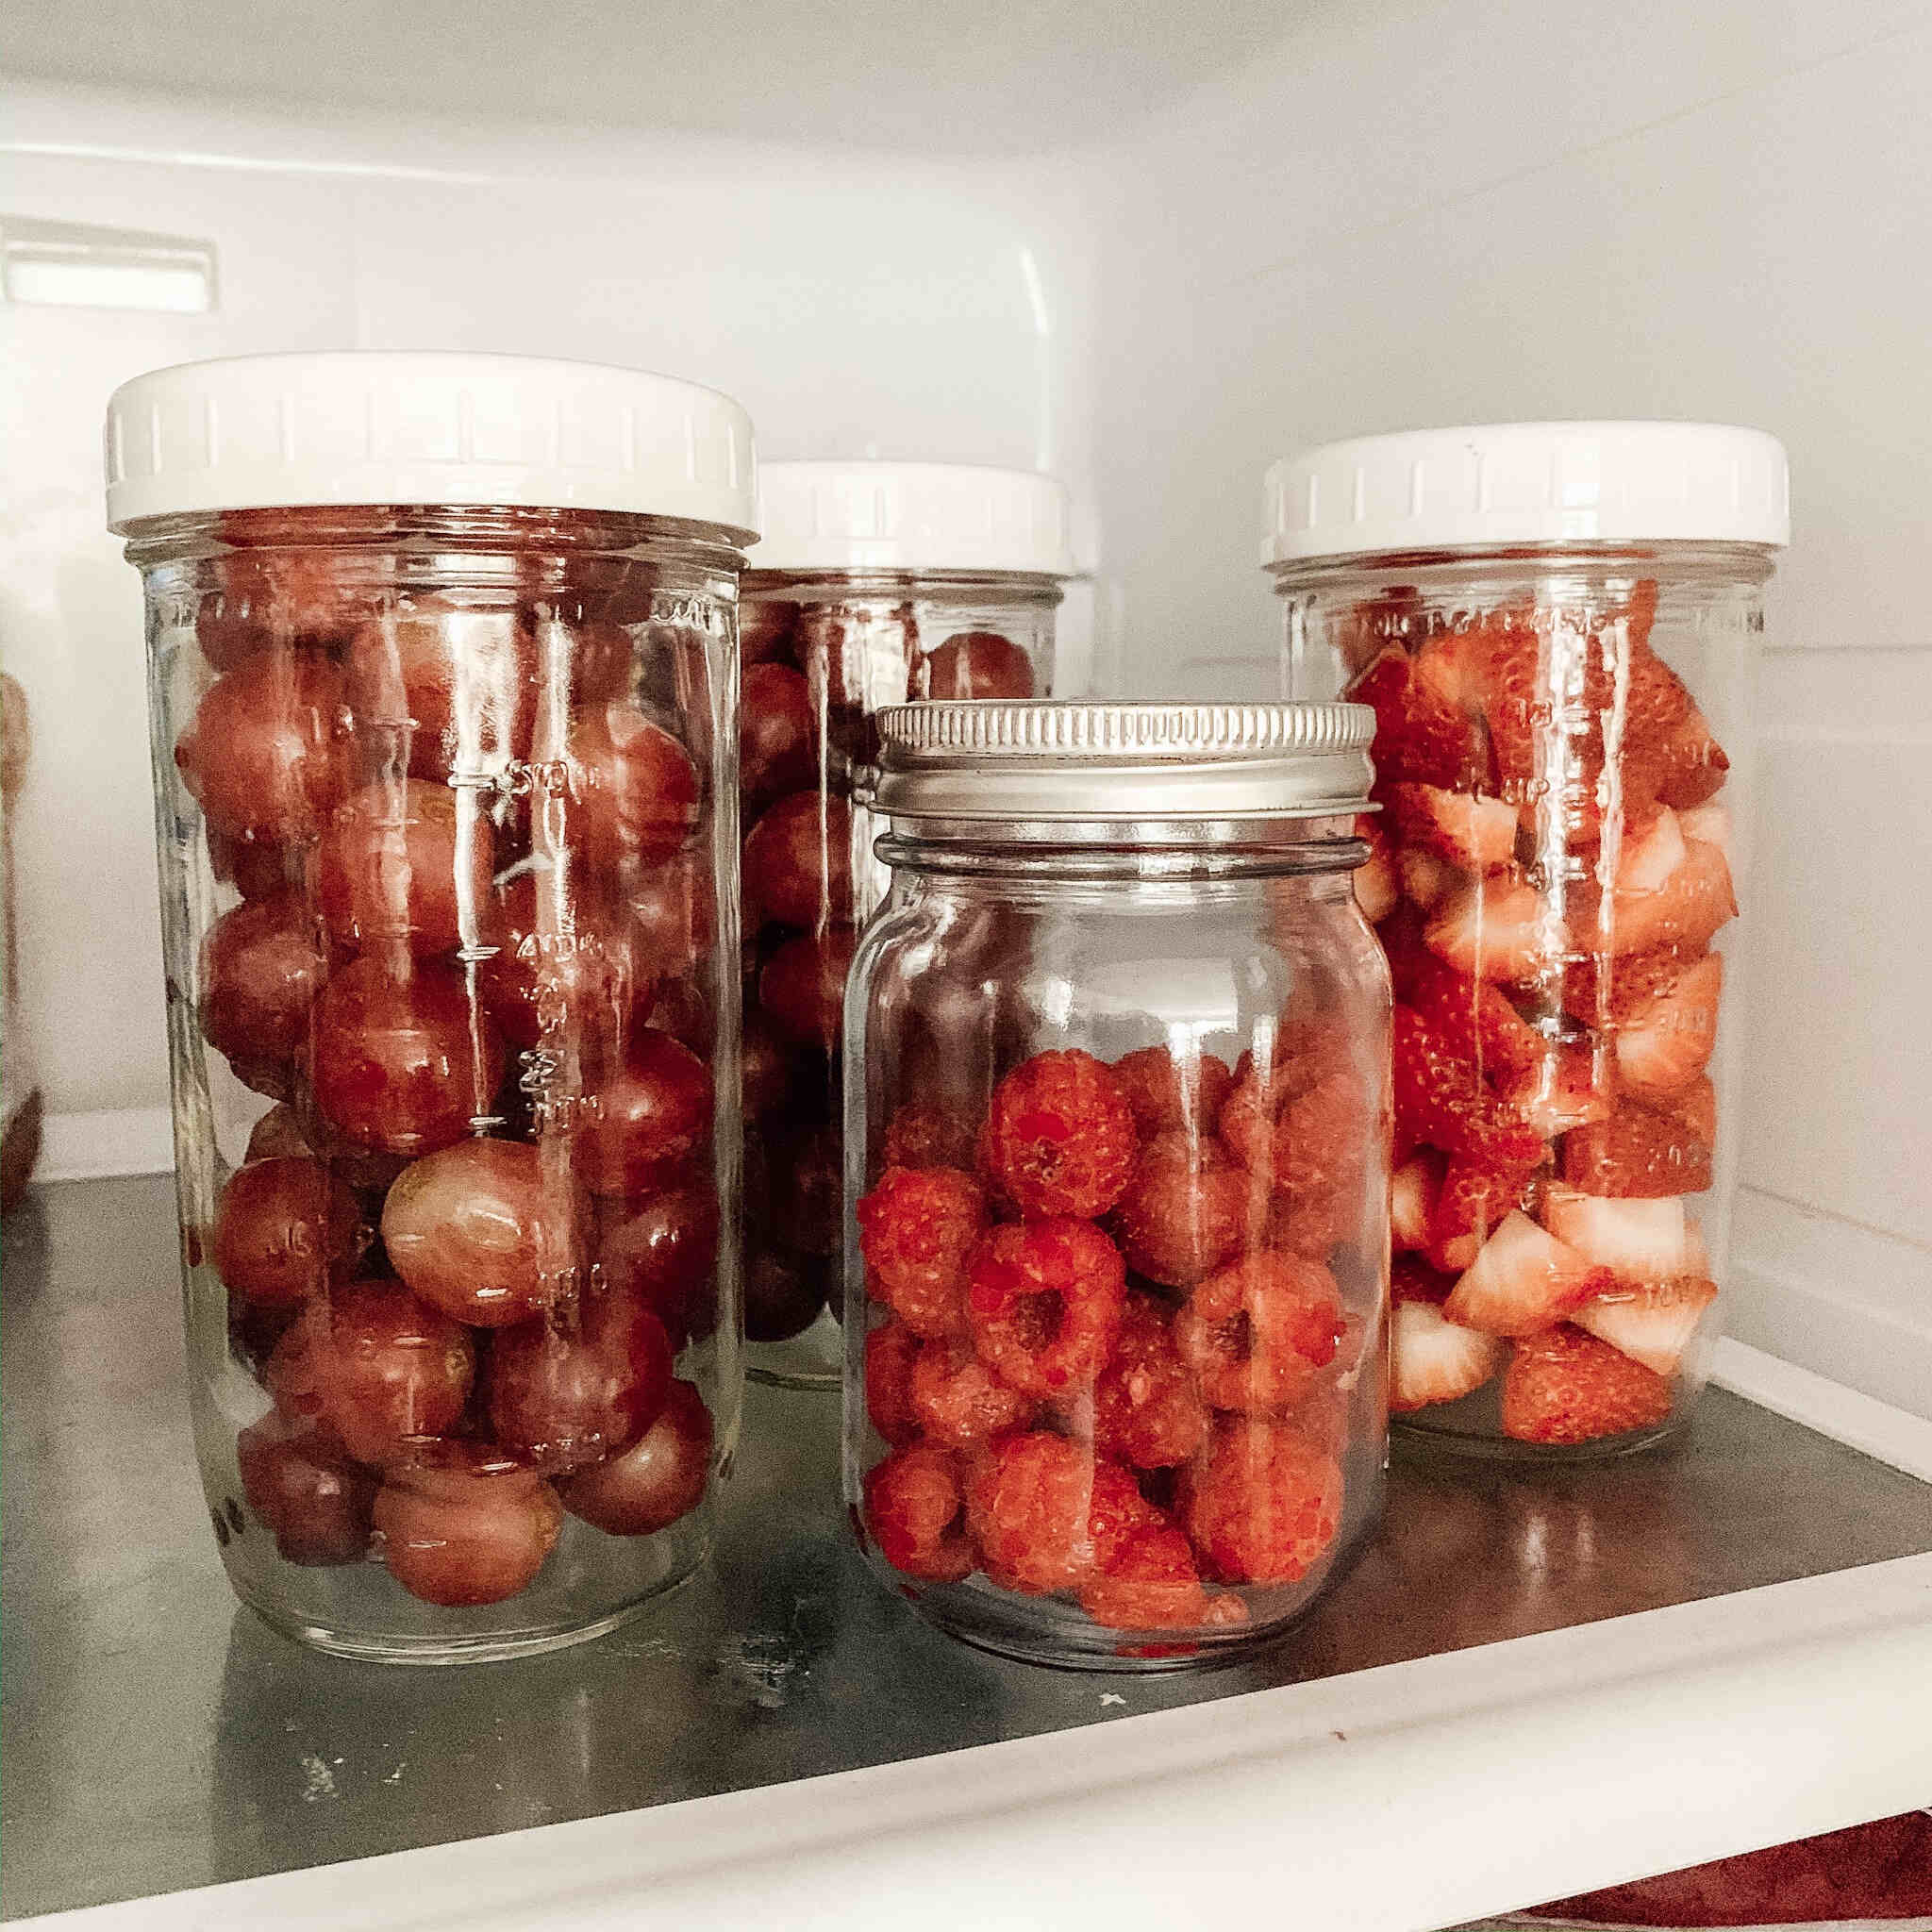
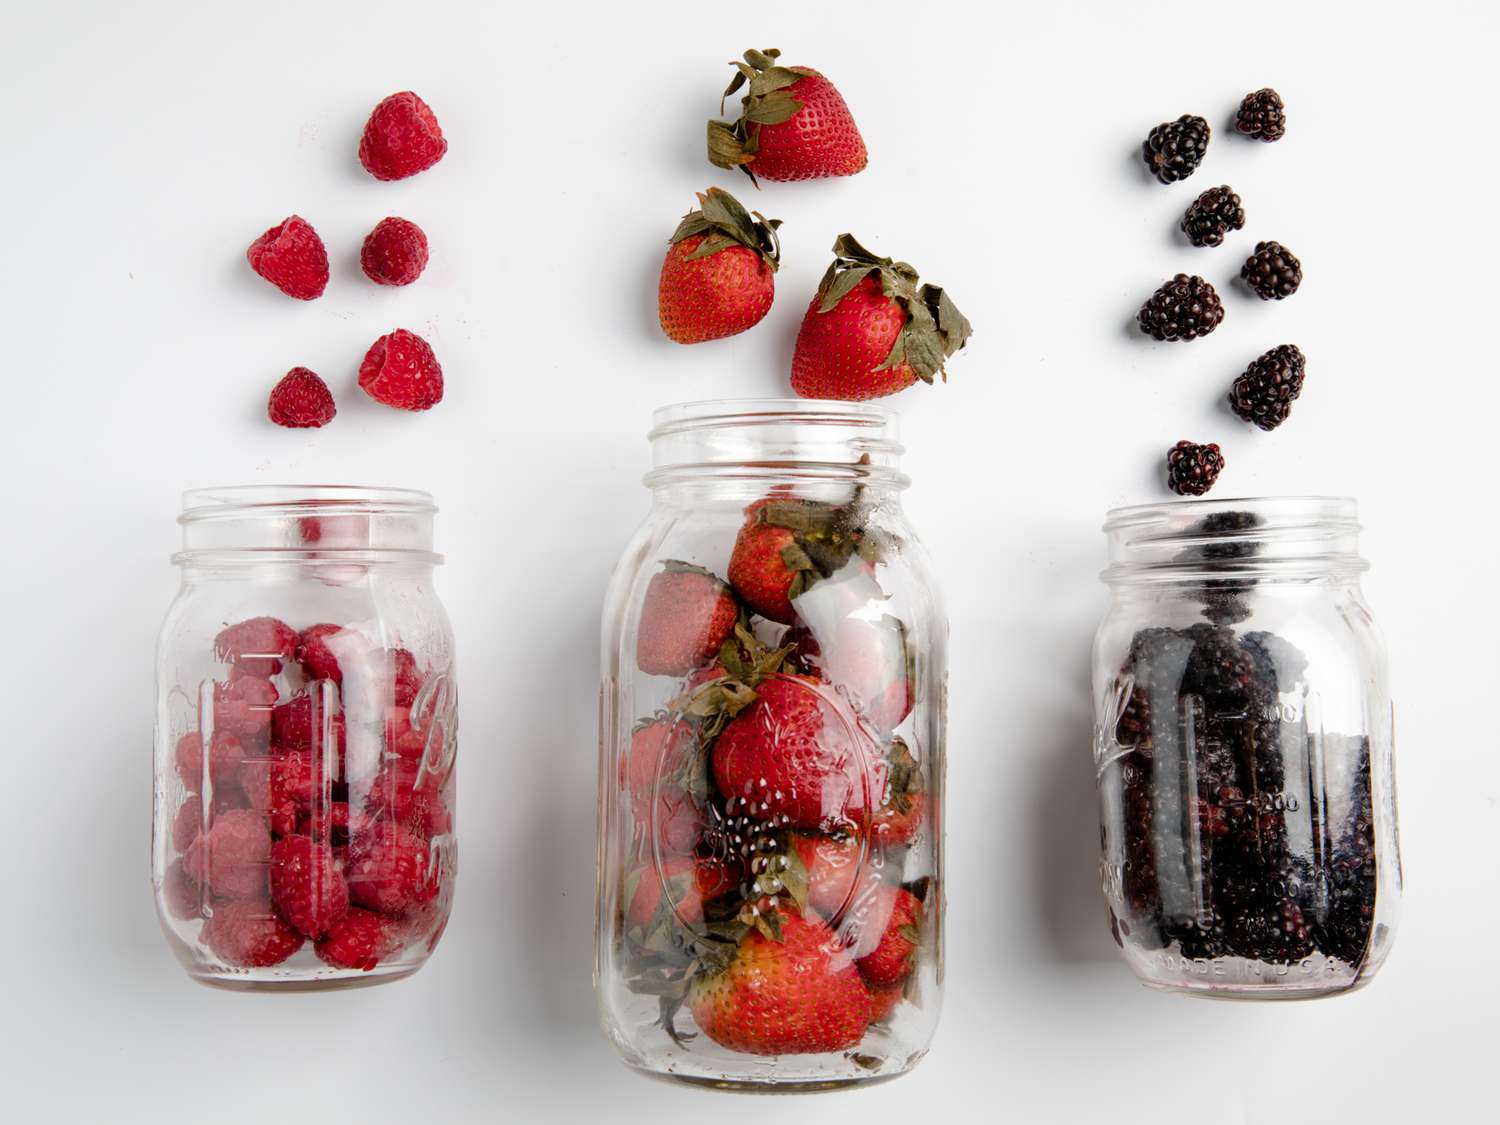
- Berries: Berries such as strawberries, blueberries, and raspberries can be stored in mason jars by layering them. Start by placing a layer of berries at the bottom of the jar, then sprinkle a layer of sugar or alternate with layers of fruit until the jar is filled. Seal the jar tightly and store in the refrigerator for up to a week.
- Citrus Fruits: Citrus fruits like oranges, lemons, and grapefruits can be stored by segmenting them. Remove the peel and pith, separate the segments, and place them in mason jars. Fill the jars with their own juice or a light syrup, leaving some headspace, and seal tightly. Store in the refrigerator for up to a week.
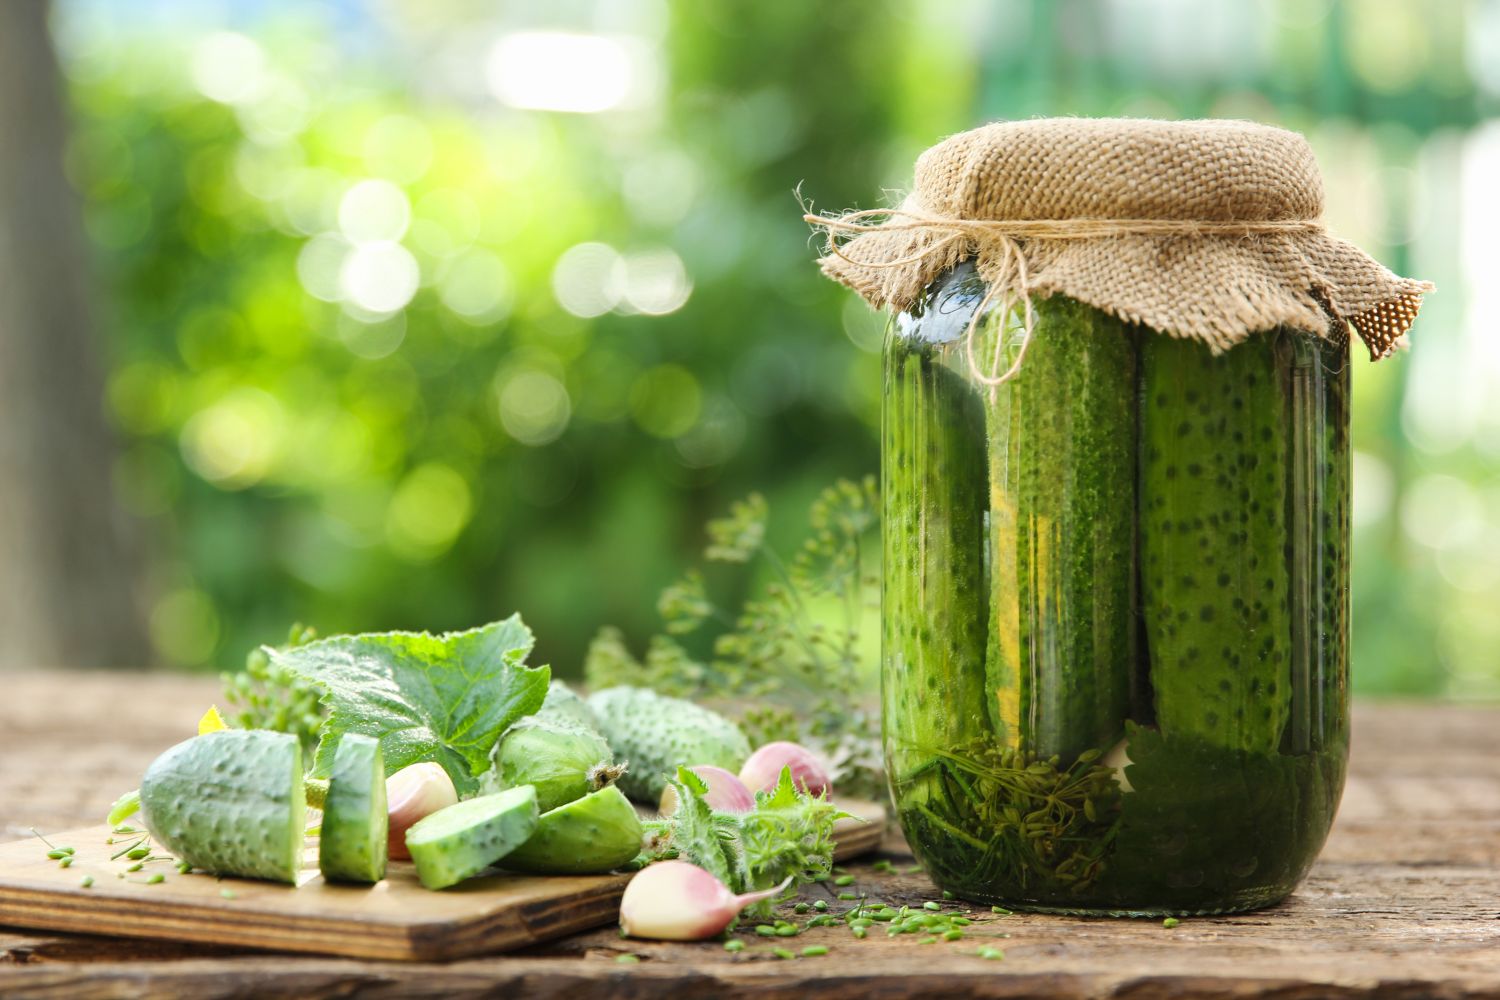
- Stone Fruits: Stone fruits such as peaches, plums, and cherries can be stored in mason jars by either canning or freezing. For canning, blanch the fruits to remove the skins, then pack them into sterilized jars with a light syrup or juice. Process the jars in a water bath for long-term storage. For freezing, pit and slice the fruits, place them in mason jars, and cover with a light syrup or their own juice. Leave some headspace before sealing and freeze for up to six months.
- Apples and Pears: Apples and pears can be stored in mason jars by making a compote. Peel, core, and slice the fruits, then cook them with a bit of water, sugar, and spices until they are soft. Ladle the hot compote into sterilized mason jars, leaving some headspace, and seal tightly. Process the jars in a water bath for long-term storage or store in the refrigerator for up to a week.
- Bananas: Bananas can be stored in mason jars by making a puree or by slicing and freezing them. For puree, blend ripe bananas until smooth and pour into mason jars, leaving some headspace. Seal tightly and store in the refrigerator for up to three days. For freezing, slice ripe bananas, place the slices in mason jars, and seal tightly. Freeze for up to six months.
- Other Fruits: For fruits like pineapple, mango, or melons, dice or slice them and pack them into mason jars. Fill the jars with their own juice or a light syrup and leave some headspace. Seal tightly and store in the refrigerator for up to a week.
Remember to label the mason jars with the contents and date of storage. In the next sections, we’ll explore different storage options such as storing fruit in syrup, water, or its own juice.
Storing Fruit in Syrup or Juice
Storing fruit in syrup or juice is a popular method for preserving their flavor and texture while adding a touch of sweetness. Here’s how you can store fruit in syrup or juice using mason jars:
- Prepare the Syrup or Juice: Depending on your preference, you can prepare a light syrup or use fruit juice to pack the mason jars. To make a light syrup, dissolve sugar in water over low heat until it forms a thin syrup. Alternatively, you can use freshly squeezed fruit juice or a naturally sweet fruit juice to enhance the flavor of the stored fruits.
- Choose Suitable Fruits: Select ripe and high-quality fruits that are suitable for storing in syrup or juice. Berries, stone fruits, and citrus fruits work particularly well for this method.
- Prepare and Pack the Fruit: Clean, peel, and slice the fruits as desired. Place the prepared fruits into the clean and sterilized mason jars, leaving about ½ inch (1.27 cm) of headspace at the top.
- Add the Syrup or Juice: Pour the prepared syrup or juice over the fruits in the jar, ensuring that they are completely covered. Leave about ½ inch (1.27 cm) of headspace below the rim of the jar.
- Remove Air Bubbles: Gently tap the filled mason jar on the counter to remove any air bubbles trapped between the fruit slices. This helps ensure that the syrup or juice reaches every part of the fruit, enhancing the preservation process.
- Wipe the Jar Rim: Before sealing the jar, wipe the rim with a clean, damp cloth to remove any residue. This helps create a proper seal when closing the jar.
- Secure the Lid: Place the sterilized metal lid on top of the jar, ensuring that the rubber ring is in contact with the rim. Screw the metal ring onto the jar tightly but not excessively.
- Label and Date the Jars: Use a permanent marker or labels to indicate the contents and date of storage on each jar. This will help you track the freshness of the fruit.
- Storage: Store the jars in a cool and dark place, such as a pantry or cupboard. Properly stored, the fruit will remain fresh for several weeks, with the syrup or juice helping to maintain their flavor and texture.
Remember to check the jars periodically for signs of spoilage and discard any jars with visible mold or off smells. When you’re ready to enjoy the fruit, simply open the jar, remove the desired amount, and reseal the jar tightly before returning it to the storage location.
Next, we’ll discuss an alternative method for storing fruit in mason jars using water or its own juice.
Storing Fruit in Water or Its Own Juice
Storing fruit in water or its own juice is a simple and refreshing method that helps maintain the natural flavors of the fruits. Here’s how you can store fruit in water or its own juice using mason jars:
- Choose Suitable Fruits: Select ripe and high-quality fruits that will retain their taste and texture when stored in water or their own juice. Fruits like melons, pineapple, or grapes work well with this method.
- Prepare the Fruit: Clean, peel, and slice the fruits as desired. Remove any seeds, cores, or tough parts as necessary.
- Pack the Mason Jars: Fill the clean and sterilized mason jars with the prepared fruit, leaving about ½ inch (1.27 cm) of headspace at the top. Ensure that the jars are not overly packed, allowing enough room for the liquid to cover the fruits.
- Add Water or Juice: Fill the jars with either clean water or the fruit’s own juice, ensuring that the liquid covers the fruit completely. Leave about ½ inch (1.27 cm) of headspace below the rim of the jar.
- Remove Air Bubbles: Gently tap the filled mason jar on the counter to remove any air bubbles trapped between the fruit slices. This will help the liquid reach all parts of the fruit, maintaining its freshness.
- Wipe the Jar Rim: Before sealing the jar, wipe the rim with a clean, damp cloth to remove any residue. This ensures a proper seal when closing the jar.
- Secure the Lid: Place the sterilized metal lid on top of the jar, making sure that the rubber ring is in contact with the rim. Screw the metal ring onto the jar tightly but not excessively.
- Label and Date the Jars: Use a permanent marker or labels to indicate the contents and date of storage on each jar. This will help you track the freshness of the fruit.
- Storage: Store the jars in a cool and dark place, such as a pantry or refrigerator. The fruits will remain fresh for several days, with the water or juice helping to maintain their natural flavors.
When you’re ready to enjoy the fruit, simply open the jar, remove the desired amount, and reseal the jar tightly before returning it to the storage location. You can also use the fruit-infused water or juice as a refreshing beverage or as an addition to smoothies or other recipes.
Remember to check the jars periodically for signs of spoilage and discard any jars with visible mold or off smells. Properly stored and handled, the fruit stored in water or its own juice can provide a tasty and hydrating treat for you to enjoy.
In the next sections, we’ll provide useful tips for labeling and organizing your fruit-filled mason jars, as well as the importance of storing them in a cool and dark place.
Tips for Labeling and Organizing Fruit in Mason Jars
Labeling and organizing your fruit-filled mason jars can help you keep track of the contents and ensure a seamless storage experience. Here are some tips to help you label and organize your jars effectively:
- Use Permanent Markers or Labels: To label your jars, use a permanent marker or adhesive labels that can withstand moisture. Write the name of the fruit and the date of storage on each jar. This will help you identify the contents and keep track of their freshness.
- Categorize by Fruit Type: Sort your jars by fruit type for easy identification and access. You can group similar fruits together or create different sections or shelves in your storage area for each type of fruit.
- Color-Code the Lids or Labels: Consider using a color-coding system by assigning a specific color to each fruit type. You can use colored labels or paint the jar lids with different colors. This visual cue will help you quickly locate the desired fruit in your storage area.
- Create an Inventory List: Keep an inventory list of the fruits you have stored and their quantities. This can be a simple handwritten list or a digital spreadsheet. Update the list whenever you add or remove fruits from your storage, allowing you to track your supplies and plan accordingly.
- Arrange by Expiration Date: When organizing your jars, place the ones with the nearest expiration date towards the front of your storage area. This will help ensure that you consume the fruits in a timely manner, reducing food waste.
- Consider Clear Containers: If you prefer to store your fruits in clear glass containers instead of mason jars, opt for containers with labels or etch the fruit name directly onto the glass. This will provide a visual reminder of the contents without the need for additional labels.
- Optimize Shelf Space: Arrange your jars in a way that maximizes shelf space. Consider using stackable or modular storage solutions to make the most of the available area. This will help keep your storage area organized and allow for easy access to the fruit-filled jars.
By implementing these tips, you can create a well-organized and user-friendly system for storing and accessing your fruit-filled mason jars. This will make it easier for you to enjoy your preserved fruits and keep track of your inventory.
In the next sections, we will discuss the importance of storing your mason jars of fruit in a cool, dark place and provide tips for monitoring and checking the stored fruit for freshness.
When storing fruit in mason jars, make sure to clean and dry the jars thoroughly before adding the fruit. This will help prevent mold and spoilage.
Read more: How To Store Mason Jars
Storing Mason Jars of Fruit in a Cool, Dark Place
Proper storage conditions play a vital role in maintaining the quality and longevity of the fruit stored in mason jars. Here’s why storing them in a cool, dark place is important and some tips to help you create an ideal storage environment:
Importance of a Cool, Dark Place:
Exposure to heat, light, and fluctuating temperatures can accelerate the breakdown of fruits and compromise their freshness. Storing your mason jars of fruit in a cool, dark place offers several benefits:
- Minimized Spoilage: Keeping the fruit in a cool environment slows down the enzymatic activity that causes spoilage. This extends the shelf life of the fruit stored in the jars and helps maintain its flavor and texture.
- Reduced Nutrient Loss: Excessive heat and light exposure can lead to nutrient degradation in fruits. Storing them in a cool, dark place helps preserve their nutritional value, ensuring you can enjoy the full benefits of the fruits when consuming them.
- Protection from Harmful UV Rays: Direct sunlight can degrade the quality of fruits and cause color changes. Storing the mason jars in a dark place protects the fruits from the harmful UV rays, helping to maintain their visual appeal.
- Improved Flavor Retention: Exposure to light and heat can alter the taste of fruits. By storing the jars in a cool, dark place, you can preserve the natural flavors of the fruits, allowing you to enjoy their true taste when you consume them.
- Extended Shelf Life: A cool, dark environment helps slow down the growth of bacteria, mold, and yeast, which can cause the fruits to spoil. This extends the shelf life of the preserved fruits, allowing you to savor them for longer periods.
Tips for Creating an Ideal Storage Environment:
- Choose a Suitable Location: Find a cool and dark area in your home to store the mason jars of fruit. A pantry, cellar, or basement are often suitable options. Avoid areas that may be exposed to direct sunlight, heat sources, or temperature fluctuations.
- Avoid Moisture Build-Up: Excessive moisture can lead to mold growth and spoilage. Ensure that the storage area is dry and well-ventilated to prevent any condensation from forming inside the jars or around them.
- Keep Away from Strong Odors: Fruits can absorb strong odors from nearby foods. Store your mason jars of fruit away from pungent or strong-smelling foods to prevent any flavor contamination.
- Organize and Rotate: Arrange the jars neatly in your storage area, making sure they are easily accessible. To ensure that you use the oldest fruits first, organize them in a way that allows for easy rotation, placing newly stored jars at the back of the shelf.
- Monitor Temperature: Use a thermometer to regularly check and maintain the temperature in your storage area. Ideally, the temperature should be between 50-70°F (10-21°C), as this range provides an optimal environment for fruit preservation.
By following these tips and storing your mason jars of fruit in a cool, dark place, you can extend their shelf life, maintain their quality, and enjoy the preserved fruits for an extended period.
In the final section, we’ll discuss the importance of monitoring and checking the stored fruits for freshness to ensure you enjoy them at their best.
Monitoring and Checking Stored Fruit for Freshness
Regularly monitoring and checking the stored fruit for freshness is essential to ensure that they remain in optimal condition. Follow these guidelines to keep track of the freshness of your preserved fruits:
Read more: How To Store Blueberries In Mason Jars
Monitoring and Observing:
- Regular Inspections: Check your mason jars of fruit periodically to assess their condition. Look for any signs of spoilage such as mold growth, discoloration, or off smells. Discard any jars that show visible signs of deterioration.
- Visual Examination: Inspect the fruits inside the jars for any changes in color, texture, or appearance. Fresh fruits should retain their vibrant colors and firmness. If you notice any significant changes, it may indicate that the fruit is no longer fresh.
- Odor Assessment: Open the jars and take a sniff to assess the smell. Fresh fruits should have a pleasant aroma. If you detect any off or funky smells, it may indicate spoilage or fermentation.
- Syrup or Juice Clarity: If you stored the fruits in syrup or juice, observe the clarity of the liquid. Cloudiness, sedimentation, or unusual changes in texture may suggest microbial growth or spoilage.
Sensory Evaluation:
- Taste Testing (if applicable): If you stored the fruits in syrup or juice, you can perform a taste test to ensure their quality. Take a small portion of the fruit and taste it. The fruit should have its natural flavor, without any off or unpleasant tastes.
- Texture Assessment: If you are unsure about the texture of the preserved fruits, take a sample and examine its consistency. The fruit should maintain a firm texture and not become mushy or overly soft.
Proper Handling and Consumption:
- Follow Storage Guidelines: Adhere to the recommended storage time for each type of fruit. Even when properly preserved, their quality will gradually decline over time, so it’s best to consume them within the recommended timeframe.
- Practice First-In, First-Out (FIFO): When consuming the preserved fruits, adopt a first-in, first-out approach. Use the oldest jars first to ensure that you enjoy them at their peak freshness before moving on to the newer ones.
- Refrigeration (if applicable): If you store the fruits in water or juice and have opened the jar, make sure to refrigerate any remaining portions. Proper refrigeration will help maintain the freshness and prevent spoilage.
By monitoring and checking the stored fruit for freshness, you can catch any signs of spoilage early and ensure that you enjoy the preserved fruits when they are at their best. Remember to trust your senses and use your judgment when assessing the condition of the fruits.
With these tips in mind, you are now equipped to store, monitor, and enjoy your mason jars of preserved fruit with confidence.
Happy preserving and savoring your delicious fruits!
Conclusion
Storing fruit in mason jars is a convenient, efficient, and enjoyable way to preserve their freshness and flavor. With the right mason jars, proper cleaning and sterilizing techniques, and suitable fruit preparation, you can create a long-lasting supply of delicious fruit for your enjoyment. Whether you choose to store your fruit in syrup, water, or its own juice, the benefits of using mason jars are numerous.
By choosing high-quality mason jars, you ensure that your fruit is stored in a non-reactive and durable container, preserving its taste and integrity. Cleaning and sterilizing the jars before use helps maintain hygiene and ensures the safety of your stored fruit. Proper labeling and organization of your fruit-filled mason jars make it easy to identify and access specific fruits and helps you track their freshness.
Storing your mason jars of fruit in a cool, dark place is crucial for maintaining freshness and extending the shelf life of the preserved fruits. Avoiding exposure to heat, light, and fluctuating temperatures helps prevent spoilage, nutrient loss, and flavor alteration. Monitoring and checking the stored fruits regularly allow you to identify any signs of spoilage or deterioration, ensuring that you consume them at their best.
Remember, each fruit has its optimal storage time, so it’s essential to follow recommended guidelines and practice first-in, first-out to enjoy the fruits within their prime. Refrigerating opened jars and proper handling techniques further contribute to maintaining the freshness and quality of the stored fruit.
Storing fruit in mason jars not only provides convenience and versatility but also reduces the need for single-use plastic containers, making it an eco-friendly choice. So, why not take advantage of mason jars to preserve the abundance of delicious fruits and enjoy their flavors throughout the year?
With the knowledge and tips provided in this article, you can confidently embark on your fruit preservation journey. Whether you’re storing berries, stone fruits, citrus fruits, or any other delicious variety, mason jars provide the perfect solution to extend their shelf life and savor their natural goodness.
So, let’s get started, and may your mason jars be filled with an array of delightful fruits!
Ready to dive deeper into the world of efficient home storage? If you found storing fruits in mason jars handy, imagine what mastering freezer-safe options could do! For those with a passion for order and space-saving techniques, finding ways to organize a small kitchen could simplify daily routines and amplify your culinary space. Don’t miss out on these insightful reads to perfect your home's functionality and aesthetics.
Frequently Asked Questions about How To Store Fruit In Mason Jars
Was this page helpful?
At Storables.com, we guarantee accurate and reliable information. Our content, validated by Expert Board Contributors, is crafted following stringent Editorial Policies. We're committed to providing you with well-researched, expert-backed insights for all your informational needs.


0 thoughts on “How To Store Fruit In Mason Jars”