Articles
How To Store Carrots In Mason Jars
Modified: February 23, 2024
Learn the best way to store fresh carrots in mason jars for long-term preservation. Our articles provide expert tips and techniques for keeping your carrots fresh and delicious.
(Many of the links in this article redirect to a specific reviewed product. Your purchase of these products through affiliate links helps to generate commission for Storables.com, at no extra cost. Learn more)
Introduction
Carrots are crunchy, flavorful, and incredibly versatile vegetables that are packed with essential nutrients. Whether you have a surplus of carrots from your garden or found a great deal at the local market, storing them properly is crucial to maintain their freshness and extend their shelf life. One excellent method for storing carrots is using mason jars, which not only keep the carrots fresh but also add a rustic charm to your pantry or refrigerator.
In this article, we will explore the benefits of storing carrots in mason jars, how to choose the right jars, and the steps involved in preparing and packing the carrots for storage. We will also discuss different storage options, such as refrigeration and root cellars, and provide tips on using the stored carrots effectively.
So, whether you’re a seasoned gardener looking to preserve your harvest or simply a carrot lover who wants to have a fresh supply all year round, read on to discover how to store carrots in mason jars.
Key Takeaways:
- Storing carrots in mason jars preserves freshness, protects from contamination, and reduces food waste. Enjoy organized, environmentally friendly storage with extended shelf life and maintained nutritional value.
- Properly preparing, blanching, and packing carrots in mason jars ensures extended freshness and flavor. Utilize stored carrots in cooking, snacking, salads, and more for versatile culinary creations.
Read more: How To Store Mason Jars
Benefits of Storing Carrots in Mason Jars
Storing carrots in mason jars offers several advantages over other storage methods. Here are some of the key benefits:
- Prolongs Freshness: Mason jars provide an airtight seal, which helps to maintain the freshness of carrots for a longer duration. By sealing out moisture and air, the jars prevent the carrots from becoming limp or spoiling quickly.
- Protects from Contamination: The tight seal of mason jars acts as a barrier, protecting the carrots from contamination by bacteria and other pathogens. This ensures that the carrots remain safe to consume even after an extended storage period.
- Preserves Nutritional Value: Mason jars help to preserve the nutritional value of carrots. Carrots are rich in vitamins and minerals, and when stored in mason jars, they retain their nutritional content for a longer time, ensuring you can enjoy their health benefits whenever you use them.
- Organized Storage: Storing carrots in mason jars allows for organized storage in your pantry or refrigerator. The clear glass jars make it easy to see the contents, and you can label them to keep track of the storage duration or any specific details, such as the variety of carrots.
- Reduced Food Waste: Using mason jars helps to reduce food waste as you can store the carrots for an extended period without worrying about them spoiling. This is especially beneficial if you have a surplus of carrots or want to take advantage of seasonal prices.
- Environmentally Friendly: Mason jars are reusable and environmentally friendly. Opting for this storage method reduces the need for disposable plastic bags or containers, contributing to a more sustainable lifestyle.
Overall, storing carrots in mason jars provides a convenient and effective way to keep them fresh, preserve their nutritional value, and reduce food waste. The airtight seal and clear glass design make it an attractive and practical storage solution for every carrot lover.
Choosing the Right Mason Jars
When it comes to choosing the right mason jars for storing carrots, there are a few key factors to consider. Here are some tips to help you make the best selection:
- Size: Consider the amount of carrots you plan to store. Mason jars come in various sizes, ranging from small (4 ounces) to large (32 ounces). Choose a size that will accommodate the quantity of carrots you have or typically use in one sitting.
- Wide-mouth vs. Regular-mouth: Decide whether you prefer wide-mouth or regular-mouth jars. Wide-mouth jars are easier to pack and access, especially if you plan to store whole carrots. On the other hand, regular-mouth jars are better suited for storing sliced or diced carrots.
- Glass quality: Opt for high-quality, food-grade glass jars made specifically for canning or preserving. Ensure that the jars are free from cracks, chips, or defects that could compromise their integrity during storage.
- Airtight seal: Look for mason jars with airtight seals, such as those with rubber gaskets or screw-on lids. This will help maintain the freshness and quality of the stored carrots by preventing air and moisture from entering the jars.
- Durability: Consider the durability of the jars, especially if you plan to reuse them for multiple seasons. Mason jars made from thick, sturdy glass are less likely to break or crack and will withstand repeated use.
- Quantity: Assess how many jars you will need based on the amount of carrots you want to store. Consider buying jars in bulk to save money and ensure you have enough for your storage needs.
- Labeling: If you prefer to label your mason jars for easy identification, choose jars with smooth surfaces that allow for easy attachment of labels or write-on labels that can be wiped clean for reuse.
Taking these factors into account will assist you in selecting the most suitable mason jars for storing your carrots. Remember, investing in high-quality jars will ensure effective storage and prolong the shelf life of your carrots, keeping them fresh and ready to use whenever you need them!
Preparing Carrots for Storage
Before you store your carrots in mason jars, it’s essential to properly prepare them to ensure optimal storage conditions. Follow these steps to prepare your carrots for storage:
- Harvesting: If you have grown your own carrots, harvest them when they are mature and ready for storage. For store-bought carrots, make sure they are fresh and free from any signs of damage or decay.
- Cleaning: Start by gently scrubbing the carrots under cool running water to remove any dirt or debris attached to the surface. A vegetable brush can be helpful for this step. Ensure that you remove all traces of soil from the carrots.
- Trimming: Trim off the carrot tops, leaving only about an inch of the stem attached. Removing the greens helps to prevent moisture loss and prolongs the freshness of the carrots.
- Sorting: Inspect the carrots and separate them based on their size and quality. Set aside any damaged, bruised, or infected carrots for immediate use, as they are more likely to spoil during storage.
- Drying: Allow the cleaned and sorted carrots to air dry for a few minutes on a clean kitchen towel or paper towels. Make sure they are completely dry before proceeding to the next step.
- Trimming (optional): If desired, you can further trim the carrots into smaller, more uniform pieces, such as sticks or coins, before storing them in the mason jars. This step is convenient if you prefer to have pre-cut carrots for specific recipes.
By properly preparing your carrots, you remove any dirt or contaminants that may lead to spoilage. Additionally, trimming and drying the carrots help to minimize moisture content, which can extend their shelf life when stored in mason jars. Once your carrots are prepared, you are ready to proceed with the next steps of blanching and packing them into your chosen jars.
Blanching Carrots
Blanching is an important step in preparing carrots for long-term storage. It involves briefly scalding the carrots in boiling water, followed by rapid cooling in ice water. This process helps to preserve the color, texture, and flavor of the carrots while also killing any bacteria or enzymes that can cause spoilage. Here’s how to blanch carrots:
- Bring a pot of water to a boil: Fill a large pot with water and bring it to a rolling boil. Ensure that there is enough water to fully submerge the carrots.
- Prepare an ice bath: While the water is boiling, fill a large bowl or sink with ice cubes and cold water. This will be used to rapidly cool the carrots after blanching.
- Peel and cut the carrots (optional): If you prefer, you can peel the carrots before blanching. Additionally, you have the option to leave them whole or cut them into desired shapes, such as sticks or coins.
- Blanch the carrots: Carefully add the carrots to the boiling water and let them cook for 2-5 minutes, depending on their size. The goal is to slightly cook the carrots without making them too soft. Keep a close eye on their texture during blanching to achieve the desired outcome.
- Cool the carrots: Using a slotted spoon or tongs, quickly transfer the blanched carrots to the ice bath. Let them sit in the cold water for the same amount of time as the blanching time to cool them rapidly and stop the cooking process.
- Drain and dry: Once the carrots are cooled in the ice bath, remove them and place them on a clean kitchen towel or paper towels to drain excess water. Allow them to air dry for a few minutes before proceeding to pack them into mason jars.
Blanching carrots before storing them in mason jars helps to preserve their color, texture, and nutrients. The short cooking time followed by rapid cooling ensures that the carrots remain crisp and flavorful when you’re ready to use them. The next step is to pack the blanched carrots into your chosen mason jars.
Read more: How To Store Blueberries In Mason Jars
Packing Carrots in Mason Jars
Now that your carrots are blanched and dried, it’s time to pack them into mason jars for storage. Follow these steps to ensure proper packing:
- Choose the right jar size: Select mason jars that can comfortably hold the amount of carrots you have. Consider the quantity you’ll need for each serving or recipe to determine the appropriate jar size.
- Sanitize the jars: Before packing the carrots, make sure the mason jars and lids are clean and sanitized. Wash them in hot soapy water, rinse them thoroughly, and then sterilize them by boiling them in water for a few minutes. Allow them to air dry or dry them with a clean kitchen towel.
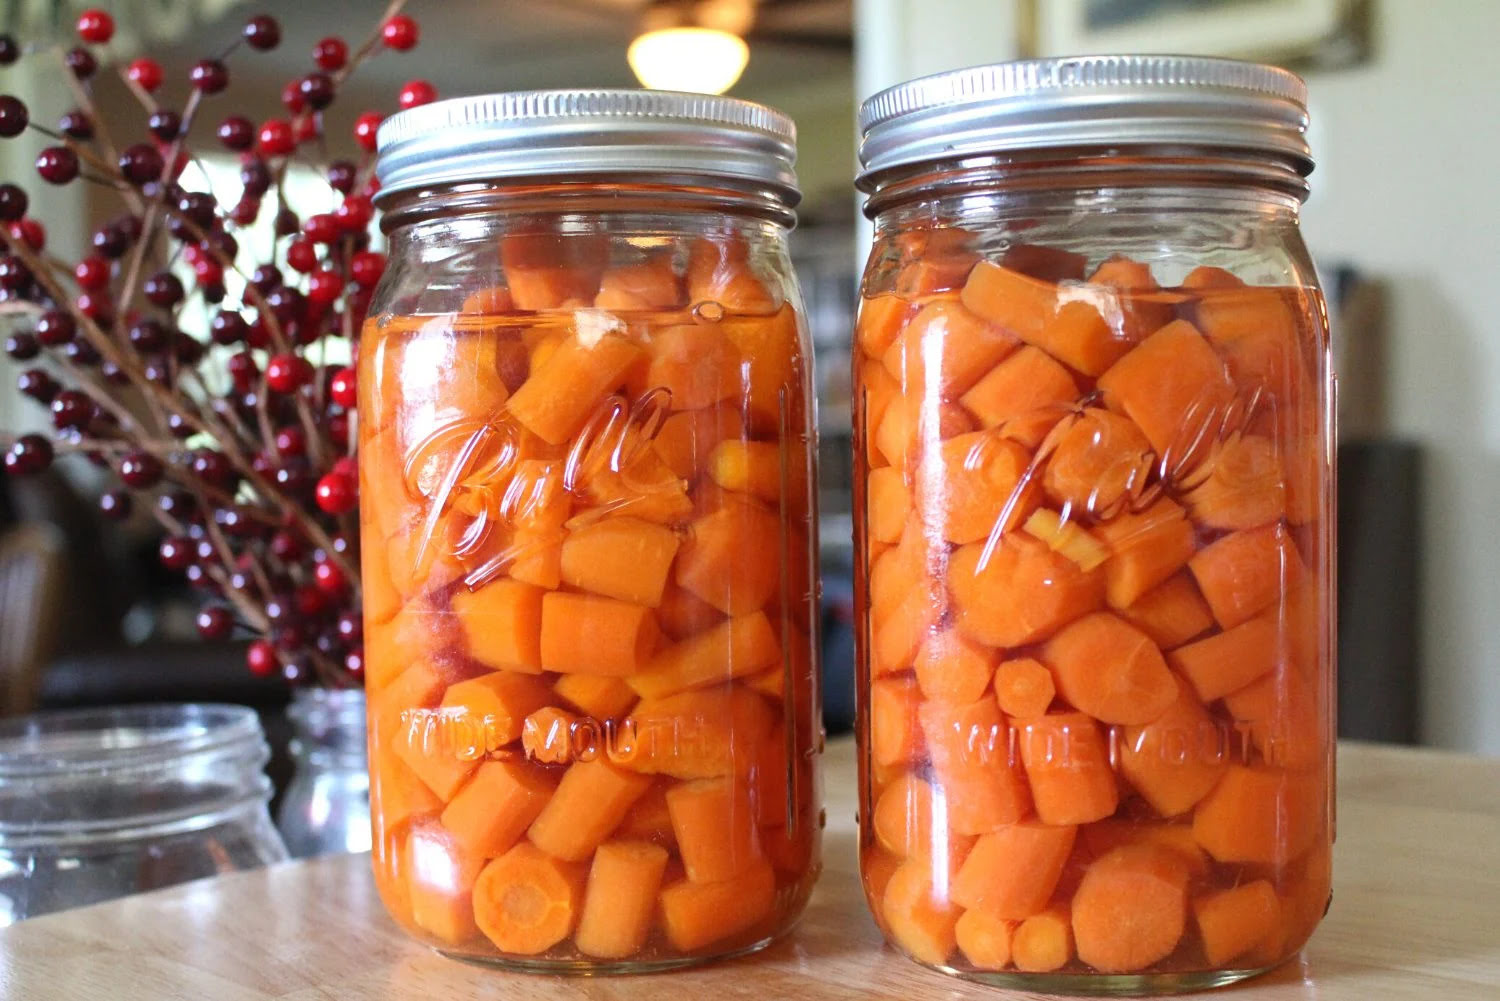
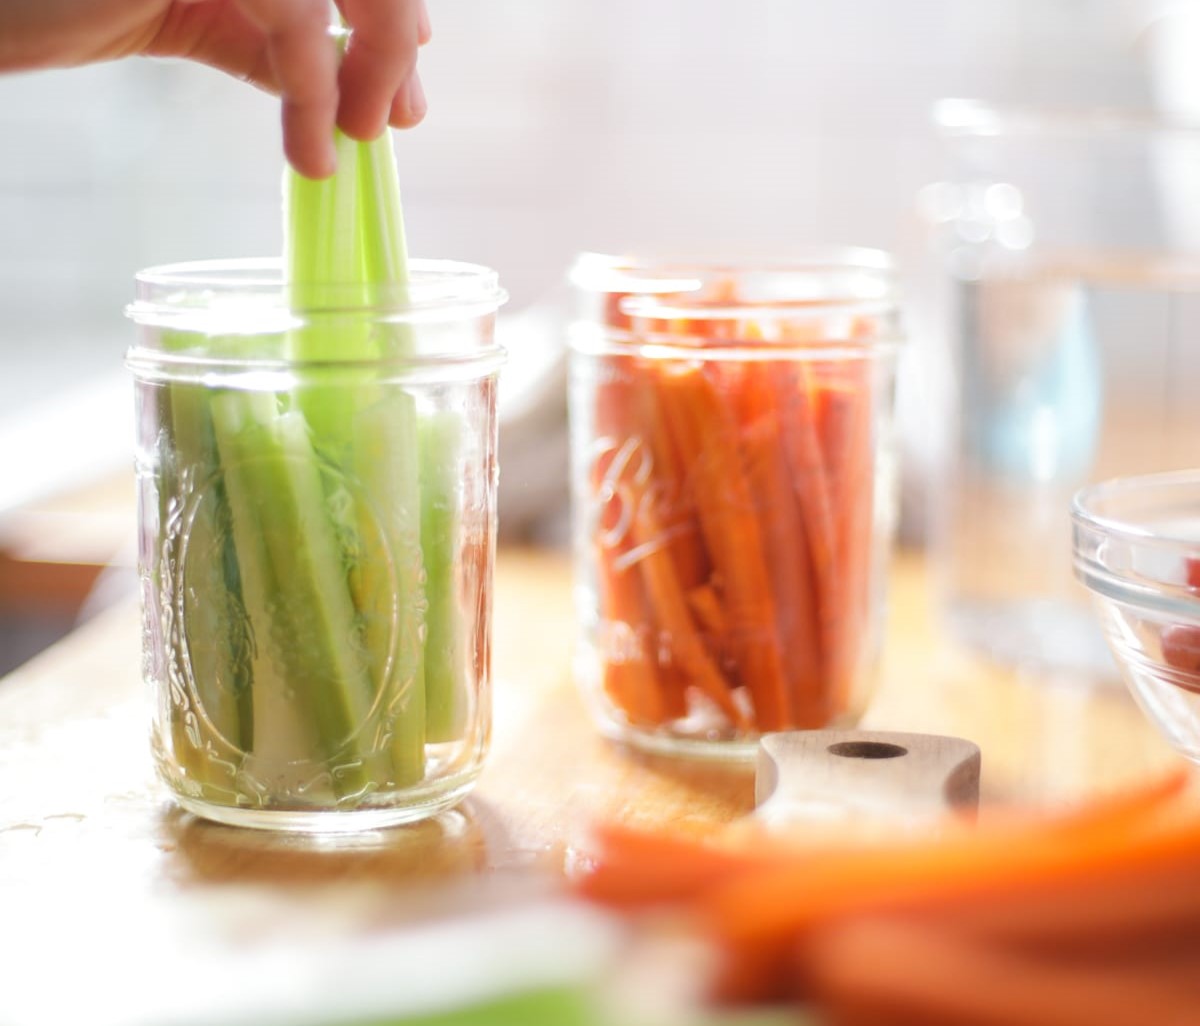
- Fill the jars: Start by layering the blanched carrots into the jars. If you cut the carrots into smaller pieces, pack them tightly, leaving some headspace at the top of each jar. For whole carrots, position them vertically in the jars, ensuring they fit snugly but are not overly compressed.
- Add liquid (optional): If desired, you can add liquid to the jars to help preserve the texture and flavor of the carrots. This can be water, vegetable broth, or a lightly seasoned brine. Leave about 1/4 inch of headspace at the top of the jar.
- Remove air bubbles: Use a clean utensil, such as a chopstick or plastic spatula, to gently press down and remove any air bubbles trapped between the carrots. This helps ensure that the jars are properly packed and reduces the risk of spoilage.
- Wipe the jar rims: Using a clean, damp cloth, wipe the rims of the jars to remove any food particles or liquid that may interfere with the sealing process.
- Secure the lids: Place the sanitized lids on the jars and tighten them securely. Ensure that the lids are not overly tight, as this can prevent proper sealing.
Properly packing the carrots into mason jars ensures that they are stored in a well-organized and airtight environment. This helps preserve their freshness and quality for an extended period. Once the jars are securely sealed, you can store them in the refrigerator or a root cellar, depending on your preferred storage method.
To store carrots in mason jars, first wash and peel the carrots. Cut them into sticks or slices and blanch them in boiling water for 2-3 minutes. Then, pack the carrots into clean mason jars and cover them with water, leaving 1 inch of headspace. Seal the jars and store them in the refrigerator for up to 2 weeks.
Sealing the Mason Jars
Properly sealing mason jars is crucial to maintain the quality and freshness of the packed carrots during storage. Follow these steps to ensure a secure seal:
- Checking the lids: Before sealing the jars, inspect the lids to ensure they are in good condition and free from any dents or defects. Damaged lids may compromise the sealing process.
- Positioning the lids: Place the lids on top of the jars, ensuring that the sealing compound is in contact with the rims. Aligning the lids correctly is essential to create a proper seal.
- Applying the screw bands: Screw the metal screw bands onto the jars, tightening them firmly but not excessively. The screw bands hold the lids in place during the sealing process.
- Using a jar lifter: To prevent burns, use a jar lifter to handle the hot jars during the sealing process. A jar lifter provides a secure grip and makes it easier to lower the jars into boiling water or remove them from the heat.
- Water bath canning method: If you want to achieve an additional level of sealing security, you can use the water bath canning method. Place the sealed jars in a pot of boiling water, making sure the jars are fully submerged. Let them boil for the recommended processing time, usually around 10-20 minutes, depending on altitude and the recipe you’re following.
- Testing the seals: After the jars have cooled, check for proper seals. Press down on the center of each cooled lid; if it is firm and doesn’t flex, the jar is sealed correctly. If the lid pops up and down when pressed, the jar did not seal properly. In this case, refrigerate and consume the carrots within a few days.
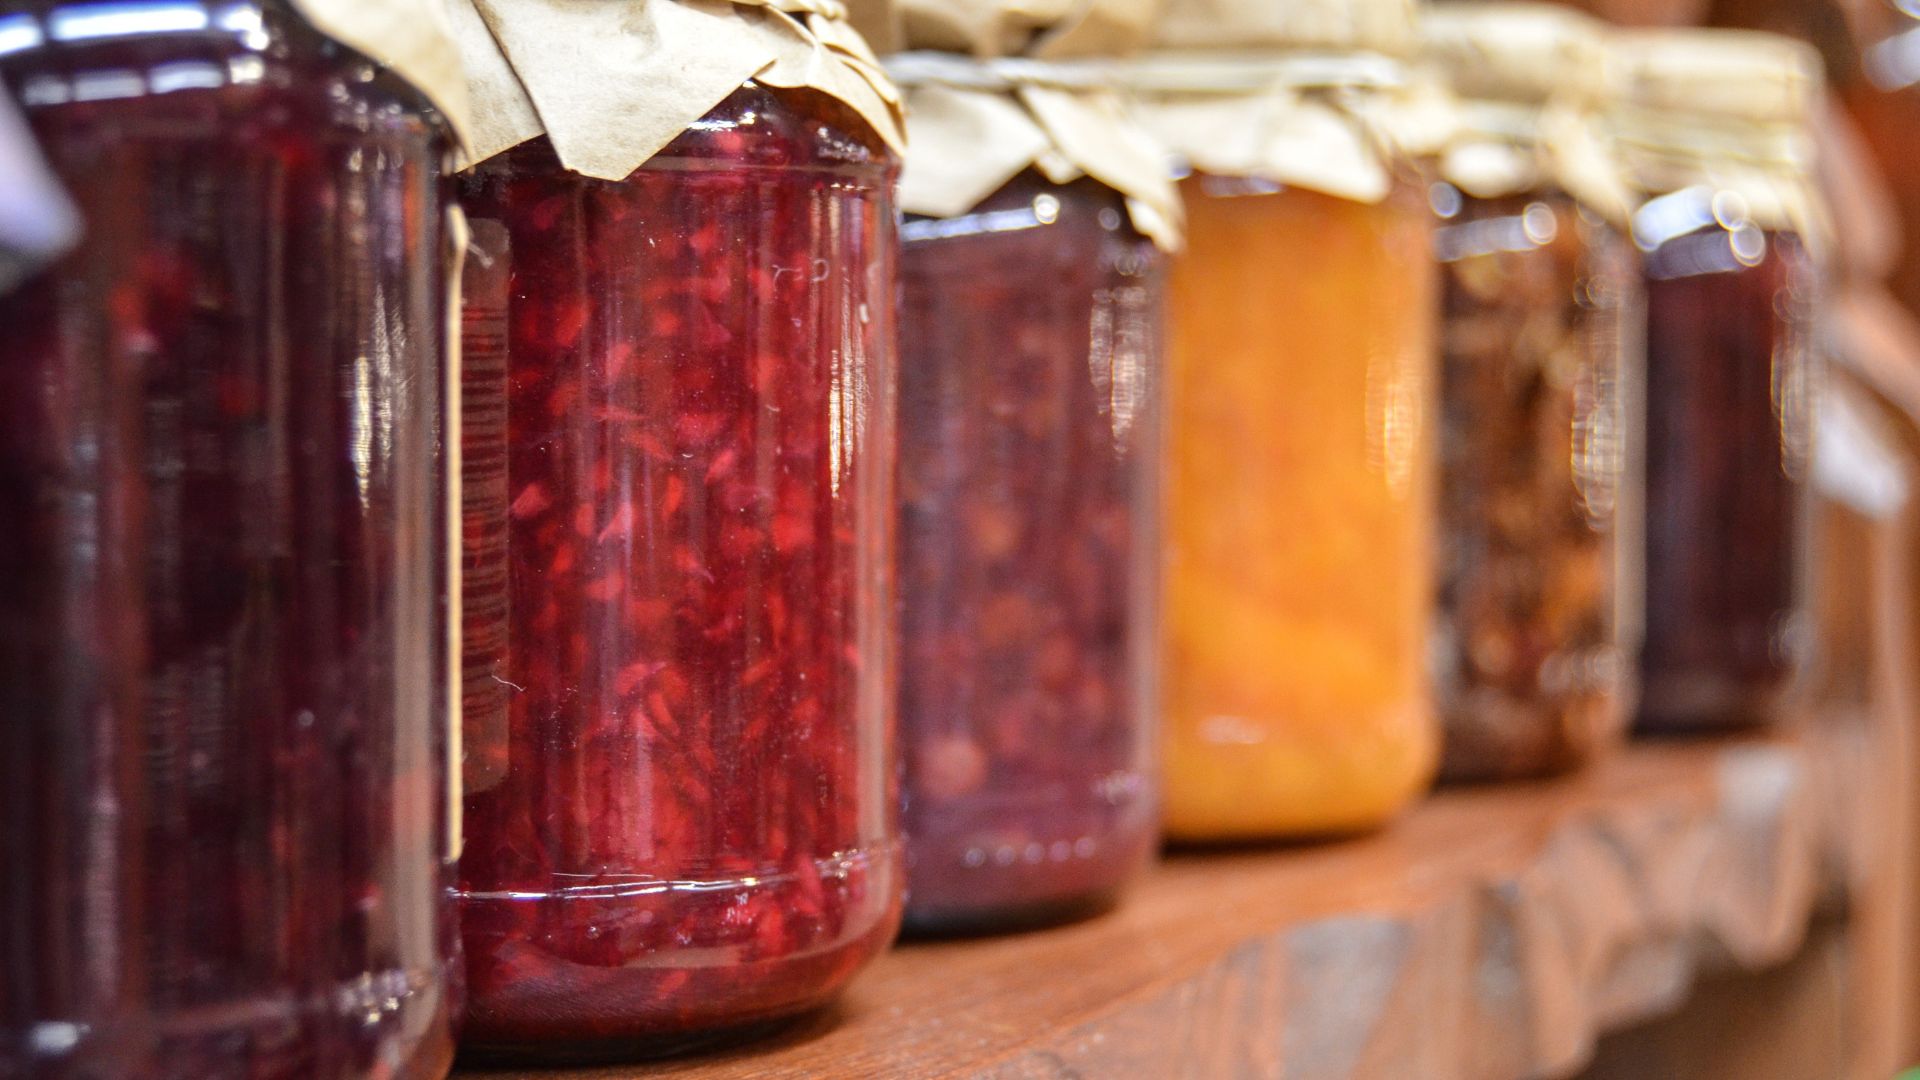
- Labeling and storing: Label the sealed jars with the date of packaging and any other relevant details, such as the variety of carrots or the canning method used. Store the sealed jars in a cool, dark place away from direct sunlight.
Properly sealing the mason jars ensures that air and moisture are locked out, creating an airtight environment for the stored carrots. This helps to preserve their freshness, flavor, and nutritional value for an extended period. With the jars securely sealed, you can choose your preferred storage location, whether it be in the refrigerator or a root cellar.
Storing Carrots in the Refrigerator
The refrigerator is a convenient and effective storage option for keeping your carrots fresh and crisp. Follow these guidelines to store your mason jars of carrots in the refrigerator:
- Cooling the jars: Allow the sealed mason jars to cool to room temperature before placing them in the refrigerator. This prevents condensation from forming inside the jars and compromising the quality of the carrots.
- Choosing the refrigerator location: Find a suitable location in your refrigerator to store the jars. Aim for a spot that maintains a consistent temperature and is not subject to temperature fluctuations, such as the door or near the freezer compartment.
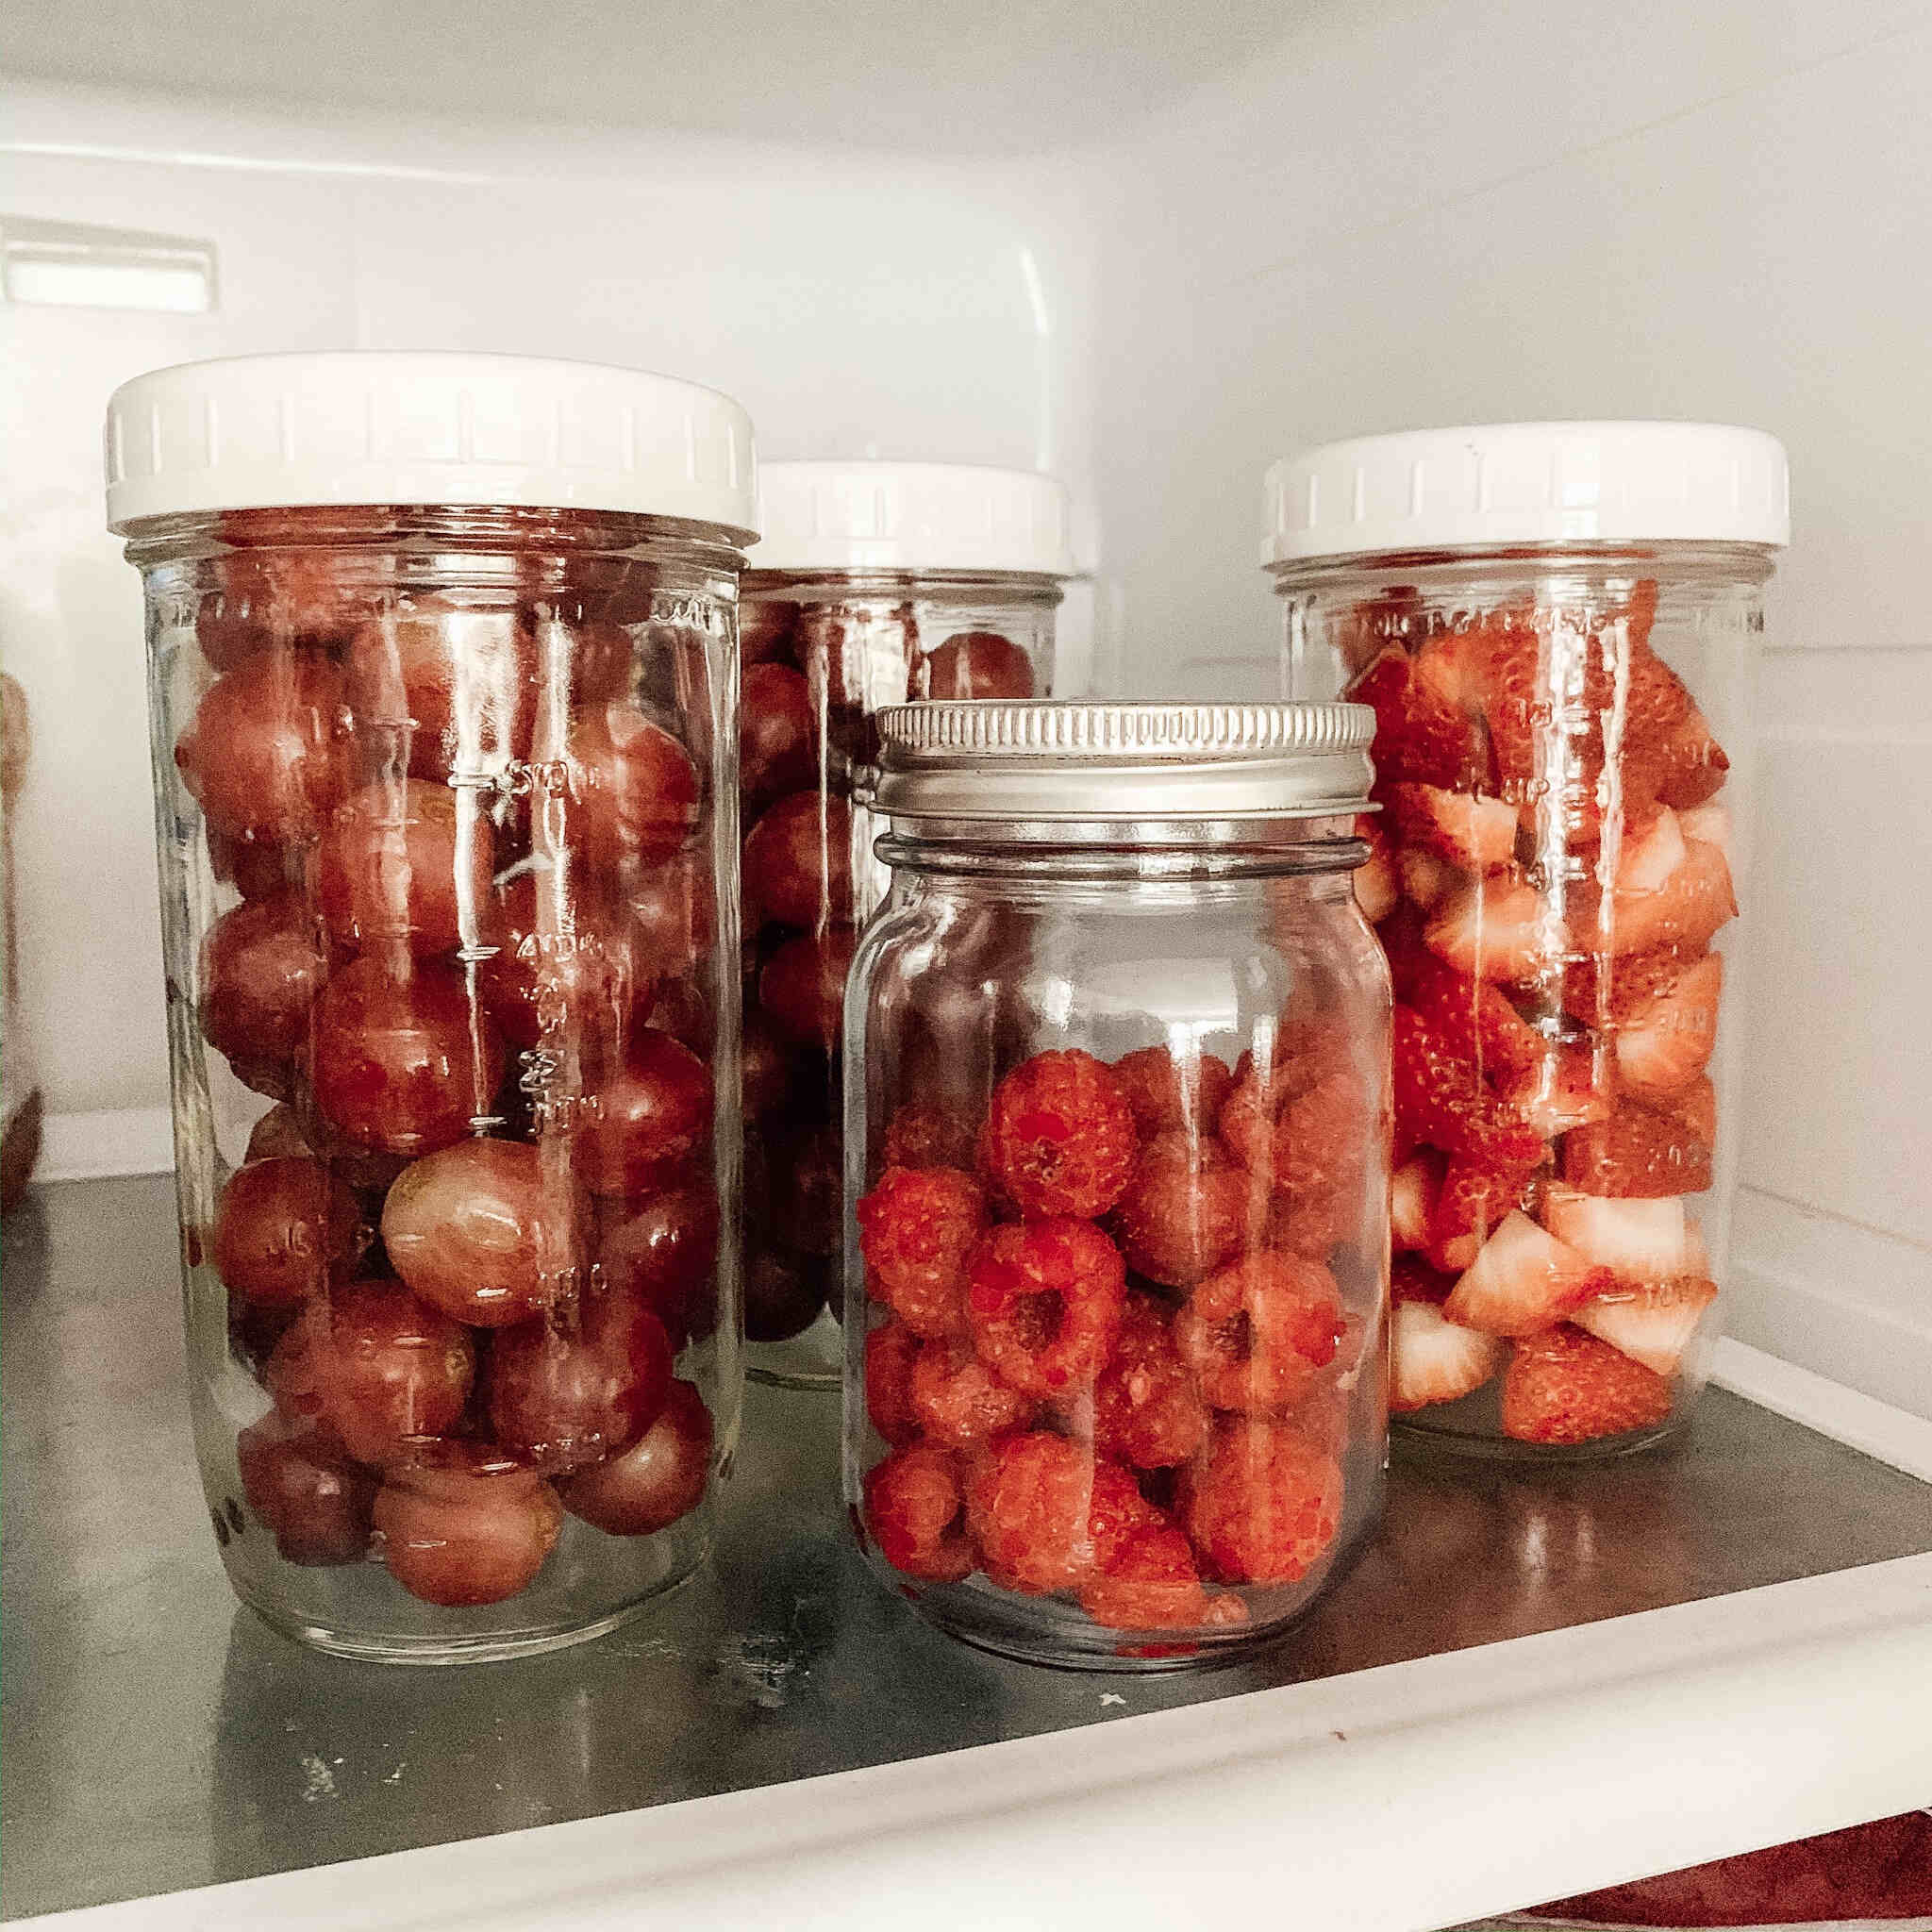
- Arranging the jars: Place the jars upright in the refrigerator, ensuring they are not overcrowded. Leave some space between the jars to allow for adequate air circulation, which helps maintain the freshness of the carrots.
- Temperature settings: Adjust the temperature of your refrigerator to around 32 to 40°F (0 to 4°C). This range is ideal for storing carrots, as it slows down the rate of spoilage without freezing them.
- Monitoring and rotation: Regularly check the carrots for any signs of spoilage, such as mold or unpleasant odors. If you notice any spoiled carrots, remove them promptly to prevent contamination of the others. It’s also a good practice to rotate your jars, using the oldest ones first to ensure fresh supply.
- Storage duration: When stored properly in the refrigerator, carrots can remain fresh for up to 2 to 4 weeks. However, it’s best to use them within the first two weeks for optimal taste and quality.
Storing your mason jars of carrots in the refrigerator allows you to keep them fresh and readily accessible for a longer period. Regular monitoring and proper rotation will ensure that you consume the carrots at their best quality and avoid any waste. However, if you prefer long-term storage or have a larger amount of carrots to store, you may consider using a root cellar.
Storing Carrots in a Root Cellar
A root cellar is an excellent option for storing carrots if you have access to one. Root cellars provide a cool and humid environment, which helps to extend the shelf life of vegetables, including carrots. Here’s how to store your mason jars of carrots in a root cellar:
- Choosing the right spot: Locate a suitable area within your root cellar that maintains a temperature range of 32 to 40°F (0 to 4°C) and a humidity level of around 90 to 95%. These conditions are ideal for preserving the freshness and crispness of the carrots.
- Preparing the storage area: Clean and organize the storage area, ensuring it is free from any dirt, debris, or other potentially contaminating substances. This helps to create a clean and hygienic environment for your stored carrots.
- Arranging the carrots: Place the mason jars upright in the root cellar, leaving enough space between the jars for proper air circulation. You can also choose to store properly cleaned and dried whole carrots directly in bins or crates, making sure to layer them with damp sand or sawdust to maintain humidity.
- Monitoring humidity: Check the humidity levels regularly in your root cellar using a hygrometer. If the humidity drops below the desired range, you can increase it by placing containers of water or damp towels in the cellar.
- Inspecting and rotating: Assess the stored carrots periodically for any signs of spoilage, such as soft spots or mold. Remove any affected carrots promptly to prevent the spread of spoilage. Additionally, rotate the mason jars or bags to ensure that you’re using the oldest carrots first.
- Storage duration: When stored in a properly maintained root cellar, carrots can stay fresh for several months, usually up to 4 to 6 months. However, it’s important to regularly check the condition of the carrots and use them before signs of spoilage occur.
A root cellar provides an ideal storage environment for carrots, mimicking the natural conditions they require to stay fresh. With proper temperature and humidity control, you can enjoy a steady supply of flavorful and nutritious carrots throughout the winter months or longer. Just make sure to monitor the storage area regularly and maintain the desired conditions for optimal storage results.
Read more: How To Store Cucumbers In Mason Jars
Using Stored Carrots
Having stored carrots in mason jars allows you to enjoy their fresh taste and nutritional benefits long after harvest. Here are some ways you can make the most of your stored carrots:
- Cooking: Stored carrots are perfect for incorporating into a variety of recipes. Whether you’re making hearty soups, stews, stir-fries, or roasted vegetable medleys, carrots add flavor, texture, and vibrant color to your dishes. They can also be shredded and used in baking, adding moisture and natural sweetness to cakes, muffins, and bread.
- Snacking: Crisp and sweet, stored carrots make a convenient and healthy snack option. Slice them into sticks or rounds and enjoy them with your favorite dips, such as hummus or ranch dressing. Carrot sticks can also be included in lunchboxes or enjoyed on their own as a refreshing snack.
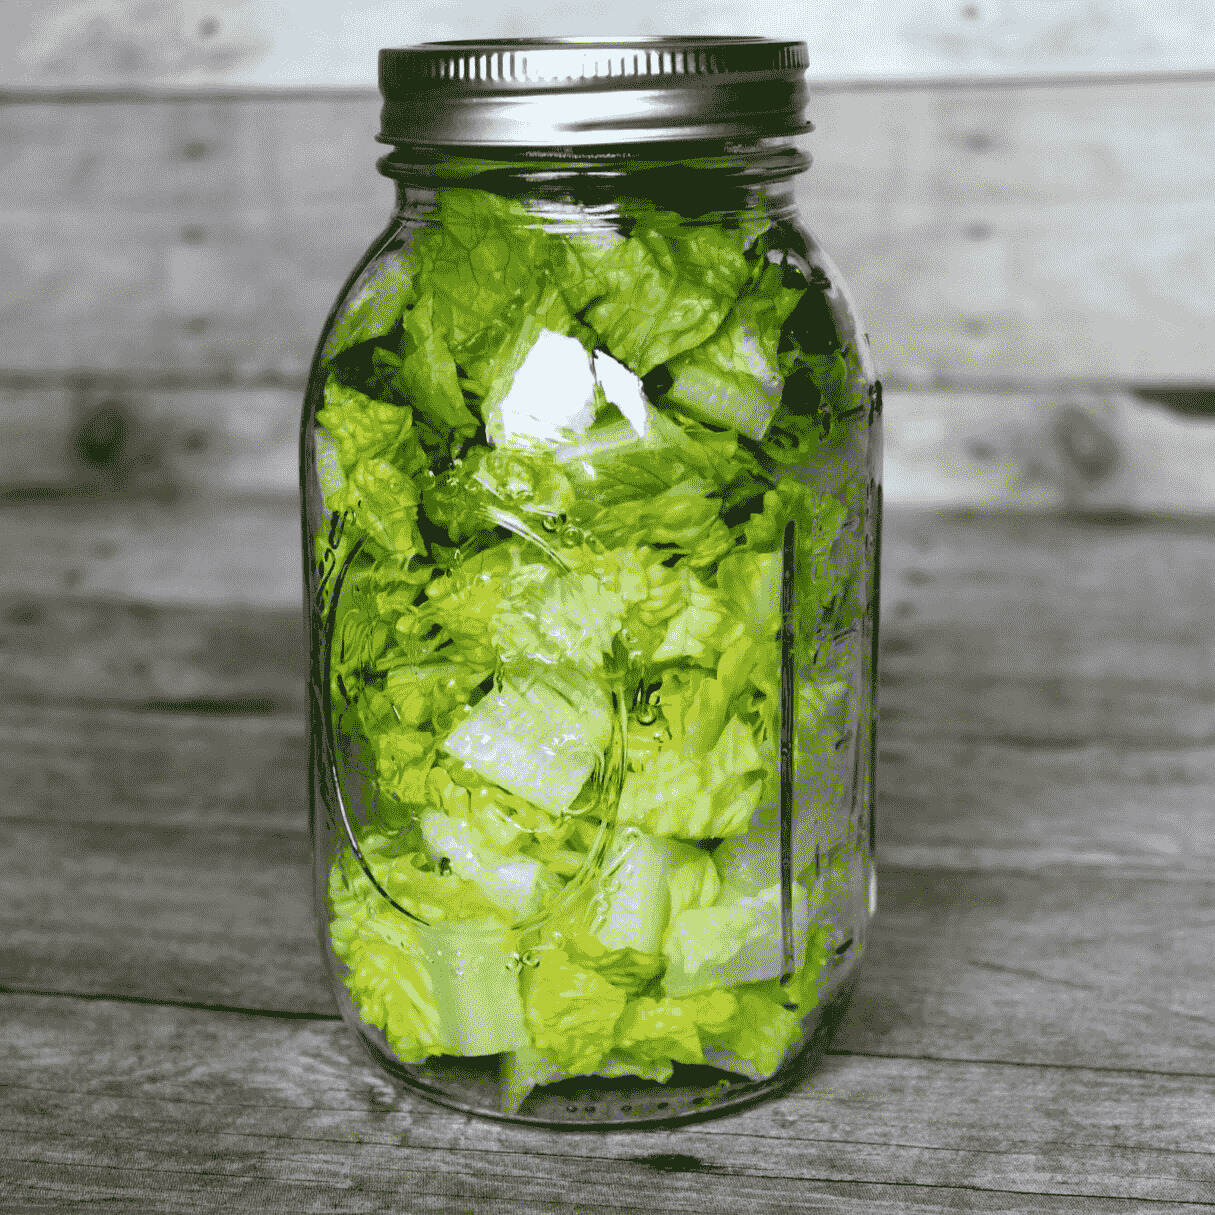
- Salads and slaws: Grate or julienne stored carrots to create colorful and crunchy additions to salads and slaws. Mix them with other vegetables, such as cabbage, lettuce, or radishes, and dress them with your favorite vinaigrette or creamy dressing. The carrots will add a delightful freshness to your salads.
- Juicing and smoothies: Blend stored carrots into fresh juices or smoothies for a nutritious boost. Carrots are packed with vitamins and antioxidants, making them a valuable addition to your morning or post-workout beverages. Combine them with other fruits and vegetables for a refreshing and nourishing drink.
- Preserving: If you find yourself with an abundance of stored carrots, consider preserving them in additional ways. You can pickle them for a tangy and crunchy treat, or blanch and freeze them in portioned bags for convenient use throughout the year.
- Baby food: If you have little ones at home, stored carrots can be pureed or mashed to make homemade baby food. Carrots are rich in vitamins and minerals, making them a nutritious option for introducing solids to your baby’s diet.
Experiment with different recipes and methods to fully enjoy the versatile flavors and textures of your stored carrots. Get creative in the kitchen and savor the rewards of preserving these nutritious vegetables!
Tips for Properly Storing Carrots
To ensure that your stored carrots remain fresh, flavorful, and ready to use, it’s important to follow these tips for proper storage:
- Choose fresh and high-quality carrots: Start with fresh, crisp, and unblemished carrots for optimal storage results. Inspect them carefully and avoid storing carrots that show signs of damage or decay.
- Store at the right temperature: Carrots prefer cool temperatures around 32 to 40°F (0 to 4°C). Whether you’re storing them in the refrigerator or a root cellar, maintaining the appropriate temperature range is crucial for preserving their freshness and texture.
- Handle with care: Be gentle when handling carrots to prevent any bruising or damage. Rough handling can lead to faster spoilage and deterioration.
- Avoid moisture: Excess moisture can cause carrots to rot quickly. Make sure to dry the carrots thoroughly after cleaning them and avoid storing them in a humid environment.
- Keep away from ethylene-producing fruits: Certain fruits, such as apples and bananas, produce ethylene gas, which can accelerate the ripening process and spoilage of carrots. Store carrots away from these fruits to prevent premature decay.
- Inspect regularly: Check your stored carrots regularly for any signs of spoilage, such as mold, soft spots, or off-putting odors. Discard any carrots that show signs of decay to prevent the spread of spoilage to the rest of the batch.
- Properly seal mason jars: Ensure that the mason jars are tightly sealed to create an airtight environment. This helps to maintain the freshness and quality of the carrots for a longer storage duration.
- Practice first-in, first-out: When using stored carrots, follow the principle of using the oldest carrots first. This prevents any carrots from sitting in storage for too long and ensures that you consume them at their best quality.
- Label and date the jars: Properly label each mason jar with the date of packaging and any other relevant details. This way, you can keep track of the storage duration and easily identify the contents.
- Store different varieties separately: If you have different varieties of carrots, it’s best to store them separately. This allows you to keep track of their individual storage life and prevents cross-contamination between different types of carrots.
By following these tips, you can maximize the storage life of your carrots and ensure that they remain fresh, crisp, and full of flavor for an extended period. Enjoy the convenience of having a supply of carrots on hand whenever you need them!
Conclusion
Storing carrots in mason jars is a practical and efficient way to preserve their freshness and extend their shelf life. With the right jars, proper preparation, and suitable storage conditions, you can enjoy the taste, crunch, and nutritional benefits of carrots long after the harvest season has ended.
By storing carrots in mason jars, you reap various benefits, including prolonging their freshness, protecting them from contamination, preserving their nutritional value, and reducing food waste. The organization and charm that mason jars bring to your pantry or refrigerator are an added bonus.
Throughout this article, we discussed the benefits of storing carrots in mason jars, how to choose the right jars, the steps involved in preparing and packing the carrots, and different storage options such as refrigeration or a root cellar. We also provided tips for using the stored carrots effectively and maintaining their quality.
Whether you’re a gardening enthusiast looking to preserve your harvest or just a carrot lover wanting a continuous supply throughout the year, storing carrots in mason jars is a simple and rewarding process. With diligent care and attention to storage guidelines, you can enjoy the vibrant flavor and nutritional value of carrots in various culinary creations.
So, grab your mason jars, follow the steps outlined in this article, and start storing your carrots today. Embrace the convenience, sustainability, and deliciousness of having fresh carrots at your fingertips whenever you need them!
Frequently Asked Questions about How To Store Carrots In Mason Jars
Was this page helpful?
At Storables.com, we guarantee accurate and reliable information. Our content, validated by Expert Board Contributors, is crafted following stringent Editorial Policies. We're committed to providing you with well-researched, expert-backed insights for all your informational needs.


0 thoughts on “How To Store Carrots In Mason Jars”