Articles
How To Tell If A Toilet Is Leaking
Modified: October 19, 2024
Learn the telltale signs of a leaking toilet with this informative article. Discover how to detect and fix toilet leaks to prevent water wastage and costly repairs.
(Many of the links in this article redirect to a specific reviewed product. Your purchase of these products through affiliate links helps to generate commission for Storables.com, at no extra cost. Learn more)
Introduction
A leaking toilet can be a frustrating and costly problem. Not only does it waste water, but it can also lead to water damage and mold growth if left untreated. Identifying a leaking toilet early on is crucial in order to prevent further damage and unnecessary expenses. In this article, we will discuss the common signs of a leaking toilet and various methods to detect and address the issue.
Whether you are a homeowner or a tenant, it is important to keep an eye out for signs of a leaking toilet. Ignoring these signs can result in significant water wastage, higher water bills, and potential damage to your property. By being proactive and addressing leaks promptly, you can save both water and money in the long run.
So, how do you tell if your toilet is leaking? There are several common signs that can indicate a leaking toilet, and being aware of these signs can help you take the necessary steps to fix the issue.
Key Takeaways:
- Detecting a leaking toilet early can prevent water damage and save money. Look for signs like water on the floor, continuous running water, or unusual sounds to identify and address leaks promptly.
- Use visual inspections, listening for leaks, dye tests, and water meters to confirm a leaking toilet. Promptly address leaks by replacing wax rings, fixing flapper valves, and seeking professional help for plumbing issues.
Common Signs of a Leaking Toilet
Identifying the signs of a leaking toilet is the first step in addressing the issue. Here are some common signs to look out for:
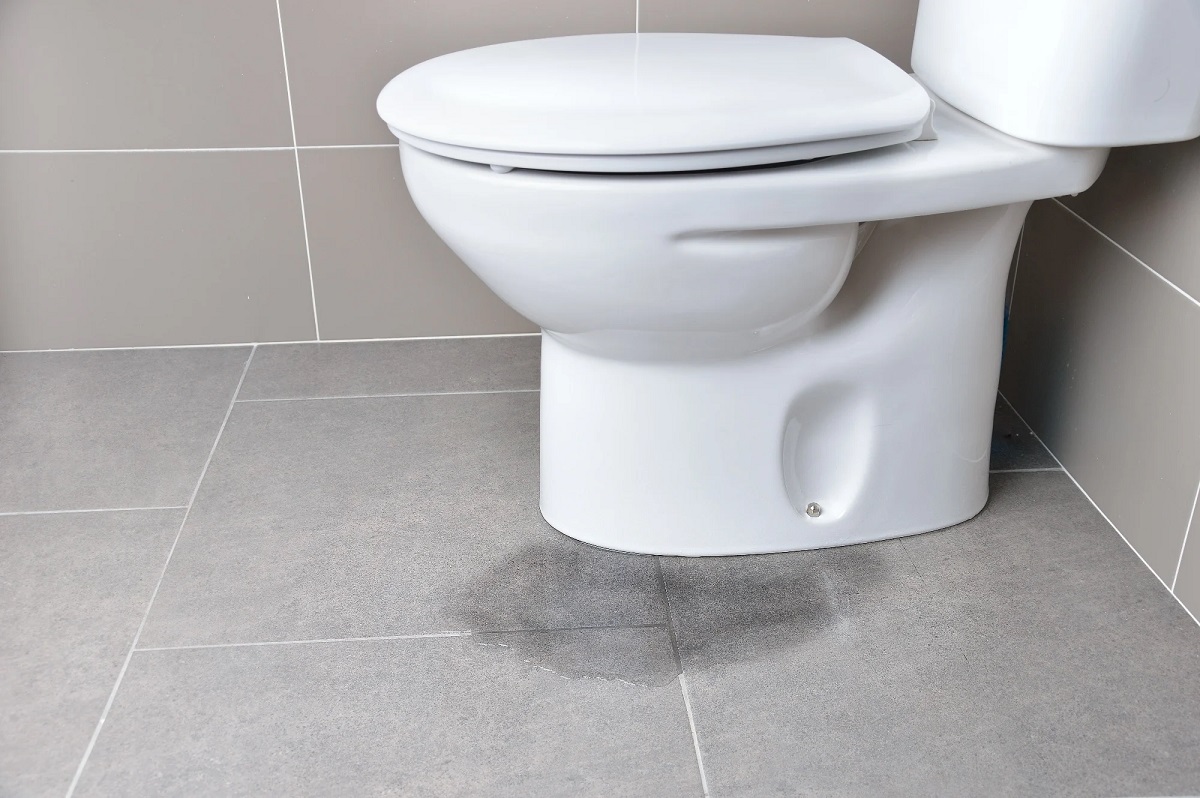
- Visible water on the floor: If you notice water pooling around the base of the toilet, it is a clear indication of a leak. This can be caused by a faulty wax ring seal or a cracked toilet base.
- Water stains: Keep an eye out for water stains on the walls, baseboards, or ceiling beneath the bathroom. These stains can be caused by water seeping through the floor due to a leaking toilet.
- Continuous running water: If you can hear water running in the toilet tank even when it is not being used, it likely means there is a leak. This can be caused by a faulty flapper valve or a damaged fill valve.
- Fluctuating water levels: If the water level in the toilet bowl keeps changing on its own, it is a sign of a leak. This can be caused by a faulty flapper, which allows water to constantly flow from the tank to the bowl.
- Unusual sounds: If you hear gurgling or bubbling sounds coming from the toilet, it may indicate a leak. This can be caused by air escaping from the pipes due to a leak in the toilet’s plumbing system.
- Foul odors: A persistent and unpleasant smell coming from the bathroom could be a sign of a leaking toilet. When water seeps through the floor or gets trapped in the bathroom, it can create a musty or sewage-like smell.
If you notice any of these signs, it is important to investigate further to confirm whether your toilet is indeed leaking. By identifying the problem early on, you can prevent further damage and minimize repair costs.
Checking for Visible Leaks
Once you suspect a leaking toilet, the first step is to visually inspect the toilet for any visible leaks. Here’s how you can do it:
- Check the base: Start by examining the area around the base of the toilet. Look for any signs of water puddles or moisture. If you notice water around the base, it may indicate a leaking wax ring seal or a crack in the toilet base.
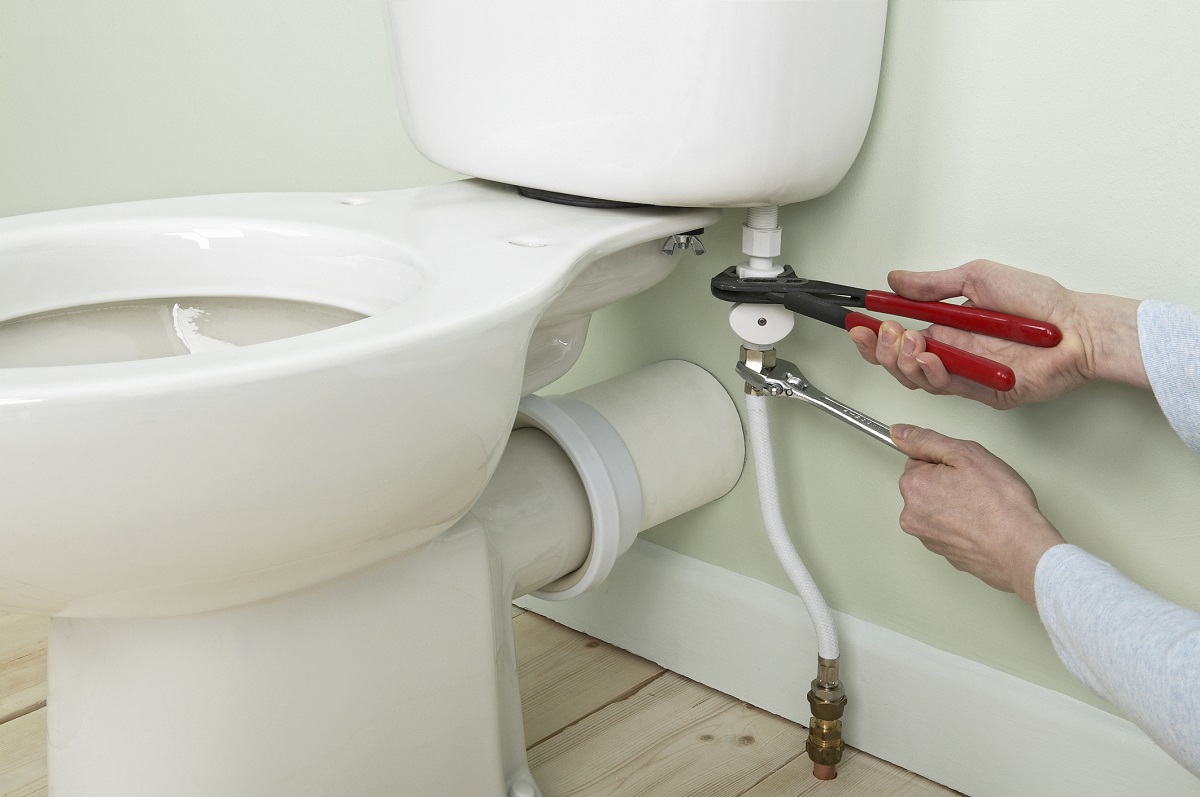
- Inspect the supply line: Next, inspect the supply line that connects the toilet tank to the water supply valve on the wall. Look for any signs of dripping water or wetness along the line. A leaking supply line can cause water to continuously flow into the toilet tank.
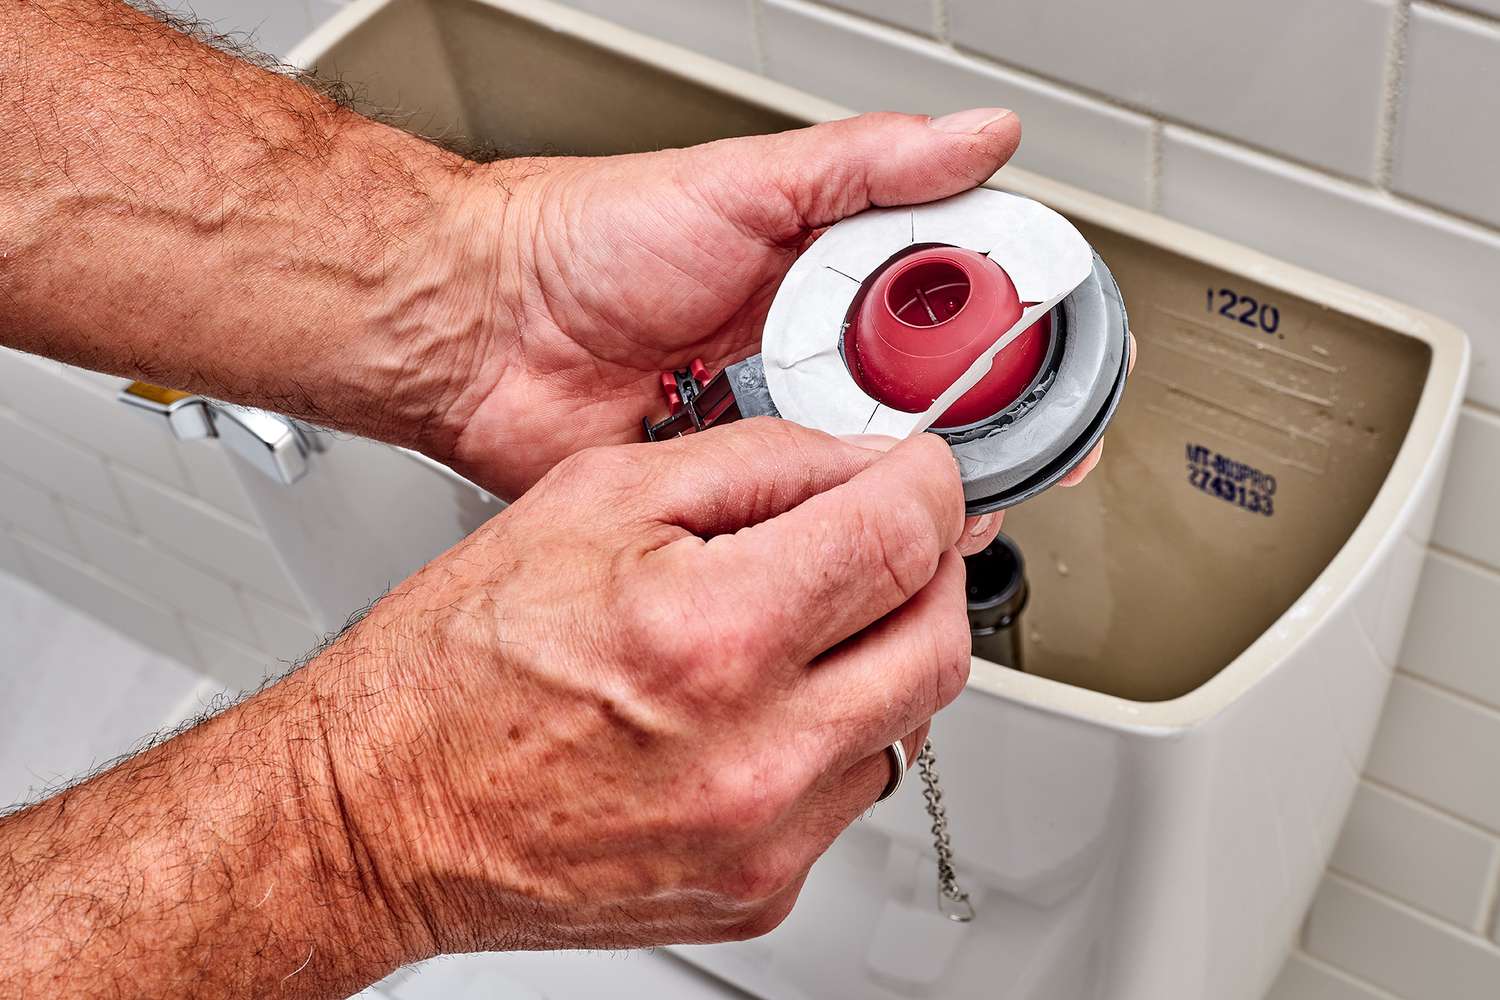
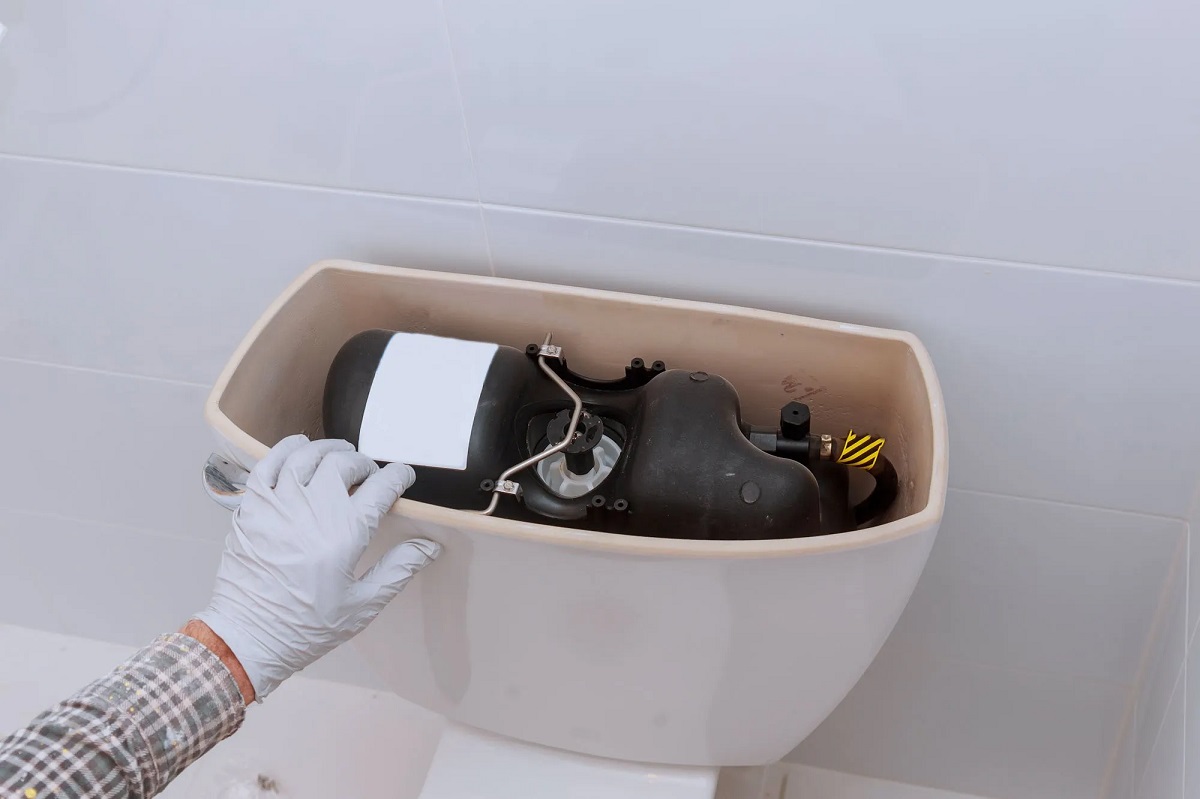
- Examine the tank and bowl: Take a closer look inside the toilet tank and bowl. Look for any cracks or damage that could be causing water to leak. Also, check the flapper valve for any signs of wear and tear, as a faulty flapper can result in continuous water flow.
- Observe the flush valve: The flush valve, located at the center of the toilet tank, is responsible for releasing water into the bowl during flushing. Check for any leaks around the flush valve. A damaged or worn-out flush valve can lead to water leakage.
- Inspect the fill valve: The fill valve, also known as the ballcock, controls the water level in the toilet tank. Ensure that the fill valve is not leaking or working improperly. Look for any signs of water dripping from the valve or excessive water overflow in the tank.
By examining these areas, you can often identify visible leaks in your toilet. If you do find any leaks, it is important to address them as soon as possible to prevent further damage and water wastage. However, not all leaks are easily visible, so it is essential to perform additional tests to confirm a leaking toilet.
Listening for Leaks
In some cases, a leaking toilet may not be easily detected visually. However, you can use your sense of hearing to listen for potential leaks. Follow these steps to listen for leaks:
- Turn off all nearby sources of noise: Make sure the bathroom is quiet by turning off any fans, music, or appliances. This will help you better hear any sounds related to water leakage.
- Listen for hissing or running water: Stand near the toilet and listen closely. If you hear a continuous hissing sound or running water, it could indicate a leak. This sound may be coming from a faulty fill valve that is allowing water to constantly flow into the toilet tank.
- Check the toilet tank: Lift the lid of the toilet tank and listen for any unusual sounds. If you hear water running or trickling, it may indicate a leaking flapper valve. The flapper valve is responsible for sealing the flush valve and preventing water from continuously flowing into the toilet bowl.
- Inspect the toilet bowl: Listen carefully to the toilet bowl as well. If you hear any bubbling or gurgling sounds, it could be an indication of a leak. These sounds may occur when air escapes through a crack or leak in the toilet’s plumbing system.
- Pay attention to water levels: While listening for leaks, also keep an eye on the water level in the toilet tank and bowl. If the water level drops without flushing or if it fluctuates on its own, it could be a sign of a leak.
By listening for these telltale sounds, you may be able to identify a leaking toilet that is not easily visible. If you hear any indications of a leak, further investigation and repairs may be necessary.
While listening for leaks can be a useful method, it is still recommended to use other detection techniques to confirm the presence of a leak in your toilet.
Check for water on the floor around the base of the toilet. Add a few drops of food coloring to the tank and wait 15 minutes – if the color appears in the bowl, you have a leak.
Conducting a Dye Test
If you suspect a leaking toilet but can’t find any visible signs or hear any obvious sounds, you can conduct a dye test to confirm the presence of a leak. Here’s how to perform a dye test:
- Gather the necessary materials: You will need a dye tablet or a few drops of food coloring. Choose a bright color that will be easily visible in the toilet bowl.
- Turn off the water supply valve: Locate the water supply valve behind or near the toilet and turn it off. This will prevent any water from flowing into the tank during the dye test.
- Add the dye: Drop the dye tablet or a few drops of food coloring into the toilet tank. Do not flush the toilet at this point.
- Wait and observe: Leave the toilet untouched for about 15-20 minutes. During this time, do not flush or use the toilet. Keep a close eye on the toilet bowl for any changes in color.
- Check the toilet bowl: After the waiting period, carefully inspect the toilet bowl. If the water in the bowl has changed color, it indicates that there is a leak allowing water to seep from the tank to the bowl.
- Confirm the source of the leak: To determine the source of the leak, flush the toilet and observe. If the water in the bowl once again changes color, it confirms that the flapper valve is not sealing properly and needs to be replaced.
The dye test is an effective and simple method to identify a leaking toilet. If you notice any color change in the toilet bowl, it is important to address the issue promptly to prevent water waste and potential damage.
Remember to turn the water supply valve back on after completing the dye test so that you can use the toilet normally. However, make sure to address any identified leaks as soon as possible to minimize water wastage and avoid further problems.
Read more: How To Tell Toilet Seat Size
Using a Water Meter to Detect Leaks
If you suspect a leaking toilet but haven’t been able to confirm it using other methods, you can use a water meter to help detect the presence of a leak. Here’s how you can use a water meter:
- Locate your water meter: The water meter is usually located outside your home, near the main water supply line. It may be in a meter box or underground. Familiarize yourself with the meter’s location before proceeding.
- Turn off all water-consuming devices: Make sure that all faucets, showers, toilets, and appliances that use water are turned off. This step is crucial to accurately measure any water usage specifically related to the suspected leaking toilet.
- Take an initial reading: Start by taking a note of the water meter reading. This reading represents the current water usage in your home.
- Refrain from using water: Avoid using any water in your home for a couple of hours. This includes flushing toilets, running faucets, and using any appliances that consume water.
- Check the water meter: After the designated time has passed, check the water meter reading again. Compare it to the initial reading. If the meter has recorded an increase in water usage during the period when no water was intentionally consumed, it suggests that there is a leak in your plumbing system, potentially including the toilet.
- Isolate the suspected area: To confirm if the toilet is the source of the leak, turn off the water supply valve to the toilet. Repeat the step of not using any water for a couple of hours and then check the water meter again. If the meter does not show any significant change in water usage, it indicates that the leak is likely coming from the toilet.
Using a water meter can be an effective method to identify leaks in your plumbing system, including those caused by a leaking toilet. If you notice a difference in water usage on the meter, it is essential to follow up with further inspection and repairs to solve the issue.
Remember to turn the water supply valve to the toilet back on after completing the test to restore its functionality. Addressing a confirmed leaking toilet promptly will not only save water but also prevent additional water damage and unnecessary expenses.
Addressing Leaks and Repairs
Once you have confirmed a leaking toilet through visual inspections, listening for leaks, performing a dye test, or using a water meter, it is crucial to address the issue promptly. Ignoring a leak can lead to further damage, wasted water, and increased repair costs. Here are some steps to address leaks and make necessary repairs:
- Identify the source of the leak: Determine the exact location and cause of the leak. It could be a faulty wax ring seal, a cracked toilet base, a damaged flapper valve, a worn-out fill valve, or a problem in the plumbing system.
- Replace the wax ring: If the leak is coming from the base of the toilet, it may be due to a deteriorated wax ring seal. To fix this, you will need to remove the toilet, replace the wax ring, and reinstall the toilet properly. This may require the assistance of a plumber if you are not comfortable doing it yourself.
- Repair or replace the flapper valve: If the flapper valve is leaking, it needs to be repaired or replaced. Turn off the water supply to the toilet, drain the tank, and remove the old flapper valve. Install a new flapper valve and ensure it creates a proper seal when closed.
- Fix or replace the fill valve: A leaking or malfunctioning fill valve may require repair or replacement. Turn off the water supply, drain the tank, and detach the old fill valve. Install a new fill valve and adjust the water level to the appropriate setting.
- Address plumbing system issues: If the leak is not limited to the toilet itself, but rather a problem in the plumbing system, it is best to seek the assistance of a professional plumber. They will be able to identify and resolve any issues with the pipes, connections, or valves.
- Perform follow-up tests: After making the necessary repairs, perform tests, such as a dye test or listening for leaks, to ensure that the toilet is no longer leaking. This will help you verify that the repair work was successful.
If you are unsure or uncomfortable with performing any of the repairs yourself, consult a reliable plumber who can properly address the leak and ensure that your toilet is functioning correctly.
Remember, addressing leaks and making repairs in a timely manner can save water, prevent further damage, and save you from costly repairs in the future. Regular maintenance and inspections can also help prevent leaks and ensure the proper functioning of your toilet.
Conclusion
A leaking toilet can be a troublesome and costly problem, but detecting and addressing it early on is essential to prevent further damage and water wastage. By familiarizing yourself with the common signs of a leaking toilet, you can promptly identify any potential issues.
Visual inspections, listening for leaks, conducting dye tests, and using water meters are effective methods to confirm the presence of a leak. Each of these techniques provides valuable insights into the condition of your toilet and helps you identify the source of the leak.
Once a leak is confirmed, it is crucial to take immediate action. Whether it’s replacing a wax ring seal, fixing a flapper valve, repairing a fill valve, or addressing plumbing system issues, timely repairs can prevent further water waste and save you from costly repairs down the line.
Regular maintenance and periodic inspections of your toilet are also important. This ensures that any potential leaks or issues are identified and resolved early, reducing the risk of long-term damage and costly repairs.
Remember, saving water not only benefits your finances but also the environment. By addressing leaks and maintaining a well-functioning toilet, you contribute to water conservation efforts and reduce the strain on natural resources.
Toilet leaks may seem like minor nuisances, but they can lead to significant water wastage and costly damage if left unattended. By staying vigilant and taking appropriate measures, you can ensure your toilet remains leak-free, saving water and protecting your property.
So, if you notice any signs of a leaking toilet, don’t delay in taking action. Address the issue promptly, make necessary repairs, and maintain your toilet to keep it in optimal condition. Your efforts will not only benefit you but also contribute to the preservation of our precious water resources.
Frequently Asked Questions about How To Tell If A Toilet Is Leaking
Was this page helpful?
At Storables.com, we guarantee accurate and reliable information. Our content, validated by Expert Board Contributors, is crafted following stringent Editorial Policies. We're committed to providing you with well-researched, expert-backed insights for all your informational needs.


0 thoughts on “How To Tell If A Toilet Is Leaking”