Articles
How To Tell If AC Is Broken
Modified: November 1, 2024
Learn how to identify if your AC unit is broken with informative articles and expert tips. Ensure optimal cooling and avoid costly repairs.
(Many of the links in this article redirect to a specific reviewed product. Your purchase of these products through affiliate links helps to generate commission for Storables.com, at no extra cost. Learn more)
Introduction
When the weather starts to heat up, there’s nothing quite as refreshing as walking into a cool and comfortable space with a functioning air conditioner (AC). However, if you’ve noticed that your AC isn’t providing the cool air it once did, or if you’re experiencing other issues like weak airflow, odd noises, or strange odors, it’s possible that your AC unit is broken.
Understanding the signs of a broken AC is crucial for early detection and prompt repairs. In this article, we’ll explore the common signs that indicate your AC may be malfunctioning. We’ll also provide tips on how to identify if your AC is broken and offer some DIY troubleshooting tips you can try before seeking professional help. So, let’s dive in and learn how to tell if your AC is broken.
Key Takeaways:
- Regularly inspect and clean or replace air filters to ensure proper airflow and cooling performance, and address unusual sounds and smells promptly to prevent further damage to your AC unit.
- Seek professional help for major mechanical issues, electrical problems, refrigerant handling, complex repairs, and regular maintenance to ensure the optimal performance and longevity of your AC system.
Read more: How To Tell If An Air Conditioner Is Broken
Signs of a Broken AC
When your AC unit isn’t operating correctly, it can lead to discomfort and inconvenience. Here are some common signs that indicate your AC may be broken:
- No Cooling: One of the most obvious signs of a broken AC is a lack of cooling. If you notice that the air blowing from your vents is warm or not as cool as it should be, it’s a clear indication that something is amiss.
- Weak Airflow: Another sign of a broken AC is weak airflow. If you notice that the air coming from your vents is barely reaching you or feels weak, it could be a sign of a malfunctioning AC unit.
- Odd Noises: Unusual or loud noises coming from your AC unit can be a cause for concern. Clanking, banging, grinding, or squealing sounds may indicate mechanical issues that require attention.
- Strange Odors: A malfunctioning AC unit can emit unpleasant odors. If you notice a musty or pungent smell coming from your air vents, it could be a sign of mold or other issues within the system.
- Excessive Humidity: Your AC unit should help maintain a comfortable level of humidity in your space. If you notice a significant increase in humidity or stickiness in the air, it could indicate a malfunctioning AC.
- Constant Cycling: AC units are designed to cycle on and off periodically to maintain a consistent temperature. If you notice that your AC is constantly cycling on and off without achieving the desired temperature, it could be a sign of a broken AC.
Keep in mind that these signs can vary depending on the specific issue with your AC unit. It’s best to further investigate the problem to accurately diagnose the problem.
No Cooling
One of the most frustrating signs of a broken AC unit is when it fails to provide the cooling you expect. If you’ve set your thermostat to a lower temperature but your space remains warm, it’s a clear indication that your AC isn’t cooling properly.
There are several reasons why your AC might not be cooling effectively:
- Refrigerant Leak: The refrigerant is the substance responsible for absorbing heat from your indoor air and releasing it outside. If your AC has a refrigerant leak, it will not be able to cool the air effectively. Look for signs of oil stains or wet spots around your AC unit, which may indicate a refrigerant leak.
- Dirty Condenser Coils: The condenser coils in your AC unit help dissipate heat from the refrigerant. Over time, these coils can become dirty and covered in debris, making it harder for them to release heat effectively. This can result in reduced cooling capacity. Regular maintenance and cleaning of the condenser coils can help prevent this issue.
- Faulty Compressor: The compressor is a crucial component of your AC unit that helps circulate refrigerant and facilitates the cooling process. If the compressor is faulty or not working properly, it can result in inadequate cooling. This is a complex issue that requires professional attention.
- Clogged Air Filters: Dirty or clogged air filters can restrict airflow and prevent your AC from effectively cooling your space. Regularly inspect and clean or replace your air filters to ensure proper airflow and cooling performance.
- Inadequate Insulation: Poor insulation in your space can cause cool air to escape and warm air to seep in, making it harder for your AC to maintain a comfortable temperature. Consider insulating your walls, windows, and doors to improve energy efficiency and cooling performance.
If you notice that your AC isn’t cooling, it’s important to address the issue promptly to avoid further discomfort and potential damage to your AC unit. Consider reaching out to a professional HVAC technician to diagnose and fix the problem.
Weak Airflow
Another common sign of a broken AC unit is weak airflow. If you notice that the air coming from your vents feels weak or doesn’t reach you as it should, it’s an indication that something is amiss with your AC system’s airflow.
Several factors can contribute to weak airflow in your AC:
- Clogged Air Filter: A clogged or dirty air filter can restrict airflow, preventing the proper circulation of cooled air throughout your space. Over time, dust, dirt, and debris can accumulate in the filter, reducing its effectiveness. Regularly cleaning or replacing your air filter can help restore proper airflow.
- Damaged Ductwork: Your AC system relies on a network of ducts to distribute cool air efficiently. If your ductwork is damaged, disconnected, or poorly sealed, it can lead to weak airflow. Inspect your ductwork for signs of leaks, loose connections, or damage, and seal or repair any issues.
- Blocked Vents or Registers: Obstructed vents or registers can impede the flow of air into your space. Make sure that furniture, curtains, or other objects are not blocking the vents or registers, hindering the airflow. Keeping the vents clear will allow air to flow freely and provide better cooling performance.
- Malfunctioning Blower Motor: The blower motor is responsible for pushing the cooled air into your space. If it is not functioning properly, it can lead to weak airflow. A malfunctioning blower motor may require professional repair or replacement to restore proper airflow.
- Improperly Sized AC Unit: If your AC unit is too small for the space it is intended to cool, it may struggle to provide sufficient airflow. An undersized AC unit will have to work harder to cool your space, leading to weak airflow and inadequate cooling. Consulting with an HVAC professional can help determine the appropriate AC unit size for your space.
If you’re experiencing weak airflow from your AC vents, it’s important to address the issue to ensure optimal cooling performance. Performing regular maintenance, like cleaning or replacing air filters, and checking for obstructions in vents, can help improve airflow. However, if the problem persists, it is advisable to contact a professional HVAC technician to assess and resolve the issue.
Odd Noises
If you notice unusual or loud noises coming from your AC unit, it is a clear sign that something is wrong. Ignoring these noises can lead to further damage and potential system failure. Here are some common odd noises that indicate a broken AC:
- Clanking: If you hear clanking or banging noises coming from your AC unit, it could be a sign of loose or broken internal components. The cause of this noise can range from a loose fan blade to a failing compressor. It is crucial to have a professional technician inspect and address the issue to prevent further damage.
- Grinding: Grinding noises usually occur when metal components rub against each other. This can happen if the bearings in your AC’s motor are worn out or if there is debris in the unit. Ignoring this noise can lead to motor failure and costly repairs. It is recommended to turn off your AC and contact a professional for assistance.
- Squealing: A high-pitched squealing noise typically indicates problems with the blower motor or the fan belt. The belt may be loose or worn out, causing it to slip or squeal. If not addressed promptly, it can lead to motor damage. It is best to have a technician inspect and replace the belt if necessary.
- Rattling: Rattling noises can occur due to loose or malfunctioning components within the AC unit. Loose screws, fan blades, or debris inside the unit can all contribute to this noise. If left unaddressed, these issues can lead to more significant damage. Check for loose parts and tighten them if possible, but seek professional help if the noise persists.
- Bubbling or Hissing: If you hear bubbling or hissing noises, it may indicate a refrigerant leak. The escaping refrigerant can create these sounds as it moves through the system. A refrigerant leak not only affects the cooling performance but can also pose health risks. Contact a professional technician to locate and repair the leak.
It’s important not to ignore any unusual noises coming from your AC unit. Strange noises often indicate underlying problems that require professional attention. Regular maintenance and timely repairs can help prevent further damage and extend the lifespan of your AC system.
Read more: How To Tell Tonnage Of AC Unit
Strange Odors
When your AC unit emits strange odors, it can be unpleasant and indicate underlying issues that need to be addressed. Here are some common odors associated with a broken AC:
- Musty or Moldy Smell: If you notice a musty or moldy smell coming from your AC vents, it could indicate the presence of mold or mildew within your system. Moisture, dust, and debris can create the perfect environment for mold growth. This not only affects the air quality but can also lead to health issues. It is crucial to have your AC system inspected and cleaned to eliminate the mold problem.
- Burning or Electrical Smell: A burning or electrical smell can be indicative of a serious problem within your AC unit. It could be due to an overheating motor, faulty wiring, or a burnt-out component. Turn off your AC immediately if you detect this smell and contact a professional technician to assess and repair the issue.
- Chemical or Pungent Odor: A strong chemical or pungent odor coming from your AC unit is a cause for concern. It could be a sign of a leak in the refrigerant lines. Refrigerants contain harmful chemicals that, when released, can pose health hazards and damage the environment. If you notice this smell, turn off your AC and contact a professional immediately for assistance.
- Rotting or Decomposing Smell: A foul odor that resembles rotting or decomposing matter could indicate the presence of a dead animal within your AC ducts or vents. Animals can sometimes find their way into the HVAC system and get trapped. If you suspect this, it’s advisable to contact a professional to safely remove the source of the odor.
- Burning Rubber or Plastic Smell: If you notice a burning smell that resembles burning rubber or plastic, it may indicate overheating or melting of components within your AC unit. This could be due to a failing motor, damaged wiring, or other electrical issues. It’s crucial to turn off your AC and seek professional assistance to prevent further damage or potential fire hazards.
Strange odors coming from your AC unit should never be ignored. They can be indicators of serious problems that require immediate attention. Regular maintenance, including cleaning or replacing air filters and scheduling professional inspections, can help identify and resolve odor-related issues.
Excessive Humidity
One of the functions of an AC unit is to control the humidity levels in your space. If you notice excessive humidity despite your AC running, it could indicate a problem with your AC system. Here are some common reasons for excessive humidity when your AC is on:
- Improper Size or Capacity: If your AC unit is undersized or not powerful enough for the space it is intended to cool, it may struggle to dehumidify effectively. An undersized AC unit will run continuously, unable to remove moisture from the air. Consulting with an HVAC professional to ensure you have the correct AC unit size for your space is essential.
- Faulty Dehumidifier Component: AC units generally have a built-in dehumidifier component that helps regulate humidity levels. If this component is malfunctioning, it can result in excessive humidity. A professional technician can diagnose the issue and repair or replace the faulty component to restore proper dehumidification.
- Refrigerant Leak: A refrigerant leak not only affects cooling performance but also impacts the dehumidification process. Without a sufficient amount of refrigerant, the AC cannot remove humidity effectively. If you suspect a refrigerant leak, contact a professional to inspect and repair it.
- Inadequate Insulation: Poor insulation in your space can cause cool air to escape and warm, humid air to seep in. This can make it harder for your AC unit to dehumidify effectively. Consider insulating your walls, windows, and doors to reduce the transfer of heat and moisture.
- Faulty Thermostat: A malfunctioning thermostat can lead to issues with moisture control. If the thermostat is not accurately measuring the humidity in your space or not communicating with the AC unit properly, it can result in excessive humidity. Consult a professional to evaluate and possibly replace the faulty thermostat.
Excessive humidity can lead to discomfort, health issues, and potential damage to your property. If you notice persistent high humidity levels, it’s essential to address the issue by contacting a professional HVAC technician. They can identify the root cause of the problem and provide the necessary repairs or adjustments to restore optimal humidity control in your space.
Constant Cycling
If your AC unit is constantly cycling on and off without reaching the desired temperature, it is a sign of a problem known as “short cycling.” This issue not only affects the comfort of your space but also puts unnecessary strain on your AC system, potentially leading to increased energy consumption and premature wear and tear.
Several factors can contribute to constant cycling in your AC:
- Dirty Condenser Coils: The condenser coils are responsible for releasing heat from the refrigerant. If these coils are dirty or covered in debris, they cannot dissipate heat effectively, causing your AC unit to cycle more frequently. Regular cleaning and maintenance of the condenser coils can help resolve this issue.
- Clogged Air Filters: Dirty or clogged air filters can restrict airflow, causing the AC to work harder and cycle more frequently in an attempt to reach the desired temperature. Ensure you clean or replace the air filters regularly to maintain proper airflow and prevent short cycling.
- Oversized AC Unit: An AC unit that is oversized for your space can lead to frequent cycling. This occurs because the unit cools the space too quickly and then shuts off. It is important to consult with an HVAC professional to ensure proper sizing of your AC unit based on the square footage and cooling needs of your space.
- Thermostat Issues: Incorrect thermostat settings or a faulty thermostat can cause the AC to cycle too frequently. Ensure that the thermostat is set to the desired temperature, and consider calibrating or replacing it if necessary.
- Refrigerant Leak: A refrigerant leak can disrupt the cooling process and cause your AC unit to cycle frequently. The reduced refrigerant levels make it harder for the AC to cool your space effectively. If you suspect a refrigerant leak, it’s crucial to have it fixed by a professional technician.
Constant cycling is a sign of an underlying issue with your AC unit. It is important to address this issue promptly to avoid unnecessary energy consumption, increased utility bills, and potential damage to your AC system. Regular maintenance, cleaning or replacing air filters, and seeking professional help for proper diagnosis and repairs are essential steps to resolve constant cycling.
How to Identify if Your AC is Broken
It’s important to be able to identify if your AC is broken so that you can take appropriate action to fix the issue. Here are some steps you can take to determine if your AC unit is broken:
- Check Thermostat Settings: Start by checking the thermostat settings to ensure that it is set to the desired temperature and cooling mode. If the thermostat is functioning correctly and set appropriately, but you’re still experiencing issues, there may be a problem with your AC unit.
- Inspect the Air Filter: A dirty or clogged air filter can obstruct airflow and affect the performance of your AC. Check the air filter and clean or replace it if necessary. If the air filter is clean, and you’re still experiencing problems, the issue may lie elsewhere.
- Examine the Outdoor Unit: Take a look at the outdoor unit of your AC system. Make sure it is not blocked by debris, such as leaves, branches, or dirt. An obstructed outdoor unit can hinder proper airflow and cooling performance.
- Listen for Unusual Sounds: Pay attention to any unusual sounds coming from your AC unit, such as grinding, squealing, or banging noises. These noises can indicate mechanical issues that require professional attention.
- Detect Strange Smells: If you notice any strange or unpleasant odors coming from your AC vents, it may indicate mold, electrical problems, or refrigerant leaks. These issues should be addressed promptly by a professional technician.
- Observe Excess Humidity: Monitor the humidity levels in your space. If you notice excessive humidity despite your AC running, it could indicate that your AC system is not effectively dehumidifying the air.
If after following these steps you believe that your AC unit is broken, it is advisable to seek professional help from a licensed HVAC technician. They have the expertise and necessary tools to diagnose the issue accurately and provide appropriate repairs or maintenance.
Remember, regular maintenance and timely repairs are essential to keep your AC system in good working condition. It is recommended to schedule annual maintenance checks to prevent potential problems and ensure optimal performance and energy efficiency.
Read more: How To Tell If Your AC Is Frozen
Check Thermostat Settings
One of the first things you should do when trying to identify if your AC is broken is to check the thermostat settings. The thermostat is the control center for your AC system, allowing you to set the desired temperature and cooling mode. Here’s what you can do to ensure the thermostat is properly set:
- Set the Temperature: Make sure the temperature setting on the thermostat is set to a lower temperature than the current room temperature. If the temperature setting is higher than the room temperature, your AC won’t kick in, and you won’t feel any cool air.
- Switch to the Cooling Mode: Ensure that the thermostat is set to the cooling mode rather than the heating or fan-only mode. Sometimes, the thermostat can get accidentally switched to the wrong mode, preventing your AC from providing cool air.
- Check the Fan Setting: Confirm that the fan setting is appropriate for your cooling needs. Most thermostats have options like “auto” and “on.” In the “auto” setting, the fan only runs when the AC is actively cooling. In the “on” setting, the fan runs continuously even when the AC is not actively cooling. If your AC is not producing cool air, make sure the fan setting is on “auto.”
- Replace Batteries (if applicable): If your thermostat is battery-operated, check if the batteries need to be replaced. Weak or dead batteries can cause the thermostat to malfunction and prevent your AC from working properly.
- Calibrate the Thermostat: It’s possible for thermostats to become misaligned and display inaccurate temperature readings. To calibrate your thermostat, compare the reading on your thermostat to a separate thermometer placed nearby. If there’s a significant discrepancy, adjust the thermostat accordingly or contact a professional to calibrate it for you.
After checking and adjusting the thermostat settings, give your AC system some time to kick in and cool the air. If you still don’t feel any cool air or notice any improvement, there may be an issue with your AC unit that requires further investigation and professional assistance.
Remember, proper thermostat settings are essential for your AC system to function effectively. Regularly check and ensure that the thermostat is set correctly to maintain a comfortable indoor temperature.
Inspect the Air Filter
Another crucial step in identifying if your AC is broken is to inspect the air filter. The air filter plays a vital role in maintaining the air quality and proper functioning of your AC system. Here’s what you can do to assess the condition of the air filter:
- Locate the Air Filter: The air filter is typically located behind the return air grille or inside the air handler unit of your AC system. Refer to the AC system’s manual or consult a professional if you’re unsure where to find it.
- Turn Off the AC: Before inspecting the air filter, ensure that the AC unit is turned off. This will protect you from any moving parts and prevent the filter from being sucked into the system during inspection.
- Remove the Air Filter: If your AC system has a reusable filter, carefully remove it from its slot. If the filter is disposable, detach it from the air handler unit or grille. Be cautious not to damage the filter during removal.
- Assess the Condition: Examine the air filter for any visible dirt, dust, or debris buildup. A dirty or clogged filter can obstruct the airflow and affect the efficiency of your AC system. If the filter appears dirty or discolored, it needs to be cleaned or replaced.
- Clean or Replace the Air Filter: If you have a reusable filter, follow the manufacturer’s instructions for cleaning. This typically involves rinsing the filter with water and allowing it to dry completely before reinstalling. If you have a disposable filter, discard it and replace it with a new one of the appropriate size and type.
- Regular Maintenance: To ensure proper airflow and efficient operation, it’s recommended to inspect and clean or replace the air filter every one to three months, depending on the filter type, household conditions, and level of usage.
An obstructed or dirty air filter can restrict the airflow and affect the cooling performance of your AC. By inspecting and maintaining the air filter regularly, you can promote better air quality and optimize the efficiency of your AC system.
If the air filter appears to be clean, and you’re still experiencing issues with your AC, there may be other underlying problems that require professional attention. Regular filter maintenance combined with professional HVAC inspections and maintenance can ensure the optimal performance of your AC unit.
Check for signs such as weak airflow, strange noises, or warm air coming from the vents. Also, look for leaks or unusual odors. If you notice any of these signs, it’s best to have a professional inspect your AC system.
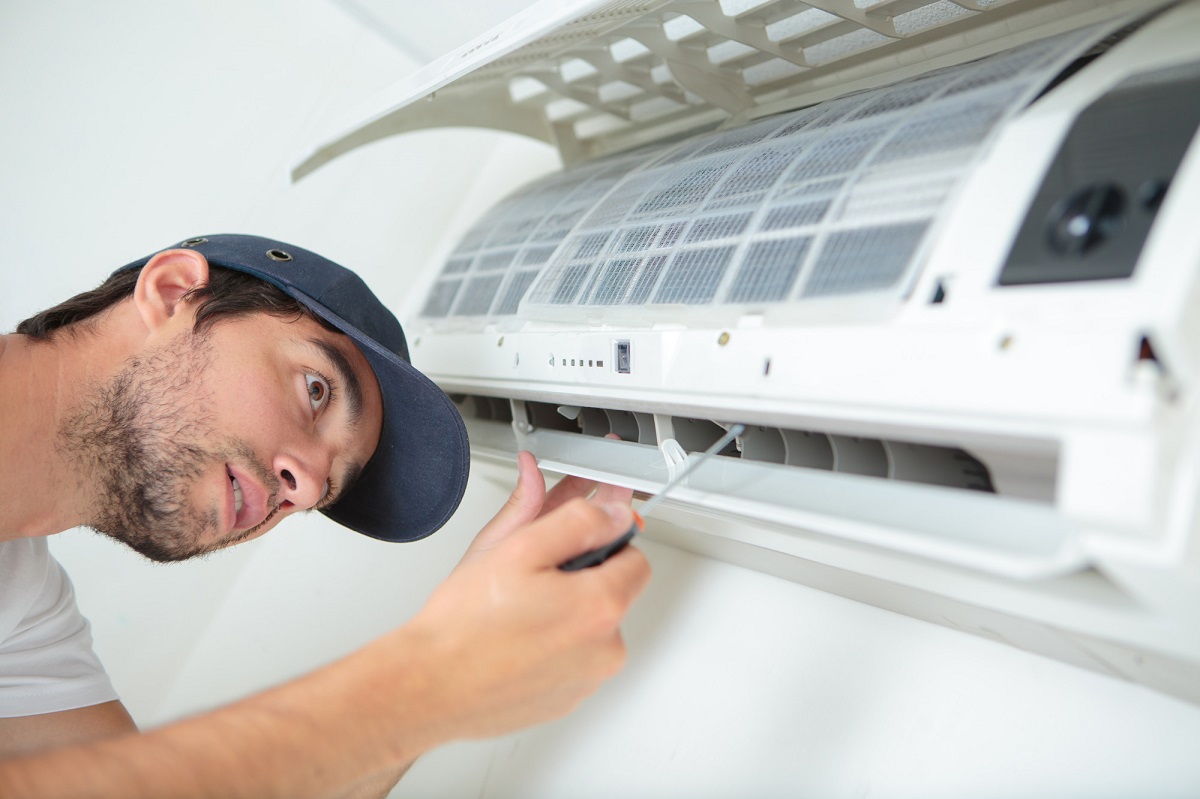
Examine the Outdoor Unit
When trying to identify if your AC is broken, it’s essential to examine the outdoor unit of your AC system. The outdoor unit, also known as the condenser unit, plays a crucial role in the cooling process. Here’s what you can do to assess the condition of the outdoor unit:
- Turn Off the AC: Before examining the outdoor unit, ensure that the AC is turned off. This will protect you from any moving parts and electrical hazards.
- Remove Debris: Clear away any debris, leaves, dirt, or obstructions that may have accumulated around the outdoor unit. Debris obstructing the unit can hinder proper airflow and cooling performance.
- Inspect the Fins: Carefully check the fins on the outdoor unit for any damage or bending. The fins are located on the outside of the unit and play a vital role in heat transfer. If the fins are bent, they can restrict airflow and affect the system’s efficiency. Use a fin comb or seek professional assistance to straighten any bent fins.
- Clean the Fins: If the fins are dirty, use a soft brush or vacuum cleaner with a brush attachment to remove any dust, dirt, or debris. Be gentle to avoid damaging the fins. Cleaning the fins helps maintain proper airflow and heat exchange.
- Inspect the Fan: Check the fan blades for any signs of damage, such as cracks or chips. Damaged fan blades can affect the performance of the outdoor unit. If you notice any damage, contact a professional technician to assess and repair the fan.
- Look for Refrigerant Leaks: Inspect the outdoor unit for any signs of refrigerant leakage, such as oil stains or wet spots. A refrigerant leak can hinder the cooling process and cause your AC unit to malfunction. If you suspect a refrigerant leak, contact a professional technician for repair.
Regularly examining and maintaining the outdoor unit of your AC system helps optimize its performance and extends its lifespan. However, if you notice any significant damage, refrigerant leaks, or issues beyond your expertise, it’s crucial to consult with a professional HVAC technician for a thorough inspection and repairs.
A well-maintained outdoor unit contributes to the overall efficiency and effectiveness of your AC system, ensuring that it operates smoothly and provides the cooling comfort you need.
Listen for Unusual Sounds
When trying to identify if your AC is broken, it’s important to listen for any unusual sounds coming from your AC unit. Unusual noises can be indicative of underlying issues that require attention. Here are some sounds to listen for and what they could potentially mean:
- Grinding: Grinding noises often indicate a problem with the motor bearings or other internal components. This could be due to lack of lubrication or general wear and tear. Grinding noises should not be ignored as they can cause further damage to the AC unit and may require professional repair.
- Squealing: High-pitched squealing sounds can be a sign of a slipping or worn-out fan belt. The fan belt connects the motor to the fan and helps it operate efficiently. If the belt is loose or damaged, it can create a squealing noise. This should be addressed promptly to prevent further complications.
- Banging or Clanking: Loud banging or clanking noises may indicate loose or broken components within the AC unit. This could be a result of a loose fan blade, motor mount, or damaged compressor. If these noises persist, it’s best to turn off the AC unit and contact a professional for inspection and repair.
- Hissing or Bubbling: Hissing or bubbling sounds can be a sign of a refrigerant leak. If you hear these sounds, it means that the refrigerant is escaping from the system. Refrigerant leaks not only affect cooling performance but can also be harmful to the environment. Contact a professional technician immediately to address the issue.
- Rattling: Rattling noises are often associated with loose or vibrating parts within the AC unit. It could be a loose panel, fan blades, or debris trapped inside the unit. While not as severe as other sounds, it’s still important to address the issue to prevent further damage or potential blockage.
If you hear any of these unusual sounds coming from your AC unit, it’s important not to ignore them. Attempting to diagnose and repair the issue yourself may lead to further damage or personal injury. Instead, it is recommended to contact a professional HVAC technician who can accurately diagnose the problem and provide the necessary repairs or maintenance.
Identifying and addressing unusual sounds early can help prevent extensive damage to your AC unit and ensure optimal performance and longevity.
Read more: How To Fix A Broken Thermostat
Detect Strange Smells
When trying to identify if your AC is broken, it’s essential to pay attention to any strange smells coming from your AC unit. Unusual odors can indicate underlying issues that require prompt attention. Here are some strange smells to be aware of and what they might signify:
- Musty or Moldy Smell: A musty or moldy smell coming from your AC vents may indicate the presence of mold or mildew within the system. This can often occur due to excess moisture or a clogged condensate drain. Mold can negatively affect indoor air quality and potentially cause health issues, so it’s crucial to take action promptly.
- Burning or Electrical Smell: A burning or electrical smell can be a sign of overheating components, electrical issues, or even a potential fire hazard. It’s important to turn off your AC unit immediately and contact a professional technician to assess and address the problem.
- Chemical or Pungent Odor: A strong chemical or pungent smell coming from your AC could indicate a refrigerant leak. Refrigerant contains harmful chemicals, and its presence in the air can be hazardous to your health. If you smell this odor, it’s crucial to turn off your AC unit and contact a professional technician immediately.
- Rotting or Decomposing Smell: A foul odor resembling rot or decomposition may indicate the presence of a dead animal within your AC ducts or vents. Animals can sometimes find their way into the system and get trapped. If you suspect this, it’s advisable to contact a professional HVAC technician to safely remove the source of the odor.
- Burning Rubber or Plastic Smell: A burning rubber or plastic smell can suggest melting or overheating components within the AC unit. It may indicate a problem with the wiring, motor, or other electrical parts. It’s important to turn off the AC and seek professional assistance right away to prevent further damage or potential fire hazards.
If you detect any of these strange smells coming from your AC unit, it’s important not to ignore them. Ignoring the smells can lead to further damage to your AC system and potentially compromise your health and safety. Contact a professional HVAC technician to diagnose and address the issue promptly.
Regular maintenance and timely repairs are key to preventing strange odors and ensuring the proper functioning of your AC unit.
Observe Excess Humidity
When assessing if your AC is broken, it’s important to observe the level of humidity in your space. Your AC system plays a crucial role in controlling indoor humidity levels. If you notice excessive humidity despite your AC running, it could indicate a problem with your AC unit. Here are some key points to consider:
- Effects of Excess Humidity: High humidity levels can lead to discomfort, promote the growth of mold and mildew, and adversely affect the overall air quality in your space. It may also make it difficult for your AC system to cool the air effectively.
- Probable Causes: There are several potential causes of excessive humidity in your space despite the functioning of your AC:
- Oversized AC Unit: If your AC unit is too large for your space, it may cool the air quickly without running long enough to effectively dehumidify. This can result in excess humidity. Consulting with an HVAC professional can help determine if your AC unit is properly sized.
- Faulty Dehumidifier: AC units often have a built-in dehumidifying component. If this component is not functioning correctly, it can lead to excessive humidity. A faulty dehumidifier may need to be repaired or replaced by a professional technician.
- Inadequate Insulation: Poor insulation in your space can allow warm, humid air from outside to infiltrate your space, making it harder for your AC to maintain lower humidity levels. Proper insulation can help prevent this issue.
- Thermostat Issues: If your thermostat is not calibrated properly or is faulty, it may not be able to control the humidity levels effectively. Consider having a professional HVAC technician assess and resolve any thermostat issues.
- Monitor Indoor Humidity Levels: Use a hygrometer or a smart thermostat with humidity detection capabilities to monitor the indoor humidity levels in your space. Ideally, the relative humidity should be kept between 30% and 50% for optimal comfort and air quality.
- Seek Professional Assistance: If you consistently observe excessive humidity despite your AC system running, it’s recommended to seek professional assistance. An HVAC technician can thoroughly assess your AC unit, identify any underlying issues, and provide the necessary repairs or adjustments to ensure proper dehumidification.
It’s important to maintain the appropriate humidity levels in your space for comfort and indoor air quality. If you suspect that your AC system is not effectively dehumidifying, addressing the issue promptly can help improve your overall indoor environment.
DIY Troubleshooting Tips
If you suspect that your AC is broken, there are some troubleshooting steps you can try before seeking professional help. Here are some DIY troubleshooting tips to get started:
- Clean or Replace Air Filters: Clogged or dirty air filters can restrict airflow and impact the cooling performance of your AC. Check your filters and clean or replace them if necessary. This simple maintenance task can often resolve airflow issues.
- Clear Debris from the Outdoor Unit: Ensure that the outdoor unit is free from debris such as leaves, branches, and dirt. Obstructions can impede airflow, affecting the cooling efficiency. Gently clean the outdoor unit or clear any debris that may be surrounding it.
- Check for Leaks: Inspect the refrigerant lines for any signs of leakage, such as oil stains or wet spots. If you suspect a refrigerant leak, it is crucial to contact a professional technician immediately, as handling refrigerant requires specialized knowledge and equipment.
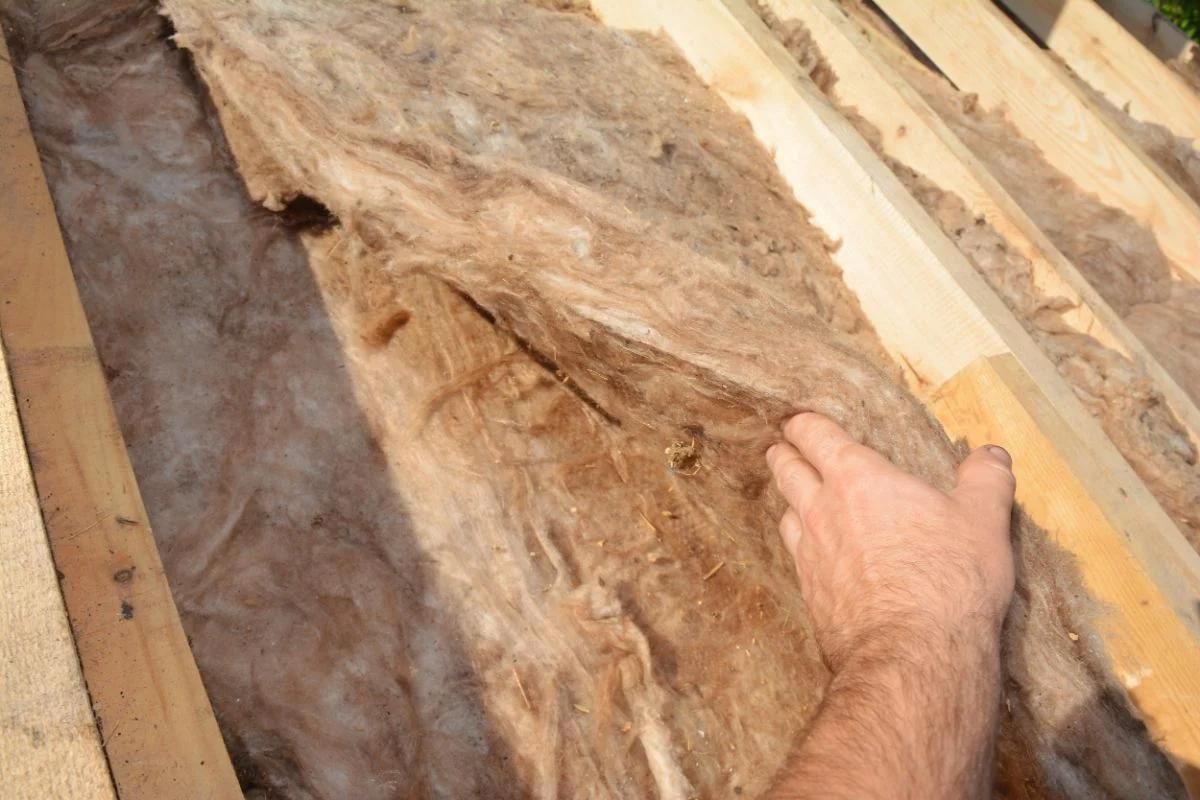
- Verify Proper Air Duct Insulation: Check the insulation on your air ducts to ensure it’s intact and in good condition. Damaged or poorly insulated ducts can lead to air leaks and reduced cooling performance. Seal any gaps or replace damaged insulation as necessary.
These DIY troubleshooting tips can help resolve some common issues that may cause your AC to malfunction. However, please exercise caution while performing these tasks, and if you are unsure or uncomfortable, it is best to seek professional assistance. DIY troubleshooting is suitable for minor issues, but more complex problems require the expertise of a licensed HVAC technician.
If the troubleshooting steps do not resolve the issue or if you encounter other problems, it is recommended to contact a professional HVAC technician. They have the knowledge, experience, and tools to diagnose and address more intricate AC problems, ensuring safe and effective repairs.
Clean or Replace Air Filters
One of the simplest and most effective DIY troubleshooting tips for a malfunctioning AC is to clean or replace the air filters. Air filters play a crucial role in maintaining good indoor air quality and the overall performance of your AC system. Here’s how you can clean or replace your air filters:
- Locate the Air Filters: Depending on your AC system, the air filters are typically located behind the return air grille or within the air handler unit. Check the user manual or consult a professional if you’re unsure of their exact location.
- Turn Off the AC: Before attempting to clean or replace the air filters, make sure to turn off the AC system. This avoids any potential hazards and keeps the system from drawing in debris during the process.
- Inspect the Air Filters: Examine the air filters for any visible dirt, dust, or debris accumulation. Over time, these particles can clog the filters and restrict airflow, diminishing the cooling efficiency of your AC unit.
- Cleaning the Air Filters: If you have reusable filters, gently remove them from their slots and rinse them with water. Use a mild soap or a mixture of water and vinegar to remove stubborn dirt. Allow the filters to air dry completely before reinstalling them.
- Replacing the Air Filters: If you have disposable filters, discard the old filters and replace them with new ones of the appropriate size and type. Make sure to insert the filters correctly according to the arrows or guidelines marked on them.
- Maintenance and Frequency: It’s important to establish a regular maintenance routine for your air filters. Cleaning or replacing them every one to three months is a good general guideline, although the frequency may vary based on factors such as household conditions, pets, and filter type.
Cleaning or replacing the air filters helps ensure proper airflow, improves air quality, and prevents strain on your AC system. It allows the unit to operate more efficiently, providing better cooling performance and potentially reducing energy consumption.
Remember to consult your AC system’s user manual for specific instructions regarding the air filters. If you’re unsure or uncomfortable performing the task yourself, don’t hesitate to reach out to a professional HVAC technician for assistance. They can guide you through the process and provide additional maintenance recommendations to keep your AC system running smoothly.
Read more: How To Tell If Your HVAC Is Gas Or Electric
Clear Debris from Outdoor Unit
Another important DIY troubleshooting step to identify if your AC is broken is to clear any debris from the outdoor unit. The outdoor unit, also known as the condenser unit, plays a crucial role in cooling your home by dissipating heat. Here’s how you can clear debris from the outdoor unit:
- Shut Off the Power: Before working on the outdoor unit, turn off the power to the AC system. This ensures your safety and prevents any accidental activation of the unit while performing the maintenance.
- Clear Surrounding Area: Remove any debris, such as leaves, branches, dirt, or grass, that may have gathered around the outdoor unit. Use a rake, broom, or gloved hands to carefully clear the area. Make sure there is at least two feet of clearance around the unit to ensure proper airflow.
- Clean the Fins: The condenser unit has fins to facilitate heat transfer. Inspect the fins for any dirt, dust, or debris buildup. Gently clean them using a soft brush, vacuum cleaner with a brush attachment, or a specialized fin cleaning tool. Avoid bending the fins, as that can restrict airflow. If the fins are significantly bent, consider contacting a professional to restore their shape.
- Keep the Unit Elevated: Ensure that the outdoor unit is elevated on a level surface. This helps prevent water accumulation and potential damage to the unit. If necessary, use a level to check and adjust the unit’s position.
- Regular Maintenance: Incorporate regular outdoor unit maintenance into your routine. Clear debris as needed throughout the cooling season, especially after storms or heavy winds. This helps maintain proper airflow and cooling efficiency.
Clearing debris from the outdoor unit is an important maintenance task that can improve the overall performance and longevity of your AC system. An unobstructed outdoor unit allows for better airflow and heat transfer, ensuring efficient cooling of your home.
If you’re unsure about how to safely clear debris or if there are any other issues with your AC system, it’s advisable to contact a professional HVAC technician. They can provide guidance, perform proper maintenance, and address any potential problems with your outdoor unit to keep your AC running smoothly.
Check for Leaks
Checking for leaks is an important step in troubleshooting your AC unit. Leaks can affect the performance and efficiency of your system, so identifying and addressing them promptly is crucial. Here’s how you can check for leaks in your AC system:
- Visual Inspection: Start by visually inspecting the various components of your AC system. Look for any signs of leakage, such as oil stains, wet spots, or water dripping from the unit. Pay close attention to the refrigerant lines, connections, and joints.
- Refrigerant Odor: If you detect a strong, chemical smell near your AC unit, it could indicate a refrigerant leak. Refrigerants contain harmful chemicals, and exposure to them can be dangerous for your health. If you notice this odor, turn off your AC unit and reach out to a professional technician for assistance.
- Listen for Hissing Sounds: Sometimes, refrigerant leaks can produce a hissing sound as the refrigerant escapes. If you hear any unusual hissing noises around the AC unit, it may indicate a leak in the refrigerant lines. In such cases, it’s important to turn off the AC and seek professional help immediately.
- Perform a Bubble Test: Mix a solution of soapy water and water in a spray bottle. Spray the mixture onto the refrigerant lines, connections, and joints. If you see bubbles forming, it indicates a leak. Take care not to spray any electrical components.
- Pressure Test: Pressure testing is another method to identify refrigerant leaks. This test requires specialized equipment and knowledge, so it’s recommended to contact a professional HVAC technician for accurate testing and diagnosis.
If you suspect a refrigerant leak or identify any other kind of leak in your AC system, it’s important to address it right away. Refrigerant leaks can not only affect cooling performance but also contribute to environmental harm. Contact a professional HVAC technician who can safely and effectively locate and repair the leaks in your AC system.
Regular maintenance and inspections by HVAC professionals help prevent leaks and ensure the proper functioning of your AC unit. They can identify potential issues before they become major problems, ultimately prolonging the lifespan of your AC system and maintaining its efficiency.
Verify Proper Air Duct Insulation
Checking and verifying the proper insulation of your air ducts is an important step in troubleshooting your AC system. Insulated air ducts help maintain the efficiency of your cooling system and ensure optimal performance. Here’s what you can do to verify the insulation of your air ducts:
- Locate Air Ducts: Identify the location of the air ducts in your home. They are usually found in crawl spaces, attics, or basements.
- Visual Inspection: Visually inspect the air ducts for any signs of damage or missing insulation. Look for areas where the insulation appears worn, torn, or improperly installed.
- Check for Air Leaks: Run your hand along the ductwork to feel for any noticeable air leaks. If you notice cool air escaping or warm air entering through gaps or cracks, it indicates inadequate insulation or damaged ducts.
- Seal Gaps and Cracks: Use foil tape or mastic sealant to seal any gaps or cracks in the air ducts. Properly sealing the ductwork helps prevent air leaks and ensures that cooled air reaches its intended destination.
- Insulate Uninsulated Ducts: If you find areas of your ductwork that are not properly insulated, consider adding insulation. Use insulation materials specifically designed for air ducts, such as fiberglass duct board or reflective insulation.
- Consider Professional Inspection: If you are unsure about the condition or insulation of your air ducts, it’s advisable to seek professional assistance. A licensed HVAC technician can conduct a thorough inspection, identify areas that need insulation improvement, and provide recommendations for proper insulation and repairs.
Proper insulation of air ducts helps minimize energy losses, improve cooling efficiency, and distribute conditioned air more effectively throughout your home. Well-insulated ducts keep the temperature consistent and reduce strain on your AC system.
Regular maintenance, including checking and verifying proper air duct insulation, is essential for the overall functionality of your AC system. By addressing any insulation issues, you can enhance the performance of your AC, lower energy consumption, and enjoy more comfortable indoor temperatures.
When to Seek Professional Help
While DIY troubleshooting can be helpful in identifying and resolving minor issues with your AC system, there are times when it’s best to seek professional help. Here are some situations where it’s advisable to contact a licensed HVAC technician:
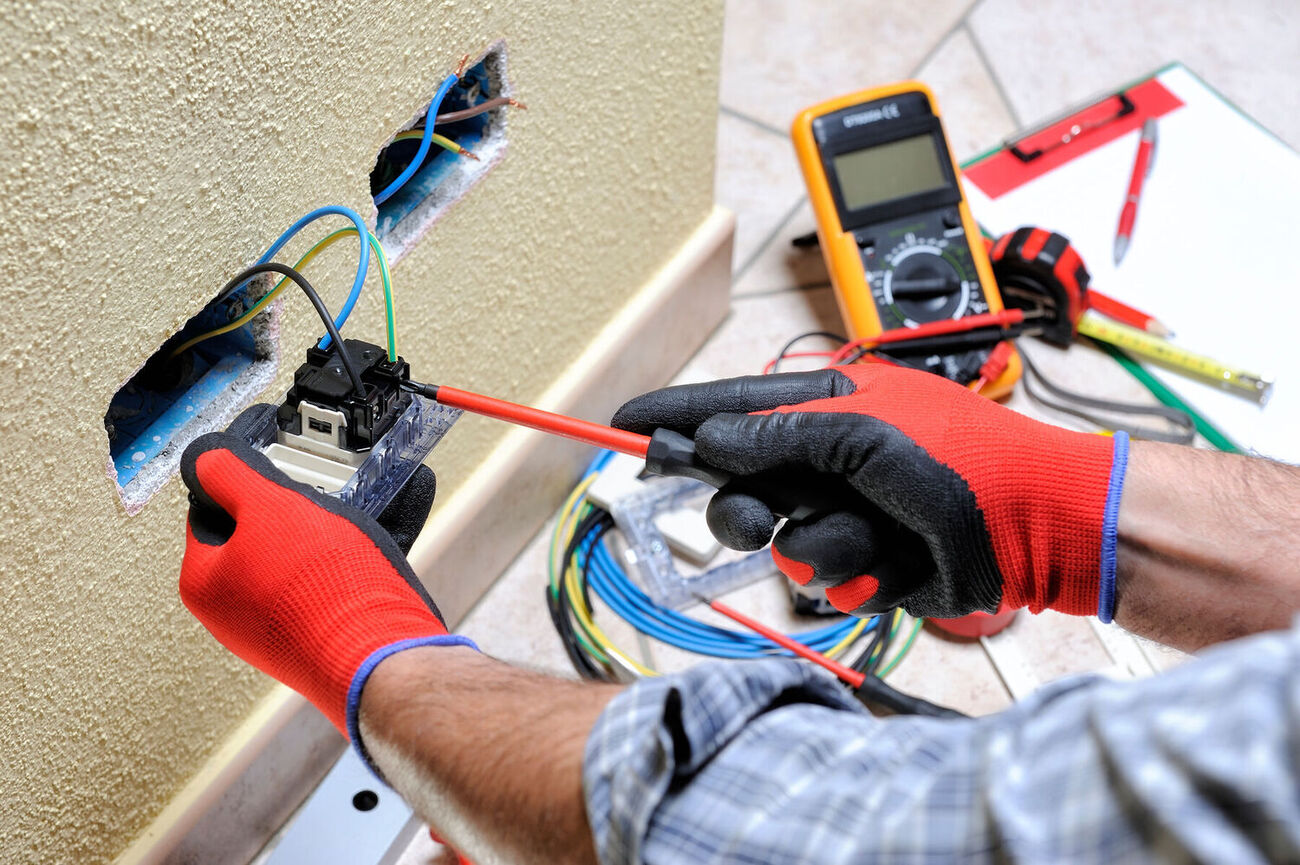
- Major Mechanical Issues: If you encounter major mechanical issues with your AC, such as a faulty compressor, motor failure, or refrigerant leaks, it’s essential to leave the repairs to professionals. These issues require specialized knowledge and equipment to diagnose and resolve properly.
- Electrical Problems: Electrical issues can be dangerous and potentially lead to serious damage or fire hazards. If you experience electrical problems with your AC, such as repeated tripping of circuit breakers or burnt-out wires, it’s crucial to call a professional technician who is trained to handle electrical components safely.
- Refrigerant Handling: Handling refrigerant requires expertise and EPA certification. If you suspect a refrigerant leak or need to recharge your AC system, it’s important to have a licensed technician handle the refrigerant, as it poses environmental and health risks.
- Complex Repairs: If you’re unsure about the complexity of the repairs needed, it’s best to consult a professional. They can accurately assess the problem, provide appropriate solutions, and conduct the repairs with precision and safety.
- Manufacturer’s Warranty: If your AC system is still under warranty, attempting repairs yourself or hiring an unauthorized technician may void the warranty. It’s advisable to contact the manufacturer or a certified HVAC professional who can conduct the repairs without compromising the warranty coverage.
- Regular Maintenance: Even if you don’t currently face any noticeable issues, it’s still recommended to schedule regular maintenance for your AC system. Trained technicians can perform essential tasks such as cleaning coils, checking refrigerant levels, and conducting overall system inspections, ensuring your AC operates efficiently and reducing the risk of major breakdowns.
Professional technicians have the expertise, experience, and tools necessary to handle a wide range of AC issues. They can accurately diagnose problems, provide suitable solutions, and perform repairs or maintenance to restore your AC system’s optimal performance.
Remember, the safety of yourself and your home is paramount. If you encounter any complex or potentially hazardous situations, it’s best to err on the side of caution and contact a qualified HVAC technician for assistance.
Read more: How To Open A Broken Door Lock
Conclusion
Identifying if your AC is broken and taking the necessary steps to address the issue is crucial for maintaining a comfortable and efficient home. By recognizing the signs of a broken AC, such as no cooling, weak airflow, odd noises, strange odors, excessive humidity, and constant cycling, you can begin troubleshooting to determine the underlying problem.
Through DIY troubleshooting, you can try steps like checking thermostat settings, inspecting air filters, examining the outdoor unit, listening for unusual sounds, detecting strange smells, and verifying proper air duct insulation. These measures can often resolve minor issues and improve the performance of your AC system.
However, it’s also important to know when it’s time to seek professional help. Major mechanical issues, electrical problems, refrigerant handling, complex repairs, warranty considerations, and regular maintenance should all prompt you to contact a licensed HVAC technician. They have the expertise and equipment necessary to diagnose and resolve AC issues accurately and safely.
In conclusion, a well-maintained AC system plays a vital role in keeping your space cool and comfortable. Regular maintenance, timely repairs, and professional assistance when required are key to ensuring optimal performance, energy efficiency, and longevity of your AC unit.
Remember, the information provided in this article serves as a general guide. It’s always best to consult the manufacturer’s instructions, user manuals, and professional technicians for specific troubleshooting steps and recommendations tailored to your AC system.
Frequently Asked Questions about How To Tell If AC Is Broken
Was this page helpful?
At Storables.com, we guarantee accurate and reliable information. Our content, validated by Expert Board Contributors, is crafted following stringent Editorial Policies. We're committed to providing you with well-researched, expert-backed insights for all your informational needs.


0 thoughts on “How To Tell If AC Is Broken”