Articles
How To Fix A Leaky Toilet Flapper
Modified: October 20, 2024
Learn effective methods and techniques for repairing a leaky toilet flapper with our informative articles on fixing common plumbing issues.
(Many of the links in this article redirect to a specific reviewed product. Your purchase of these products through affiliate links helps to generate commission for Storables.com, at no extra cost. Learn more)
Introduction
A leaky toilet flapper can be a frustrating and wasteful problem to deal with. Not only can it lead to a constantly running toilet, but it can also result in wasted water and increased water bills. Fortunately, fixing a leaky toilet flapper is a relatively simple task that you can easily do on your own with the right tools and instructions.
Before we dive into the steps to fix a leaky toilet flapper, let’s first understand what exactly a toilet flapper is and why it can develop leaks.
A toilet flapper is a rubber or plastic valve that is located at the bottom of the toilet tank. Its main function is to regulate the flow of water from the tank into the toilet bowl during a flush. When you push the flush handle, it lifts the flapper, allowing water to rush into the bowl and create the flush.
Over time, toilet flappers can develop wear and tear, leading to leaks. The most common cause of a leaky toilet flapper is a worn-out or warped flapper. This can happen due to age, exposure to cleaning chemicals, or mineral deposits in the water supply. A leaky flapper can result in water continuously seeping into the toilet bowl, causing the tank to refill constantly.
Now that we understand what a toilet flapper is and why it can develop leaks, let’s move on to the signs that indicate you have a leaky flapper and the tools and materials you will need to fix it.
Key Takeaways:
- Fixing a leaky toilet flapper is a simple DIY task that can save water and reduce water bills. Identifying signs of a leaky flapper and using the right tools and materials are essential for a successful repair.
- Proper maintenance and periodic replacement of the toilet flapper can prevent leaks and ensure efficient flushing. Following the step-by-step process, including testing for leaks, is crucial for a successful repair.
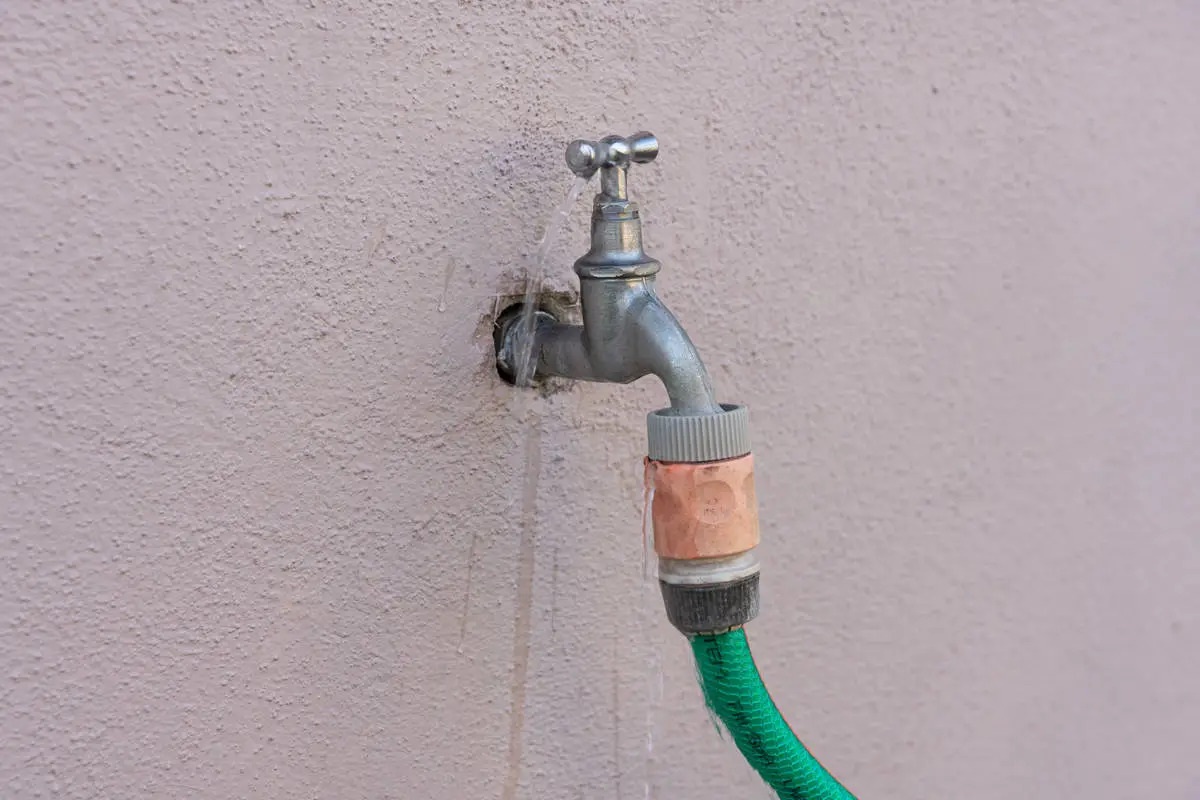
Read more: How To Fix A Leaky Faucet
What is a toilet flapper?
A toilet flapper is a crucial component of the toilet’s flush mechanism. It is a valve that is typically made of rubber or plastic and is located at the bottom of the toilet tank. The flapper is designed to create a seal against the flush valve opening, preventing water from flowing into the toilet bowl until the flush is initiated.
When you press the flush handle on the toilet, a chain or rod connected to the handle lifts the toilet flapper, allowing water to flow from the tank into the bowl. This rush of water creates the flushing action, effectively emptying the bowl. Once the flush is complete, the flapper drops back down, forming a seal and stopping any further water flow.
There are different types of toilet flappers, including the traditional flapper, the adjustable flapper, and the flapperless flush valve. The traditional flapper is the most common type and is a hinged rubber or plastic valve that swings open and closed. The adjustable flapper allows for customization of the water volume and duration of the flush. The flapperless flush valve uses air pressure to create the flushing action.
As mentioned earlier, the toilet flapper can develop wear and tear over time, leading to leaks and other issues. When the flapper becomes damaged or worn out, it may not form a proper seal, resulting in water continuously leaking into the toilet bowl. This constant leak can waste a significant amount of water and cause the toilet to run constantly, leading to higher water bills and potential water damage.
Regular maintenance and periodic replacement of the toilet flapper can help prevent leaks and ensure the proper functioning of your toilet. Identifying the signs of a leaky flapper is crucial in determining when it needs to be repaired or replaced. In the following section, we will discuss some common signs that indicate a leaky toilet flapper, as well as the tools and materials you will need to fix it.
Signs of a leaky toilet flapper
Detecting a leaky toilet flapper may not always be apparent, but there are some telltale signs that can indicate a problem. If you notice any of the following signs, it is likely that your toilet flapper is leaking and needs to be fixed:
- Constant running water: One of the most obvious signs of a leaky flapper is if you constantly hear the sound of running water in your toilet tank. If the flapper is not sealing properly, water will continuously flow from the tank into the bowl, causing the water level in the tank to drop and triggering the tank to refill.
- Visible water movement: Another indicator of a leaky flapper is if you see water moving in the toilet bowl even when you haven’t recently flushed. This movement indicates that water is entering the bowl from the tank due to a faulty flapper seal.
- Water stains or damage: A leaky flapper can also result in water stains or damage around the toilet bowl or on the floor near the base of the toilet. If you notice any discoloration, warping, or water damage, it is likely that a leaky flapper is the cause.
- Inefficient flushing: If you find that your toilet is not flushing efficiently or the bowl doesn’t empty completely, it could be due to a flapper that isn’t opening fully. This can happen if the flapper is partially stuck or obstructed, which prevents proper water flow during the flush.
- Elevated water bills: A significant increase in your water bills without any other identifiable reason can be an indication that your toilet flapper is leaking. The constant flow of water from a leaky flapper can waste a significant amount of water, resulting in higher water usage and bills.
If you notice any of these signs, it is important to take action to fix the leaky toilet flapper as soon as possible. Not only will this help conserve water, but it will also prevent further damage and reduce your water costs. In the next section, we will discuss the tools and materials you will need to fix a leaky toilet flapper.
Tools and Materials Needed
When it comes to fixing a leaky toilet flapper, you’ll need a few tools and materials to get the job done efficiently. Here’s a list of what you’ll need:
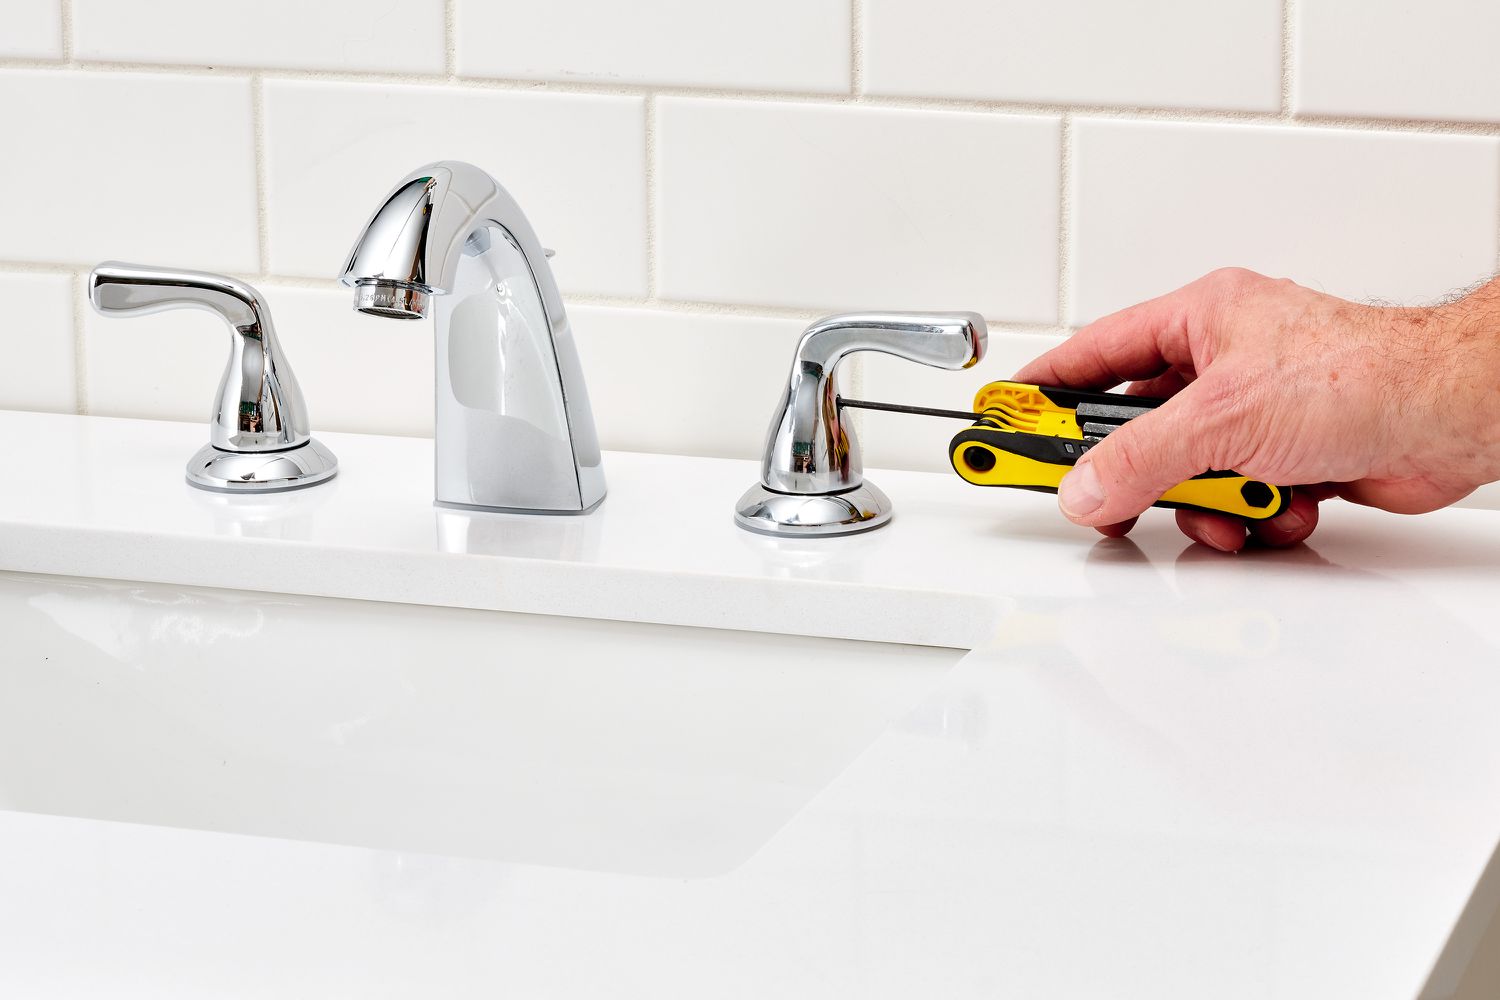
- Adjustable wrench: An adjustable wrench will come in handy for loosening and tightening various nuts and bolts during the flapper replacement process.
- Sponge or towel: Have a sponge or towel available to soak up any excess water that may spill when you remove the tank lid or detach the flapper.
- Bucket: It’s a good idea to have a bucket on hand to catch any water that may still be in the tank when you disconnect the flapper.
- Toilet flapper: You will need to purchase a new toilet flapper that is compatible with your toilet model. Make sure to bring the old flapper or note down the model number and specific details to ensure a proper replacement.
- Replacement flapper chain or lift wire: In some cases, the chain or lift wire connected to the flush handle and the flapper may need to be replaced. Check the condition of these components and have a replacement ready if necessary.
- Cleaning solution: Depending on the condition of your toilet tank and flapper seat, you may need a mild cleaning solution to remove any mineral deposits or debris.
- Soft brush or scrub pad: A soft brush or scrub pad can be useful for cleaning the flapper seat and other parts of the toilet tank.
- Teflon tape: Teflon tape can help create a watertight seal when reattaching the water supply line to the fill valve.
- Gloves: It’s a good idea to wear gloves to protect your hands during the maintenance process. This is especially important if you will be working with any cleaning solutions or handling potentially dirty surfaces.
Having these tools and materials on hand will ensure that you are adequately prepared to fix the leaky toilet flapper. Once you have everything ready, you can proceed with the step-by-step process to replace the flapper, which we will discuss in the following sections.
Step 1: Turn off the water supply
Before you begin any work on your toilet, it’s essential to turn off the water supply to avoid any potential flooding or water damage. Here’s how you can do it:
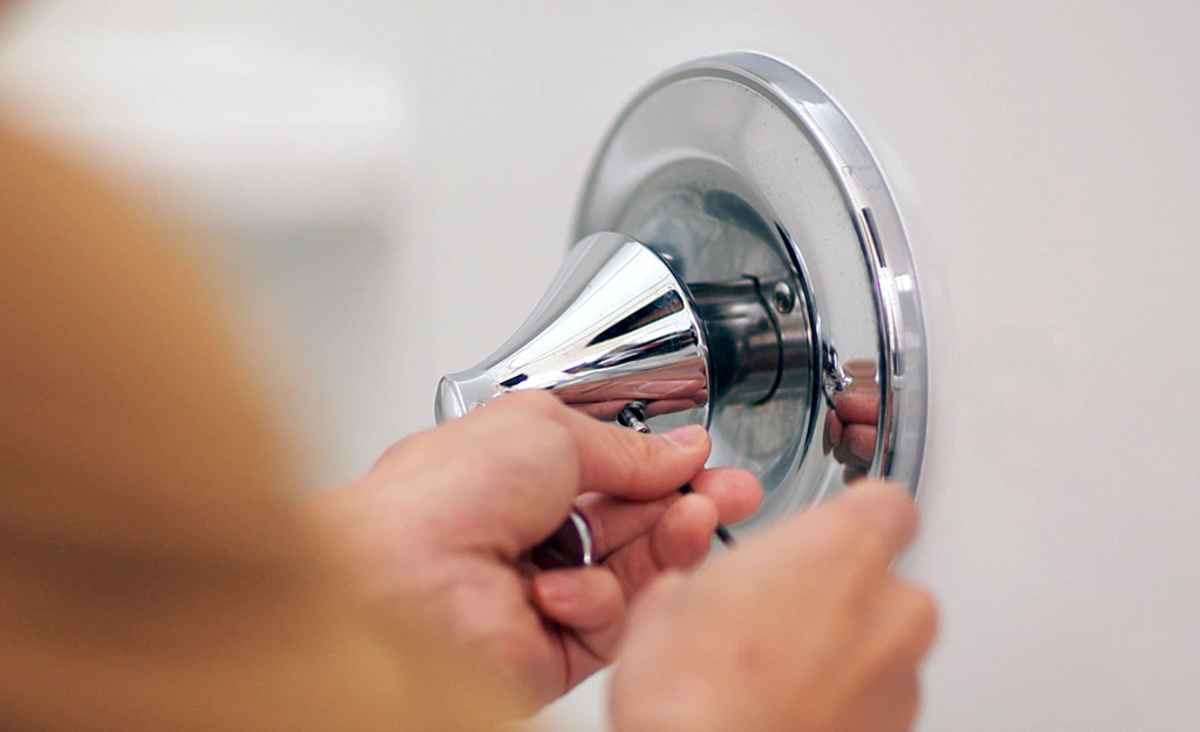
- Locate the shut-off valve: Look for the shut-off valve, which is usually located on the wall behind your toilet. It is a small knob or lever attached to a water supply pipe.
- Turn off the water supply: Once you’ve located the shut-off valve, turn it clockwise (to the right) to shut off the water supply. Make sure to turn it firmly but not forcefully.
- Flush the toilet: After shutting off the water supply, flush the toilet once to drain out any remaining water in the tank and bowl. This will make it easier to work on the flapper without water spilling out.
- Check for water flow: Once you’ve flushed the toilet, check the tank and bowl to ensure that no water continues to flow. If you still see water flowing, double-check that you’ve closed the shut-off valve completely.
By turning off the water supply, you prevent water from flowing into the tank while you work on replacing the flapper. This step is essential to avoid any potential water damage or accidental flushes during the repair process.
With the water supply successfully turned off, you’re ready to move on to the next step: removing the tank lid. We’ll discuss this in detail in the following section.
Read more: How To Fix A Leaky Moen Faucet
Step 2: Remove the tank lid
Now that you have turned off the water supply, it’s time to remove the tank lid. The tank lid covers the top of the toilet tank and provides access to the internal components, including the flapper. Follow these steps to remove the tank lid:
- Locate and identify the tank lid: The tank lid is typically made of porcelain or another material that matches the toilet. It is rectangular or oval-shaped and sits on top of the tank.
- Find the securing mechanism: Look for the securing mechanism that keeps the tank lid in place. This can be a pair of bolts located at the bottom of the lid or a bracket system. Some lids may have a handle or a button that needs to be pressed or lifted to release them.
- Remove the securing mechanism: Depending on the type of securing mechanism, use a screwdriver or your hands to loosen and remove any bolts, nuts, or brackets. If there is a handle or button, press or lift it to release the lid.
- Lift and remove the tank lid: Once the securing mechanism is removed or released, carefully lift the tank lid straight up to avoid any damage or breakage. Set the lid aside in a safe place, such as on a towel or a flat surface.
By removing the tank lid, you will have clear visibility and easy access to the internal workings of the toilet tank, including the flapper. Make sure to handle the tank lid with care to prevent any accidental drops or breakage.
With the tank lid removed, you’re now ready to move on to the next step: identifying the type of flapper installed in your toilet. This will help you choose the correct replacement flapper. We’ll cover this in detail in the following section.
Check the flapper for any signs of wear or damage, and replace it if necessary. Make sure the flapper is properly aligned and creates a tight seal when the toilet is flushed. Adjust the chain length if needed to ensure proper functioning.
Step 3: Identify the type of flapper
Before you proceed with replacing the flapper, it is important to identify the type of flapper that is currently installed in your toilet. Different toilets can have different types of flappers, and using the wrong replacement flapper can lead to improper functioning of your toilet. Follow these steps to identify the type of flapper in your toilet:
- Inspect the flapper: Take a close look at the flapper that is currently installed in your toilet. Observe its shape, size, and how it connects to the flush valve. Make note of any distinguishing features or unique characteristics.
- Note the brand and model: If possible, check for any branding or model information on the flapper. This may be stamped or printed on the flapper itself. Jot down these details for reference when purchasing the replacement flapper.
- Take measurements: Measure the diameter of the flapper and note its size. Additionally, observe whether the flapper has a chain or a lift wire connected to it. These measurements and observations will help you find the appropriate replacement flapper.
- Consult a professional or refer to the manufacturer: If you are unsure about the type of flapper in your toilet, it is always a good idea to consult a plumbing professional or refer to the toilet’s manufacturer. They can guide you in identifying the correct flapper for your specific toilet model.
Identifying the type of flapper in your toilet is essential to ensure a proper replacement. Whether it’s a traditional flapper, an adjustable flapper, or a flapperless flush valve, knowing the specific details will help you choose the right replacement flapper and ensure a smooth installation process. Once you have determined the type of flapper, you can proceed to the next step: detaching the old flapper, which we will discuss in detail in the following section.
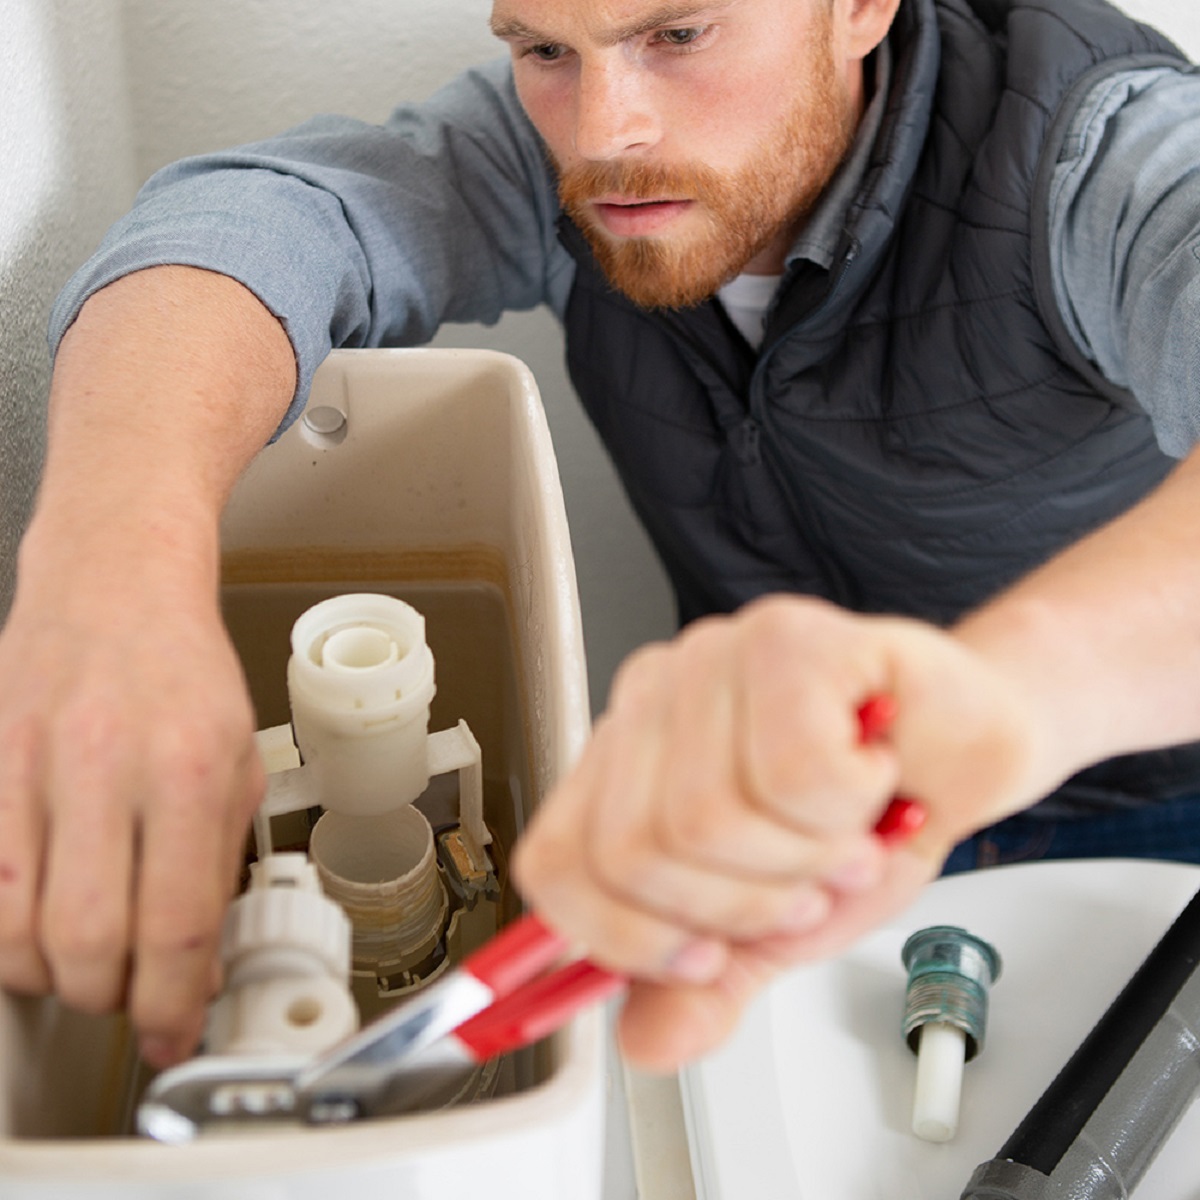
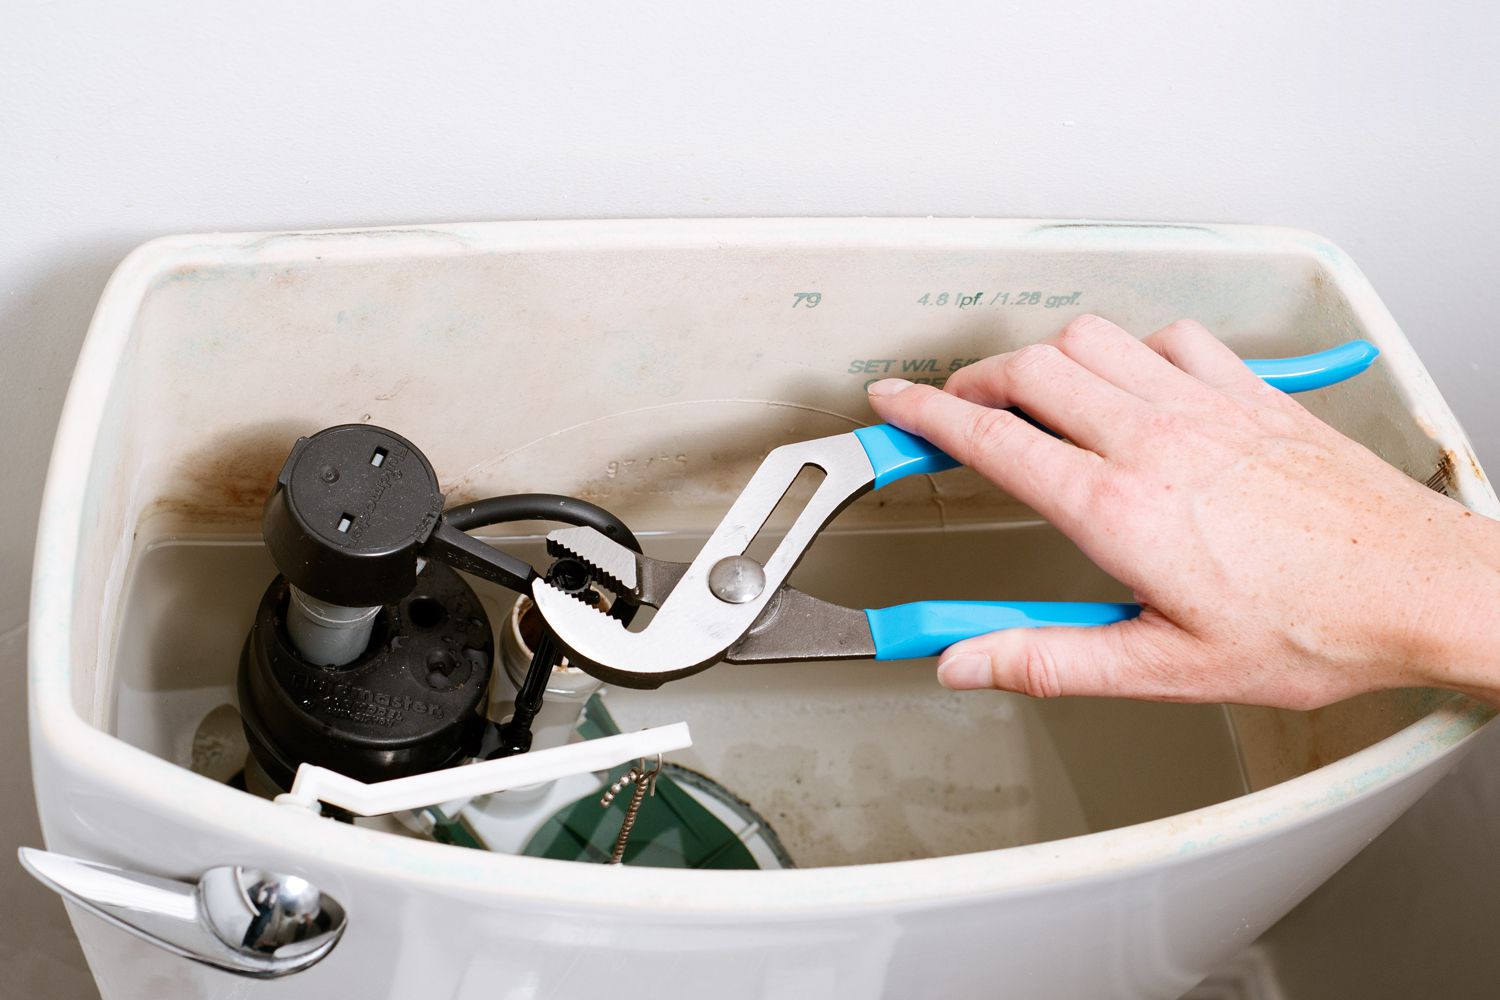
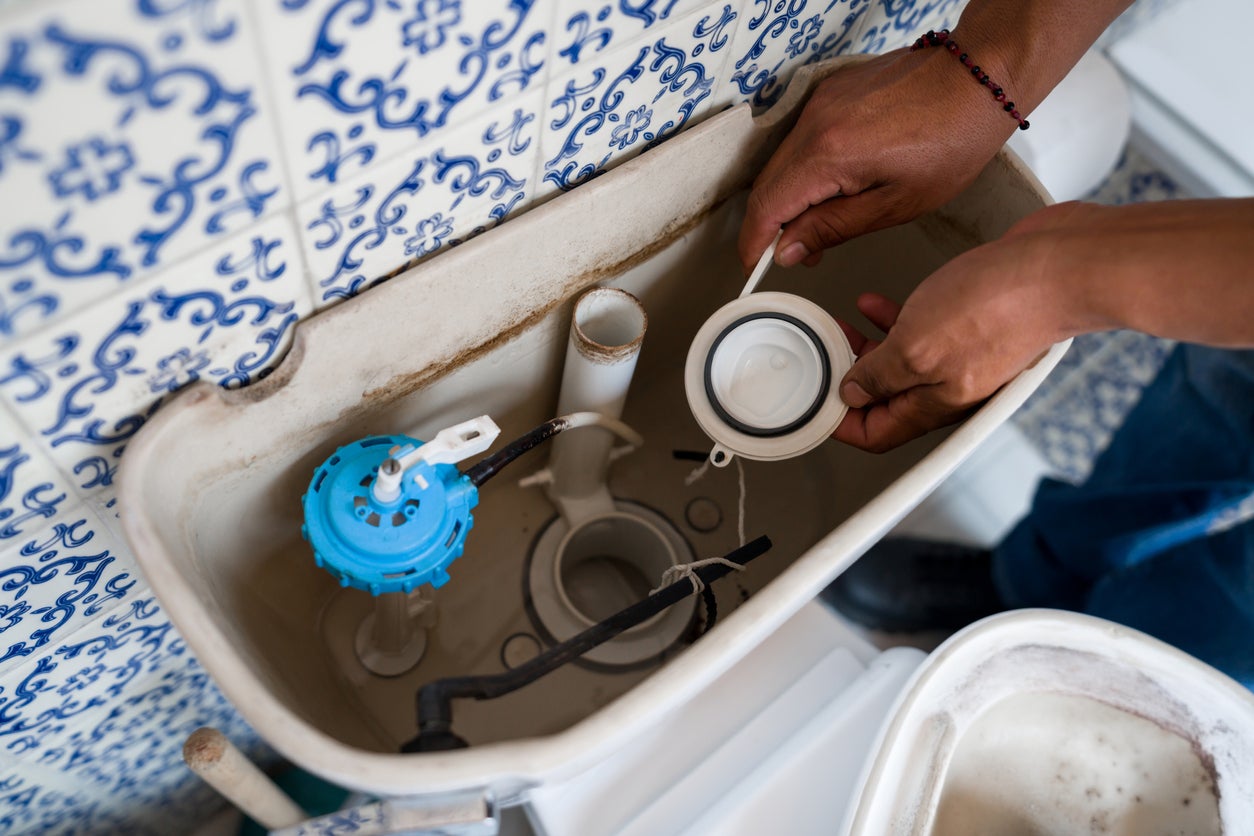
Step 4: Detach the old flapper
Now that you know the type of flapper in your toilet, it’s time to detach the old flapper. Removing the old flapper is necessary to make way for the new one. Follow these steps to detach the old flapper:
- Locate the flapper chain or lift wire: The flapper is connected to the flush valve with a chain or a lift wire. Find the chain or wire attached to the flapper and take note of how it is connected.
- Disconnect the flapper: Depending on the type of connection, disconnect the flapper from the flush valve. For a flapper connected by a chain, pinch and release the clip or clasp holding the chain and flapper together. For a flapper connected by a lift wire, carefully unhook the wire from the flush valve.
- Remove the old flapper: Once the flapper is disconnected, lift it out of the flush valve and remove it from the toilet tank. Inspect the old flapper for any signs of damage or wear and tear.
- Check the flapper seat: While the old flapper is removed, take a moment to inspect the flapper seat. The flapper seat is the opening at the bottom of the tank where the flapper rests. Look for any mineral deposits, debris, or damage on the flapper seat.
- Clean or replace the flapper seat: If the flapper seat is dirty, use a soft brush or scrub pad and a mild cleaning solution to gently clean it. Remove any mineral deposits or debris. If the flapper seat is damaged or heavily worn, it may need to be replaced. Consult a plumbing professional if you are uncertain about the condition of the flapper seat.
By detaching the old flapper, you make space to install the new flapper. Take note of how the old flapper was connected so you can easily connect the new one in the same manner. Cleaning the flapper seat will ensure a proper seal when the new flapper is installed. Now that the old flapper is removed and the flapper seat is clean, you are ready to move on to the next step: attaching the new flapper. We will discuss this in detail in the following section.
Step 5: Clean the flapper seat
After removing the old flapper from the flush valve, it’s important to clean the flapper seat before installing the new flapper. The flapper seat is the opening at the bottom of the toilet tank where the flapper rests. Cleaning the flapper seat will ensure a proper seal and prevent any leaks. Follow these steps to clean the flapper seat:
- Inspect the flapper seat: Take a close look at the flapper seat to check for any mineral deposits, debris, or damage. If there are any visible deposits or debris, it’s important to remove them before installing the new flapper.
- Prepare a cleaning solution: Create a mild cleaning solution by mixing water with a small amount of dish soap or a non-abrasive cleaner.
- Apply the cleaning solution: Dampen a soft brush or scrub pad with the cleaning solution. Gently scrub the flapper seat, paying attention to any areas with deposits or buildup. Make sure to clean the seat thoroughly to ensure a clean surface for the new flapper.
- Rinse the flapper seat: Once you’ve scrubbed the flapper seat, use a sponge or a damp cloth to rinse away any residue from the cleaning solution. Ensure that the seat is completely free from any cleaning agents.
- Inspect and dry the flapper seat: After rinsing, inspect the flapper seat to ensure it is clean and free from any debris or residue. Use a towel or a clean cloth to dry the flapper seat completely.
By cleaning the flapper seat, you create a smooth and clean surface for the new flapper to make a proper seal. This will help prevent any leaks and ensure the efficient functioning of your toilet. With the flapper seat thoroughly cleaned, you’re ready to move on to the next step: attaching the new flapper, which we’ll discuss in detail in the following section.
Read more: How To Fix Leaky Pipe In Basement
Step 6: Attach the new flapper
Now that you have cleaned the flapper seat, it’s time to attach the new flapper. The new flapper will ensure a proper seal and prevent any leaks in your toilet. Follow these steps to attach the new flapper:
- Take out the new flapper: Remove the new flapper from its packaging and inspect it for any defects or damage. Make sure it matches the type and size of the old flapper.
- Position the new flapper: Place the new flapper over the flapper seat, aligning it with the opening at the bottom of the toilet tank. Ensure that the flapper is centered and resting evenly on the seat.
- Connect the flapper chain or lift wire: Reconnect the chain or reattach the lift wire to the flapper. Make sure it has enough slack to allow for a full and unrestricted movement of the flapper when the toilet is flushed.
- Adjust the chain length (if necessary): If the chain is too long, it may get tangled or prevent the flapper from closing properly. Adjust the chain length by removing or adding links until there is enough slack to allow the flapper to close but not so much that it gets tangled or caught.
- Check the flapper movement: Test the flapper by manually pressing down on the flush valve or simulating a flush. Ensure that the flapper lifts up completely and falls back down smoothly, creating a proper seal each time.
Attaching the new flapper is a crucial step in restoring proper functionality to your toilet. Take care to position it correctly and ensure a secure connection to the flush valve. Proper flapper movement is essential for a successful flush and to prevent any leaks.
With the new flapper securely attached, you’re ready to move on to the next step: testing for leaks. We’ll cover this in detail in the following section.
Step 7: Test for leaks
After attaching the new flapper, it’s important to test for any potential leaks to ensure that the repair was successful. Testing for leaks will help you verify that the flapper is sealing properly and that there are no issues with water flow in your toilet. Follow these steps to test for leaks:
- Turn on the water supply: Turn the shut-off valve counterclockwise (to the left) to gradually open the water supply. Allow the tank to fill with water.
- Observe the flapper: As the tank fills with water, observe the movement of the new flapper. Ensure that it remains in the closed position and does not allow any water to escape into the toilet bowl.
- Listen for running water: Listen for any sounds of running water. A properly functioning flapper should not result in constant running water. If you hear running water, it may indicate a leak, and you will need to troubleshoot further.
- Perform a dye test (optional): If you suspect a small, hard-to-detect leak, you can perform a dye test. Add a few drops of food coloring or a dye tablet to the toilet tank. Wait for a few minutes without flushing. If the colored water shows up in the toilet bowl, it indicates a leak, and you will need to check the flapper for any issues with the seal.
- Make adjustments if necessary: If you notice any leaks or issues, such as a flapper that doesn’t seal properly or running water, you may need to make adjustments. This can include adjusting the chain length, checking for debris or obstruction in the flapper seat, or replacing the flapper if it is faulty.
Testing for leaks is an essential final step in the process of fixing a leaky toilet flapper. It allows you to ensure that the repair was successful and that there are no ongoing issues with the flapper. By conducting a thorough test, you can identify and address any leaks or problems promptly.
If you find any persistent leaks or issues that you are unable to resolve, it may be wise to consult a plumbing professional for further assistance. With proper testing and any necessary adjustments, you can have confidence in the functionality of your toilet and enjoy a leak-free, efficient flush.
With the testing complete and any necessary adjustments made, congratulations! You have successfully fixed the leaky toilet flapper. Taking the time to address this issue not only saves water and reduces water bills but also ensures the proper functioning of your toilet. Remember to perform regular maintenance and inspections to prevent any future leaks and keep your toilet in optimal condition.
We hope this guide has been helpful to you in fixing a leaky toilet flapper. Remember, if you ever have any doubts or concerns, it’s always a good idea to consult a plumbing professional for assistance.
Happy flushing!
Conclusion
Fixing a leaky toilet flapper is a simple and cost-effective way to prevent water waste and maintain the proper functioning of your toilet. By following the step-by-step process outlined in this guide, you can successfully replace a leaky flapper and enjoy a leak-free and efficient flush.
Throughout this guide, we discussed various aspects of fixing a leaky toilet flapper, including understanding what a flapper is, identifying signs of a leaky flapper, gathering the necessary tools and materials, and following the steps to replace the flapper.
We began by understanding the role of the toilet flapper and why it can develop leaks. We then explored the signs that indicate a leaky flapper, such as constant running water, visible water movement in the bowl, water stains or damage, inefficient flushing, and elevated water bills. Identifying these signs early can help you take prompt action to fix the issue.
We also discussed the essential tools and materials needed for the repair process, including an adjustable wrench, sponge or towel, bucket, new flapper, replacement chain or lift wire, cleaning solution, soft brush or scrub pad, Teflon tape, and gloves. Having these items on hand will ensure a smooth and efficient repair.
The step-by-step process covered in this guide included turning off the water supply, removing the tank lid, identifying the type of flapper, detaching the old flapper, cleaning the flapper seat, attaching the new flapper, and testing for leaks.
By following these steps and conducting a thorough test for leaks, you can ensure that the repair is successful and that your toilet is functioning properly. In case of any persistent leaks or issues, it is always recommended to seek assistance from a plumbing professional.
We hope this guide has been helpful in guiding you through the process of fixing a leaky toilet flapper. By taking the time to address this issue, you can save water, lower your water bills, and contribute to a more environmentally friendly lifestyle.
Remember, regular maintenance and periodic inspections of your toilet can help prevent any future leaks and ensure its optimal performance. With proper care, your toilet will continue to serve you well for years to come.
Thank you for taking the time to read this guide, and we wish you success in fixing your leaky toilet flapper!
Frequently Asked Questions about How To Fix A Leaky Toilet Flapper
Was this page helpful?
At Storables.com, we guarantee accurate and reliable information. Our content, validated by Expert Board Contributors, is crafted following stringent Editorial Policies. We're committed to providing you with well-researched, expert-backed insights for all your informational needs.


0 thoughts on “How To Fix A Leaky Toilet Flapper”