Articles
How To Vent Range Hood Outside
Modified: October 21, 2024
Looking for articles on how to vent a range hood outside? Find expert tips and step-by-step guides to properly venting your range hood to the outdoors.
(Many of the links in this article redirect to a specific reviewed product. Your purchase of these products through affiliate links helps to generate commission for Storables.com, at no extra cost. Learn more)
Introduction
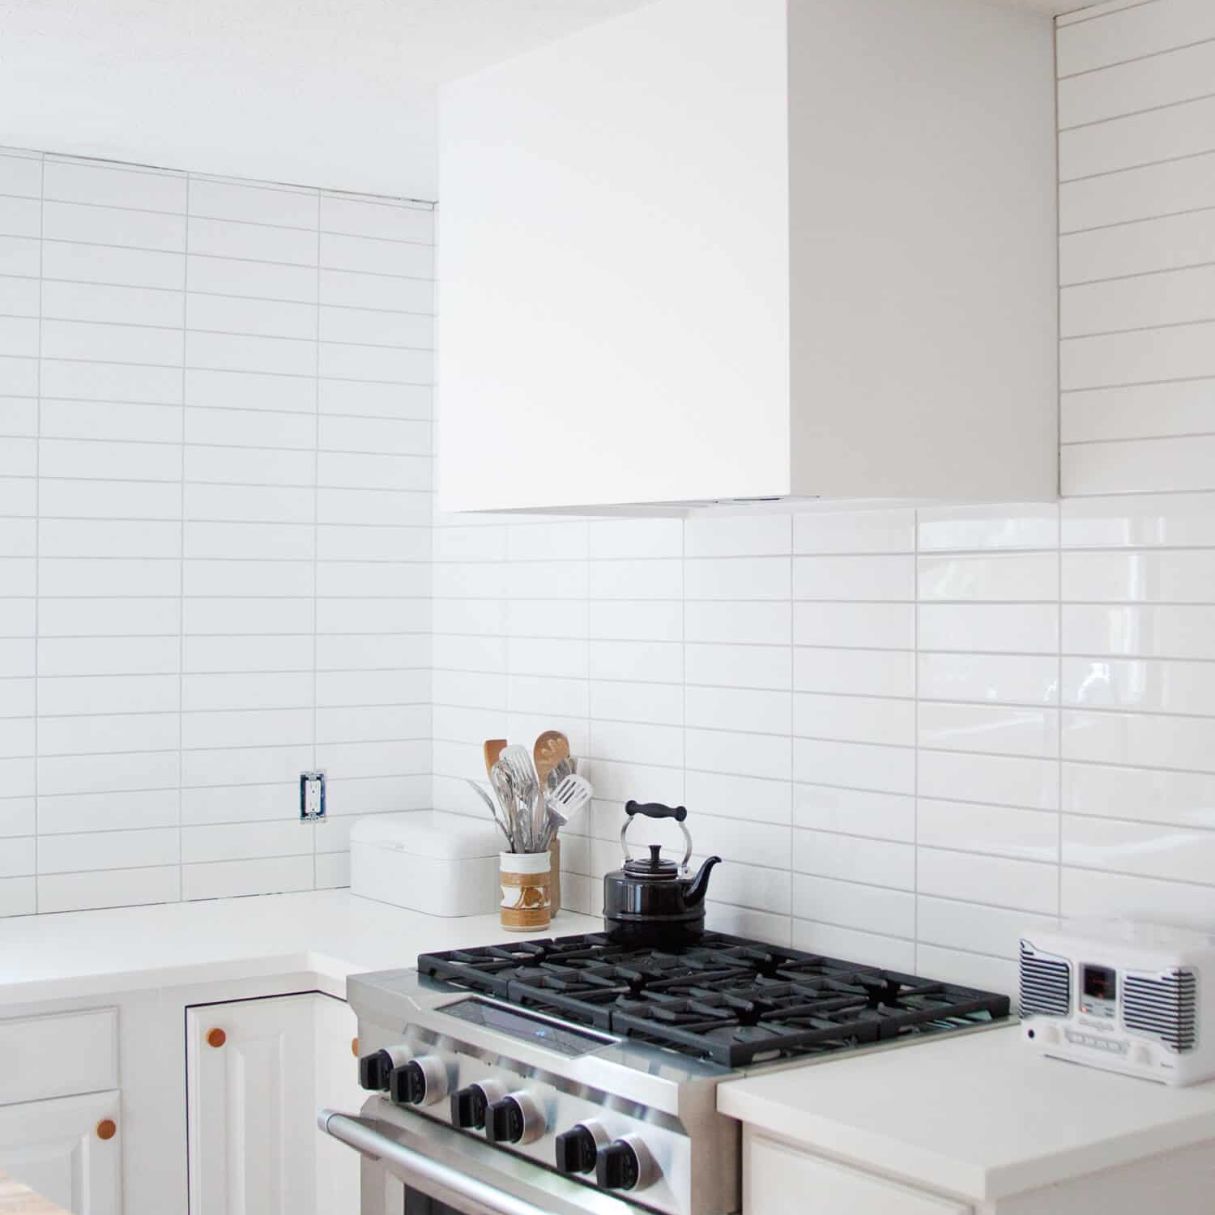
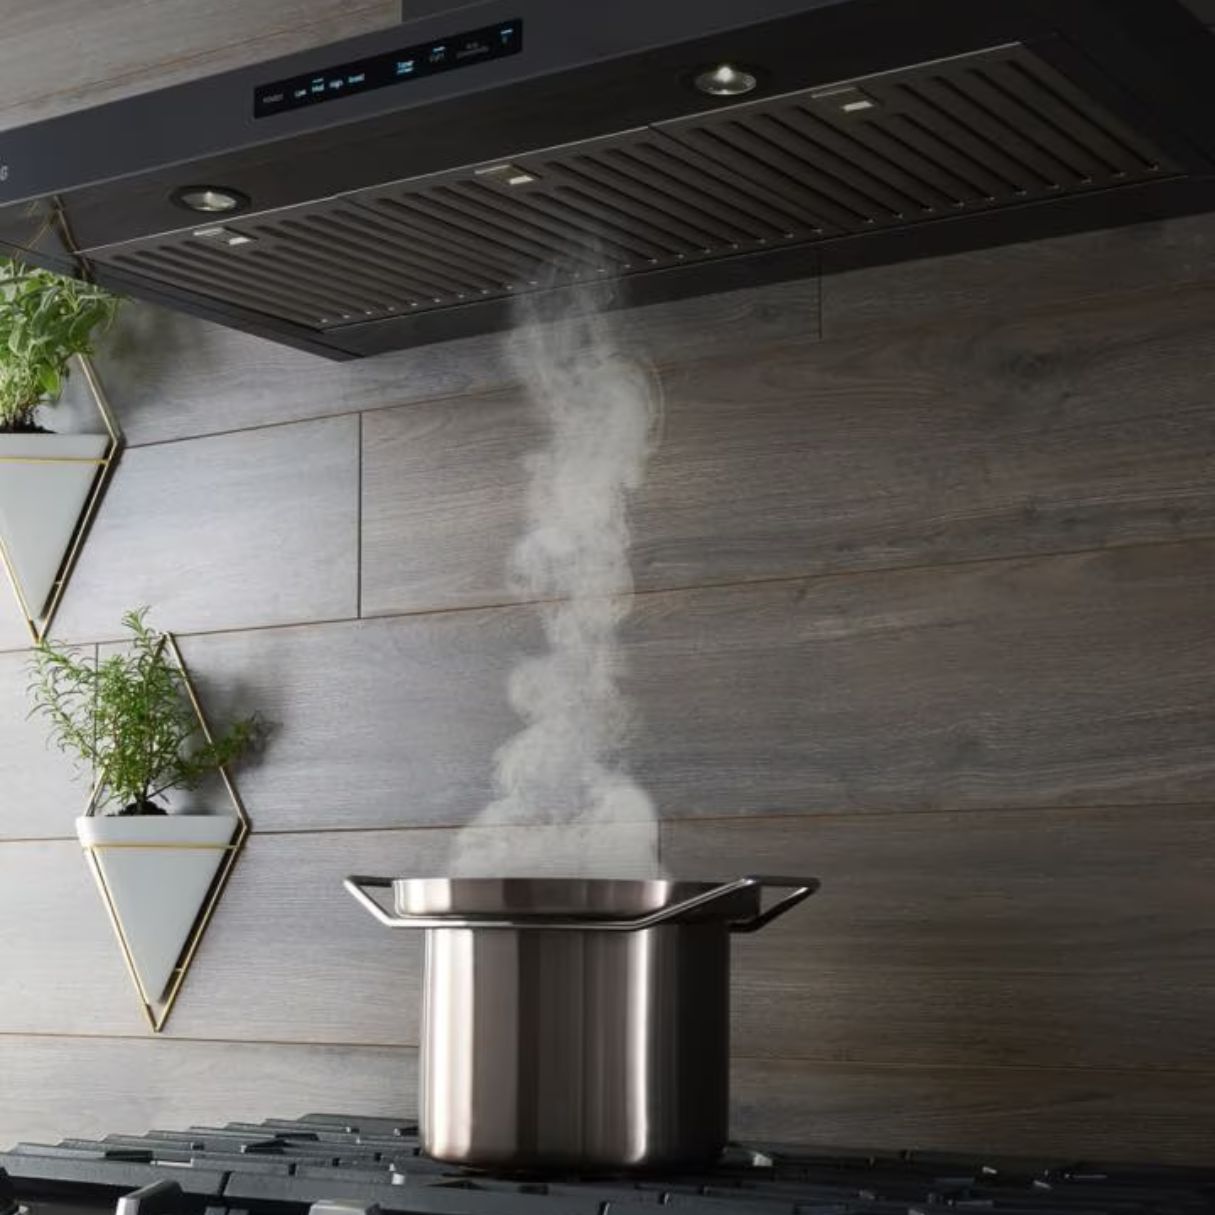
When it comes to cooking in your kitchen, a range hood can be an essential appliance for maintaining a clean and odor-free environment. However, it’s not just enough to have a range hood – it needs to be properly vented to the outside to ensure effective ventilation. Venting your range hood outside can provide numerous benefits and help improve the air quality in your kitchen.
In this article, we will explore the benefits of venting your range hood outside and provide a step-by-step guide on how to accomplish this task. So, whether you’re a seasoned DIYer or a homeowner looking to enhance your kitchen’s ventilation system, this article will guide you through the process.
Key Takeaways:
- Properly venting your range hood outside offers benefits such as improved air quality, effective smoke removal, reduced grease build-up, elimination of lingering odors, and enhanced indoor comfort, creating a healthier kitchen environment.
- By following the step-by-step guide, you can successfully vent your range hood outside, ensuring a clean, odor-free, and comfortable kitchen. Regular maintenance and cleaning are essential to keep the venting system functioning optimally.
Read more: How To Vent A Microwave Range Hood Outside
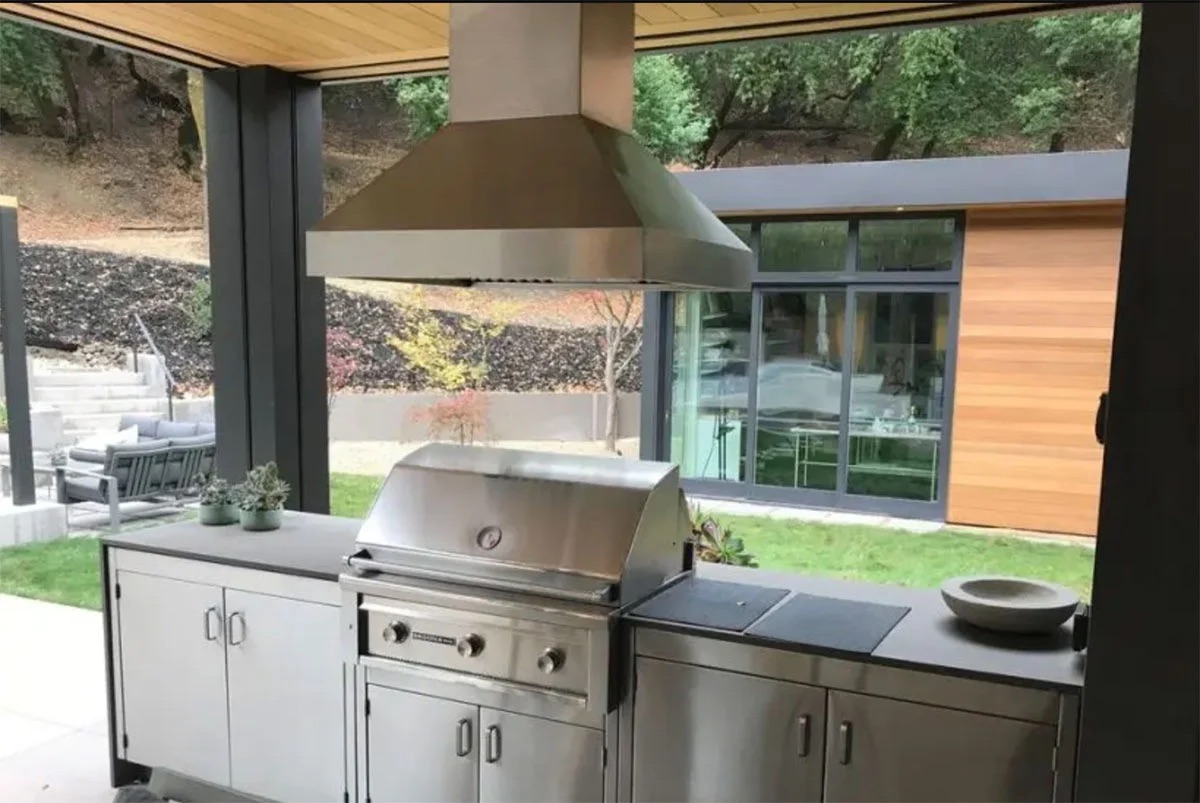
Benefits of Venting Range Hood Outside
Venting your range hood outside offers several advantages that can greatly enhance your cooking experience and the overall air quality in your kitchen. Here are some of the key benefits:
- Improved Air Quality: The main purpose of a range hood is to remove smoke, grease, and odors generated during cooking. By venting the range hood outside, you ensure that these pollutants are expelled from your kitchen instead of being recirculated back into the room. This helps to maintain fresh and clean air, reducing the risk of respiratory issues and other health concerns.
- Effective Smoke Removal: Cooking processes such as grilling and frying can produce substantial amounts of smoke, which can be irritating and even trigger fire alarms indoors. Venting your range hood outside allows the smoke to be immediately directed outdoors, preventing it from lingering in your kitchen and surrounding areas.
- Reduced Grease Build-up: When you cook, grease particles are released into the air and can accumulate on surfaces in your kitchen, including cabinets, countertops, and appliances. Venting your range hood outside helps to significantly reduce the amount of grease build-up, making cleaning and maintenance much easier and prolonging the lifespan of your kitchen components.
- Elimination of Lingering Odors: Certain types of cooking, such as frying fish or stir-frying heavily seasoned dishes, can leave strong and persistent odors. Venting your range hood outside ensures that these odors are quickly and efficiently removed, preventing them from permeating other parts of your home.
- Enhanced Indoor Comfort: Cooking generates heat, and a range hood that vents outside helps to remove excess heat from your kitchen. This can greatly improve the overall comfort level in your kitchen, especially during hot summer months or when using high-heat cooking methods.
By understanding and appreciating the benefits of venting your range hood outside, you can make an informed decision to optimize your kitchen’s ventilation system and create a healthier and more comfortable cooking environment.
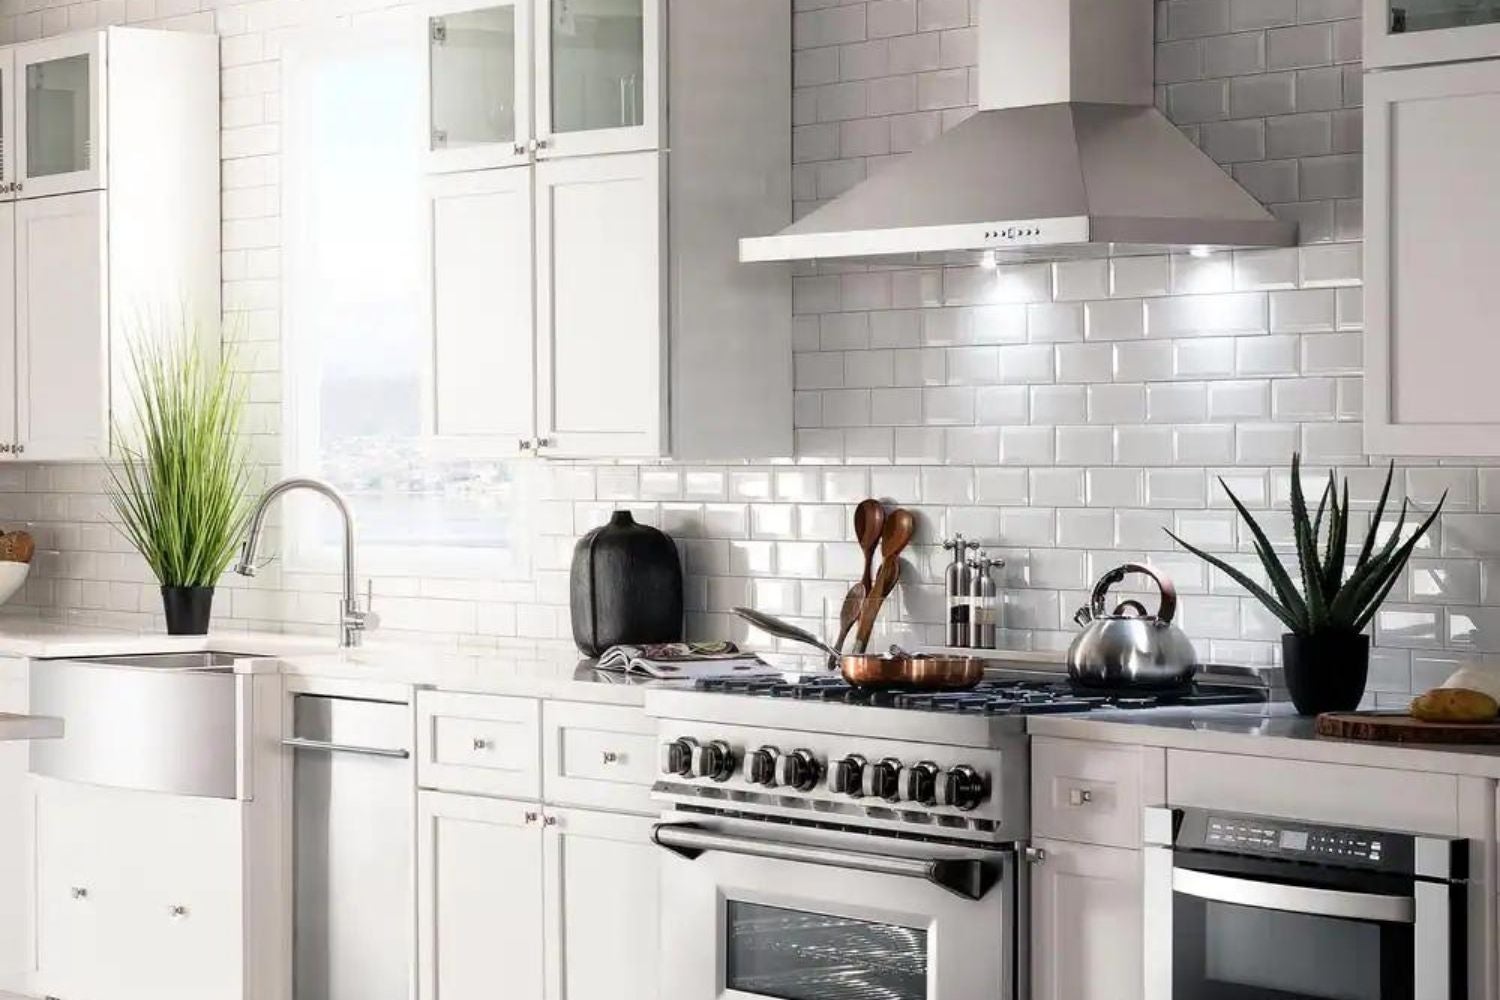
Steps to Vent a Range Hood Outside
Venting a range hood outside may seem like a complex task, but with the right tools and guidance, it can be accomplished successfully. Here, we provide a step-by-step guide to help you through the process:
1. Assess Your Range Hood: Before you begin, familiarize yourself with your range hood’s specifications and requirements. Determine if your range hood is capable of being vented outside and identify any specific instructions provided by the manufacturer.
2. Locate an Exterior Wall: Choose a suitable exterior wall where you can install the vent outlet. This should be a wall that is easily accessible and close to the range hood. Ensure that there are no obstructions such as electrical wiring or plumbing within the wall.
3. Plan the Ducting Route: Visualize the path the ductwork will take from the range hood to the exterior wall. Measure the distance and decide if any additional materials, such as elbows or extensions, will be required to create a smooth and efficient route.
4. Make a Hole in the Wall: Use a measuring tape and a pencil to mark the exact spot on the exterior wall where the hole will be made. Use a reciprocating saw or a hole saw to cut a hole of the appropriate diameter. Be cautious when cutting through the wall to avoid any electrical or plumbing lines.
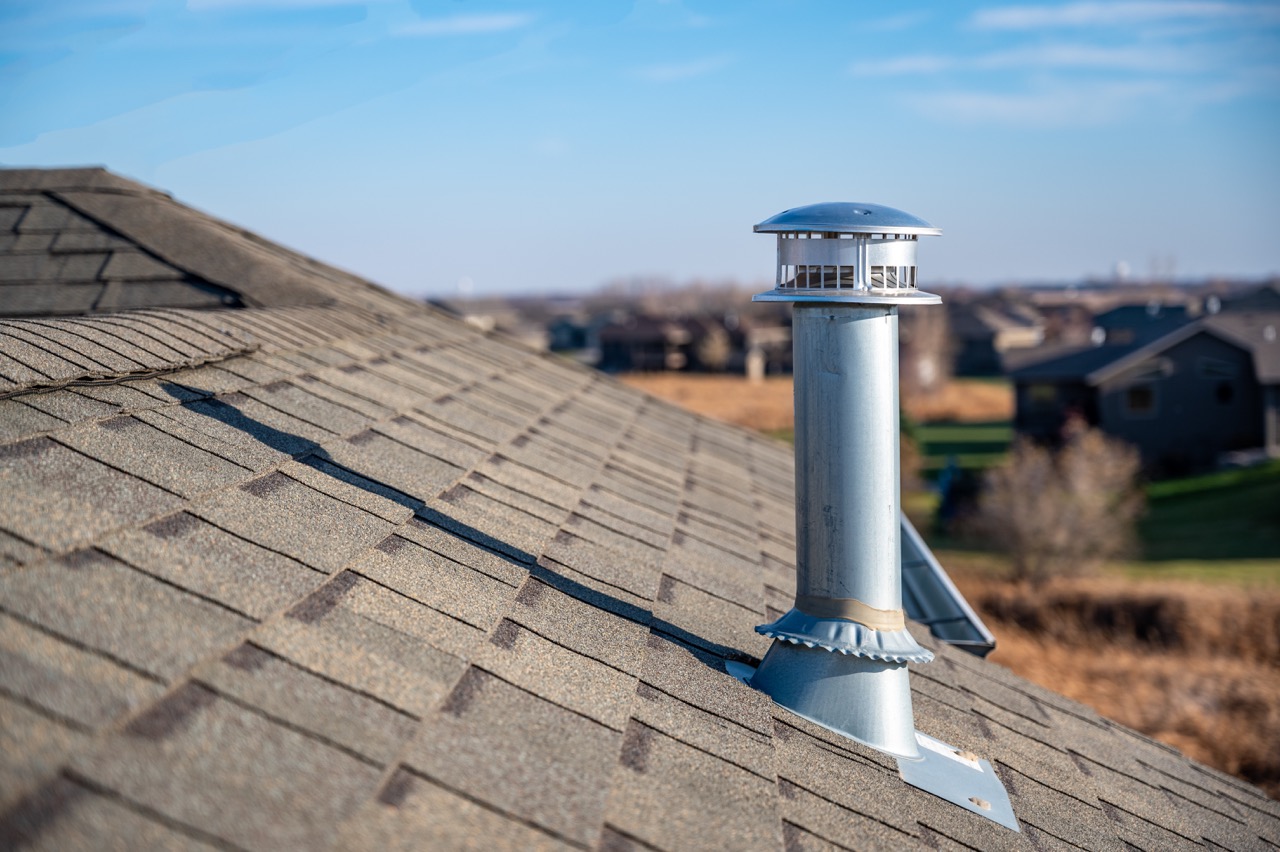
5. Install the Wall Cap: Attach a wall cap on the exterior side of the hole to prevent pests, debris, and water from entering the ductwork. Secure the wall cap onto the wall using screws or adhesive, ensuring a tight seal.
6. Connect the Ductwork: Install the appropriate-sized ductwork that connects the range hood to the wall cap. Use metal ductwork for durability and better airflow. Secure all joints with screws and seal them with foil tape or duct mastic to prevent air leaks.
7. Secure and Seal the Ductwork: Use straps or hangers to secure the ductwork to the wall and ceiling. Ensure that the ductwork is straight and free of any kinks or bends that could impede airflow. Seal all connections, joints, and seams with foil tape or duct mastic to maintain airtightness.
8. Test the Ventilation System: Once the installation is complete, turn on the range hood and check for proper airflow. Stand outside and ensure that the air is being efficiently expelled through the wall cap. Make any necessary adjustments or repairs if airflow is insufficient.
By following these steps, you can successfully vent your range hood outside, improving the air quality in your kitchen and enhancing your overall cooking experience. Remember to refer to your range hood’s manual for any specific instructions relating to installation and maintenance.
Step 1: Assess Your Range Hood
Before venting your range hood outside, it is crucial to assess its capabilities and requirements. Each range hood model and manufacturer may have specific guidelines and restrictions for venting options. By understanding your range hood’s specifications, you can ensure compatibility and optimize its performance. Here are some key factors to consider during this assessment:
1.1 Verify Venting Capability:
Check if your range hood is designed to be vented externally. Some range hoods offer both ducted and ductless options, allowing you to choose between venting outside or recirculating the air. If your range hood doesn’t have the capability for external venting, it may not be possible to proceed with this method.
1.2 Evaluate Venting Requirements:
Review the manufacturer’s instructions or user manual to determine the specific venting requirements for your range hood. This includes the recommended duct size, maximum duct run length, and any restrictions on the installation. Ensuring compliance with these requirements will help maintain optimum performance and avoid potential issues.
1.3 Consider Existing Ductwork:
If your kitchen already has a ductwork system in place, assess its condition and compatibility with your range hood. Check if it meets the necessary specifications, including the size, material (preferably metal), and insulation. If the existing ductwork doesn’t meet the requirements, you may need to make adjustments or install new ductwork for proper ventilation.
1.4 Note Clearances and Safety Considerations:
Take note of the required clearances between the range hood and surrounding surfaces, such as cabinets and walls. Ensure that there is sufficient space to accommodate the ductwork and any additional components during the installation process. It’s also important to be mindful of safety considerations, such as avoiding electrical wiring or plumbing inside the walls.
1.5 Seek Professional Guidance if Needed:
If you’re unsure about any aspect of assessing your range hood or if it requires complex modifications, consulting a professional or an experienced installer is highly recommended. They can provide expert guidance, ensure compliance with local building codes, and help you avoid potential installation issues.
By thoroughly assessing your range hood’s venting capabilities and requirements, you can confidently proceed with the next steps of venting it outside. This initial step sets the foundation for a successful and efficient ventilation system that will enhance the air quality in your kitchen.
Step 2: Locate an Exterior Wall
When venting a range hood outside, it is crucial to choose the right exterior wall where the vent outlet will be installed. Locating the appropriate wall will ensure easy access and efficient venting of the air from your kitchen. Here are some factors to consider when determining the location:
2.1 Proximity to the Range Hood:
Choose a wall that is in close proximity to your range hood. The shorter the distance between the range hood and the vent outlet, the more efficient the ventilation will be. It will also reduce the amount of ductwork needed for the installation, minimizing any potential loss of air pressure.
2.2 Accessibility:
Ensure that the chosen wall is easily accessible for the installation process. This will make it convenient to connect the ductwork and perform any necessary maintenance or repairs in the future. Consider the layout of your kitchen and the available space when selecting the exterior wall.
2.3 Structural Considerations:
Evaluate the structural integrity of the wall. Ensure that it is able to accommodate the size and weight of the vent outlet and the ductwork. Avoid walls that have obstructions such as electrical wiring, plumbing, or load-bearing elements that could impede the installation process.
2.4 Avoid Conflicts with Other External Features:
Consider the placement of other external features, such as windows, doors, utility meters, or landscaping elements. Choose a wall where the vent outlet won’t interfere with the functionality or aesthetics of these features. Also, ensure that the expelled air won’t be drawn back into the home through open windows or other openings.
2.5 Building Codes and Regulations:
Familiarize yourself with local building codes and regulations regarding venting requirements. Some jurisdictions may have specific guidelines on the placement and clearance distances for vent outlets. Ensure compliance with these regulations to ensure the safety and efficiency of your venting system.
By carefully considering these factors, you can select the ideal exterior wall for venting your range hood. This step sets the stage for a successful installation and facilitates the efficient removal of smoke, odors, and grease from your kitchen.
Read more: What Size Vent Pipe For Range Hood
Step 3: Plan the Ducting Route
Planning the ducting route is an essential step in venting your range hood outside. This process involves visualizing the path that the ductwork will take from the range hood to the exterior wall. A well-thought-out ducting route ensures efficient airflow and minimizes any obstructions. Here are some key considerations when planning the ducting route:
3.1 Measure the Distance:
Measure the distance between your range hood and the selected exterior wall. This measurement will help determine the length of ductwork needed for the installation. It is important to minimize the length of the ductwork to maintain optimal airflow and reduce the chance of air pressure loss.
3.2 Choose the Route:
Consider the layout of your kitchen and choose the most direct and unobstructed route for the ductwork. Ideally, the path should avoid any obstacles such as electrical wires, plumbing lines, or structural elements in the walls. A straight route with minimal bends and turns will ensure smooth airflow.
3.3 Account for Clearances:
Take into account the necessary clearance distances as specified by the manufacturer and local building codes. These clearances may include minimum distances from cabinets, walls, and other surfaces. Adhering to these guidelines will prevent any potential fire hazards and ensure proper ventilation.
3.4 Consider Structural Elements:
Be aware of the structural elements within the walls, such as studs and joists. Try to route the ductwork between these elements to ensure stability and adequate support. This will help maintain the integrity of the wall and prevent any damage during installation.
3.5 Use Elbows and Extensions if needed:
If the most direct route has obstacles or the range hood is not located near the exterior wall, you may need to use elbows or extensions to navigate around these obstructions. Use adjustable elbows to make turns without disrupting the airflow. Measure and cut the ductwork to fit the required length and shape.
3.6 Insulate the Ductwork:
If your kitchen is located in a cold climate or if the ductwork passes through unconditioned spaces, it may be beneficial to insulate the ductwork. This will help prevent condensation and heat loss, improving the efficiency of the ventilation system.
By carefully planning the ducting route, you can ensure a smooth and efficient installation of the vent system for your range hood. This step sets the foundation for effective ventilation and contributes to a clean and comfortable kitchen environment.
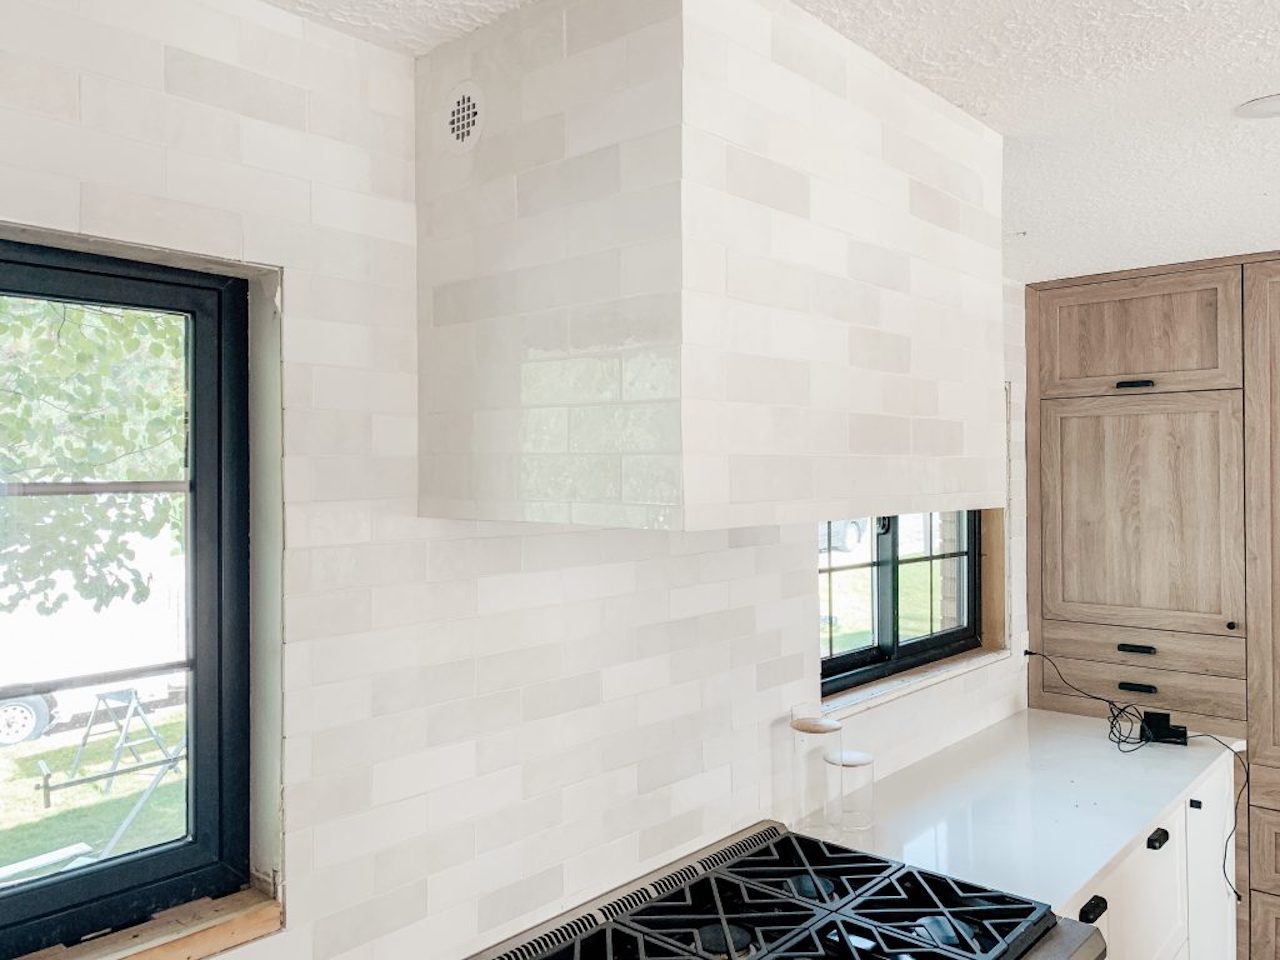
Step 4: Make a Hole in the Wall
Once you have assessed your range hood, located the exterior wall, and planned the ducting route, the next step is to make a hole in the wall where the vent outlet will be installed. This hole serves as the entry point for the ductwork to expel the air outside. Here’s how to proceed with this step:
4.1 Measure and Mark:
Using a measuring tape, determine the exact spot on the exterior wall where the hole needs to be made. Take into consideration the size and shape of the wall cap or vent outlet when making your measurements. Use a pencil to mark the center of the hole.
4.2 Gather the Necessary Tools:
Before making the hole, gather the tools you’ll need for the job. These may include a reciprocating saw or a hole saw of the appropriate size, a drill with a pilot bit, safety goggles, and gloves. Ensure that you have these tools readily available and in good working condition.
4.3 Protect the Surrounding Area:
Place a drop cloth or a tarp beneath the work area to catch any debris or dust that may be generated during the process. This will help keep the area clean and make for easier cleanup afterward. You may also want to cover any nearby furniture or appliances to protect them from dust or damage.
4.4 Cut the Hole:
Using a reciprocating saw or a hole saw, carefully cut along the marked area on the exterior wall. Start at a slow speed to create a pilot hole before increasing the speed to cut through the wall. As you cut, maintain a steady hand and follow the marked line to ensure accuracy.
4.5 Be Mindful of Obstacles:
Pay attention to any potential obstacles within the wall, such as electrical wires, plumbing, or structural elements. Take precautions to avoid damaging these components while making the hole. If necessary, consult a professional to help identify and safely work around these obstacles.
4.6 Smooth the Edges:
After making the hole, use sandpaper or a file to smooth any rough edges or splinters around the opening. This will help provide a clean and even surface for the installation of the wall cap or vent outlet.
Remember to always prioritize safety and exercise caution when making the hole in the wall. If you’re not confident in your ability to complete this step, it is recommended to seek the assistance of a professional to ensure a precise and secure installation.
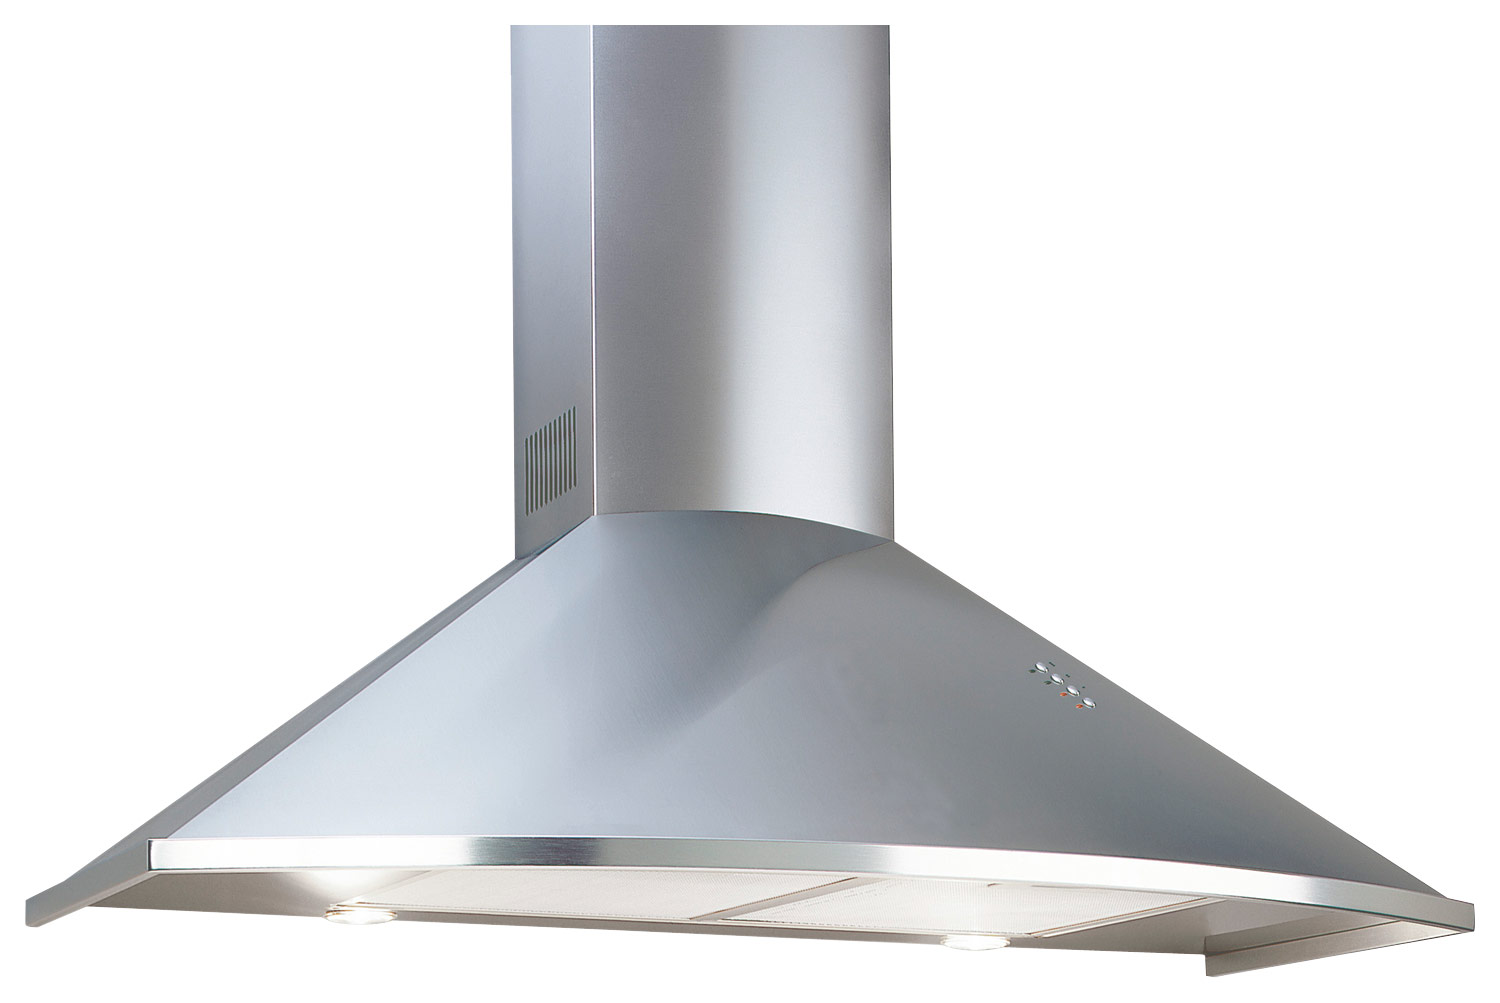
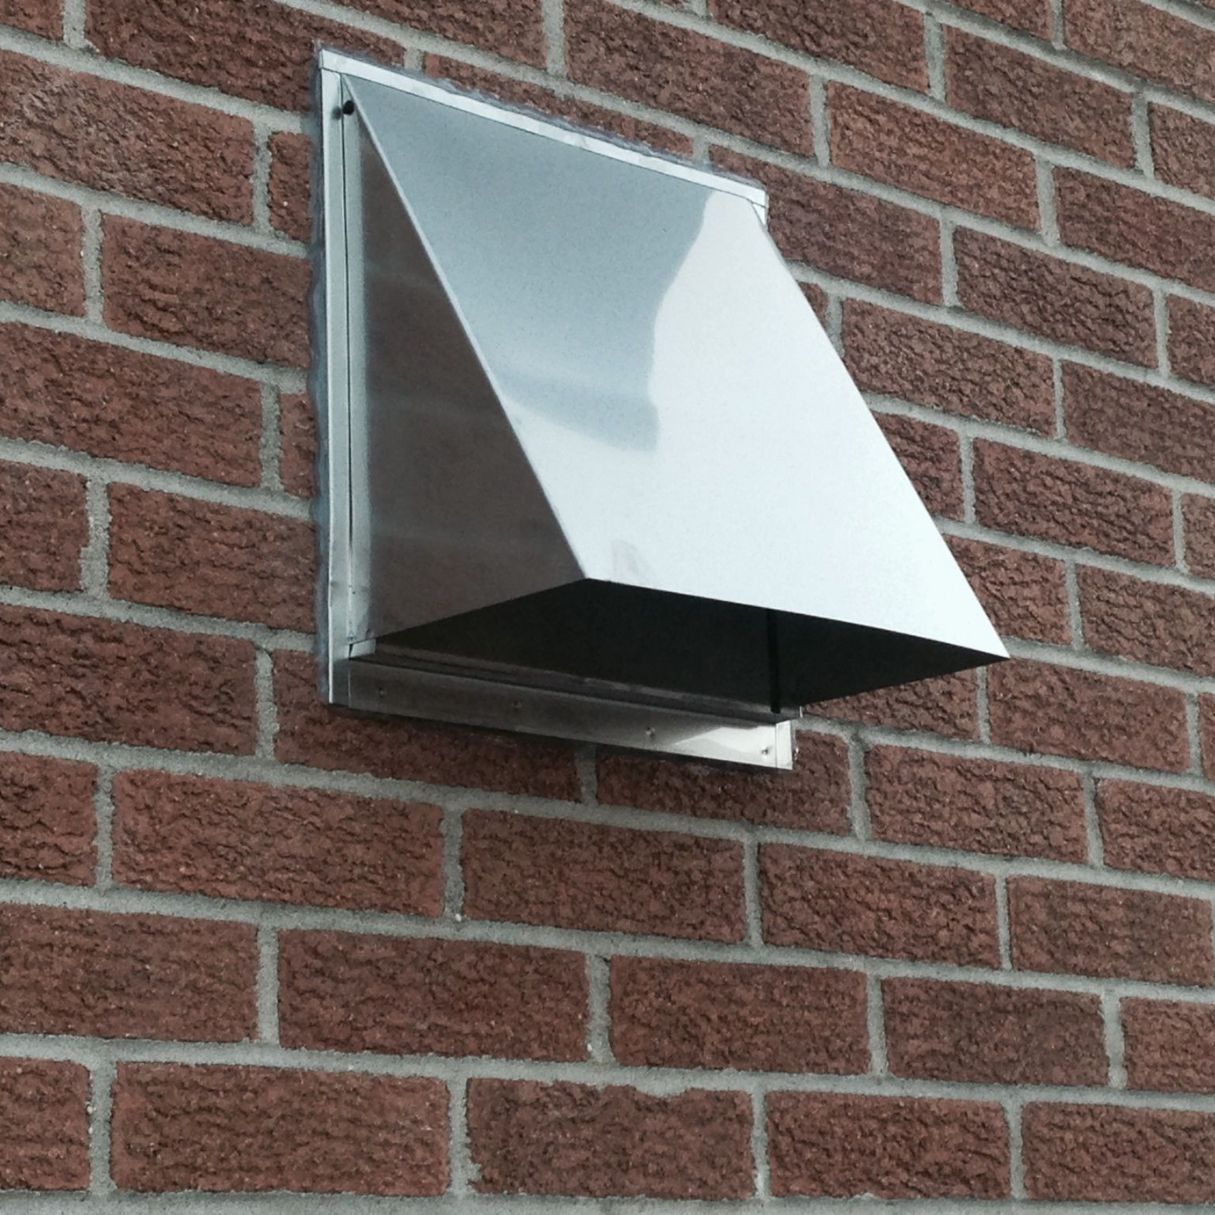
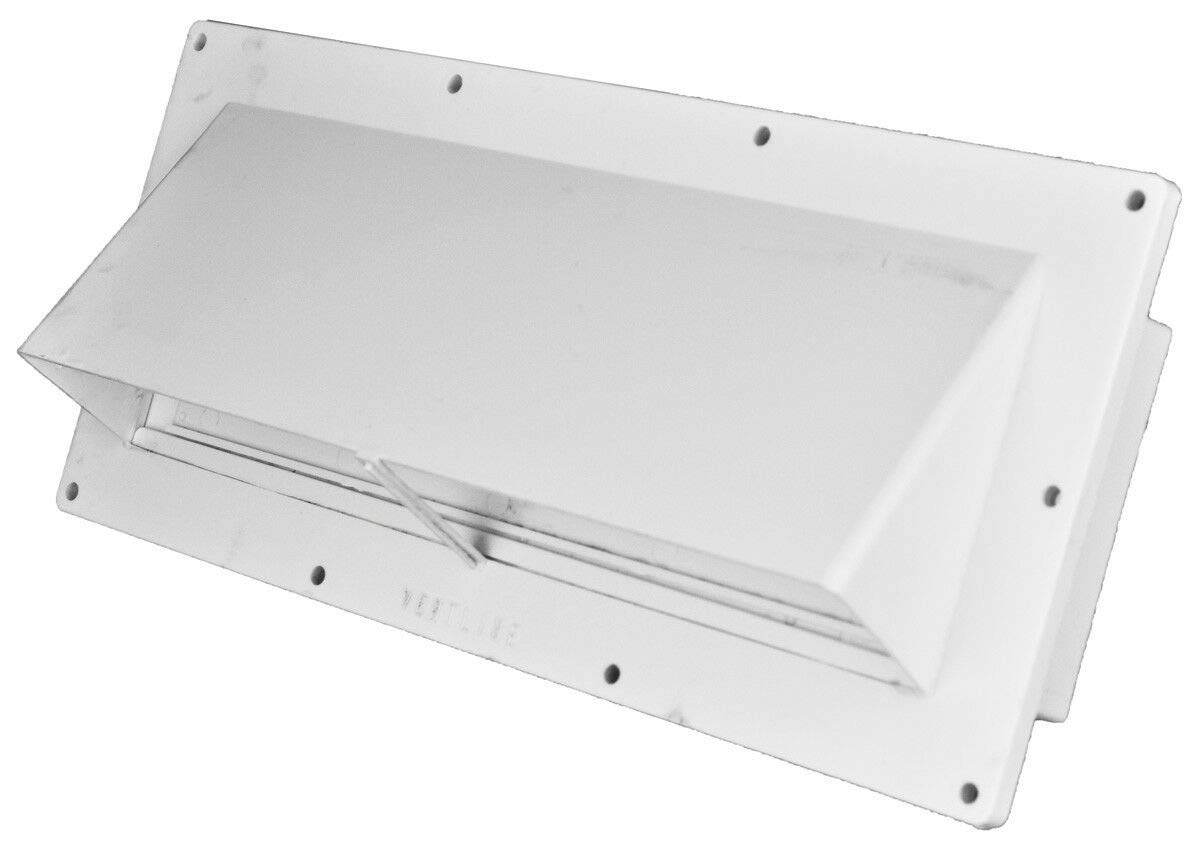
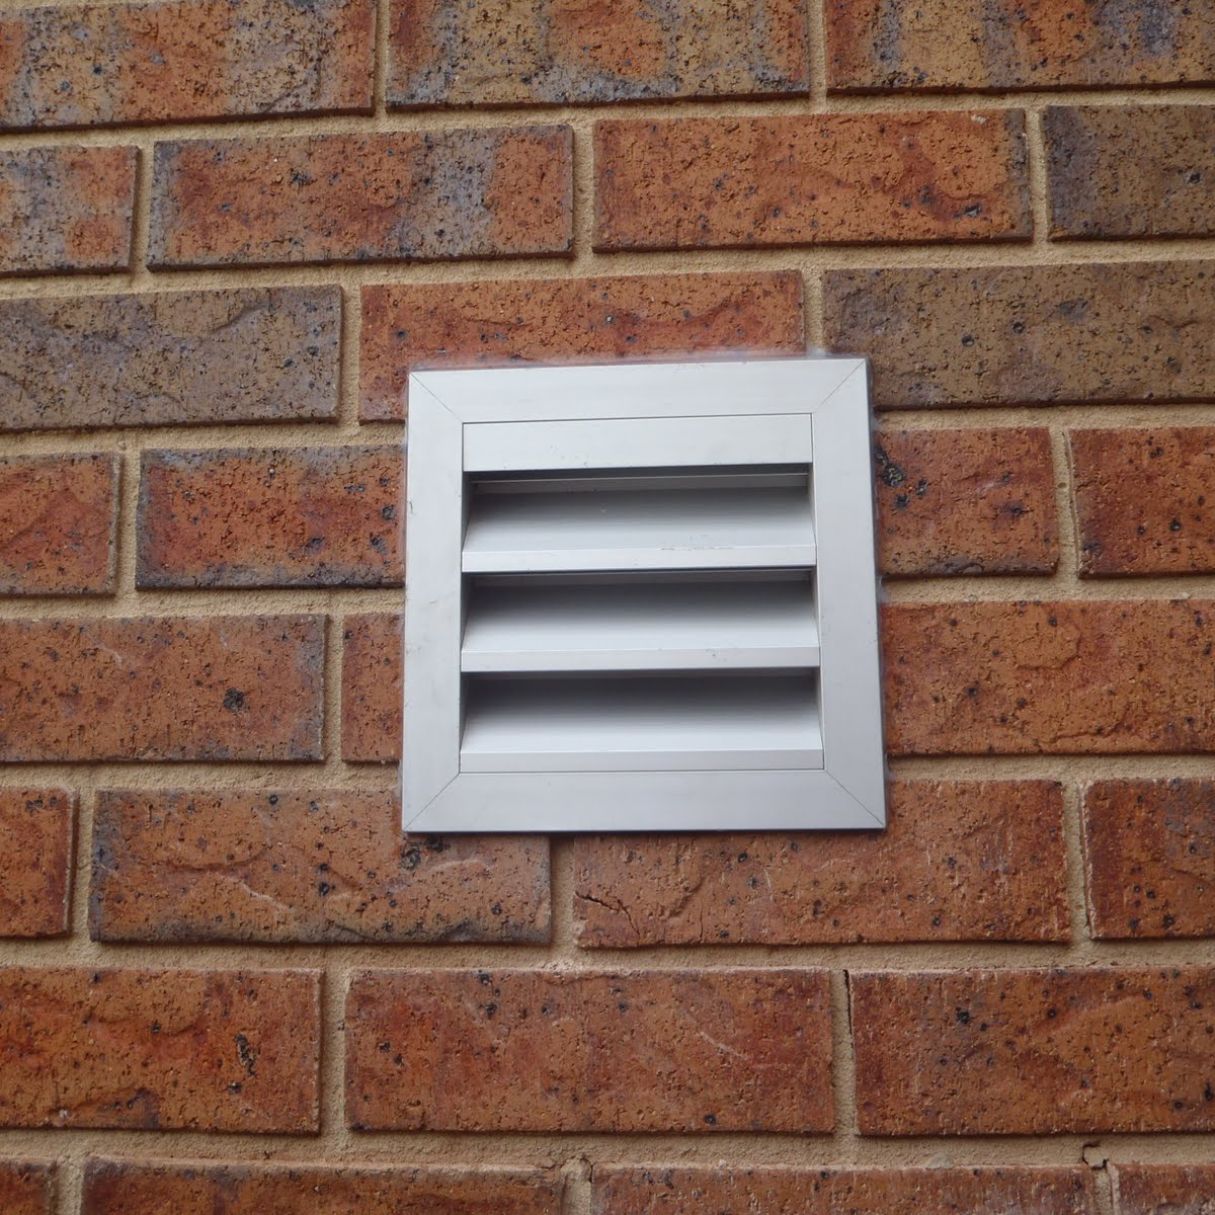
Step 5: Install the Wall Cap
After making the hole in the wall, the next step in venting your range hood outside is to install the wall cap. The wall cap serves as the exterior termination point for the ductwork and helps protect against weather elements. Here’s how to proceed with this step:
5.1 Select the Right Wall Cap:
Choose a wall cap that is compatible with your duct size and matches the design of your home’s exterior. Wall caps are available in various materials, such as aluminum or stainless steel, and styles, including louvered or hooded. Ensure that the wall cap you choose meets the necessary ventilation requirements and provides proper airflow.
5.2 Position the Wall Cap:
Align the wall cap with the hole in the exterior wall. Ensure that the cap is level and will sit flush against the wall. This will help provide a secure and tight seal to prevent any air leakage or water penetration.
5.3 Secure the Wall Cap:
Attach the wall cap to the exterior wall using screws or adhesive, as specified by the manufacturer. Ensure that the cap is securely fastened and that all sides are evenly tightened. This will help prevent any potential movement or damage due to weather conditions.
5.4 Create a Weatherproof Seal:
To ensure a weatherproof seal, apply a high-quality exterior caulk or sealant around the edges of the wall cap. This will help prevent rainwater or insects from entering the ductwork. Pay particular attention to the area where the wall cap meets the exterior wall, ensuring a tight and waterproof connection.
5.5 Test the Seal:
After installing the wall cap, visually inspect it to ensure a proper seal. Check for any gaps or open areas where air or moisture could enter. Additionally, if possible, test the seal by turning on the range hood and feeling for any air leakage around the wall cap. Make any necessary adjustments or additions to the sealant to address any issues.
5.6 Maintain the Wall Cap:
Regularly inspect and clean the wall cap to ensure optimal function and efficiency. Over time, debris, dust, or insects may accumulate on the exterior surface. Clean the wall cap periodically to maintain proper airflow and prevent any blockages.
Installing the wall cap is a critical step in venting your range hood outside, as it facilitates the proper termination of the ductwork and protects against weather elements. Take your time to ensure a secure and weatherproof installation to maintain the efficiency of your ventilation system.
Make sure to use the correct size ductwork for your range hood to ensure proper ventilation. The ductwork should be as short and straight as possible to maximize airflow. Regularly clean and maintain the ductwork to prevent blockages.
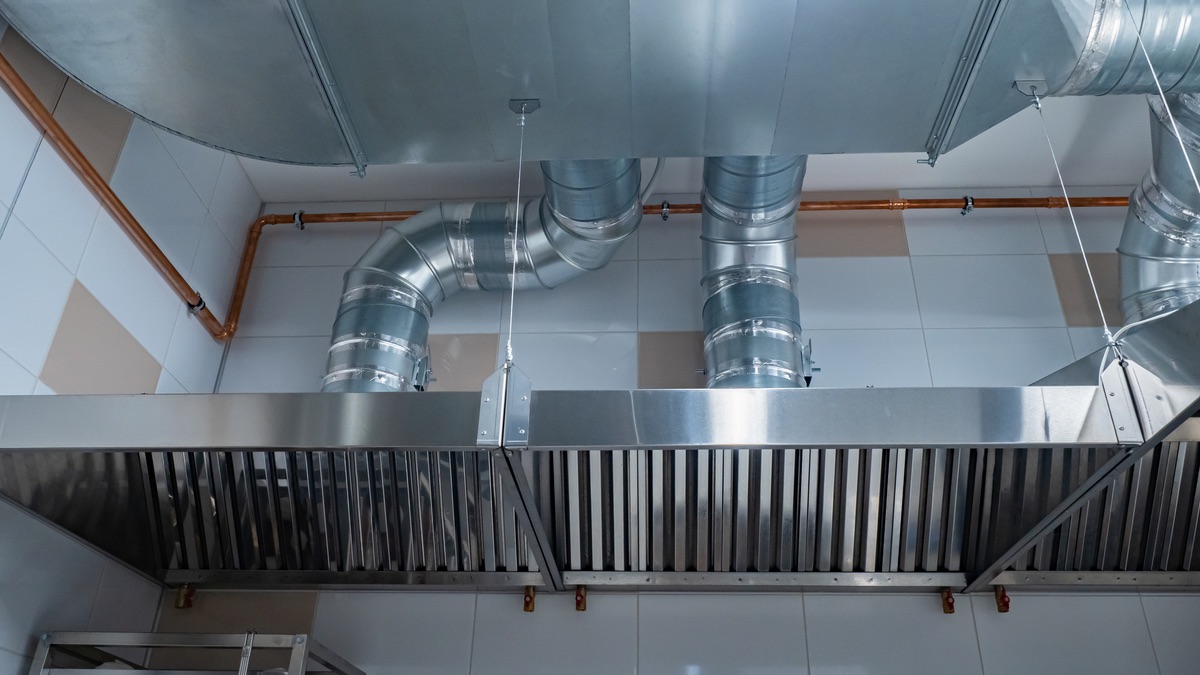
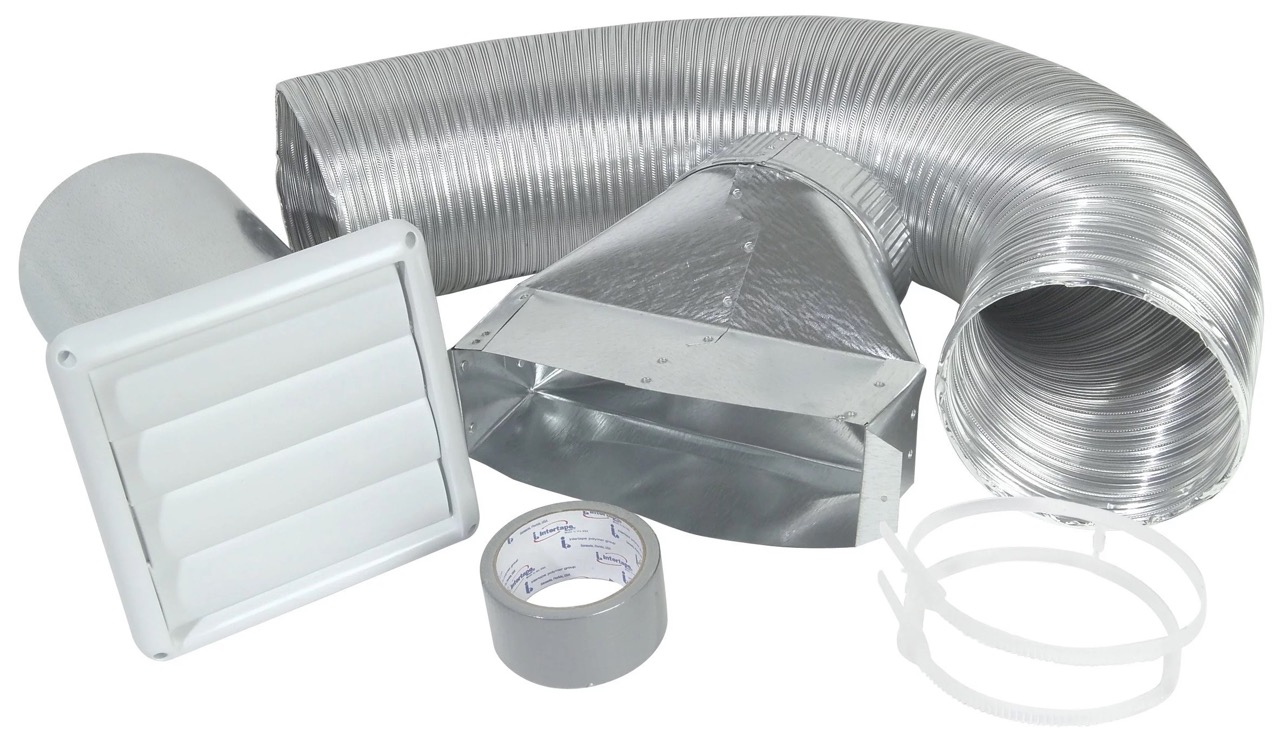
Step 6: Connect the Ductwork
Once the wall cap is installed, the next step in venting your range hood outside is to connect the ductwork. This involves joining the duct sections from the range hood to the wall cap, creating a sealed and efficient ventilation pathway. Here’s how to proceed with this step:
6.1 Gather the Necessary Materials:
Before connecting the ductwork, ensure you have all the necessary materials readily available. This may include duct sections, adjustable elbows (if needed), metal foil tape, screws, and a screwdriver. Having these items on hand will make the installation process smoother.
6.2 Measure and Cut Ductwork:
Measure the distance between the range hood and the wall cap to determine the length of ductwork required. Use a duct cutter or tin snips to cut the duct sections to the appropriate size. Ensure that the edges are smooth and clean to allow for proper airflow.
6.3 Attach Adjustable Elbows (if needed):
If your ducting route requires bends or turns, use adjustable elbows to create the necessary angles. Attach the elbows to the duct sections securely by following the manufacturer’s instructions. Ensure that the elbows are properly positioned to maintain a smooth airflow path.
6.4 Connect Ductwork Sections:
Connect the ductwork sections together, starting from the range hood and working towards the wall cap. Use metal foil tape to seal the joints, ensuring a tight and secure fit. Press the tape firmly to ensure a proper seal and prevent air leaks. Optionally, you can also use screws to reinforce the connections for added stability.
6.5 Secure Ductwork with Straps or Hangers:
Once the ductwork is connected, use metal straps or hangers to secure and support it along the planned route. These straps or hangers should be evenly spaced and provide sufficient support to prevent sagging or movement of the ductwork. Ensure that the ductwork is straight and aligned for optimal airflow.
6.6 Insulate Ductwork (if necessary):
If your kitchen is located in a cold climate or if the ductwork passes through unconditioned spaces, consider insulating the ductwork. Insulation helps prevent heat loss and condensation, improving the efficiency of the ventilation system. Install insulation sleeves or wrap the ductwork with insulation material according to the manufacturer’s instructions.
By carefully connecting the ductwork, you ensure a sealed and efficient ventilation pathway for your range hood. Take your time to properly align and seal the joints, and secure the ductwork to prevent any leaks or disruptions in airflow. This will help maintain the effectiveness of your ventilation system and promote a clean and comfortable kitchen environment.
Read also: 9 Amazing Range Hood Vents For 2025
Step 7: Secure and Seal the Ductwork
Once the ductwork is connected, the next crucial step in venting your range hood outside is to secure and seal the ductwork. Properly securing and sealing the ductwork ensures optimal airflow, prevents air leaks, and maintains the efficiency of your ventilation system. Here’s how to proceed with this step:
7.1 Secure the Ductwork:
Use metal straps or hangers to secure the ductwork along its route. Place the straps or hangers at regular intervals, ensuring that they provide adequate support and prevent sagging. This step helps maintain the alignment and stability of the ductwork, preventing unwanted movement or damage over time.
7.2 Check for Proper Alignment:
Inspect the ductwork to ensure it is straight and properly aligned. Verify that there are no kinks or sharp bends that may impede airflow. Straighten any sections that appear bent or misaligned, ensuring a smooth and unobstructed pathway for the air to flow from the range hood to the wall cap.
7.3 Seal the Connections:
Use metal foil tape or duct mastic to seal all the joints and connections in the ductwork. Apply the tape or mastic generously, ensuring that all gaps and cracks are adequately covered. This step prevents air leakage and helps maintain a consistent and efficient airflow throughout the ventilation system.
7.4 Insulate the Ductwork (if necessary):
If your ductwork passes through unconditioned spaces or areas prone to temperature fluctuations, consider insulating the ductwork. Insulation helps prevent heat loss or gain, improves energy efficiency, and reduces condensation. Wrap insulation sleeves around the ductwork or cover it with insulation material, following the manufacturer’s guidelines.
7.5 Secure Electrical Connections:
If your range hood has an electrical connection to turn on the fan or lights, secure and protect the wiring appropriately. Use wire connectors and electrical tape to join and insulate the wires, preventing any potential electrical hazards. Follow local electrical codes and regulations when handling electrical connections.
7.6 Conduct a Leakage Test:
Once the ductwork is secured and sealed, conduct a leakage test to verify the effectiveness of the seals. Turn on the range hood and feel around the joints and connections for any escaping air. If you notice any air leaks, apply additional tape or mastic to seal the gaps. Properly sealed ductwork ensures maximum ventilation efficiency.
By securing and sealing the ductwork in your venting system, you create a well-functioning and efficient pathway for air to be expelled outside. Take the time to properly secure, align, and seal all connections to maintain optimal airflow and improve the overall performance of your range hood.
Step 8: Test the Ventilation System
After completing the installation of your range hood’s venting system, it’s important to test its functionality to ensure proper ventilation and optimal performance. Testing the ventilation system allows you to identify any potential issues or adjustments that may be required. Here’s how to proceed with this final step:
8.1 Turn on the Range Hood:
Start by turning on your range hood and setting it to the highest fan speed. This will maximize airflow and allow you to assess the effectiveness of the ventilation system. Ensure that the range hood is securely plugged in and that the power is properly connected.
8.2 Verify Airflow:
Stand in front of the range hood and feel the airflow being expelled from the wall cap. The air should be consistently and strongly pushed out of the cap. If the airflow feels weak or inconsistent, there may be blockages or restrictions in the ductwork that need to be addressed. Alternatively, if the airflow seems excessively strong, it may indicate a need for minor adjustments to optimize the balance.
8.3 Check for Noise or Vibrations:
Listen for any unusual noises or vibrations coming from the range hood or the ductwork. While some degree of noise is common, excessive noise or noticeable vibrations may indicate an issue that needs attention. It’s important to address any unusual sounds or movements to maintain a quiet and efficient ventilation system.
8.4 Assess Odor and Smoke Removal:
While cooking, monitor how effectively the range hood removes odors, smoke, and cooking byproducts from the kitchen. The range hood should swiftly and efficiently remove these elements from the air, keeping your kitchen clean and comfortable. If you notice lingering odors or the presence of smoke, ensure that there are no leaks or gaps in the ductwork that could be compromising the ventilation process.
8.5 Make Necessary Adjustments:
If you encounter any issues during the testing process, determine the cause and make the necessary adjustments. This may include inspecting and sealing any potential air leaks, addressing blockages, or repositioning the ductwork if needed. It’s important to maintain a proactive approach in resolving any problems to ensure optimal ventilation efficiency.
8.6 Regularly Maintain and Clean:
After successfully testing your ventilation system, make a habit of regularly maintaining and cleaning the range hood and the ductwork. Clean the filters and remove any buildup of grease or debris that may accumulate over time. Regular maintenance will help prolong the life of your range hood and ensure its continued effectiveness.
Testing your ventilation system is the final step in the process of venting your range hood outside. By conducting a thorough evaluation and addressing any issues that arise, you can achieve a well-functioning and efficient ventilation system that improves air quality and enhances your cooking experience in the kitchen.
Conclusion
Venting your range hood outside is a vital step in creating a clean, odor-free, and comfortable kitchen environment. By following the step-by-step process outlined in this article, you can successfully accomplish this task and reap the benefits of proper ventilation. Let’s recap the key points we covered:
Assess and Plan:
Begin by assessing your range hood’s venting capabilities and requirements. Determine if your range hood can be vented outside and understand any specific guidelines provided by the manufacturer. Then, locate an exterior wall near the range hood and plan the ducting route, considering clearances, obstacles, and local building codes.
Read more: How To Vent Range Hood On Interior Wall
Installation Steps:
With a plan in place, proceed to make a hole in the wall and install the wall cap, ensuring a secure and weatherproof seal. Connect the ductwork, taking care to align and secure it properly. Seal all joints and connections to prevent air leaks. Finally, test the ventilation system to verify airflow, check noise levels, and assess odor and smoke removal.
Maintenance and Care:
Regular maintenance and cleaning are essential to keep your venting system functioning optimally. Clean the filters regularly and address any blockages or issues that may arise. By staying proactive with maintenance, you can ensure the continued efficiency of your ventilation system.
Venting your range hood outside offers numerous benefits, including improved air quality, effective smoke removal, reduced grease build-up, elimination of lingering odors, and enhanced indoor comfort. With the right tools, knowledge, and attention to detail, you can achieve an efficient ventilation system that enhances your cooking experience and promotes a healthier kitchen environment.
Remember, if you are unsure about any aspect of the installation or encounter complex challenges, it is always best to seek professional assistance. By following the steps outlined in this article and maintaining your venting system, you can enjoy the benefits of a clean and fresh kitchen for years to come.
Frequently Asked Questions about How To Vent Range Hood Outside
Was this page helpful?
At Storables.com, we guarantee accurate and reliable information. Our content, validated by Expert Board Contributors, is crafted following stringent Editorial Policies. We're committed to providing you with well-researched, expert-backed insights for all your informational needs.

0 thoughts on “How To Vent Range Hood Outside”